In the third post about fall foliage, we deal with autumn portrait pictures, which concerns how to photograph autumn landscapes with human subjects.
In addition to allowing us to have a super personal memory while visiting a place, having someone into a landscape photo, if well managed, can enhance both the landscape and the subject, and give original and certainly unique photo.
Let’s see some simple tips to get the best results!
FALL FOLIAGE PICS: COMPOSITION
Have you lost our first post about autumn pictures? We talk about how to get perfect compositions in 7 simple tips!
Autumn portrait pictures: 4 tips to take portraits photos in autumn landscapes
1. Choose a good composition before putting in the person
The first step to getting good autumn portrait pictures is not to rush.
First, observe the scene and choose the point that captures your attention the most. Understand which elements of the landscape around you want to include in the composition and which are superfluous or even annoying.
Once you have found your setting, choose where in the composition the subject could best fit.
In particular, avoid allowing the subject to obscure other elements. This means making sure, for example, that a trunk or branch does not emerge from behind the subject and seems to be sticking out of their head! Otherwise the eye will be caught by this curiousness, which will ruin the photo.
Beyond this aspect, there are some composition choices that can help you.
Here some advice on how to best fit the person in the photo:
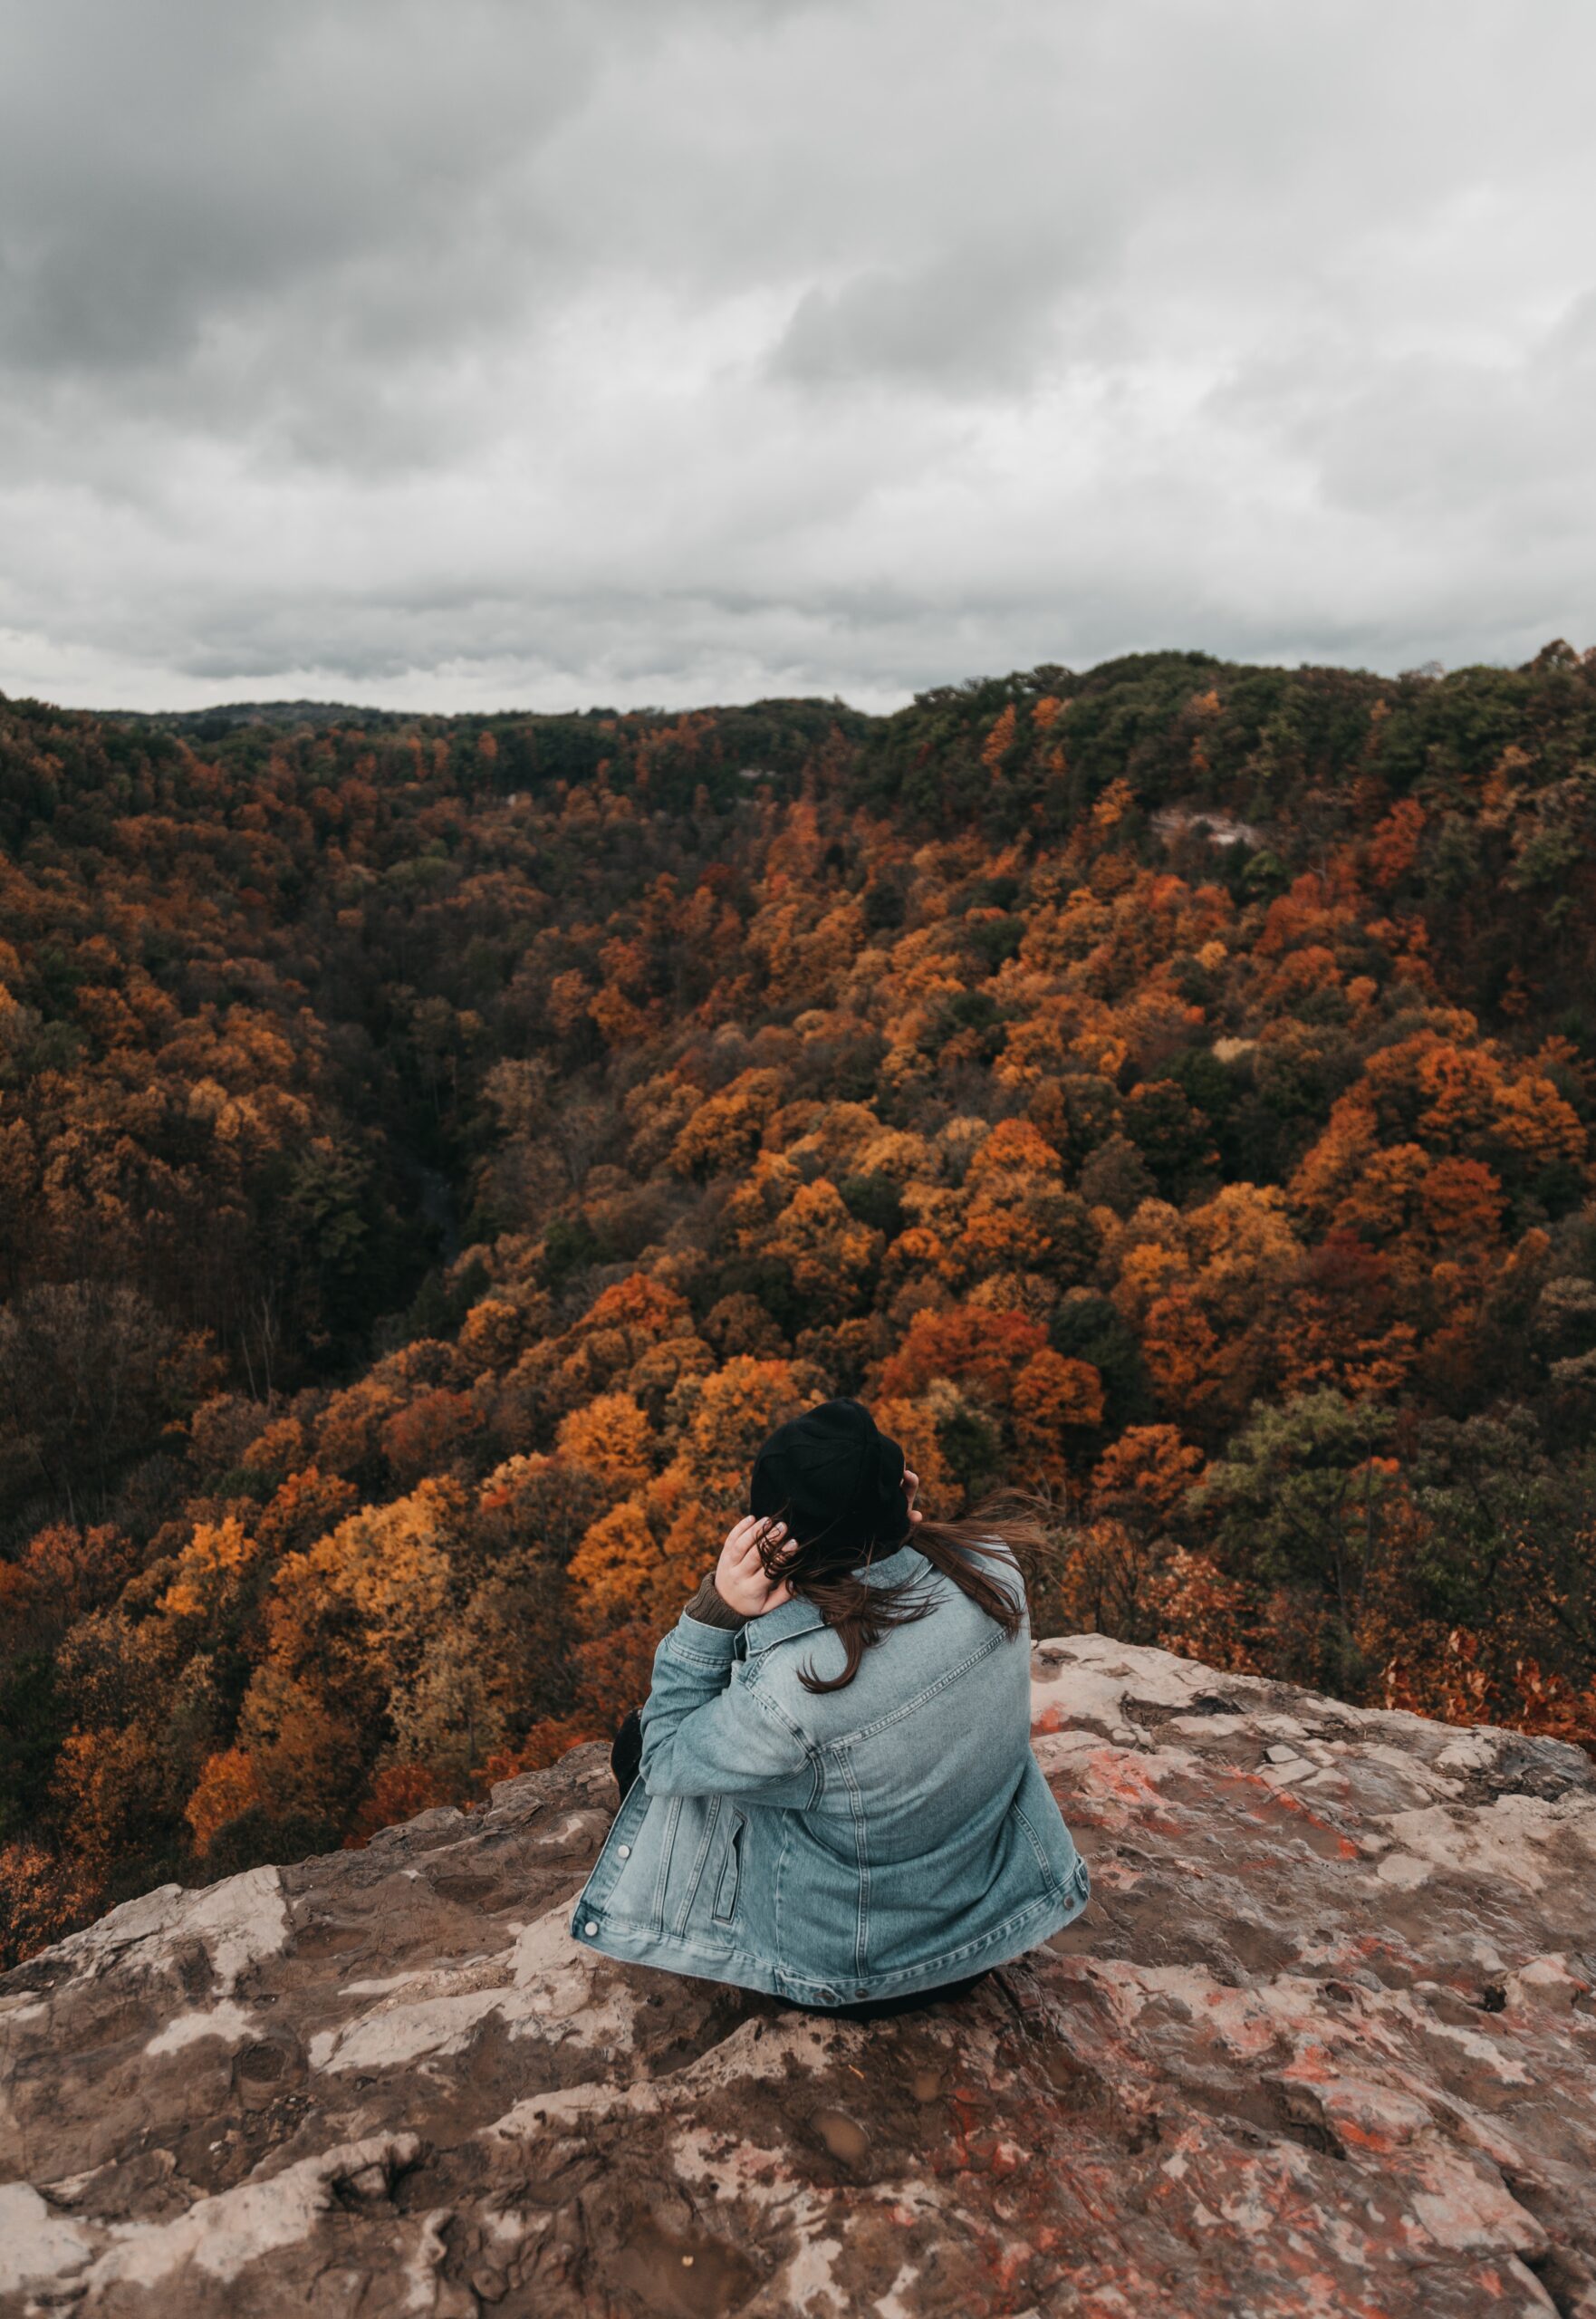
If the landscape is in the background, prefer the subject in the foreground, in the center or in one of the thirds.
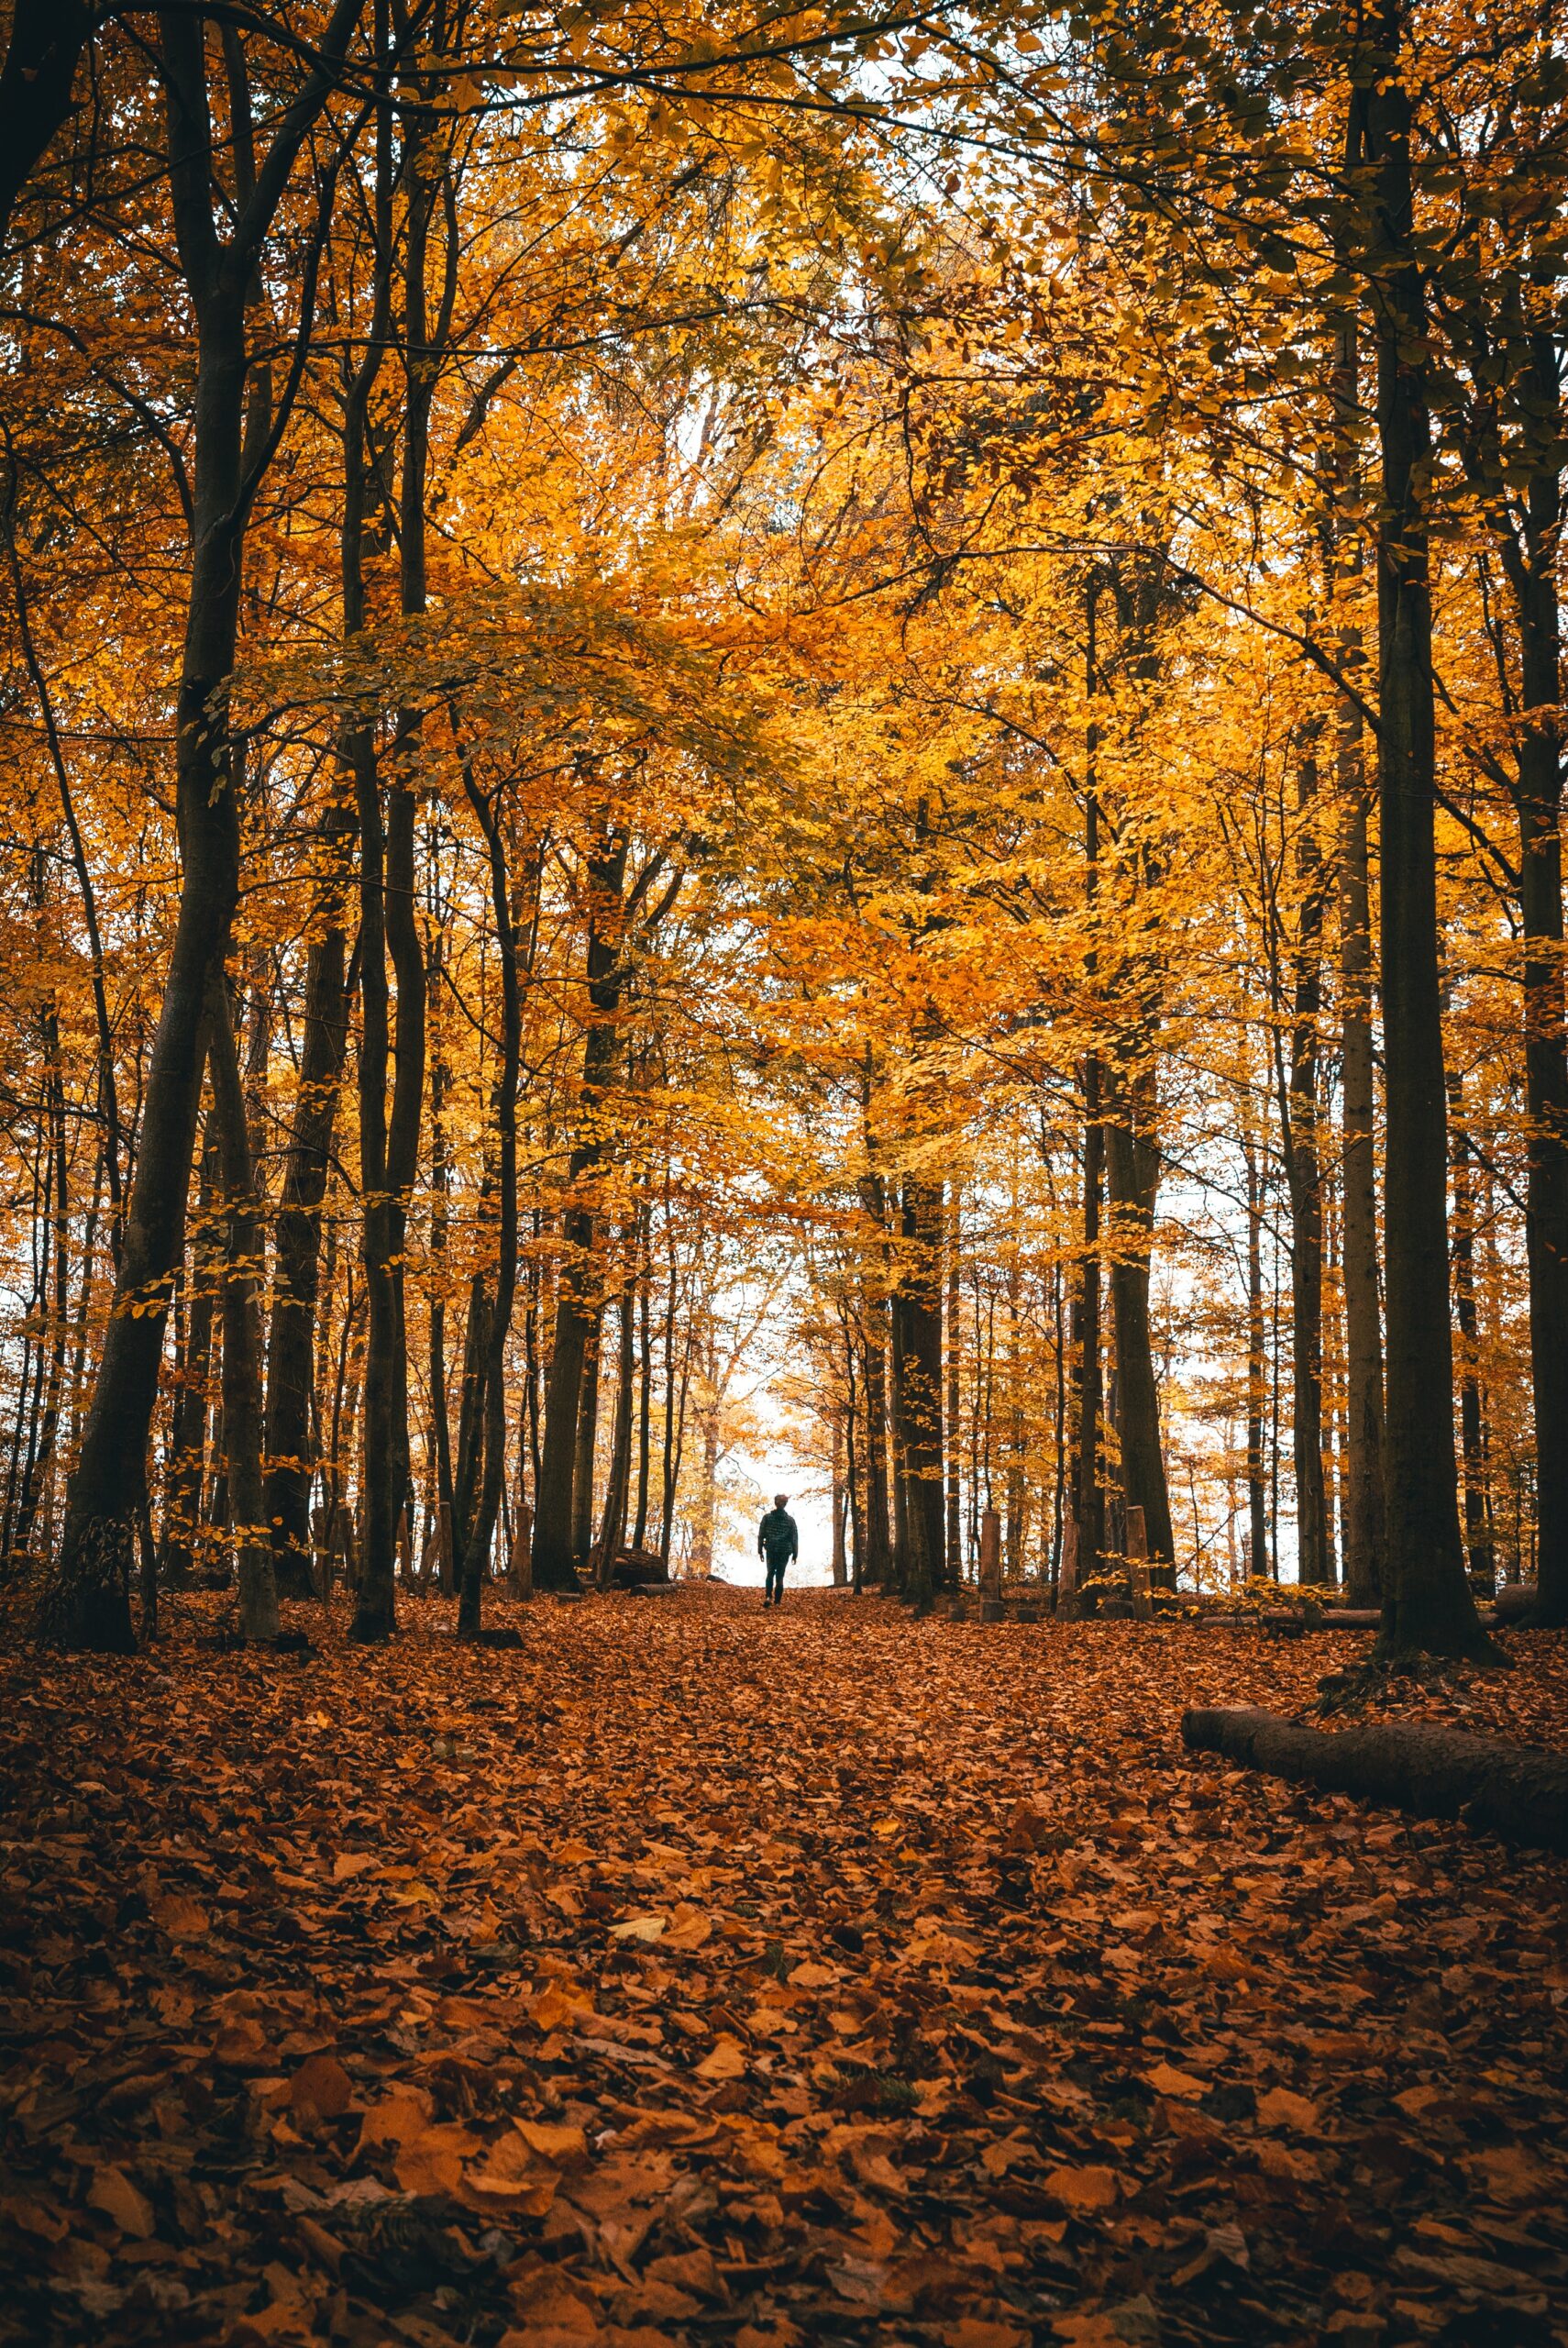
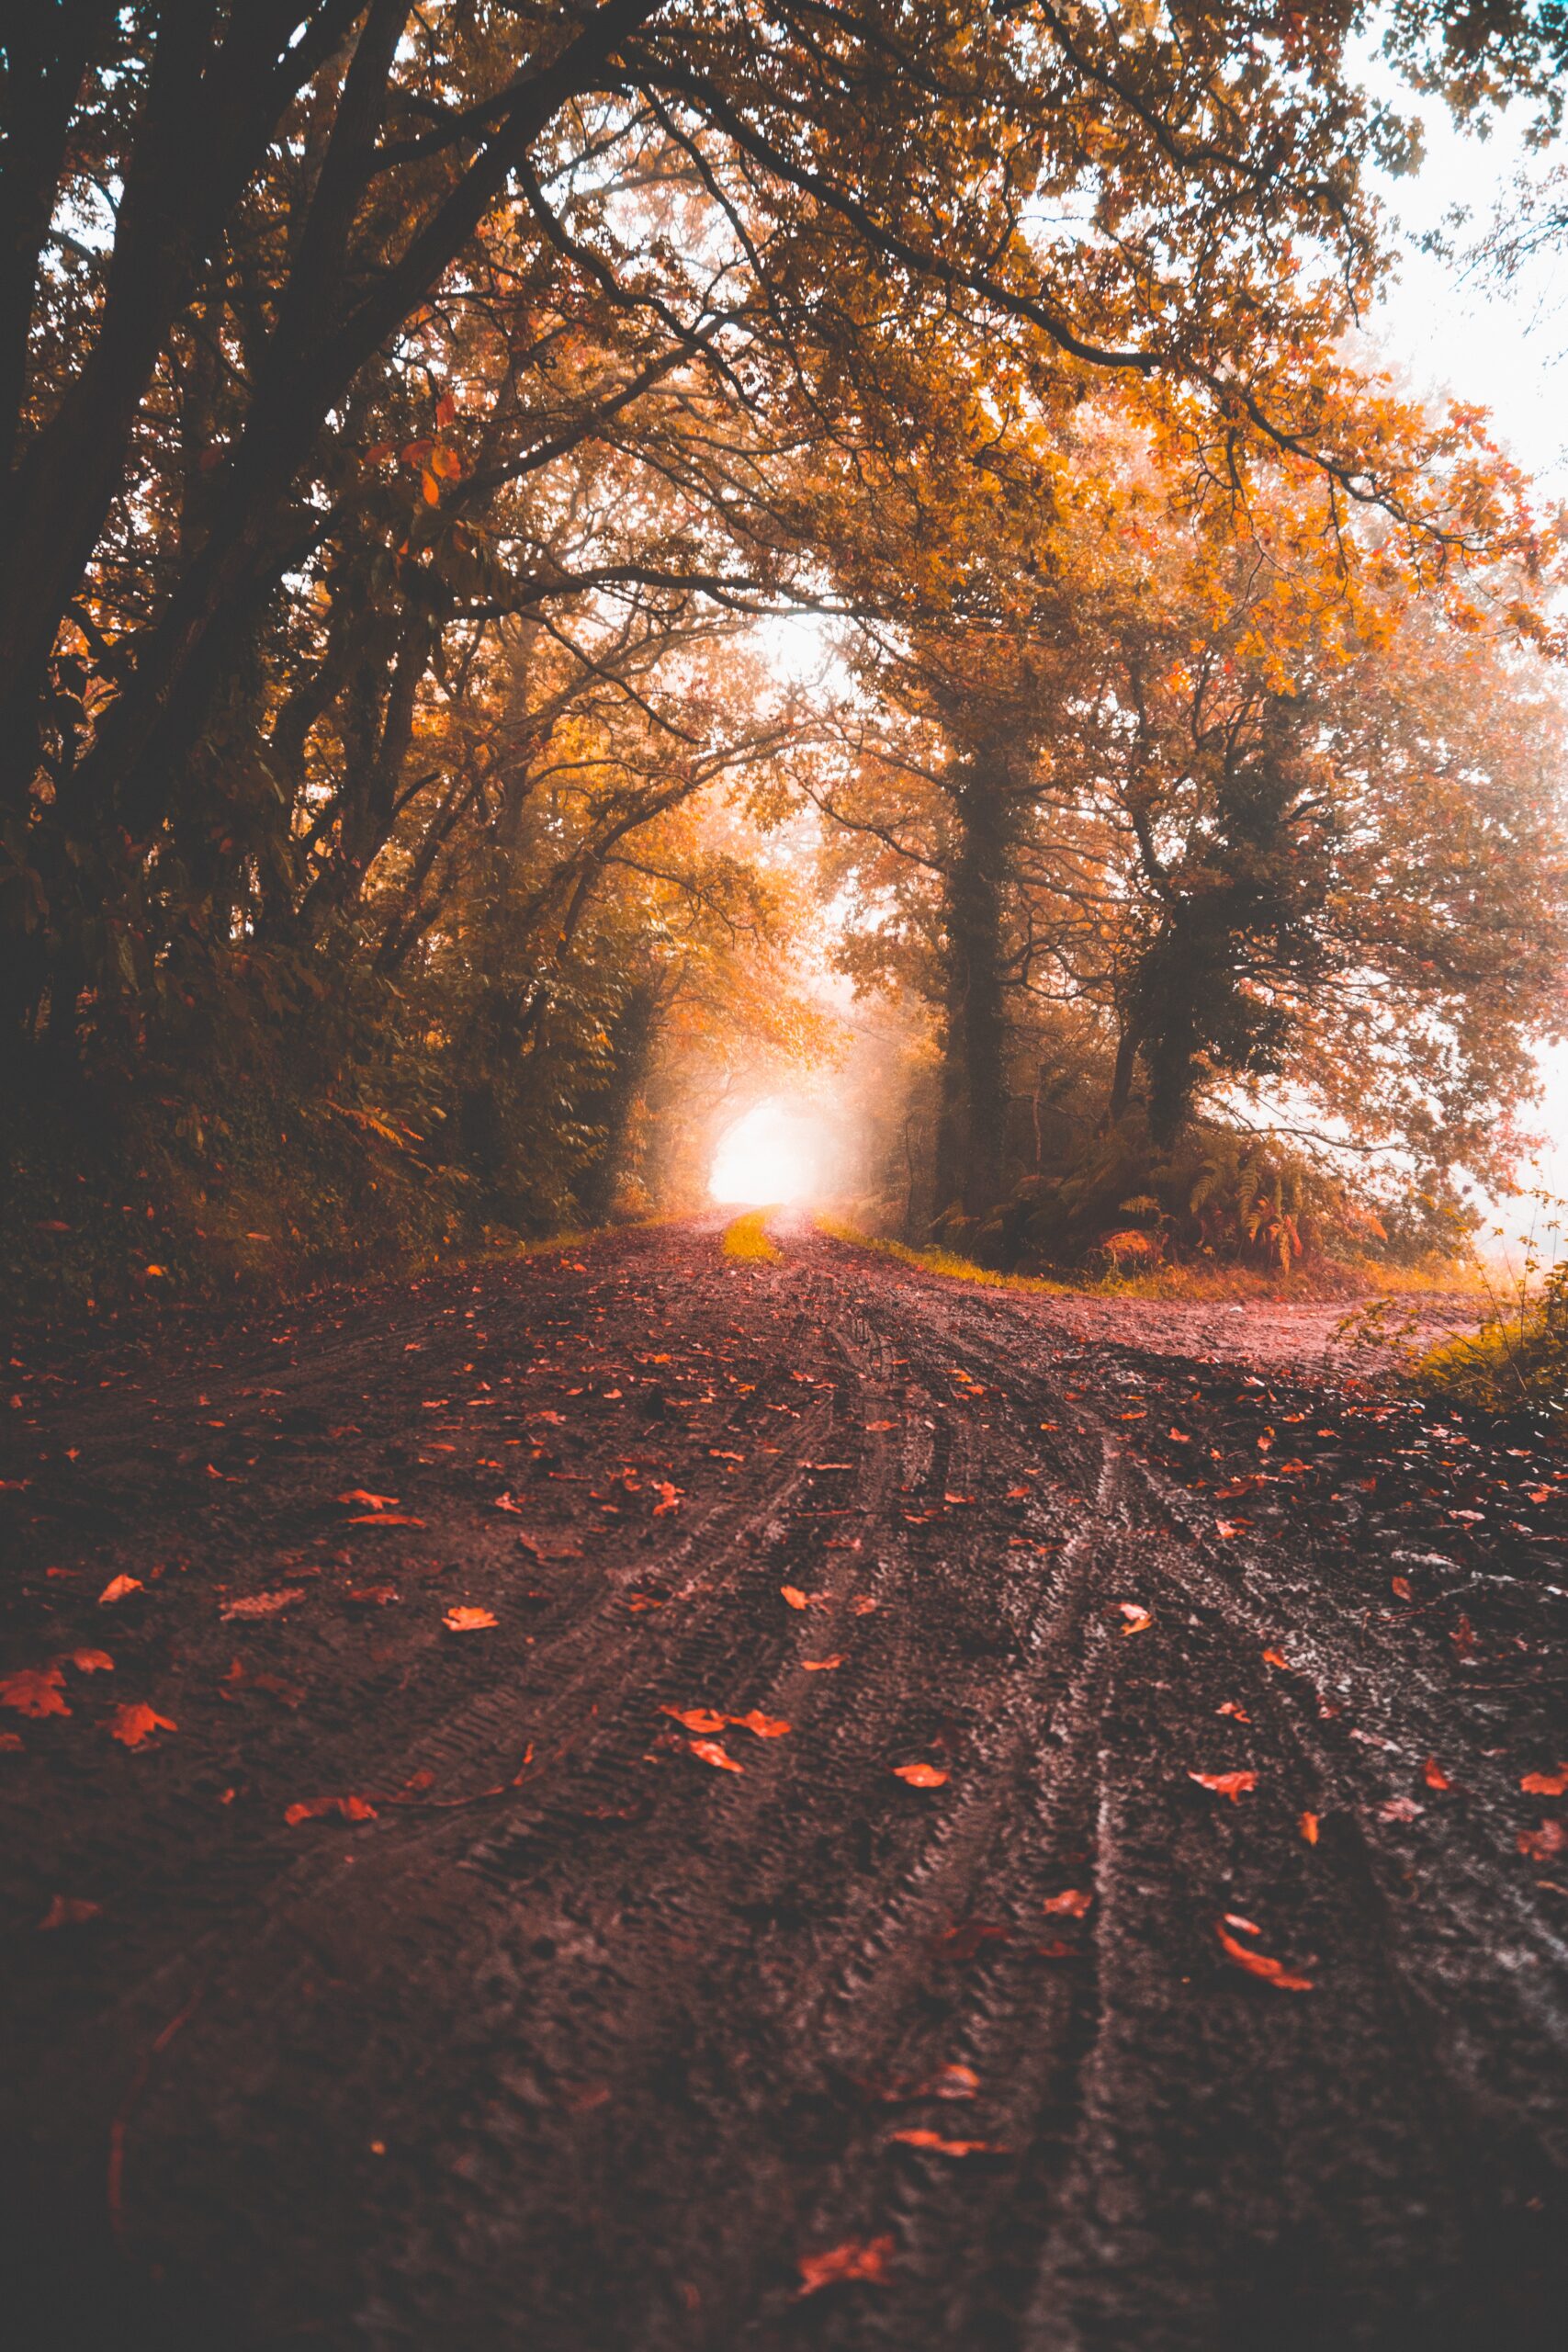
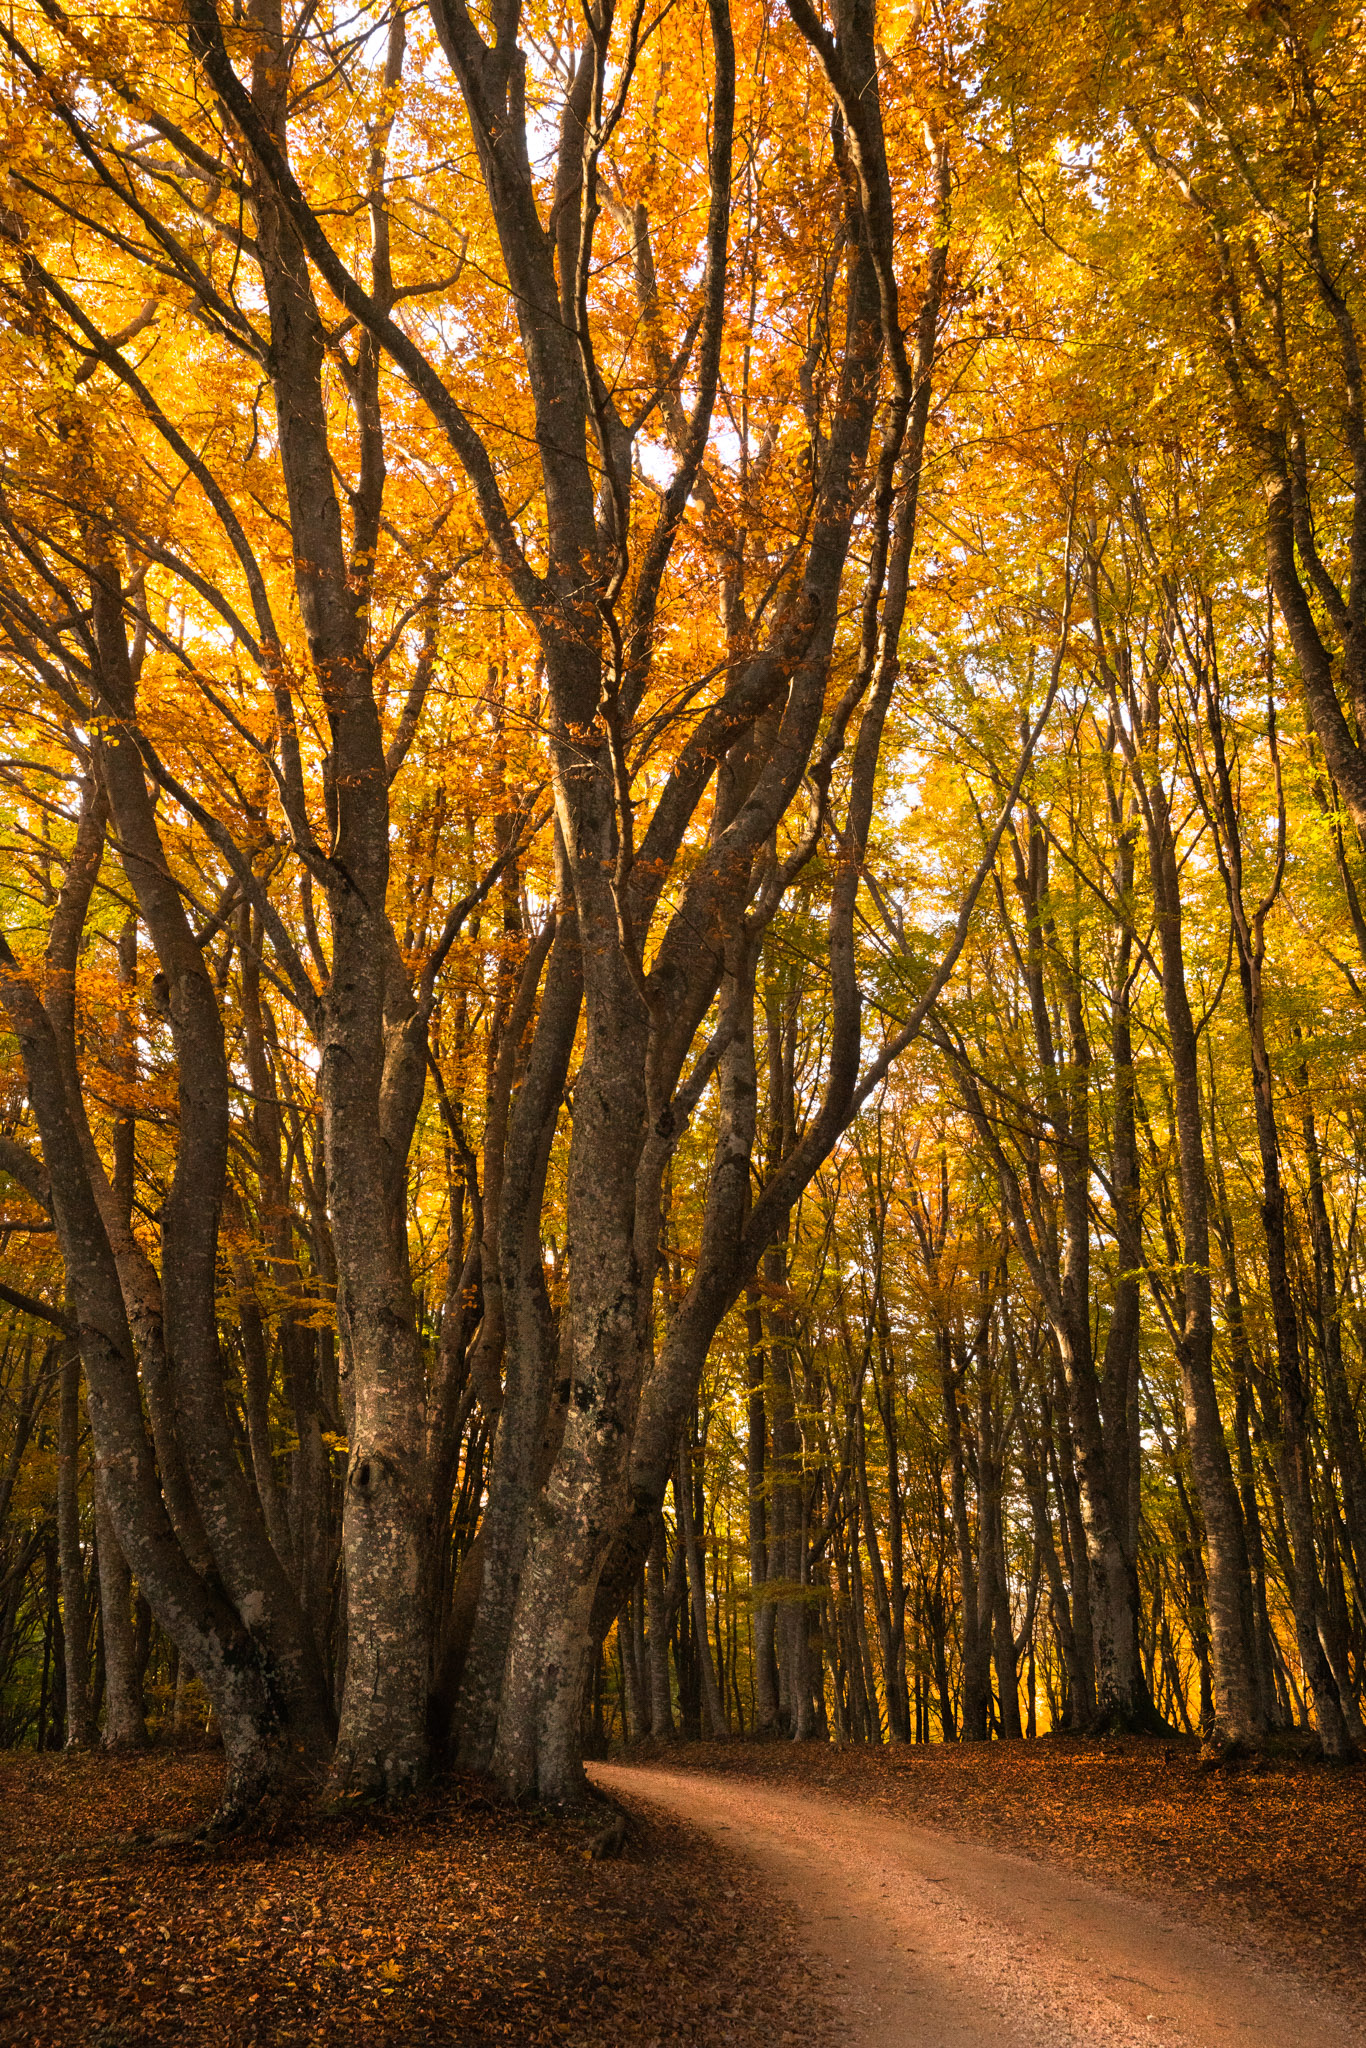
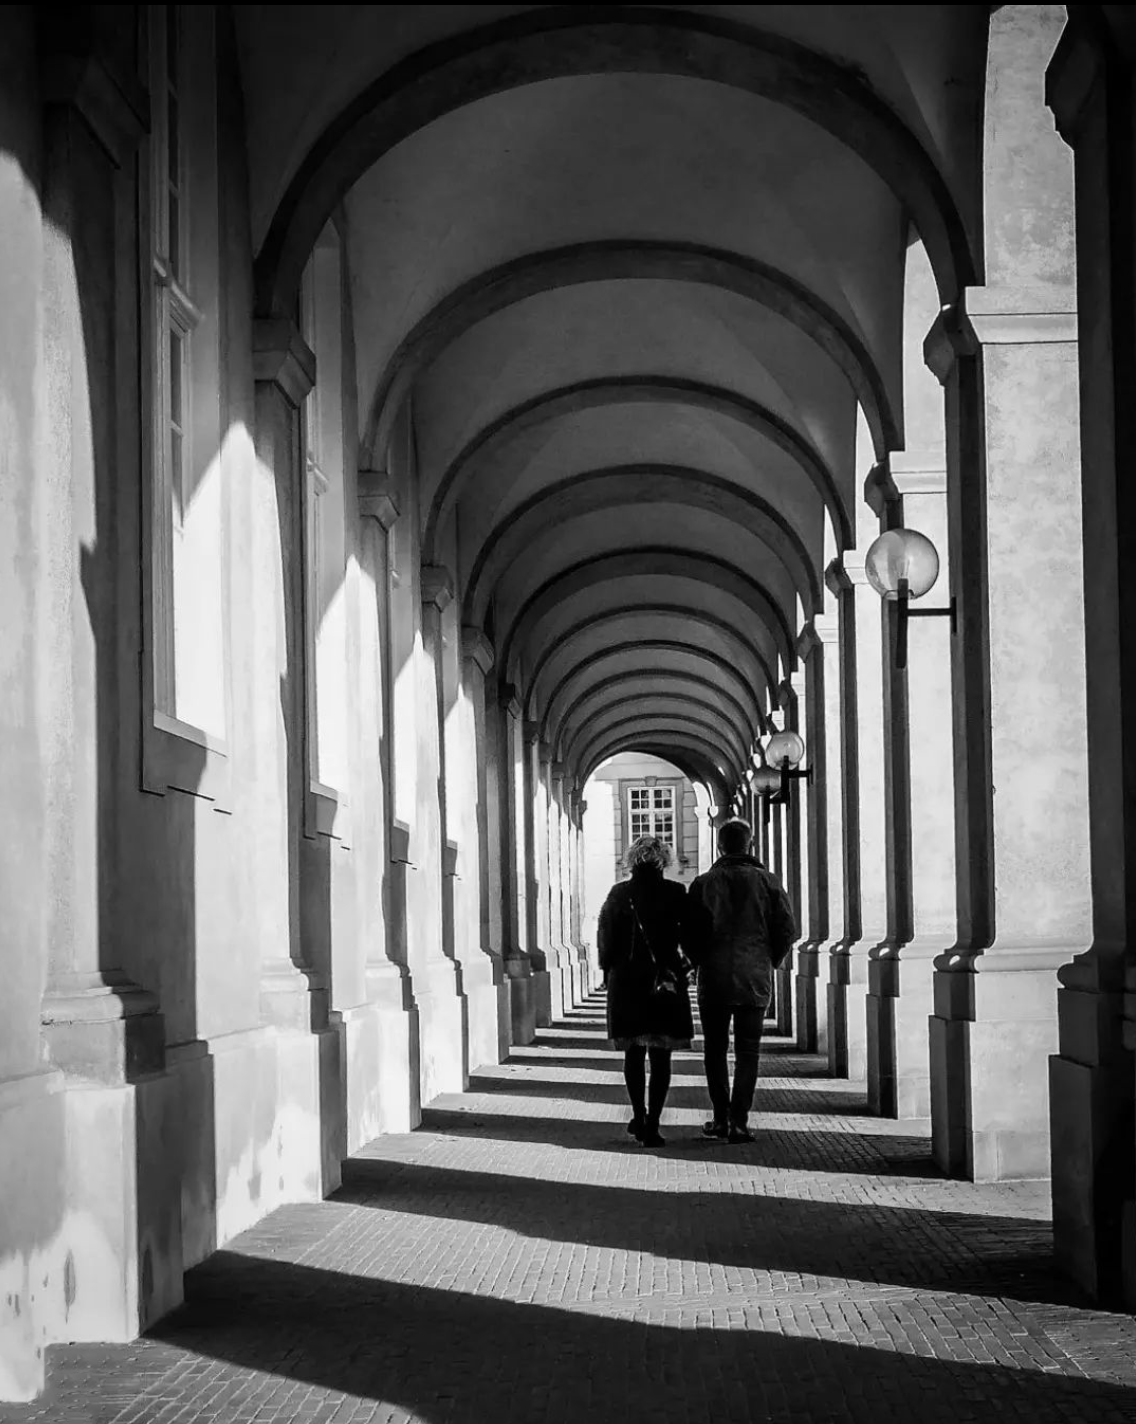
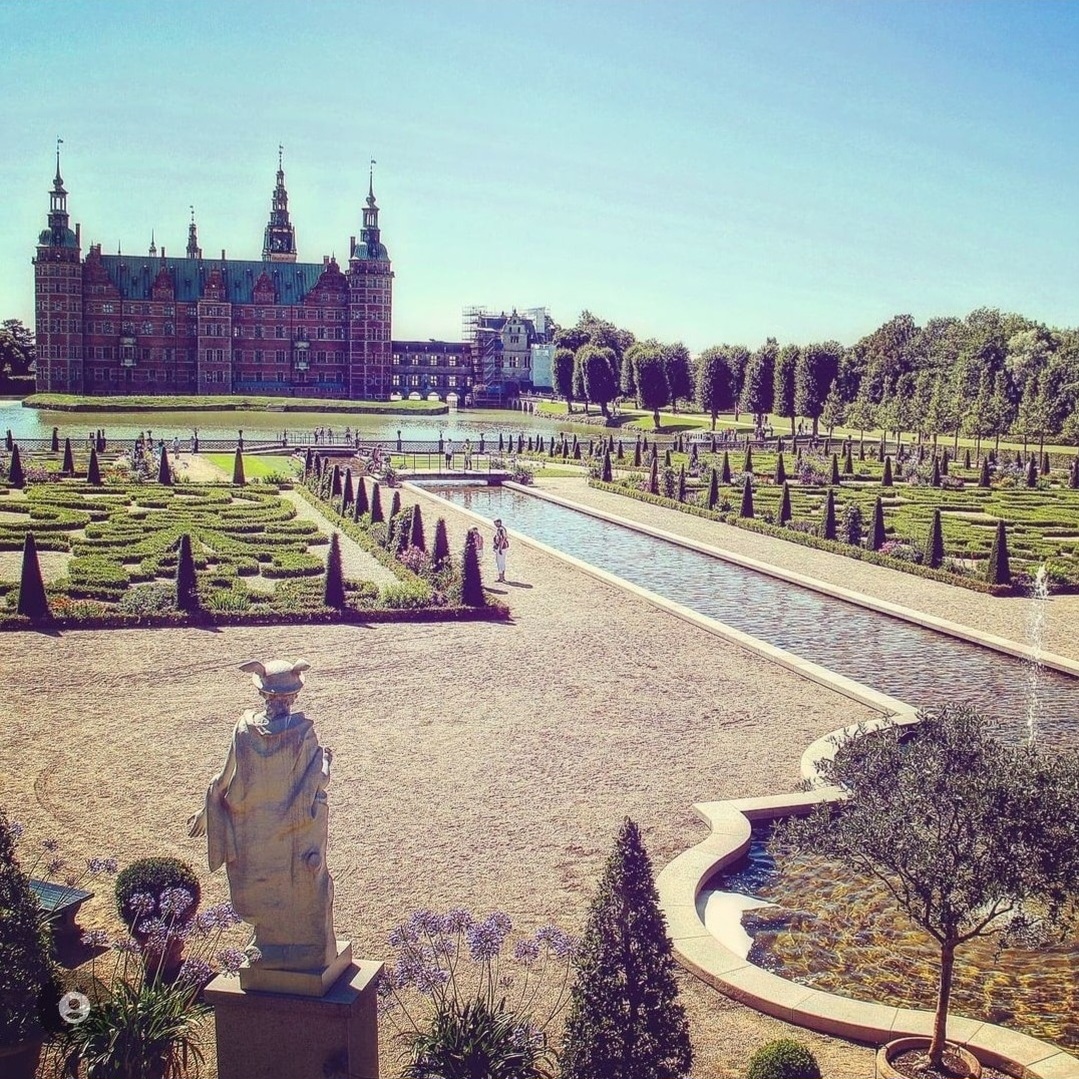
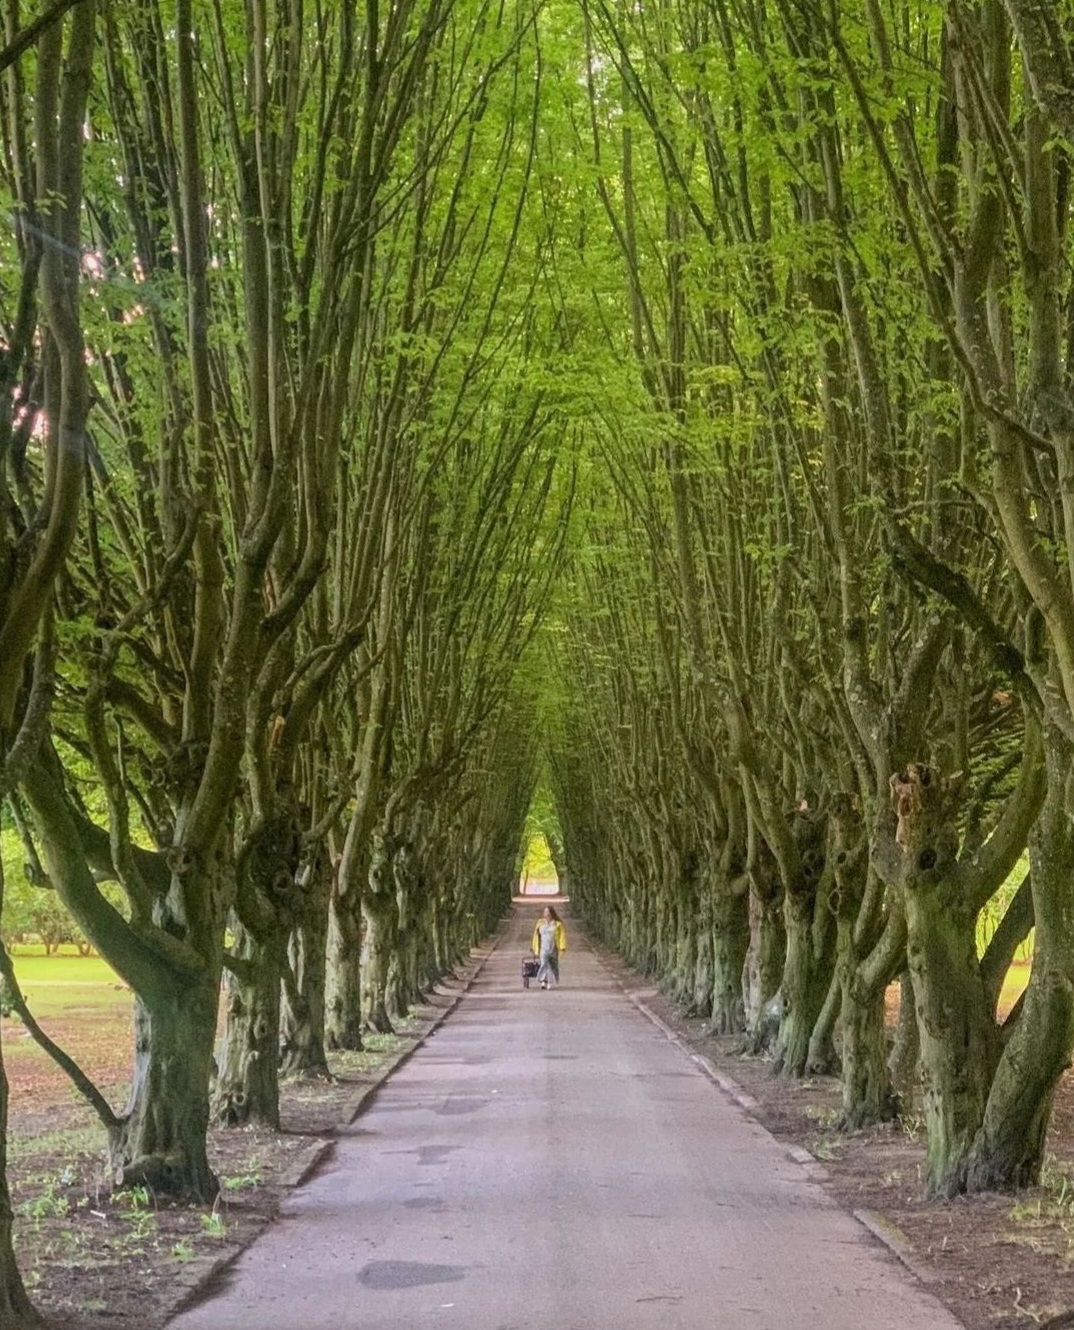
If, however, the landscape leaves the center empty and is in the sides, such as in a tree-lined avenue, then your subject will fit better in the center of the scene. In this case, also consider whether it is better to lower the frame by getting closer to the ground.
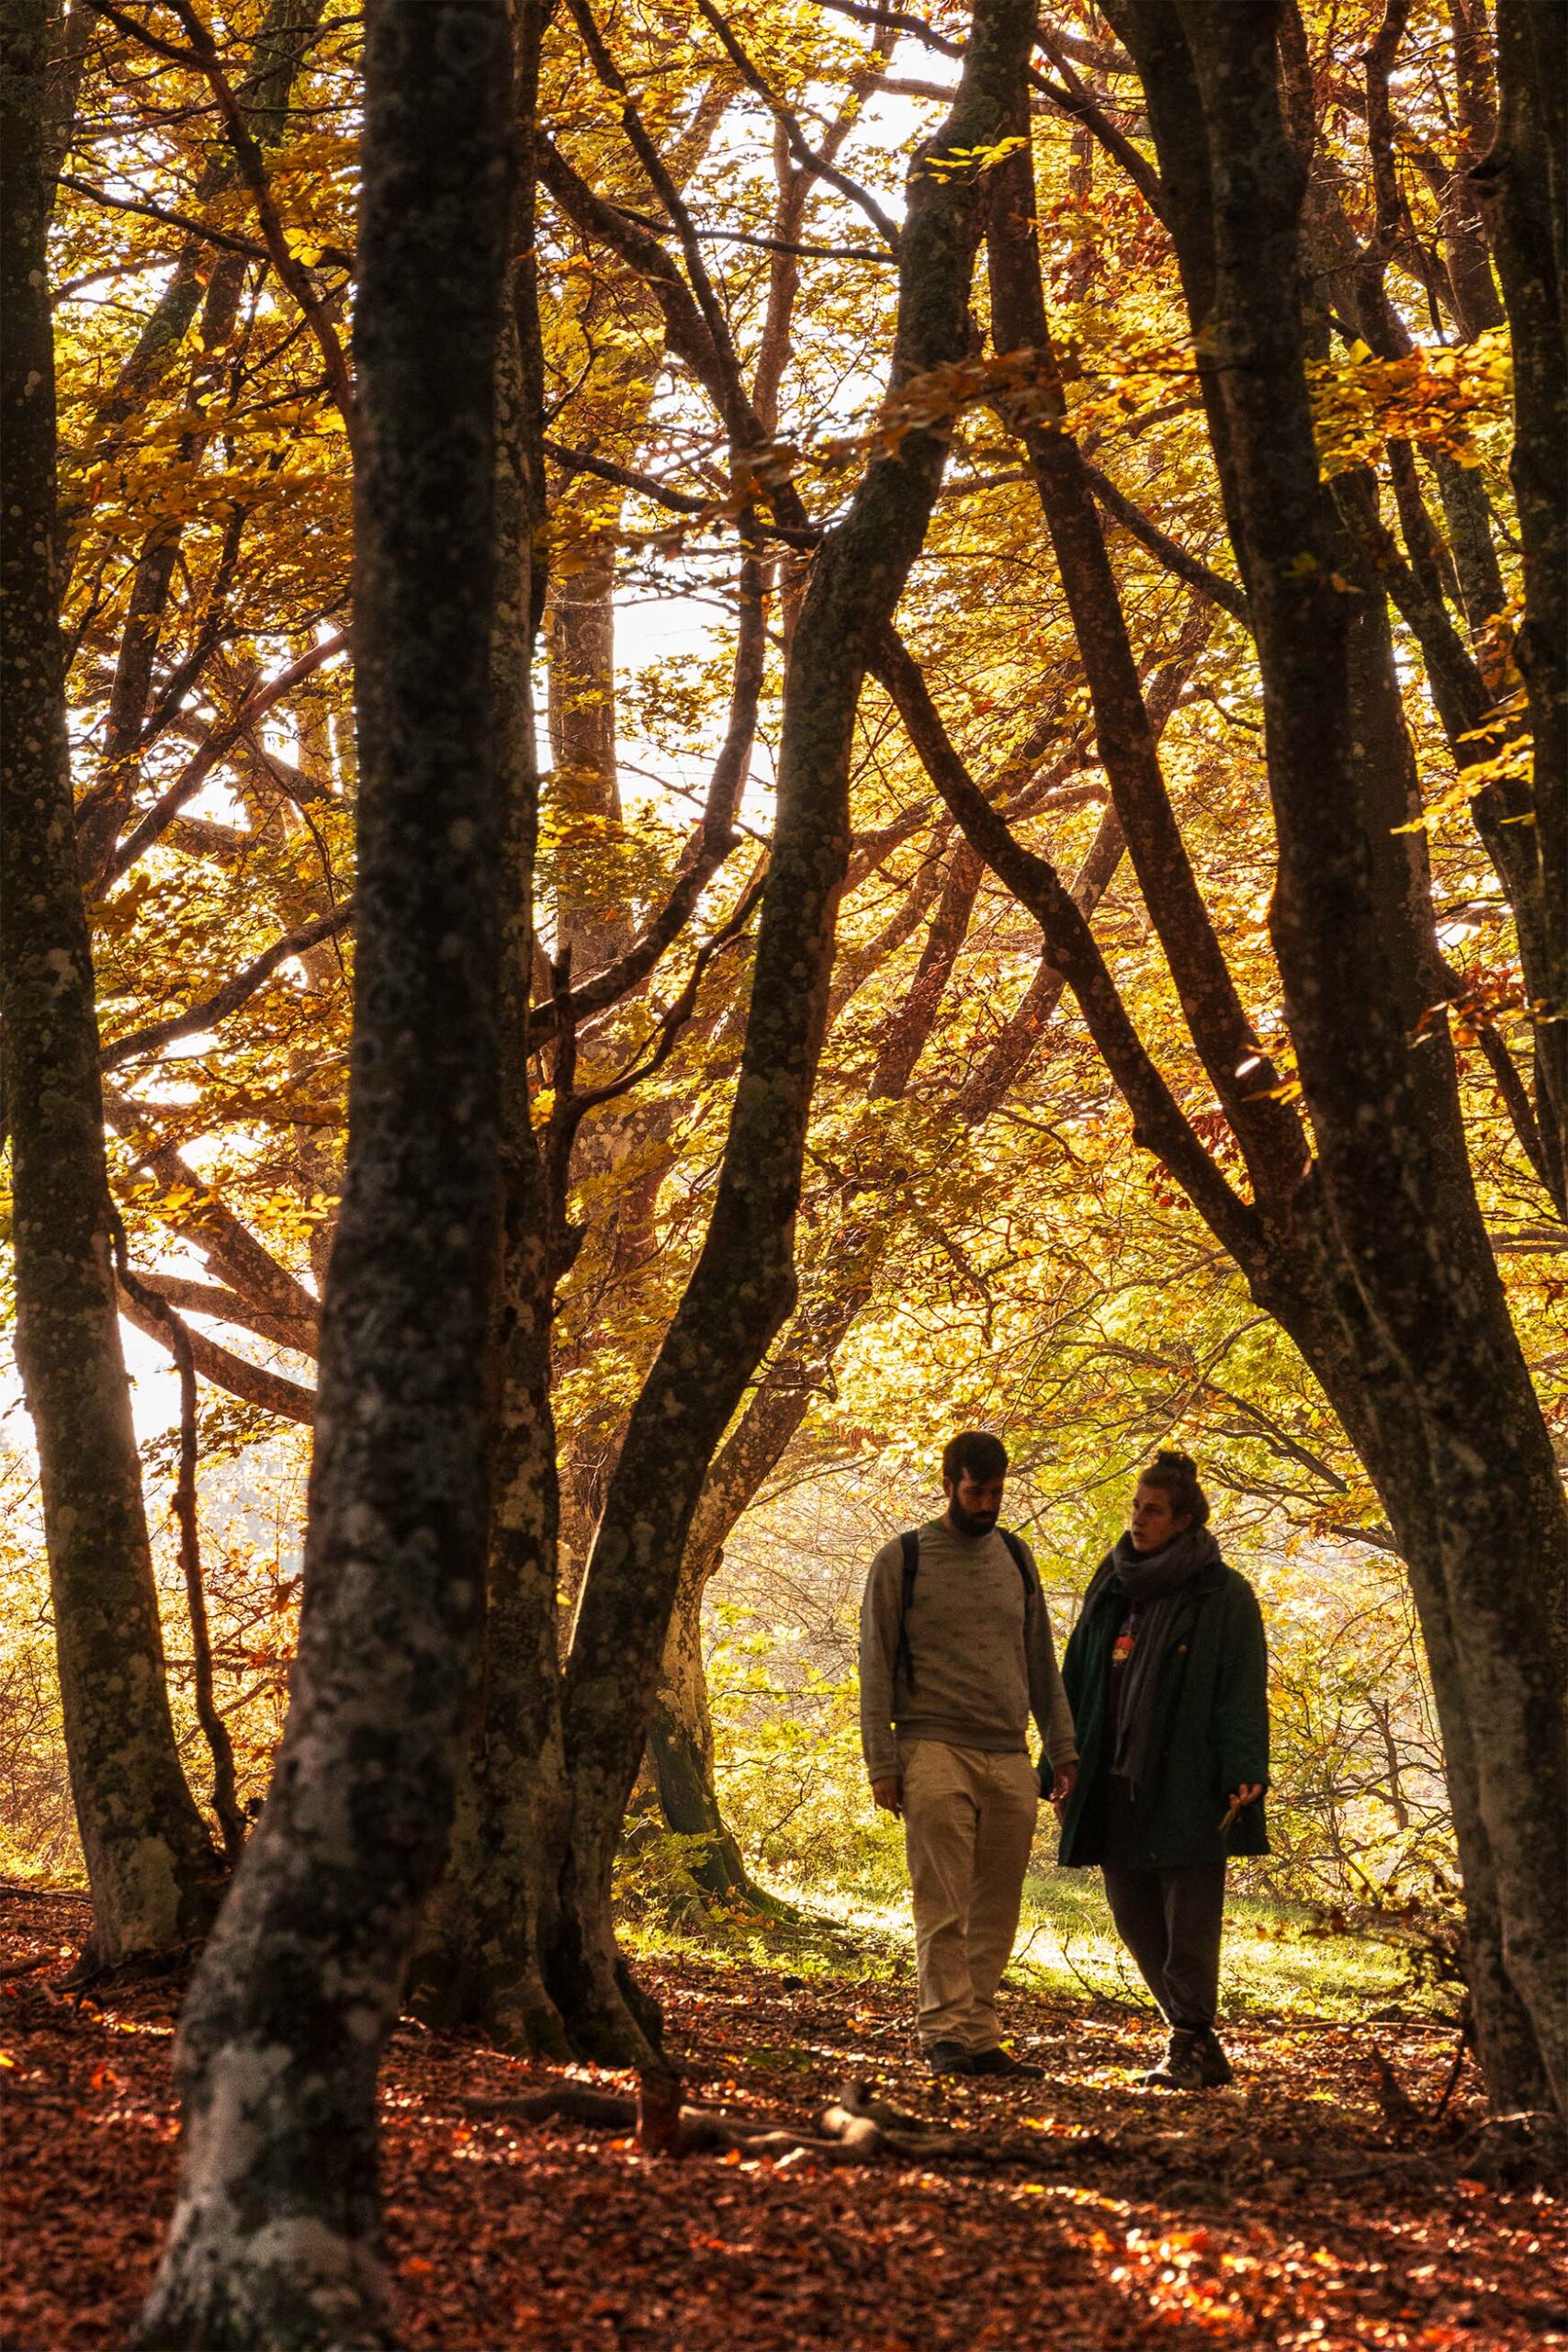
When the landscape is less “tidy”, look for an “empty spot” where to insert the subject, even if not in the foreground. If it has free space around it, it will capture the attention.
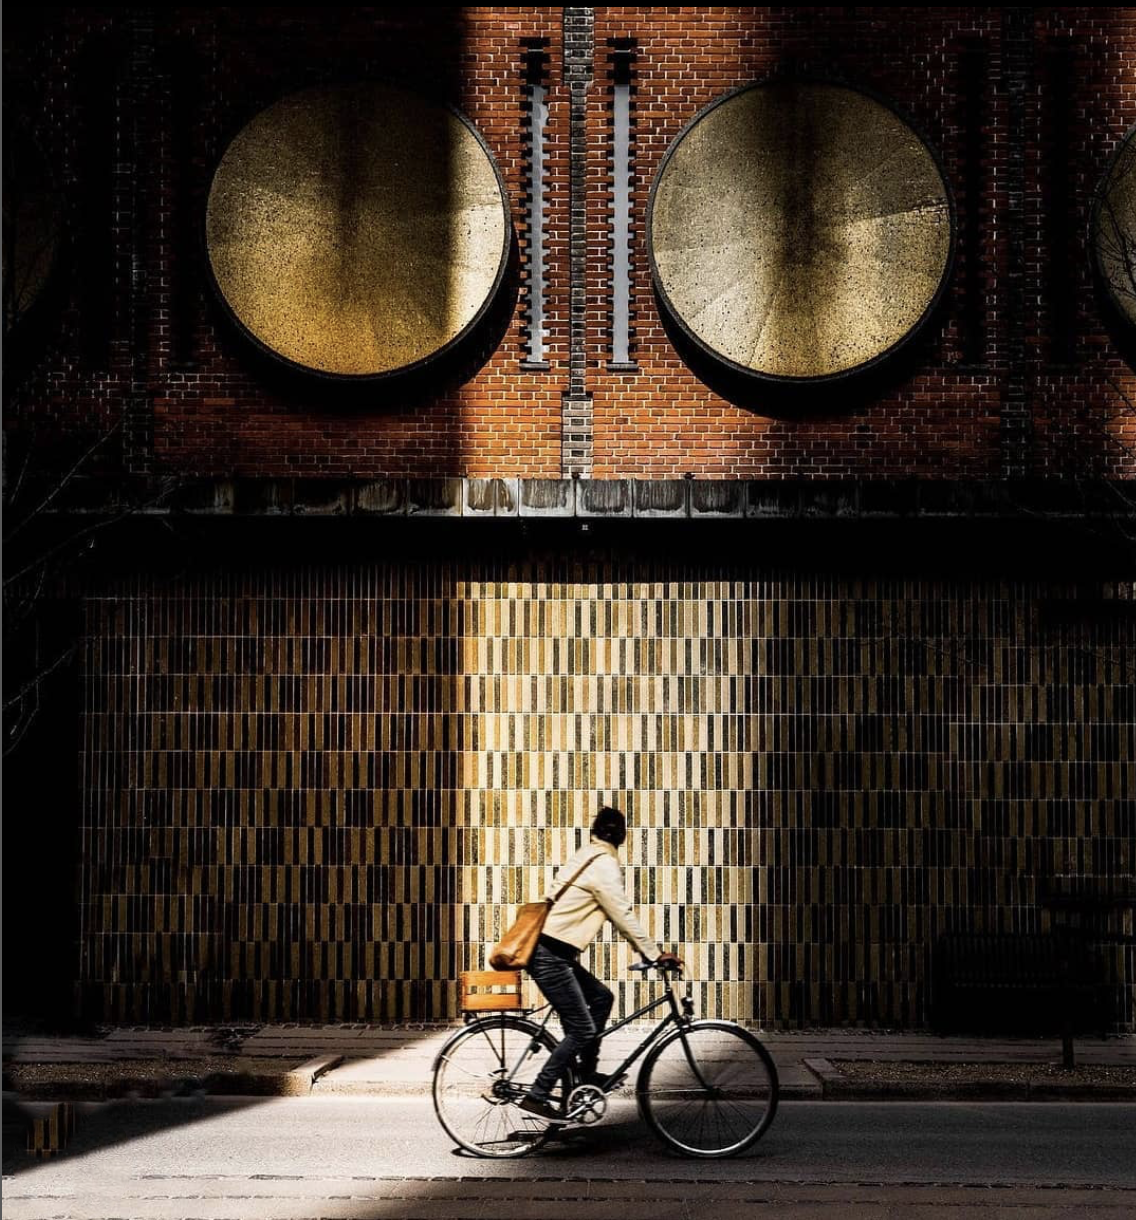
If the landscape is very confusing and there are many elements, it might be more interesting to choose a greater integration of the person into the scene, for example coming out from behind a tree or choosing a pose in direct contact with nature, to suggest the person’s immersion in the surroundings.
Photo by Brendan Church on Unsplash
Photo by Andreas Rasmussen on Unsplash
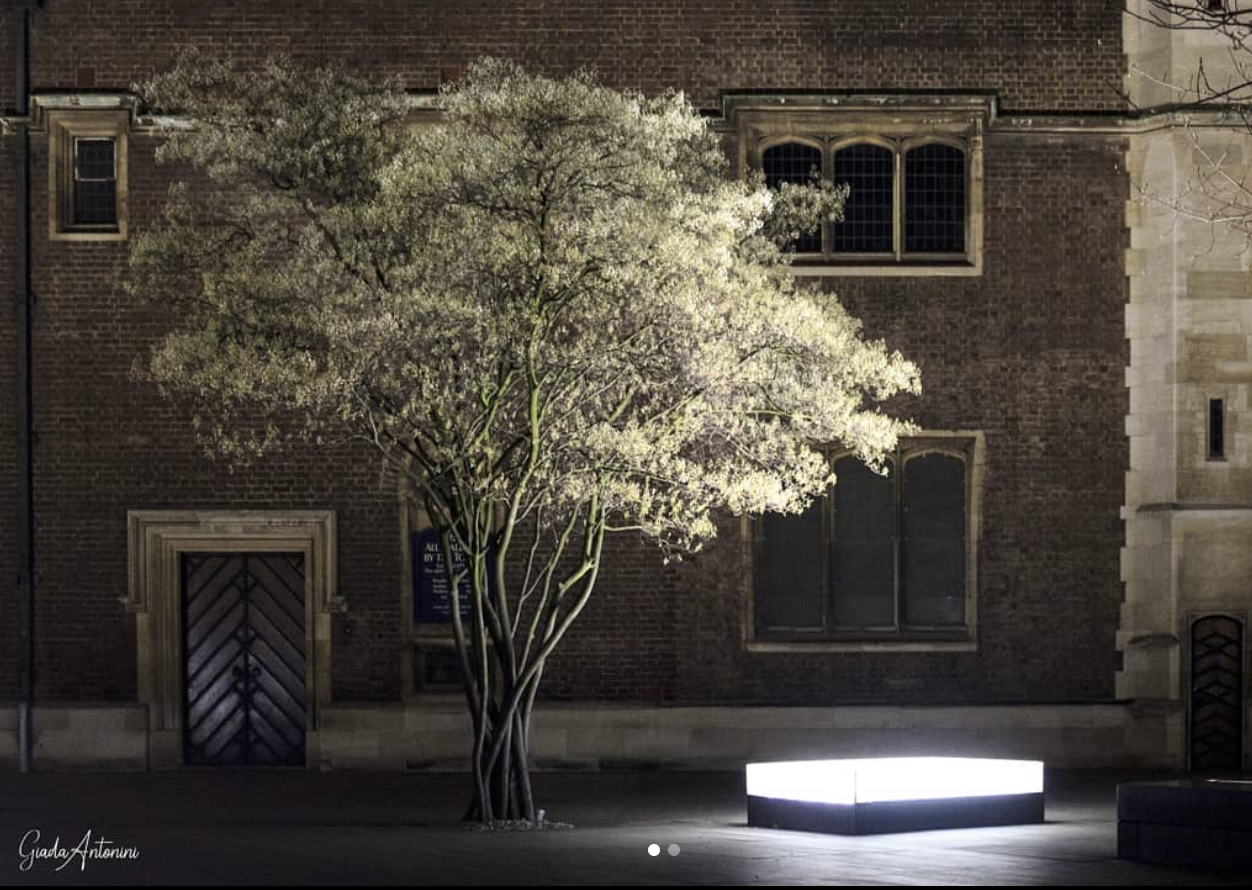
@giadaantonini_photography
Photo by Andreas Rasmussen on Unsplash
2. Autumn portrait pictures: a good pose
We are all bored of seeing in photos people standing in classic poses looking towards the camera. How to take more original autumn portrait pictures? Here are some examples.
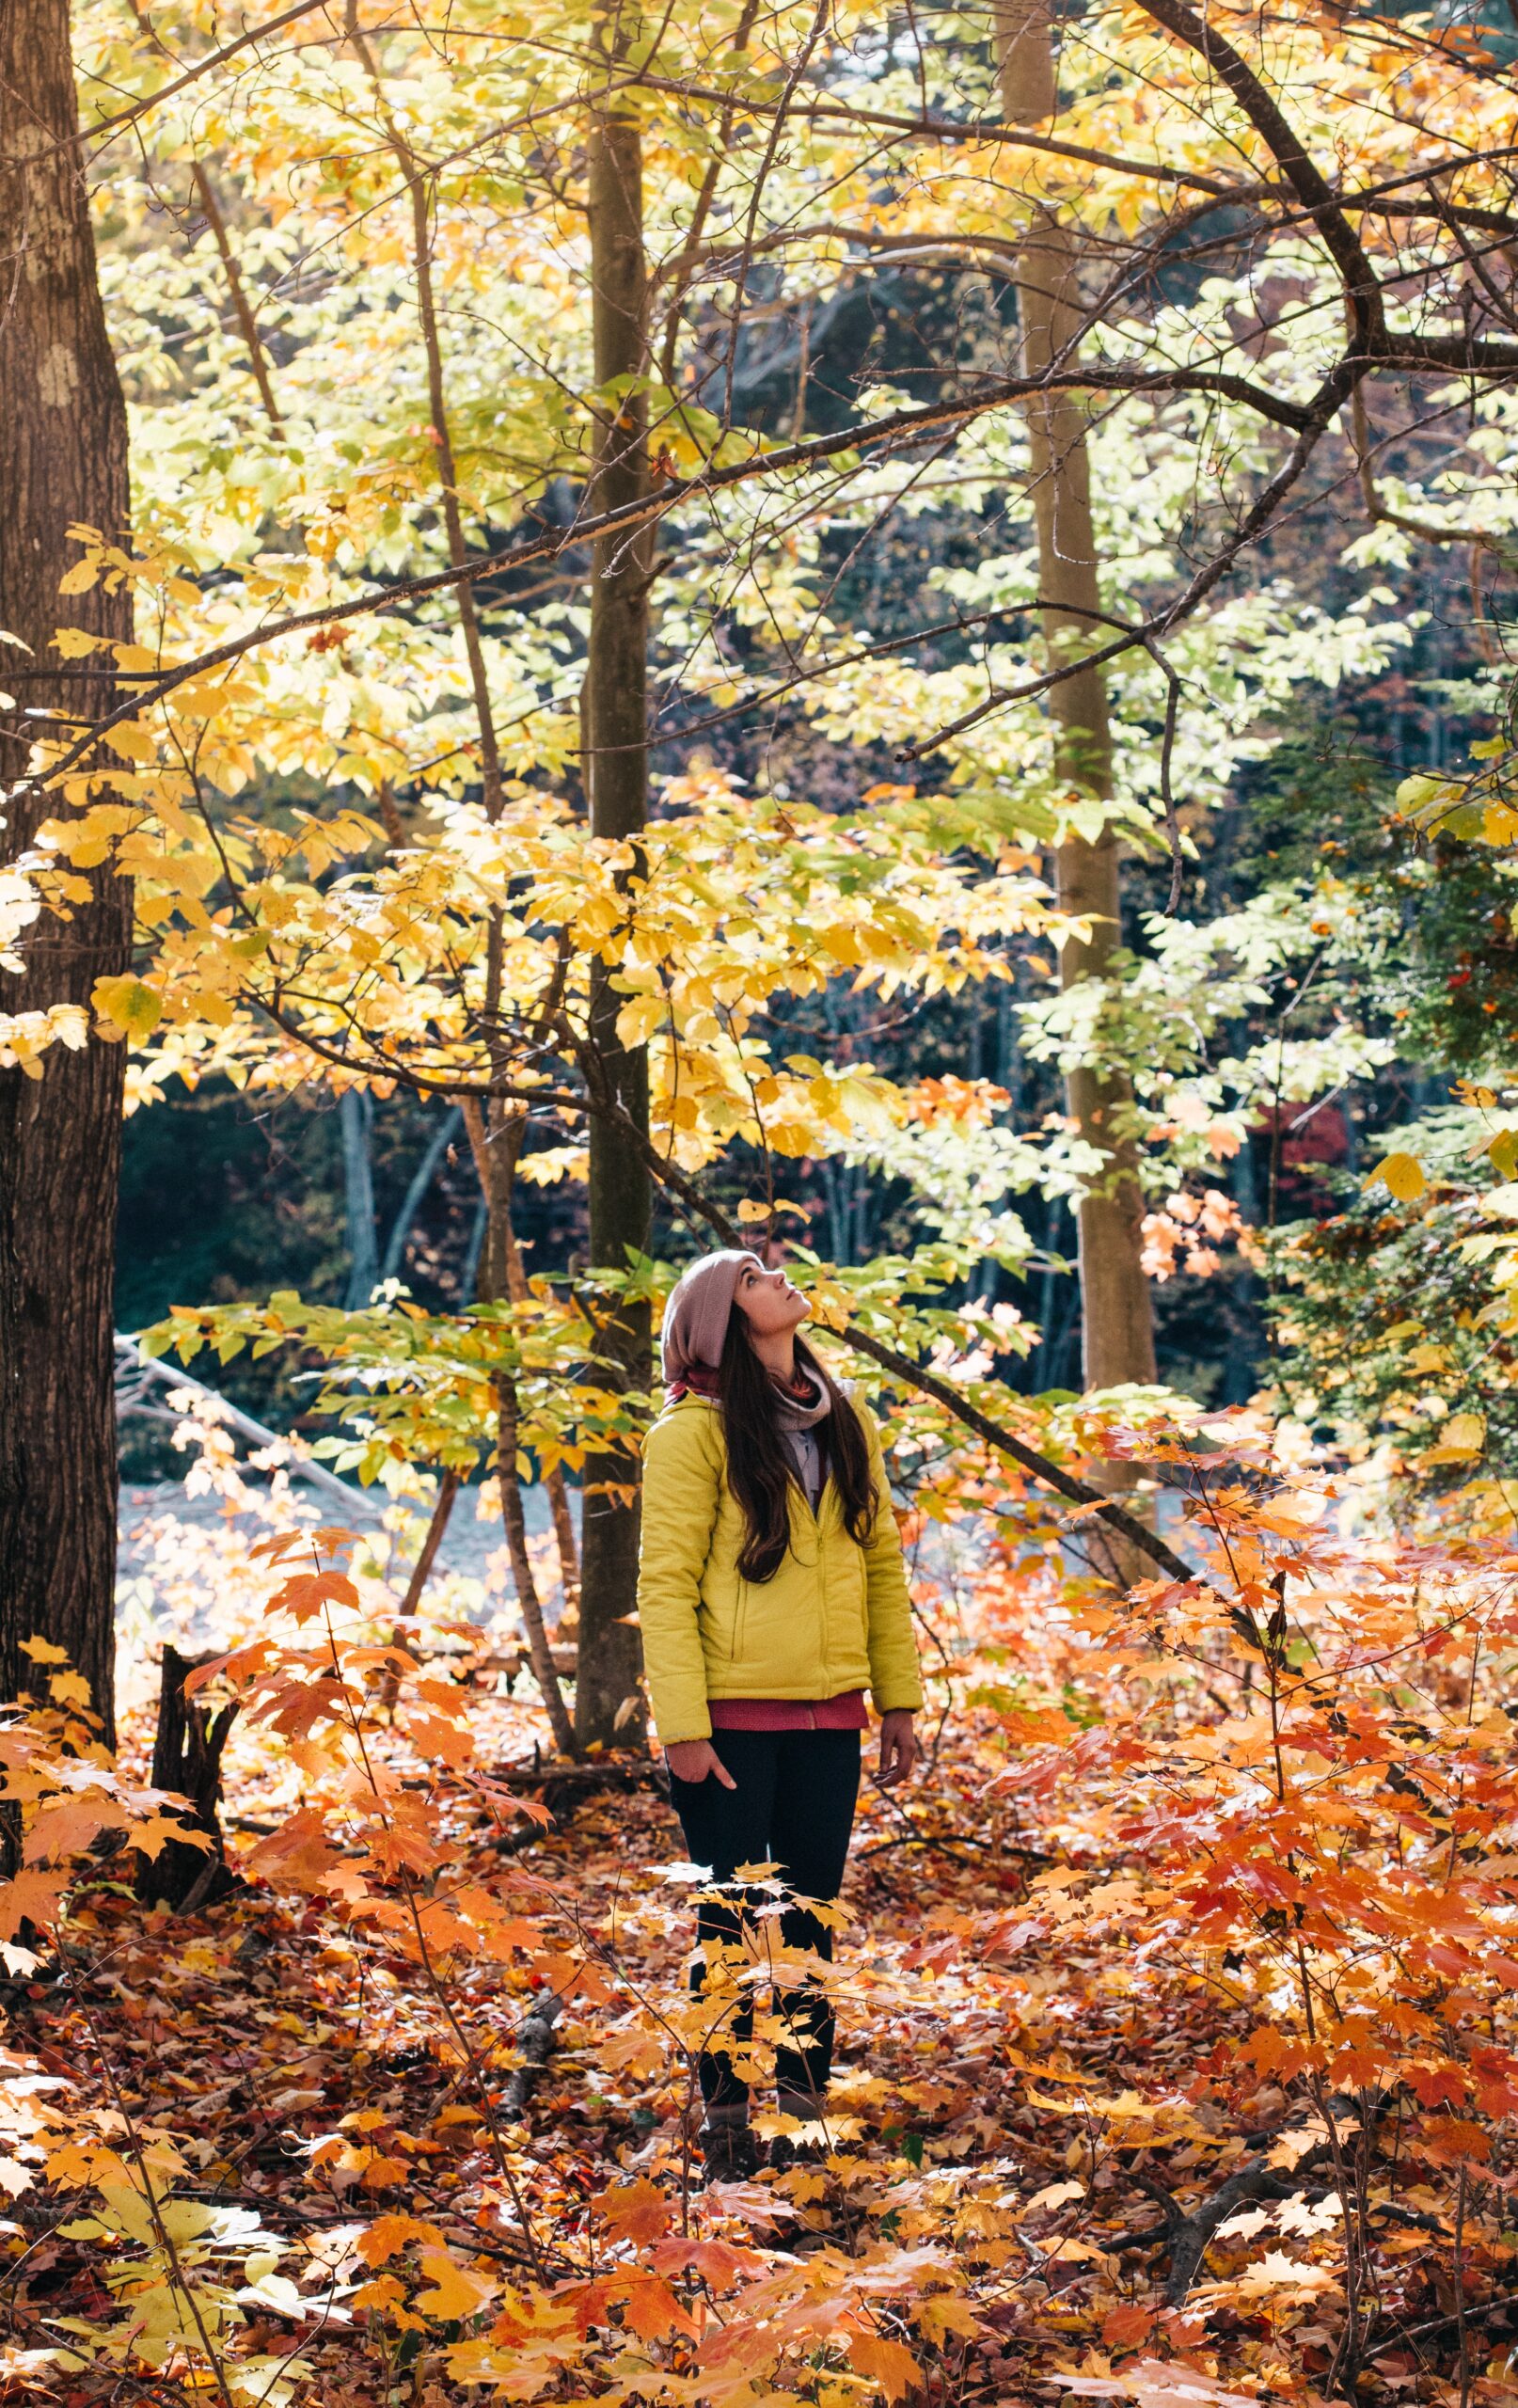
Especially in a very rich natural context such as the autumn landscape, it is preferable for the subject to take a natural pose and look away from the lens. The subject may also face a particular direction to lead the viewer’s eye to an interesting detail. This type of choice will help to narrate the experience and emotionally capture the observer.
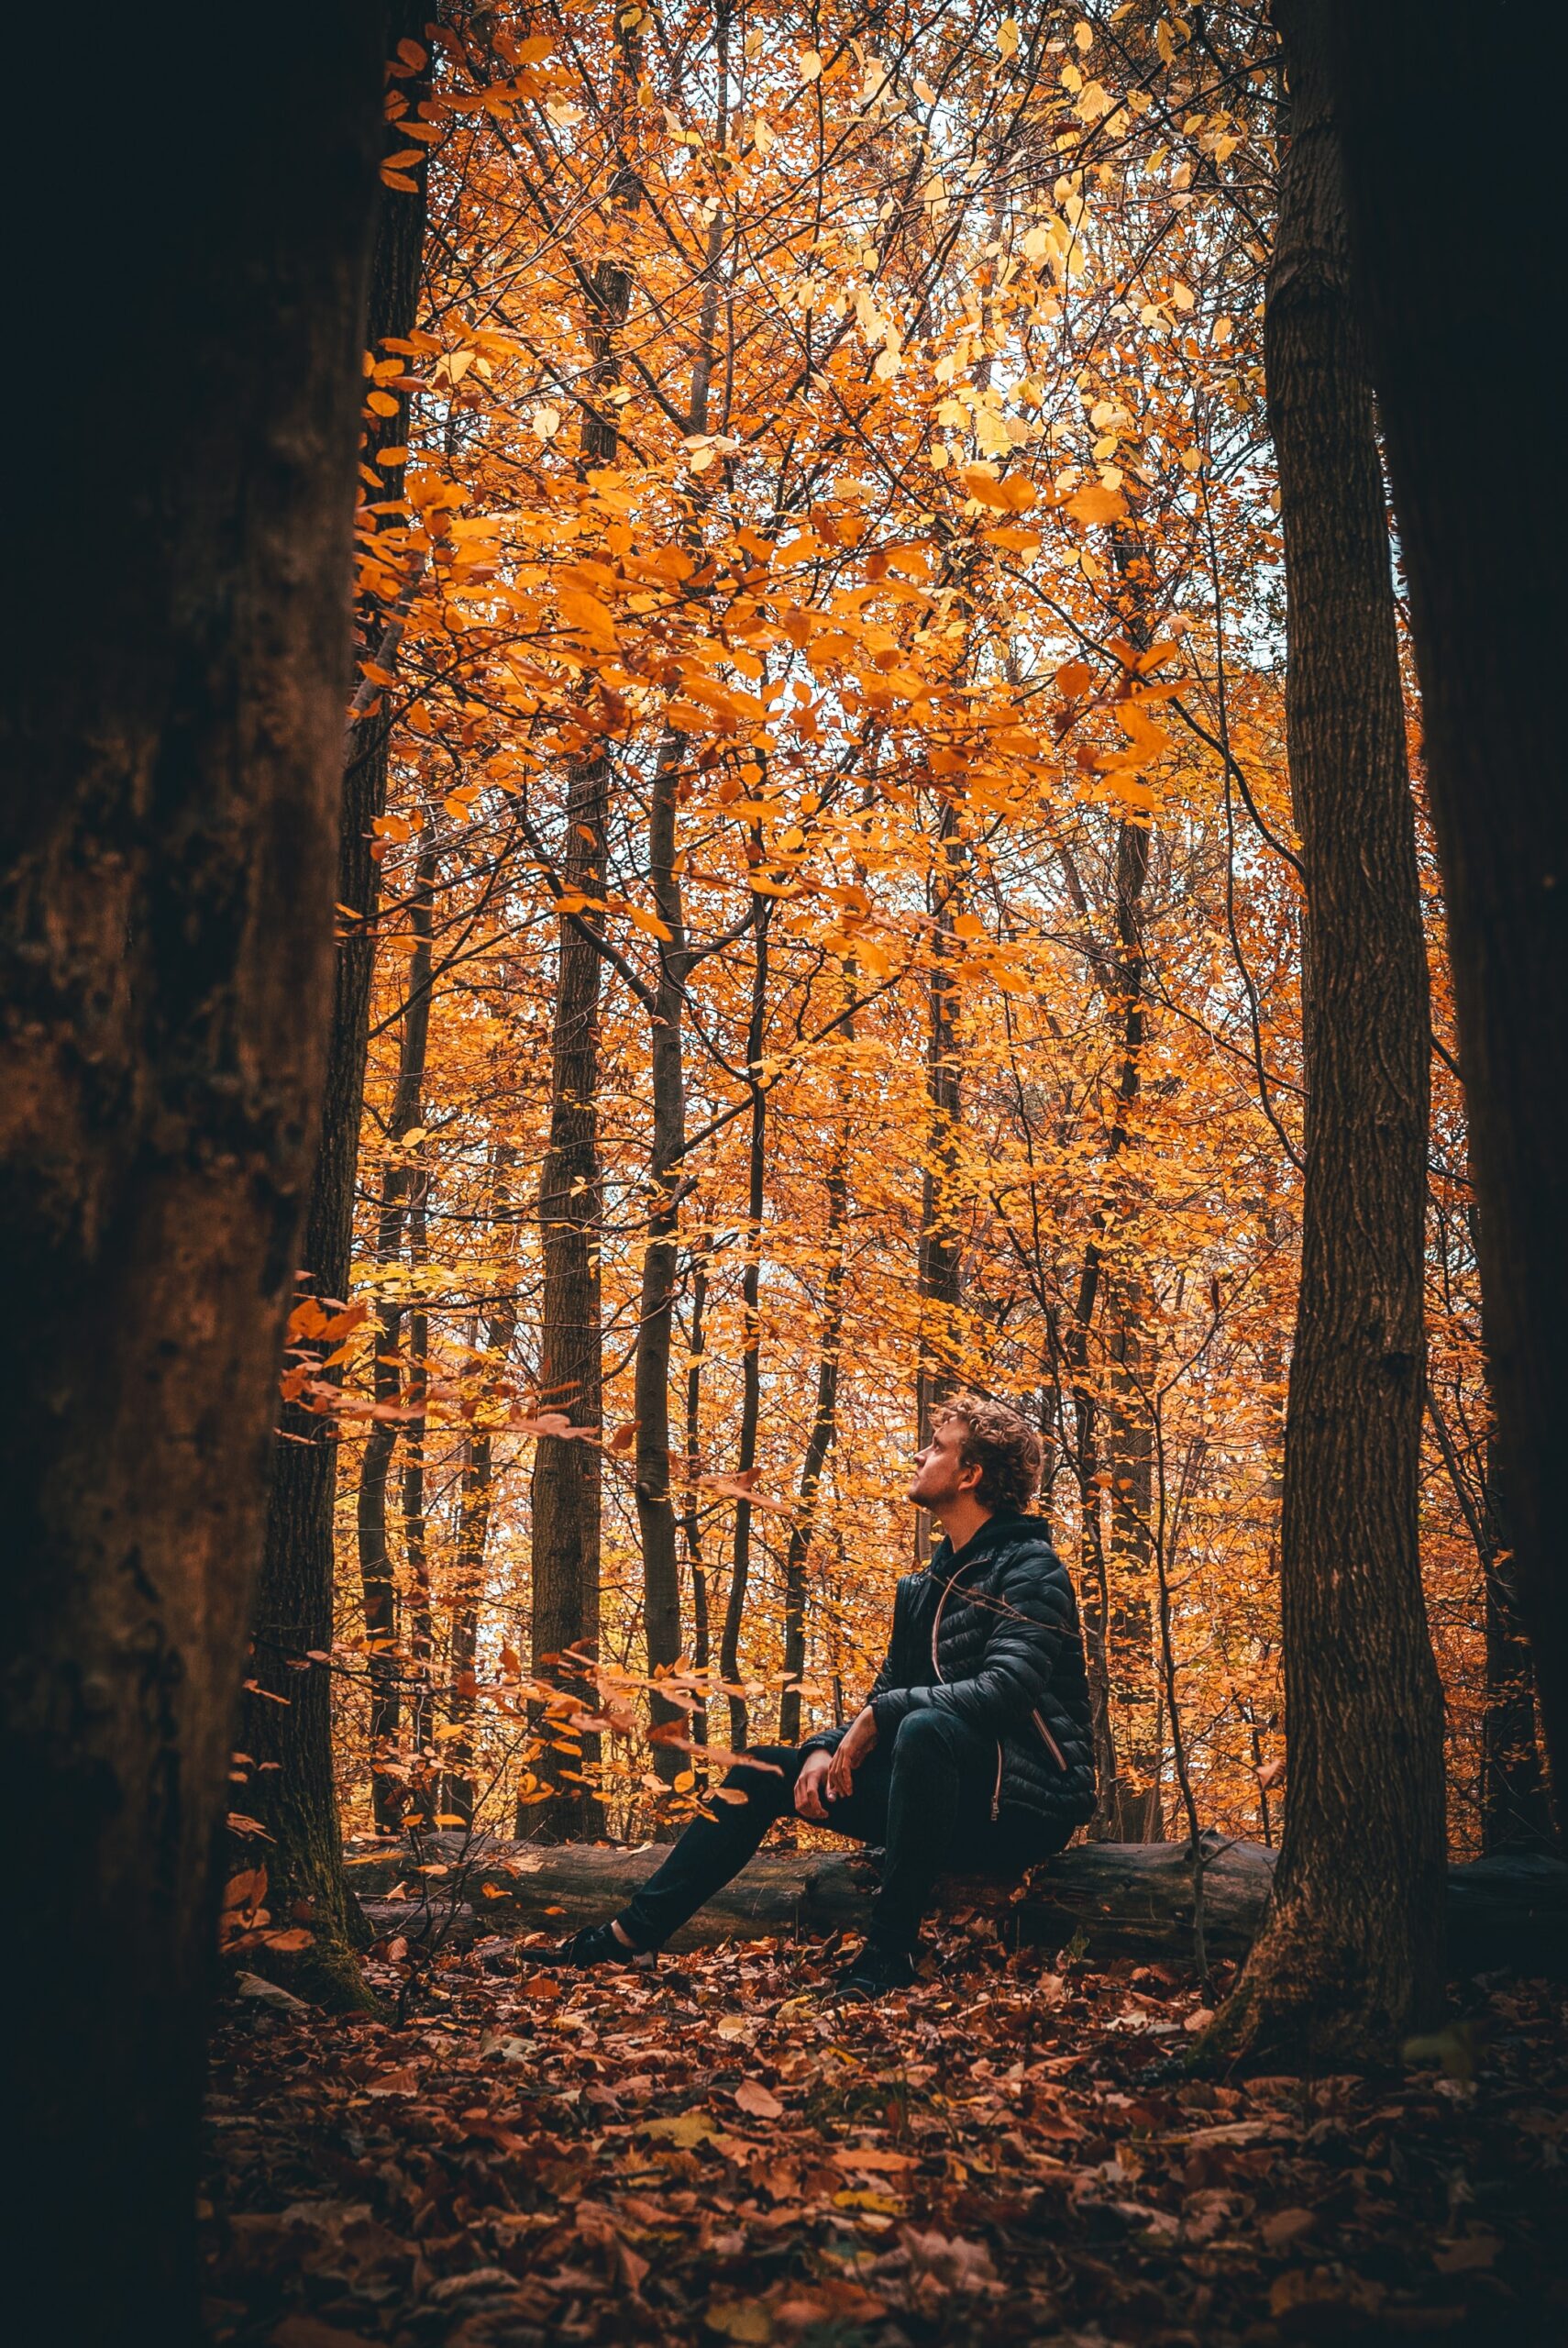
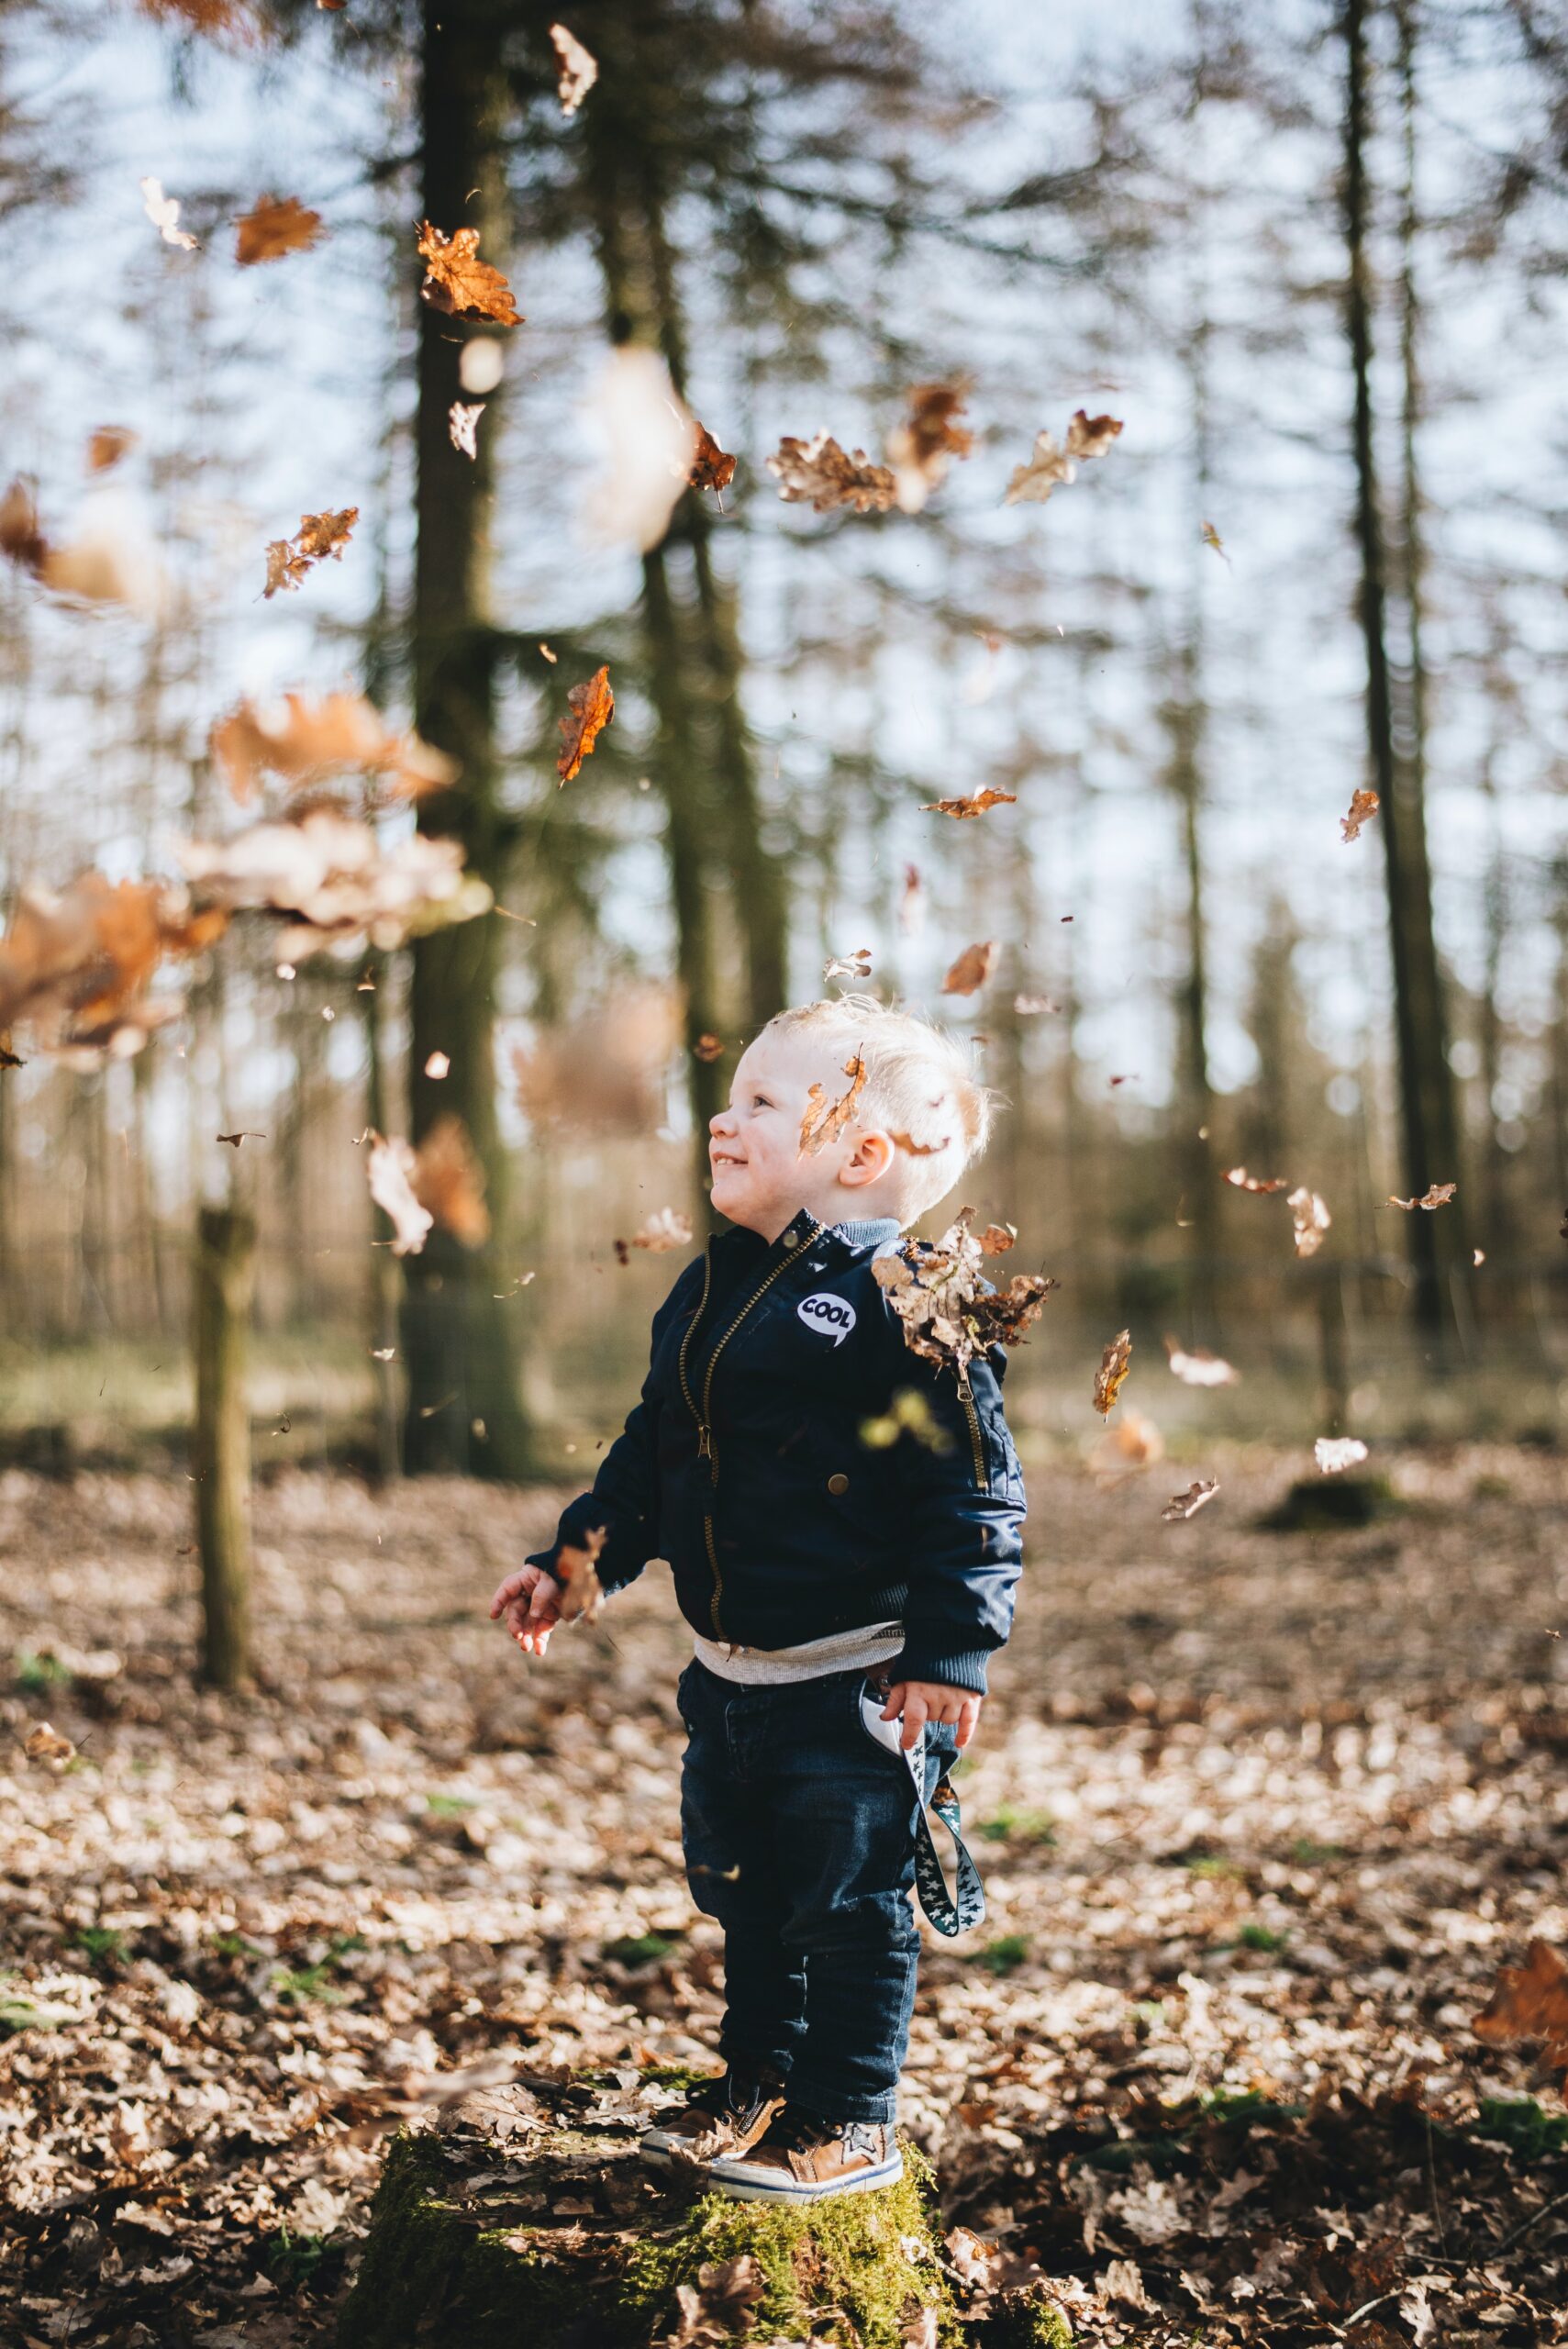
The subject can also perform a particular action to interact more with the landscape. Starting from sitting on a log, holding or throwing leaves in the air, running among fallen leaves. The photo will thus arouse greater emotional involvement and a dynamic appearance.
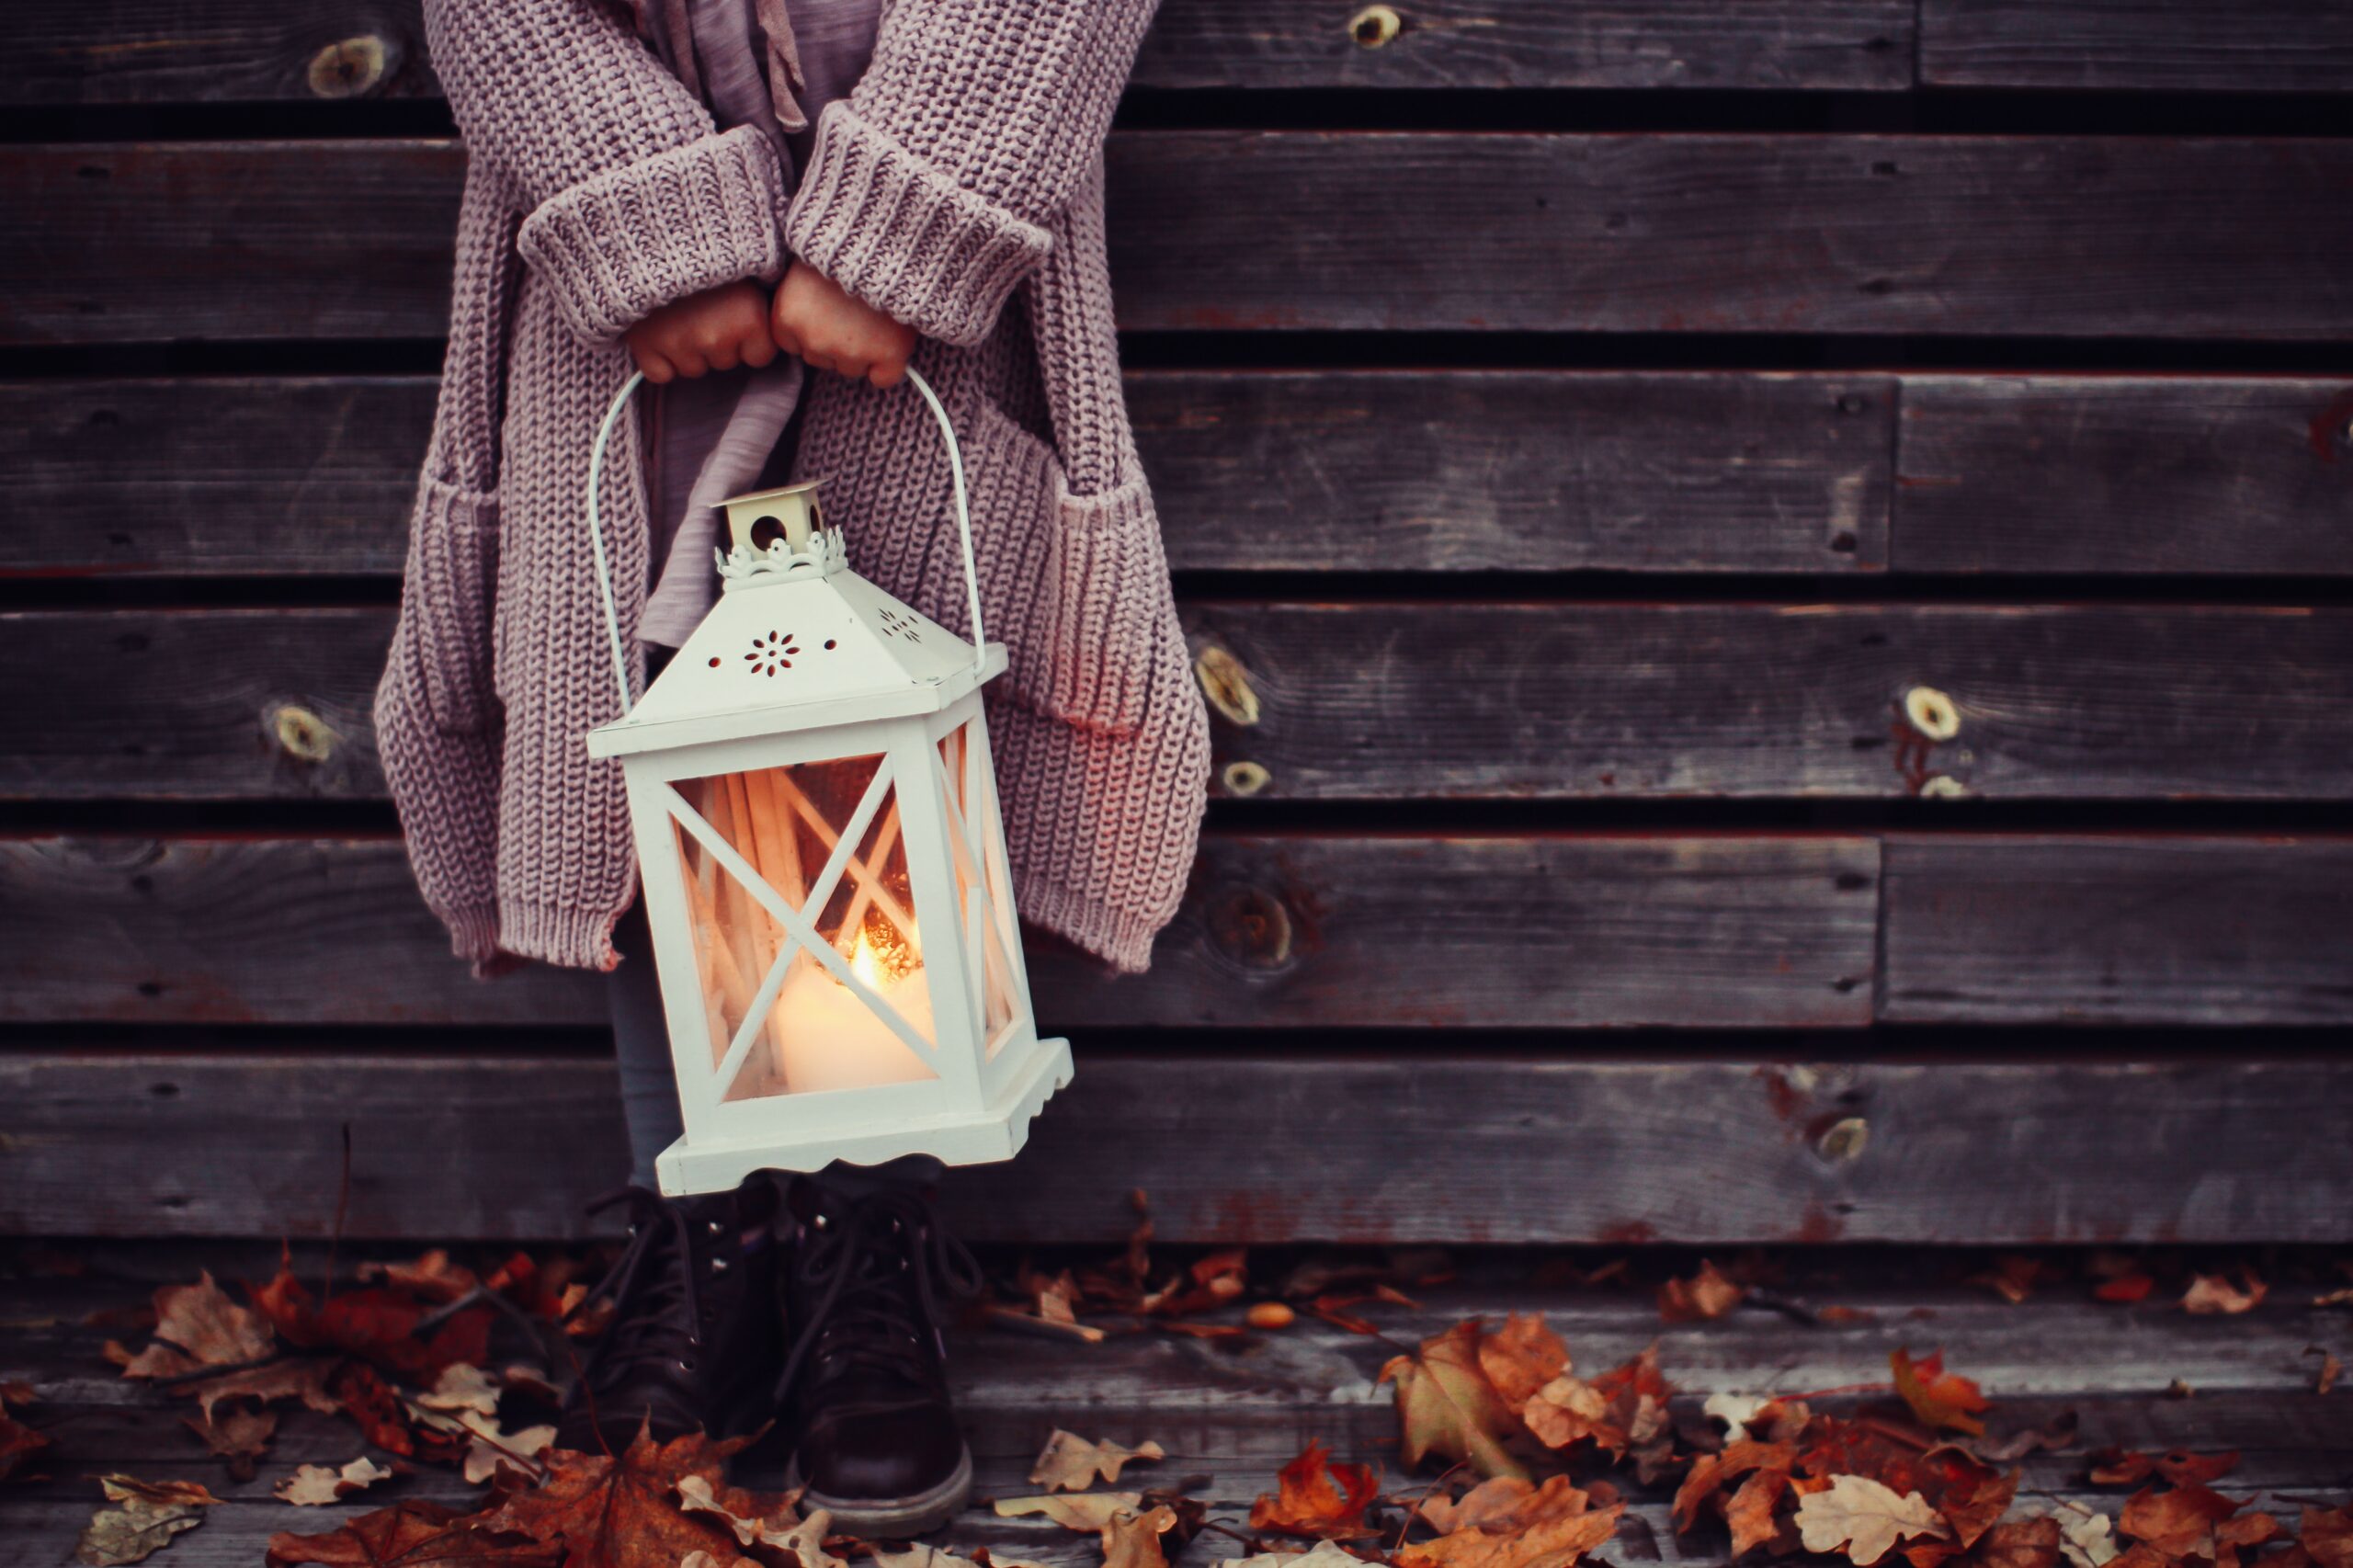
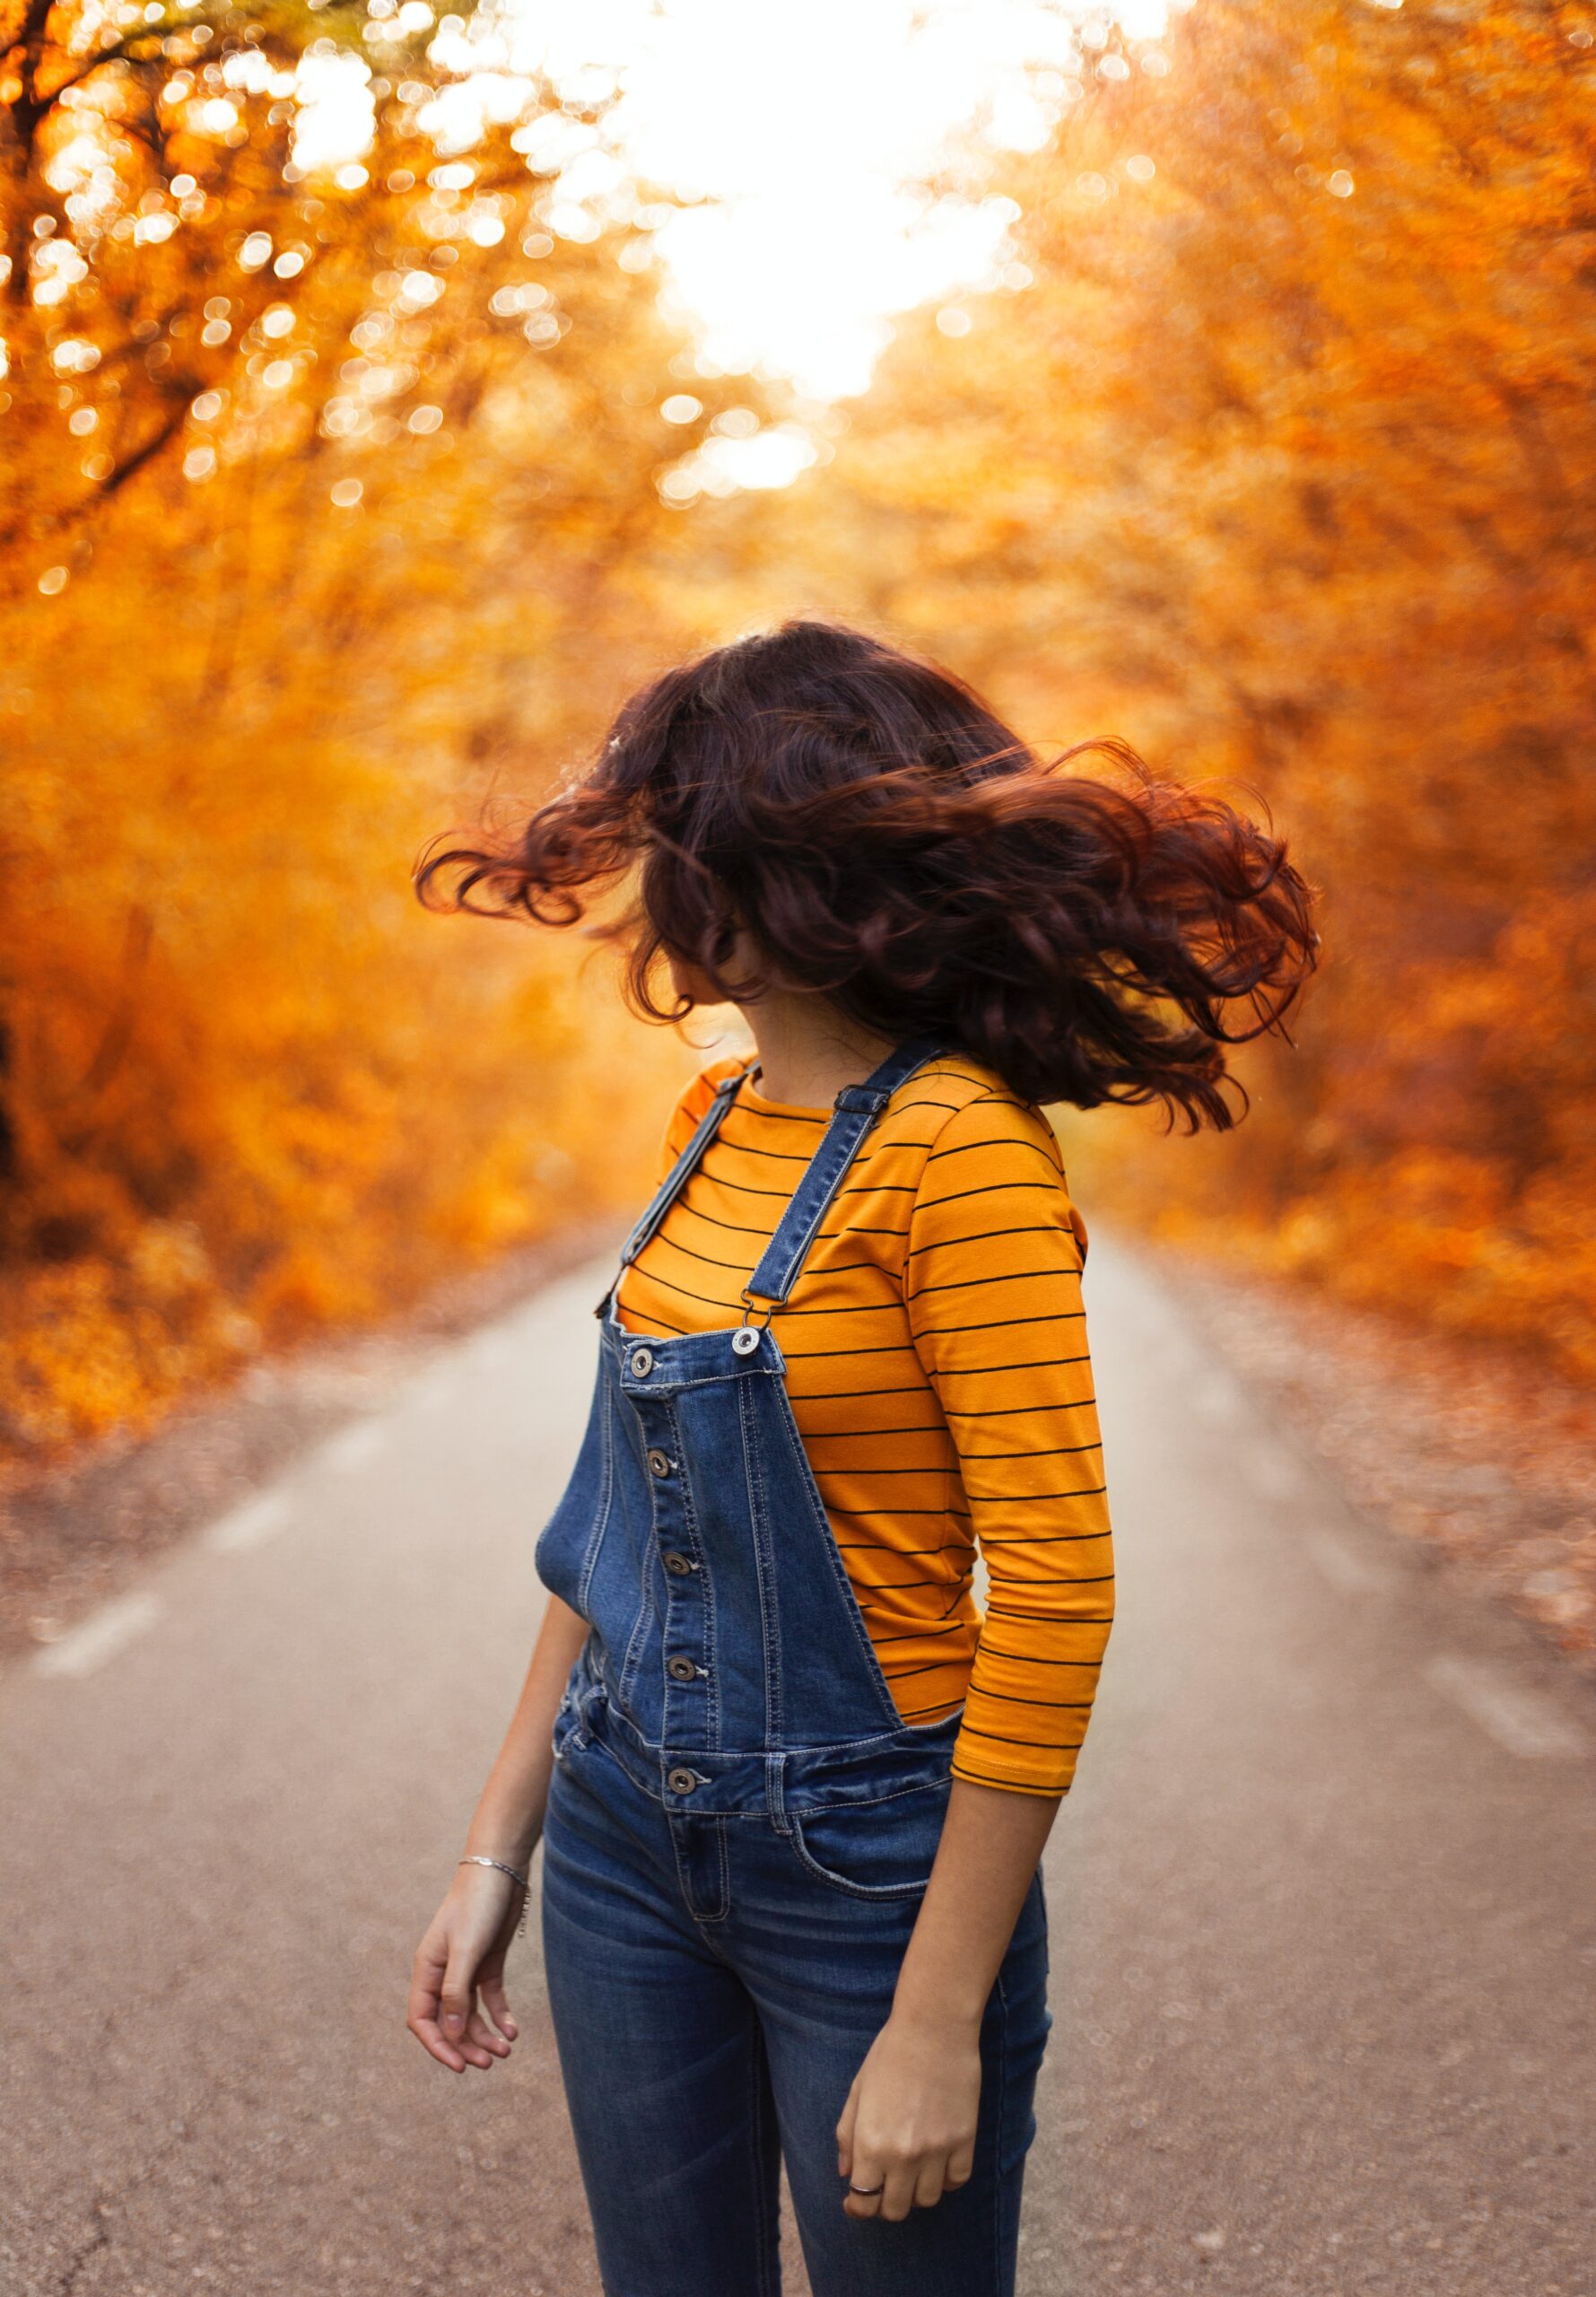
In poses like those just described, you can also choose to make drastic cuts of the subject, limited only to the hands performing the action, the legs, or the hair moving in the wind, excluding the face. Thus, in particular, the photo will represent an autumnal atmosphererather than the experience of a specific person.
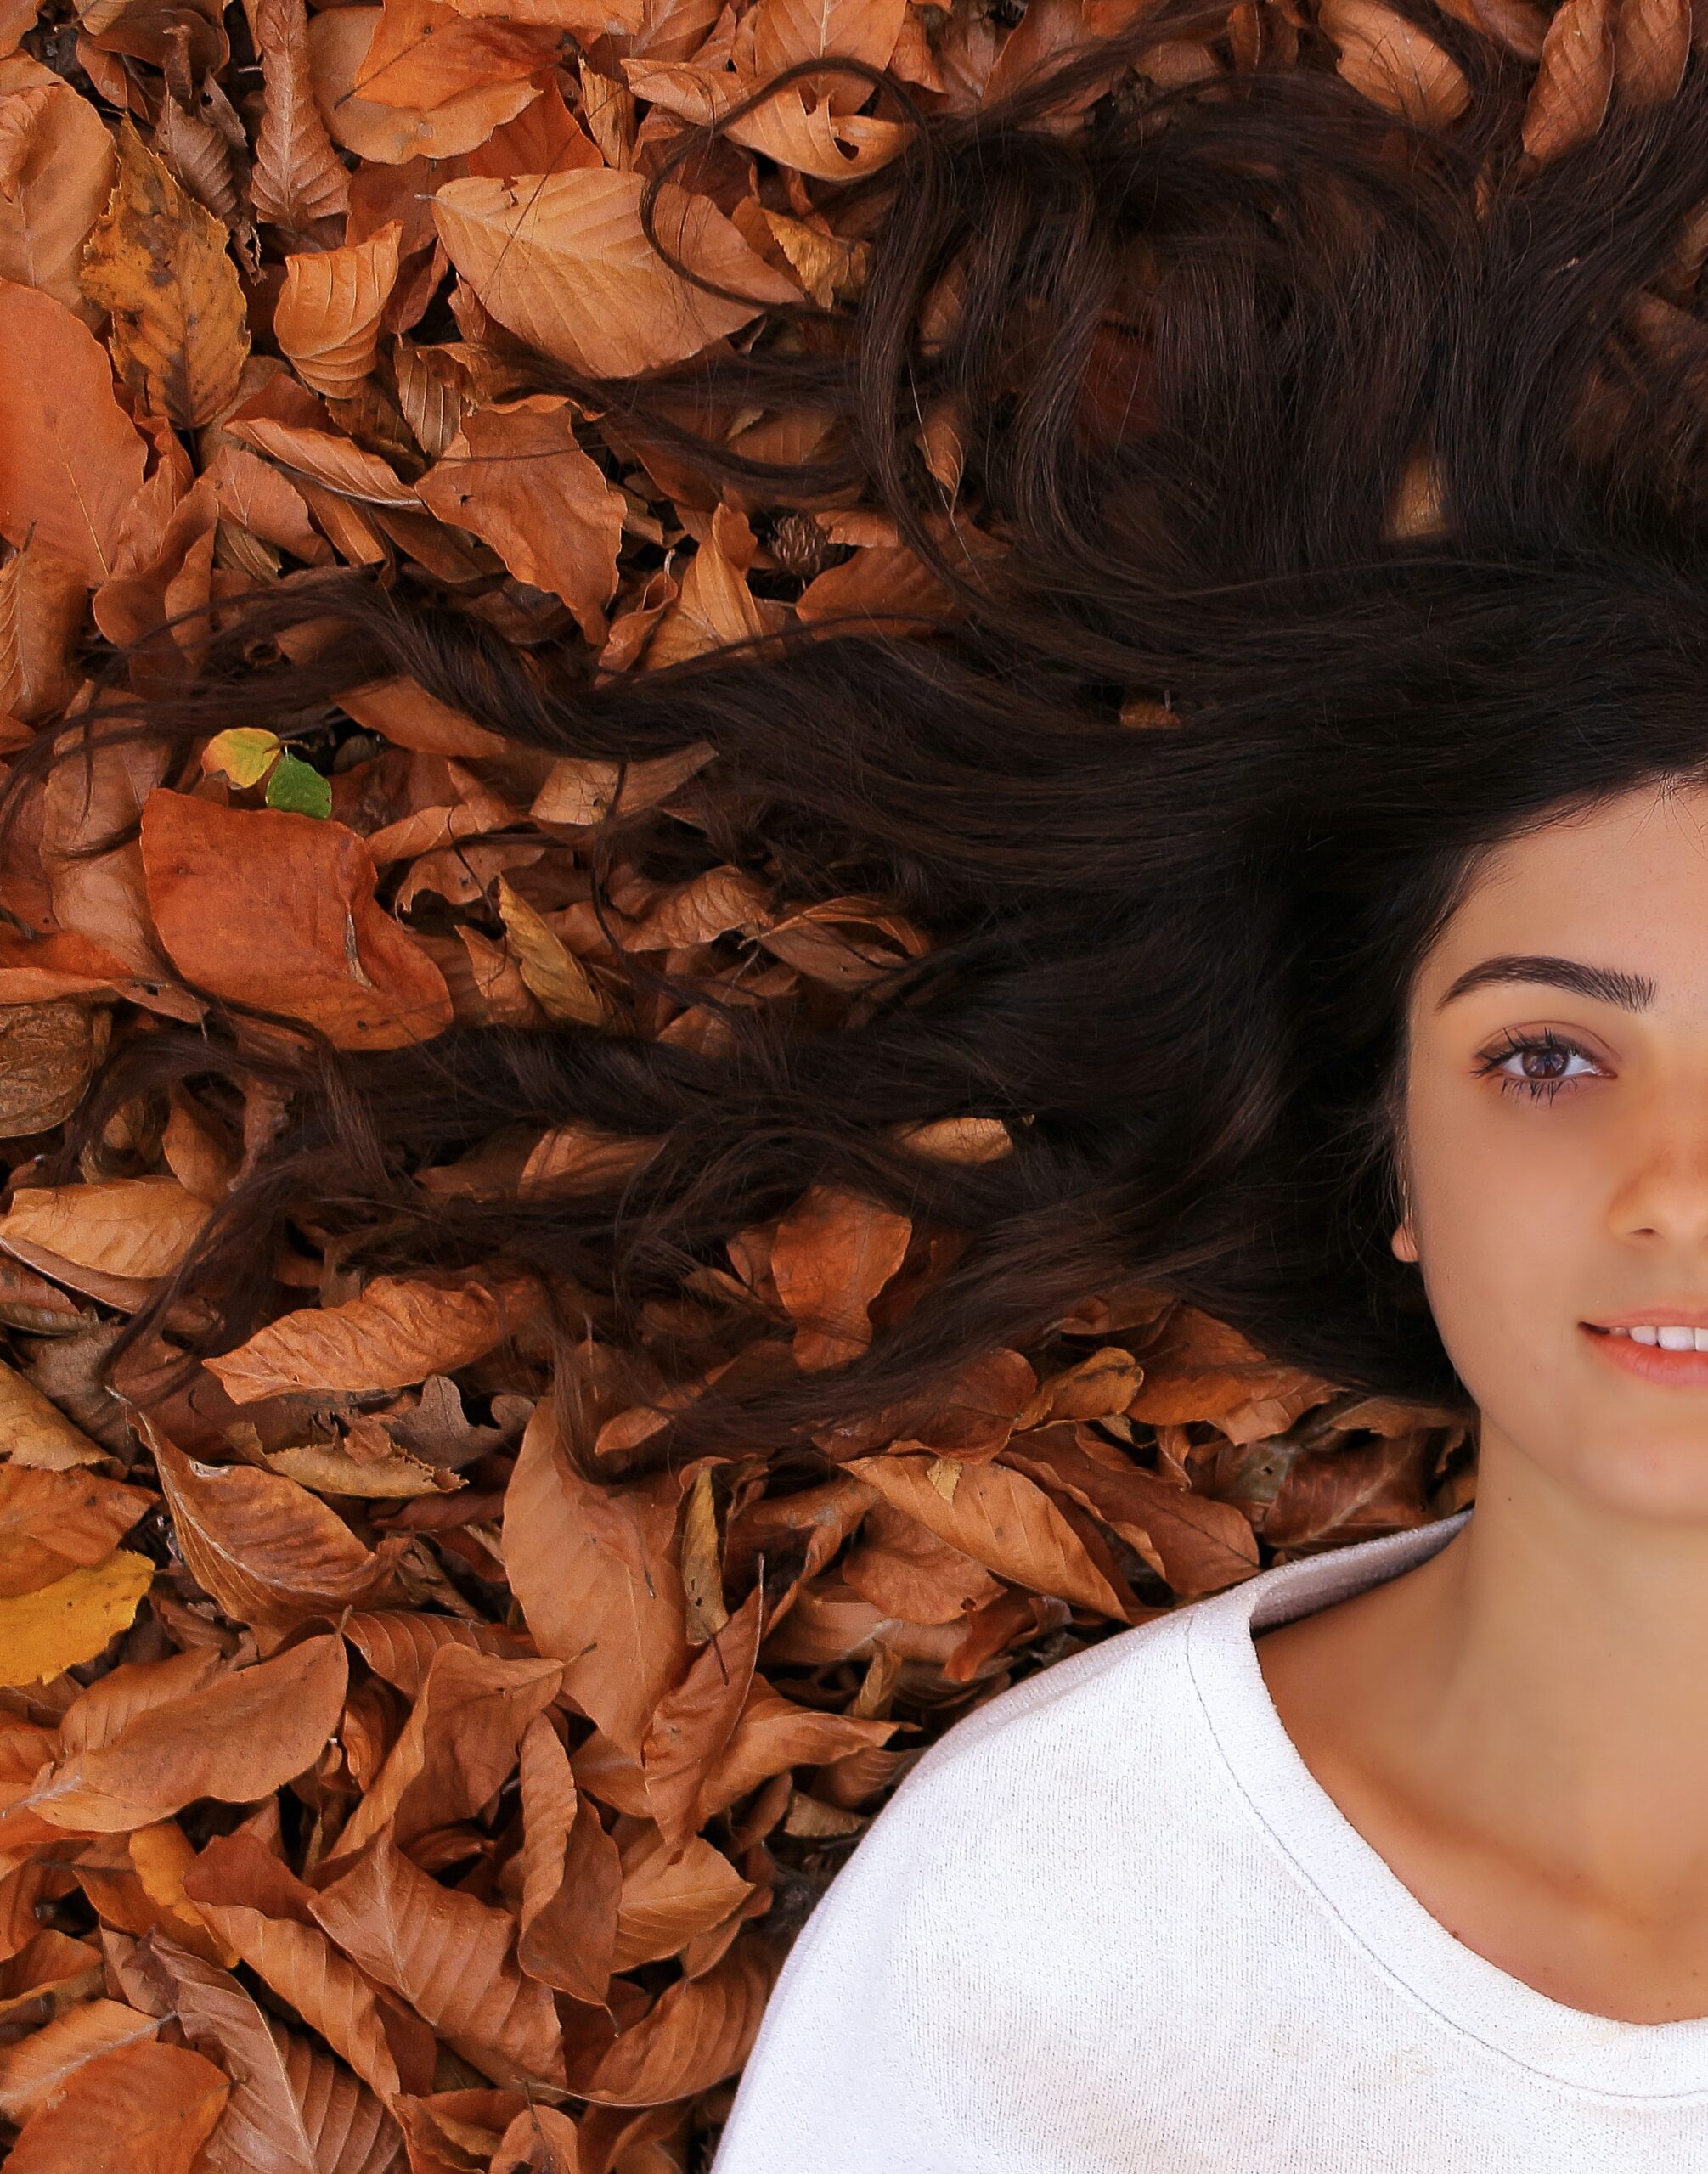
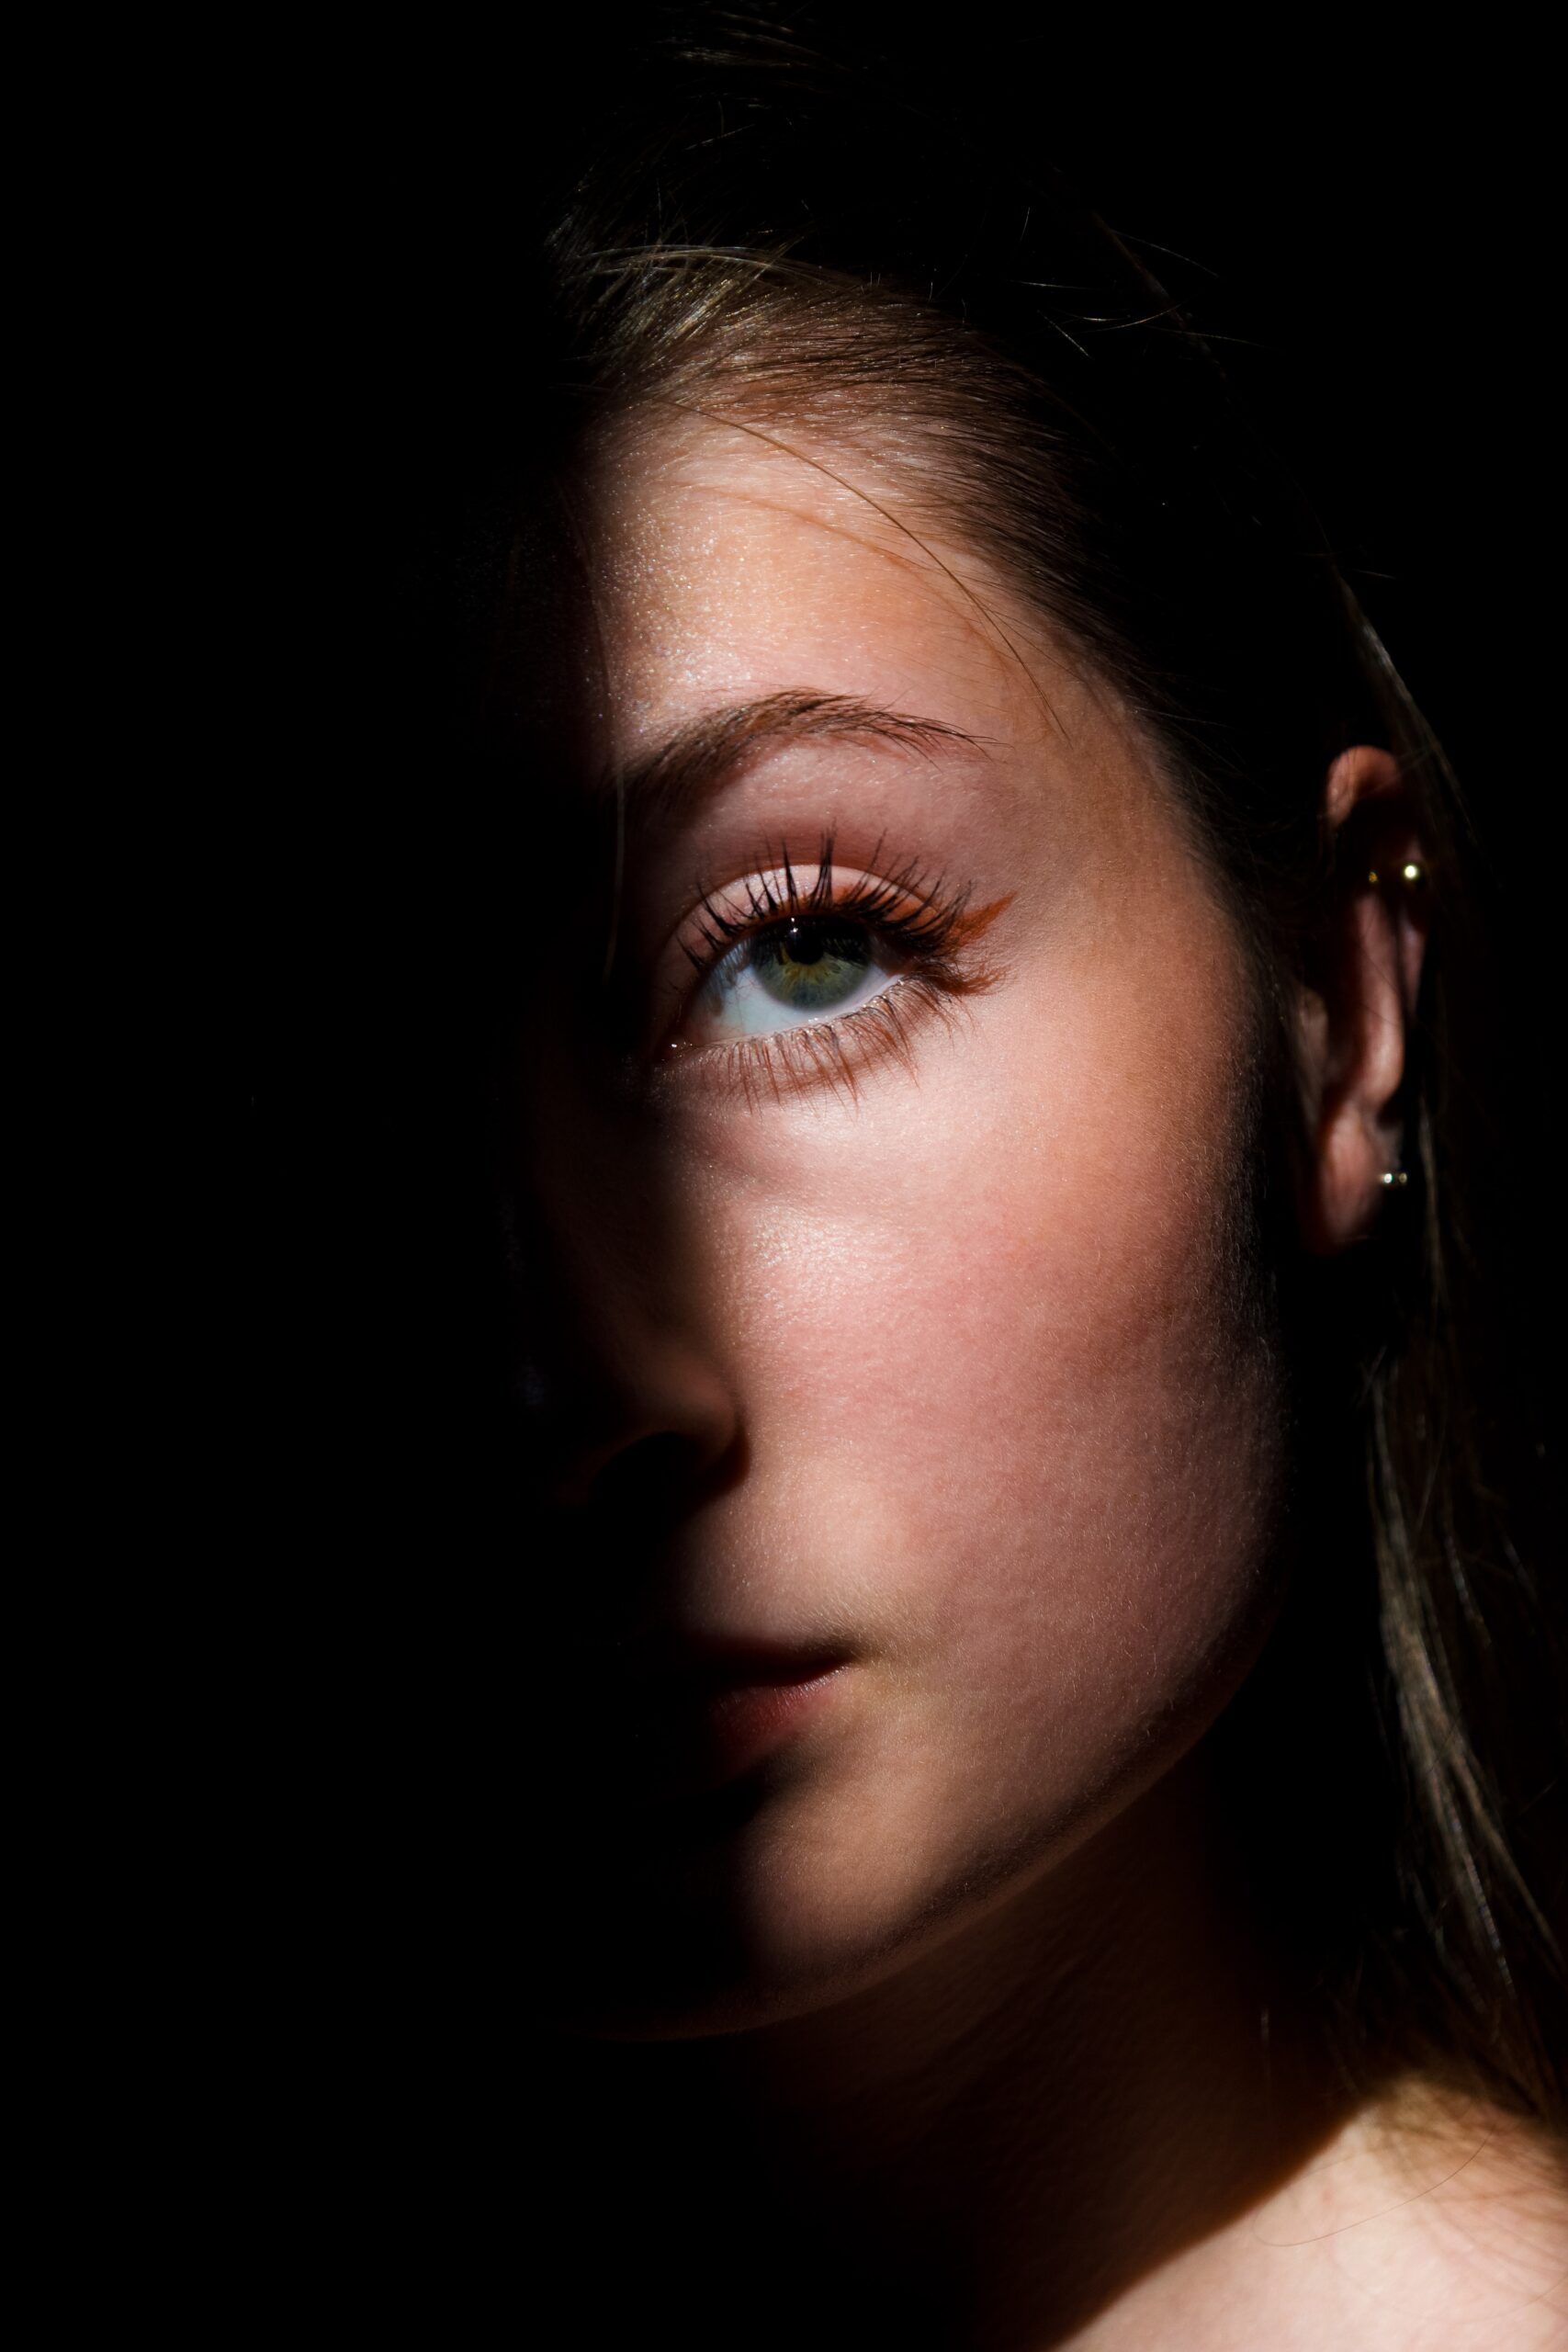
If, however, the person is looking into the camera, prefer close-ups with little context, perhaps bringing the subject closer to some details. In this type of shots you play with the contrasts between nature, people and colors. The classic example is that of the person lying on the ground among the colored leaves.
hoto by Kristopher Roller on Unsplash
Photo by Sander Weeteling on Unsplash
Photo by Nong on Unsplash
Photo by Sercan Solmaz on Unsplash
Photo by Daiga Ellaby on Unsplash
3. Autumn portrait pictures. In focus or blurry?
When taking autumn portraits pictures, playing with blur highlights the person and creates interesting backgrounds.
In fact, the colors of the leaves and the colourful landscapes, if blurred, give the photos a warm atmosphere and represent an excellent background.
To play with blurring, simply change the aperture opening.
IMPROVE YOUR PHOTOS: A GOOD COMPOSITION
How to manage aperture to get interesting shots? Discover that and other tips on our post!
Usually you choose to focus on the subject, placing it in the foreground, and blur the landscape in the background.
But even doing the opposite, blurring the person and focusing on an interesting detail, can lead to original solutions!
Photo by Neal Kharawala on Unsplash
Photo by Omid Armin on Unsplash
Photo by Jakob Owens on Unsplash
4.Autumn portraits pictures: the best outfit
Even the subject’s clothing, mainly regarding colours, can play a key role in the stylistic choices.
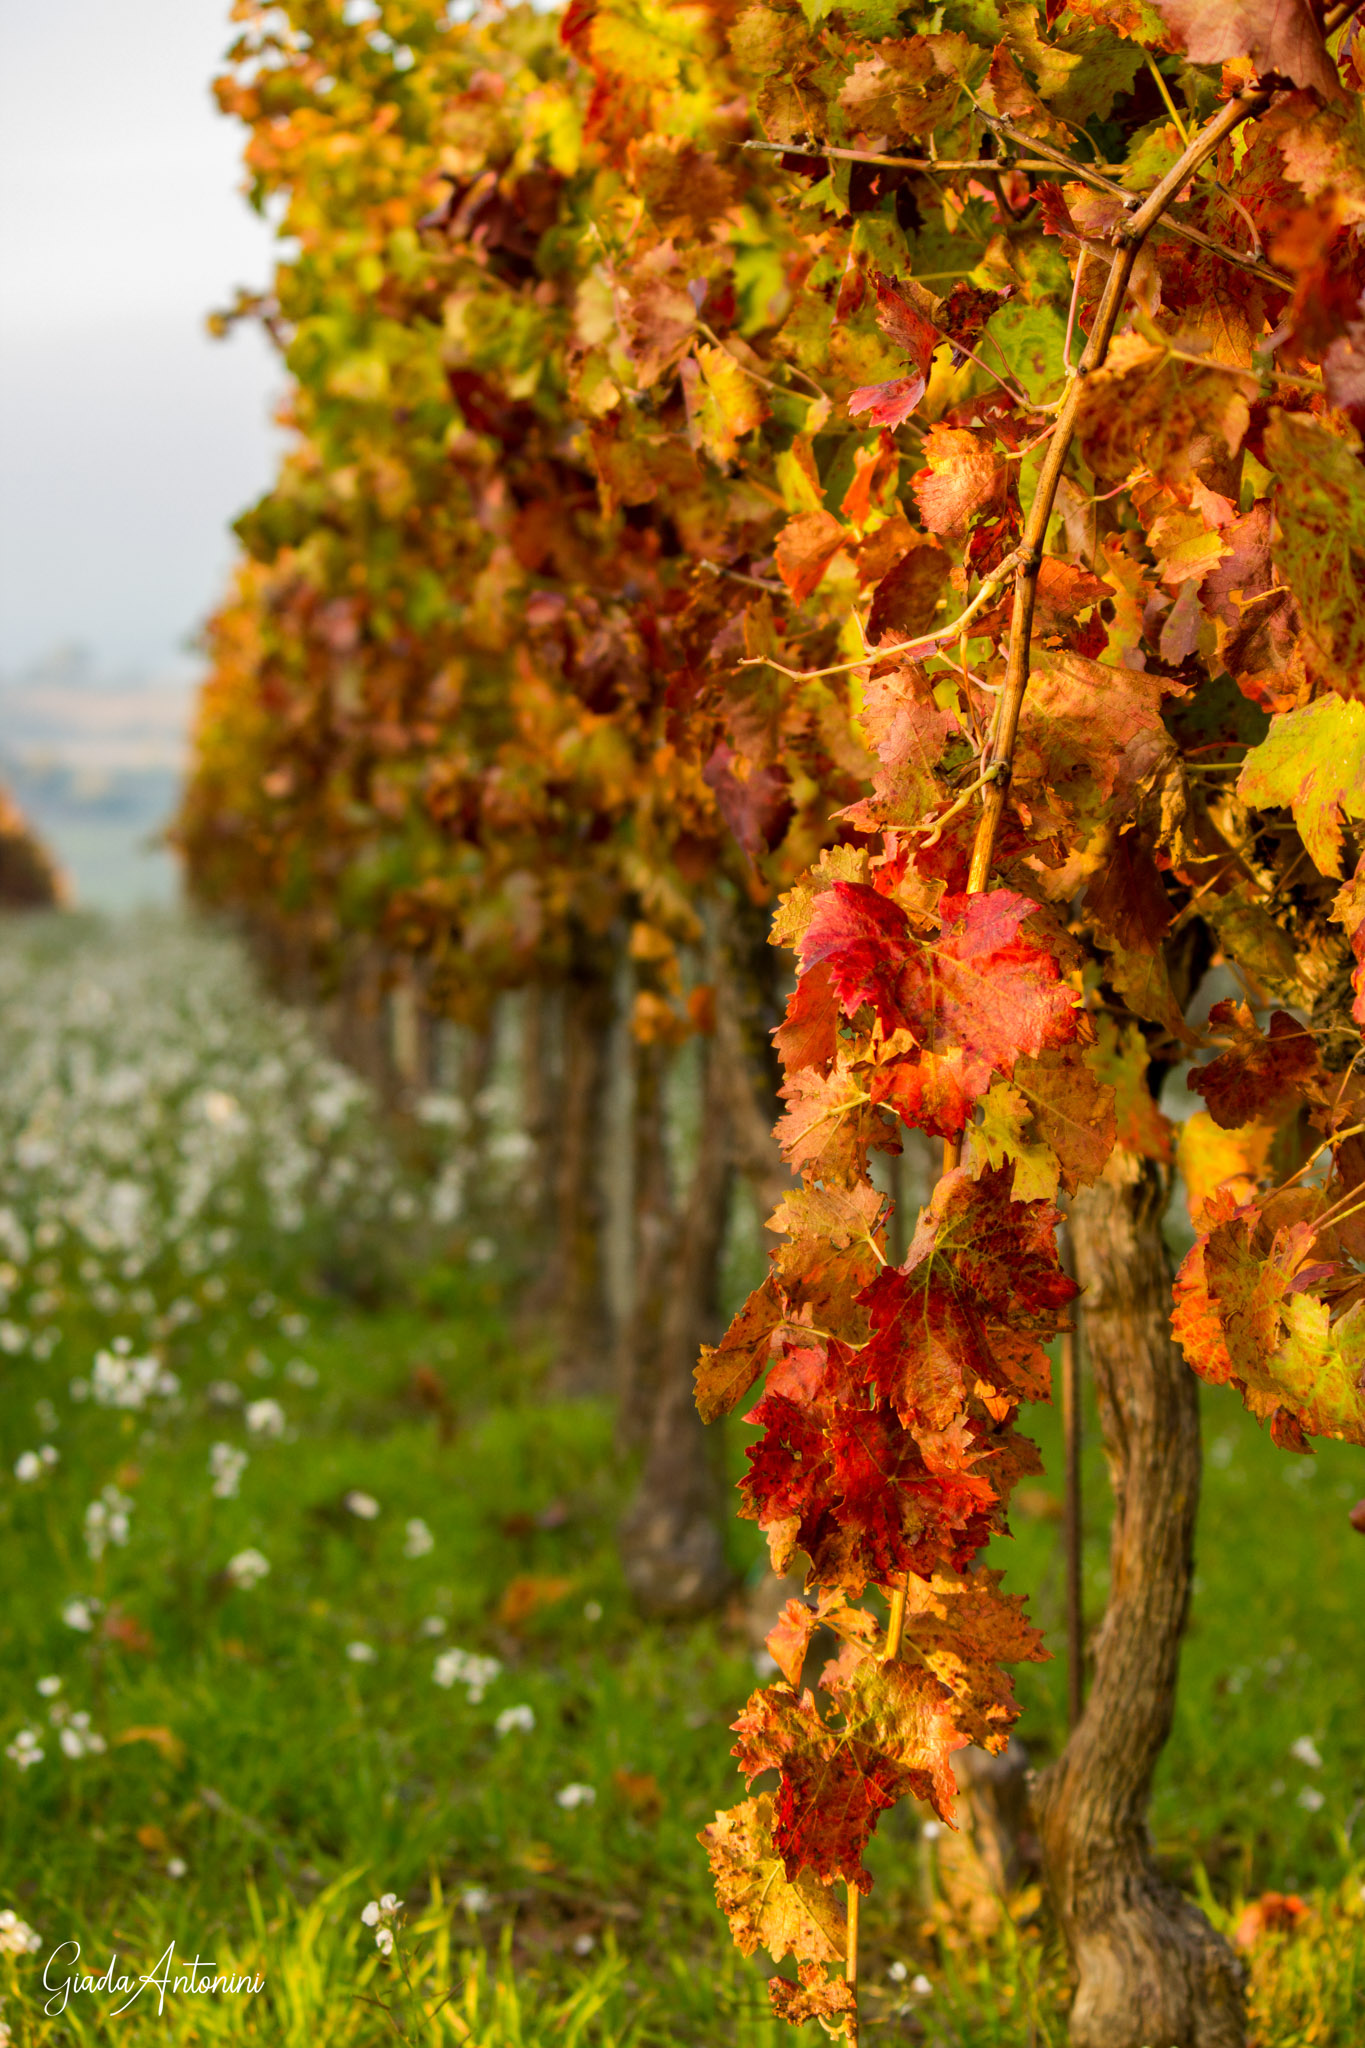
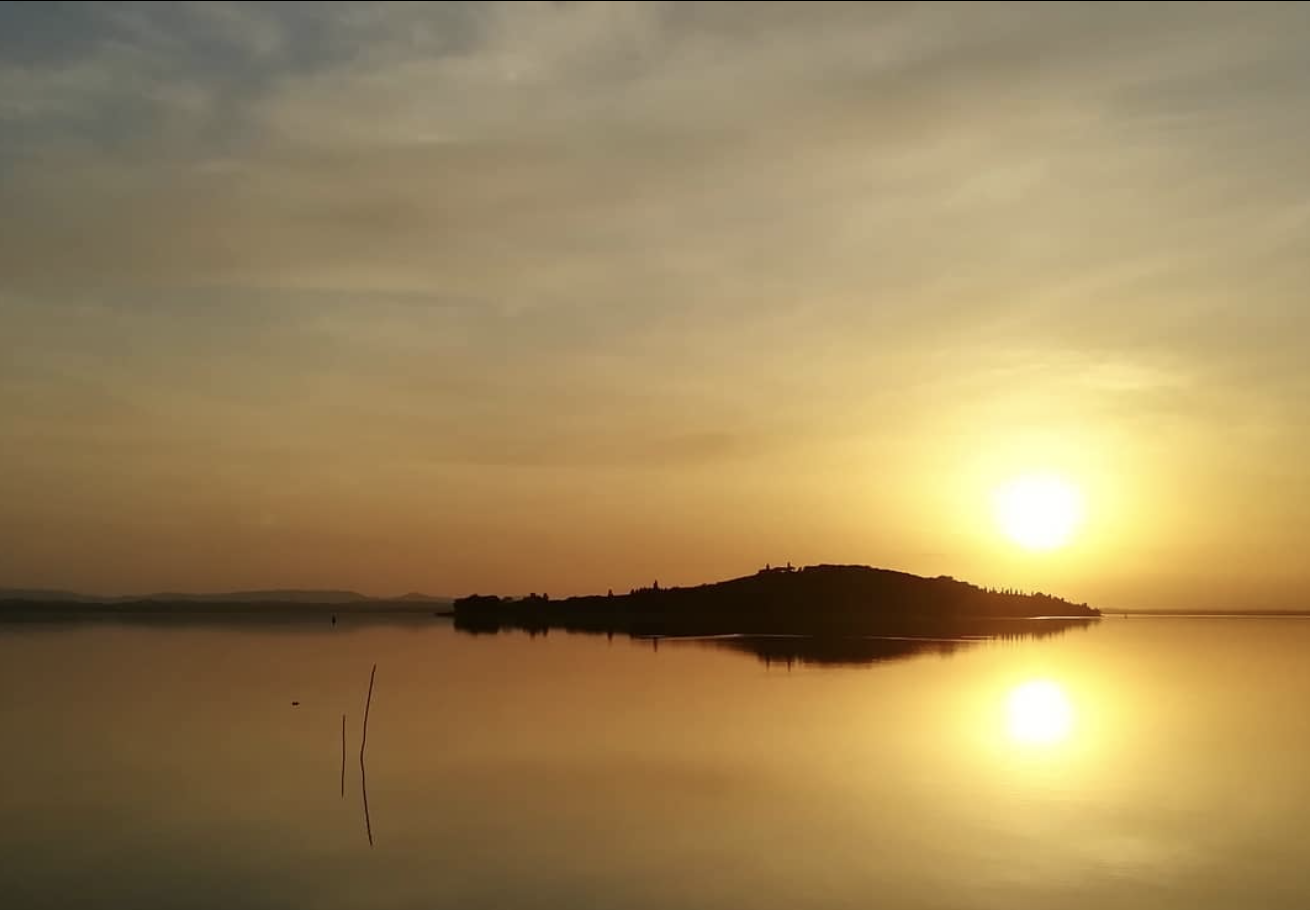
If you choose warm tones in shades of red, orange, brown and yellow, there will certainly be chromatic associations between the natural context and the subject of the photo. We will thereforework on integration, in the case of overlapping of the two elements, or on correspondencesif the person is placed alongside but not superimposed on the colored leaves (as in the example of the first photo below).
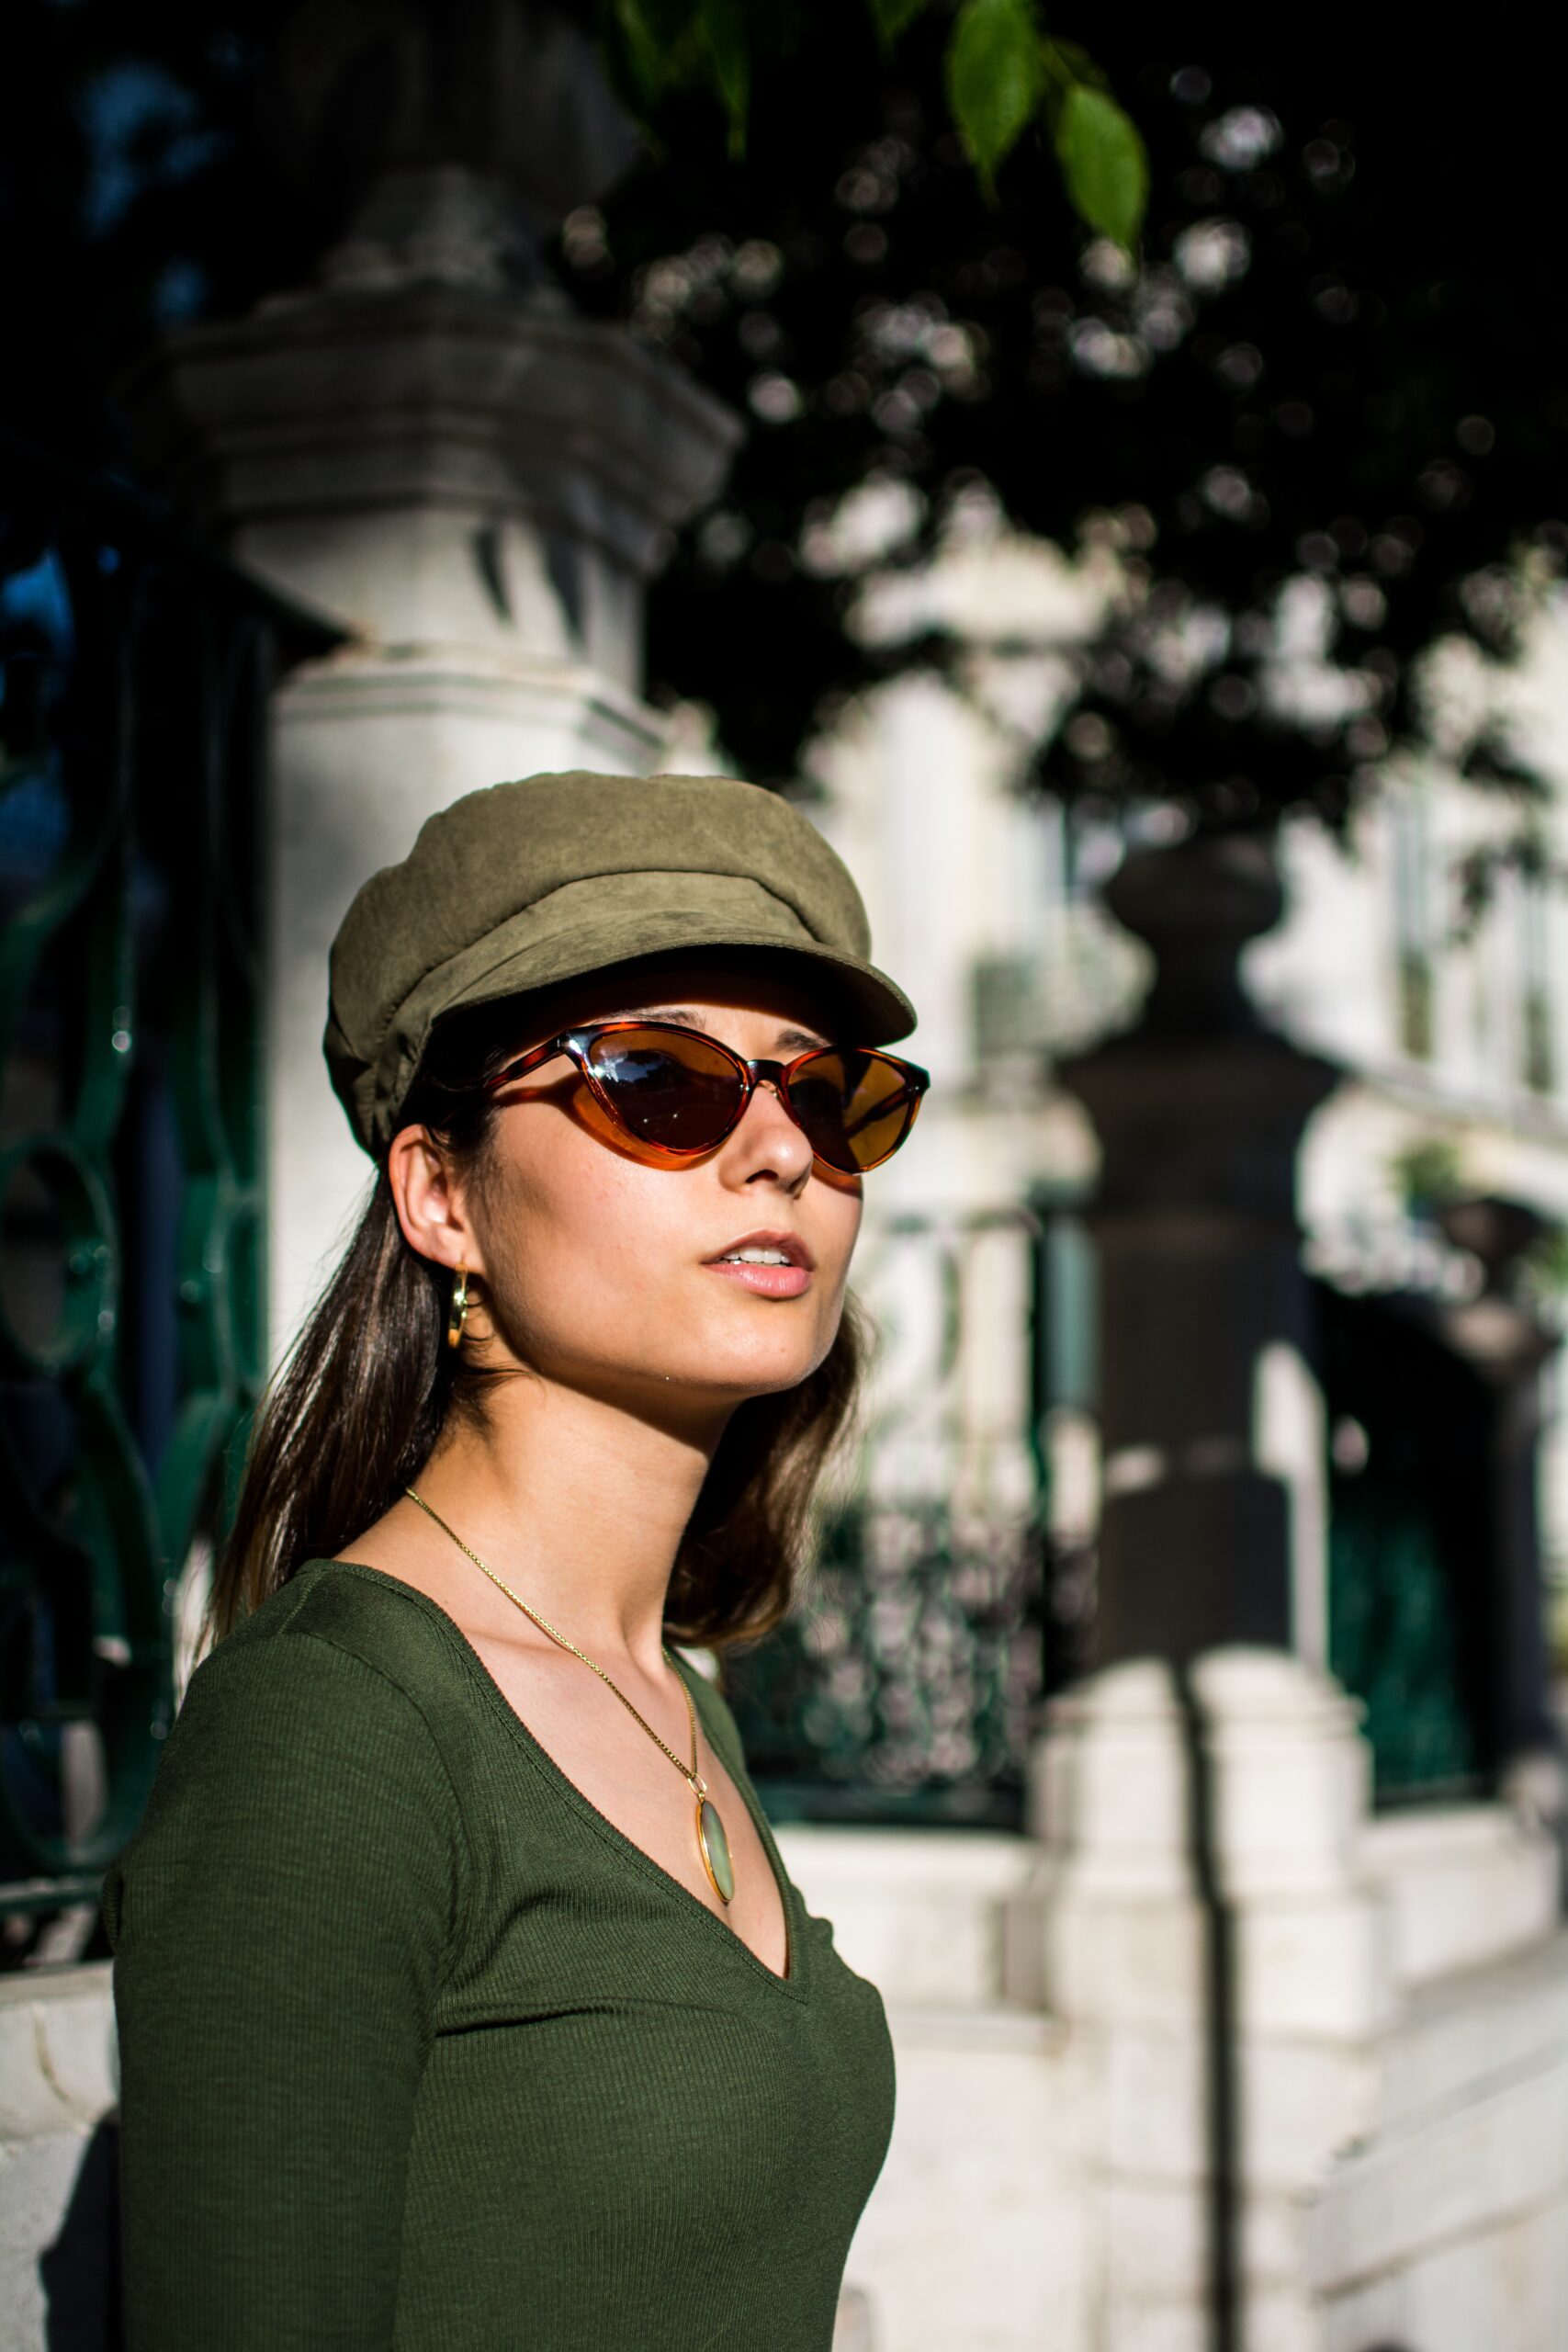
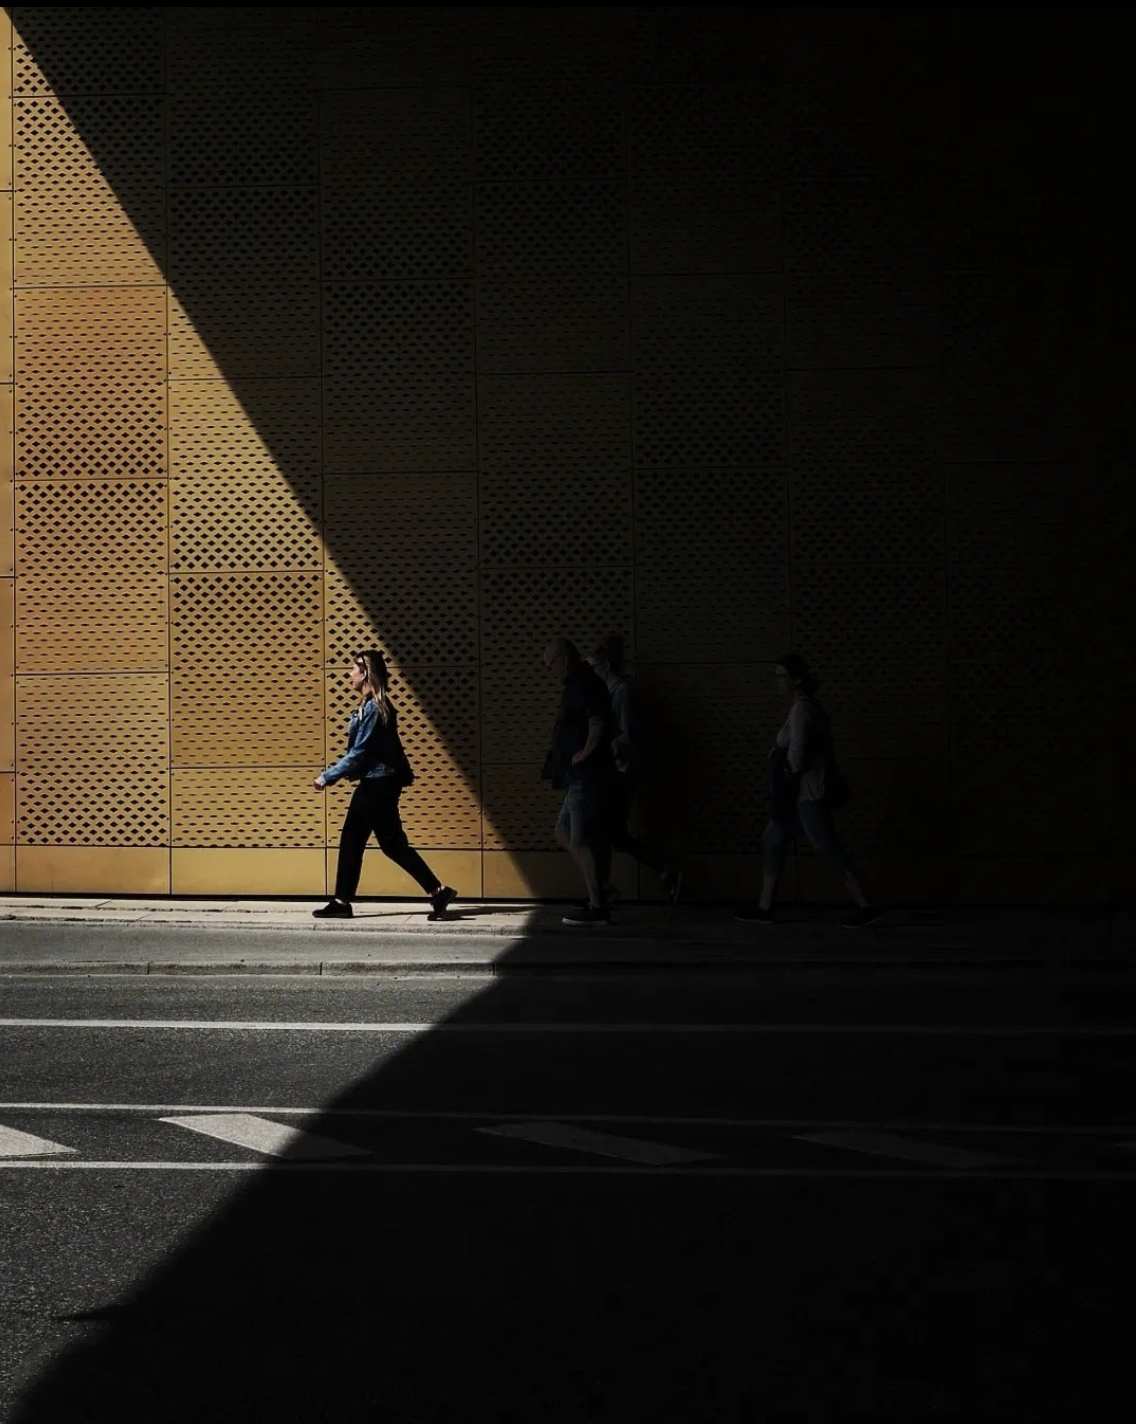
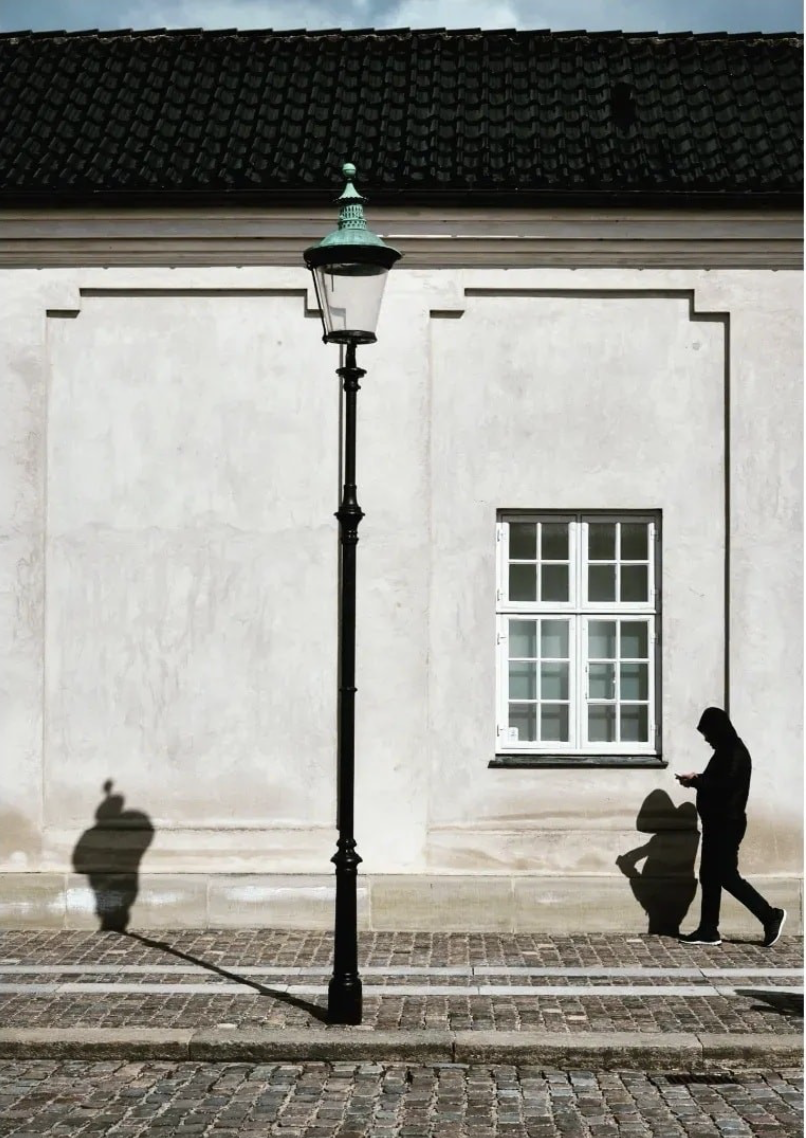
If you choose dark tones of black or light tones of white, you will work on the color contrast instead. The person you are framing will capture attention precisely because of its uniqueness compared to the surrounding landscape.
Photo by Alicia Petresc on Unsplash
Photo by Steven Aguilar on Unsplash
FALL FOLIAGE PICTURES: THE LIGHT
Find out how to make the most of every lighting situation to enhance your images. Read our post!
At this point you are almost ready to take your autumn photos. In the fourth post of our column, we will give you the latest tips to make your foliage pictures truly irresistible.
We wil talk about:
4. Fall foliage pics: equipment, post productionand presets
What are you waiting for?
Follow our tips and tag us in your shots, the best ones will be shared on Imagomap’s InstagramandFacebook pages.
If you liked our post, share it and leave a comment!
Light is always the fundamental element to get a good photo. And since the foliage shots are mainly taken outdoors, it is necessary to study the light conditions of the place where we are going to shoot, so that we can get the best from our pics.
How to achieve the results we have in mind?
Let’s see it together in 5 simple steps.
Photo tips for you foliage pics: 5 tips to manage light
1. Verify the weather before go
To get the best results from a photographic session outdoor, you necessarily need to check the weather conditions before setting off.
It could seem banal, but it doesn’t mean that you have to give up in bad conditions. Instead, it means predicting and defining the atmosphere that your photos will have in the event of different weather conditions.
On cloudy days, to shoot in the woods prefer the central hours, because you will have a soft and diffused light, while in the early morning and late afternoon the light will be insufficient for taking photos.
If the weather is sunny, however, the first lights of dawn and sunset can also be used to create splendid atmospheres. Furthermore, the full light that hits the leaves gives them a more intense color. In this case, you need to be careful about the high contrasts between lights and shadows.
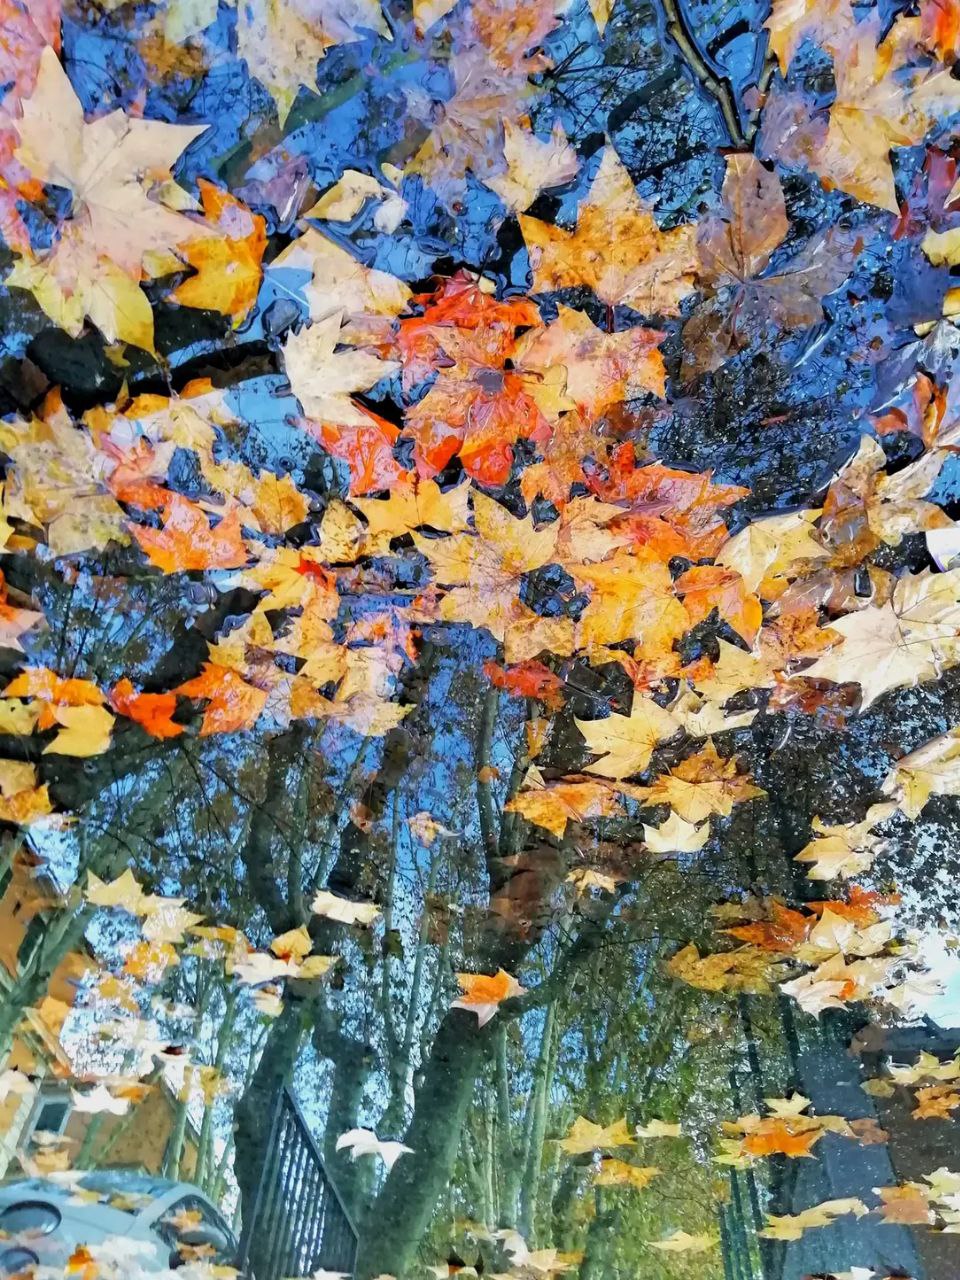
On a rainy day you can create beautiful effects along wet avenues, or by taking refuge behind the glass of a place overlooking a forest. Don’t forget the charm of the leaves that rest on the puddles, with their reflections.
If the wind adds to the rain, concentrate on the movement of the leaves falling from the trees.
@giadaantonini_photography
Photo by Temo Morales on Unsplash
Photo by Dayne Topkin on Unsplash
2. Photo tips for your fall foliage pics: sun position
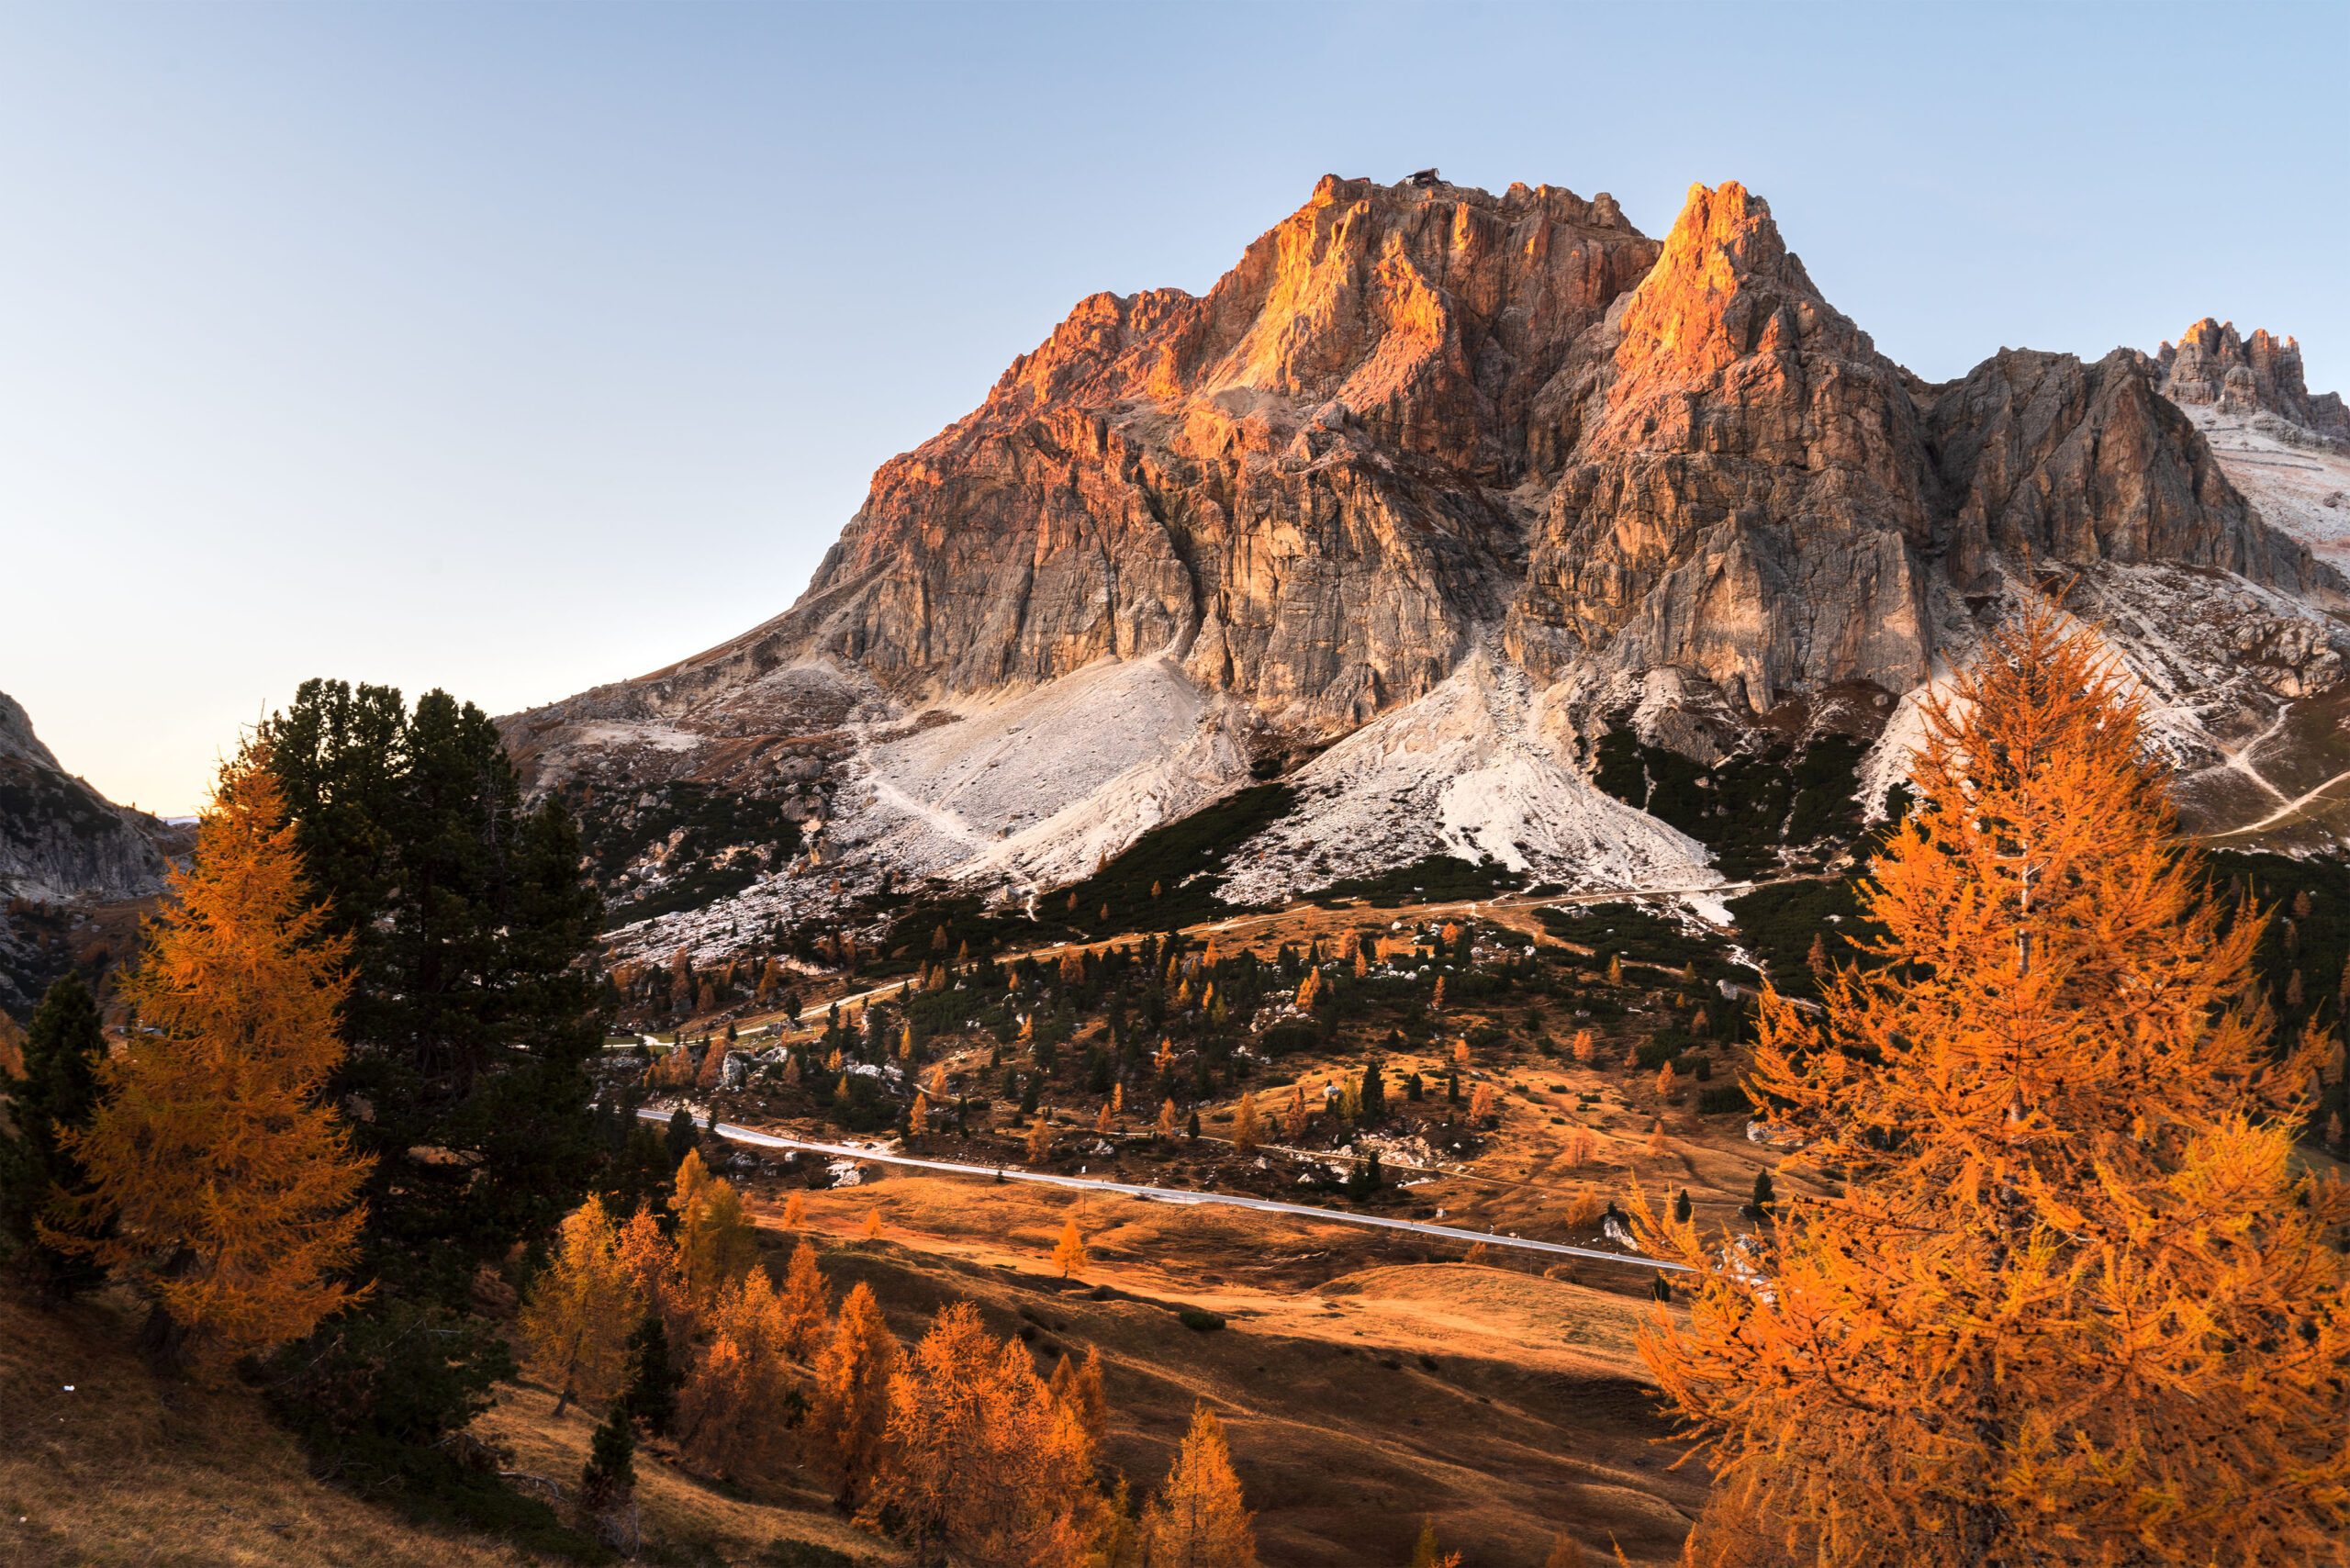
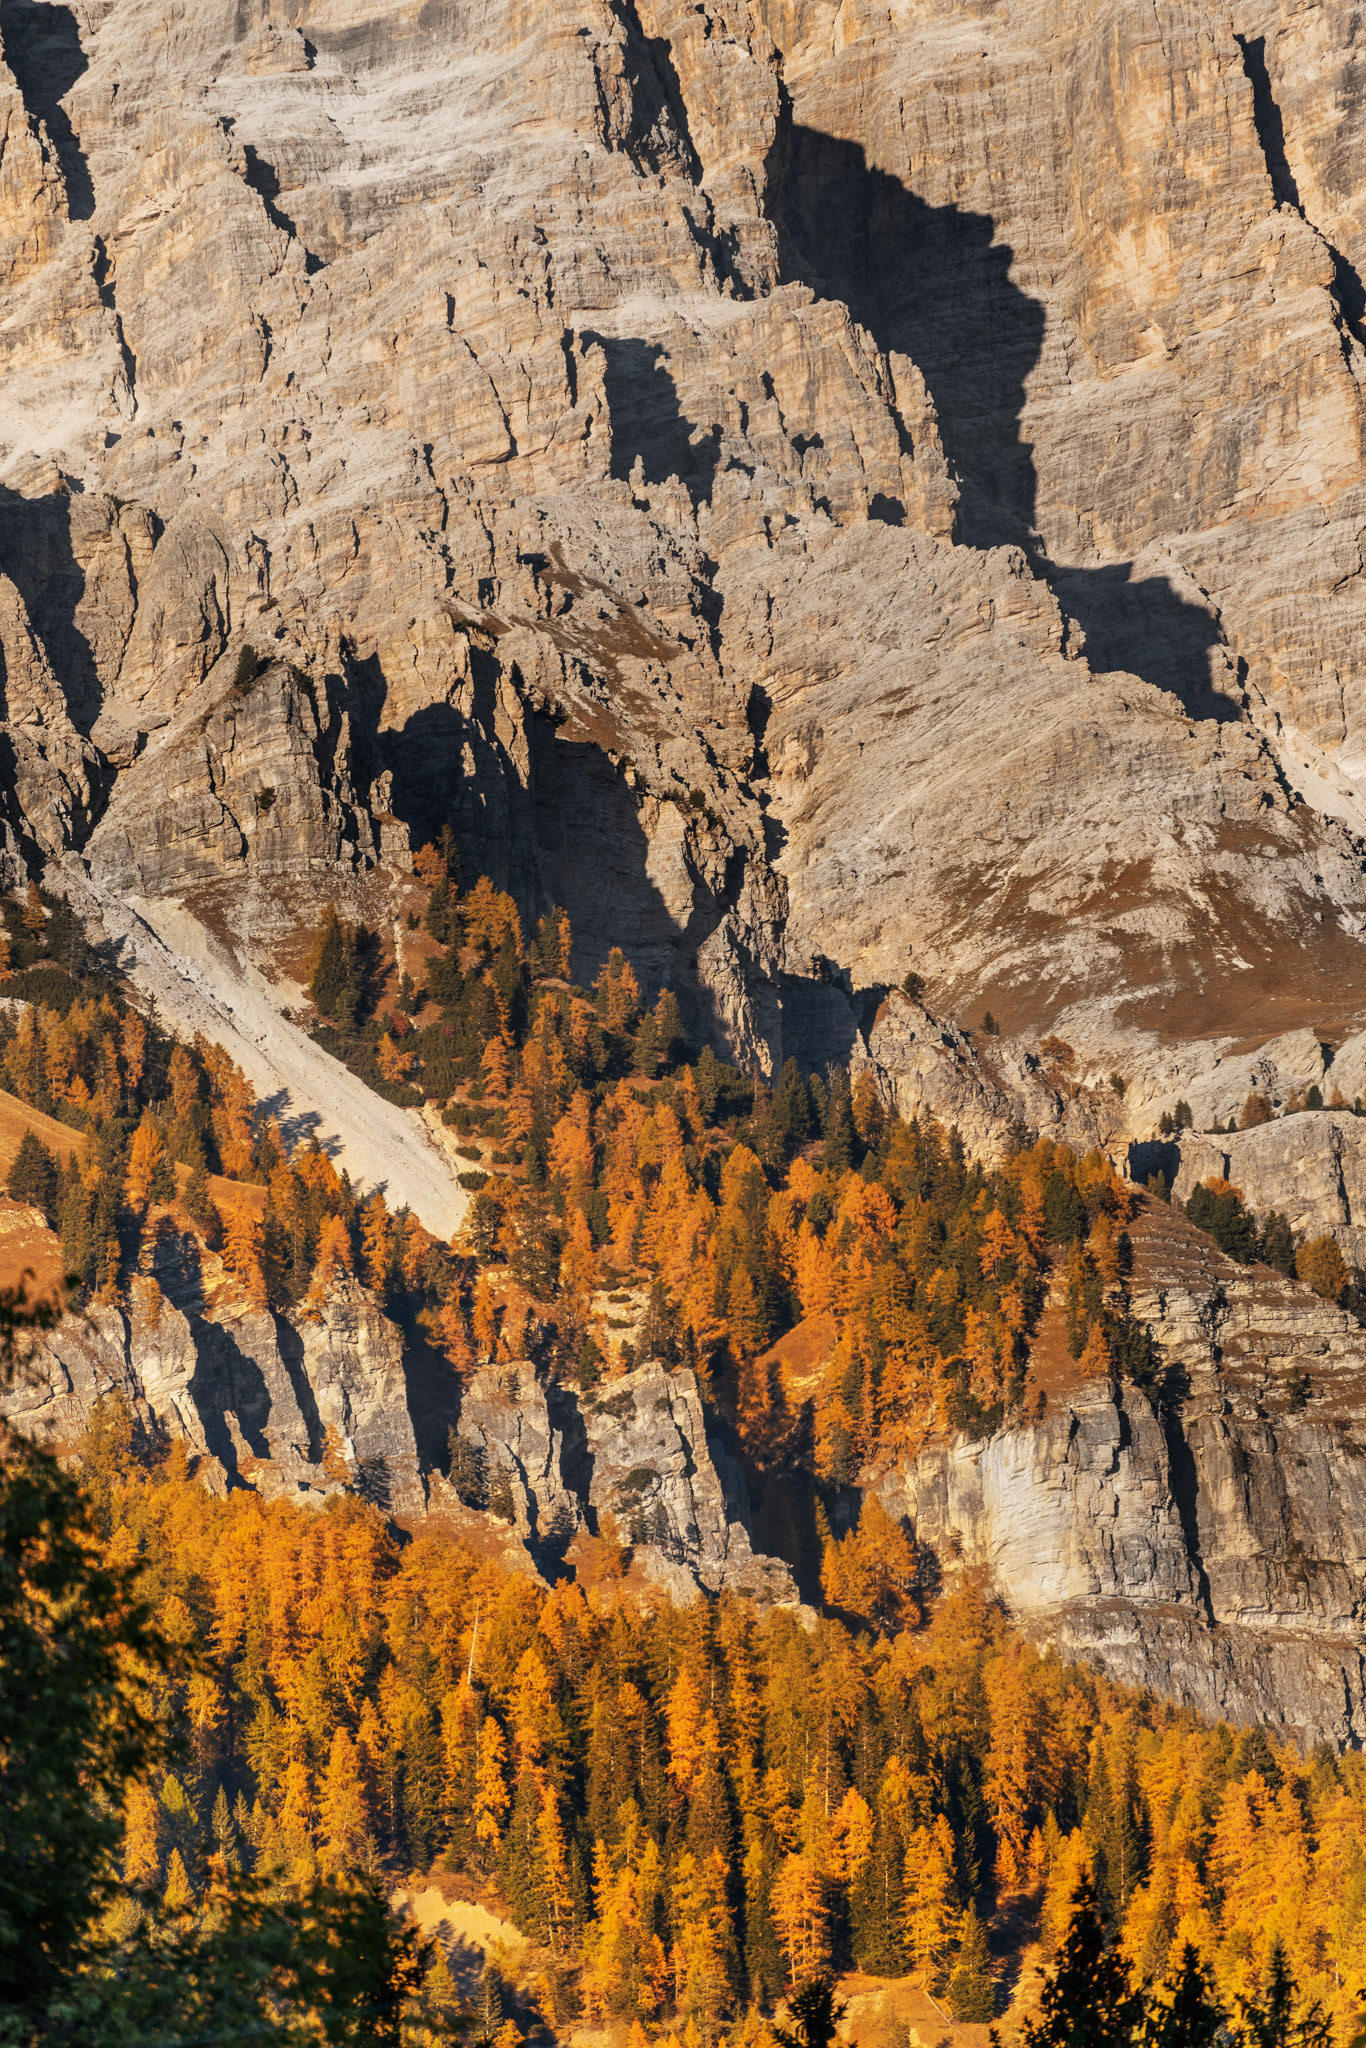
Understanding the position of the sun will further help you plan your outings. You will be able to know whether the place you are going will be lit in the morning or afternoon, as a mountainside can often be in shadow for half a day. You will also know what time the sun rises and what time it will be high enough to illuminate the area. Finally, you will be able to better understand the best location: if you want to shoot against the light to create silhouettes, or if you want the sun to illuminate the scene from behind.
For this purpose, there are many apps that provide the position of the sun. We recommend:
Sunposition, perfect for beginners, it will tell you the position of the sun in any place at any time of the day;
PhotoPills, an extremely useful app (one-off payment), which every photographer should have; it allows you to plan each shot, thanks to many professional tools.
Studying the climatic conditions and the position of the sun in advance will help you to create a photographic project, and to start already with the idea of what you want to achieve, so that once on site you can focus on that and easily reach your goals.
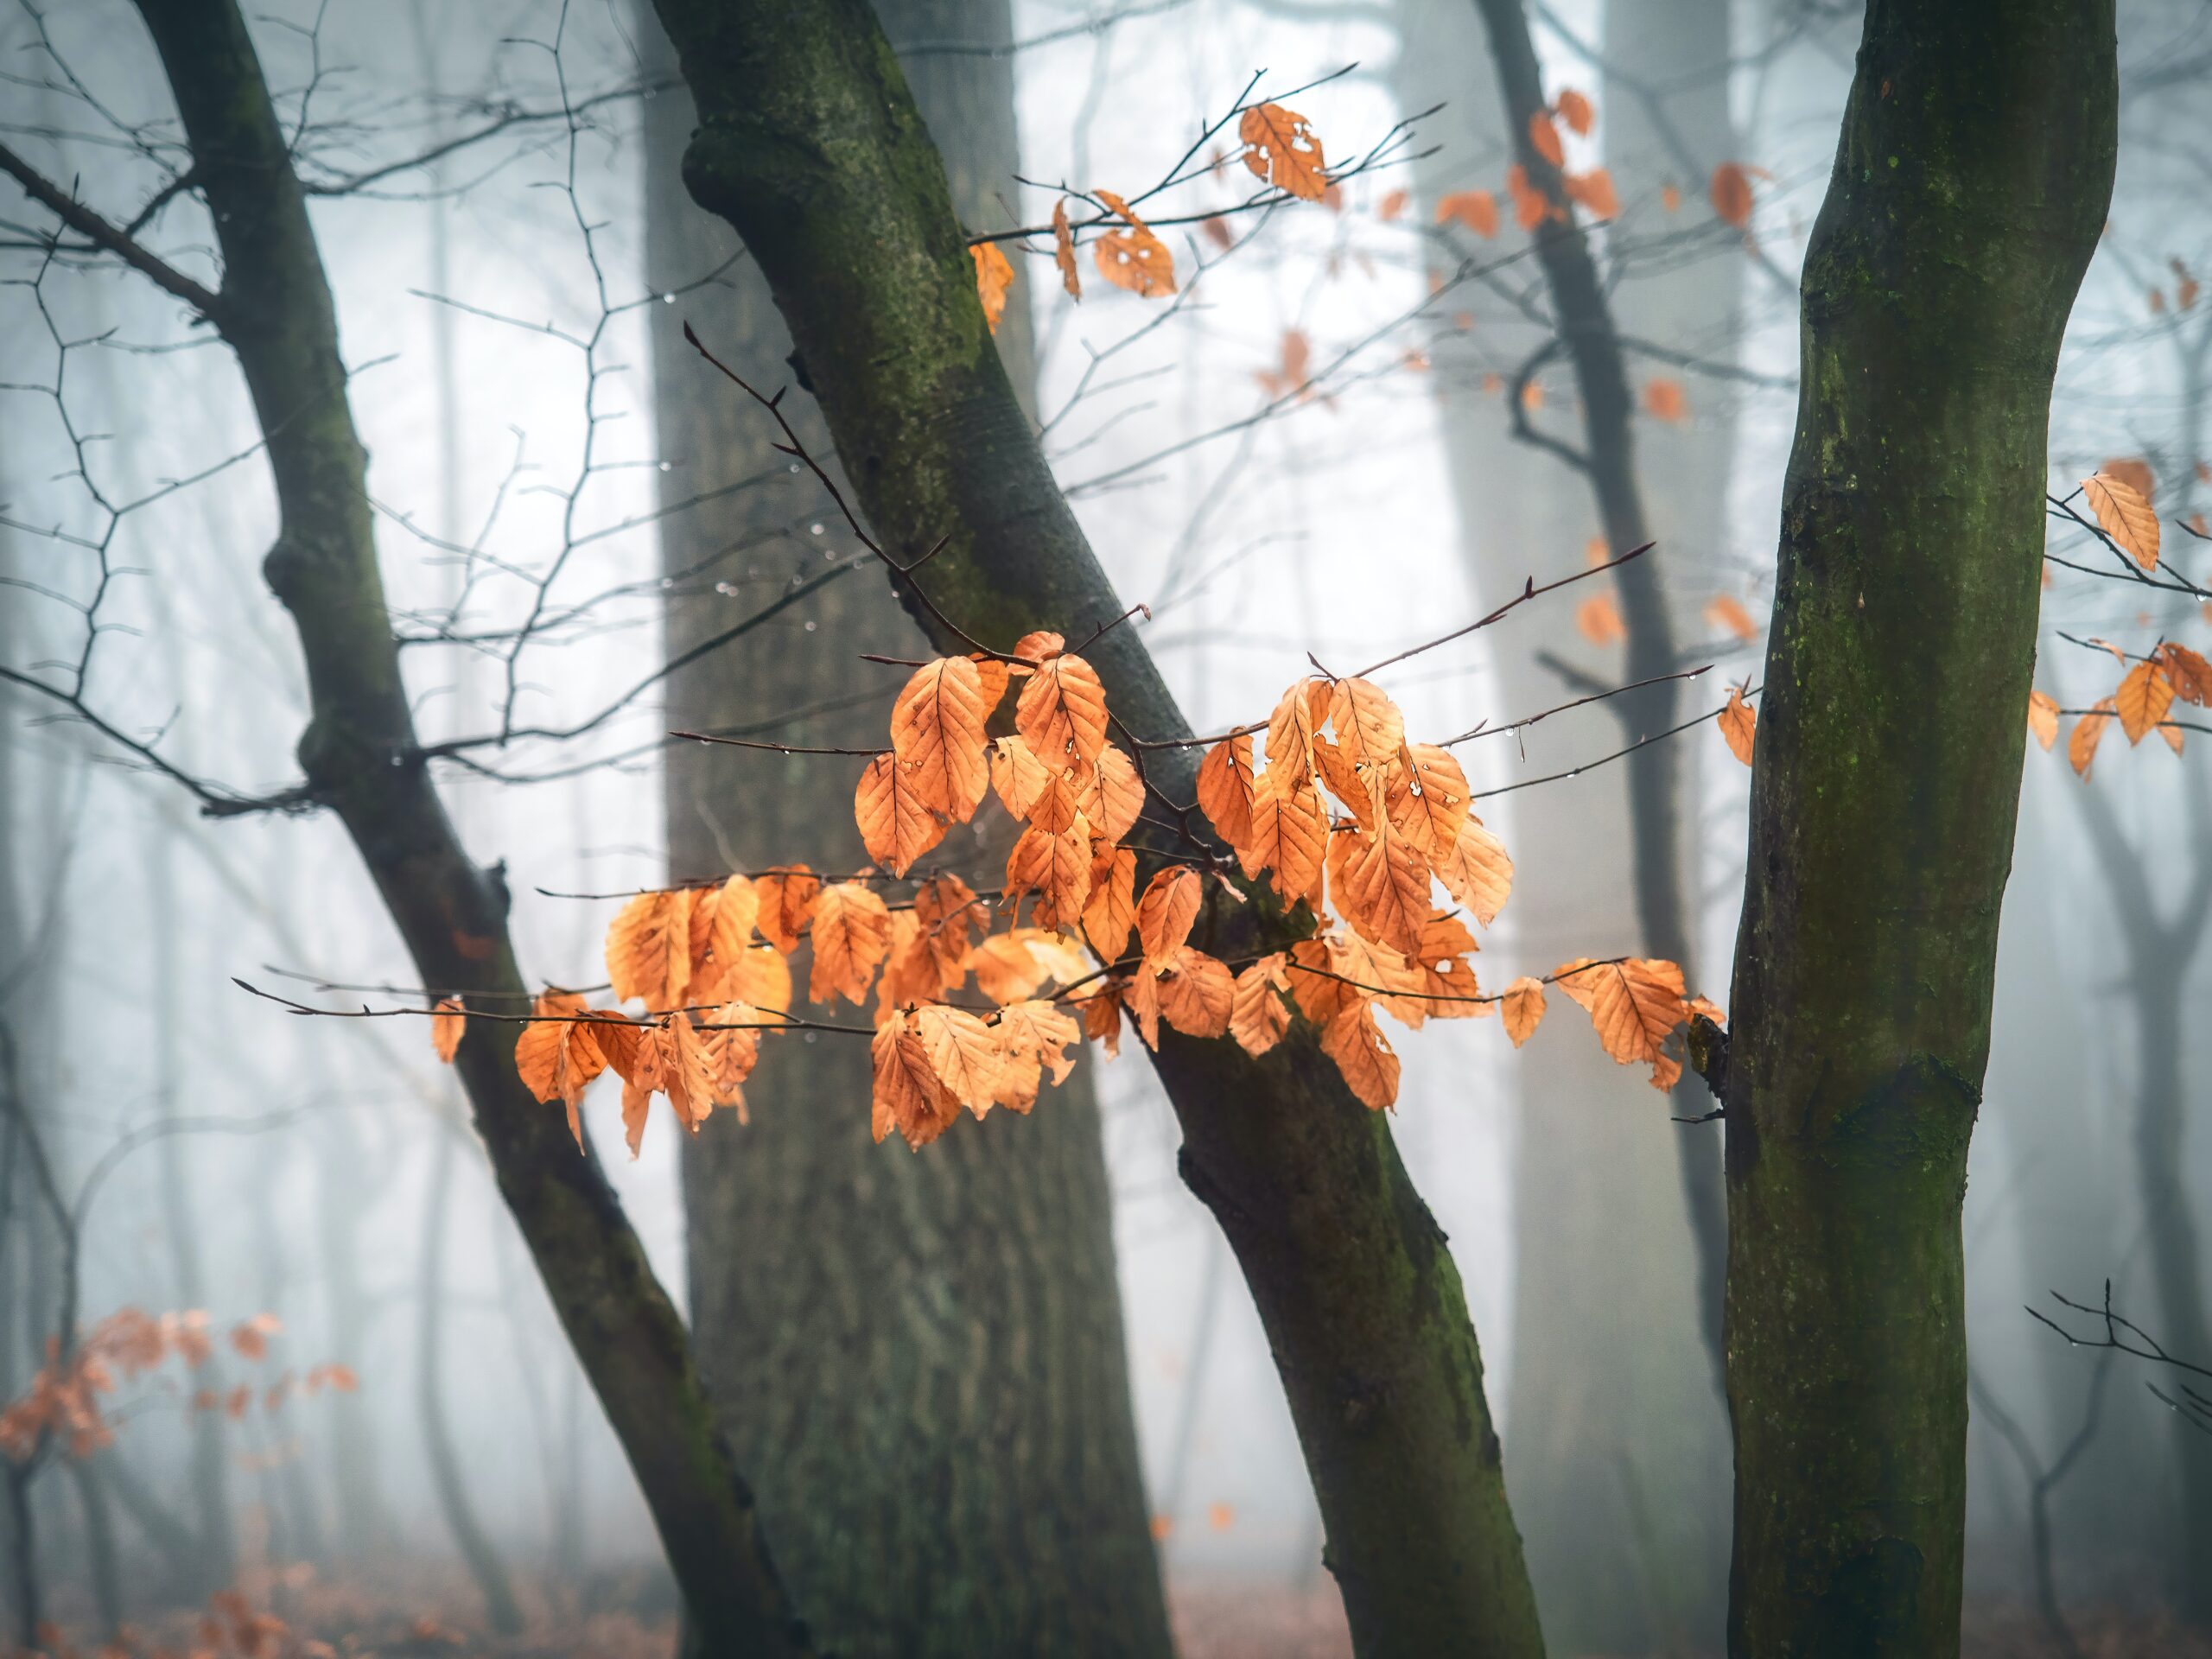
3. Taking photos at sunrise in the mist
One of the most fascinating fall atmospheres is often created in the early hours of the morning, on days of fog and mist.
Usually, in these hours, the low fog creeps between the trees and gives the photos an aura of mystery.
If you then have the patience to wait for the sun to rise above the fog, this will be illuminated by the rays that will penetrate through, creating incredible atmospheres.
In this case, since there won’t be much light, it is useful to use a tripod to lengthen the shutter speed. Slightly underexposed photos, however, are perfect in this context.
Photo by Simon Berger on Unsplash
Photo by quentin on Unsplash
Photo by Sebastian Unrau on Unsplash
SUNRISE AND SUNSET PHOTO TIPS
How to get the best sunset and sunrise colors in your shots? Three simple techniques can help you!
4. Photo tips for your fall foliage pics: manage lights and shadows during the day
Even the central hours of the day offer perfect opportunities for your shots. Here are some examples of subjects to focus on, based on your style choices:
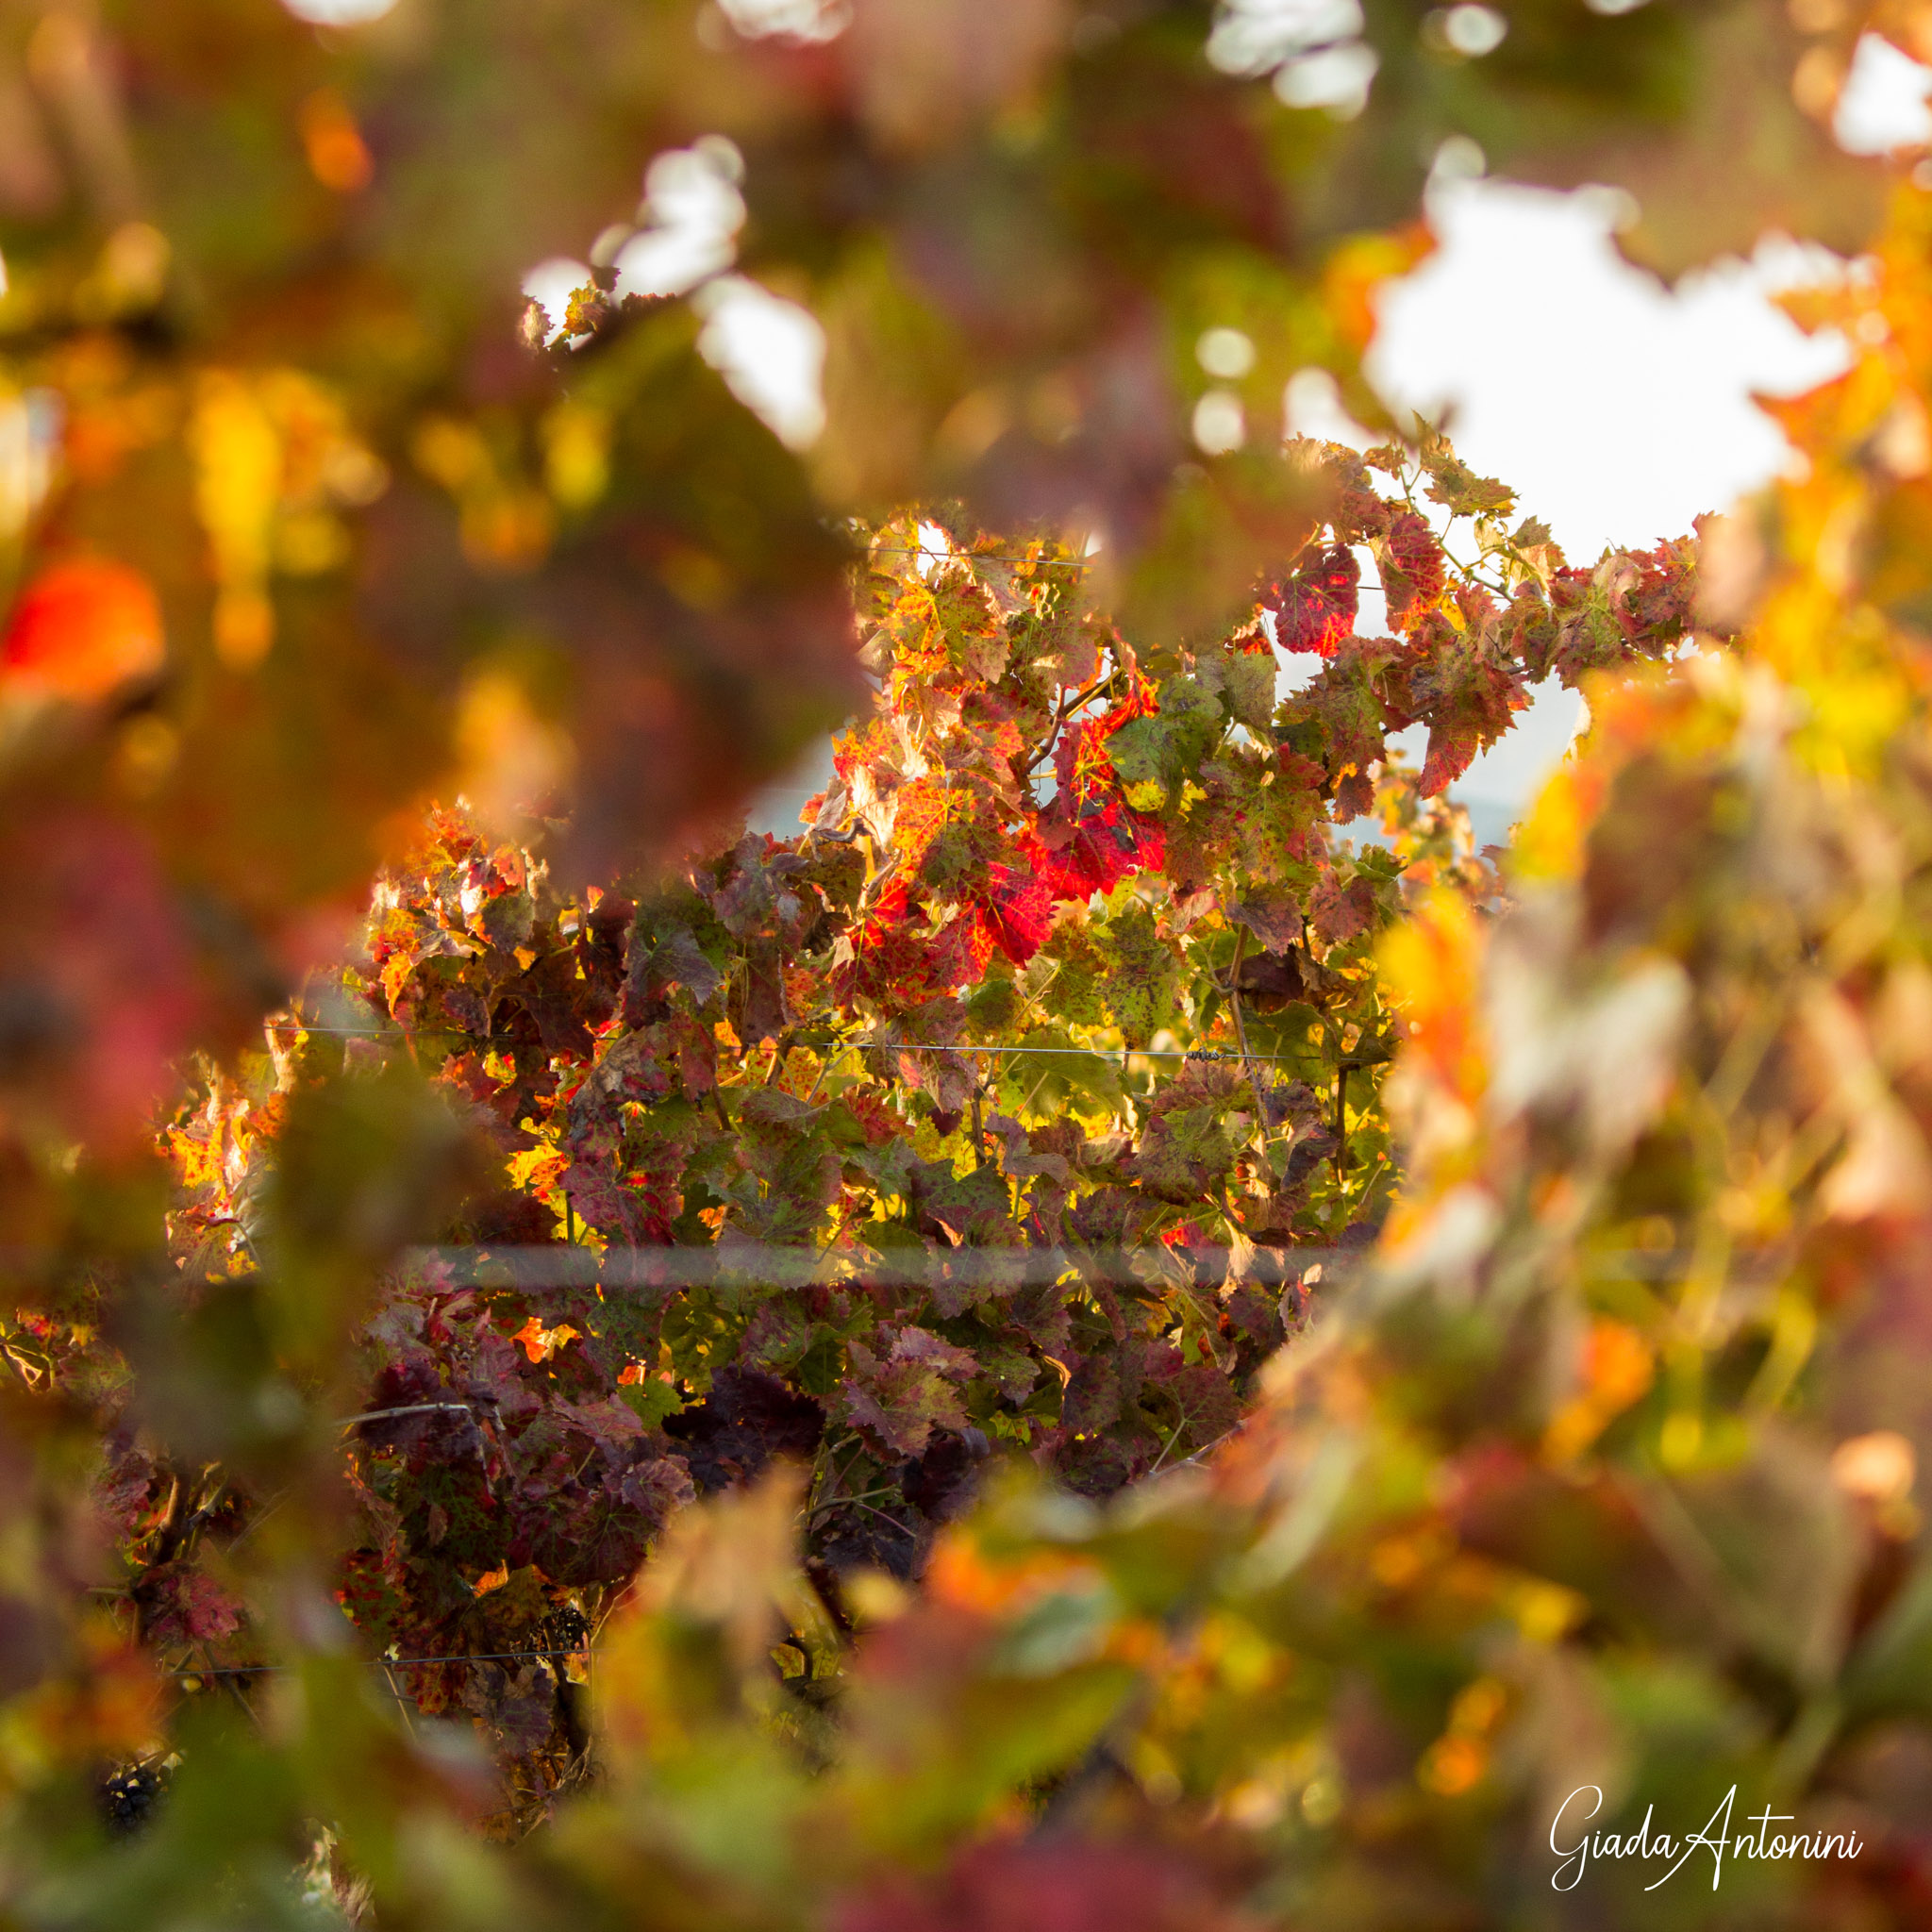
If the weather is sunny, you can focus on some details illuminated by the light, which makes the colors brighter.
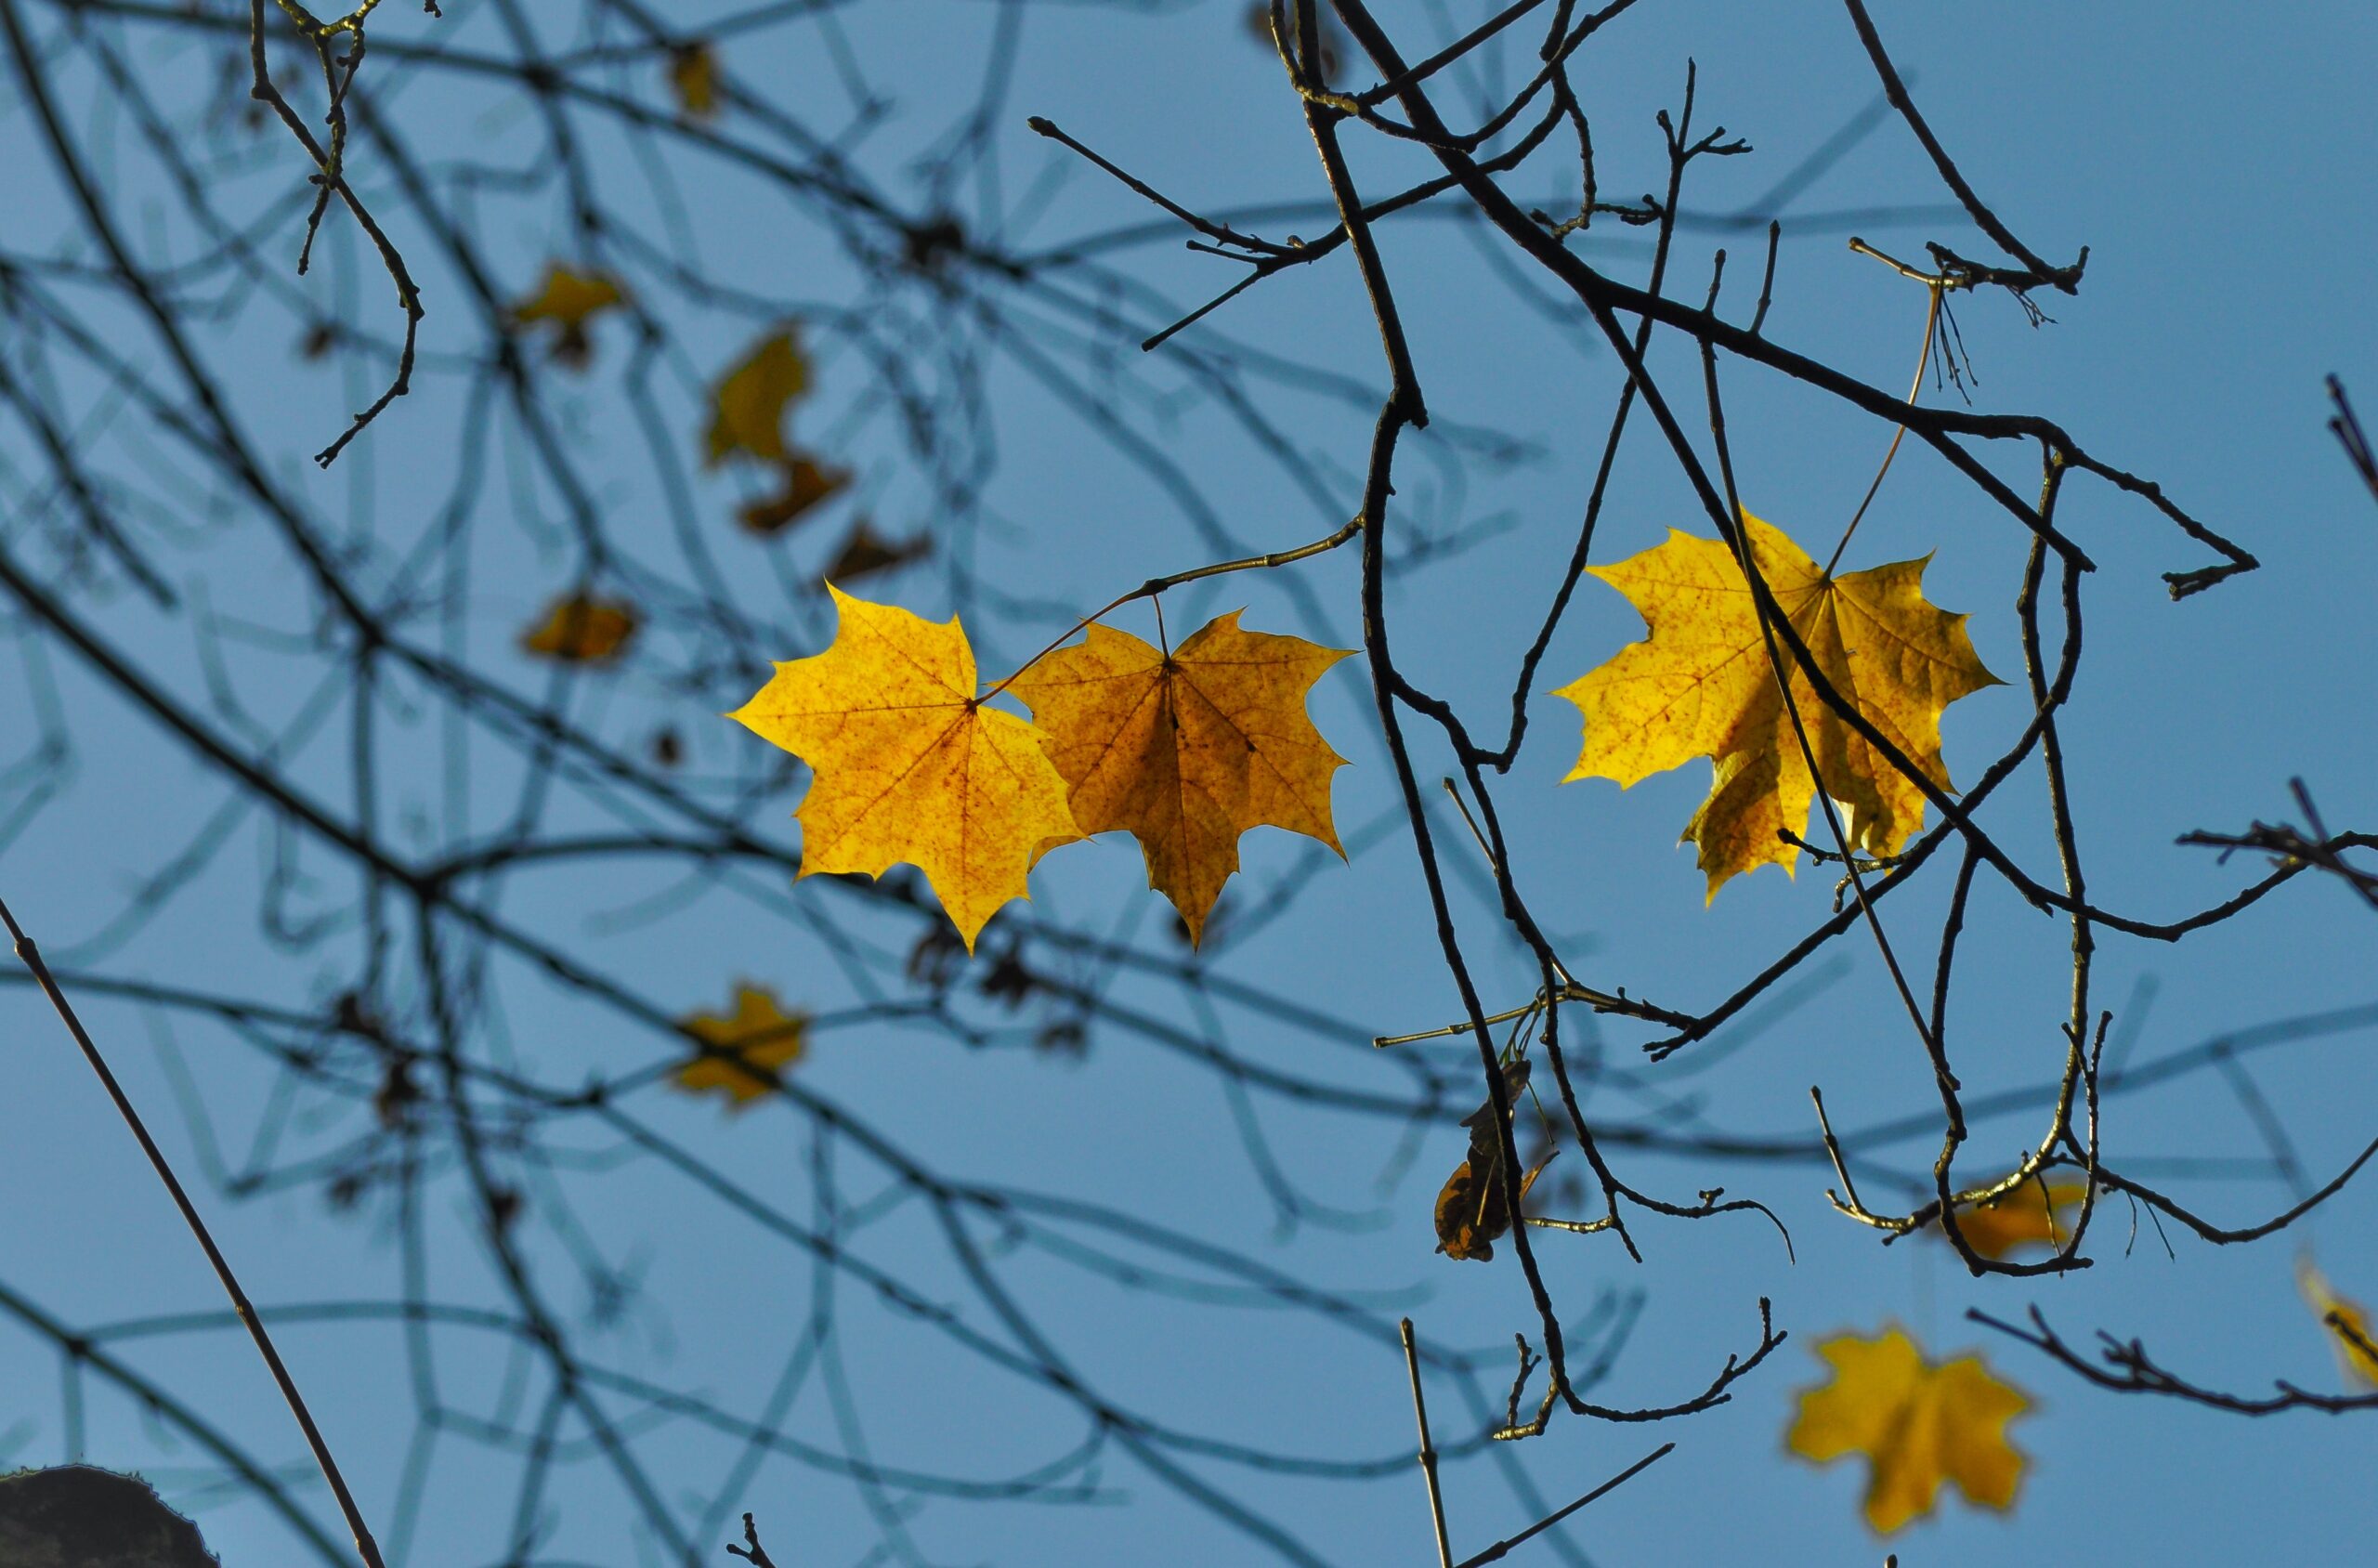
Raising the camera upwards under a tree, could provide excellent color contrasts, with the blue sky colored by the leaves.
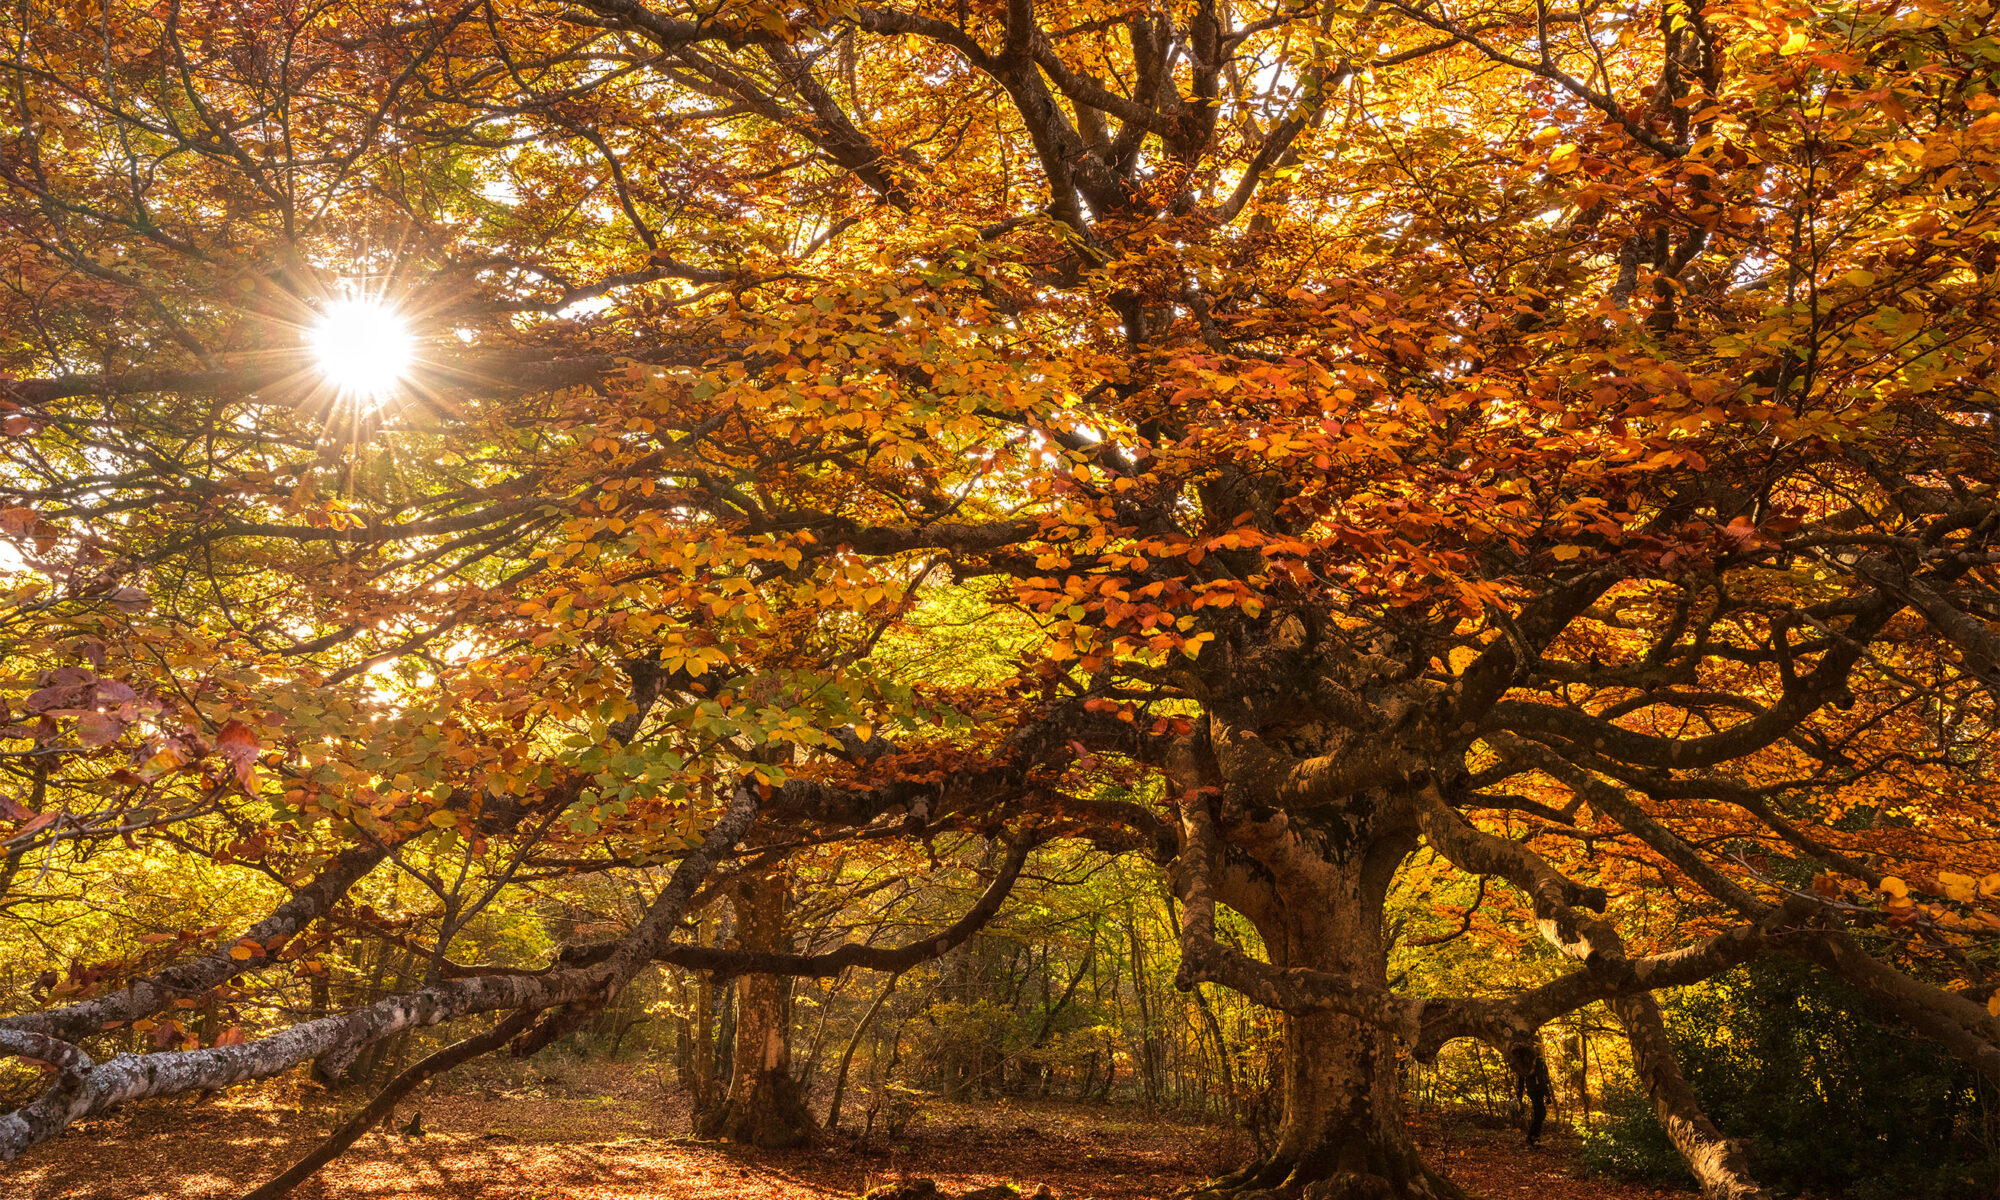
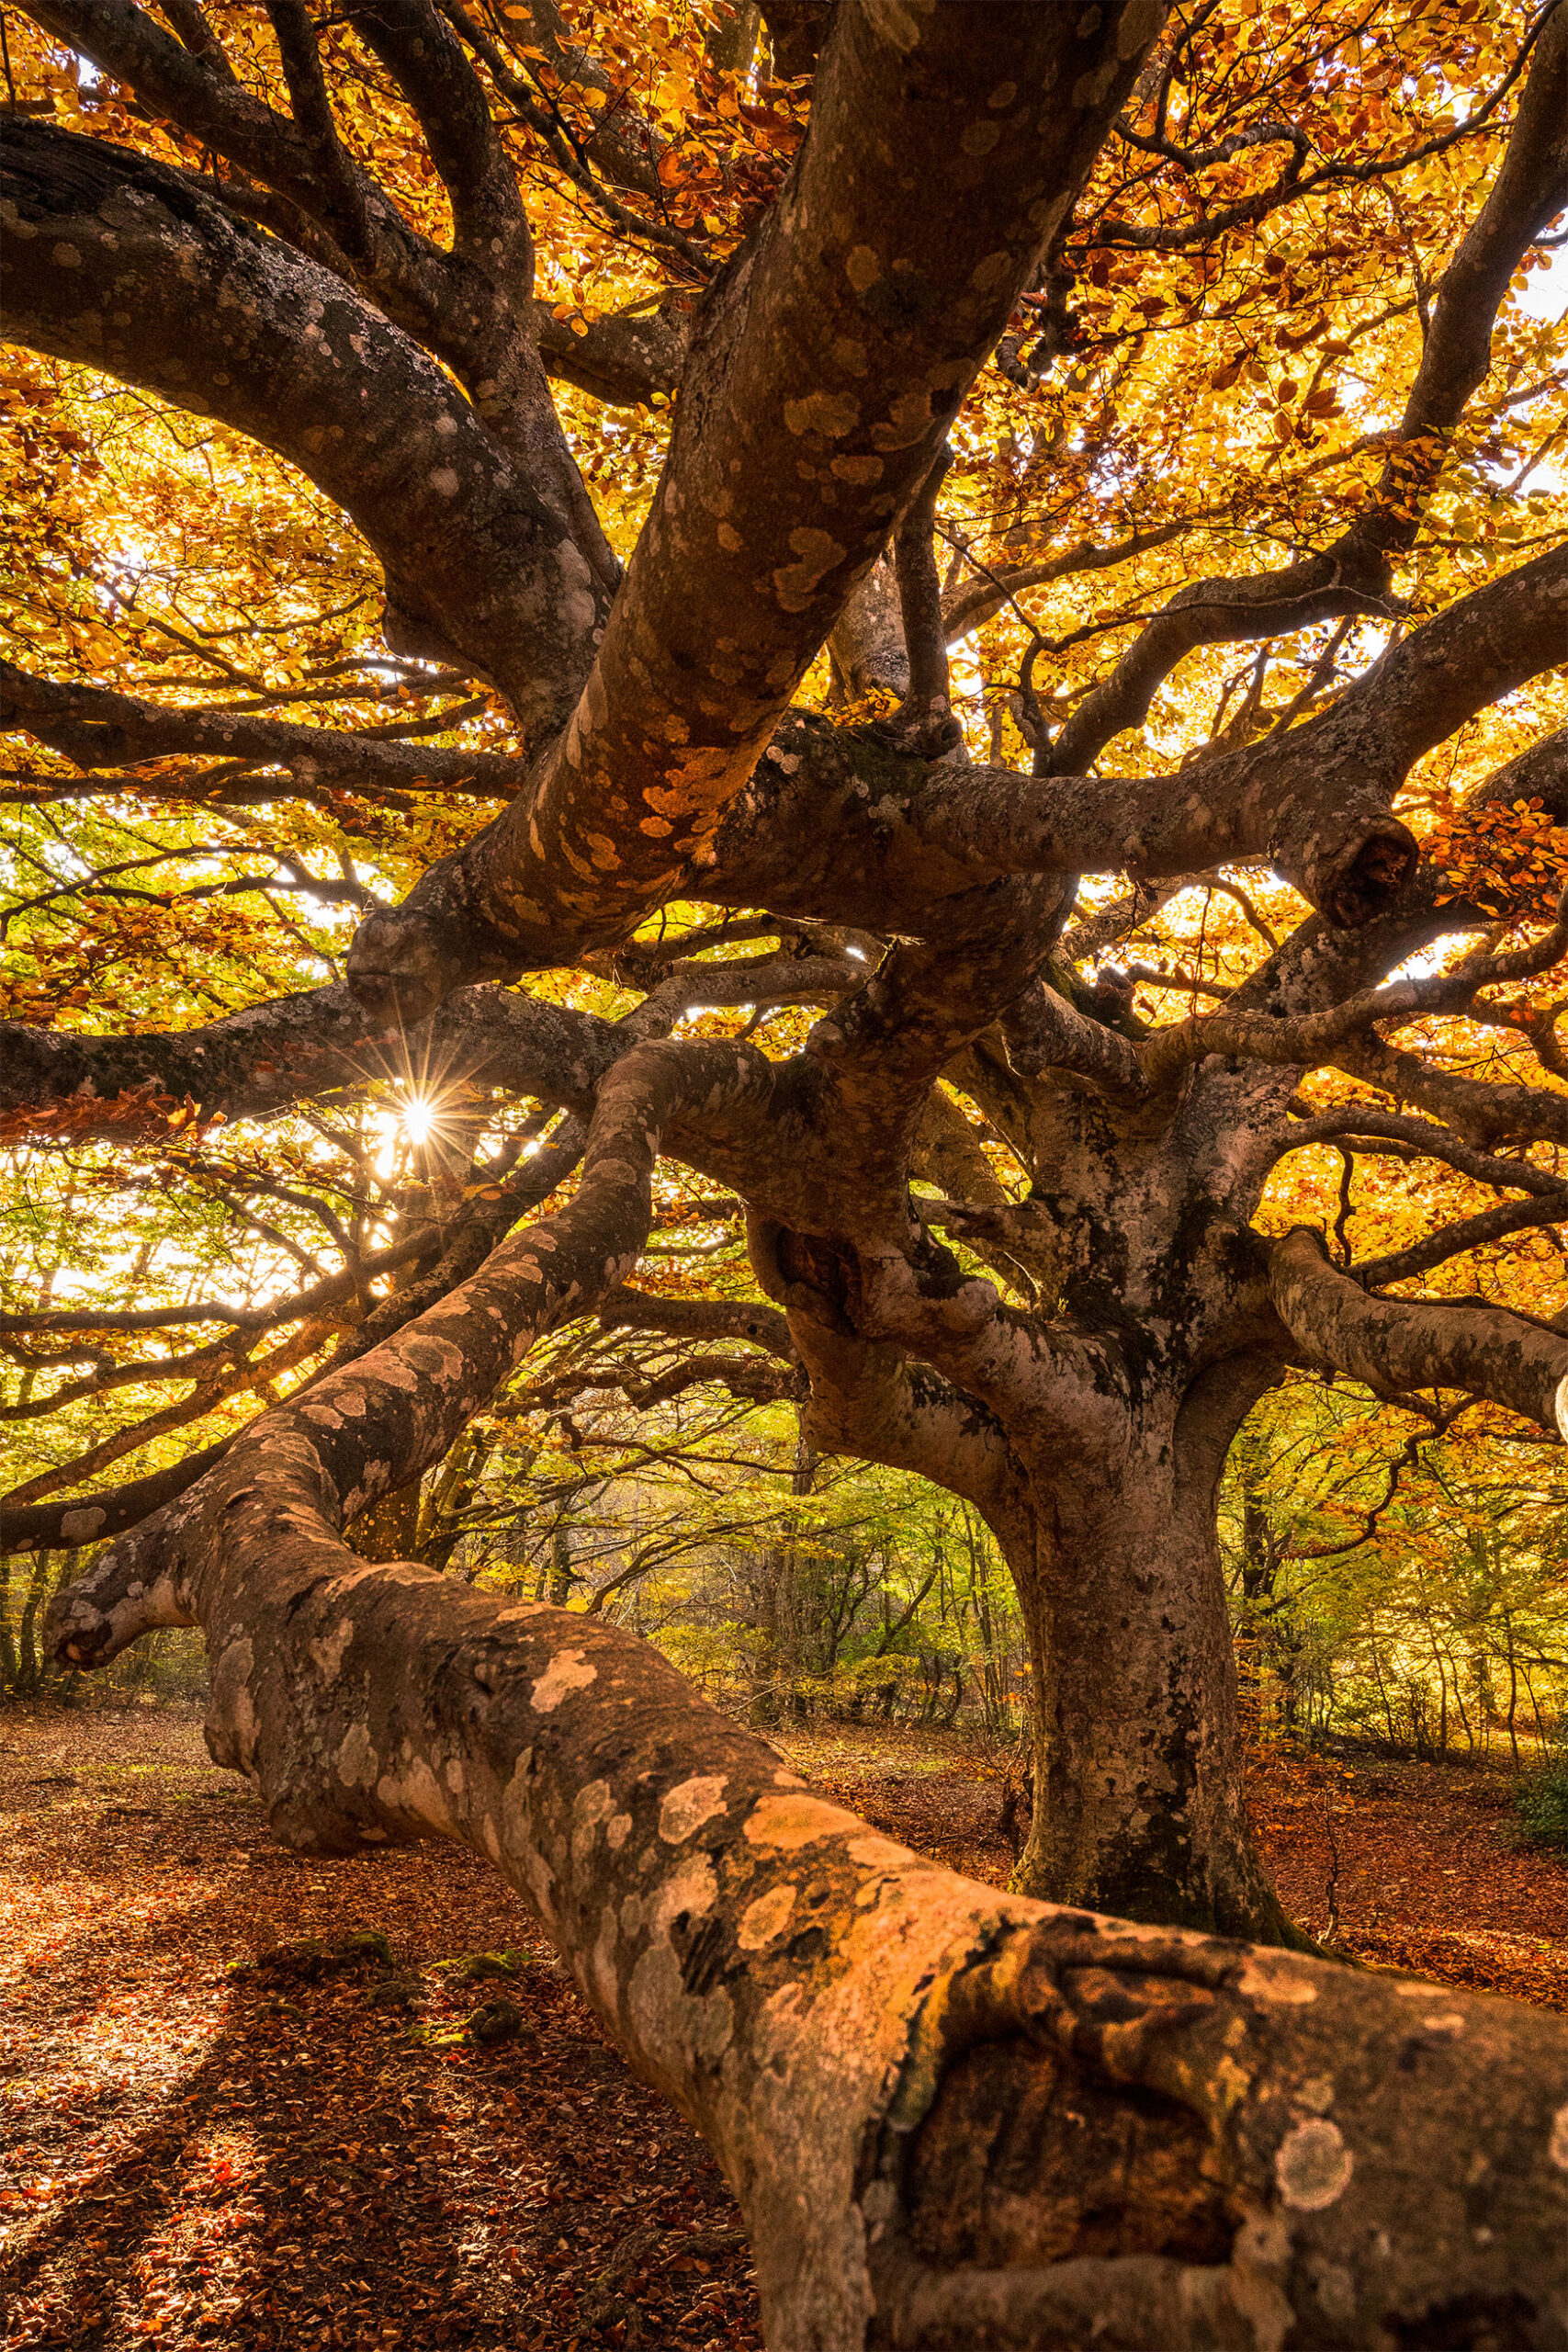
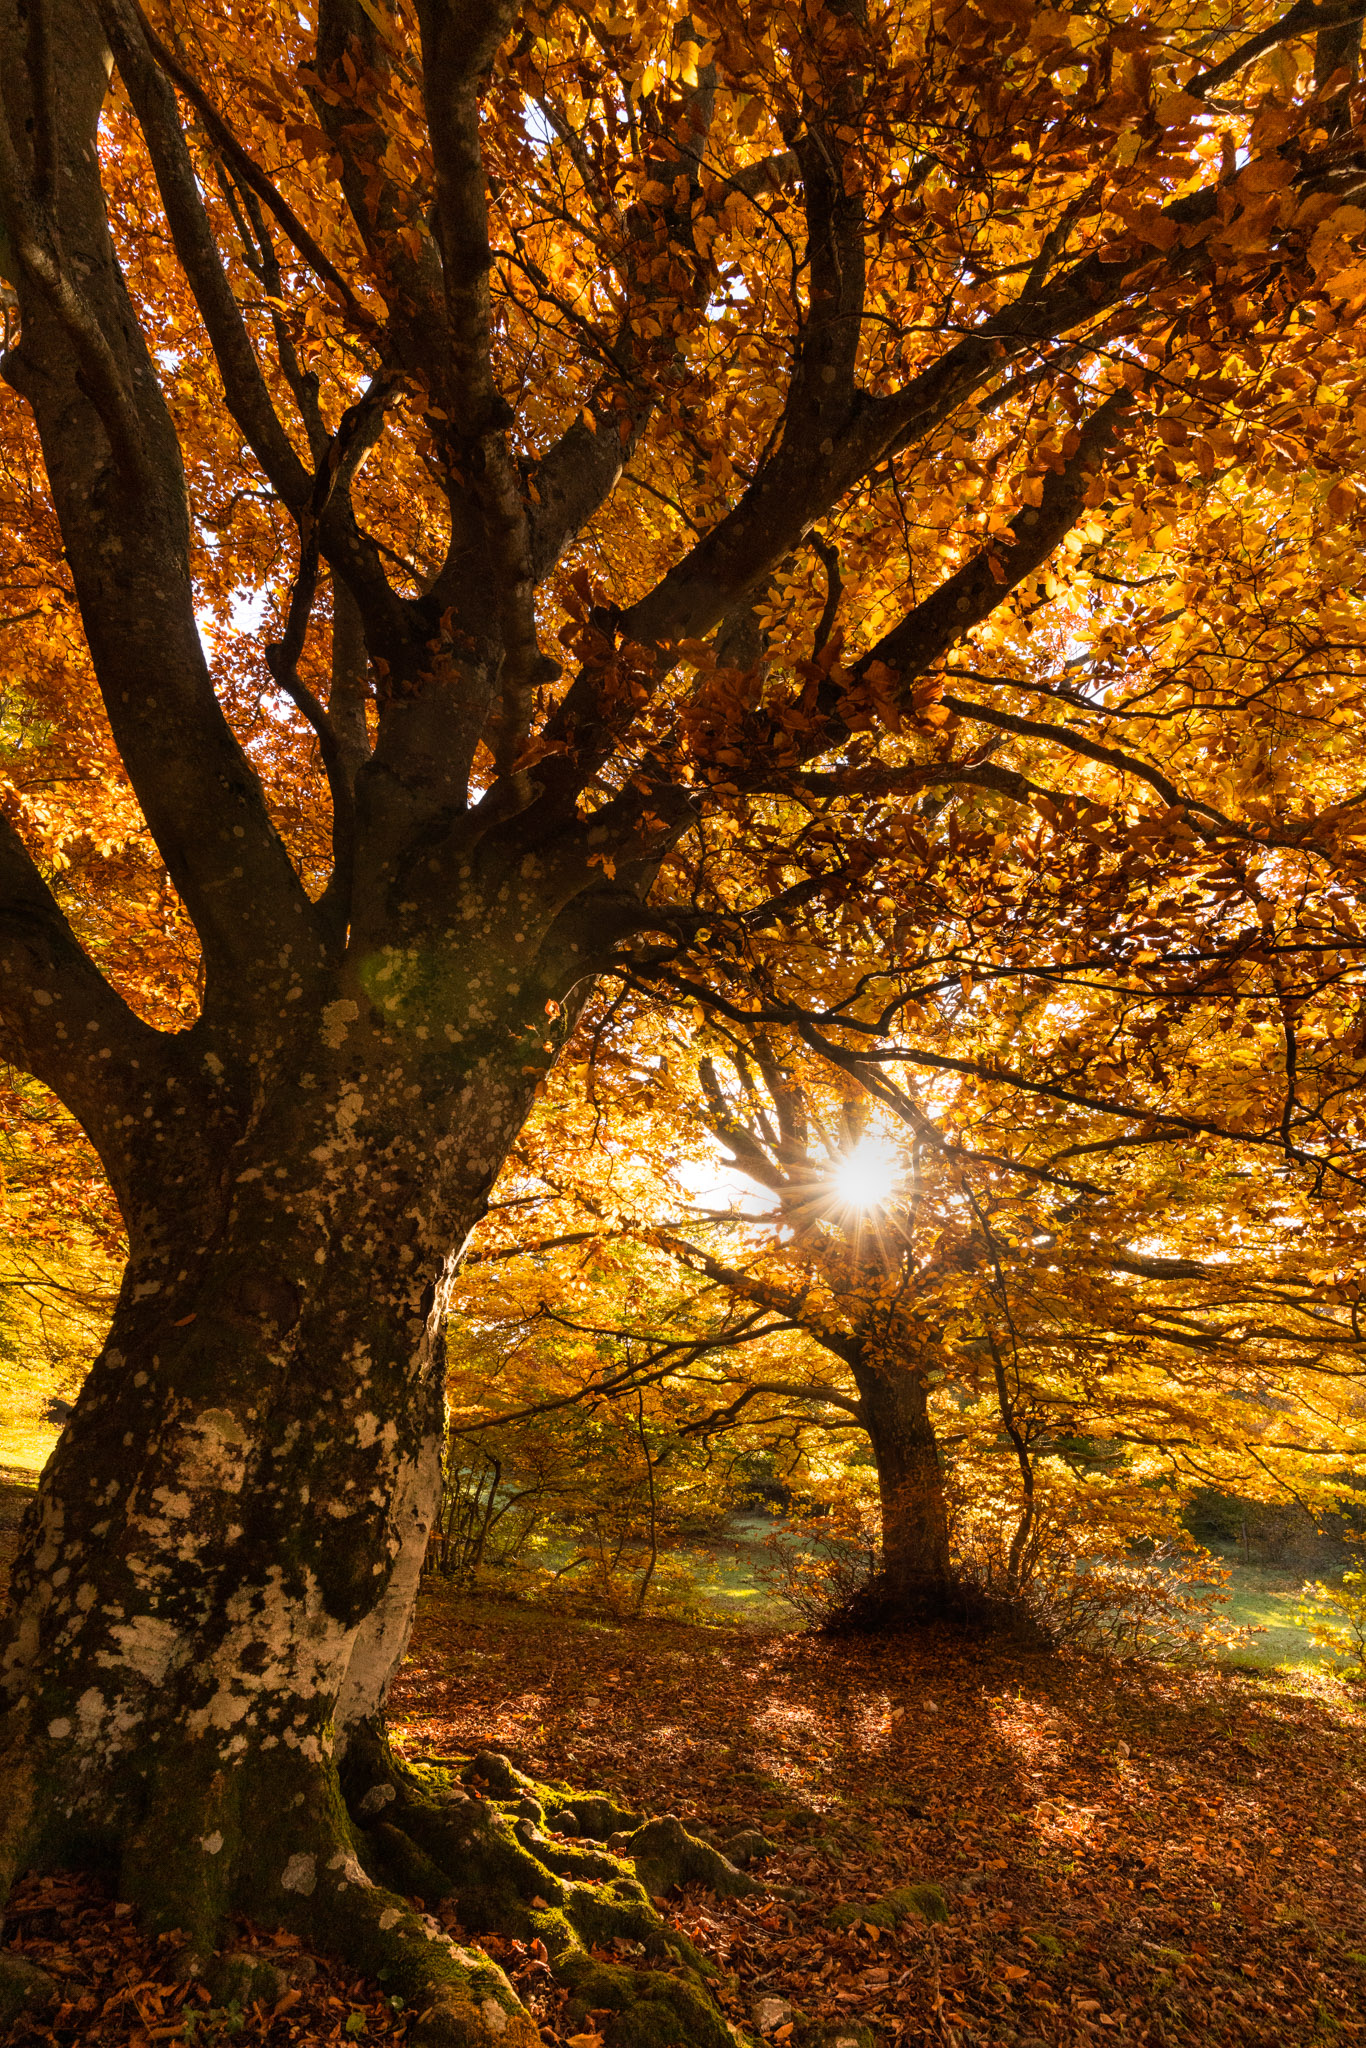
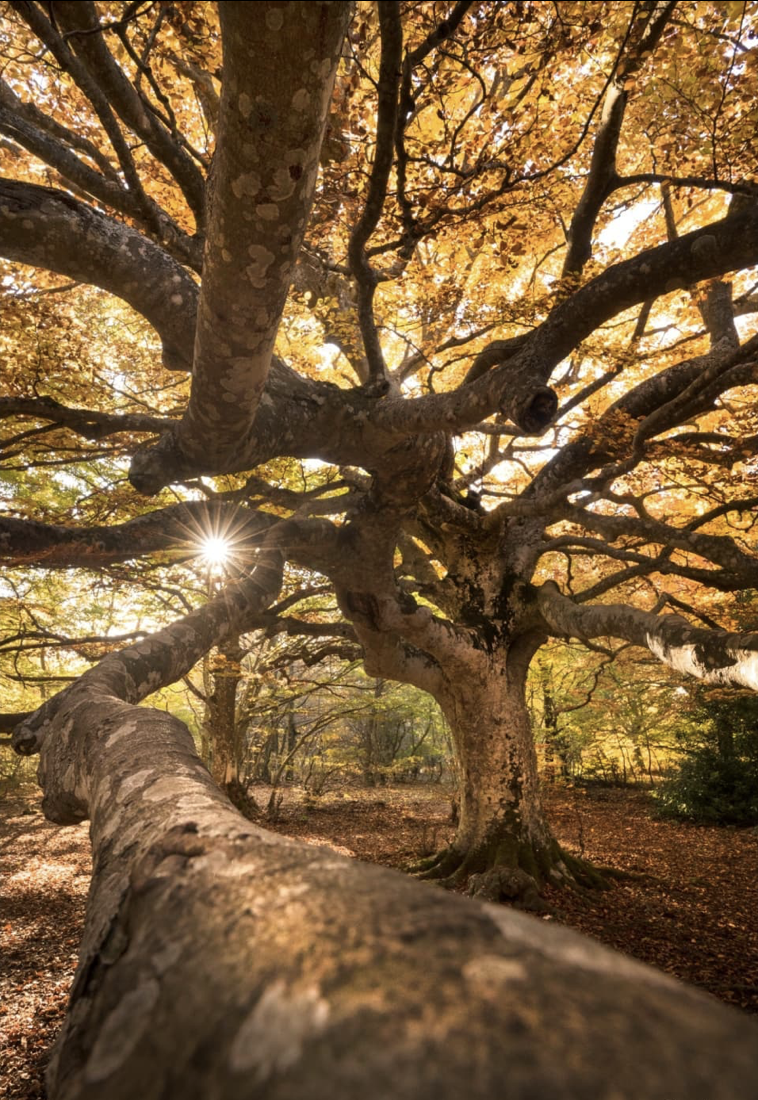
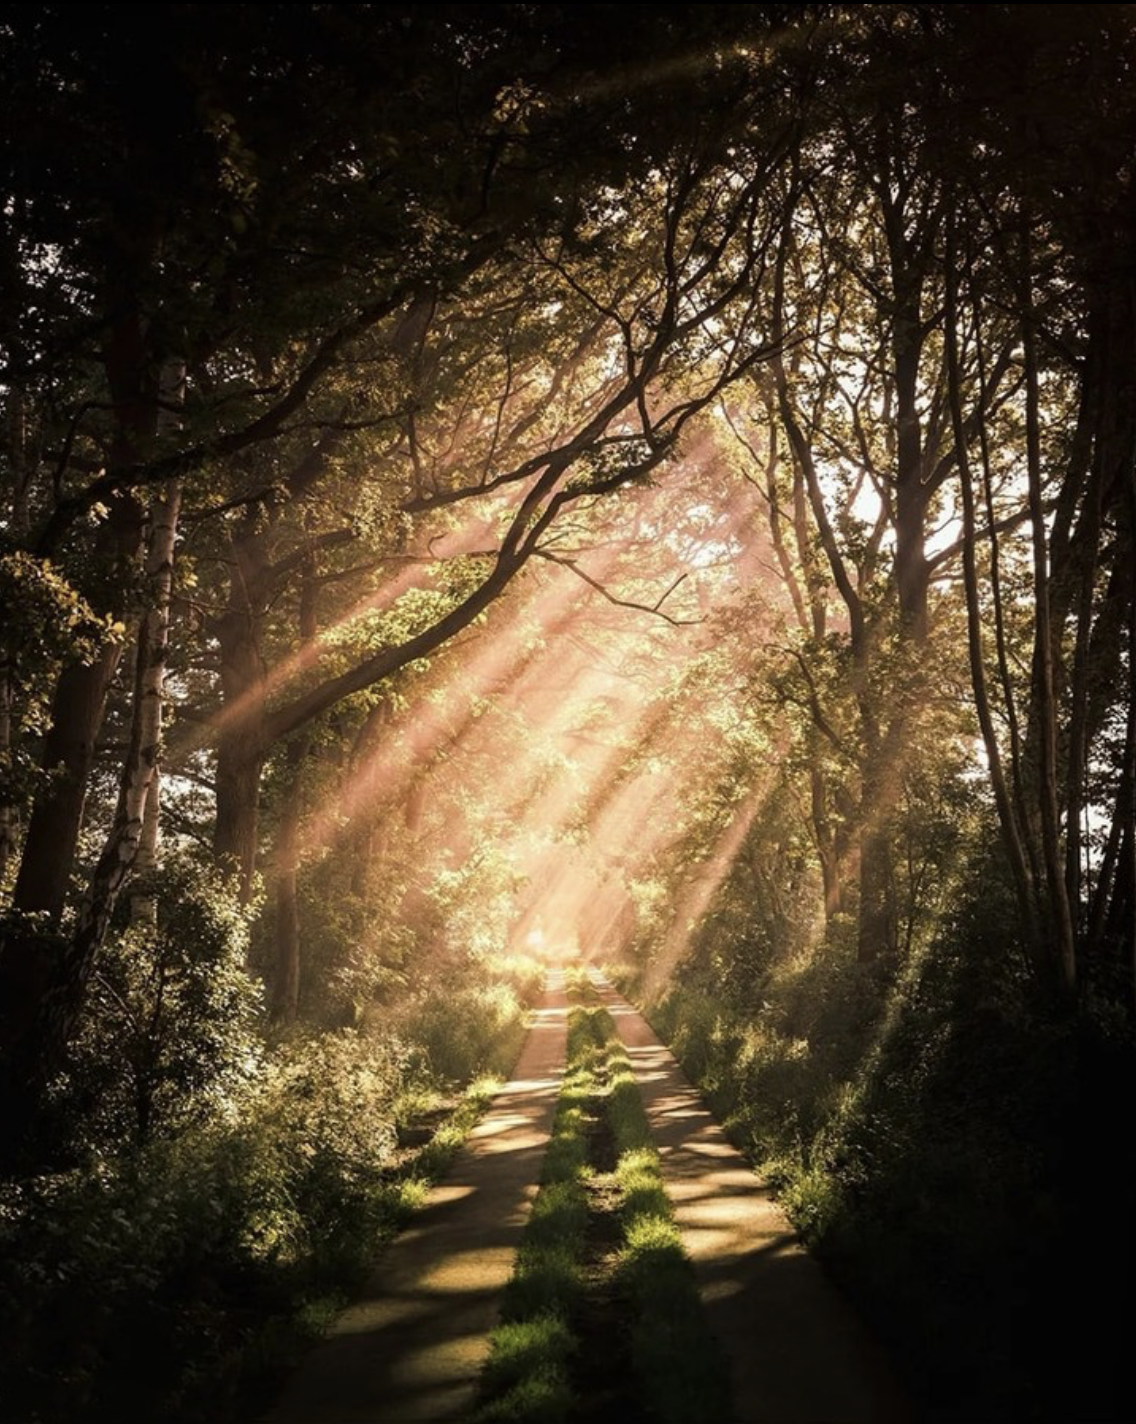
If you are in a wood, the sun penetrating the branches can create interesting lights and shadows, difficult to manage due to the strong contrasts, but certainly original. Focusing on a detail, in these cases, can help keep exposure under control, always excluding backlight.
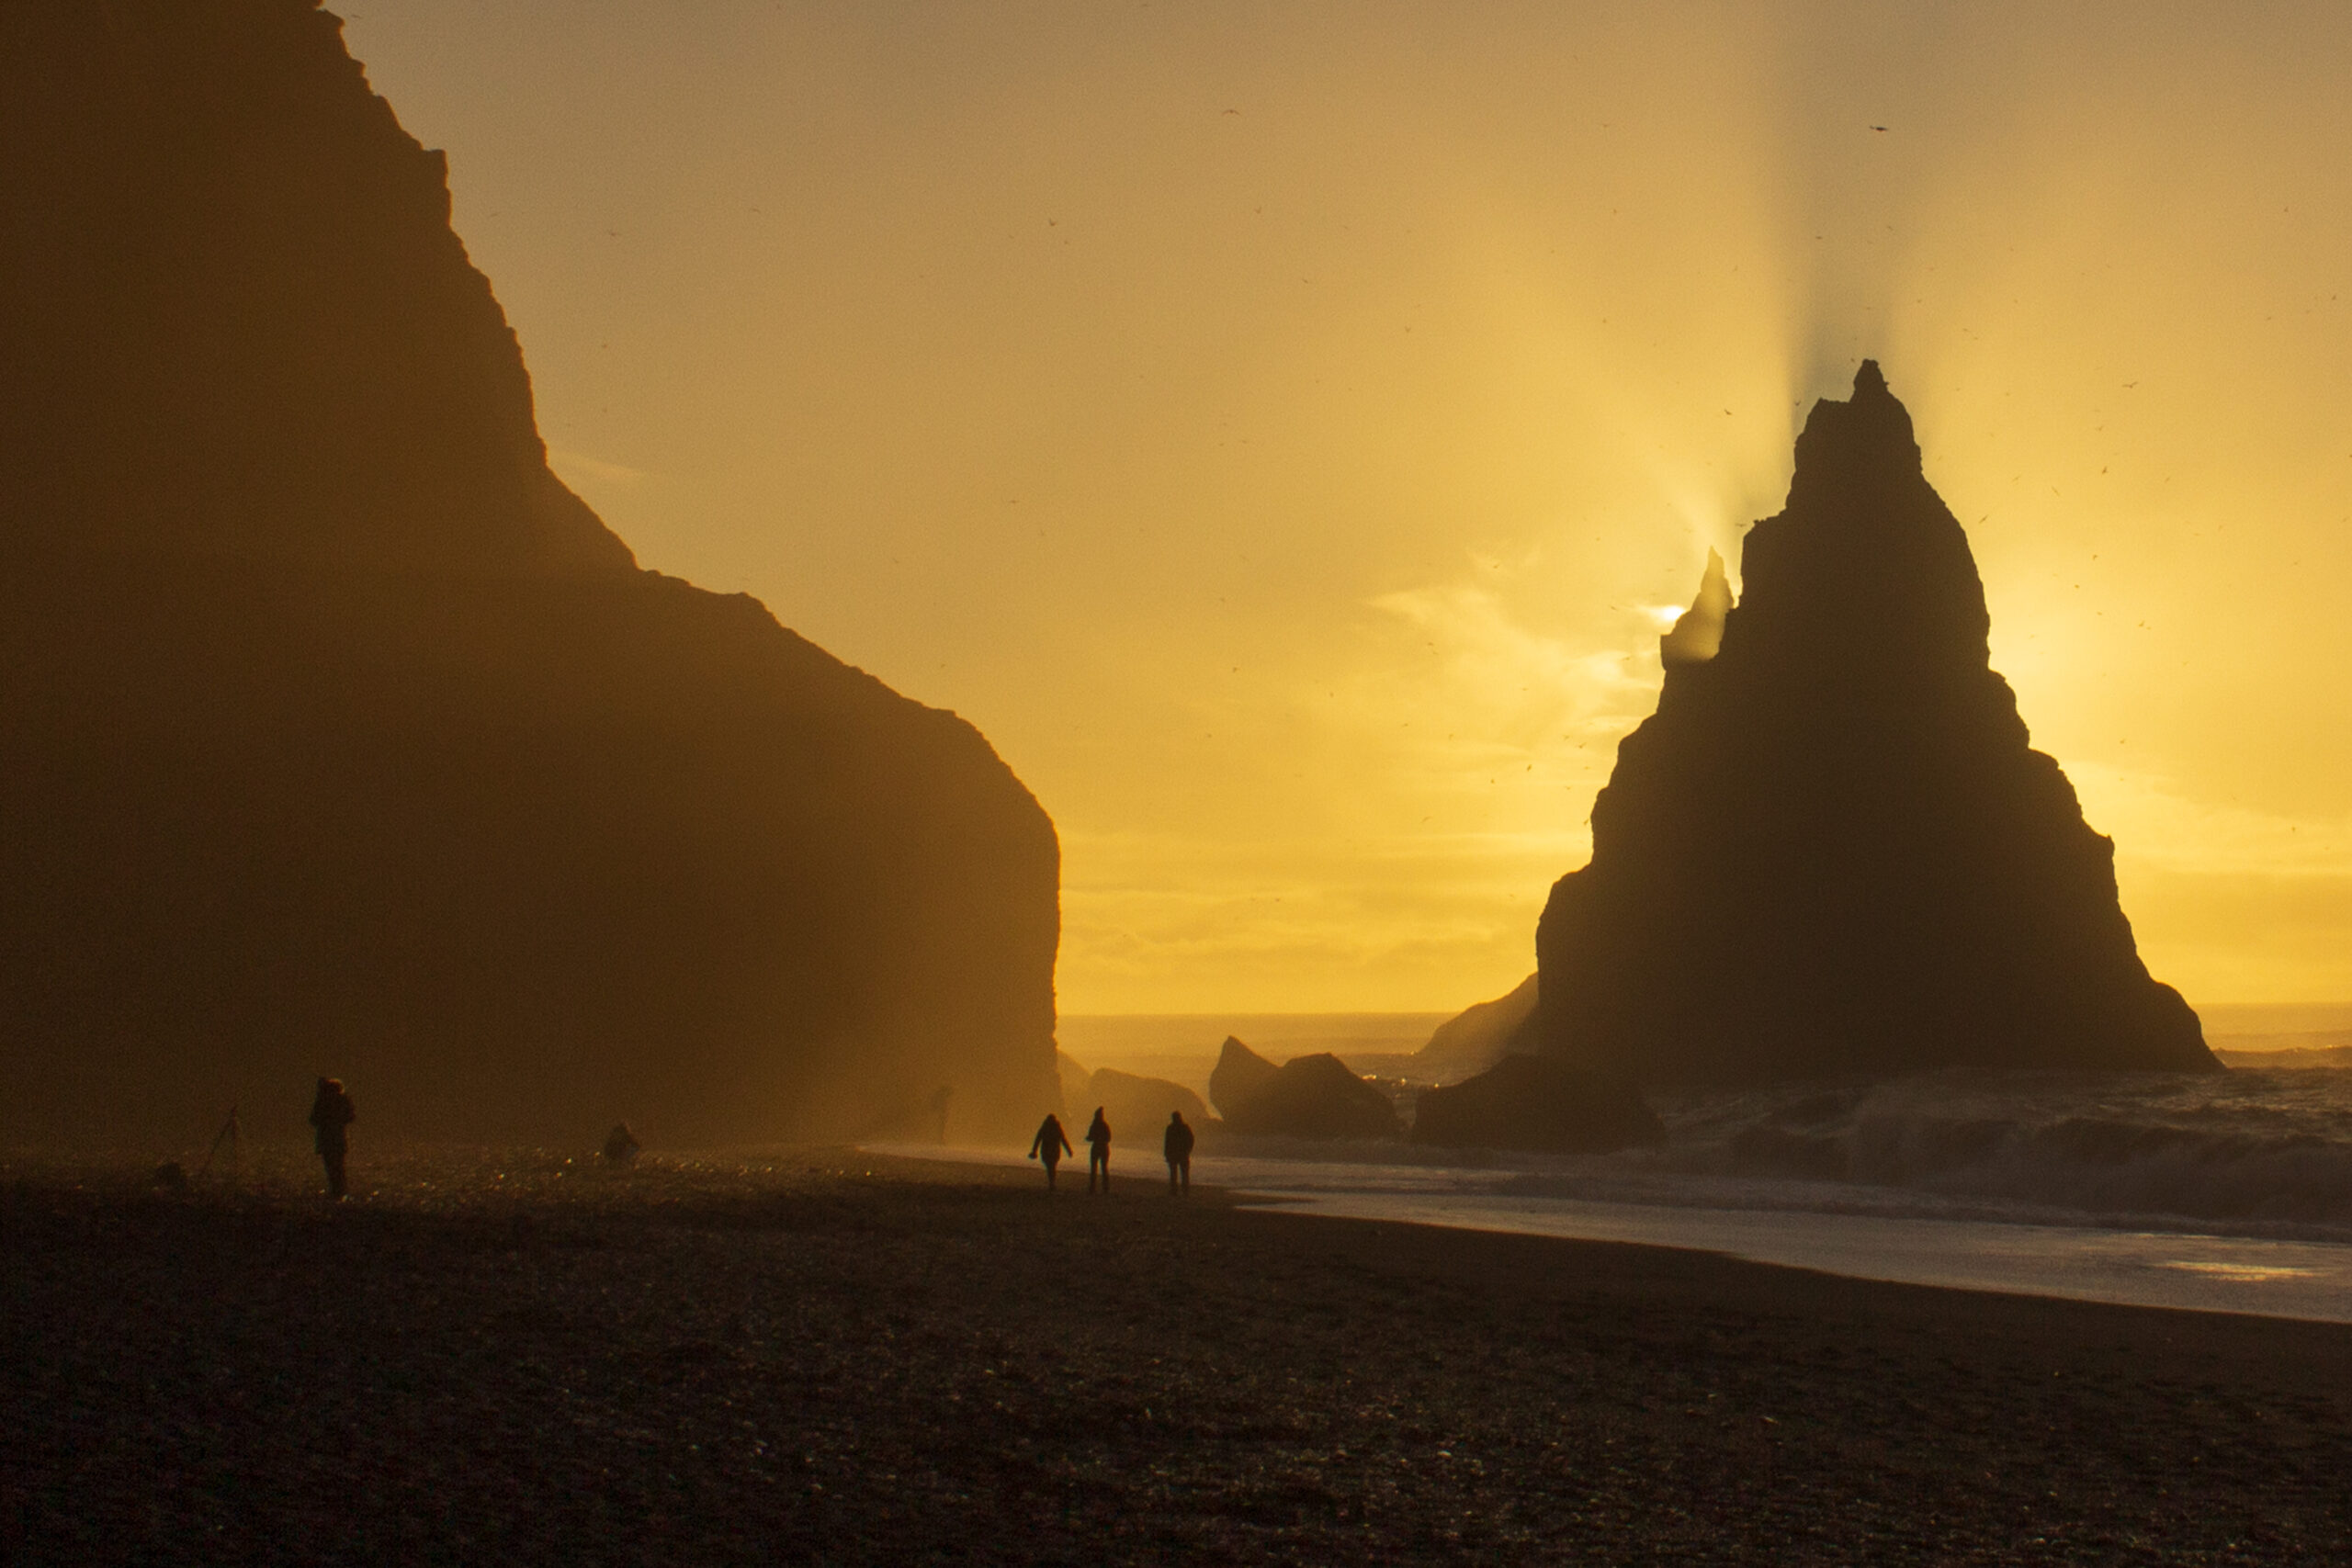
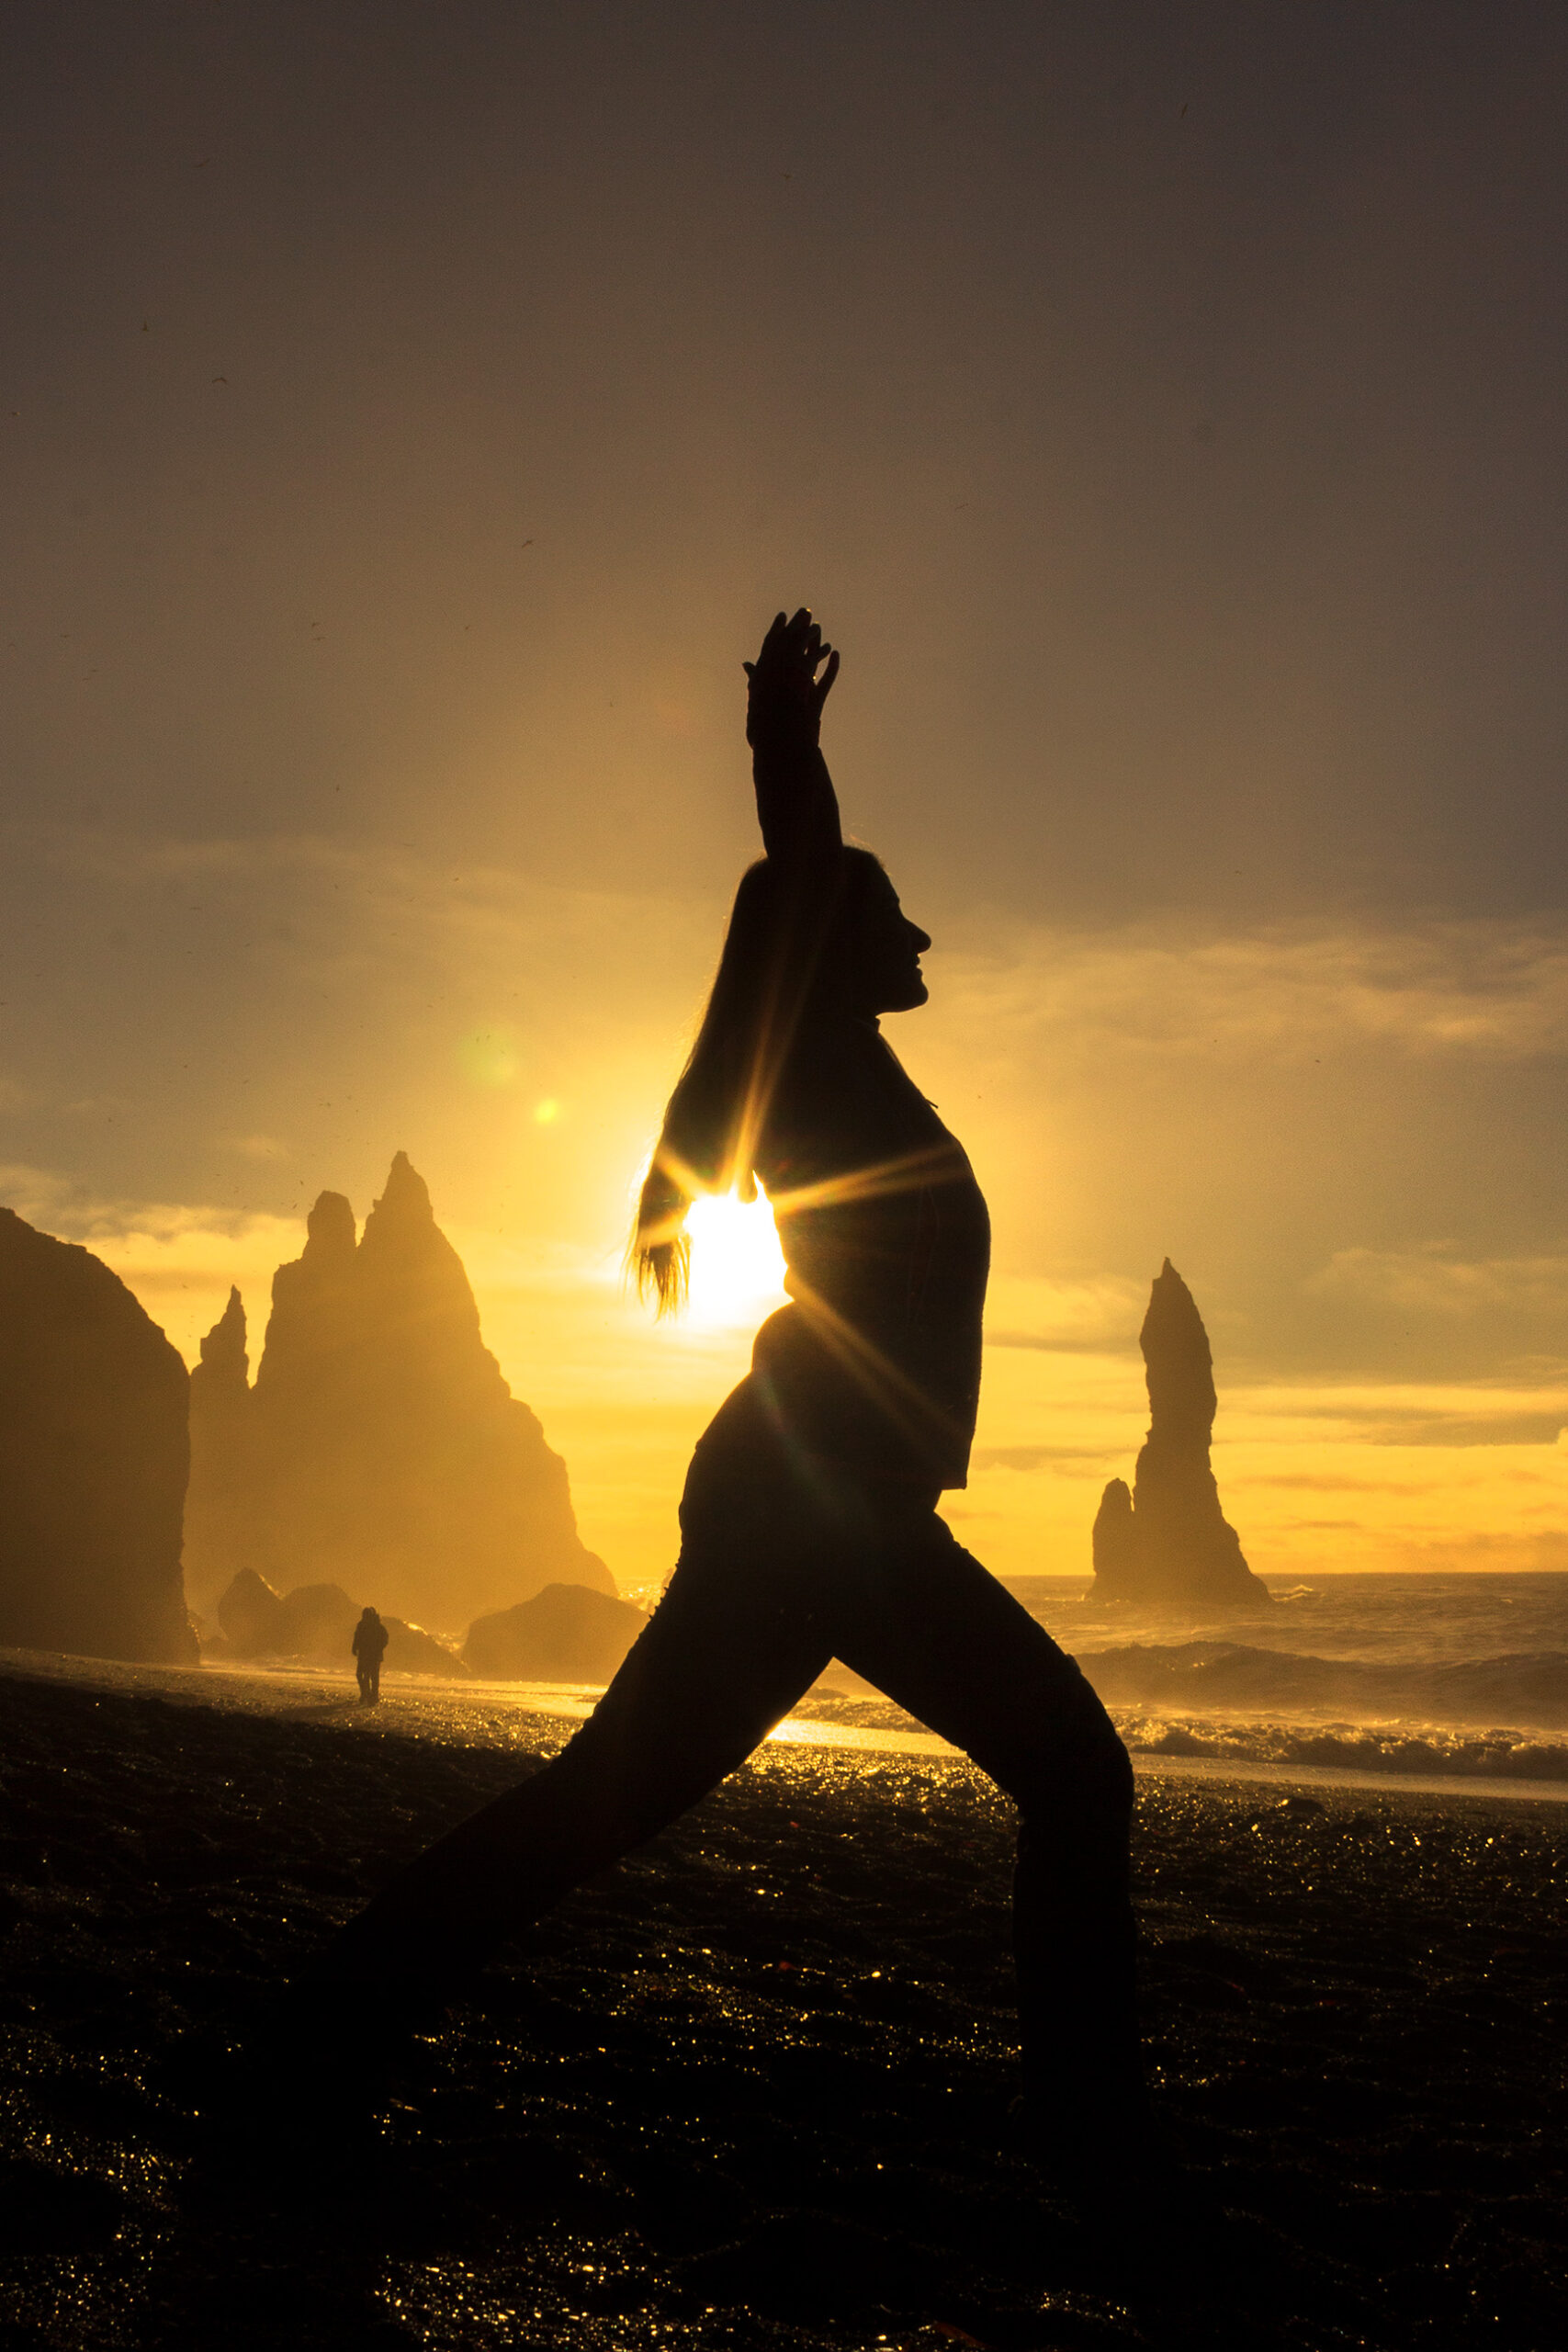
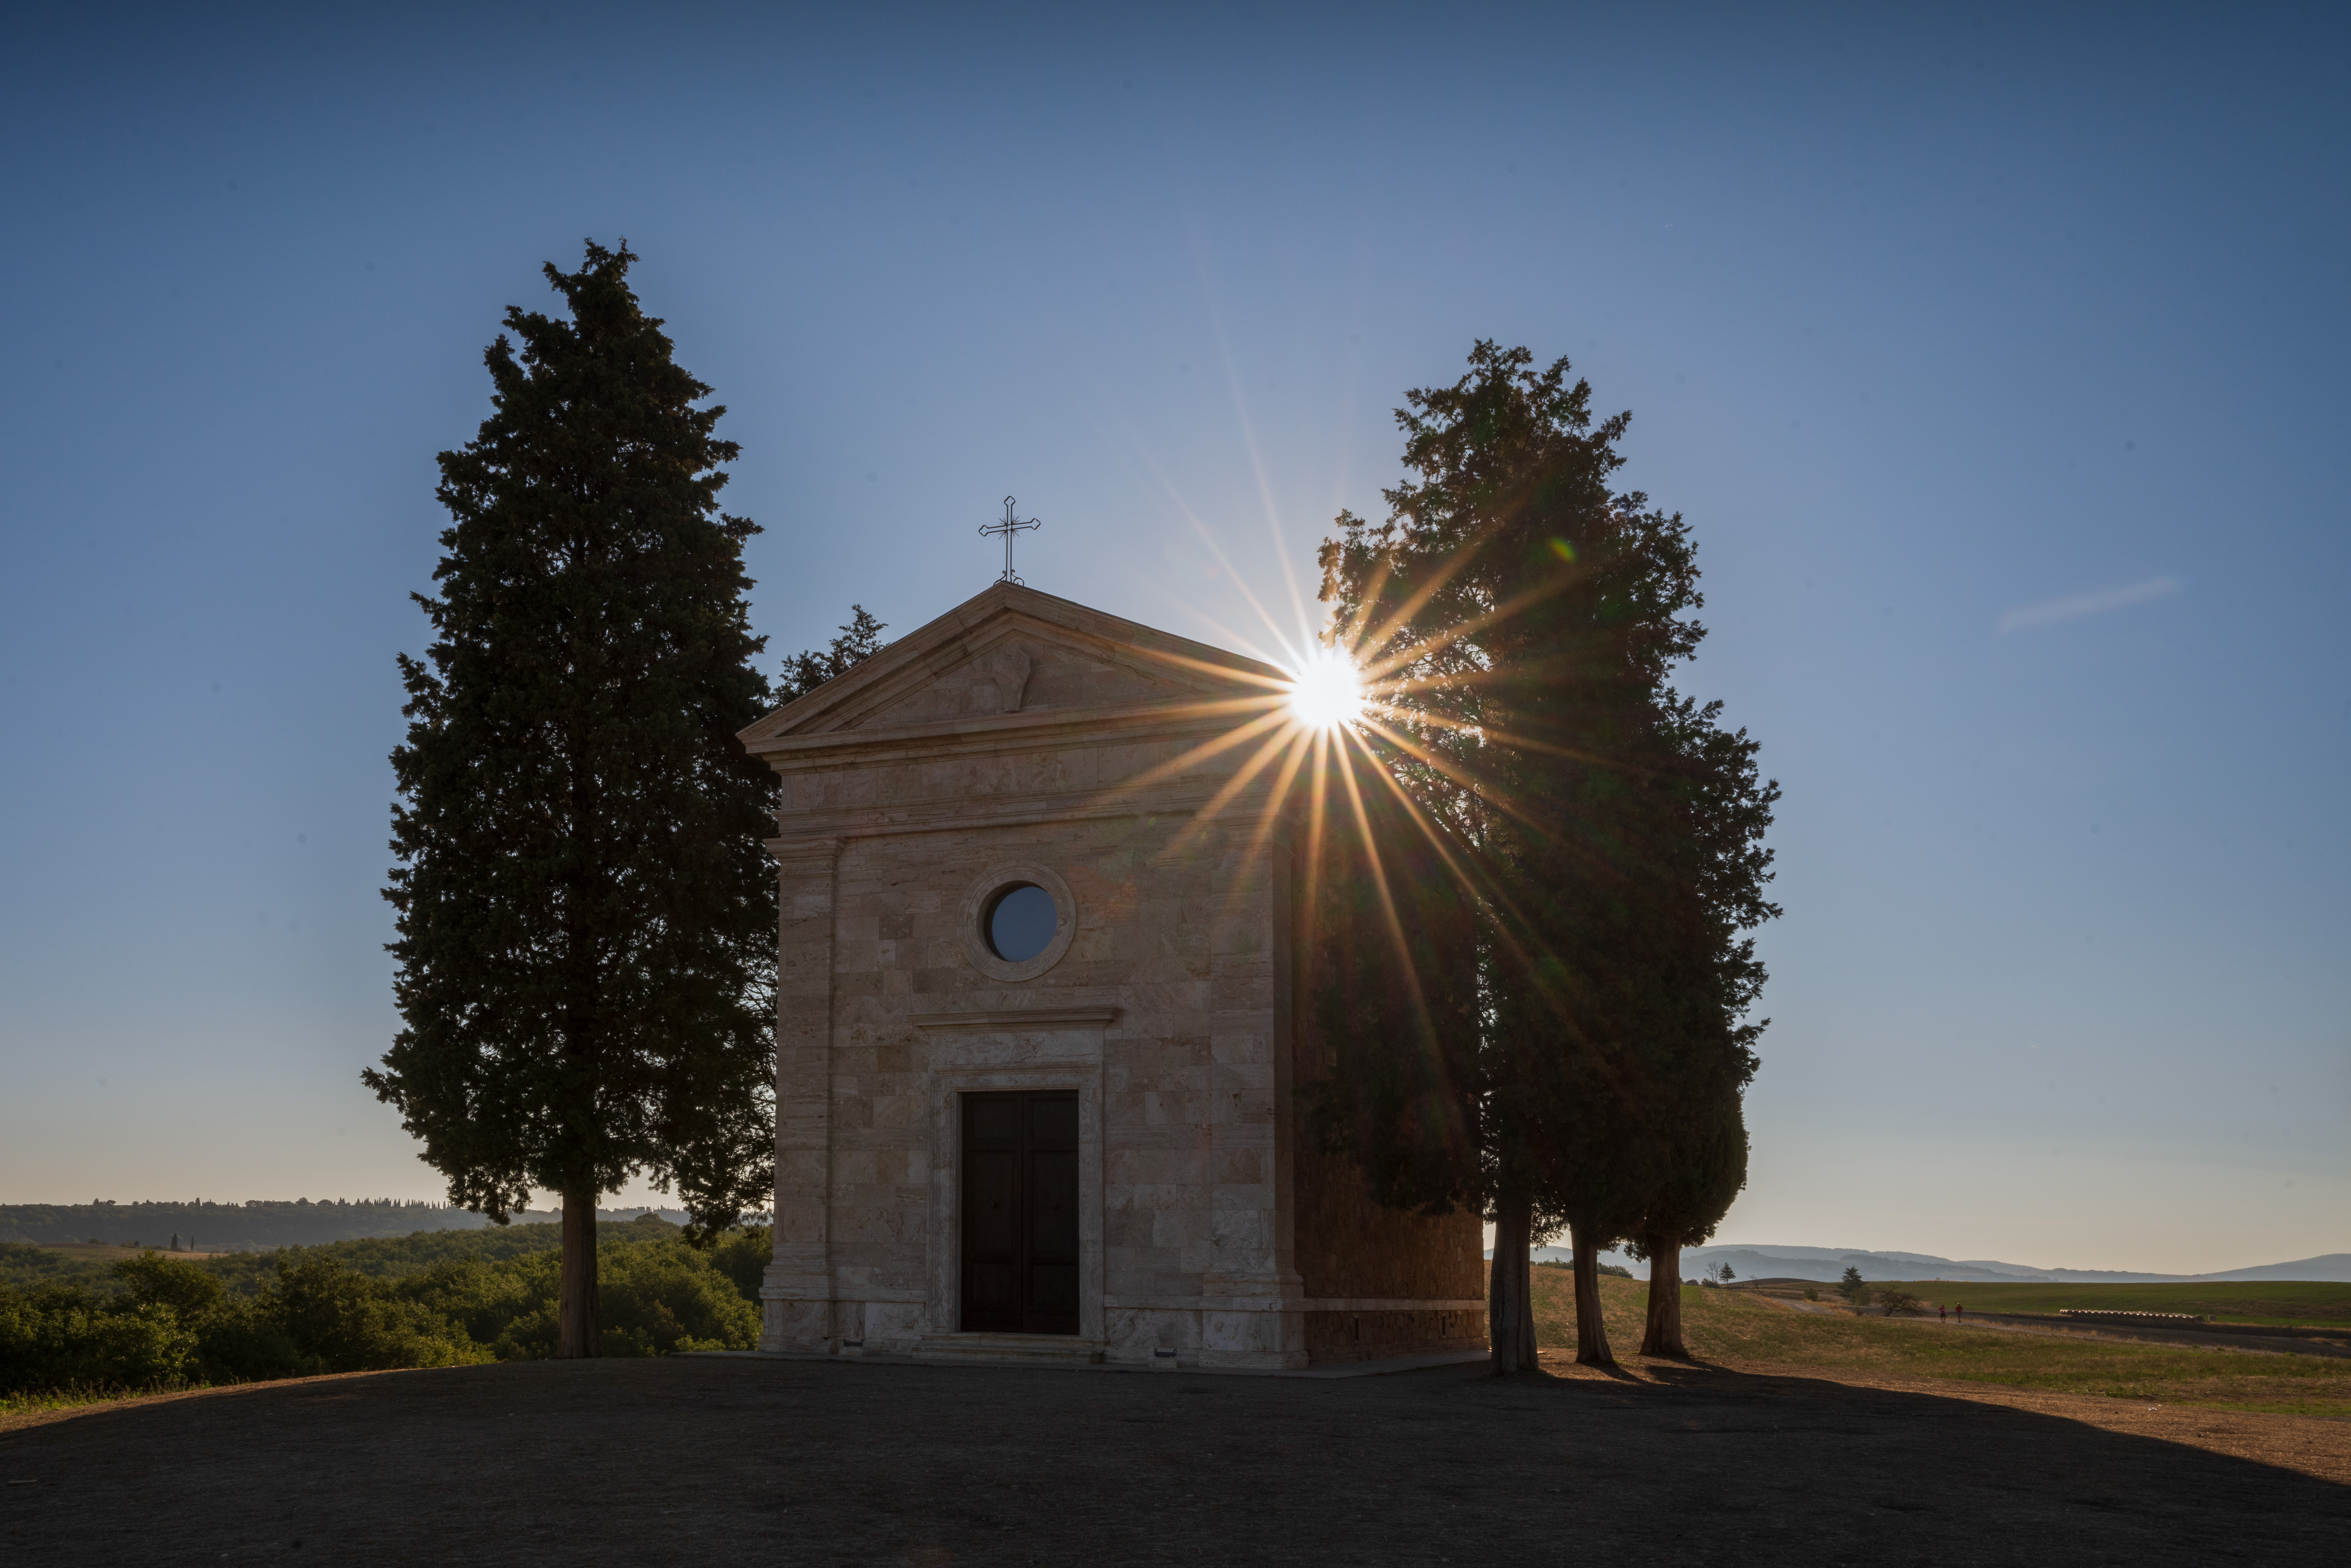
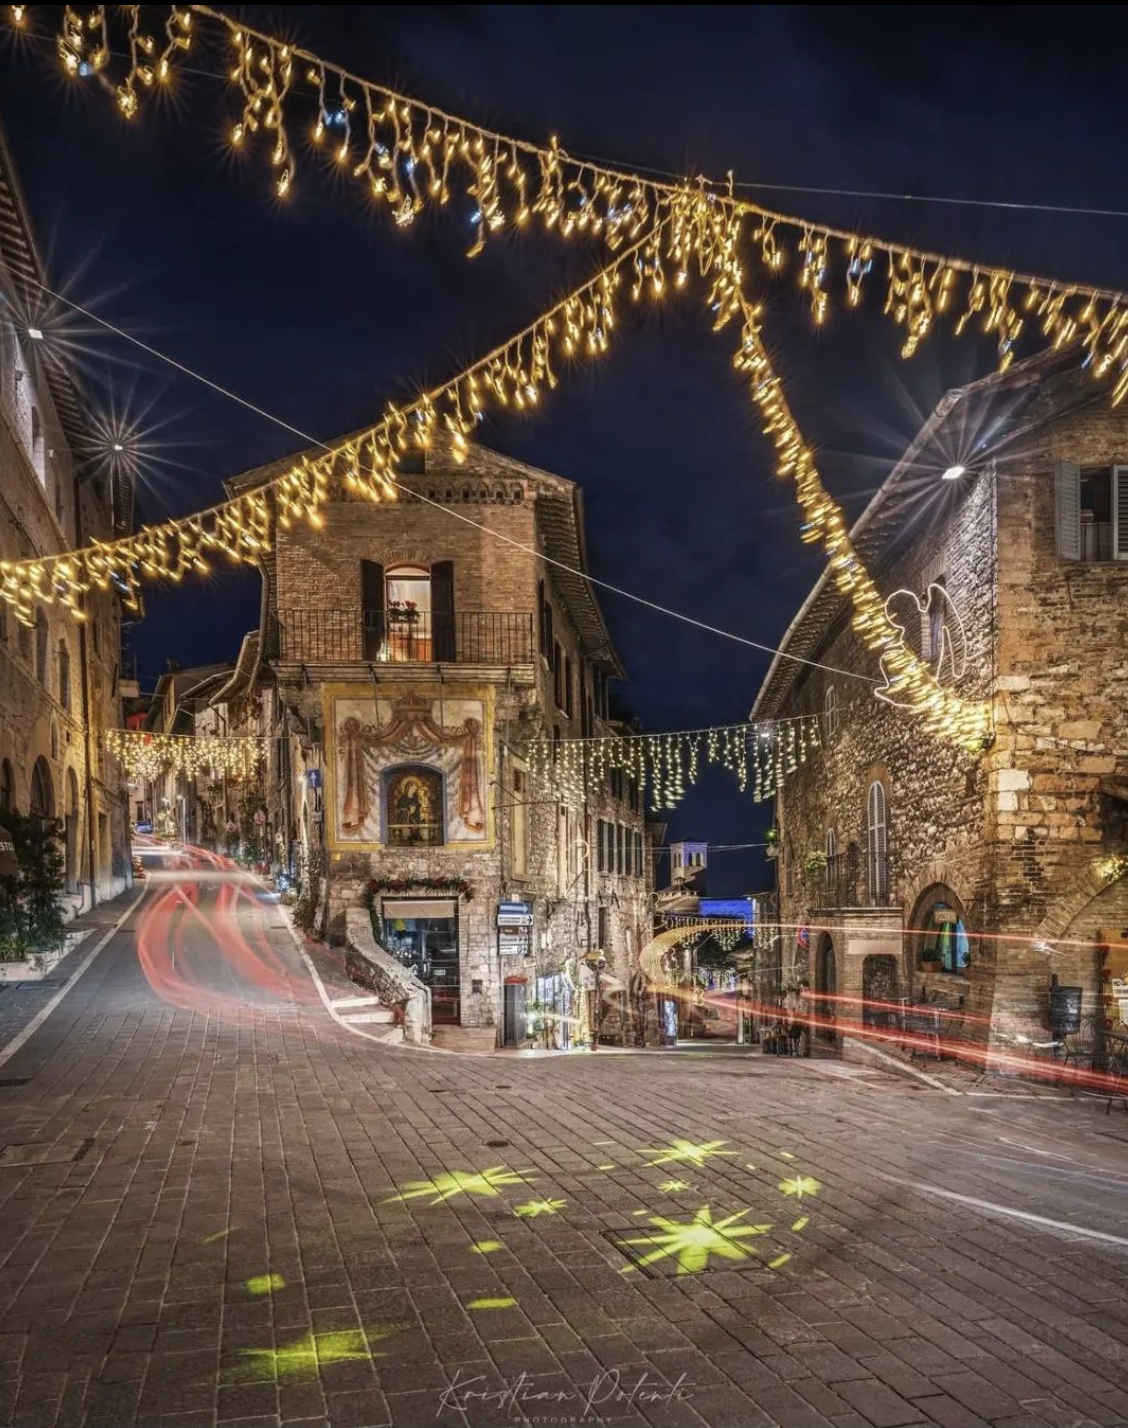
If, however, you want to work with backlight, you can partially cover the sun with a trunk or another element and close the aperture to create the “star” effect of the rays, or cover it completely to create a silhouette effect.
Photo by Łukasz Łada on Unsplash
@giadaantonini_photography
Photo by Timothy Eberly on Unsplash
LIGHT IN PHOTOGRAPHY
Find out how to make the most of every lighting situation to enhance your images. Read our tips!
To take photos at sunset you have to consider the subject and where you are.
If you are in the woods, don’t wait for sunset, because the light will be insufficient. Here the last useful moment will be half an hour before the sun disappears behind the horizon or behind another mountain. You can take advantage of the light that penetrates between the branches as described in the previous point.
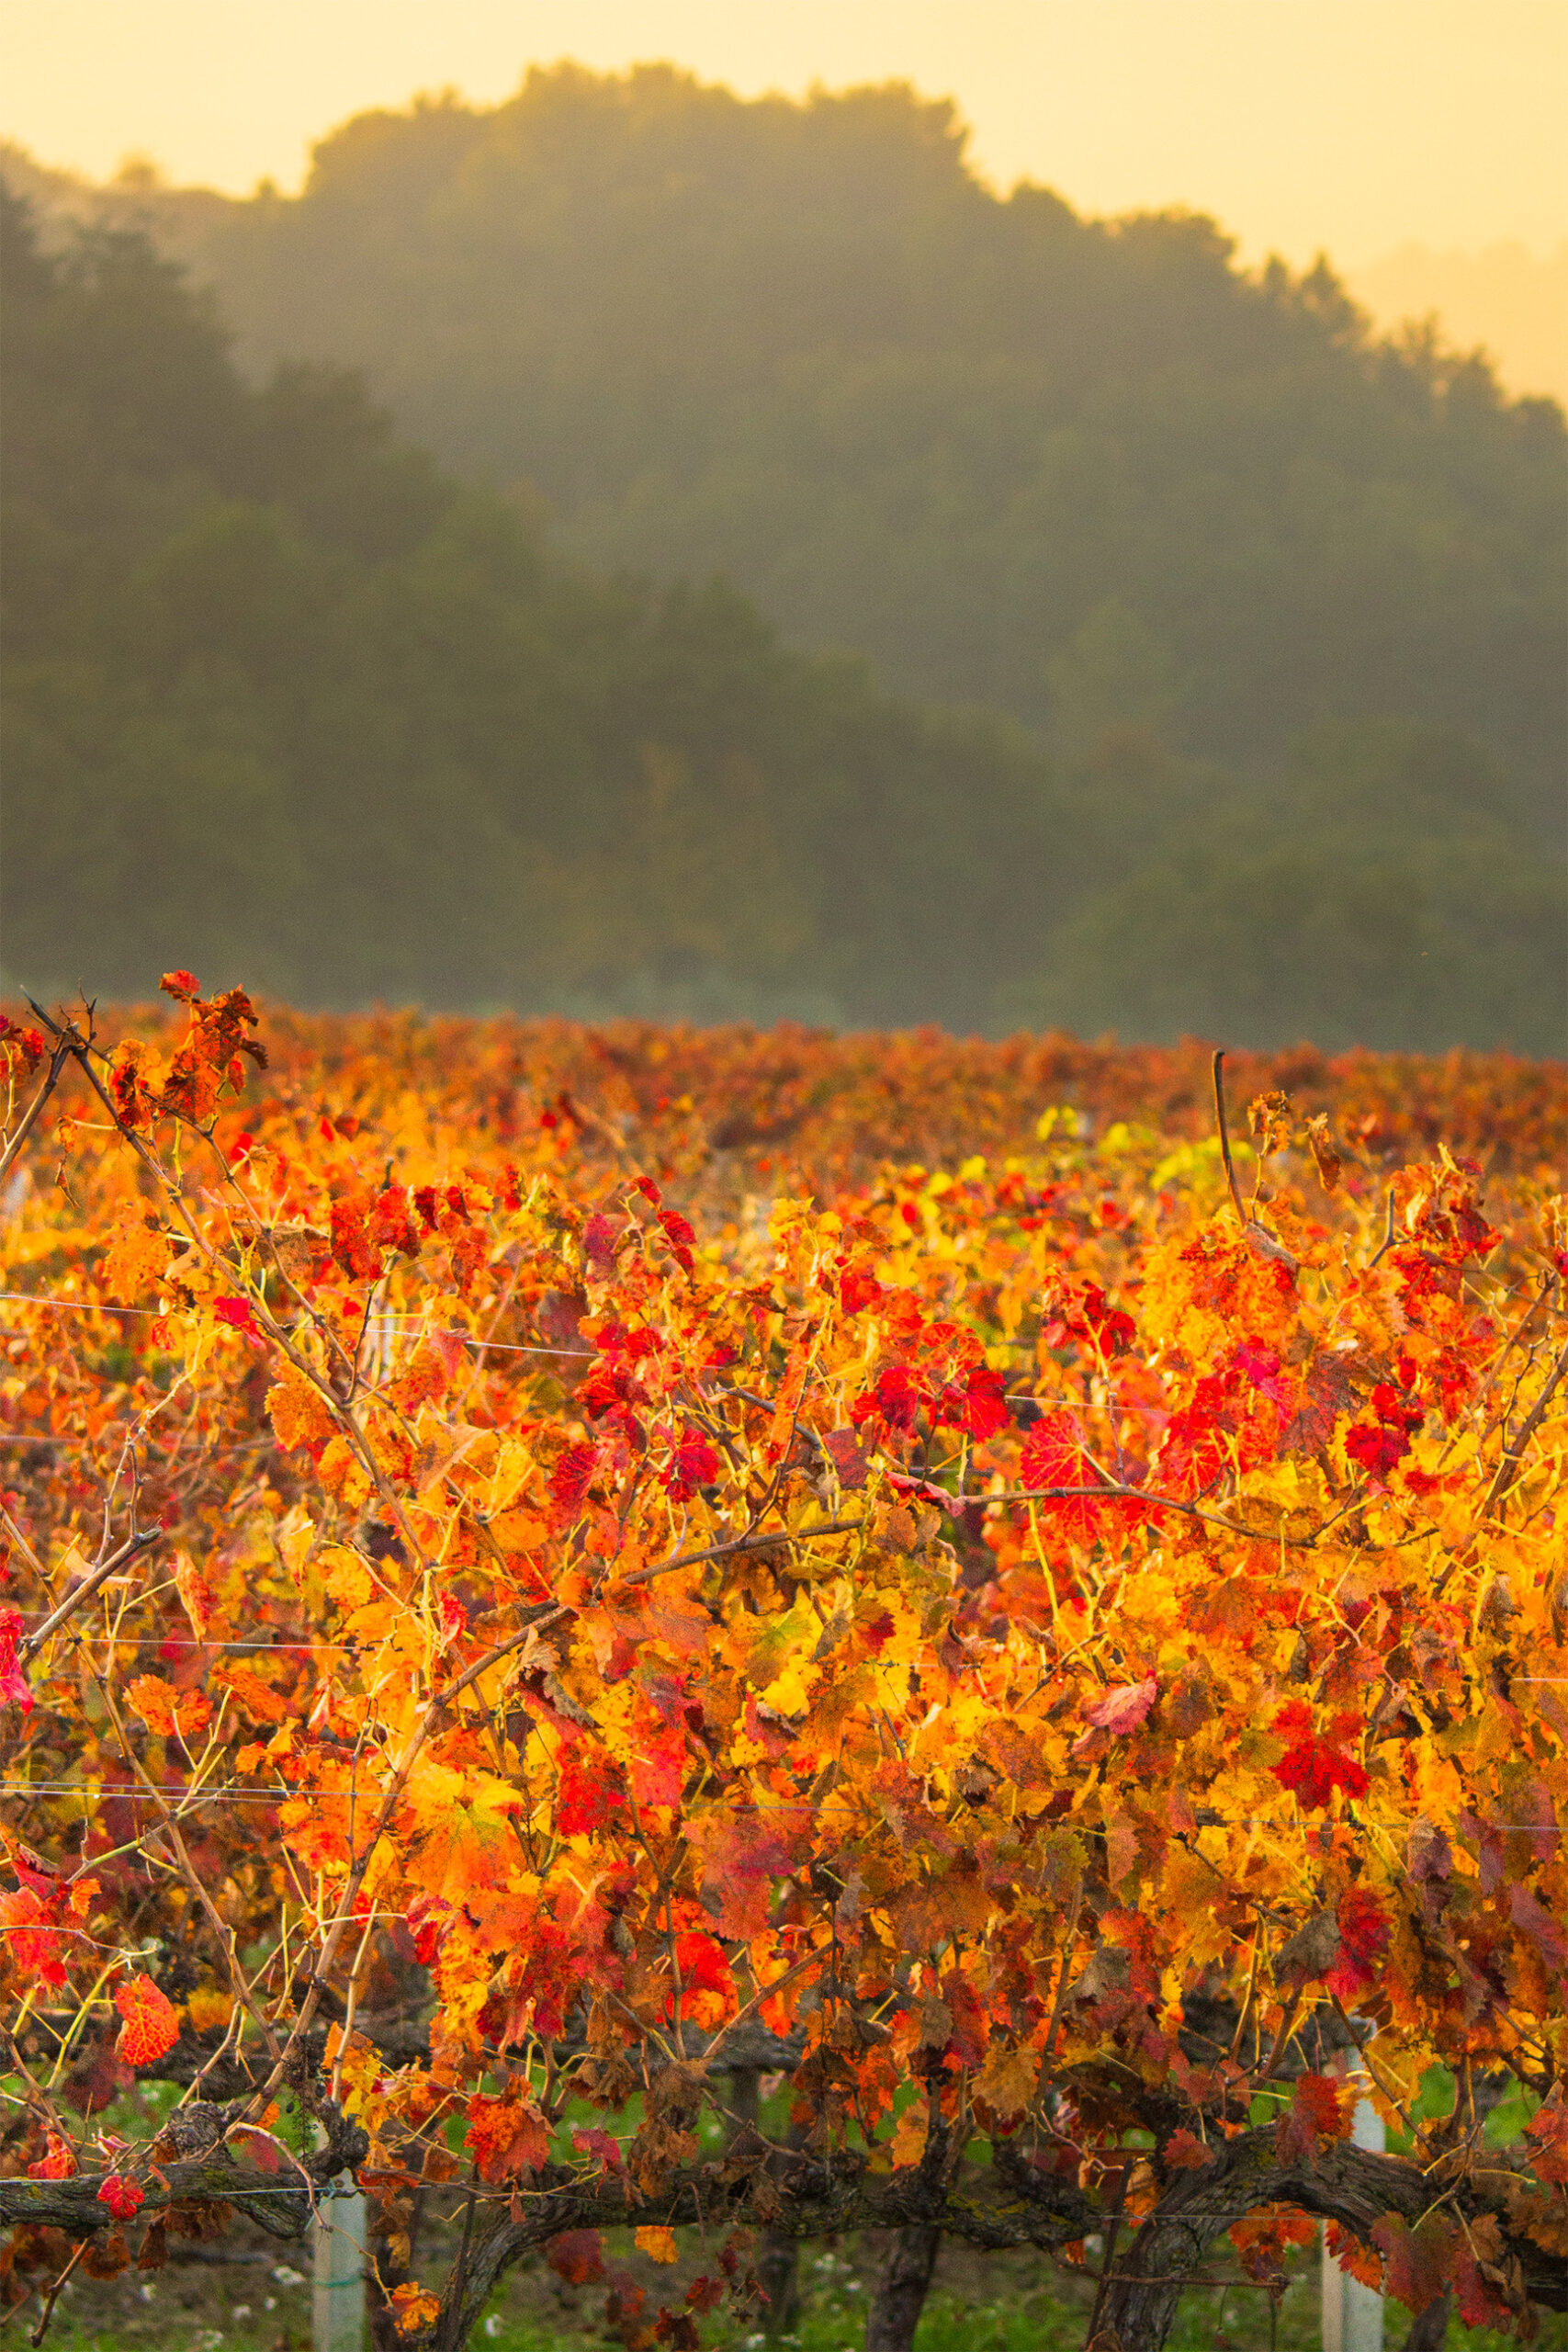
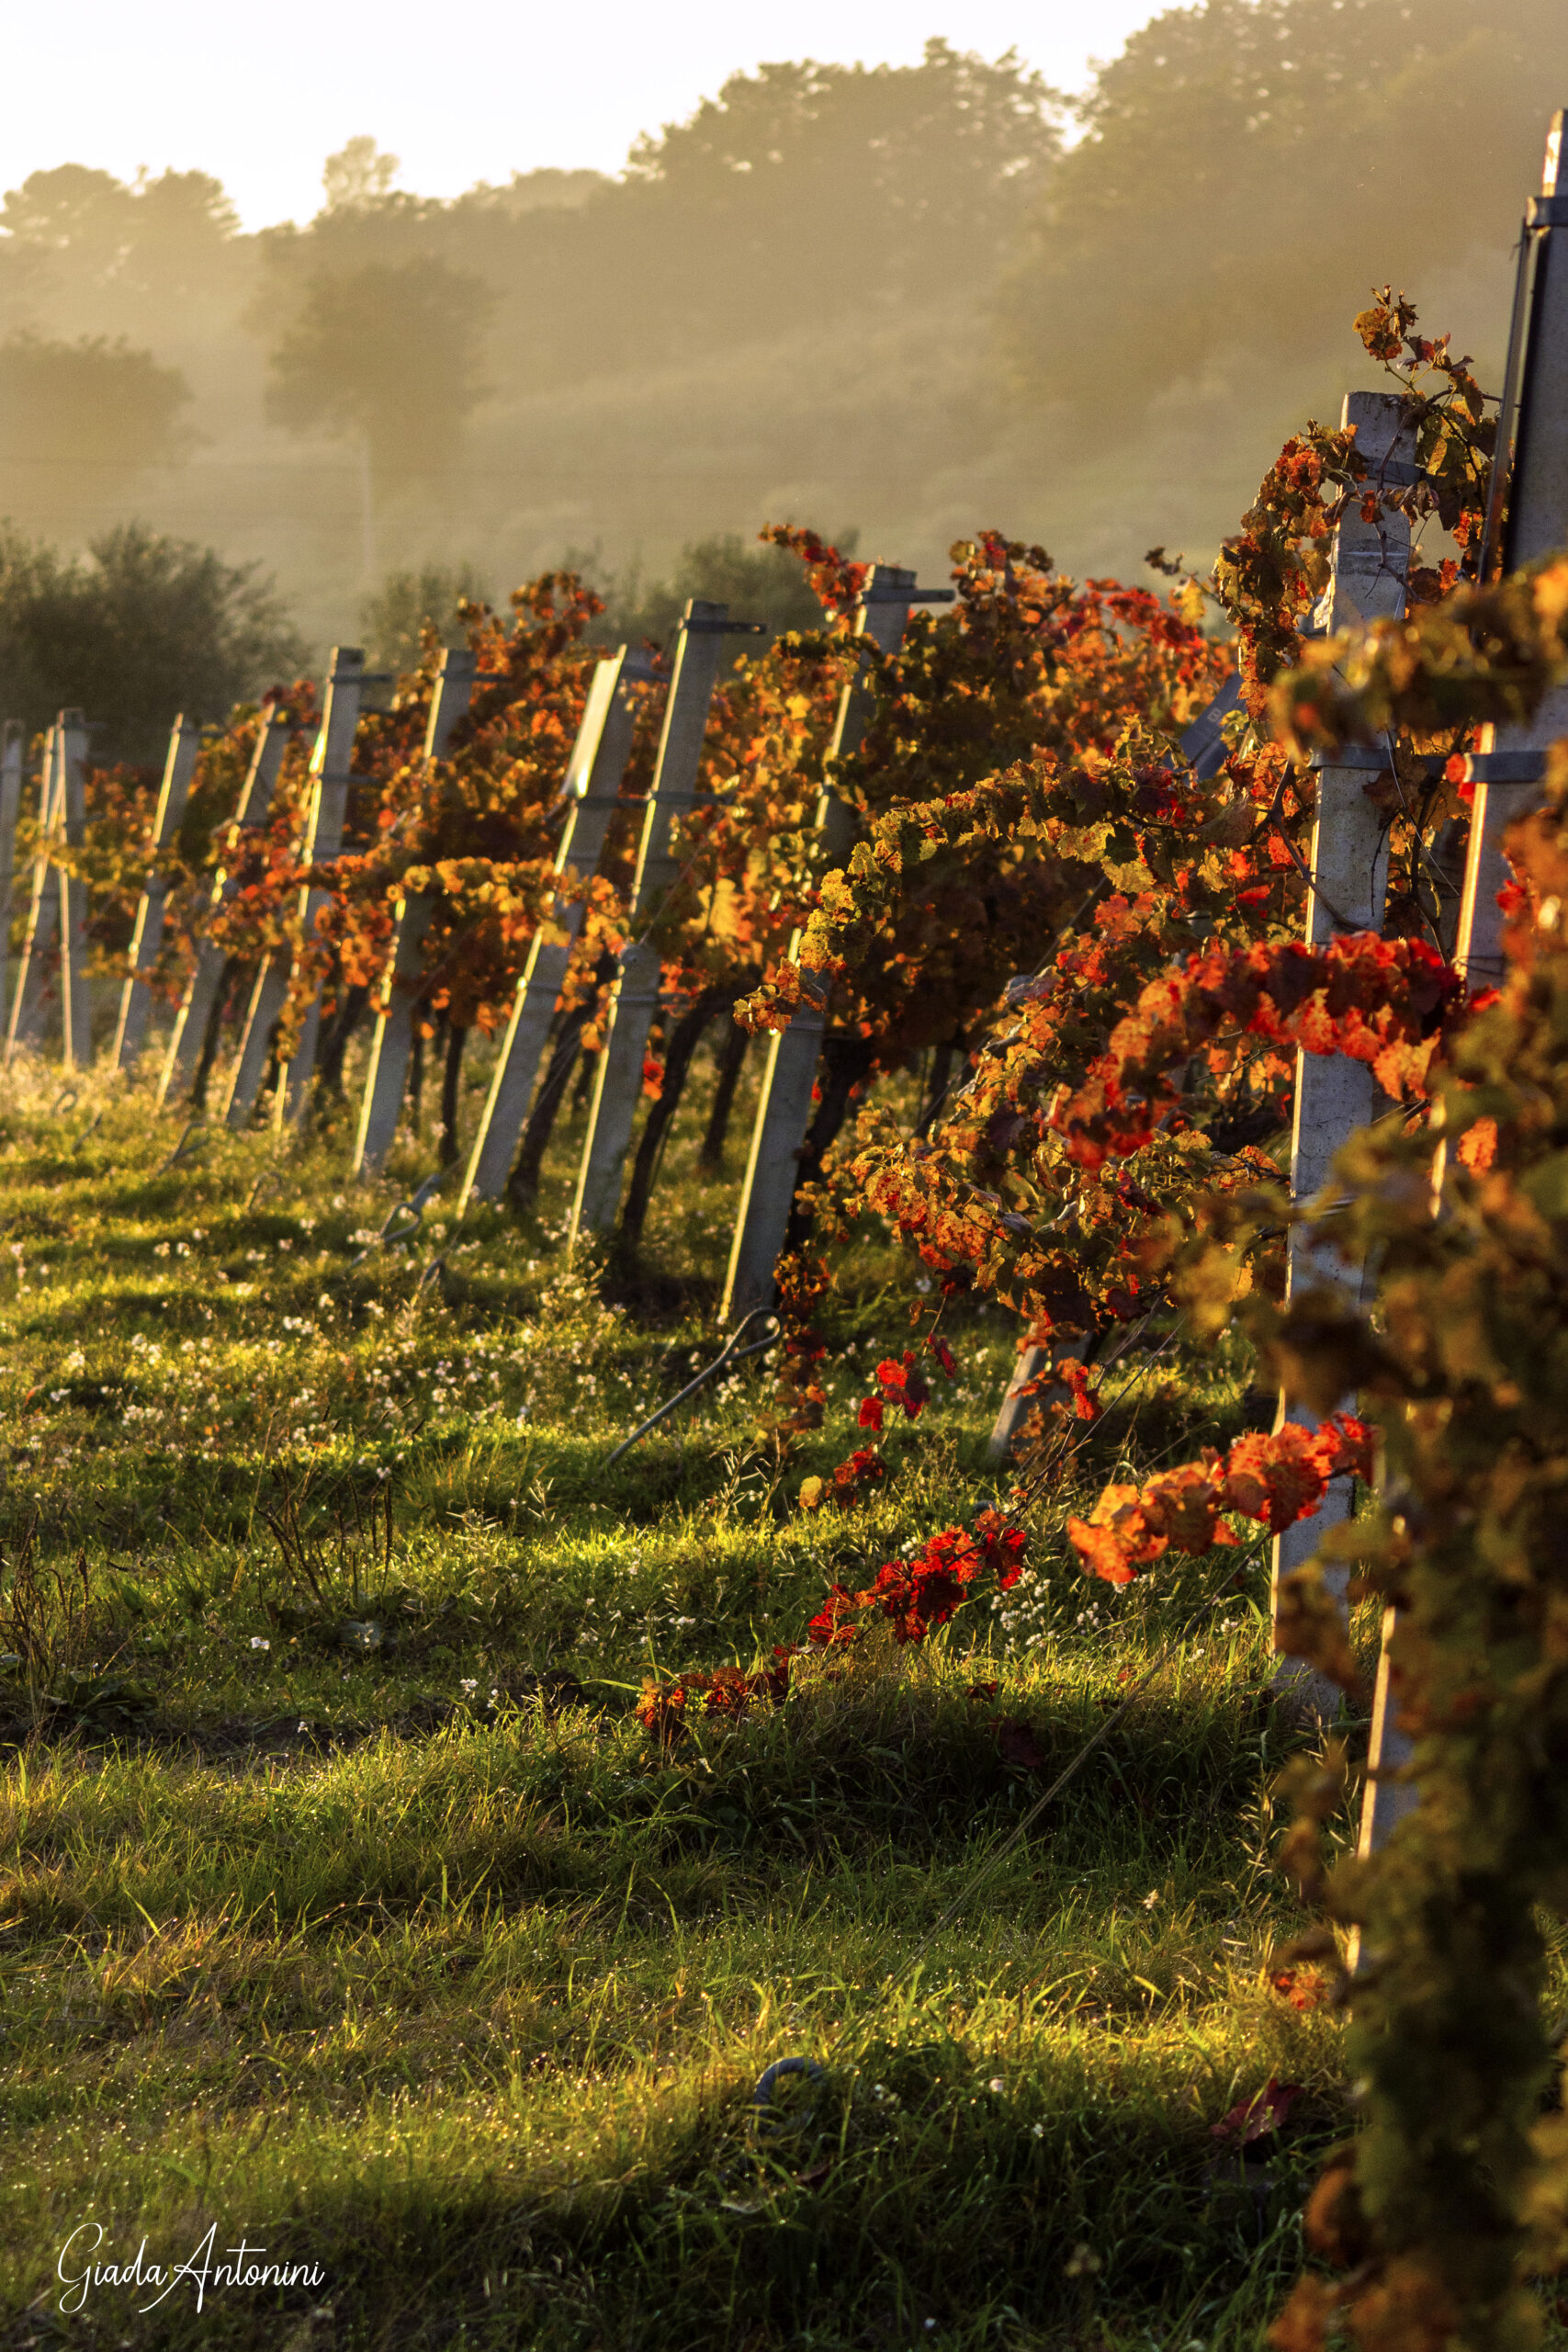
If, however, you are photographing an avenue, an isolated tree, a hill of vineyards or any other subject that leaves the sky and the horizon free, then you can shoot for the entire time of sunset, playing with the colors of the sky that are close to the shades of the leaves. The warm light of the sunset will emphasize the colors of the foliage and details and give warmth to the whole scene, without the need to apply further filters in post production.
Photo by Jake Givens on Unsplash
@giadaantonini_photography
In the next posts we will give you other photo tips for fall foliage pics, that will help you take incredible shots.
We will talk about:
Photo tips for your fall foliage photos with human subjects
Photo tips for your fall foliage photos: the equipment
Photo tips for your fall foliage photos: editing, filters and presets
What are you waiting for?
Follow our tips and tag us in your shots! The best photos will be shared on Imagomap InstagramandFacebook page.
If you liked our post, share it and leave a comment!
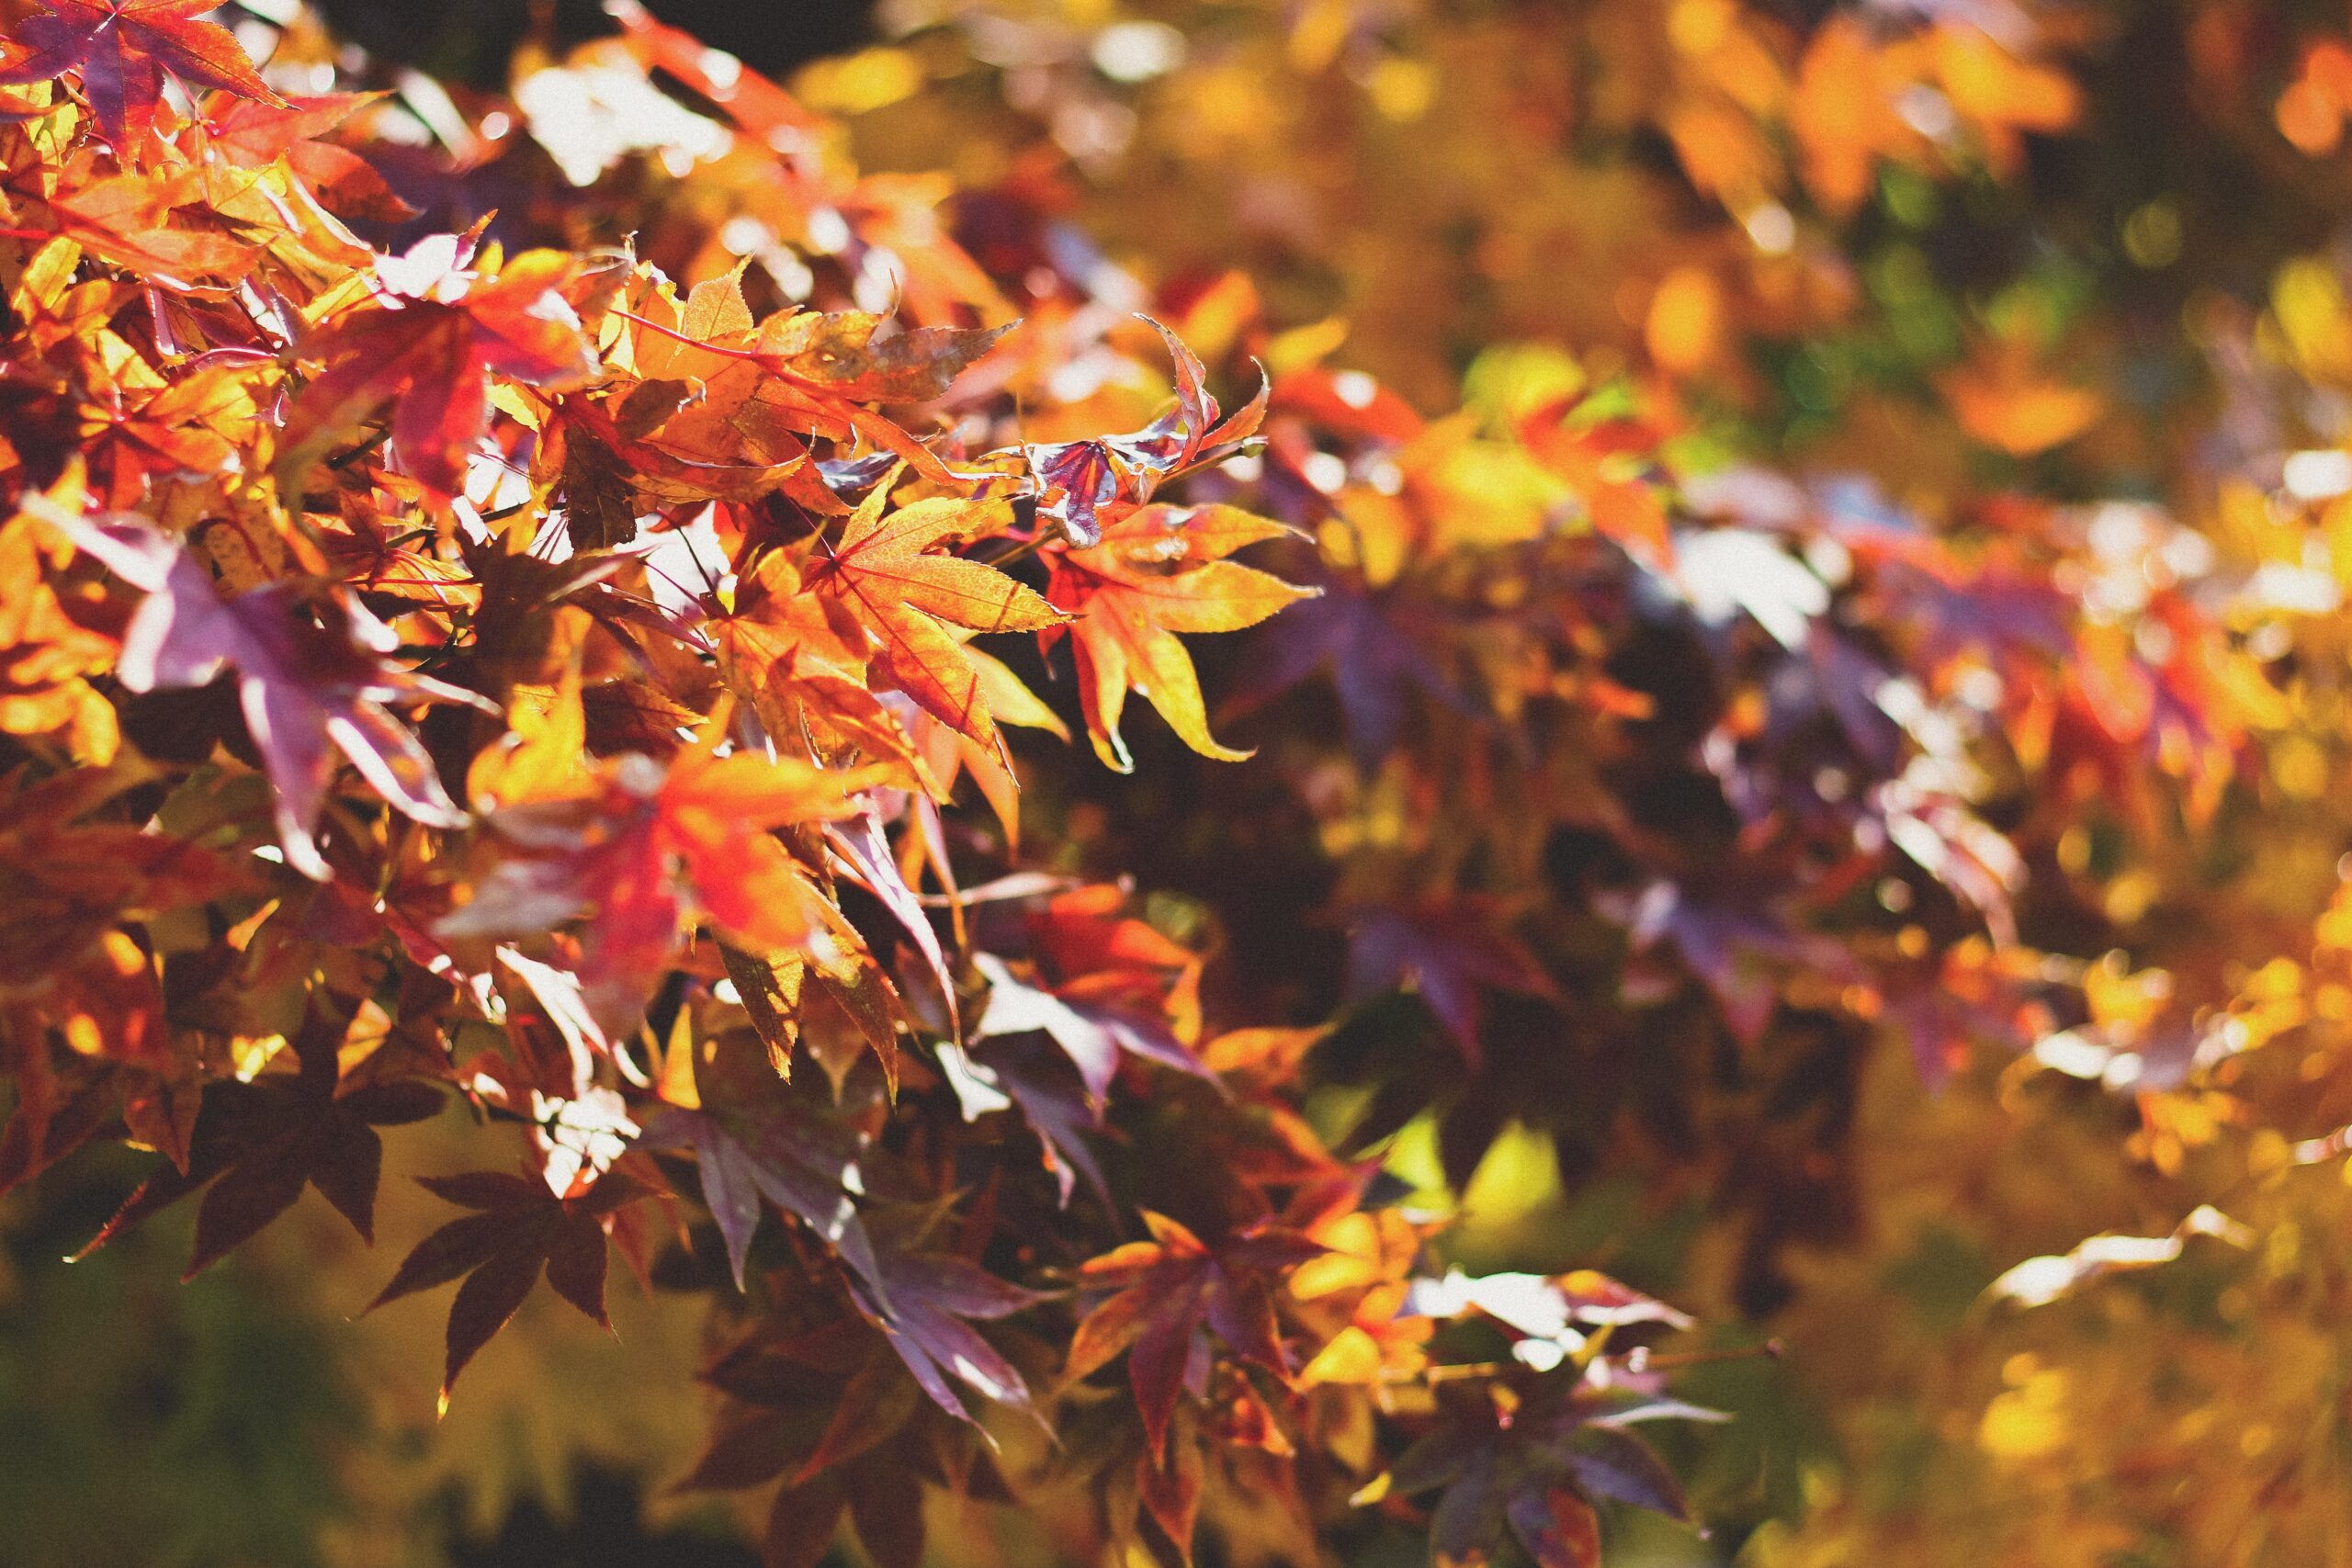
Who hasn’t stopped to take fall foliage photos at least once? Fall is perhaps the most evocative season of the year, with its amazing landscapes. In fact, the color shades of the leaves give our photos a unique atmosphere of fairytale worlds. So, what are the best photo tips for fall foliage pics?
A single tree, an entire avenue, a chestnut or beech forest, some leaves scattered along the sidewalk, offer perfect ideas for composing outstanding images.
In the next posts about fall we will see together, every week, some practical tips that professional photographers follow to get the best pics!
Let’s start from composition!
Photo tips for fall foliage pics: the composition of the shot
As in every shot, the composition is the most important aspect!
Especially during the fall season, where often the scene has too many details, with leaves, branches, trees and others elements. For this reason, it’s important to stop a bit and observe before shooting.
What do you need to ask yourself before shooting?
When you find yourself in front a scene or landscape that you love, stop for 10 seconds to analyse the scene, before hiding behind the lens of your camera. The risk of falling into banal photos is just around the corner.
These four simple questions can give you the inspiration for the perfect photo in just a few seconds:
What are you really interested in?
What is the subject of your photo?
What elements do you want to include or delete from the frame?
How can you make your pic original?
Photo tips for fall foliage pics: 7 easy photo tips
To find the answers to these questions there are some simple practical photo tips for fall foliage pics, to follow before shooting.
1.Isolate with your eyes some details of the scene
Focus on them to identify the subject or subjects of your photographic story. Whether they are a single leaf or a small group, a branch, a tree or a little mushroom that grows out of the ground, select them.
2. Photo tips for fall foliage pics: place the subject inside the composition
Give the subject the maximum strength, placing it in the center of the composition, or on one of the thirds (remember to activate the grid, both from smartphone or camera). If your subjects are more than one, placing them one on every third will give you an excellent result. For example, a tree on the right and a human subject on the left, or a branch full of colored leaves in the foreground on one side and a tree on the background, on the other side.
@giadaantonini_photography
@giadaantonini_photography
3. Choose the best distance from the subject to raise its significance in the context
Try to move closer or further away physically before shooting. You may find that you need a zoom or macro lens to better isolate the protagonist of your photo.
IMPROVE YOUR PHOTO WITH FRAMING
Learn in five minutes simple tips to improve your shots!
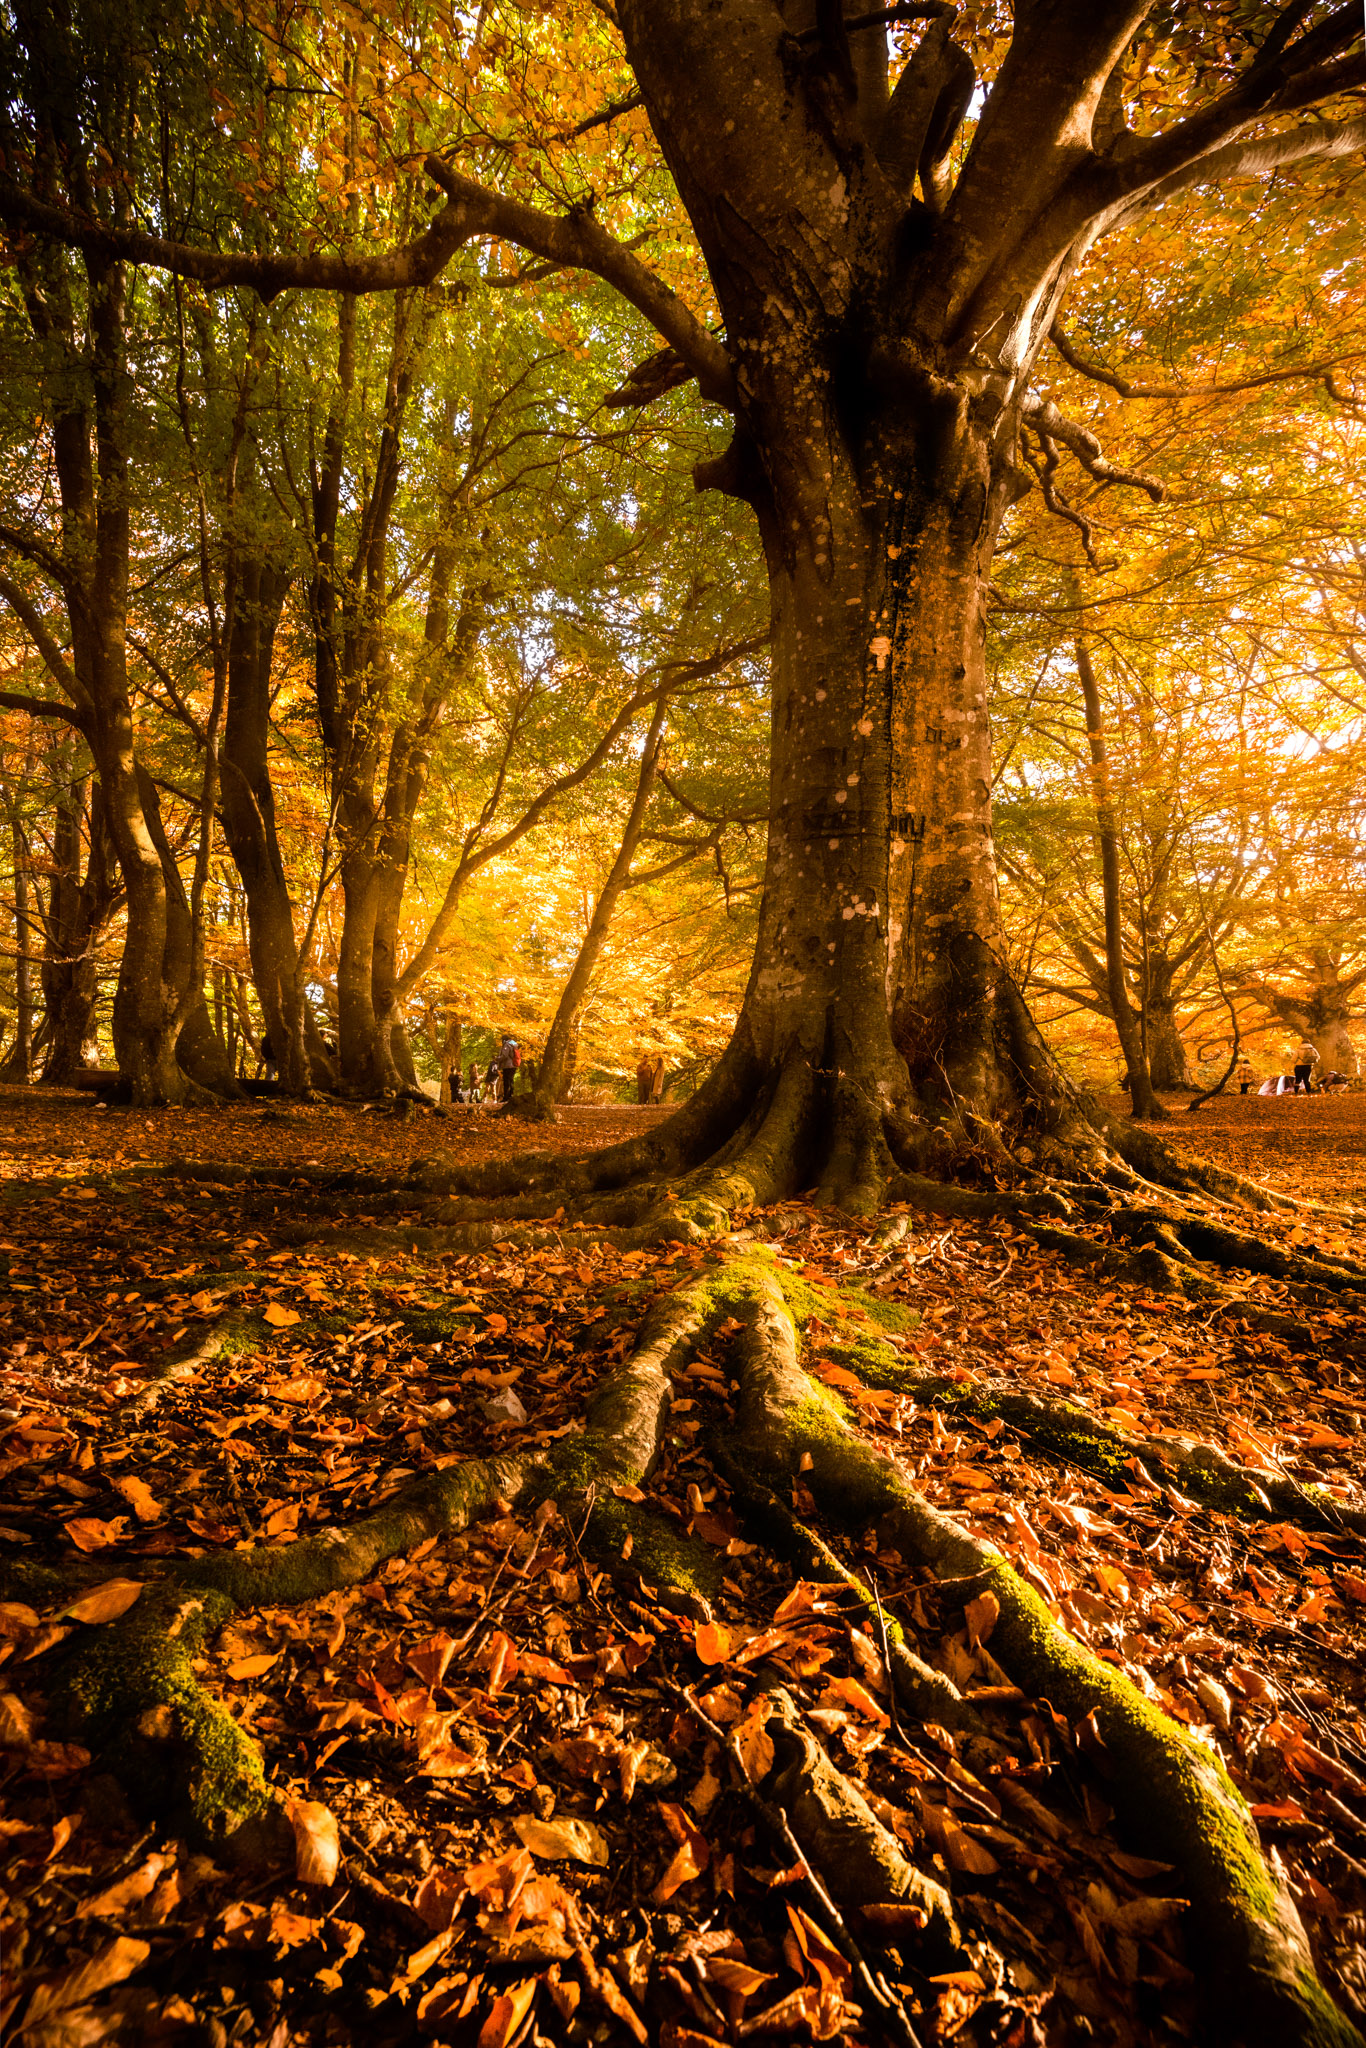
It can be from above if the main subject is on the ground, as often happens with fallen leaves. Or it can be from below close to the ground, for example to enhance a carpet of leaves and perhaps an imposing tree in the background. Don’t forget the possibility to choose a point that partially covers the scene, like a tree trunk, that can frame the subject.
@giadaantonini_photography
@giadaantonini_photography
@giadaantonini_photography
5.Photo tips for fall foliage pics: create a subject
If there is no prominent objects in the scene you are observing and you cannot find an original point of view, then create it! Just move a stone, or a small group of leaves, or put a human subject in the frame to have a protagonist who makes your composition original.
6. Observe the edges of the frame to cut out disturbing elements
They cool be stones, trees, bushes, walls, parked cars and anything else that is not useful for telling what you want to express: “less is more”. This way, whoever looks at your photo will remain focused on the subject.
@giadaantonini_photography
@giadaantonini_photography
7. Photo tips for fall foliage pics: help yourself with the focal aperture
Play with the aperture in order to keep the subject in focus and blur the background or foreground (with your smartphone just focus on the subject from a fairly close point or use the portrait option). This method helps especially if the scene is very confusing and full, as often happens in autumn landscapes.
Ph: @giadaantonini_photography
Ph: @giadaantonini_photography
In short, to realise stunning fall foliage pics, move around the scene like a director before shooting!
IMPROVE YOUR PHOTO WITH FRAMING PT.2
Do you want to know more to find the best composition in your pics?
Discover Sicily best spots with our nine-day tour, created for photographers and for anyone who wants to discover the best moment to admire each location, including sunrise and sunset!
A tour on the road from Cataniato Trapani through the southern coast of the island.
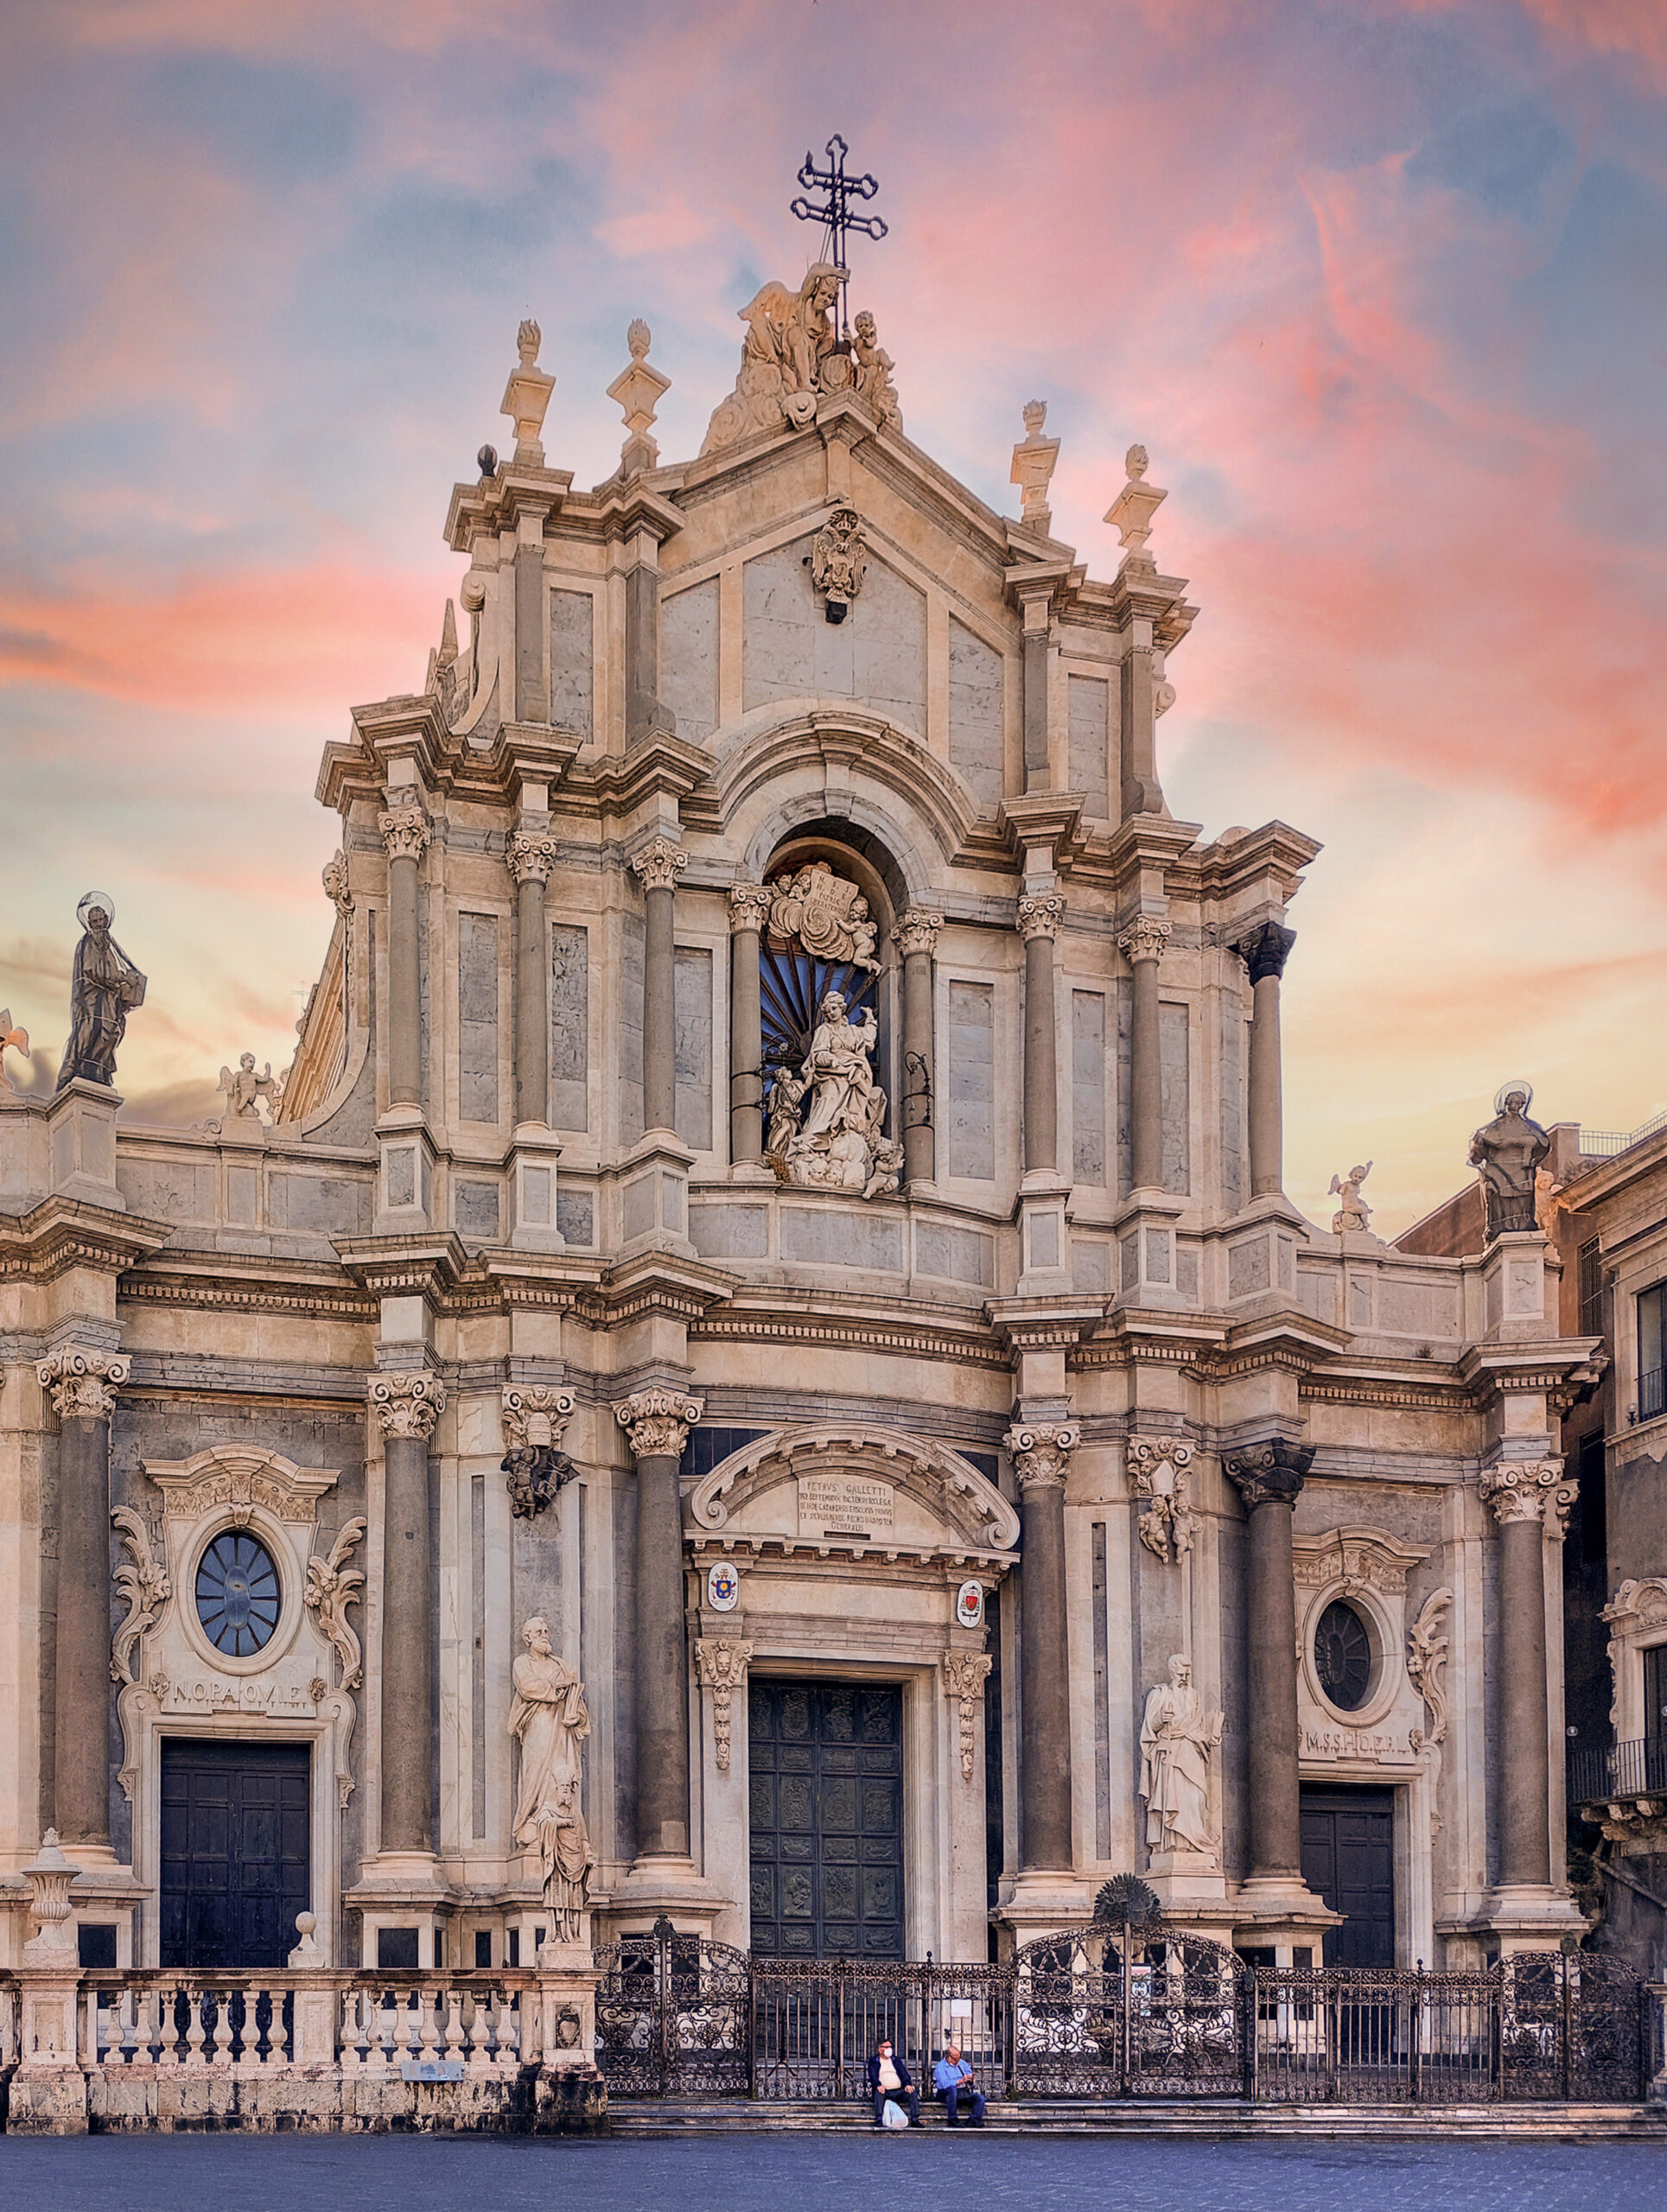
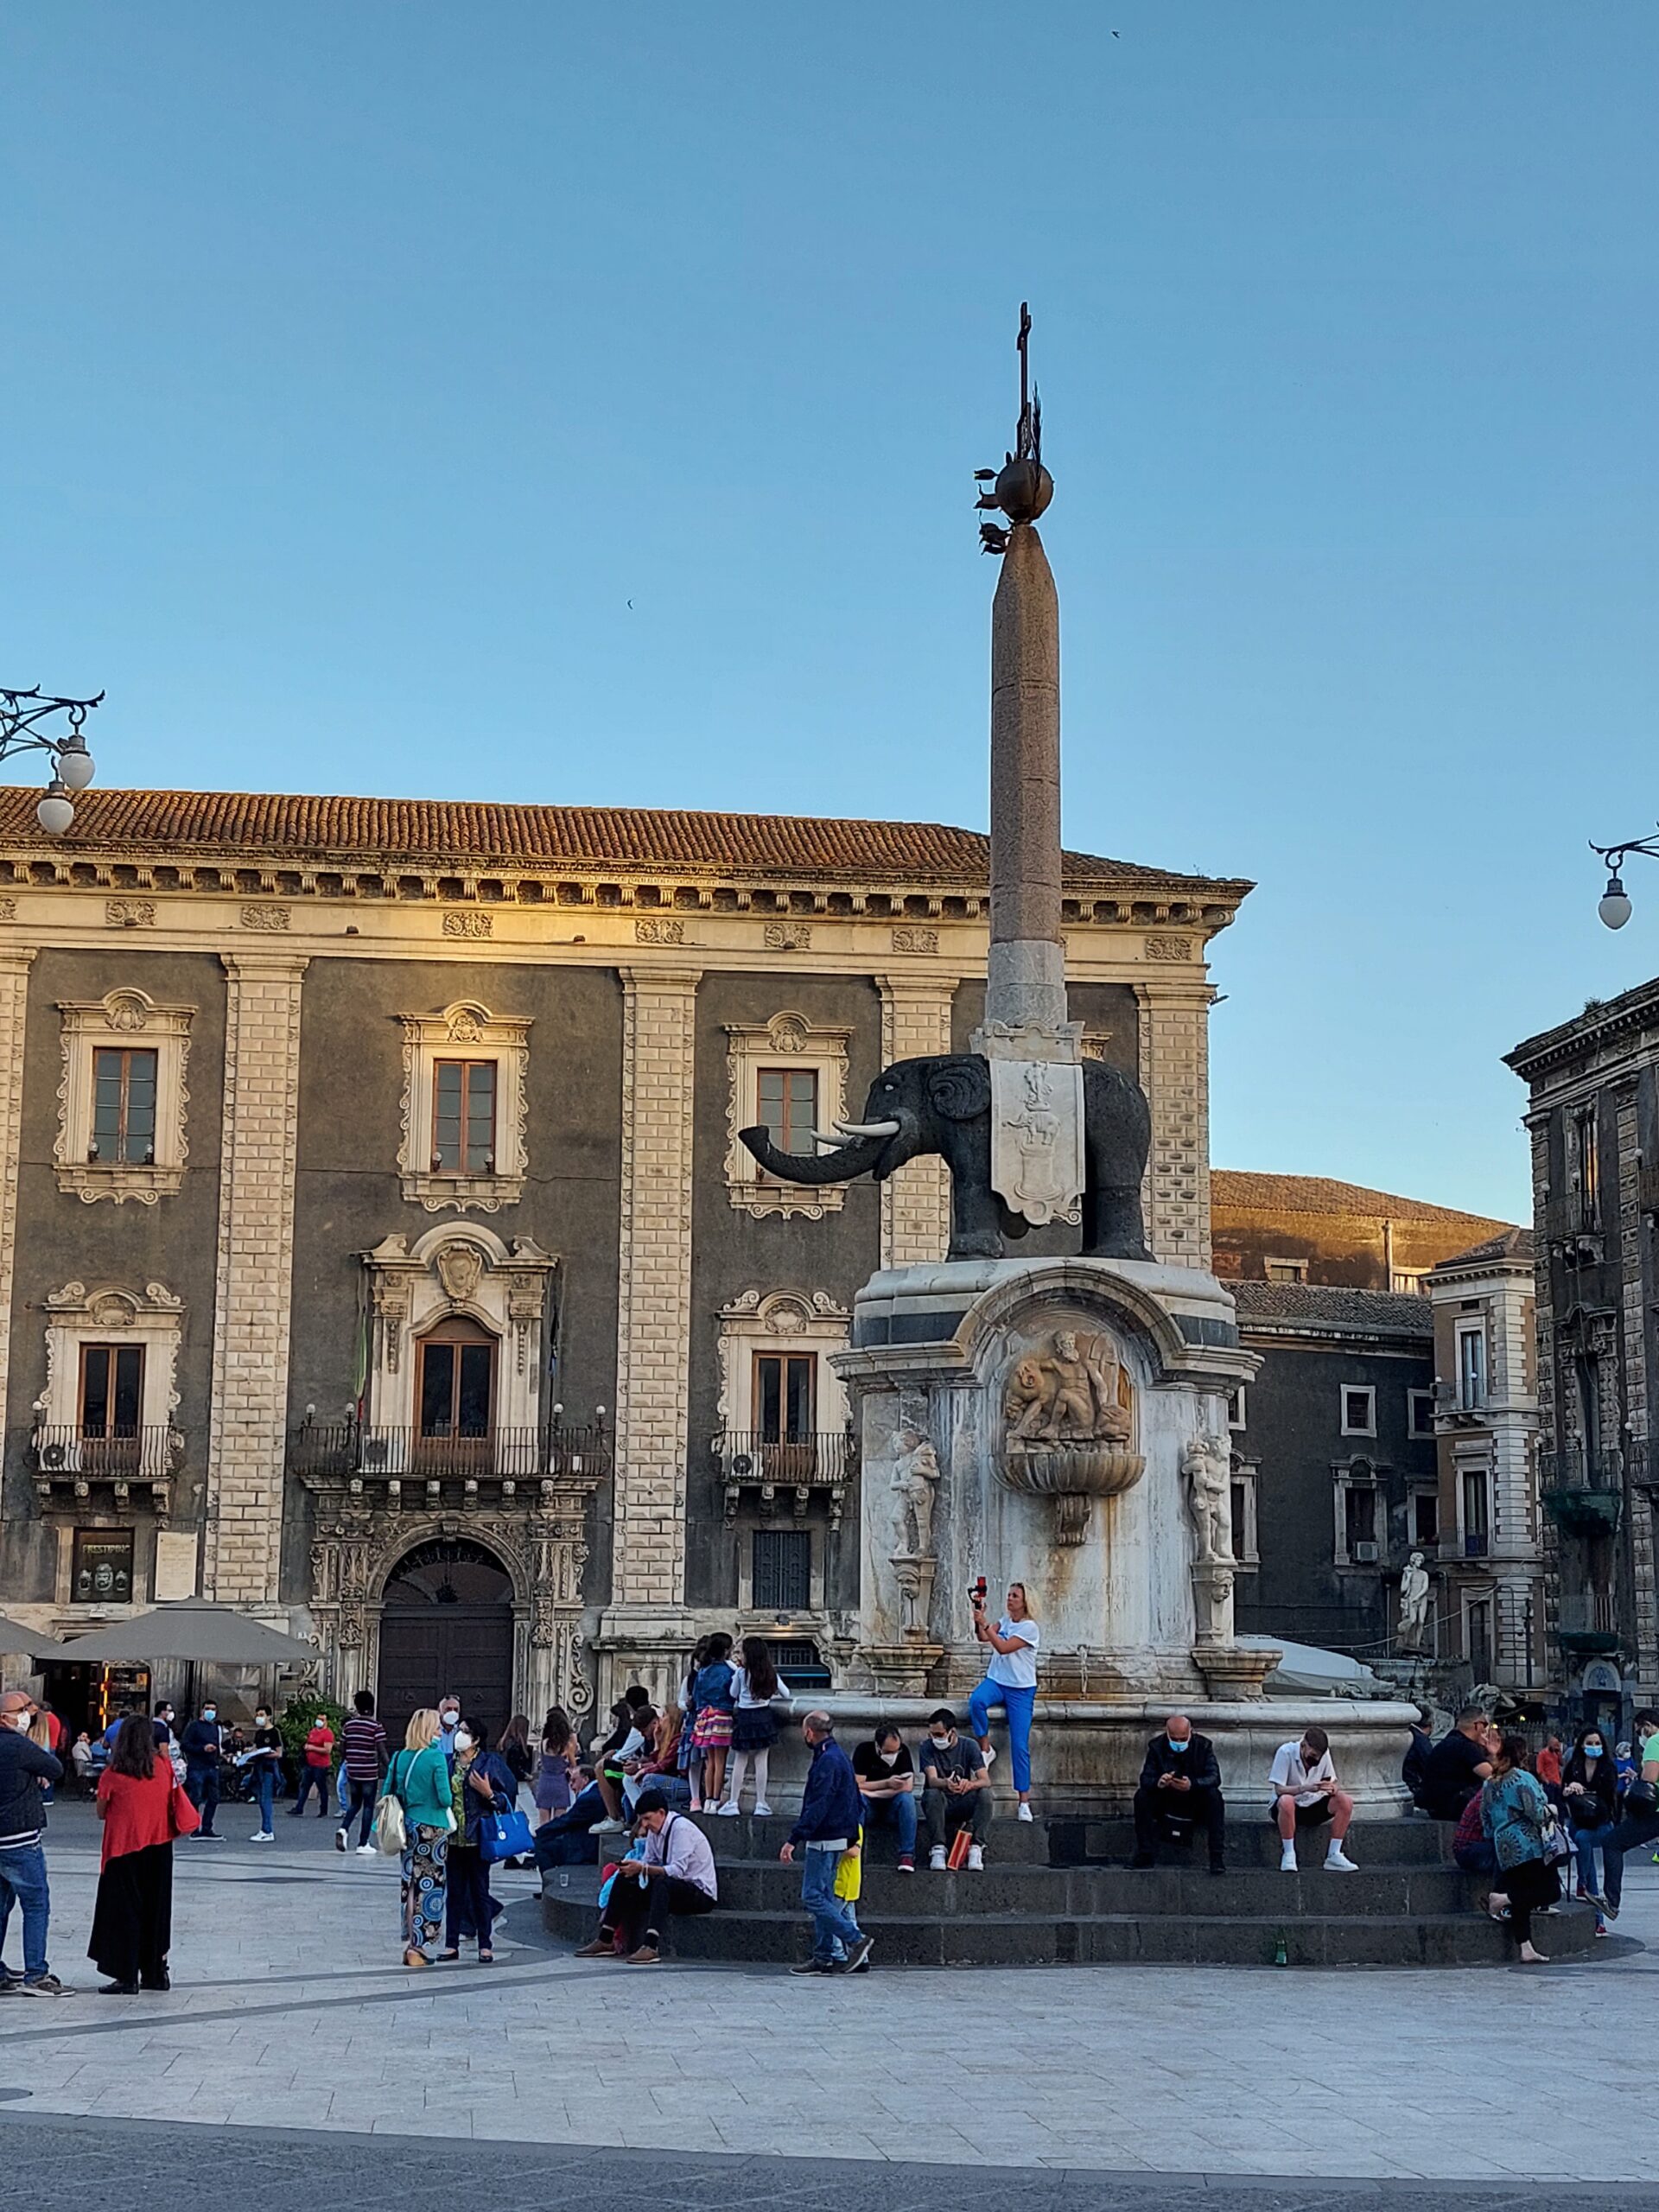
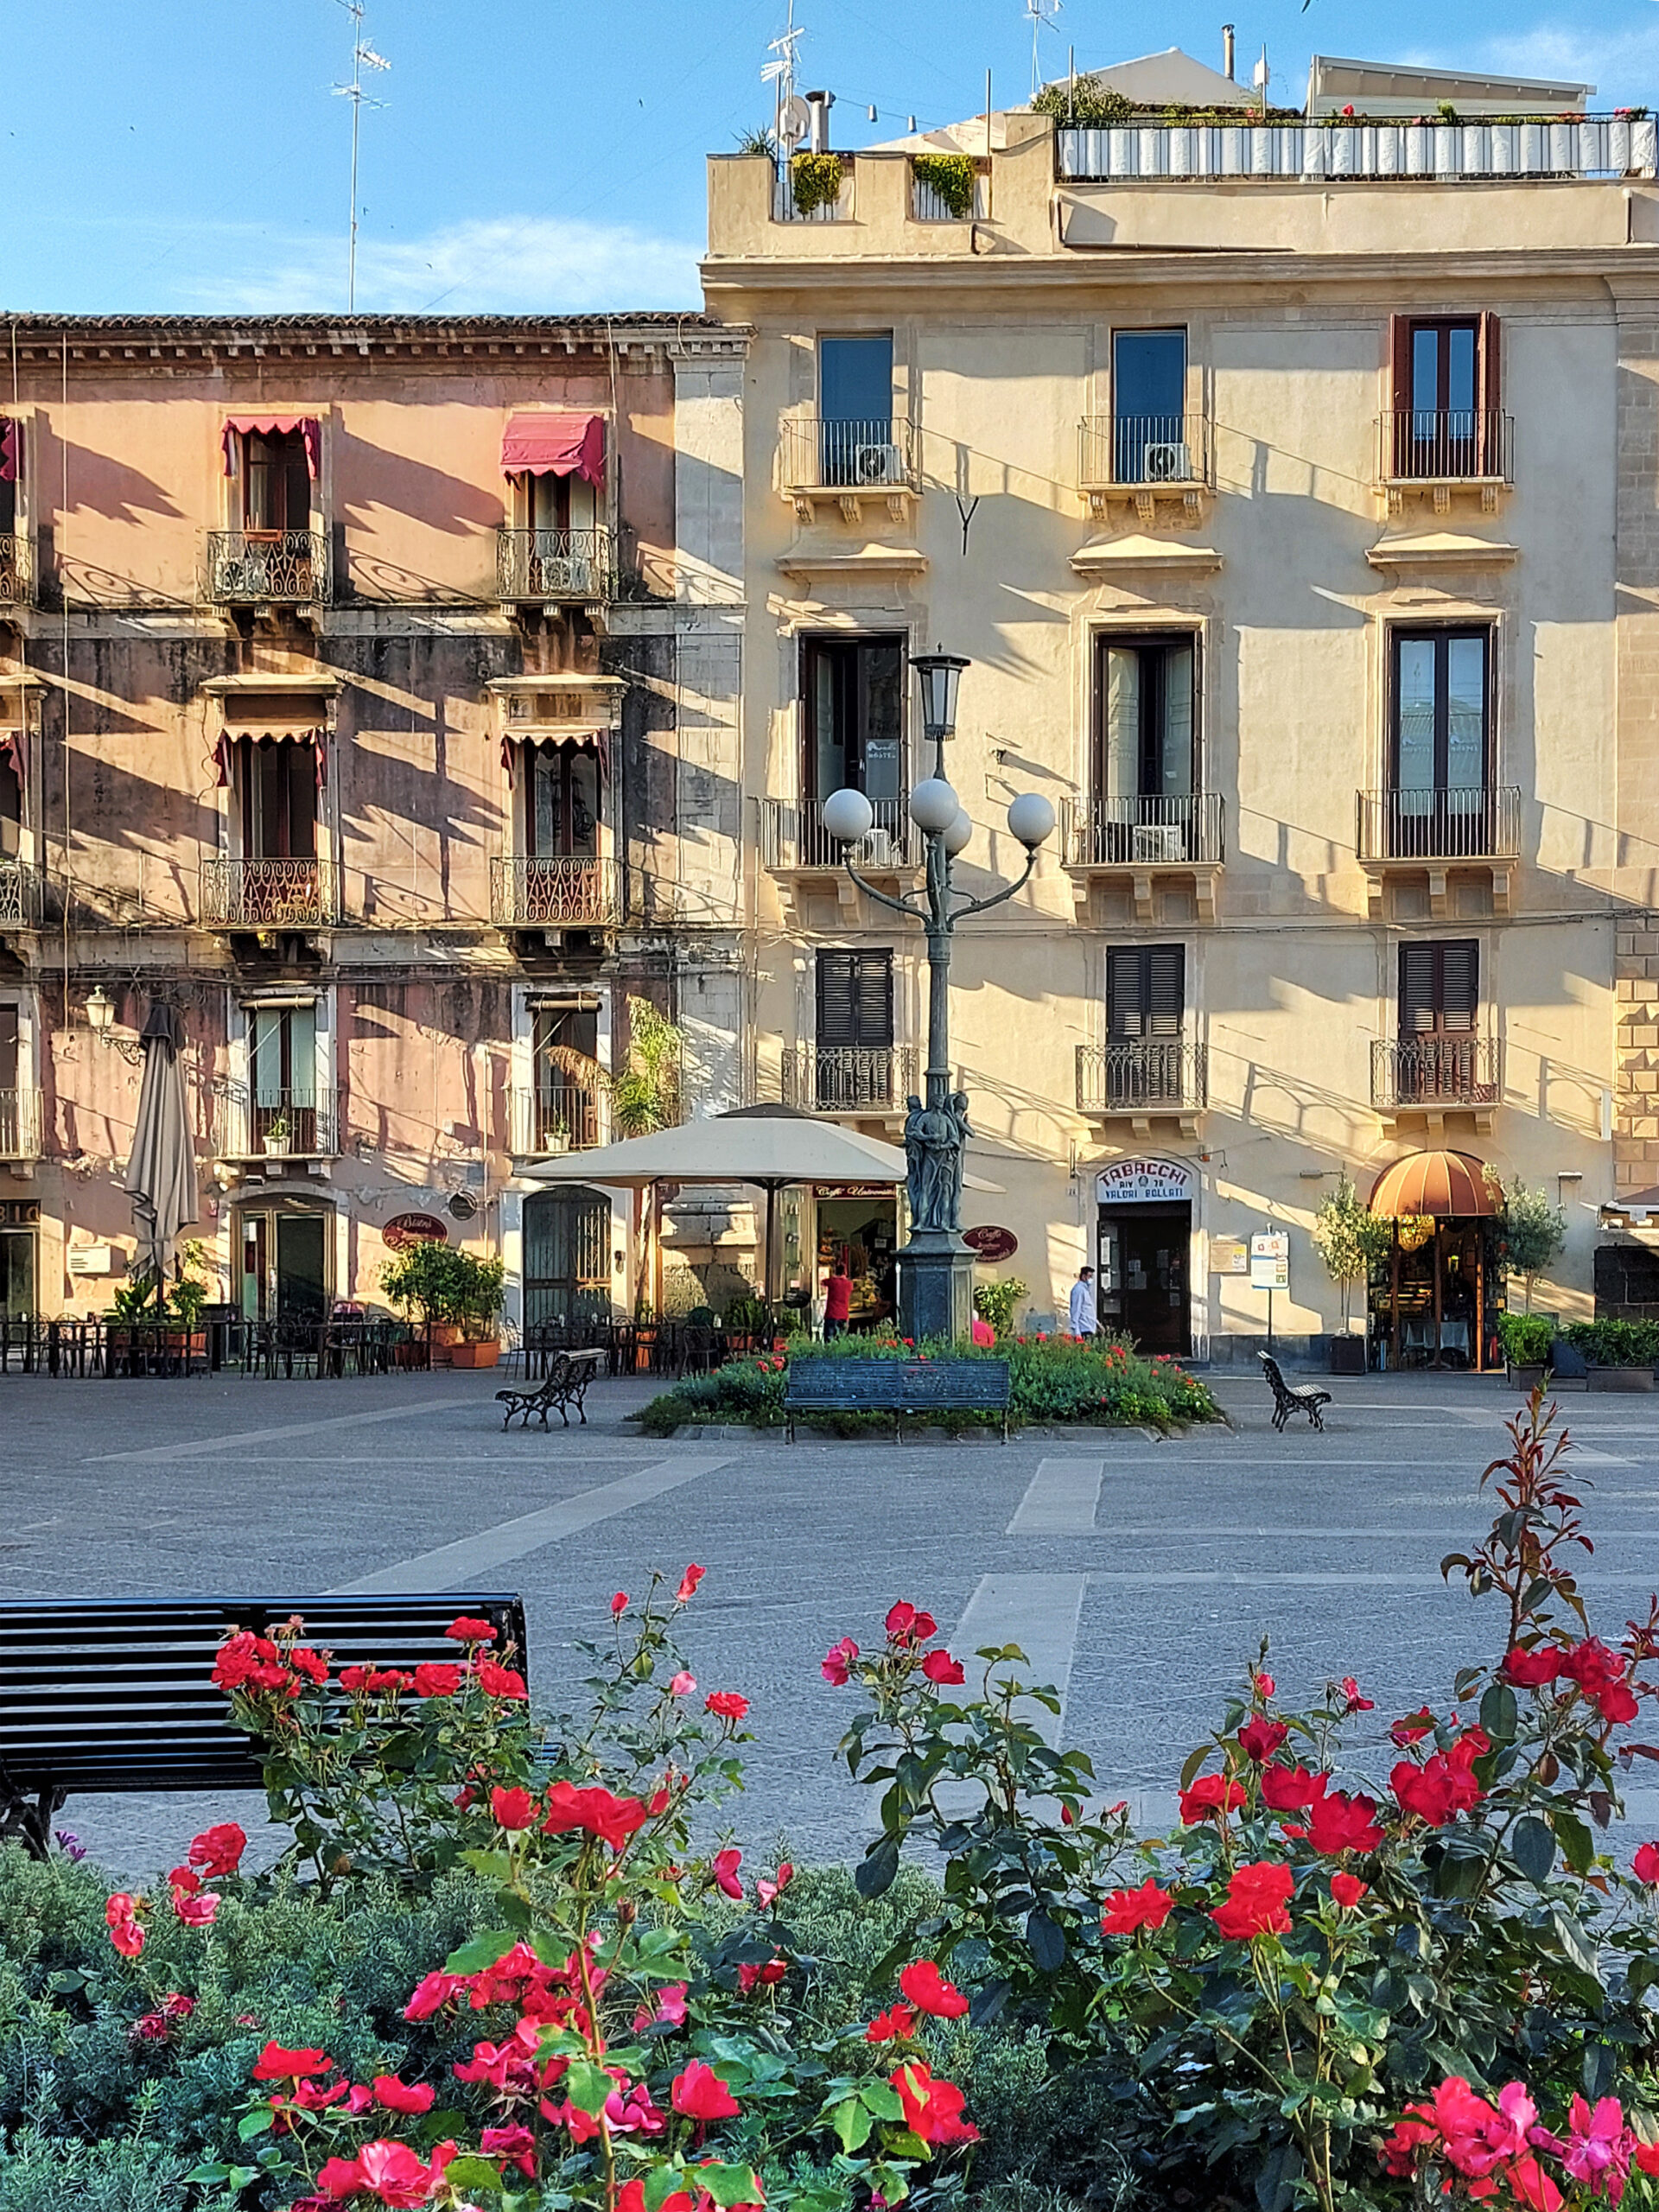
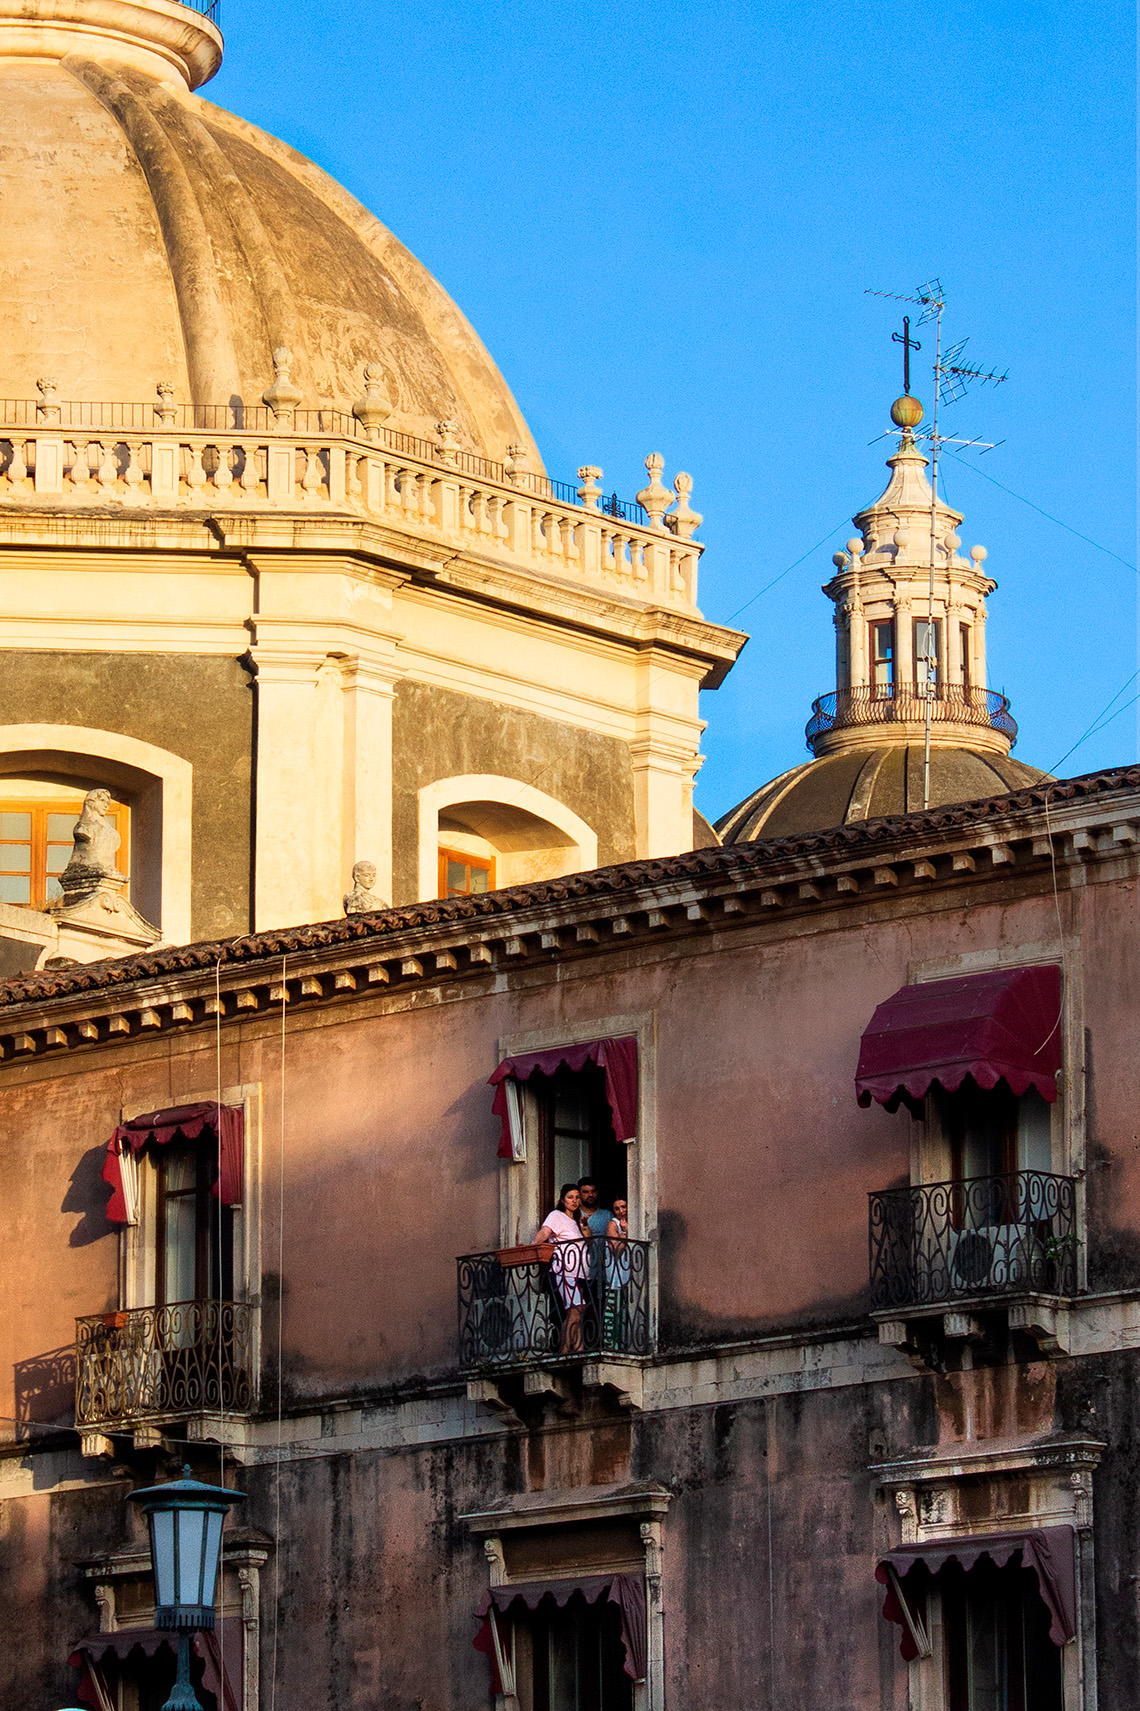
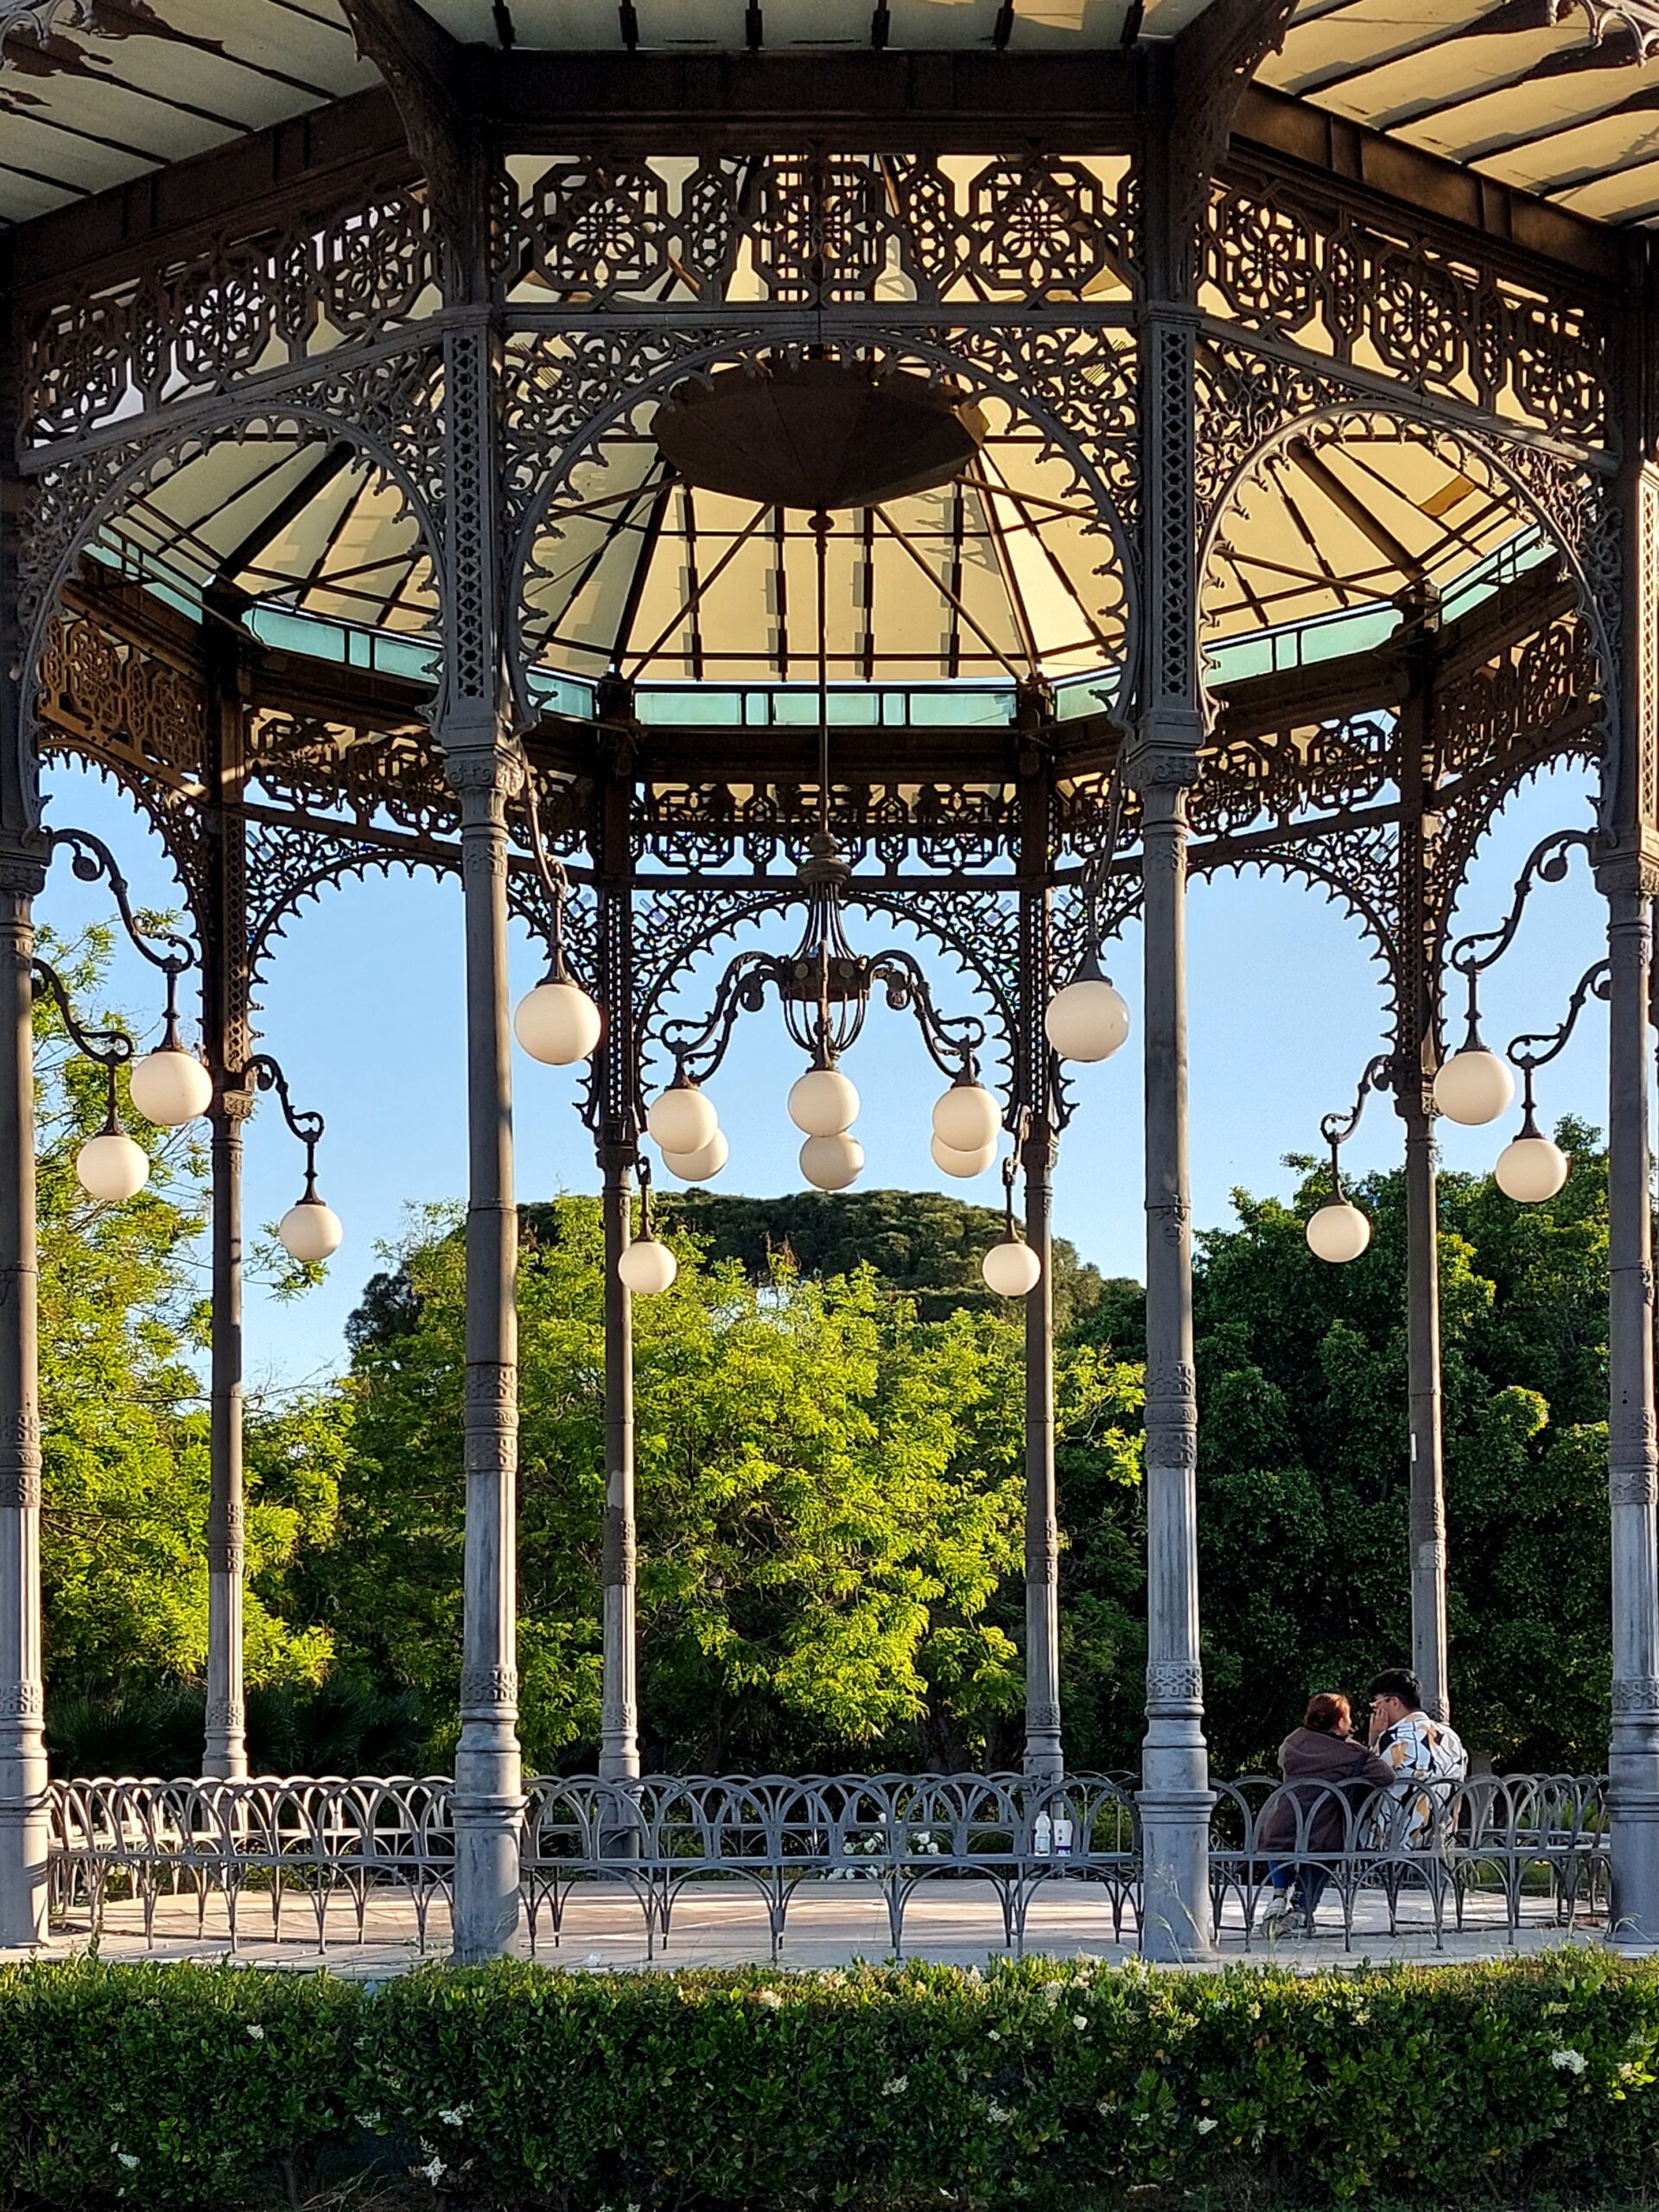
Start from Piazza Duomo: the sun that rises and turns the clouds pink will enrich the frame of the square with the Elephant fountain and the facade of the Sant’Agata Cathedral.
If you are in late spring or summer, go up to the terraces of the Cathedral to admire a wonderful panorama of the city and Mount Etna, if instead you are in a season in which the sun sets before 7 pm, do it at sunset! You can also go back to the square in the afternoon: you will have the facade illuminated by the sun and you will avoid backlighting. In this case you can capture some details of the facade and the fountain, playing with lights and shadows. If you have a strong excursion between shaded and lighted areas, to obtain shot with balanced exposure, use automatic HDR with the smartphone, and bracketing method or a graduated filter with the camera(know more about it in this article).
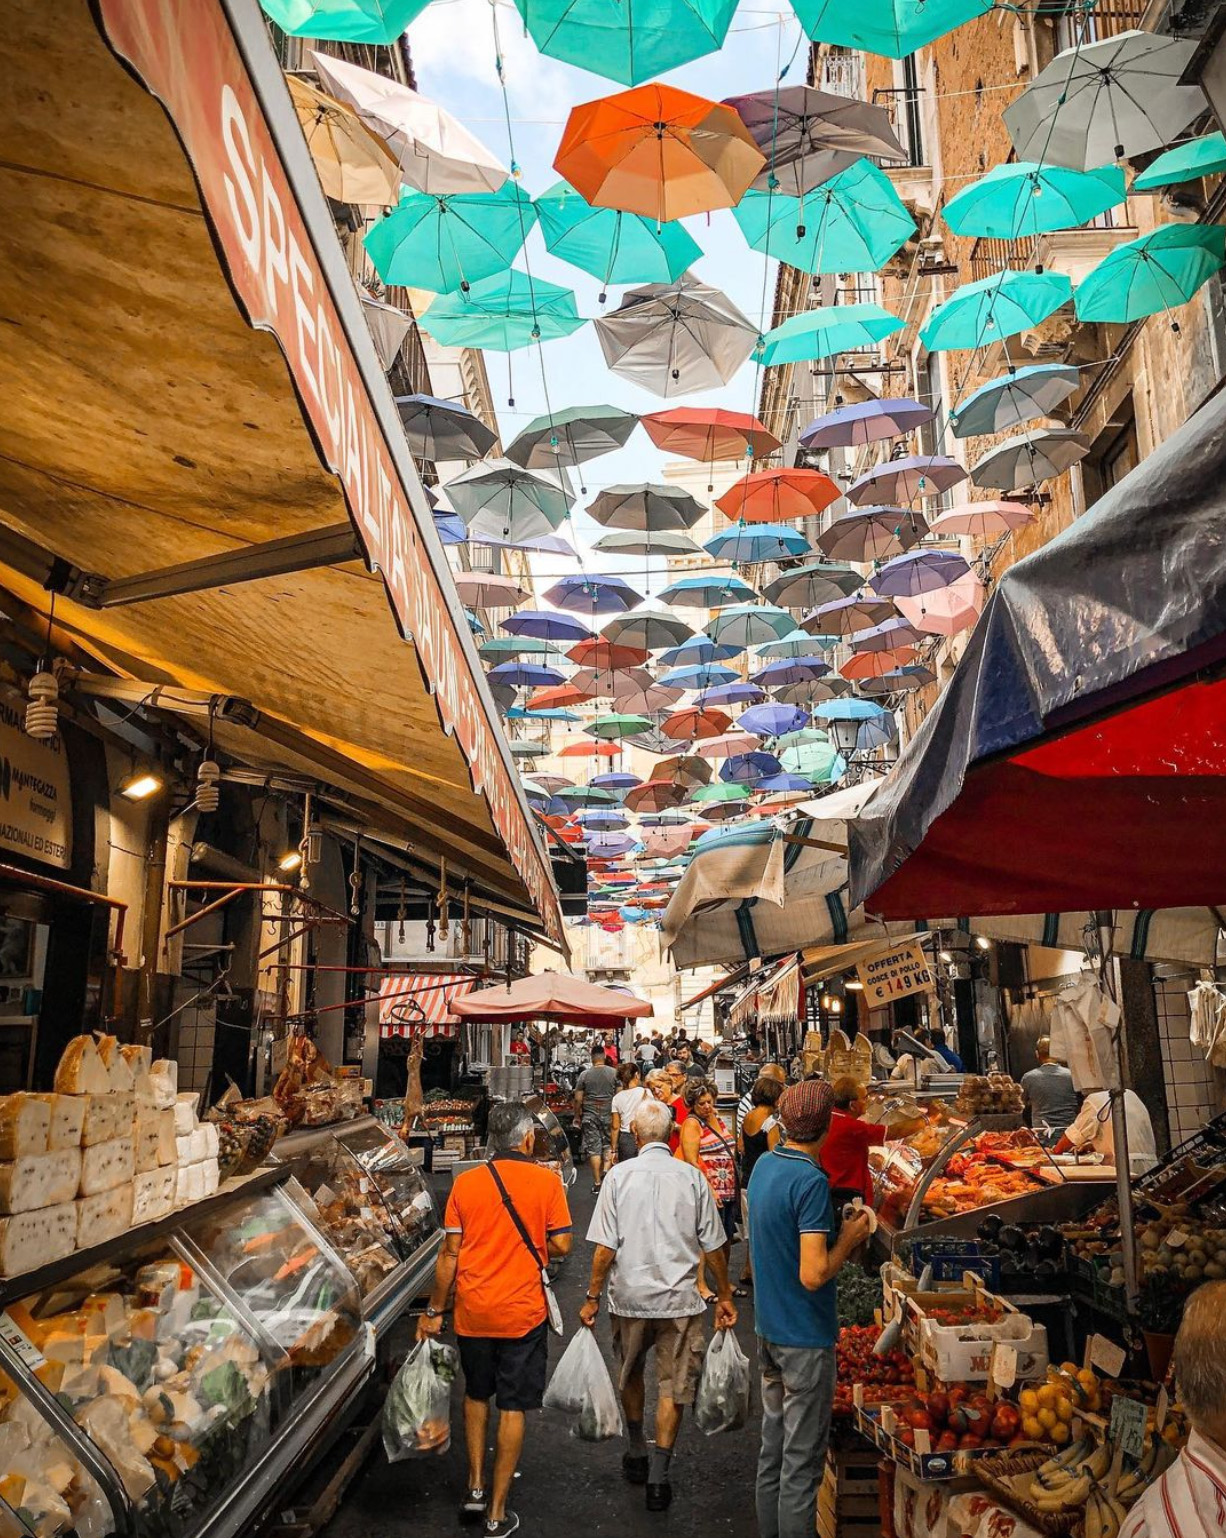
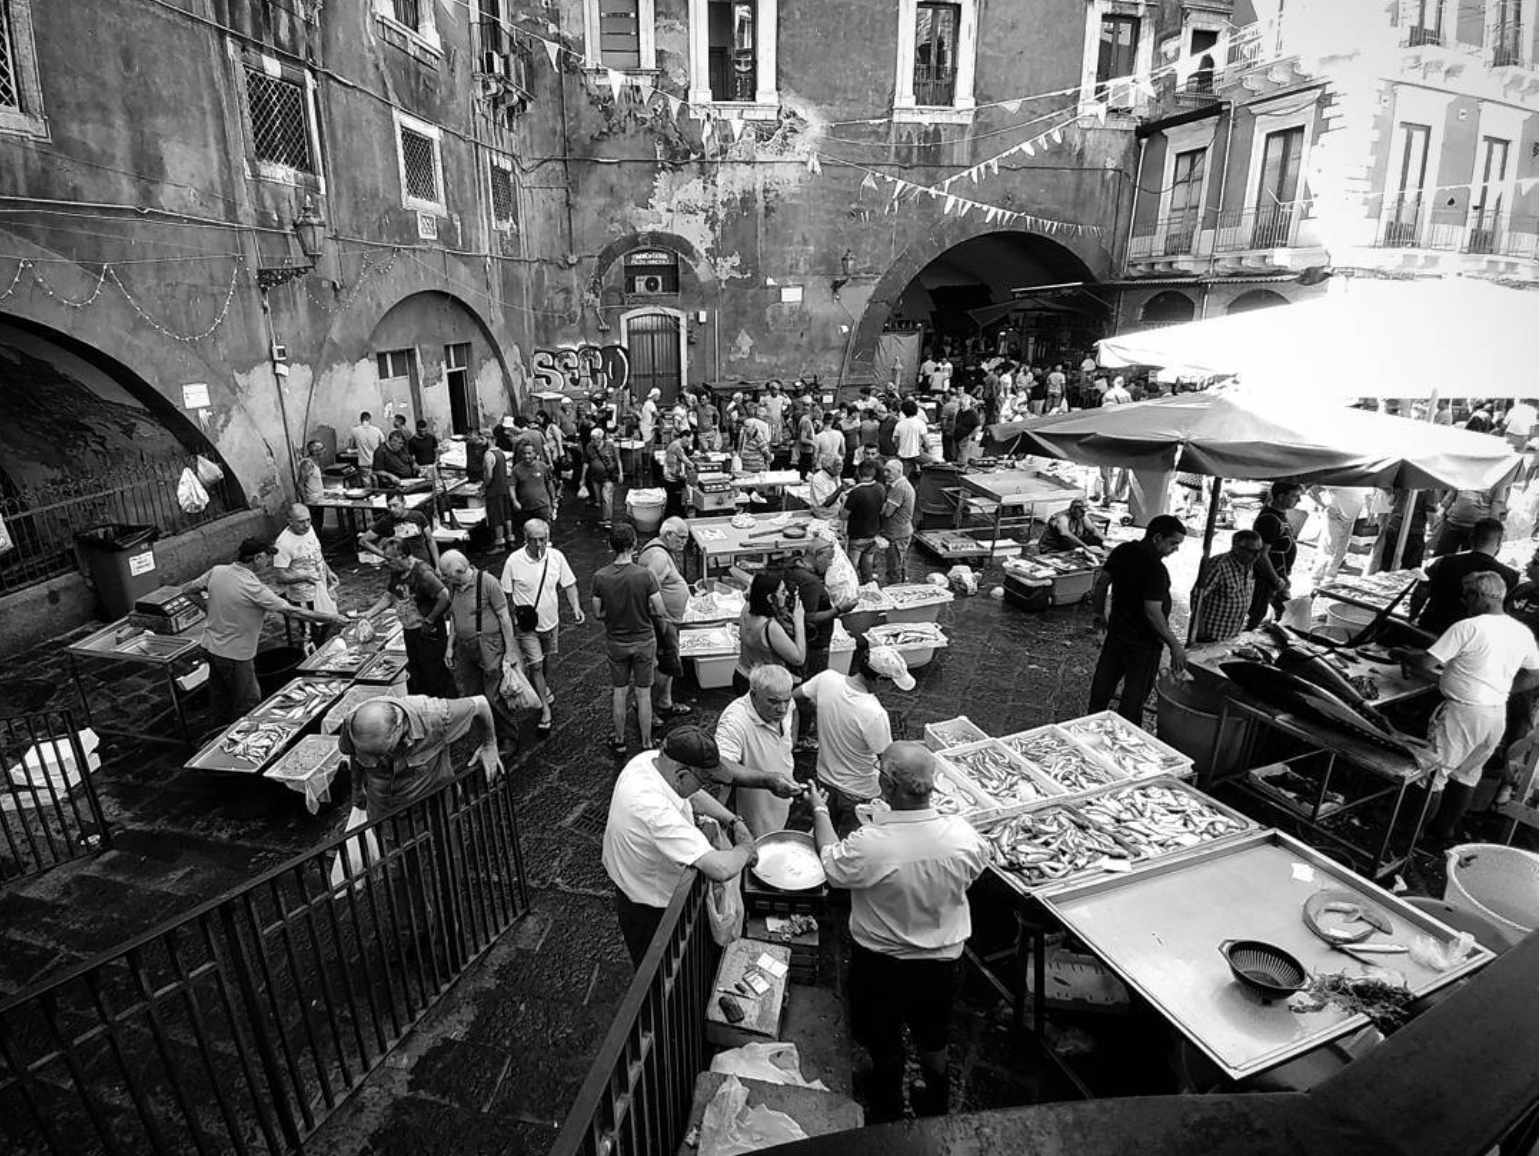
From here, enter Piazza Di Benedetto along the wonderful Amenano fountain. Here, every morning there is ‘A Piscaria, the characteristic fish market. In the early morning the fishermen begin to set up the benches and you can experience the moment that precedes the large crowd of people who will soon arrive. Lose yourself in the near streets, where very colorful fruit and vegetable stalls and butchers counters are set up. Not to be missed via Gisira, covered by a roof of umbrellas and colorful pinwheels.
Capture the gestures of the fishermen and the colorful fish shoals in contrast with the dark facades of the buildings. Focus on the details. Use fast shutter speeds to freeze momentum or long shutter speeds to represent the movement of traders. In this case, use a tripod to make sure that the static elements remain motionless in the photo. Be careful respectively not to underexpose or overexpose too much. Stop to talk to the locals: listening to their stories can give rise to useful suggestions to capture in your photos.
@giadaantonini_photography
@giadaantonini_photography
@1300_chicche_ditalia
@peppeastonebnw
Morning: Via Etnea, Via Del Teatro Massimo and Villa Bellini
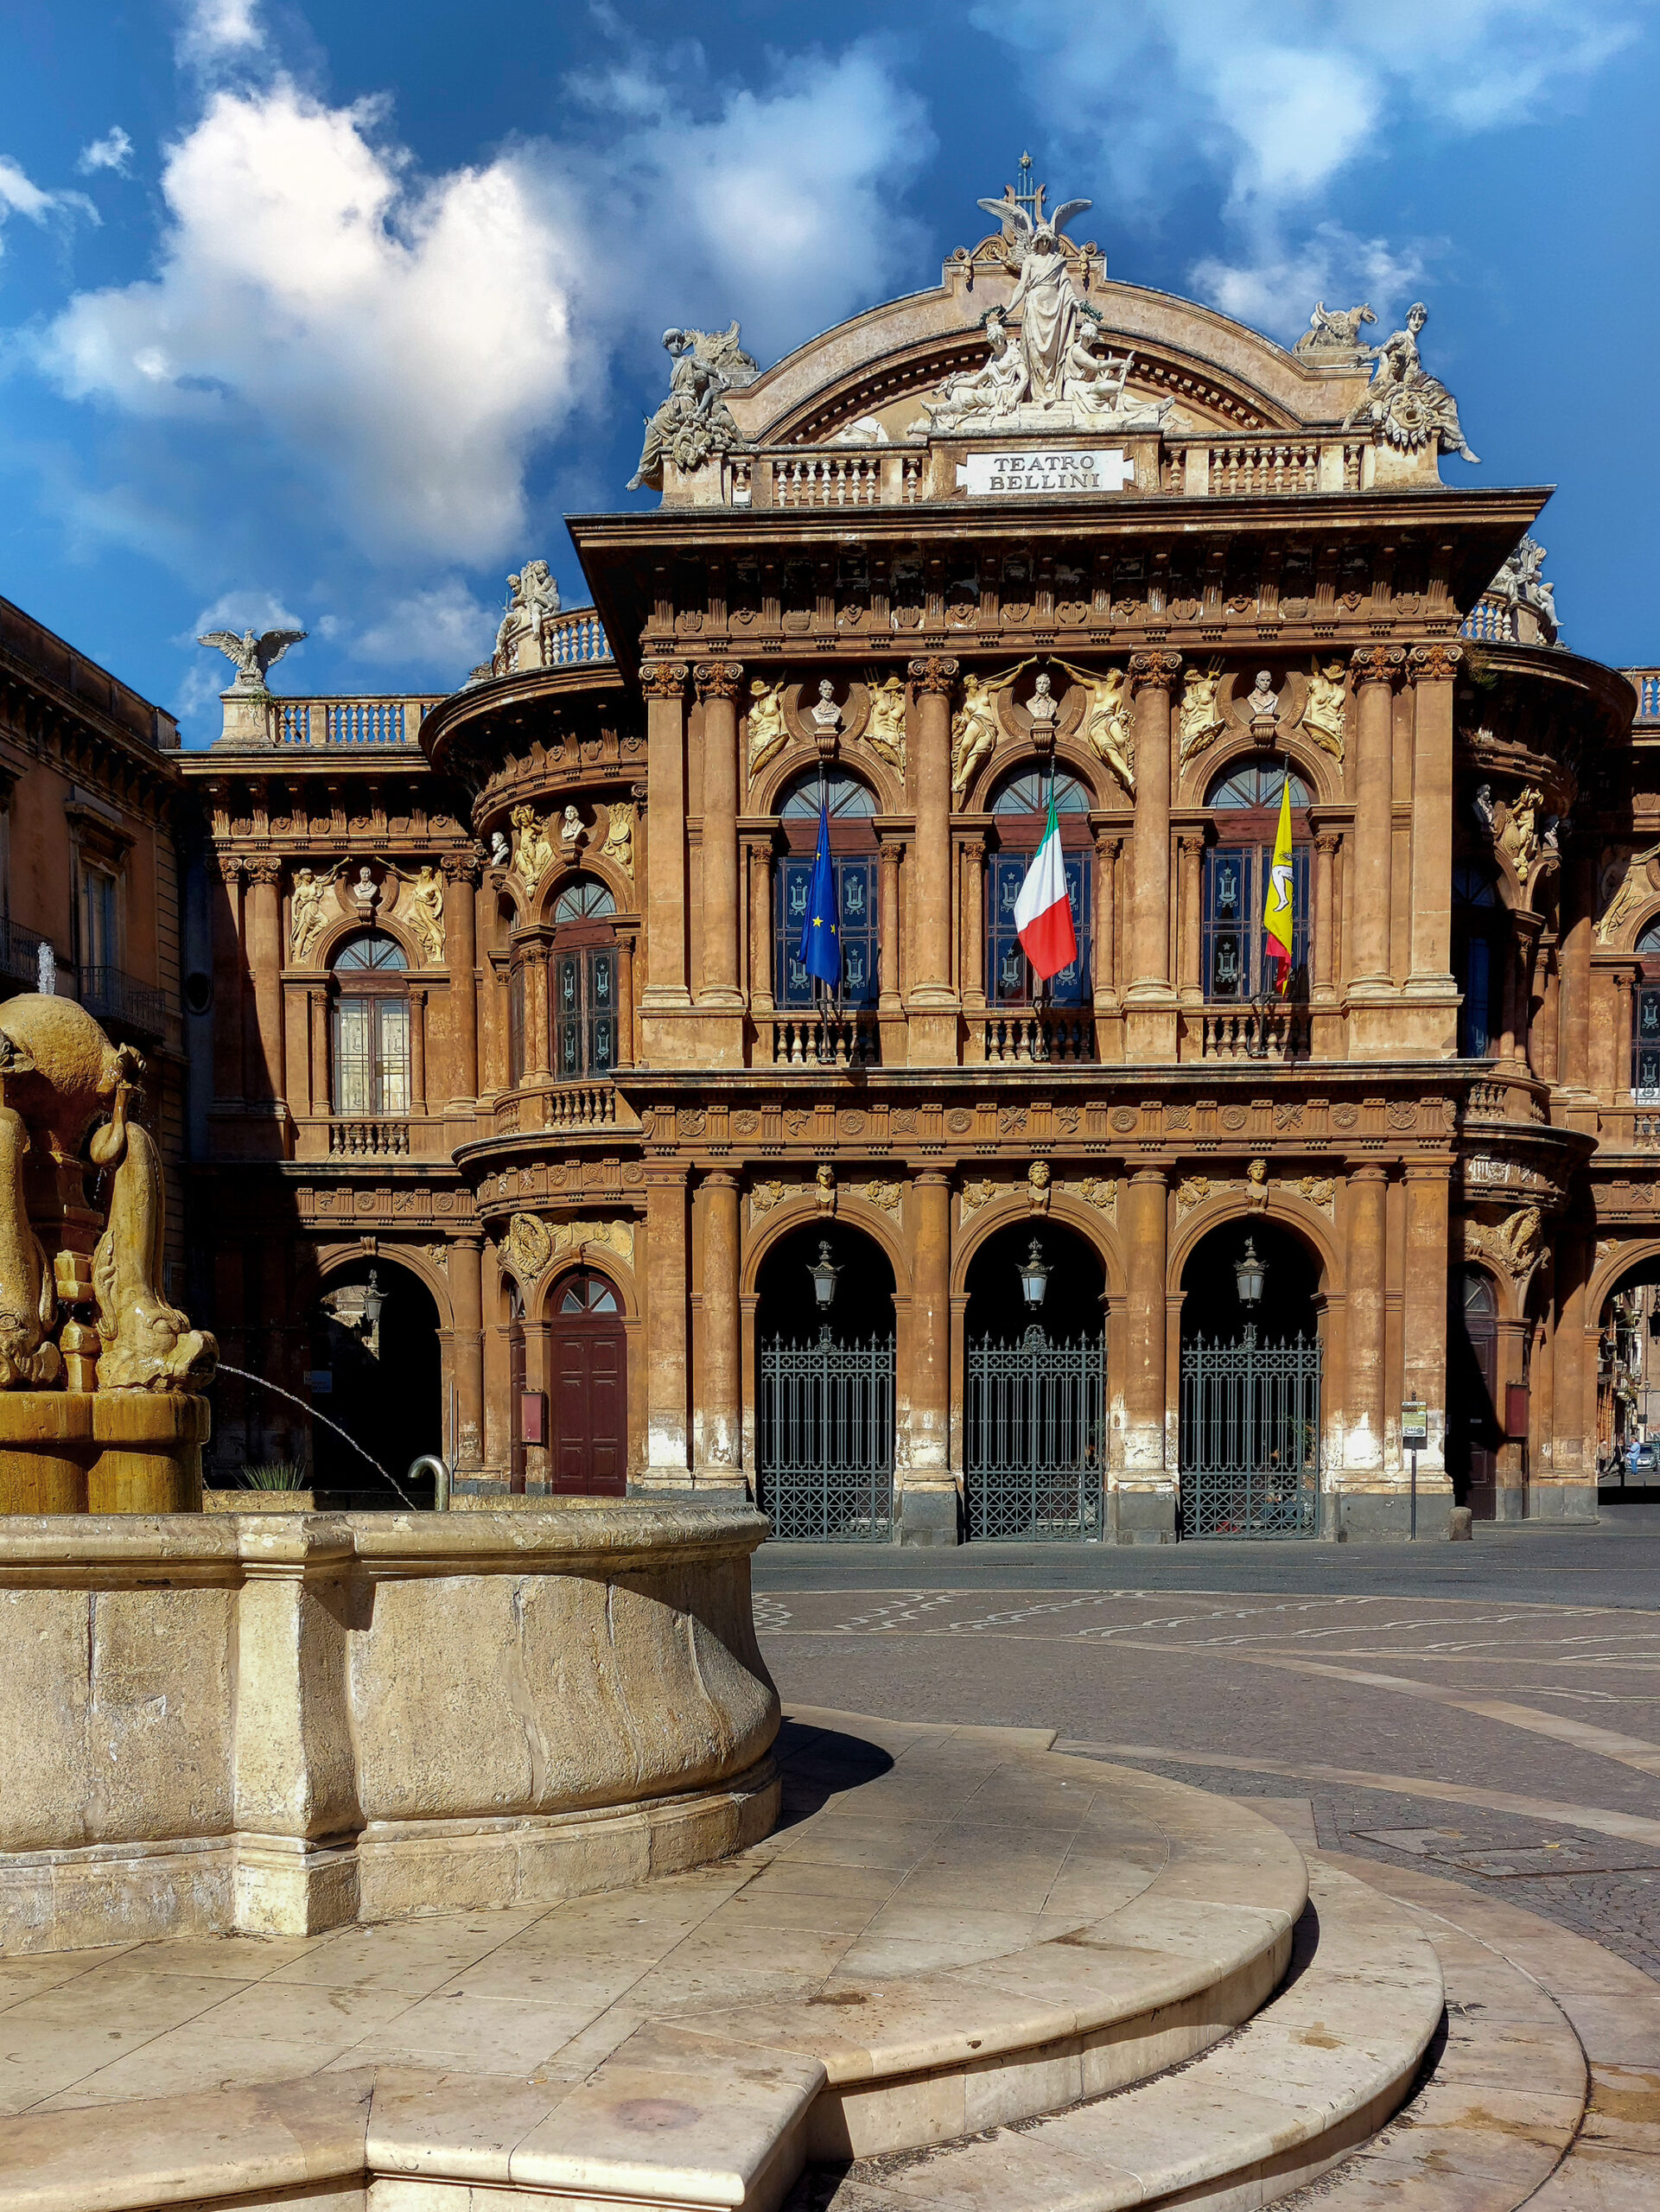
Along via Etnea, stop in Piazza dell’Università and take a detour to admire the splendid facade of the Teatro Massimo Bellini and stroll along the street of the same name. Also from via Etnea, reach Piazza Stesicoro, with the remains of the Roman amphitheater and San BiagioCathedral.
In the morning, you will be able to capture all the monuments and main buildings well-lit without running into backlit photos. Remember, in your photos, to respect the verticality of the lines, helping you with the grid. If you want to know more take a look at this article.
Finally, enjoy the elegant park of Villa Bellini, where you can rest for a bit.
@giadaantonini_photography
@giadaantonini_photography
@giadaantonini_photography
@giadaantonini_photography
Central hours and afternoon: panoramic view and ancient buildings.
The sun high in the sky will better illuminate the spaces and allow you to have a good view of the landscape.
Start right from the city view from the Gronda walkway of the Church of San Nicolò l’Arena, the largest church in Sicily. The entire Benedictine monastery, of which it belongs, deserves a short visit of its beautiful cloisters.
Continue towards the Ancient Greek-Roman Theater, now incorporated within the truly evocative district.
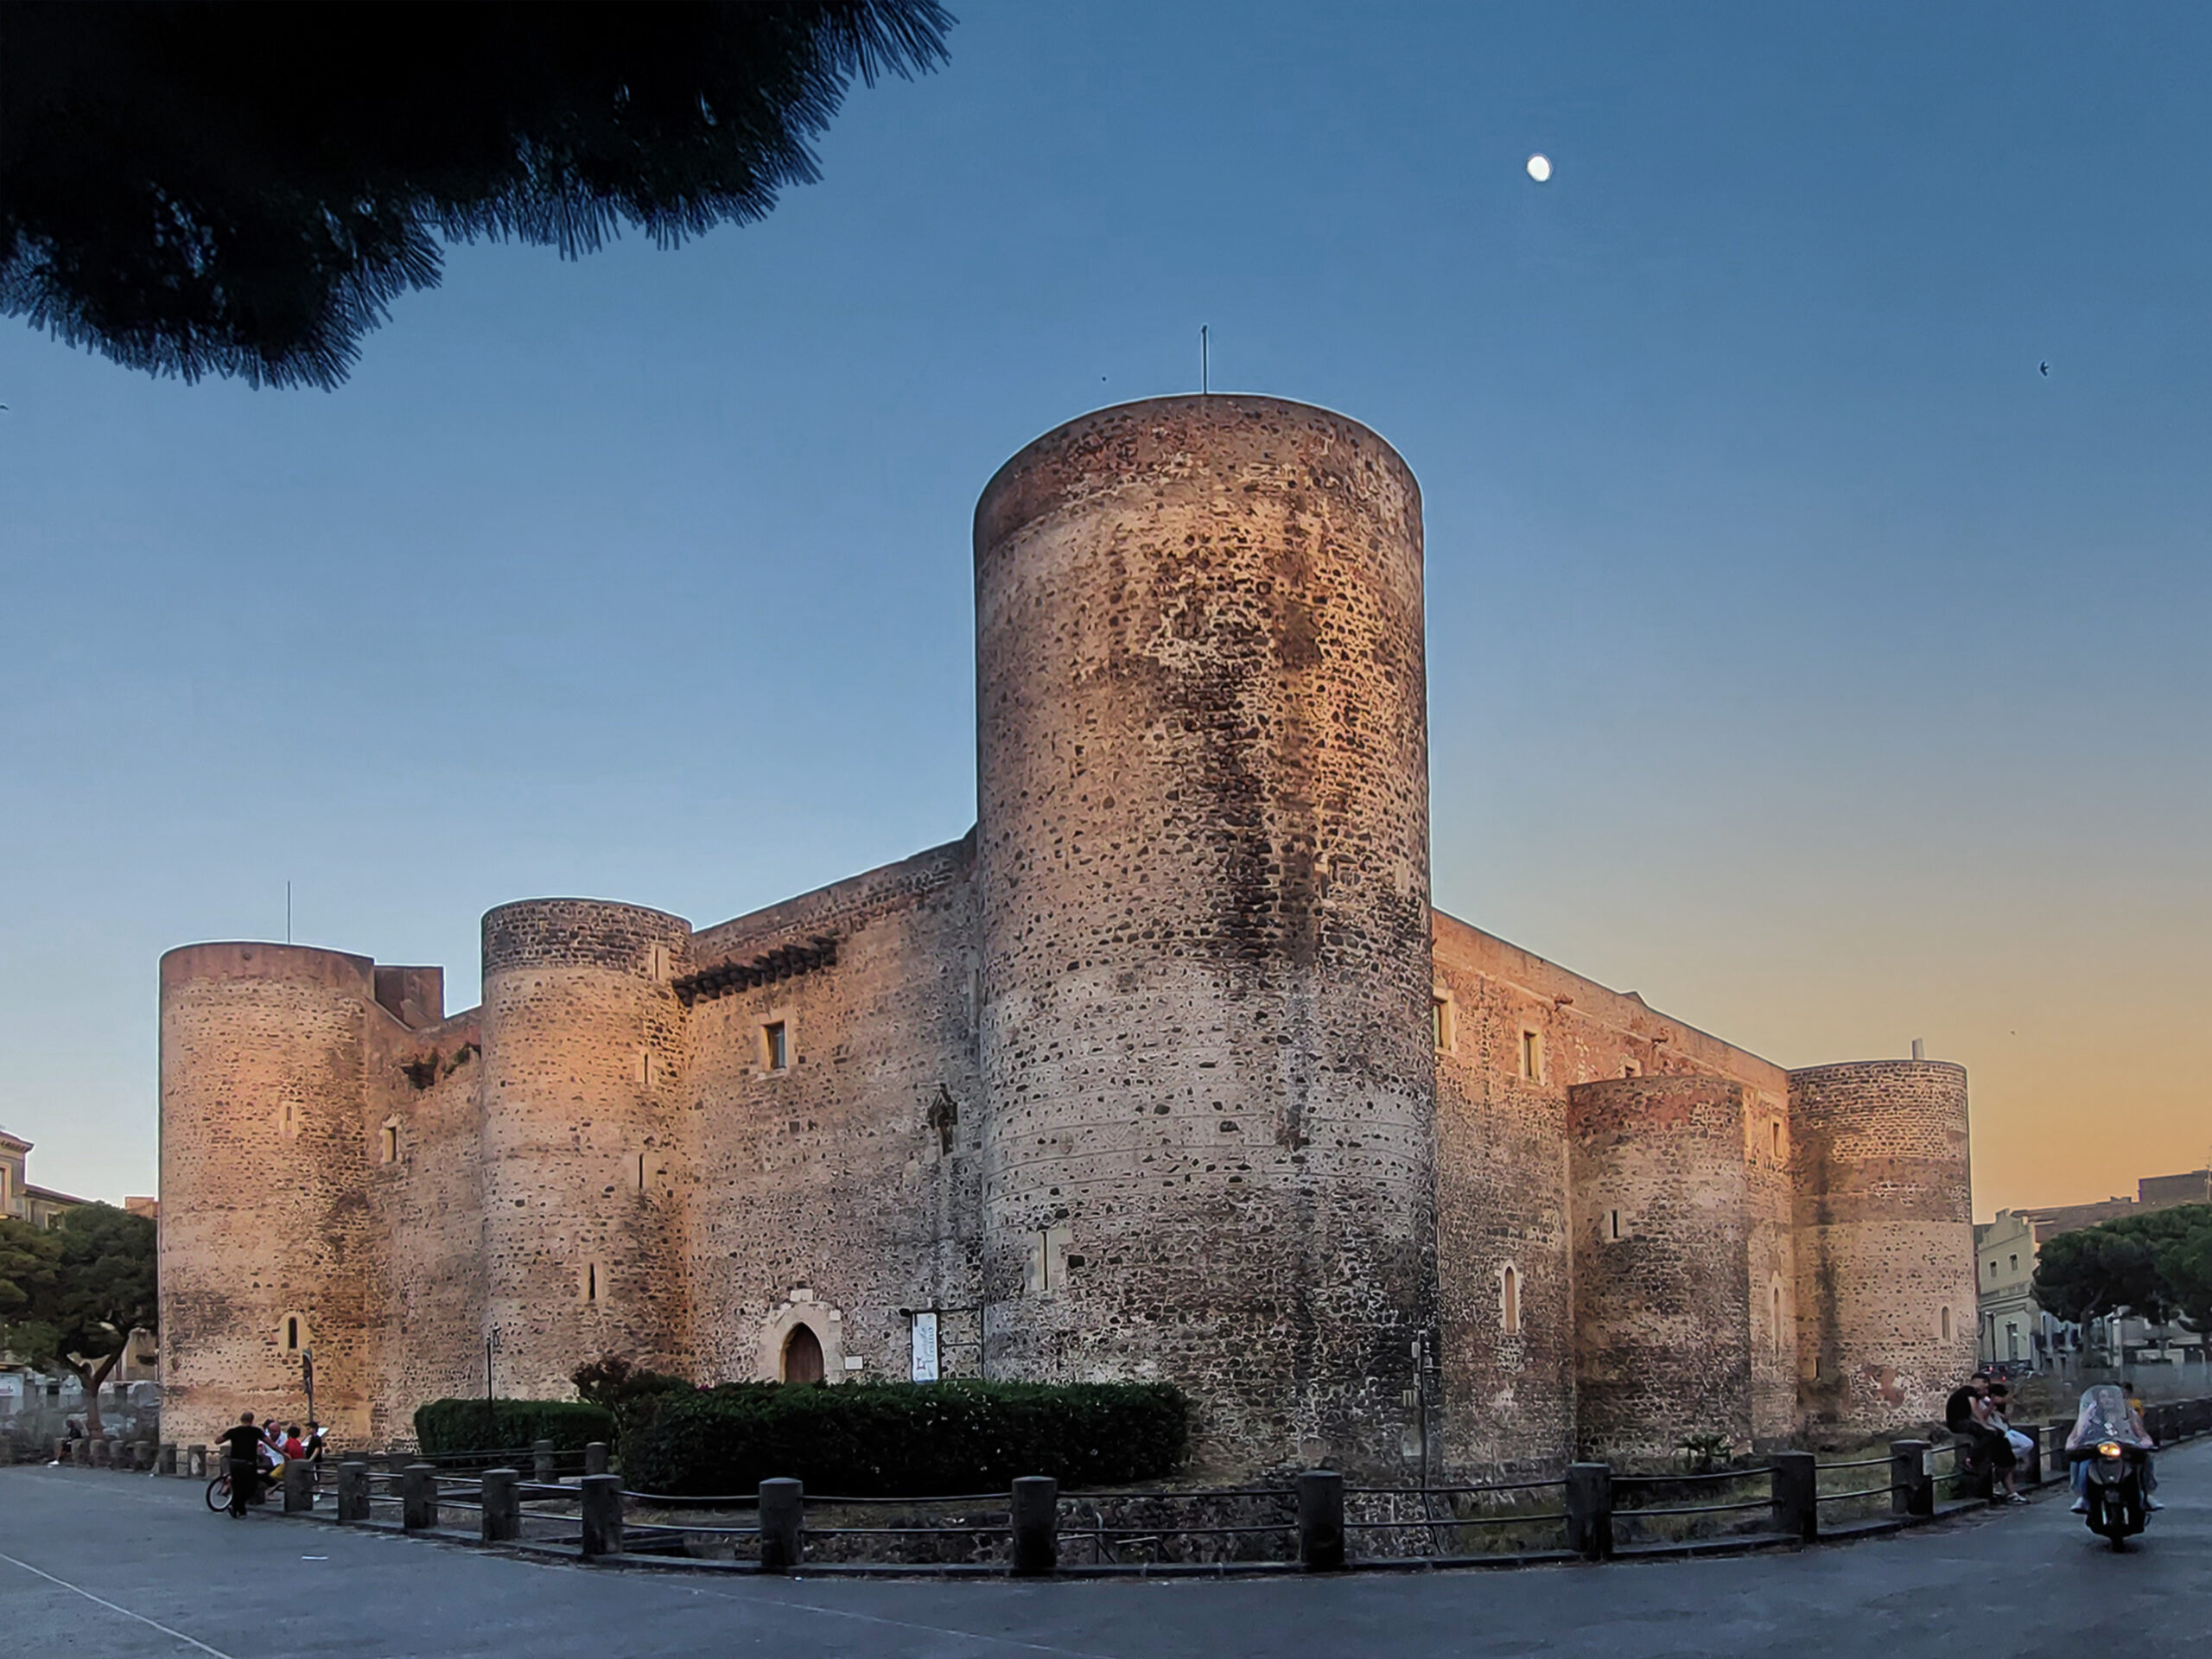
Last stop the Ursino Castle, in the heart of the city.
The best point from which to capture it is probably, facing the facade, from the right side of the square. In the afternoon the sun will illuminate this part and will enhance the three circular towers on the main front.
@giadaantonini_photography
Sunset and evening: panoramic view and market area
In the evening, go back to the market area which is completely transformed with lights, music, clubs and restaurants.
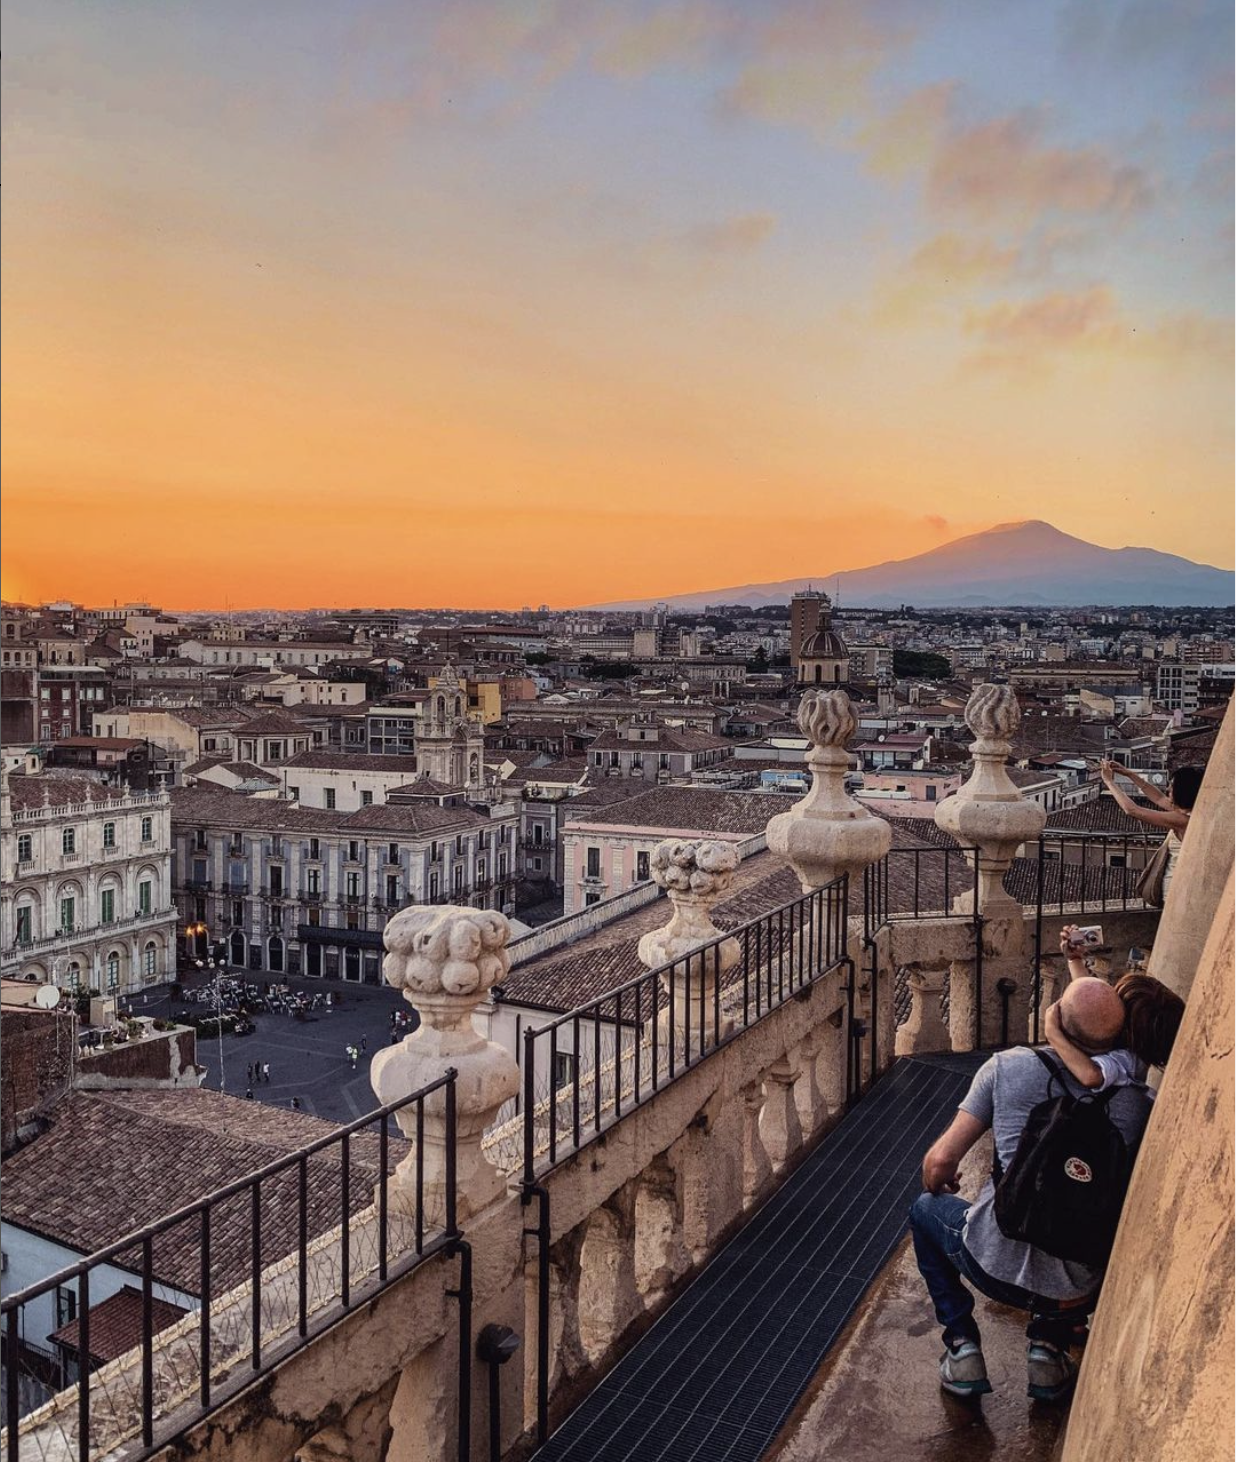
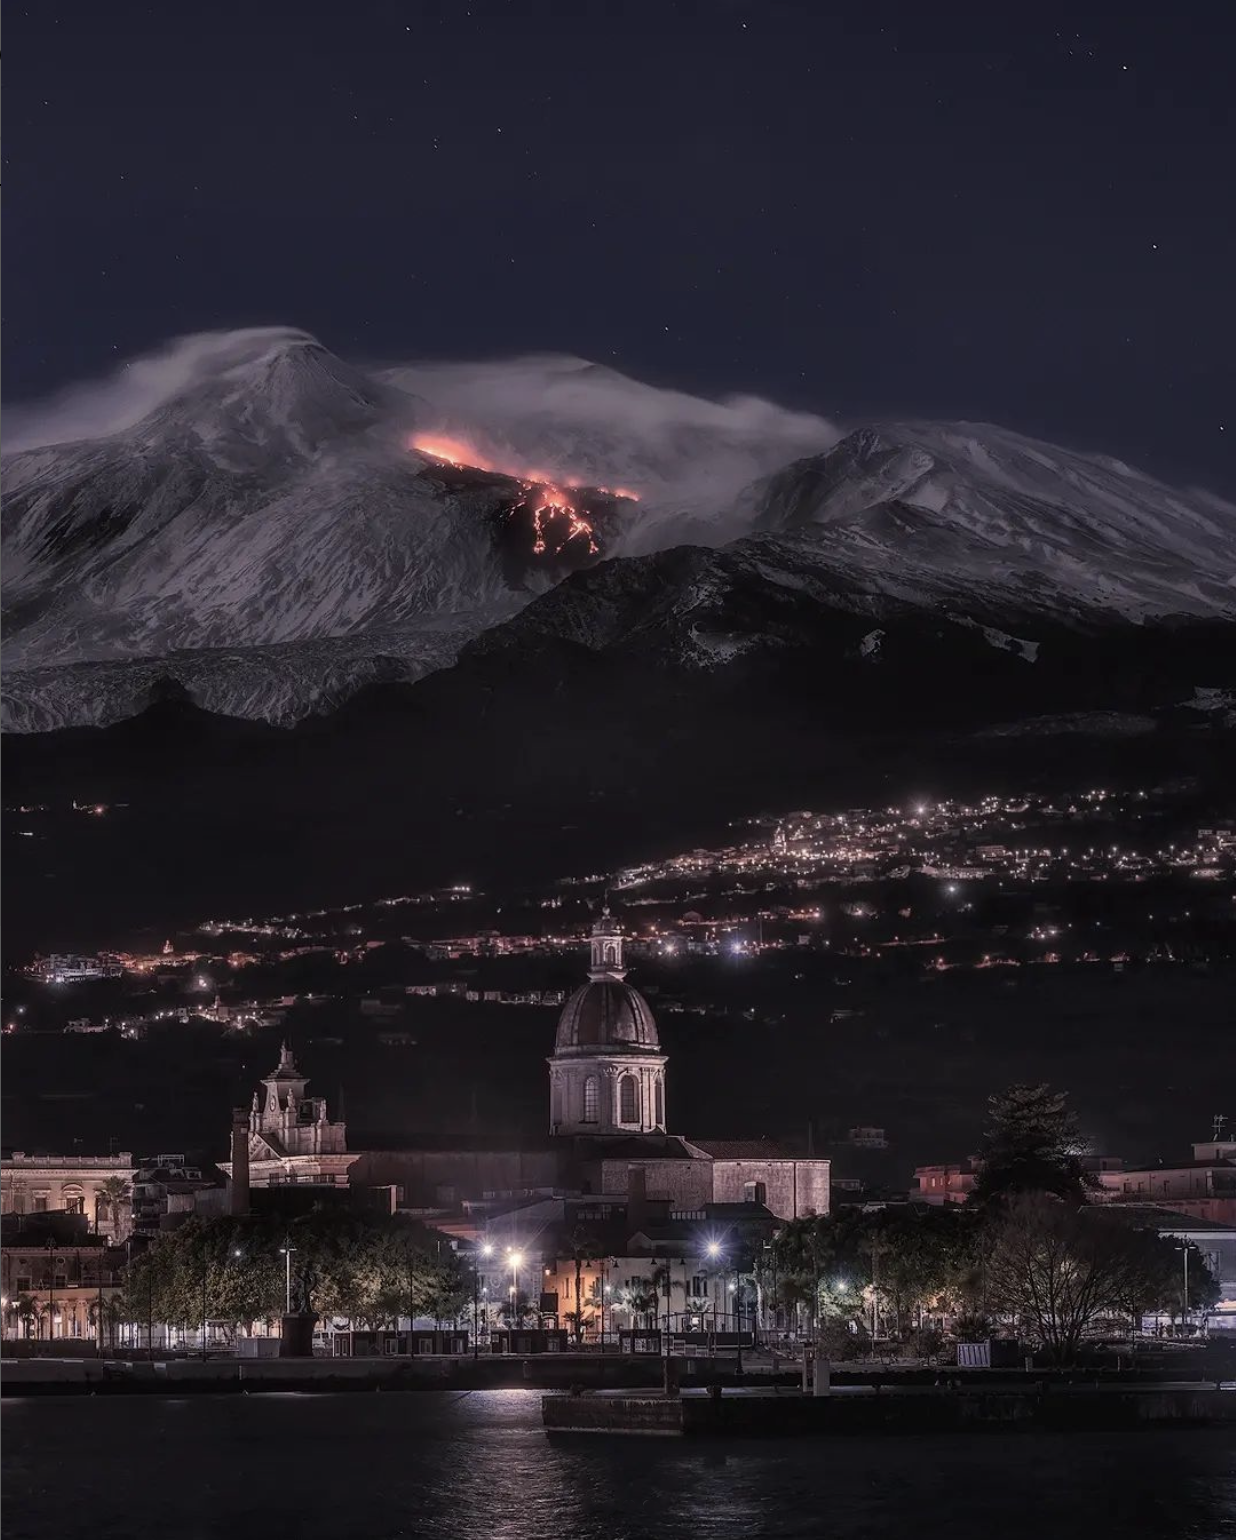
If you are in a season in which the sun sets before the Cathedral closes at 7 pm, go back to Piazza del Duomo and go up to the terraces to photograph the sunset with the magnificent panorama over the city and Mount Etna, even more spectacular when the volcano is erupting.
@goingmattos
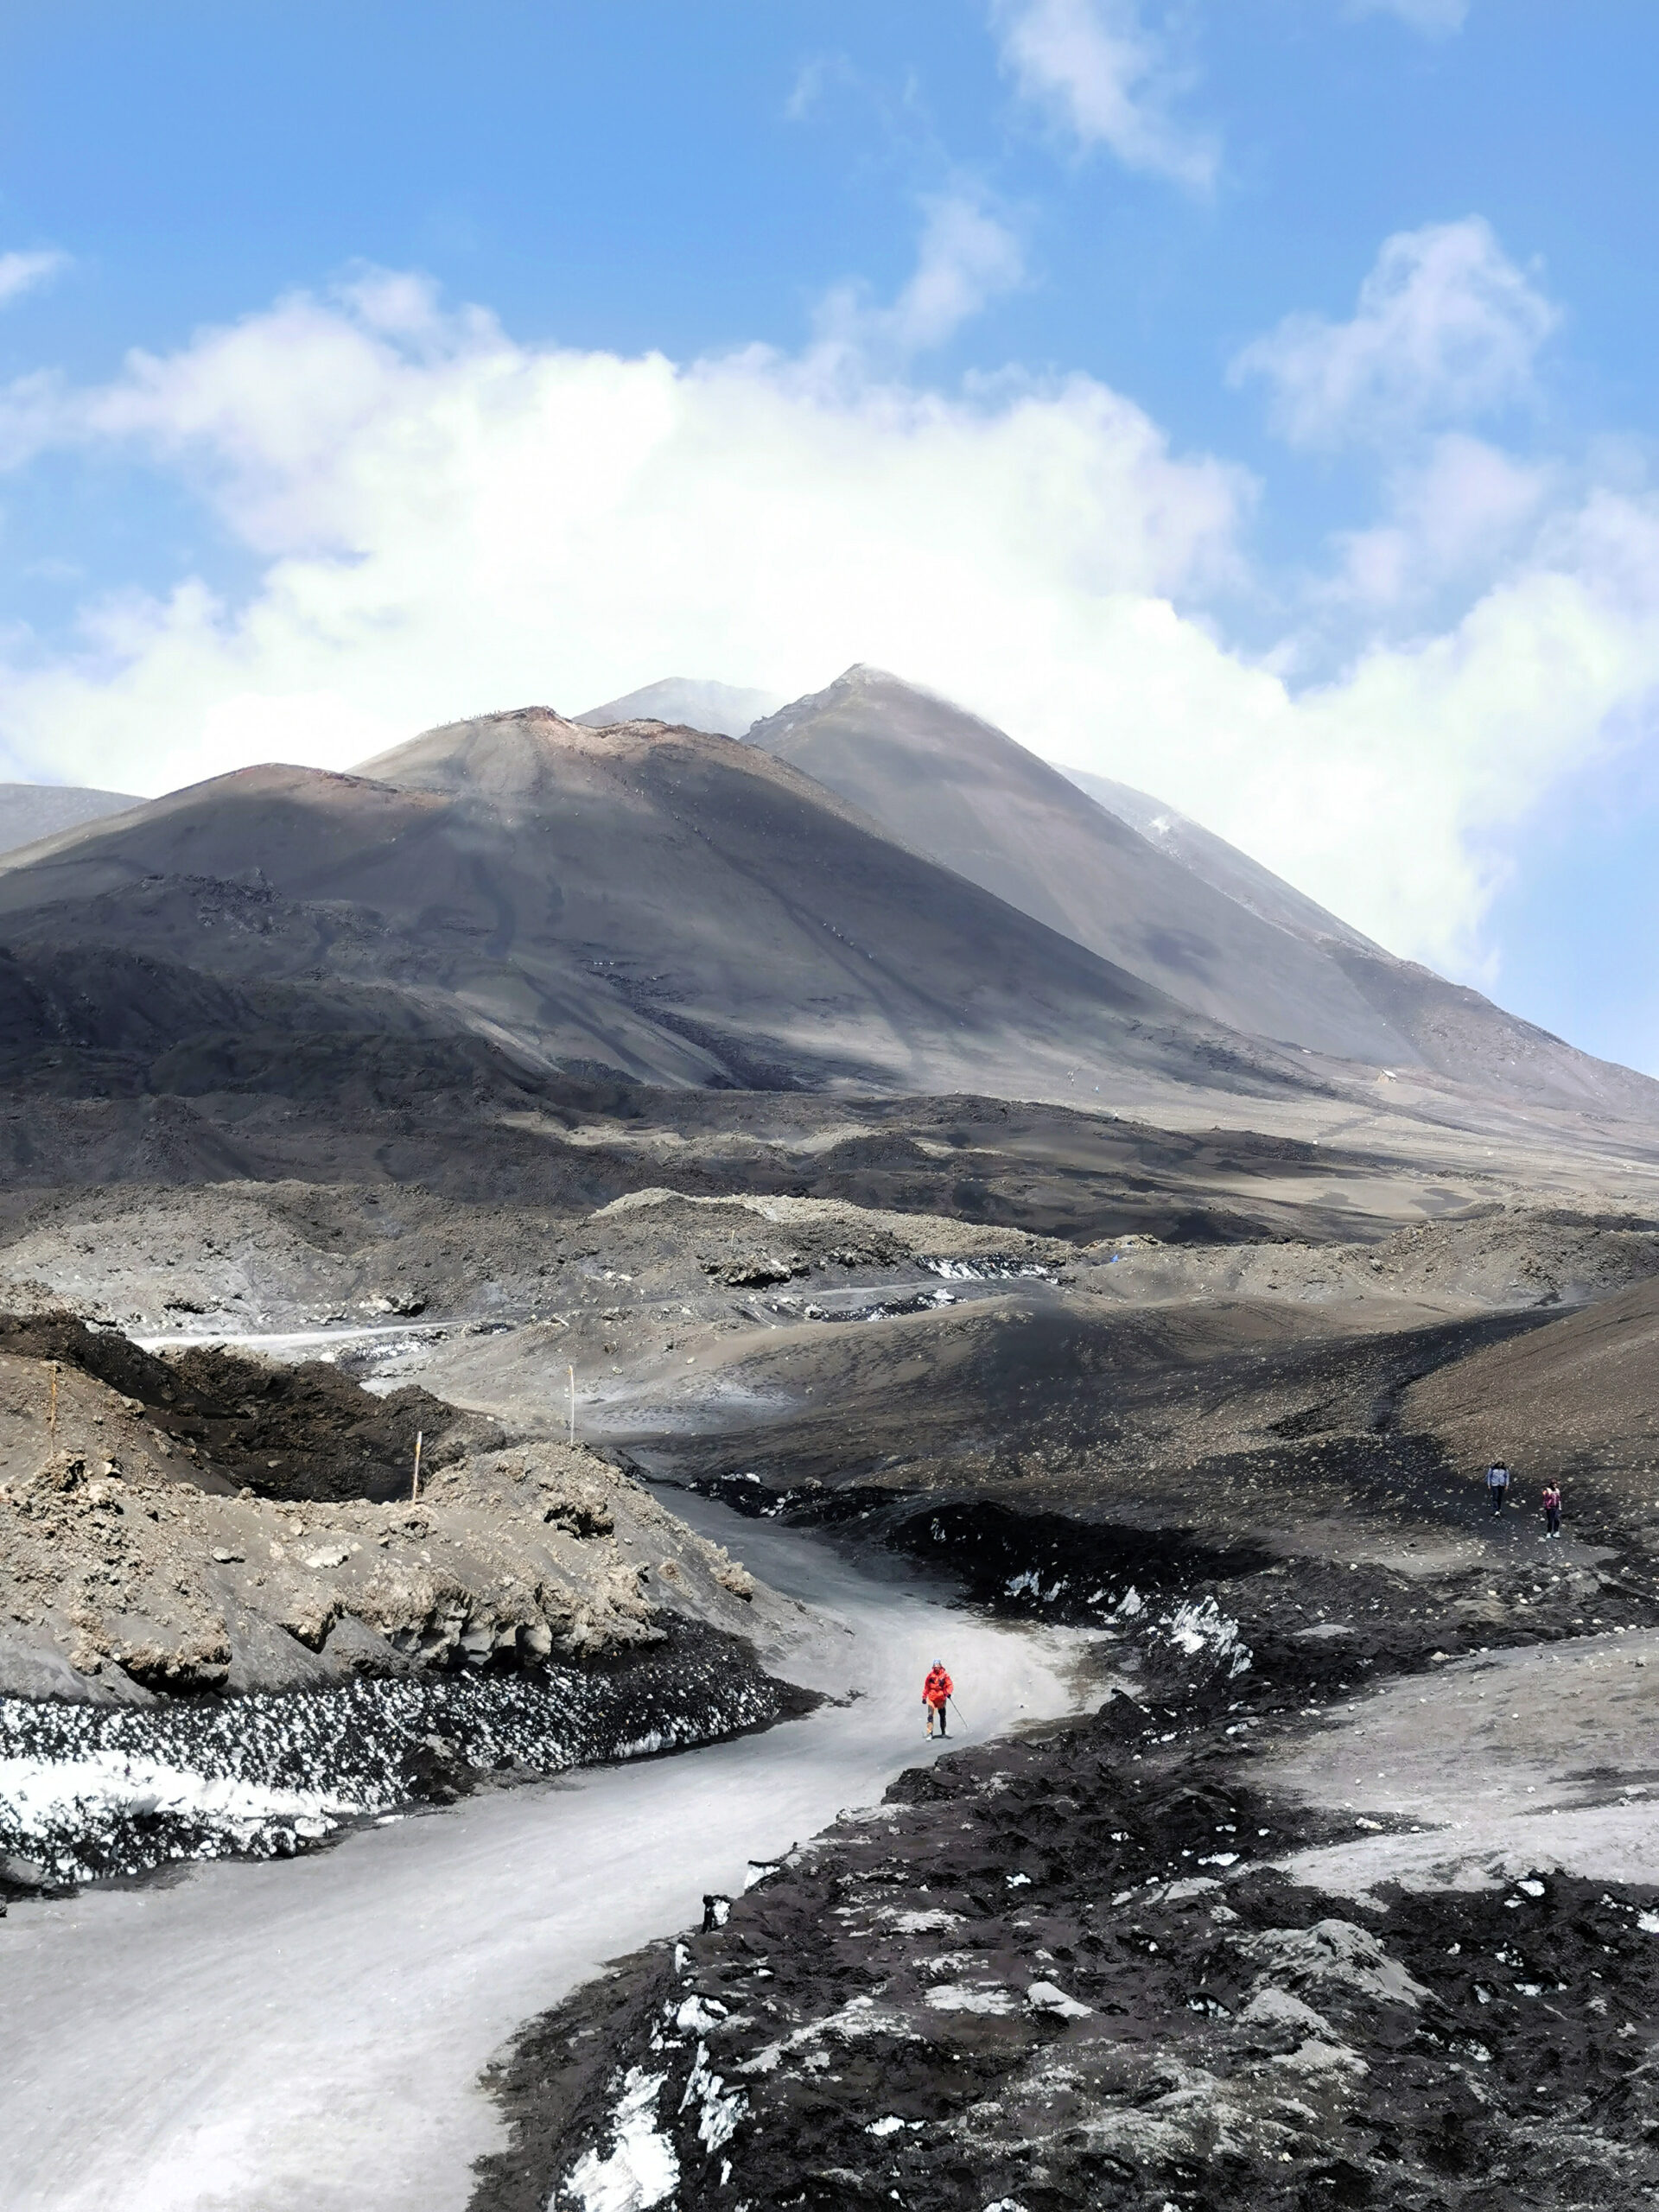
Day 2:Etna
With departure and return to Catania.
Etna is definitely a place to take panoramic photos with wide focal lengths. To characterize the image add a human subject to understand the proportions, perhaps on one of the thirds (to learn more about the rule of thirds and other little tricks, read this article). Other interesting ideas can arise by observing the lines of the paths, the clouds or the shapes of the craters if you have an elevated view.
Sunrise and sunset: a guided tour
Many tours are organized, which can be booked online to admire the sunrise and sunset from Etna. If the day is beautiful and there is no haze, it will certainly be unforgettable!
Morning: superior craters
Once you get to the Sapienza refuge (2000 m), you can park and take the cable car up, if the wind permits, and then continue on foot (very tiring) or go up with the Jeeps up to higher altitudes. To get to the summit craters you need to buy a tour with a guide. Therefore, we recommend choosing and booking in advance or contacting the cable car office once you arrive.
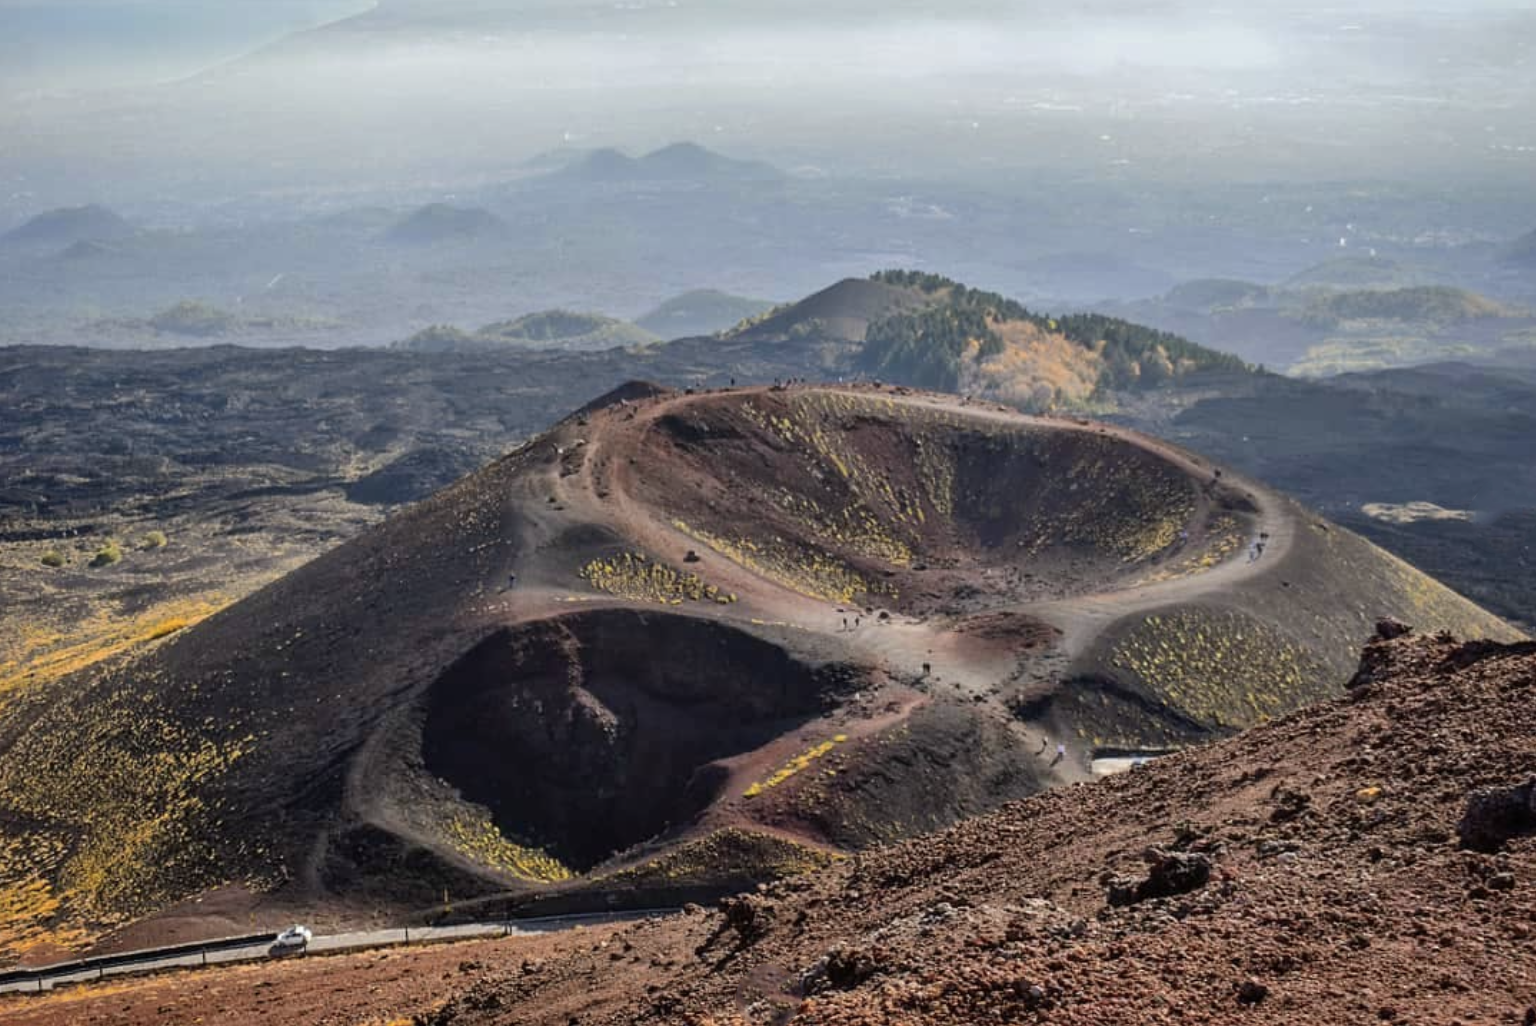
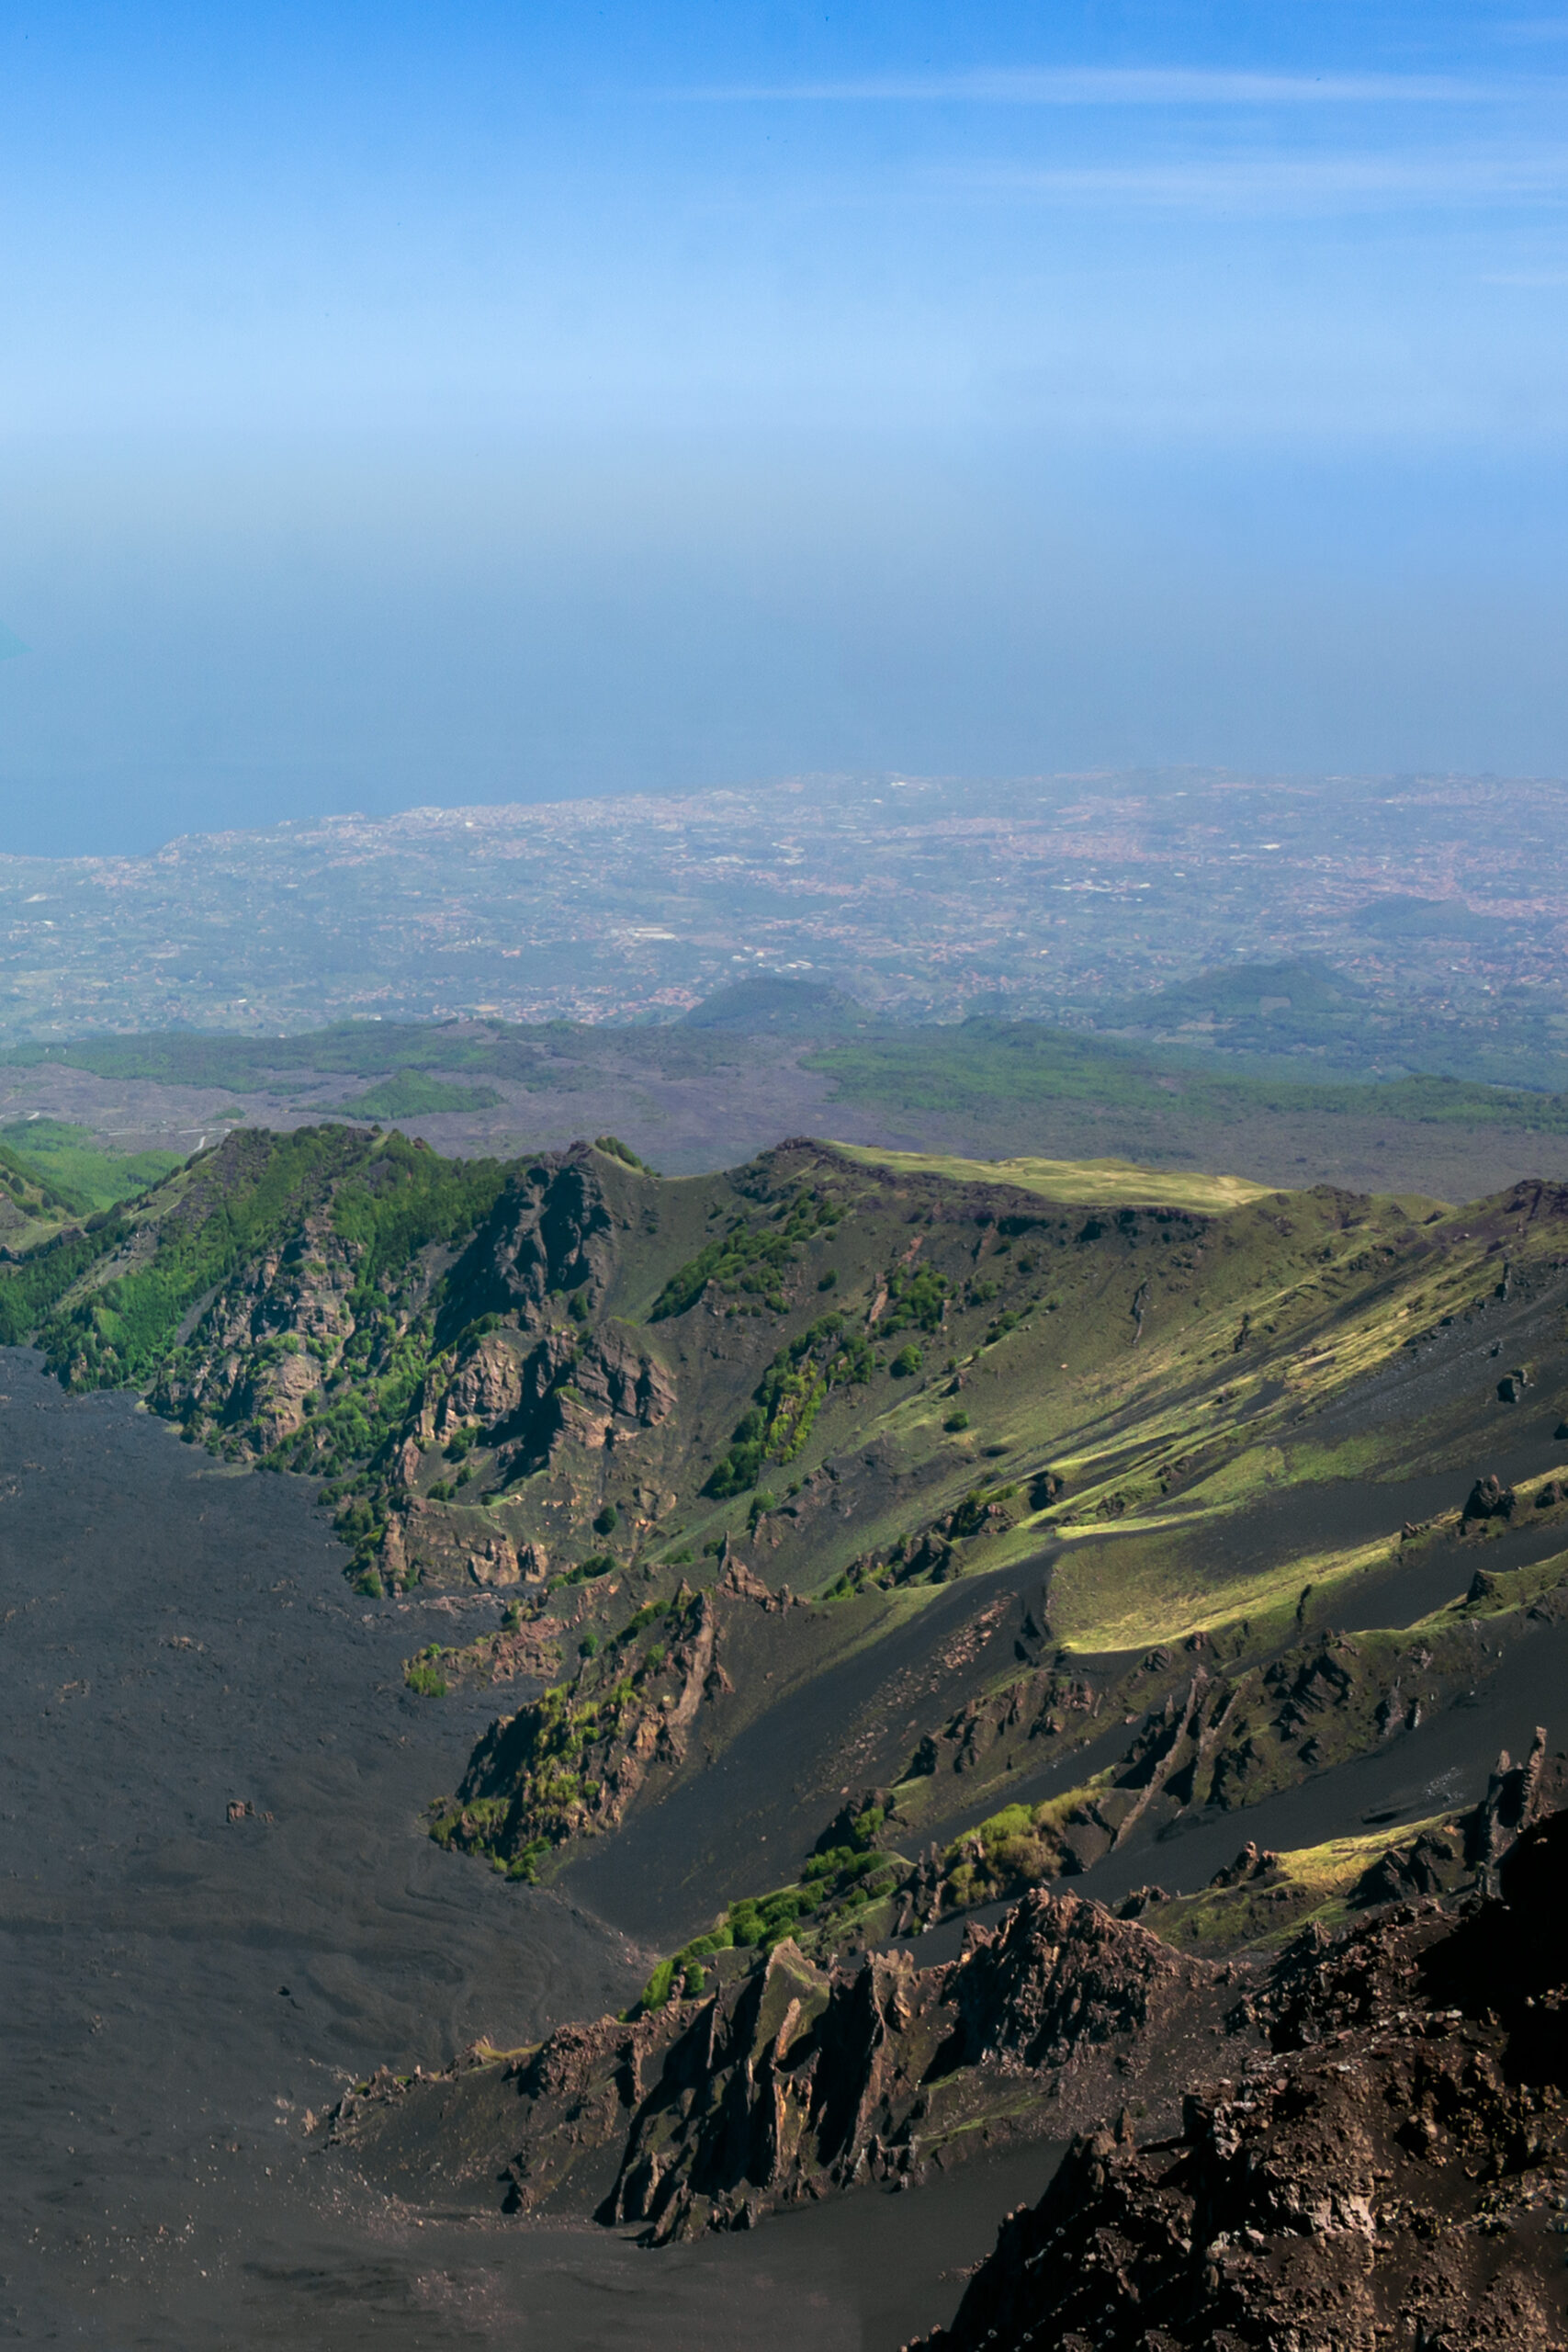
Afternoon: Bove Valley and Silvestri Craters
Going down, take a break to look out towards the lava flows on the Bove valley, which reach the sea. Returning to the car park, visit the Silvestri craters (easily reached without taking the cable car), from which you can enjoy an exciting panorama of Catania and the sea.
@marcopeppucci
@gianlucamusmeci
@simona_sanf
@giadaantonini_photography
Day 3: Cyclops coast, Giardini Naxos, Alcantara gorges, Taormina
With departure and return to Catania.
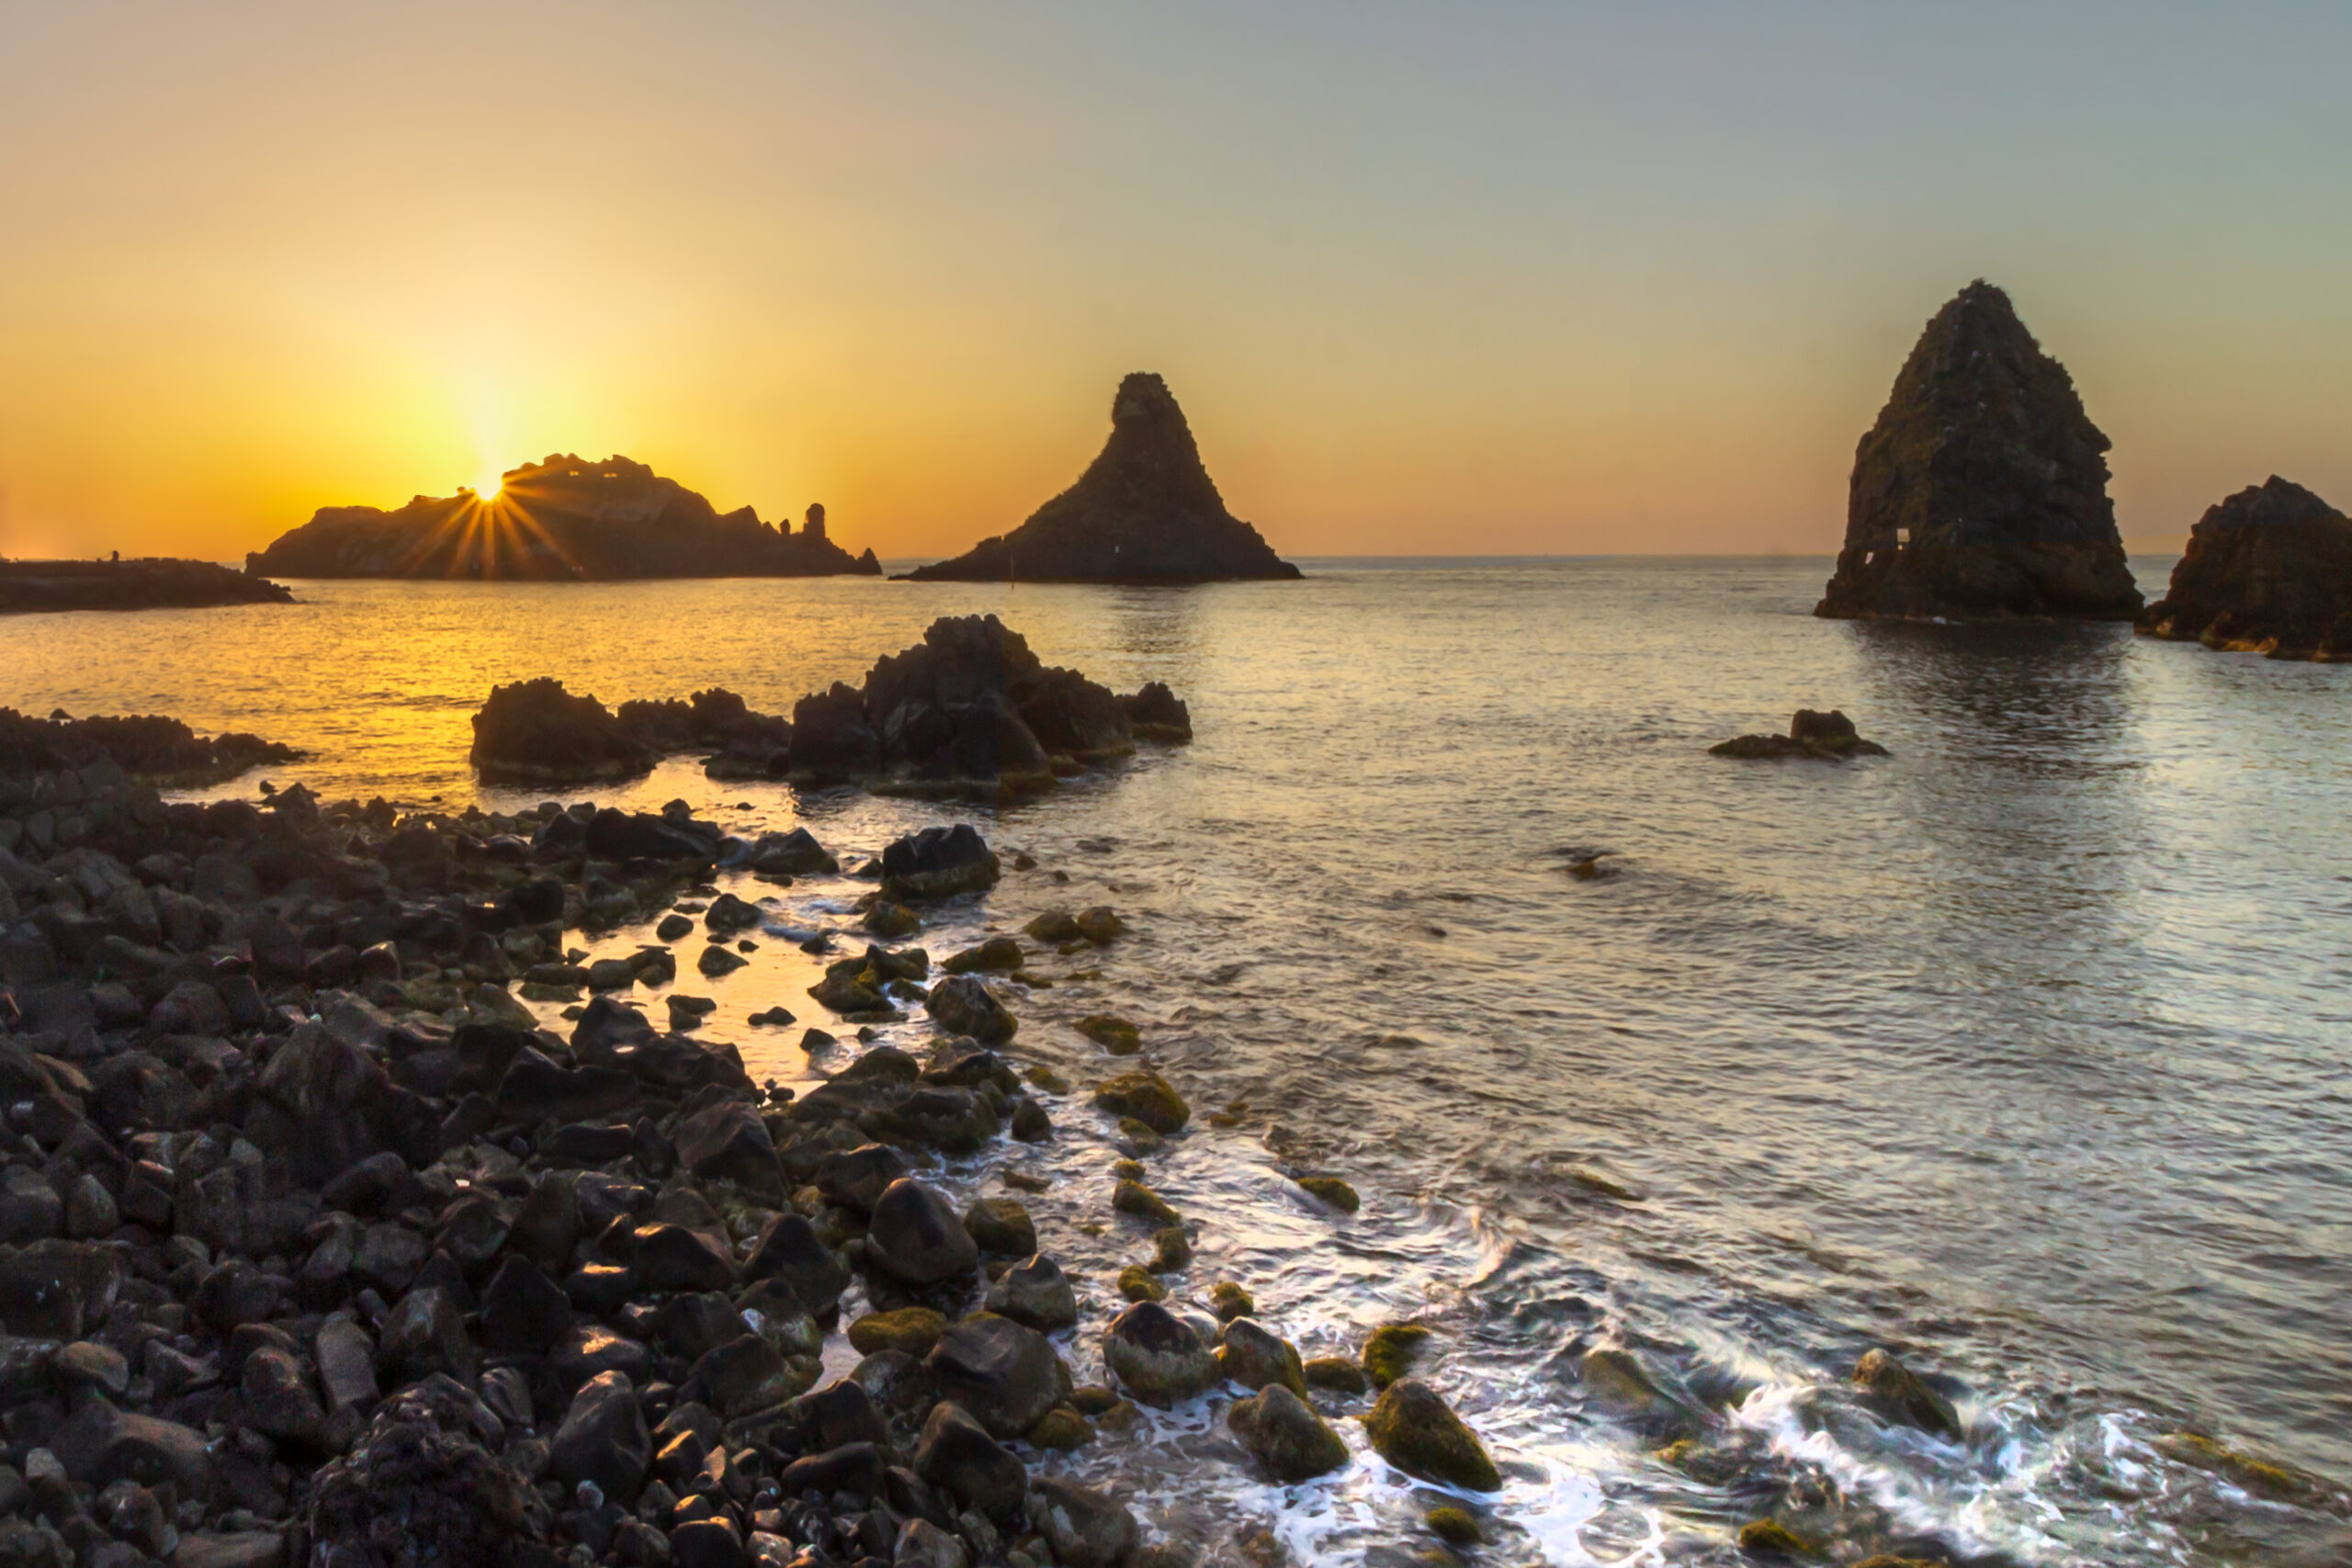
Alba: the stacks of Aci Trezza
Along the Cyclops coast, which includes the areas of Aci Trezza, Aci Castello and Aci Reale, stop on the seafront to enjoy a breathtaking sunrise over the famous stacks of Aci Trezza.
To be sure to don’t miss the best moment of sunrise, arrive half an hour before it to prepare the equipment and study the composition. Don’t forget to bring a tripod, useful for long exposures to capture silky water or cloud movement. To compensate the low light, use graduated filters or bracketing. Read this article to learn more about taking wonderful sunrise and sunset photos.
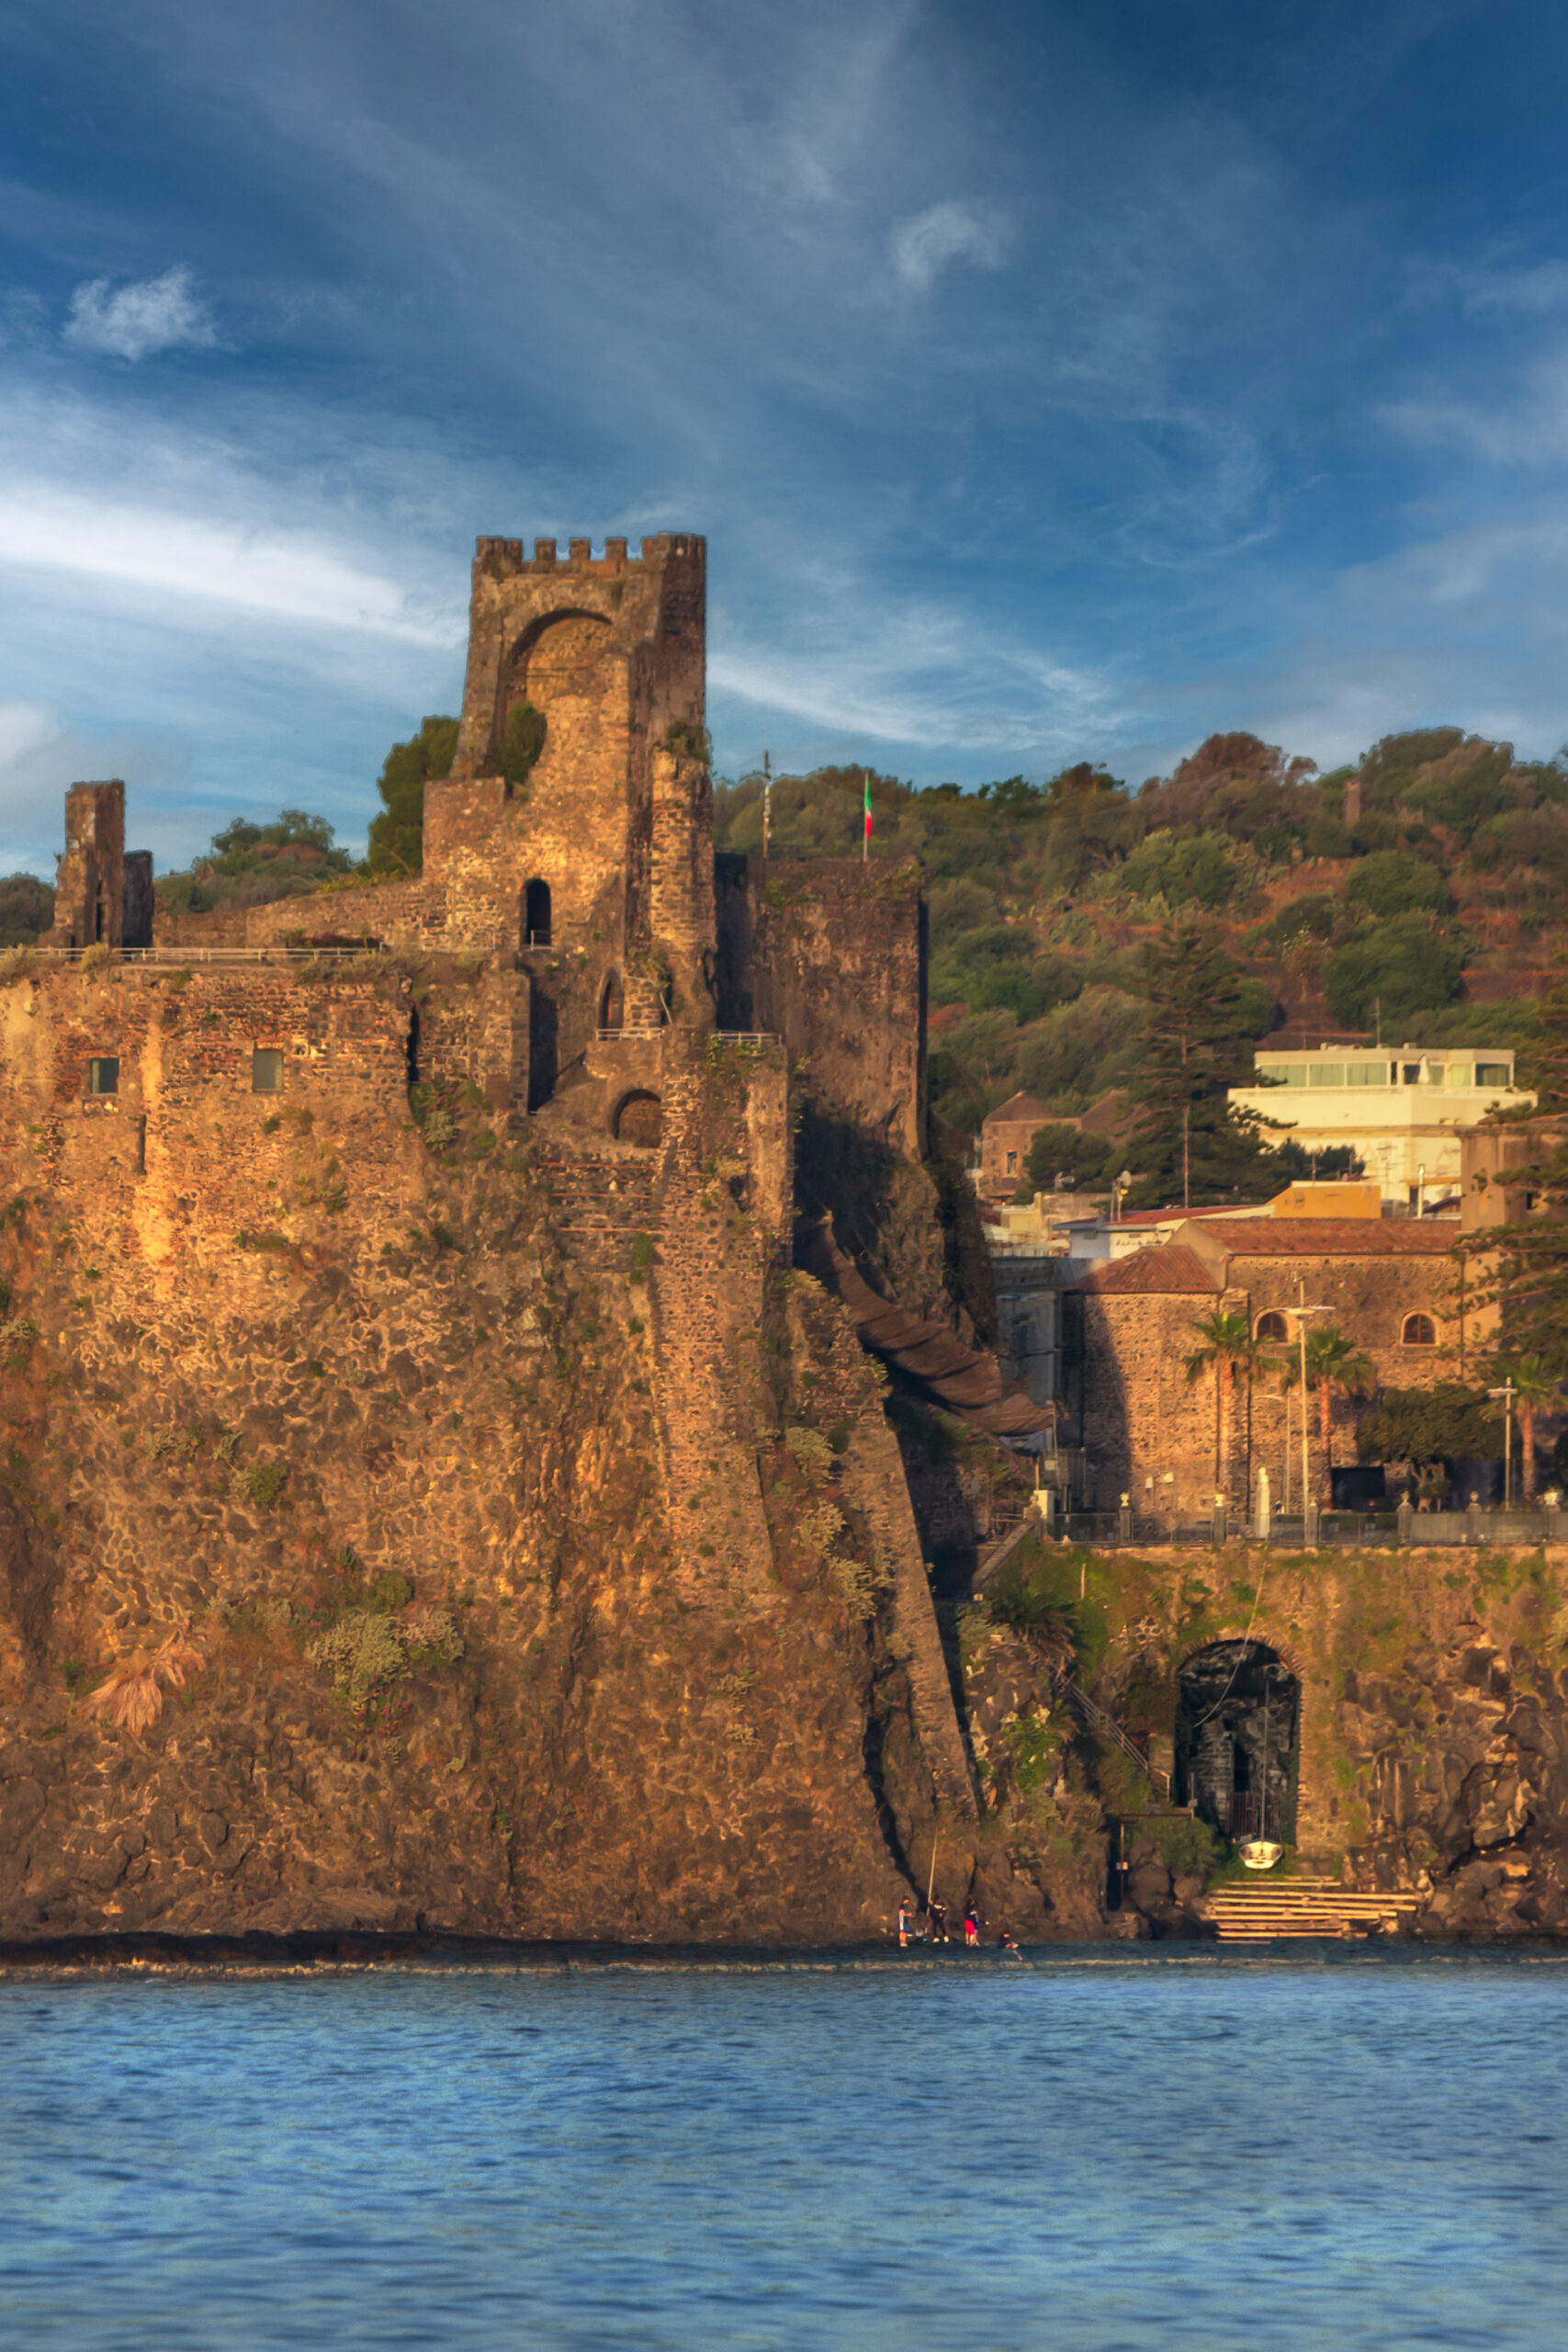
Still from the seafront, turn back towards Aci Castello, with its fortification overlooking the sea. You can also go back (five minutes by car) to look out from the panoramic terrace at the foot of the castle.
Continue by car on the coast road up to Giardini Naxos following the sun, which illuminates the sand and the moored boats with golden hues. Here you can have a refreshing break and a nice breakfast on the seafront.
@giadaantonini_photography
@giadaantonini_photography
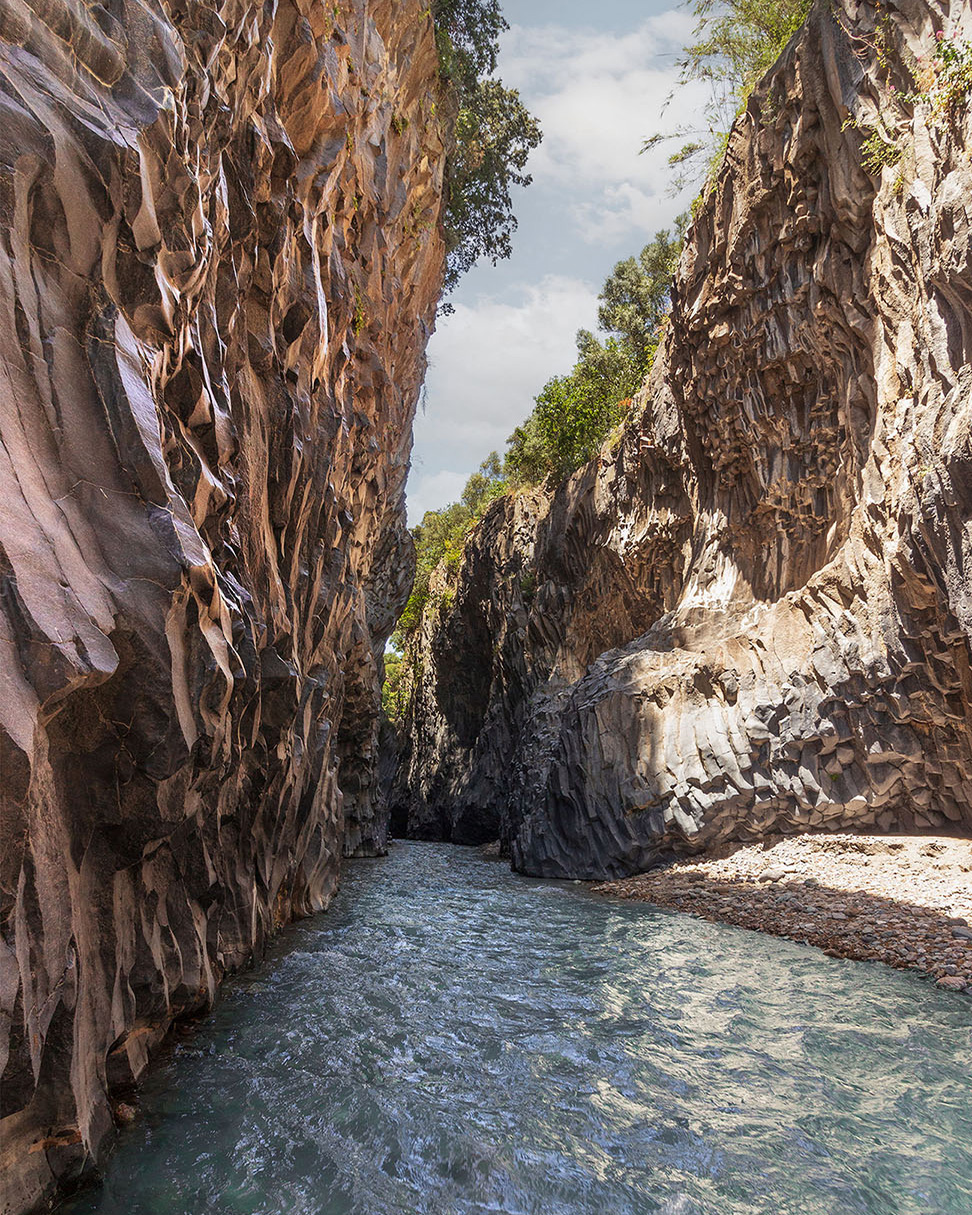
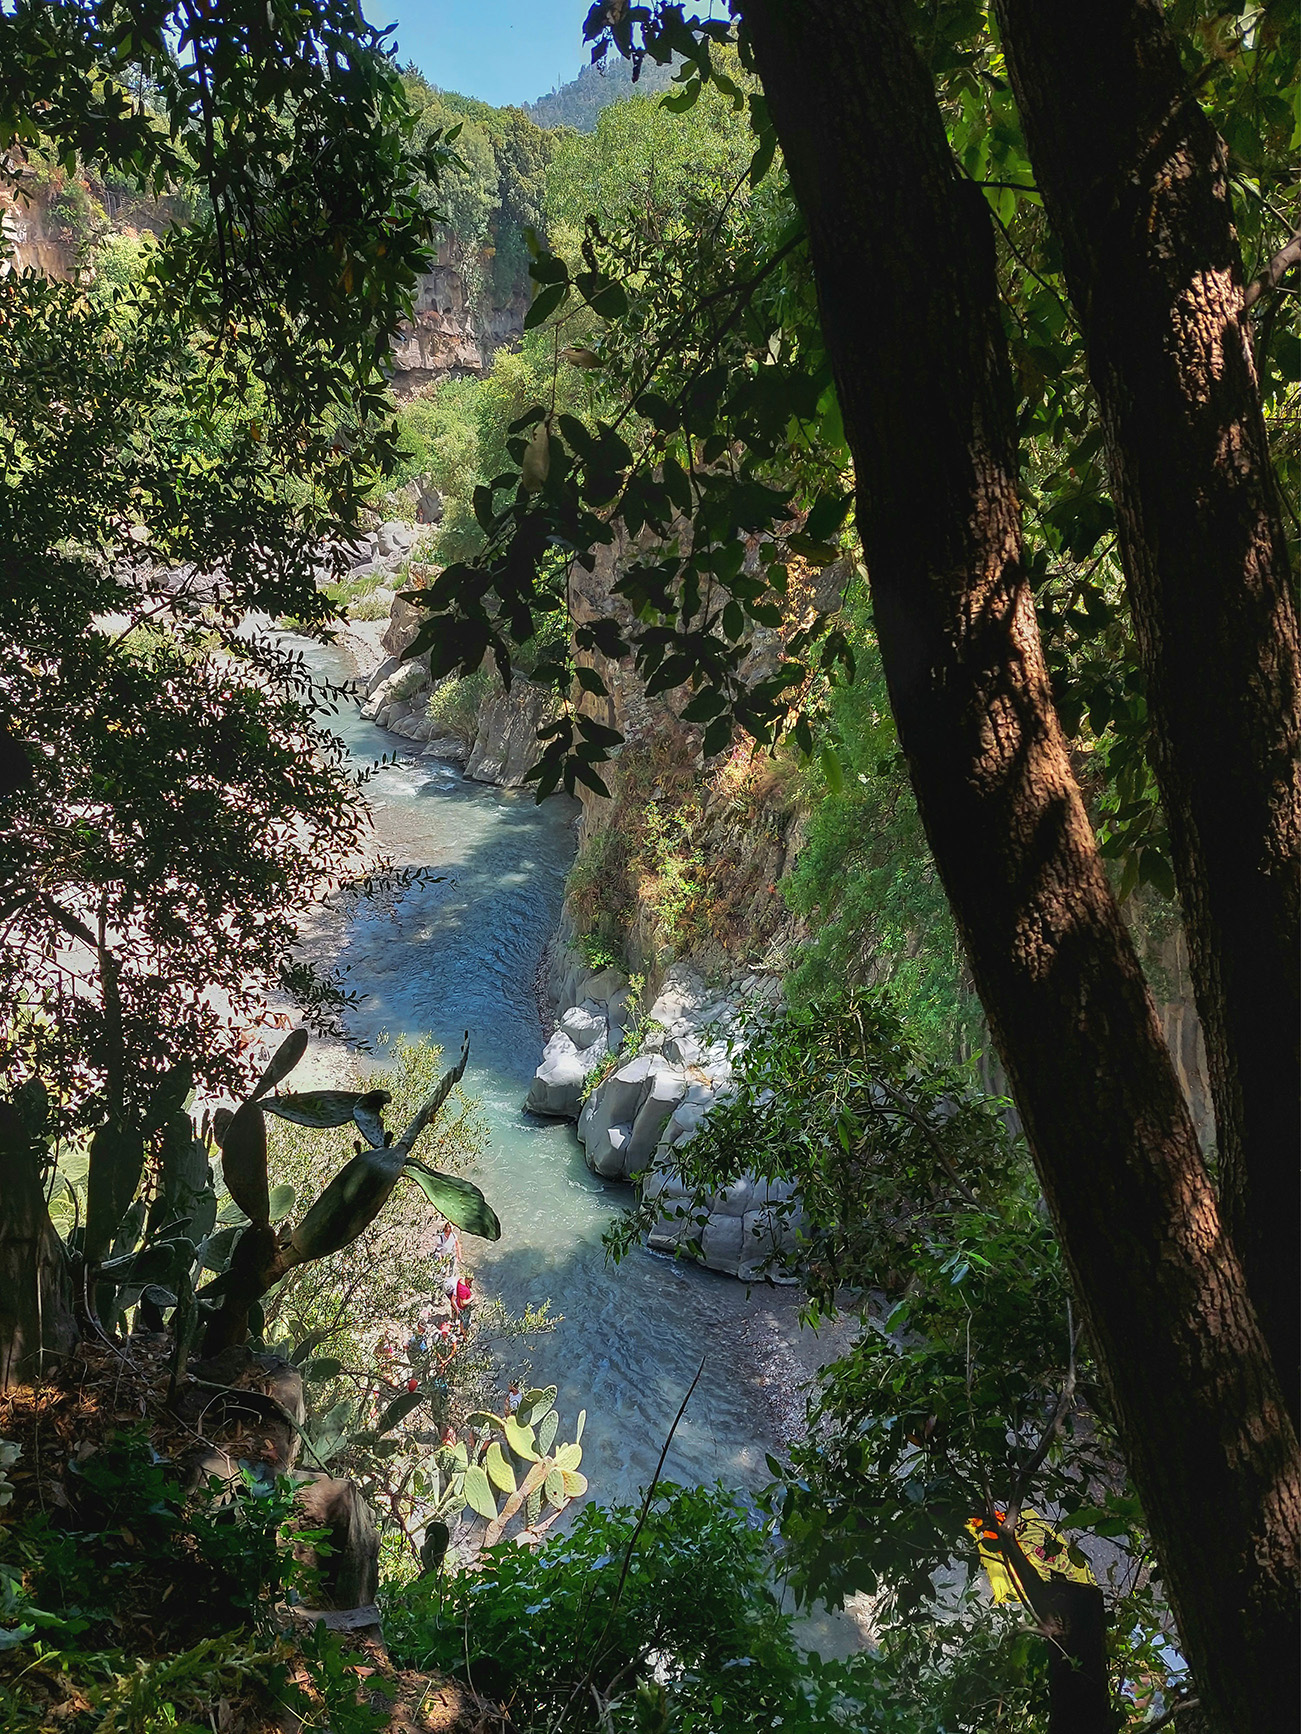
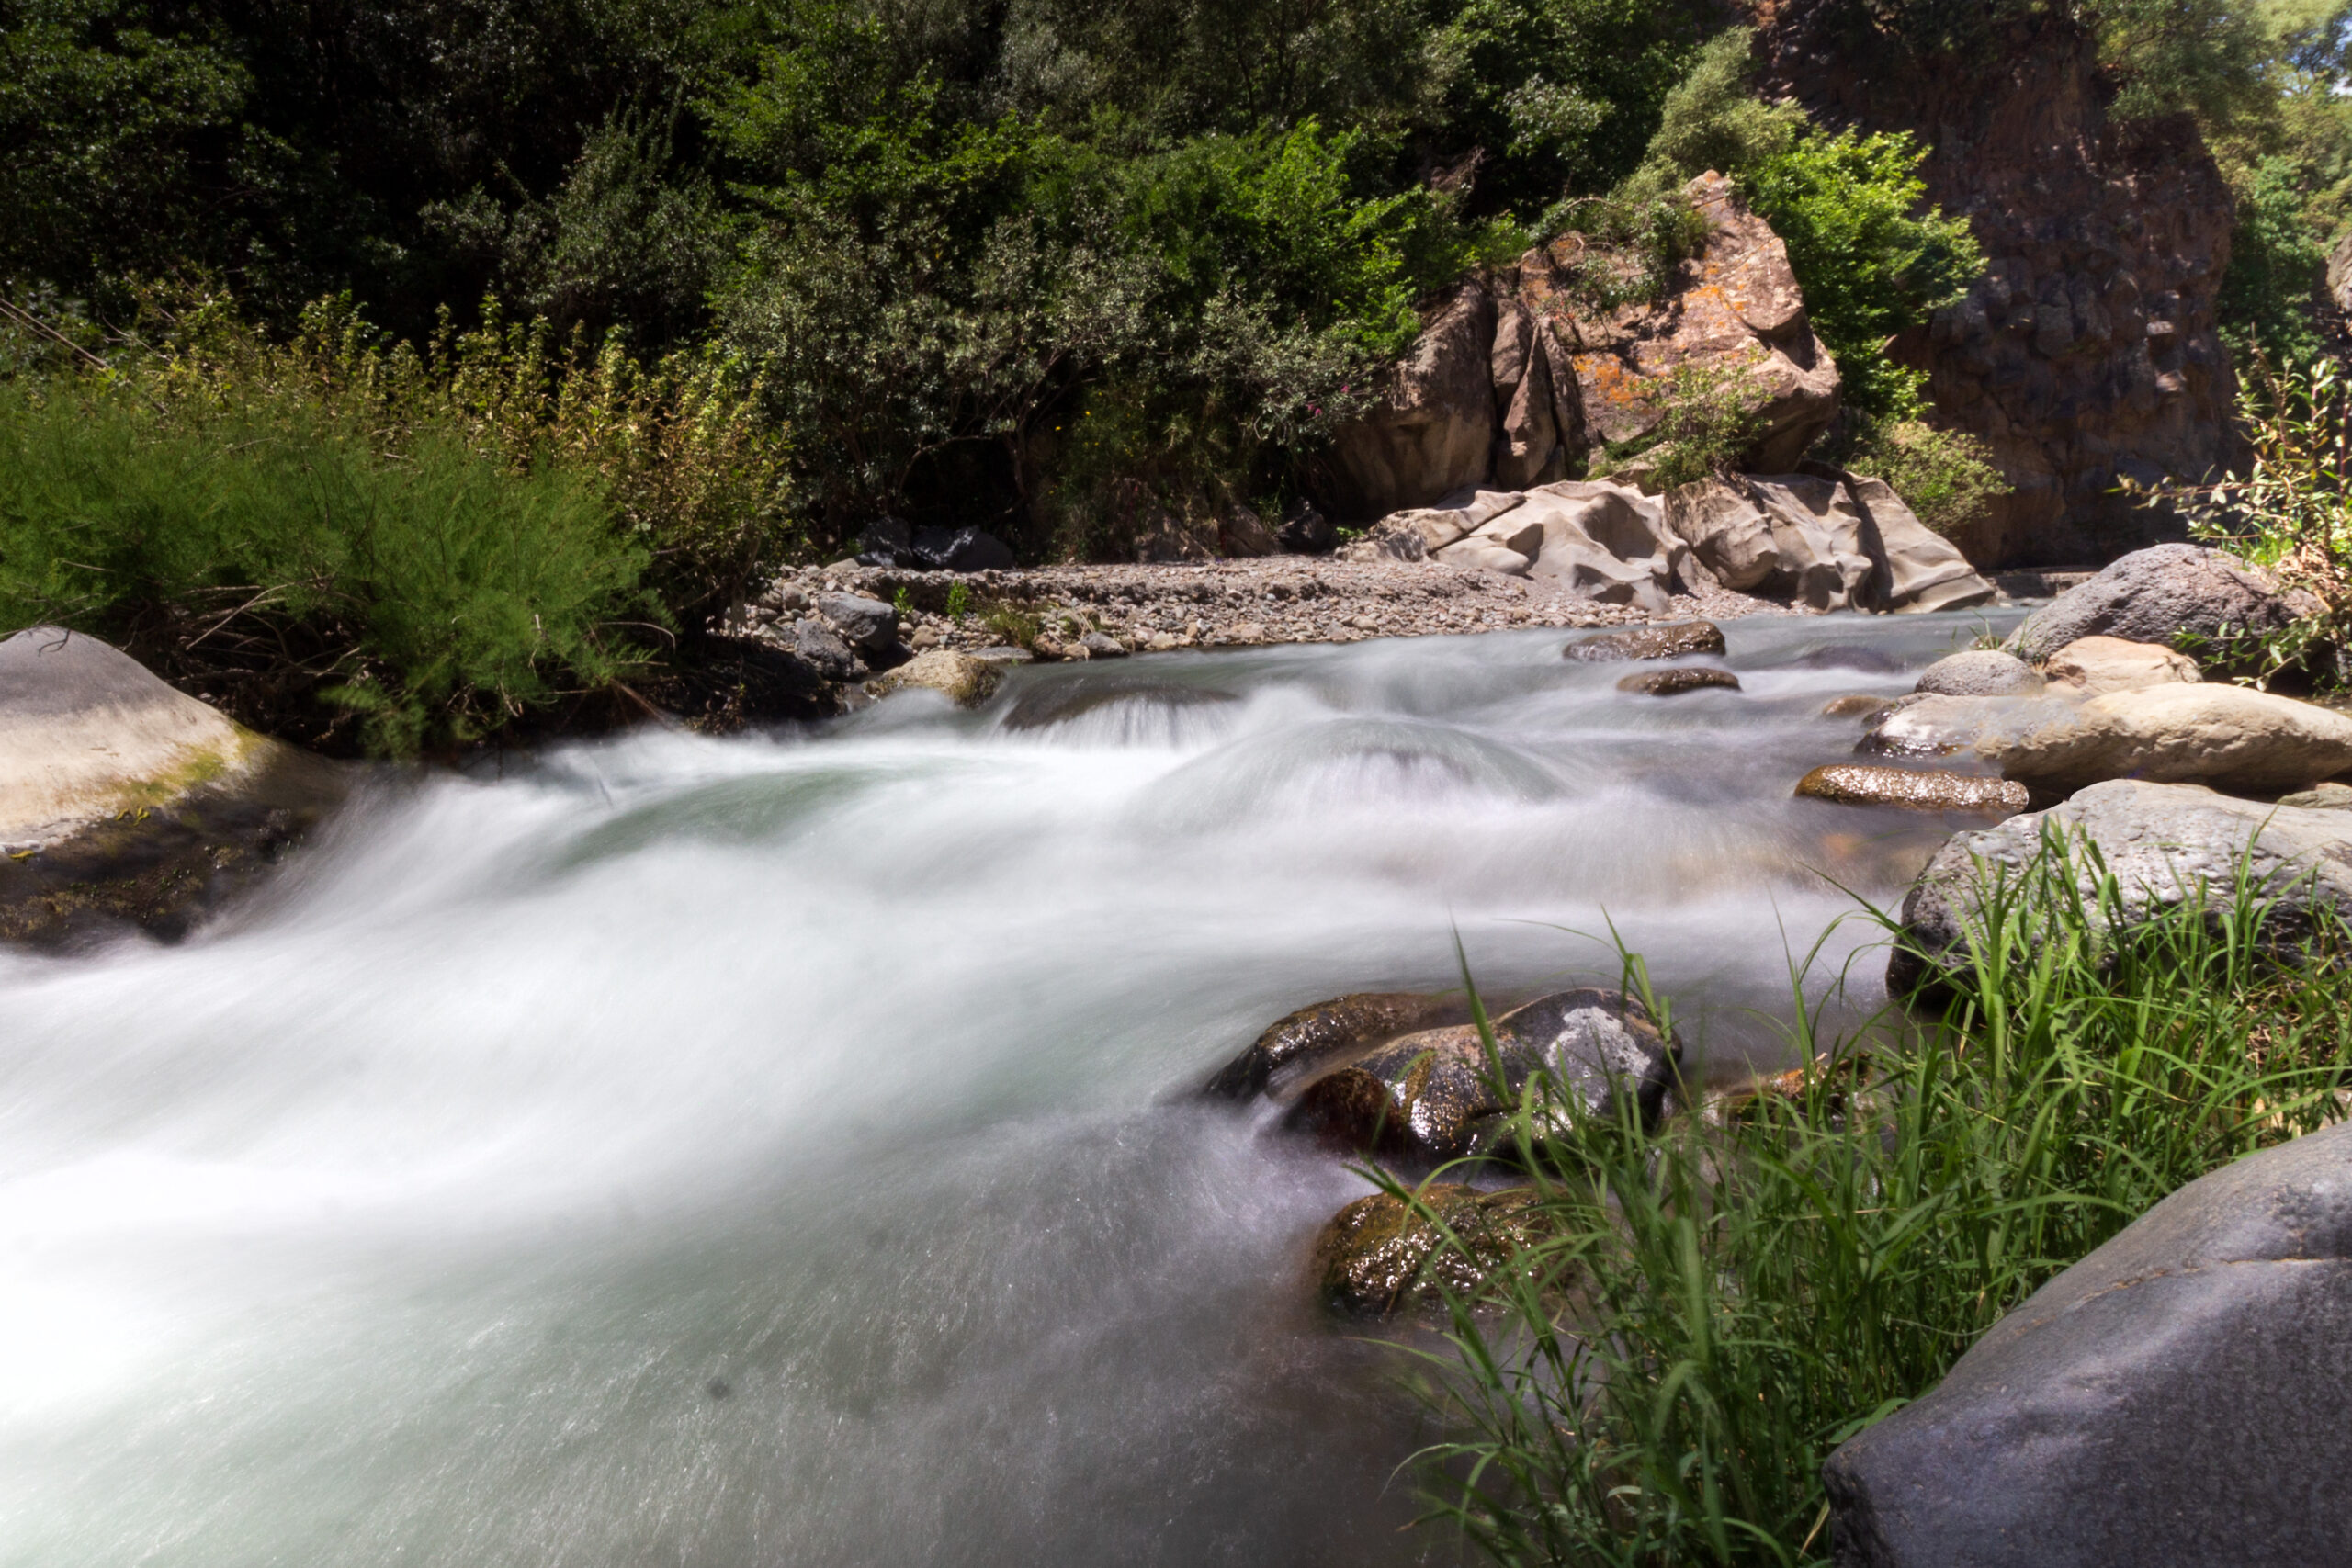
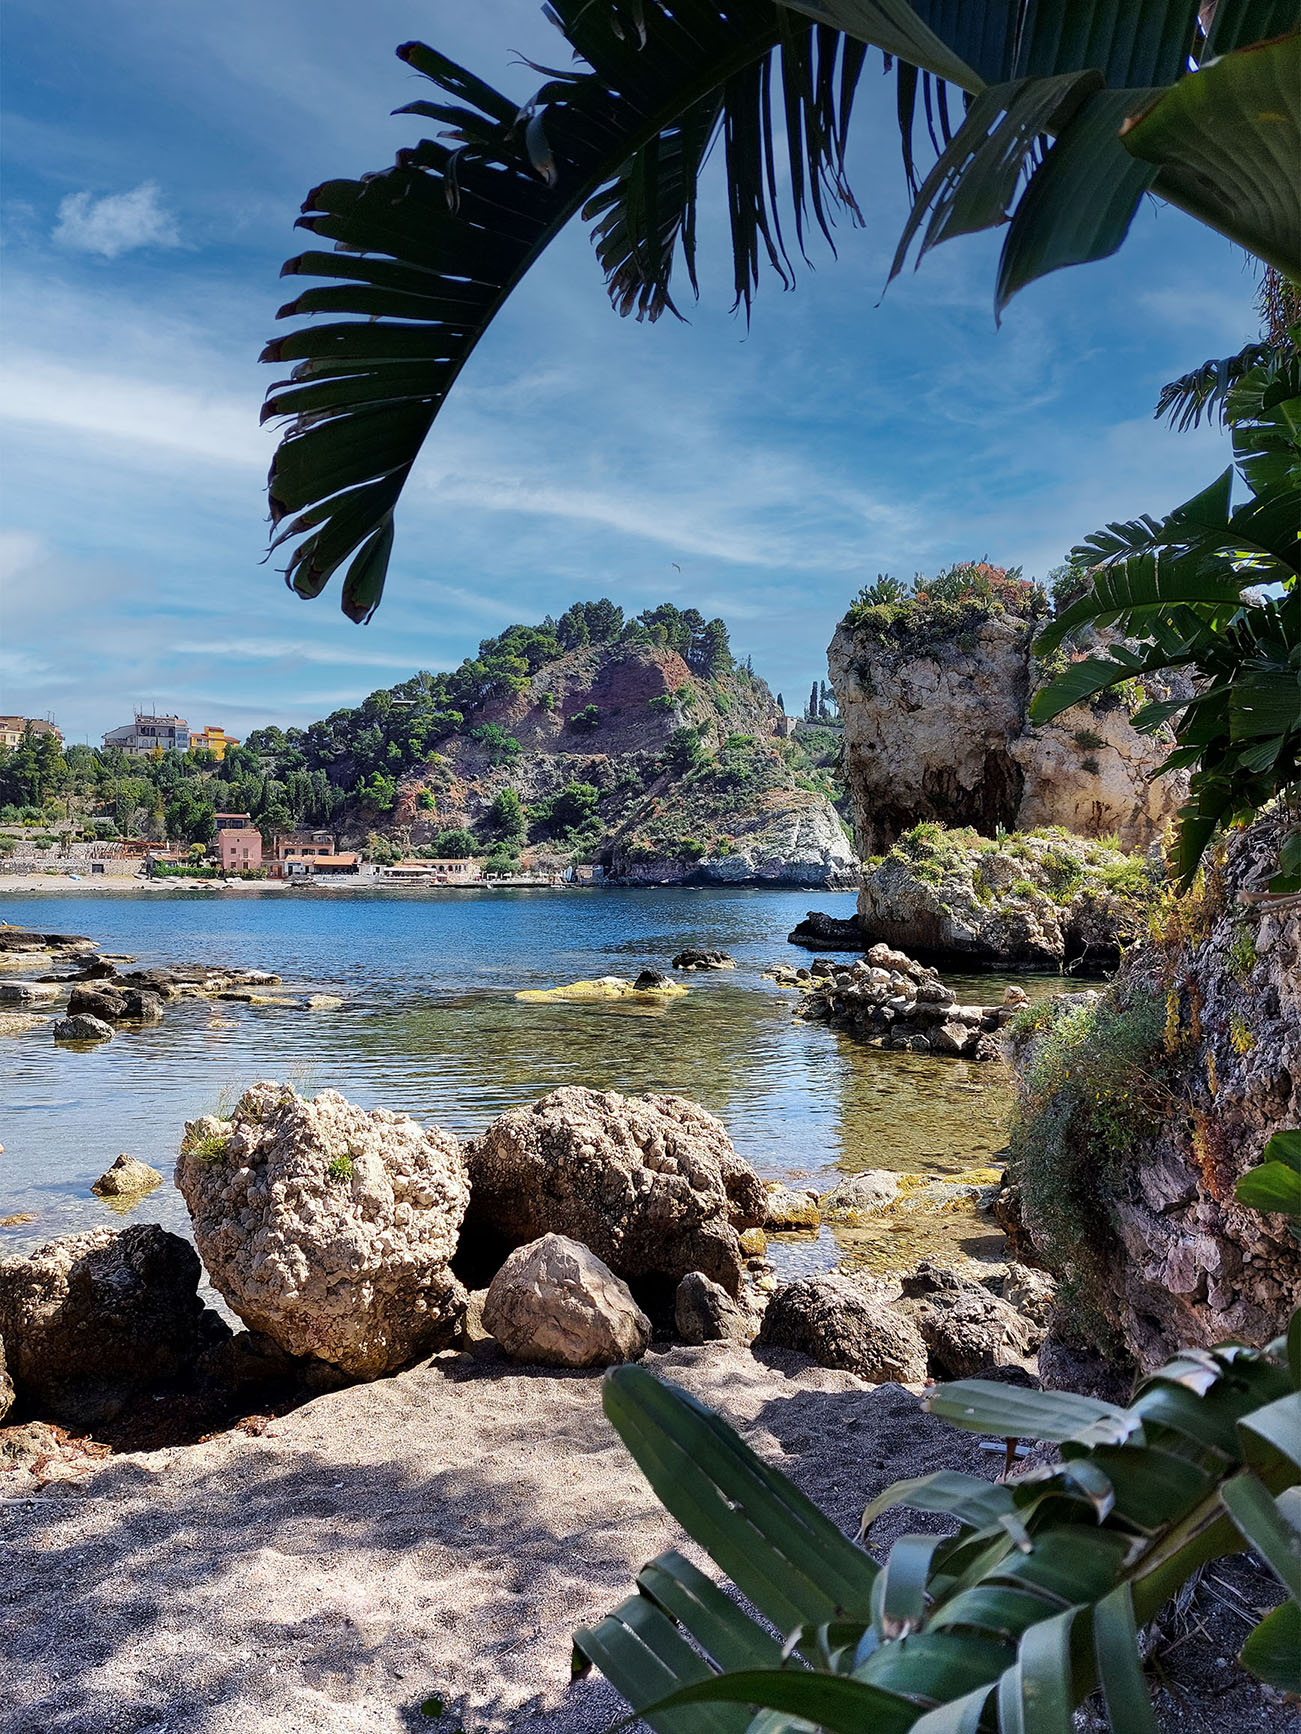
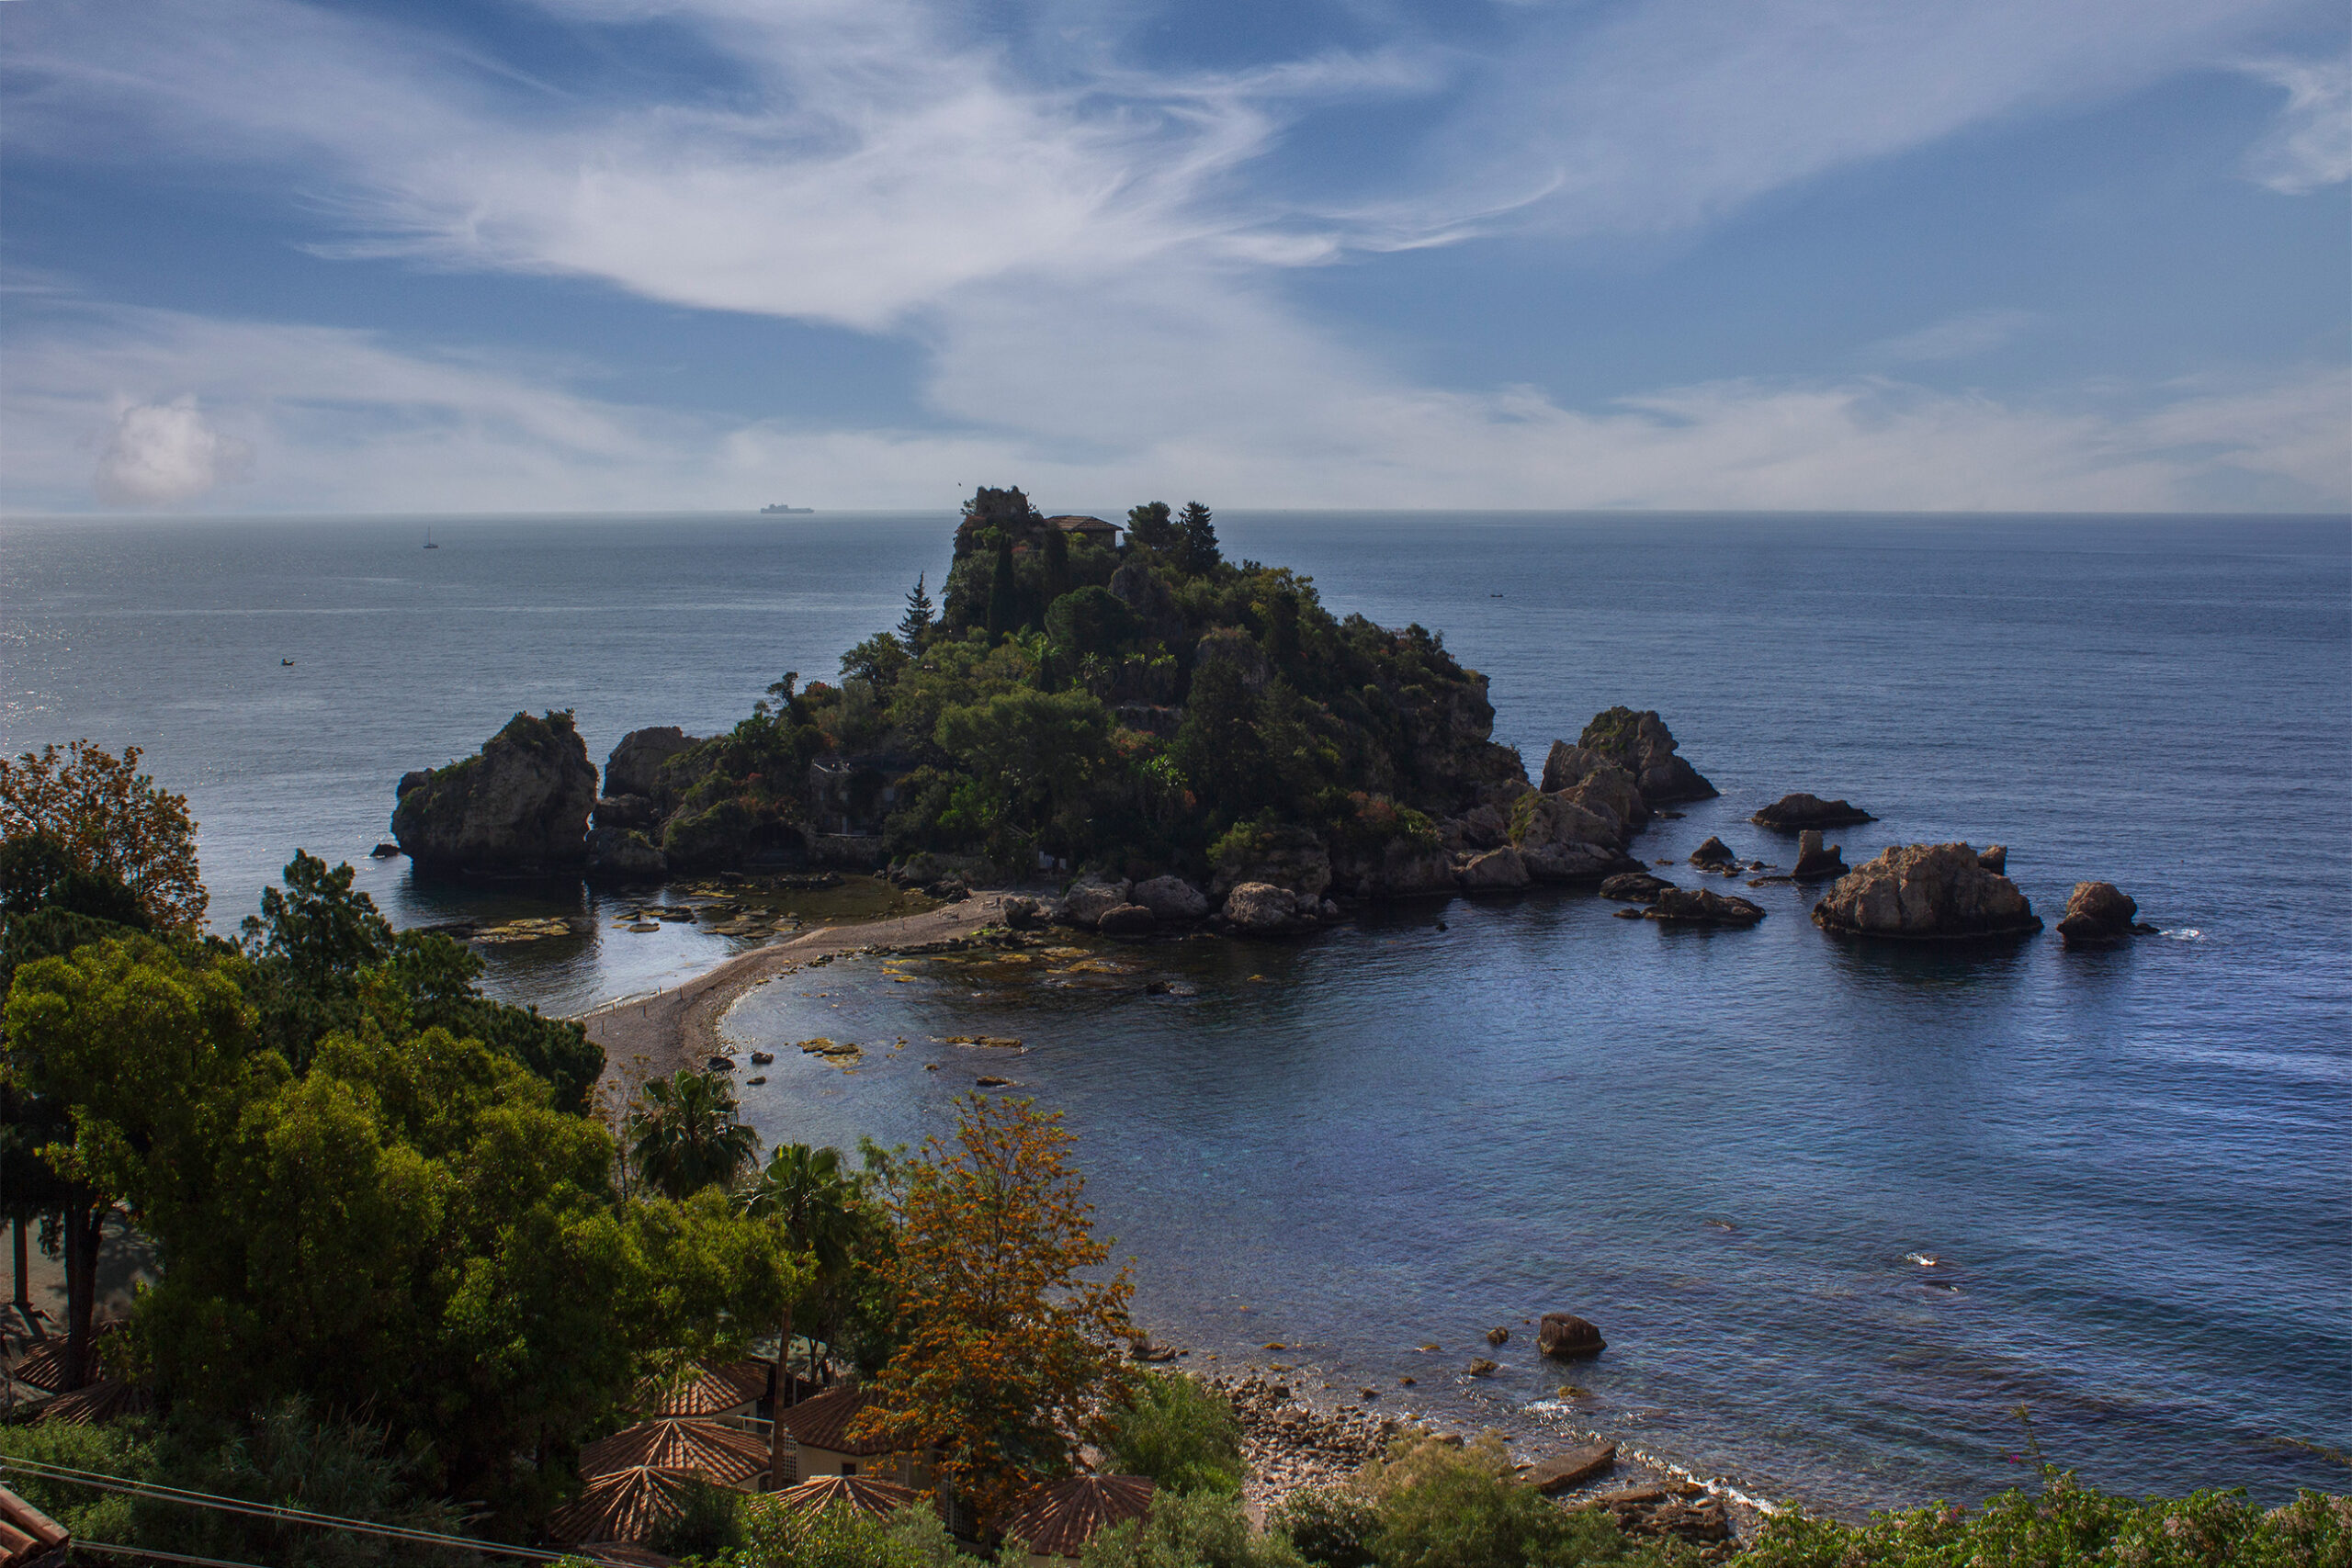
Morning: Alcantara gorges and Isola Bella
Spend about two hours visiting the volcanic gorges, which offer a unique spectacle, both going down inside and from the highest panoramic points that you come across following the path in the woods. You will have a thousand glimpses to capture, mainly with a wide angle shot.
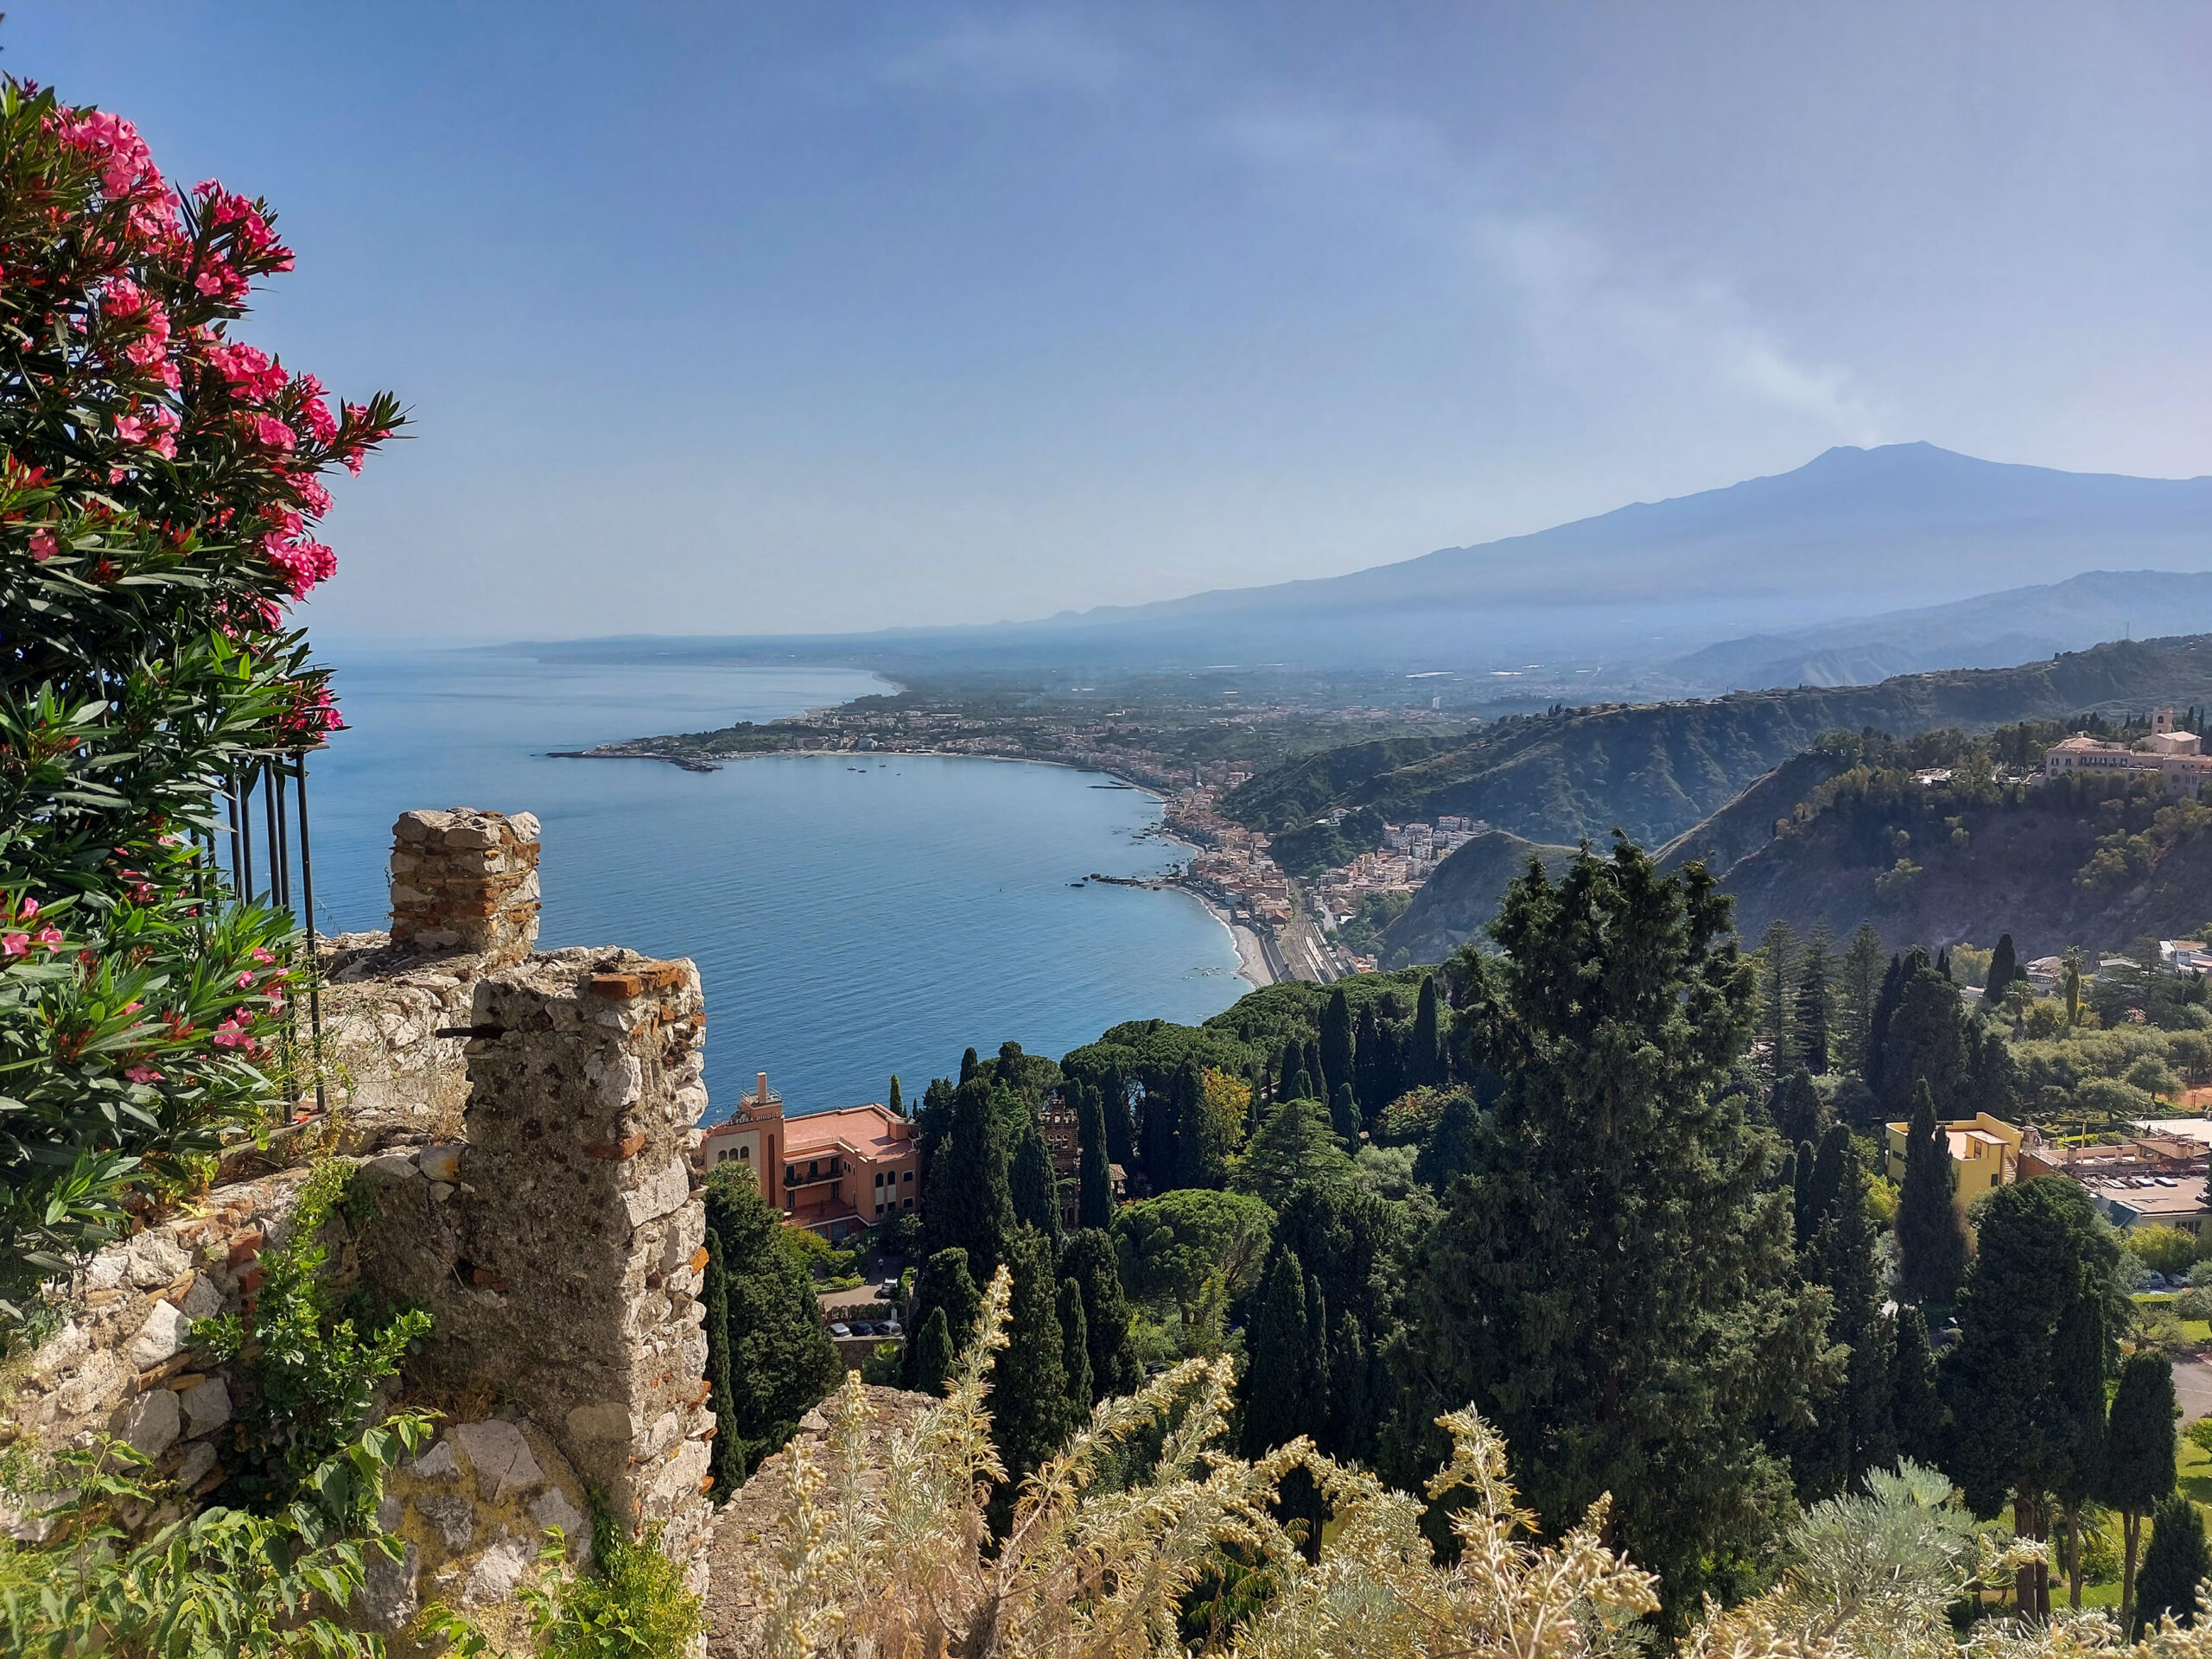
In the late morning you reach Taormina, stopping for a few minutes along via Nazionale, immediately after the tunnel that leads towards the centre. From this point you will enjoy a breathtaking elevated view.Go down to the beach to relax a bit and enjoy the wonder of the island.
@giadaantonini_photography
@giadaantonini_photography
@giadaantonini_photography
@giadaantonini_photography
@giadaantonini_photography
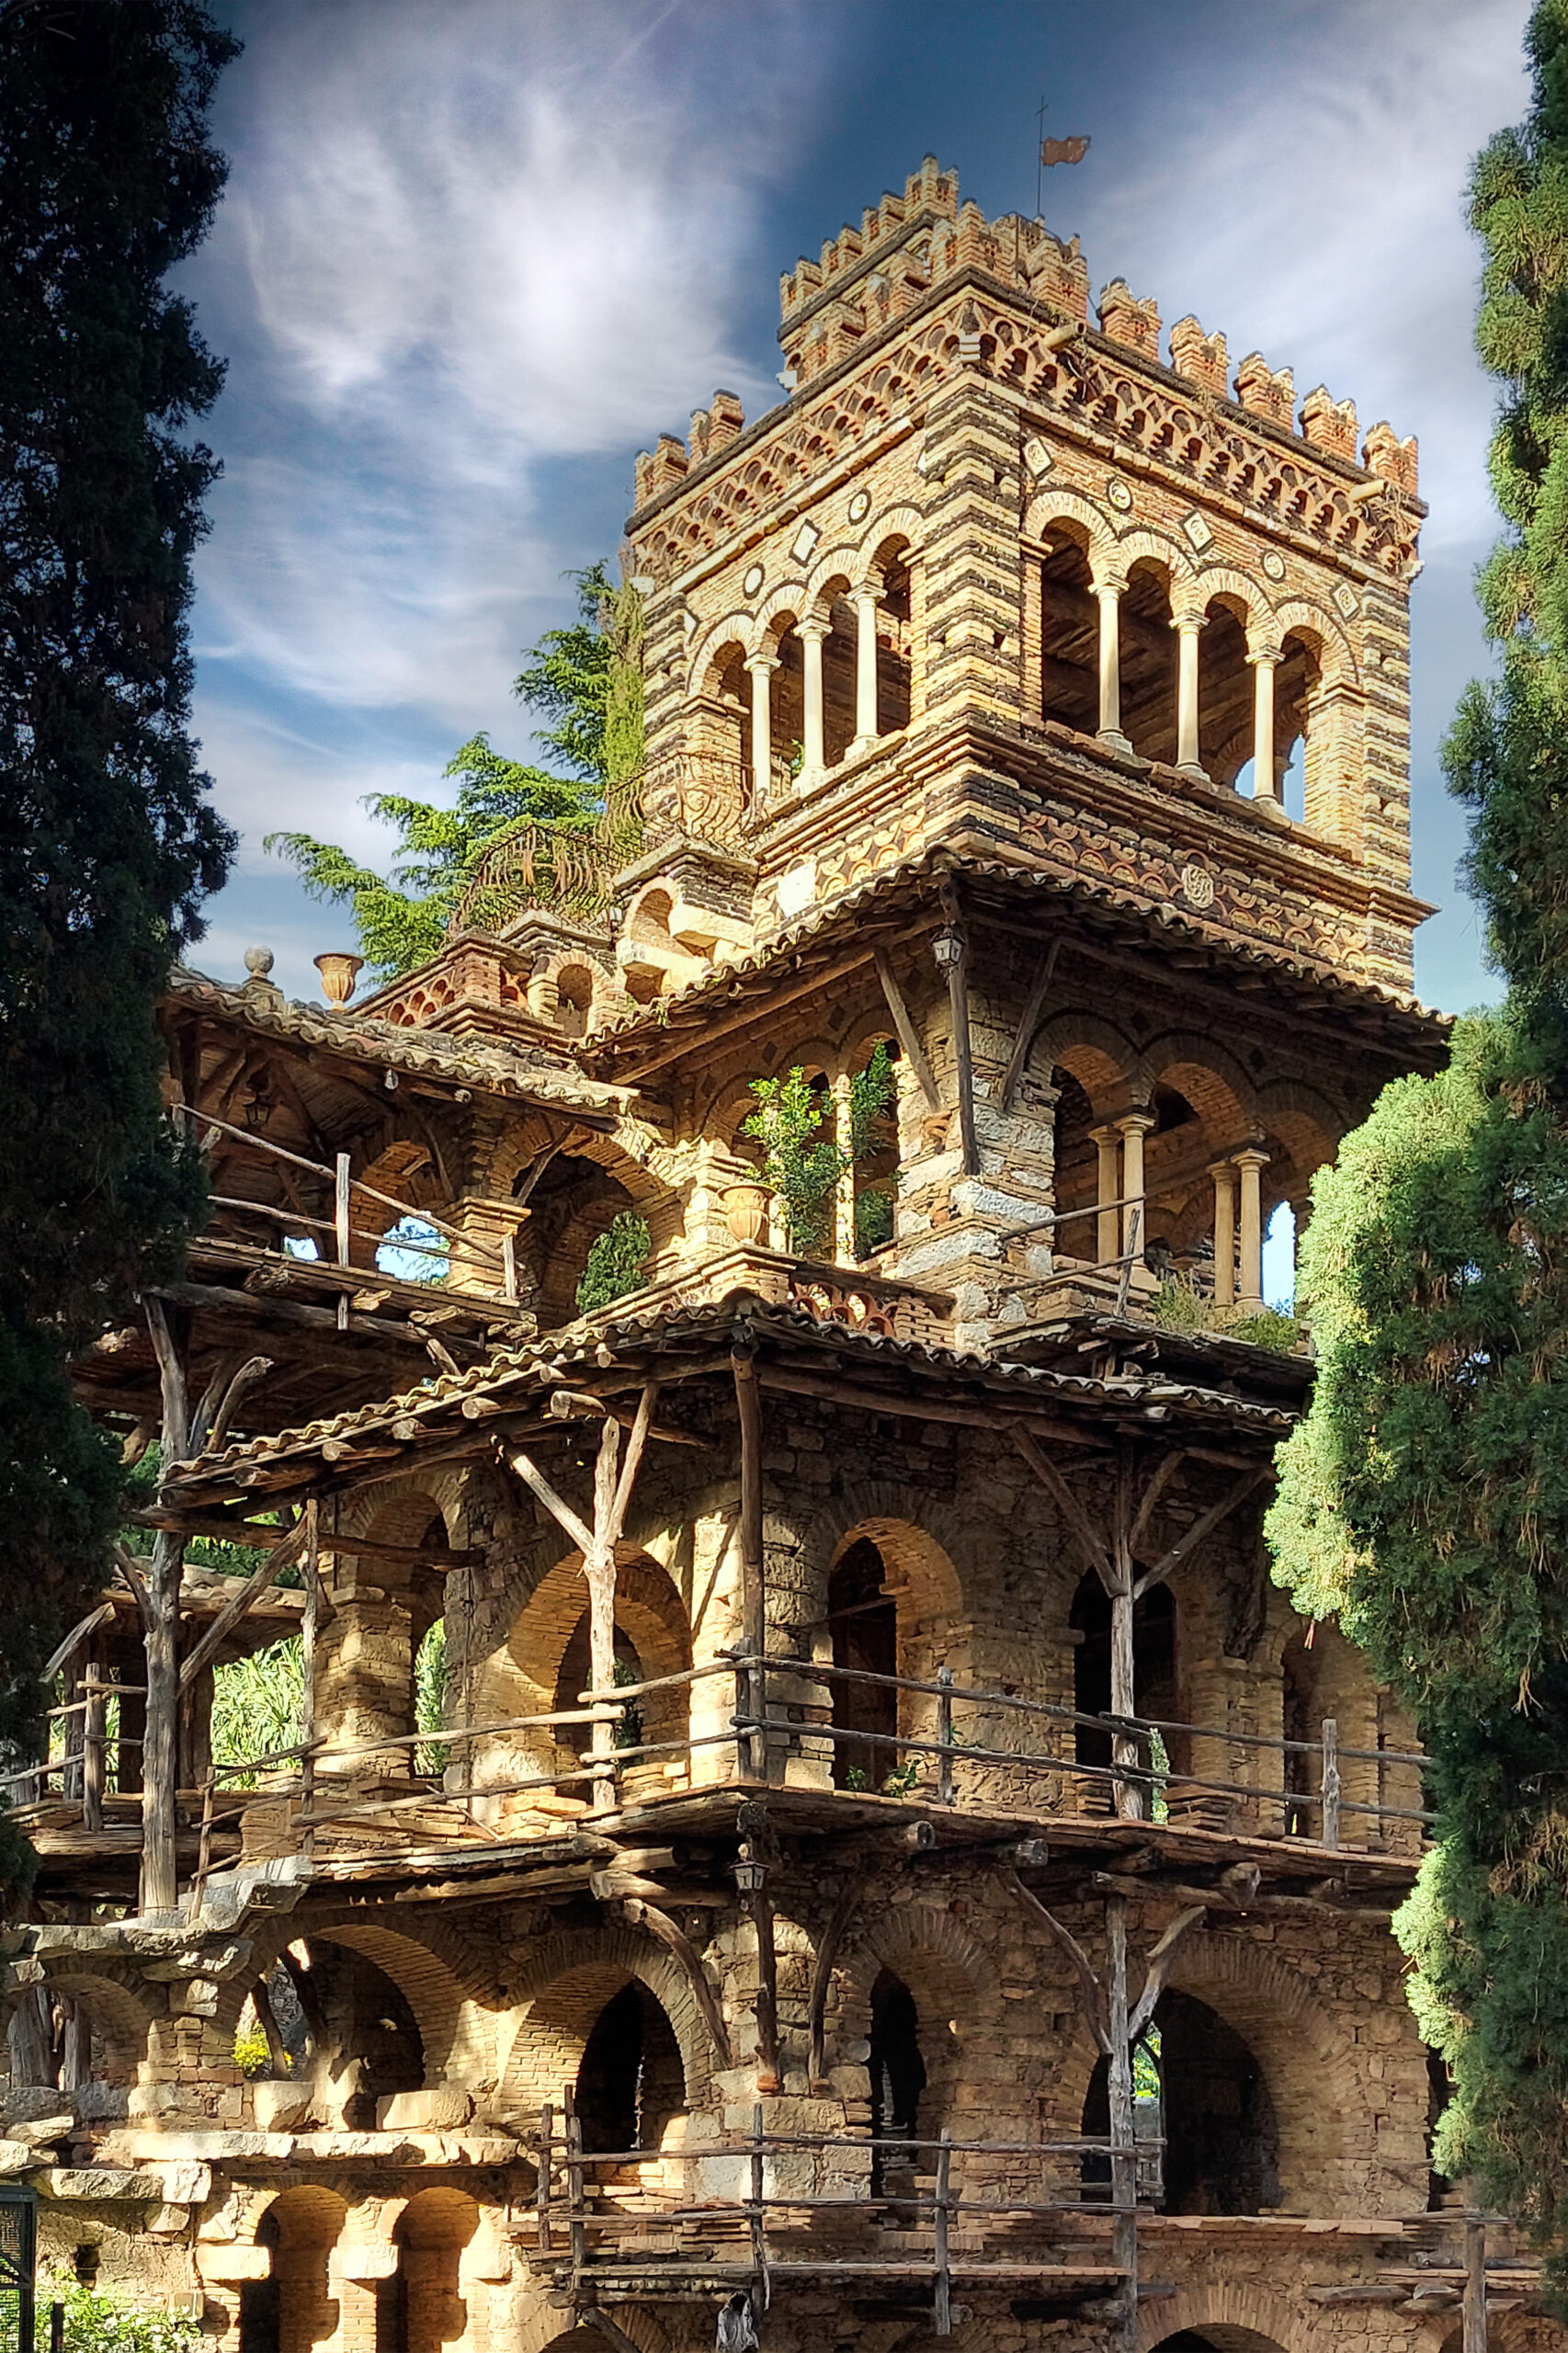
Afternoon and evening: Taormina.
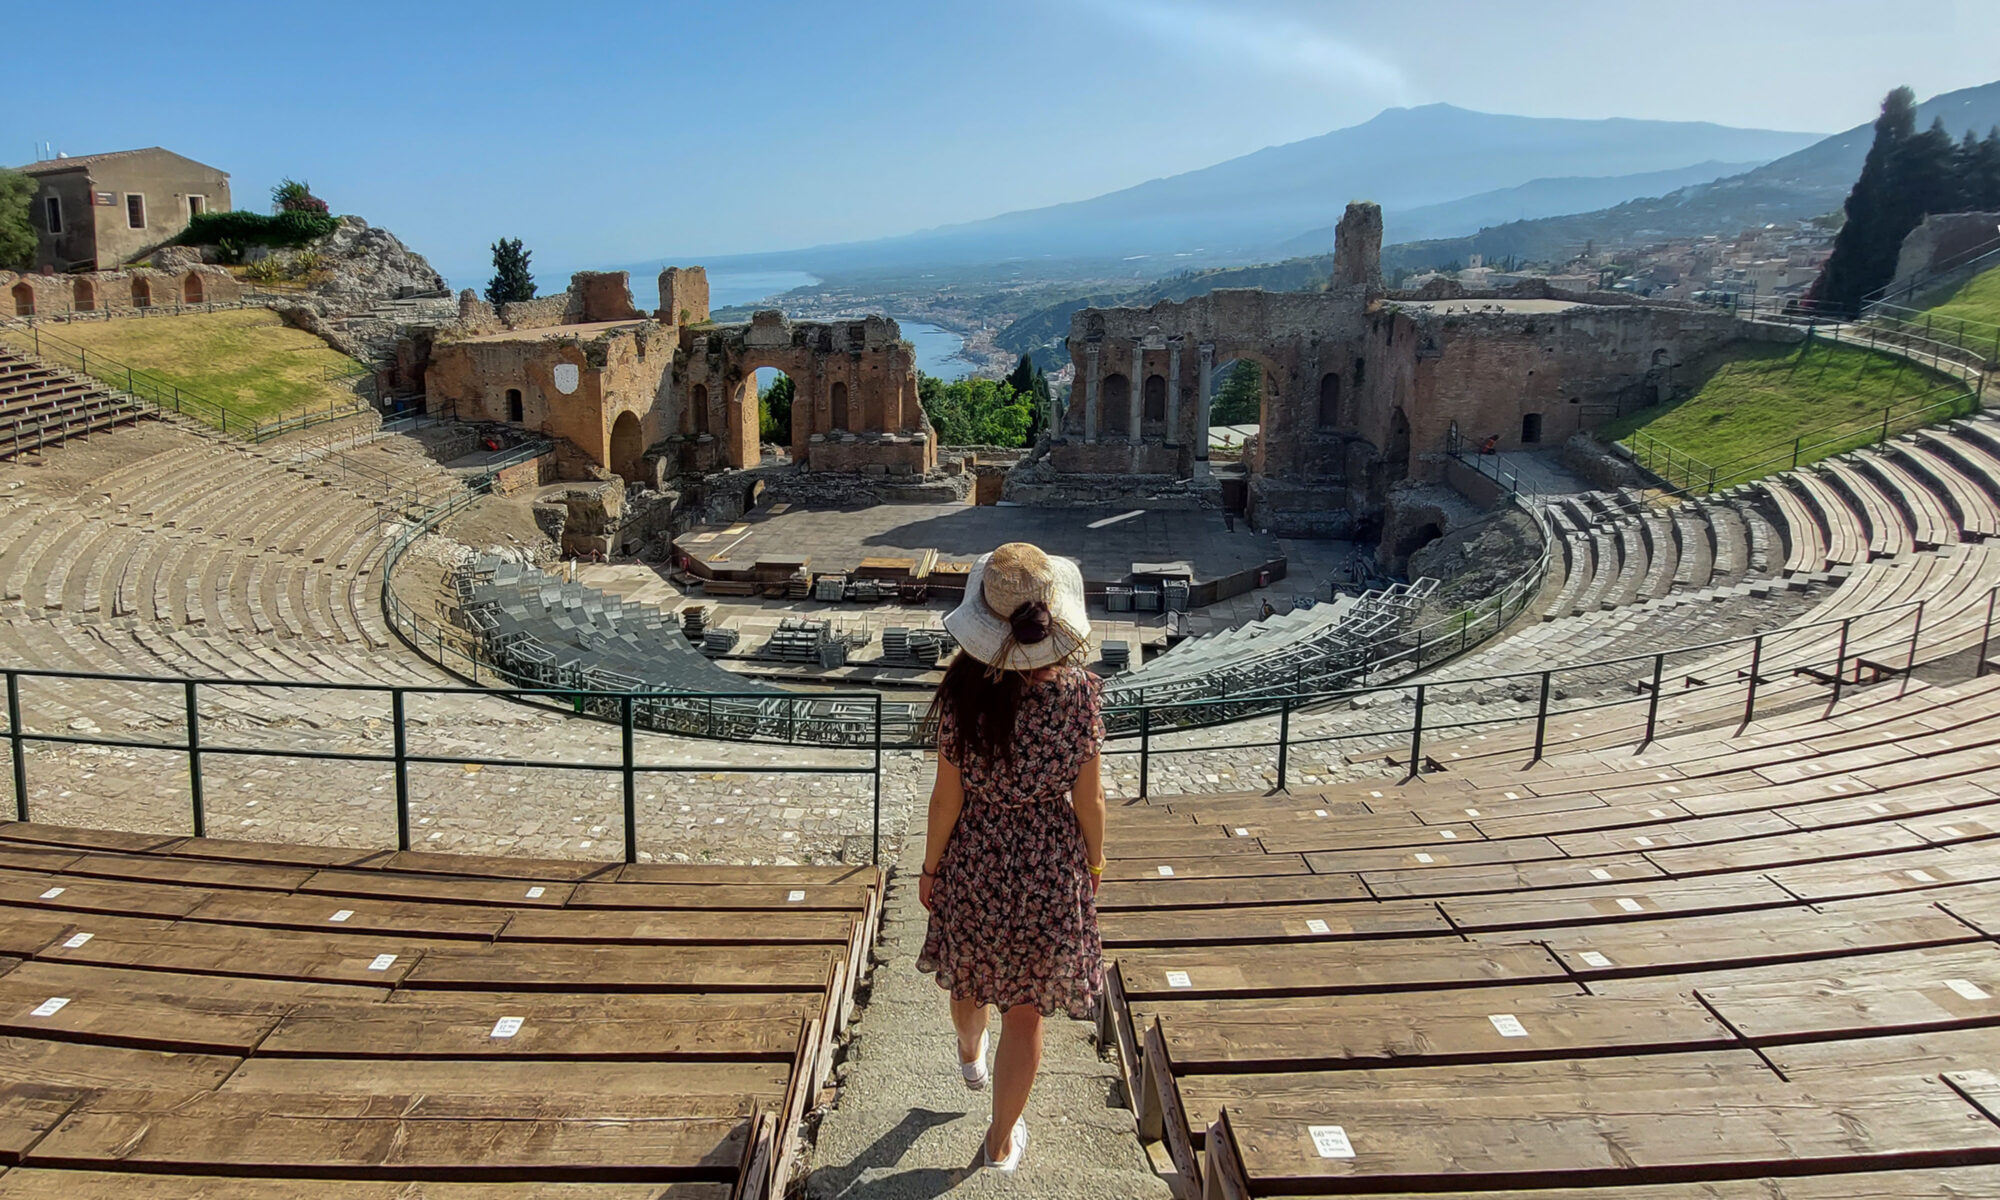
Leave your car at the Porta Catania car park (for a fee, very convenient for reaching the city center) and start the visit from the gardens of the Villa Comunale, then get lost in the city streets and walk Corso Umberto I until you reach, at least one hour before sunset, the Greek Theater (check the opening hours for visits, considering the season of events). In this way you can admire the theater with the sunset and the Etna in the background. A gorgeous view.
To best capture this moment, use the wide angle. To balance the exposure, with your smartphone, activate HDR correction, while with your reflex, help yourself with a graduated filter or shoot using bracketing. Read this article to learn more. If the sunset time is beyond the visiting time, go there in the early afternoon. In this way the sun will be high and you will not have annoying backlight.
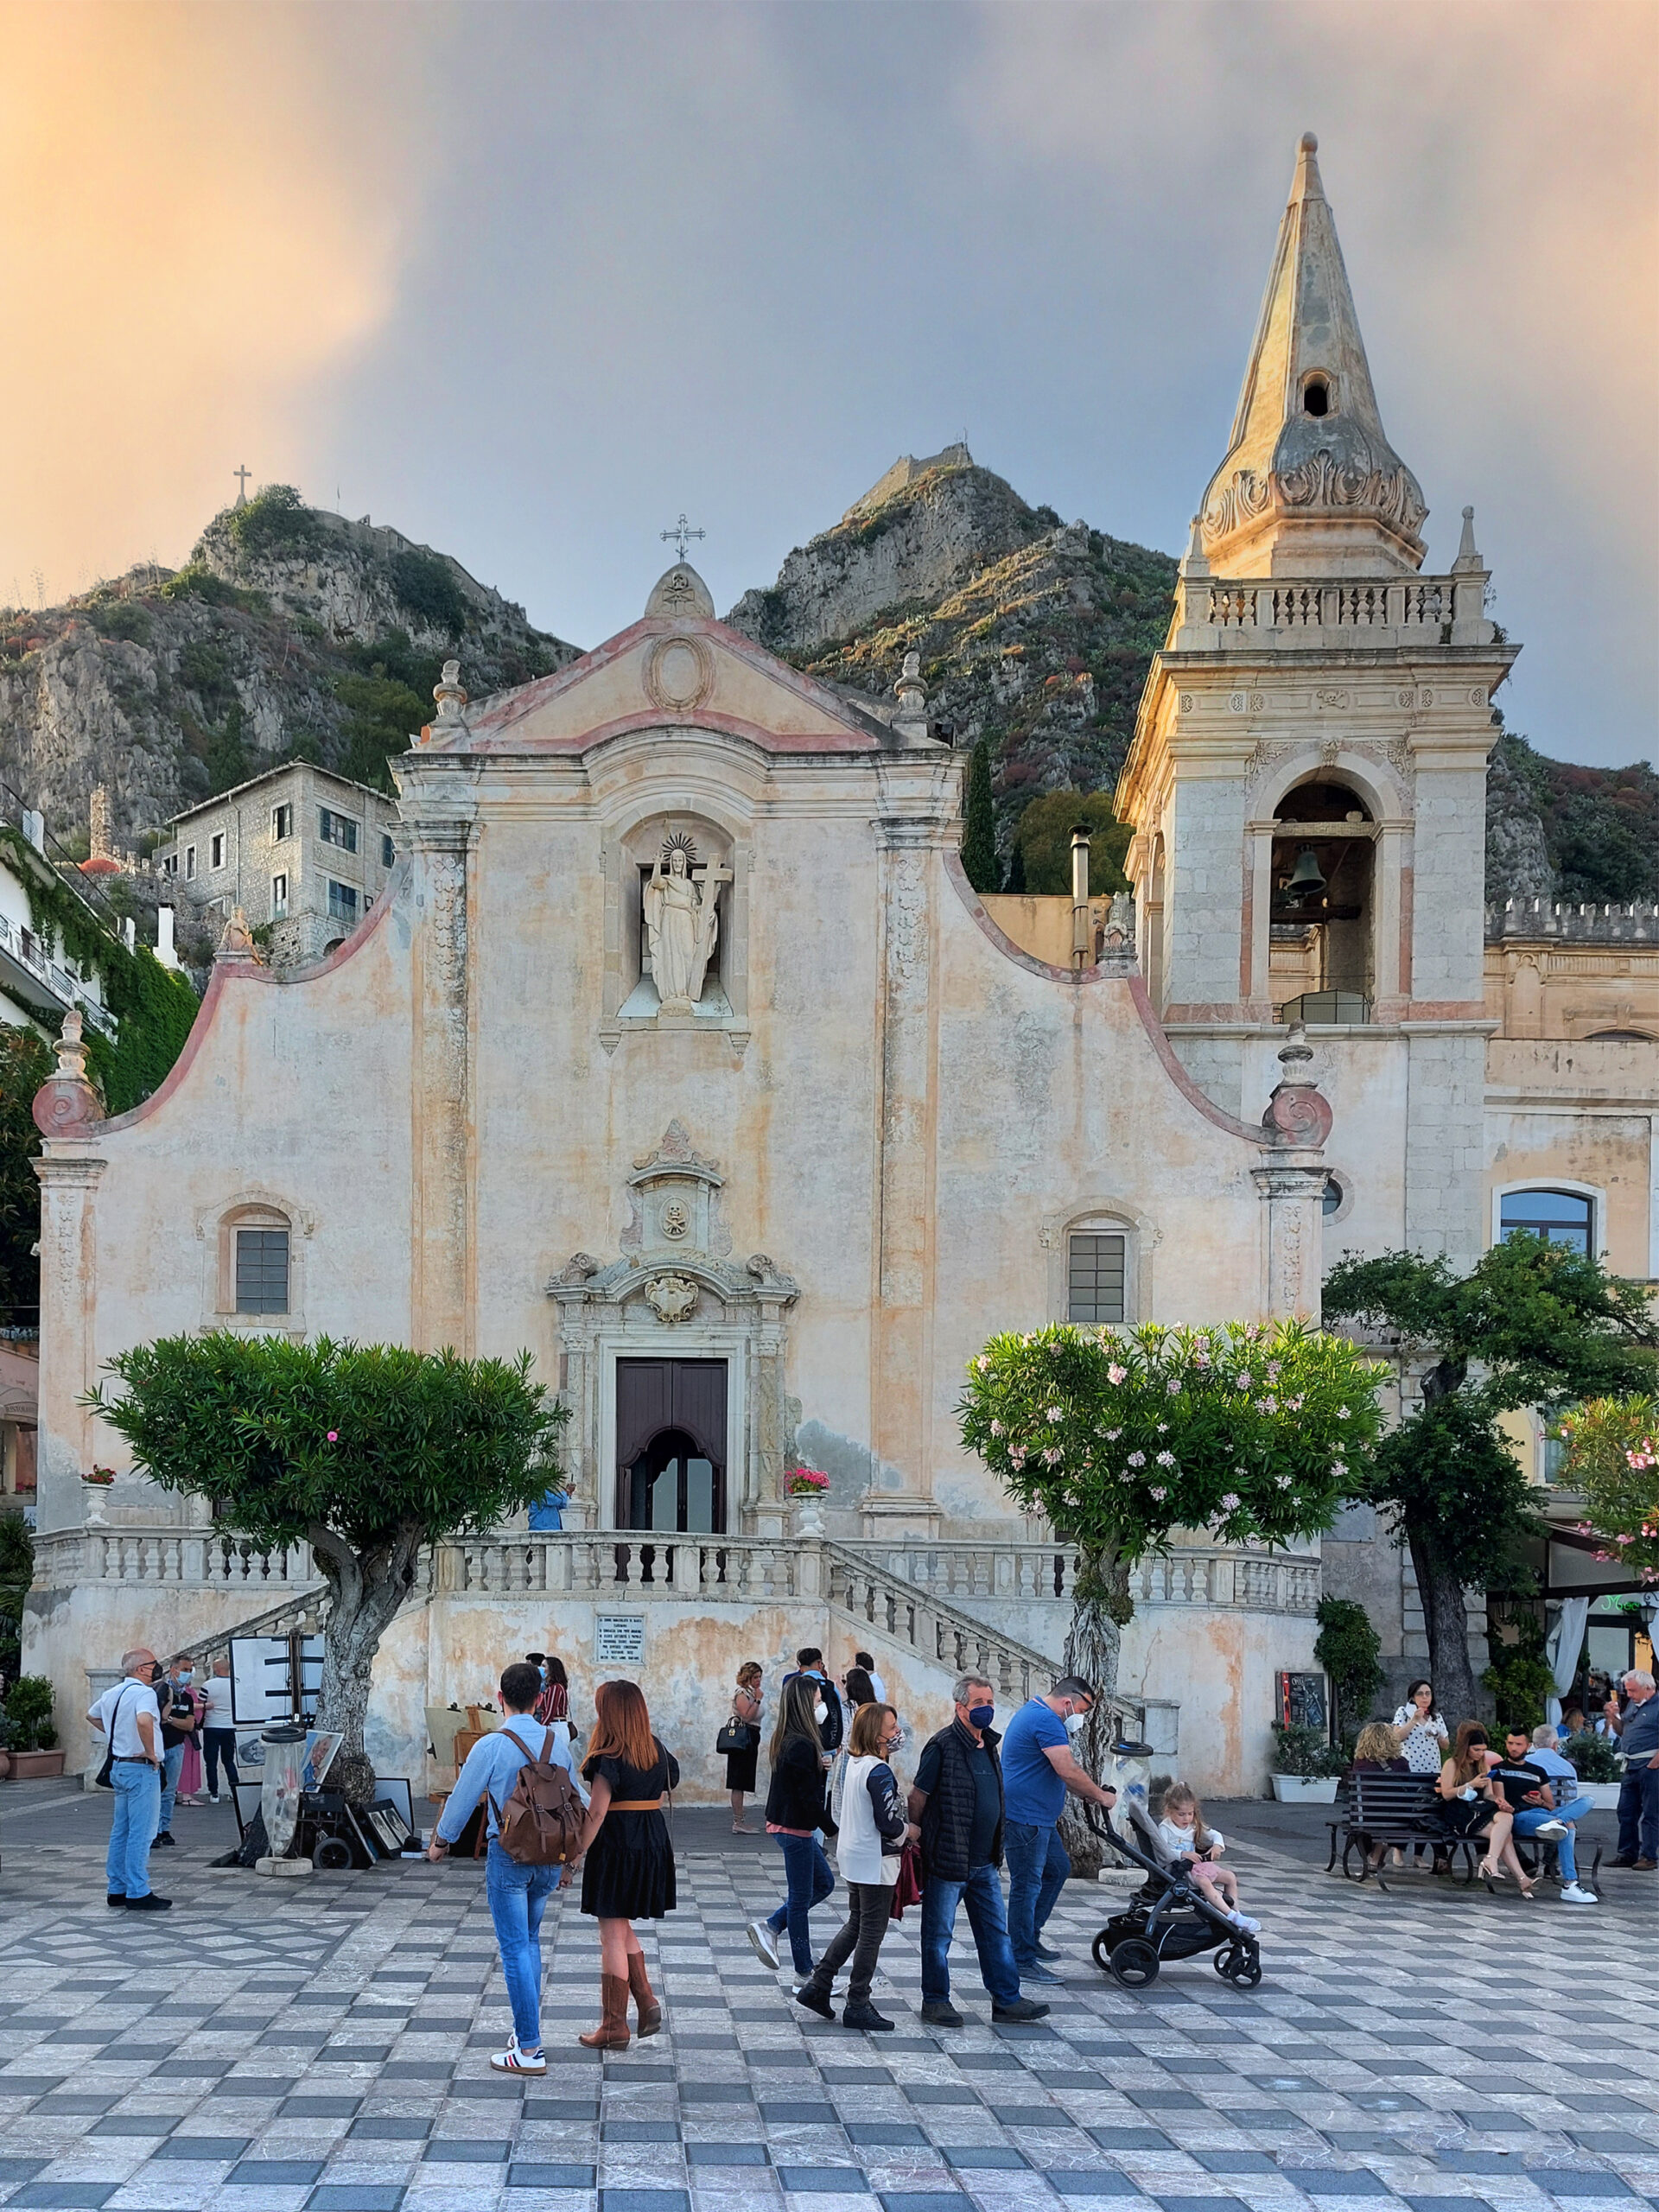
Leaving the theater, head towards Piazza IX Aprile, from which you can enjoy a breathtaking view of the sea. The square, dominated by the Church of San Giuseppe, dominated by the rock, is a very elegant place with the evening lights and the people crowd outside the clubs. Continue then to the historic Porta Catania. Stop for dinner in Taormina, don’t miss this unique atmosphere!
@giadaantonini_photography
@giadaantonini_photography
@giadaantonini_photography
@giadaantonini_photography
Giorno 4: Siracusa
Leave from Catania and reach Syracuse, about an hour’s drive away, where you can stay for another two nights.
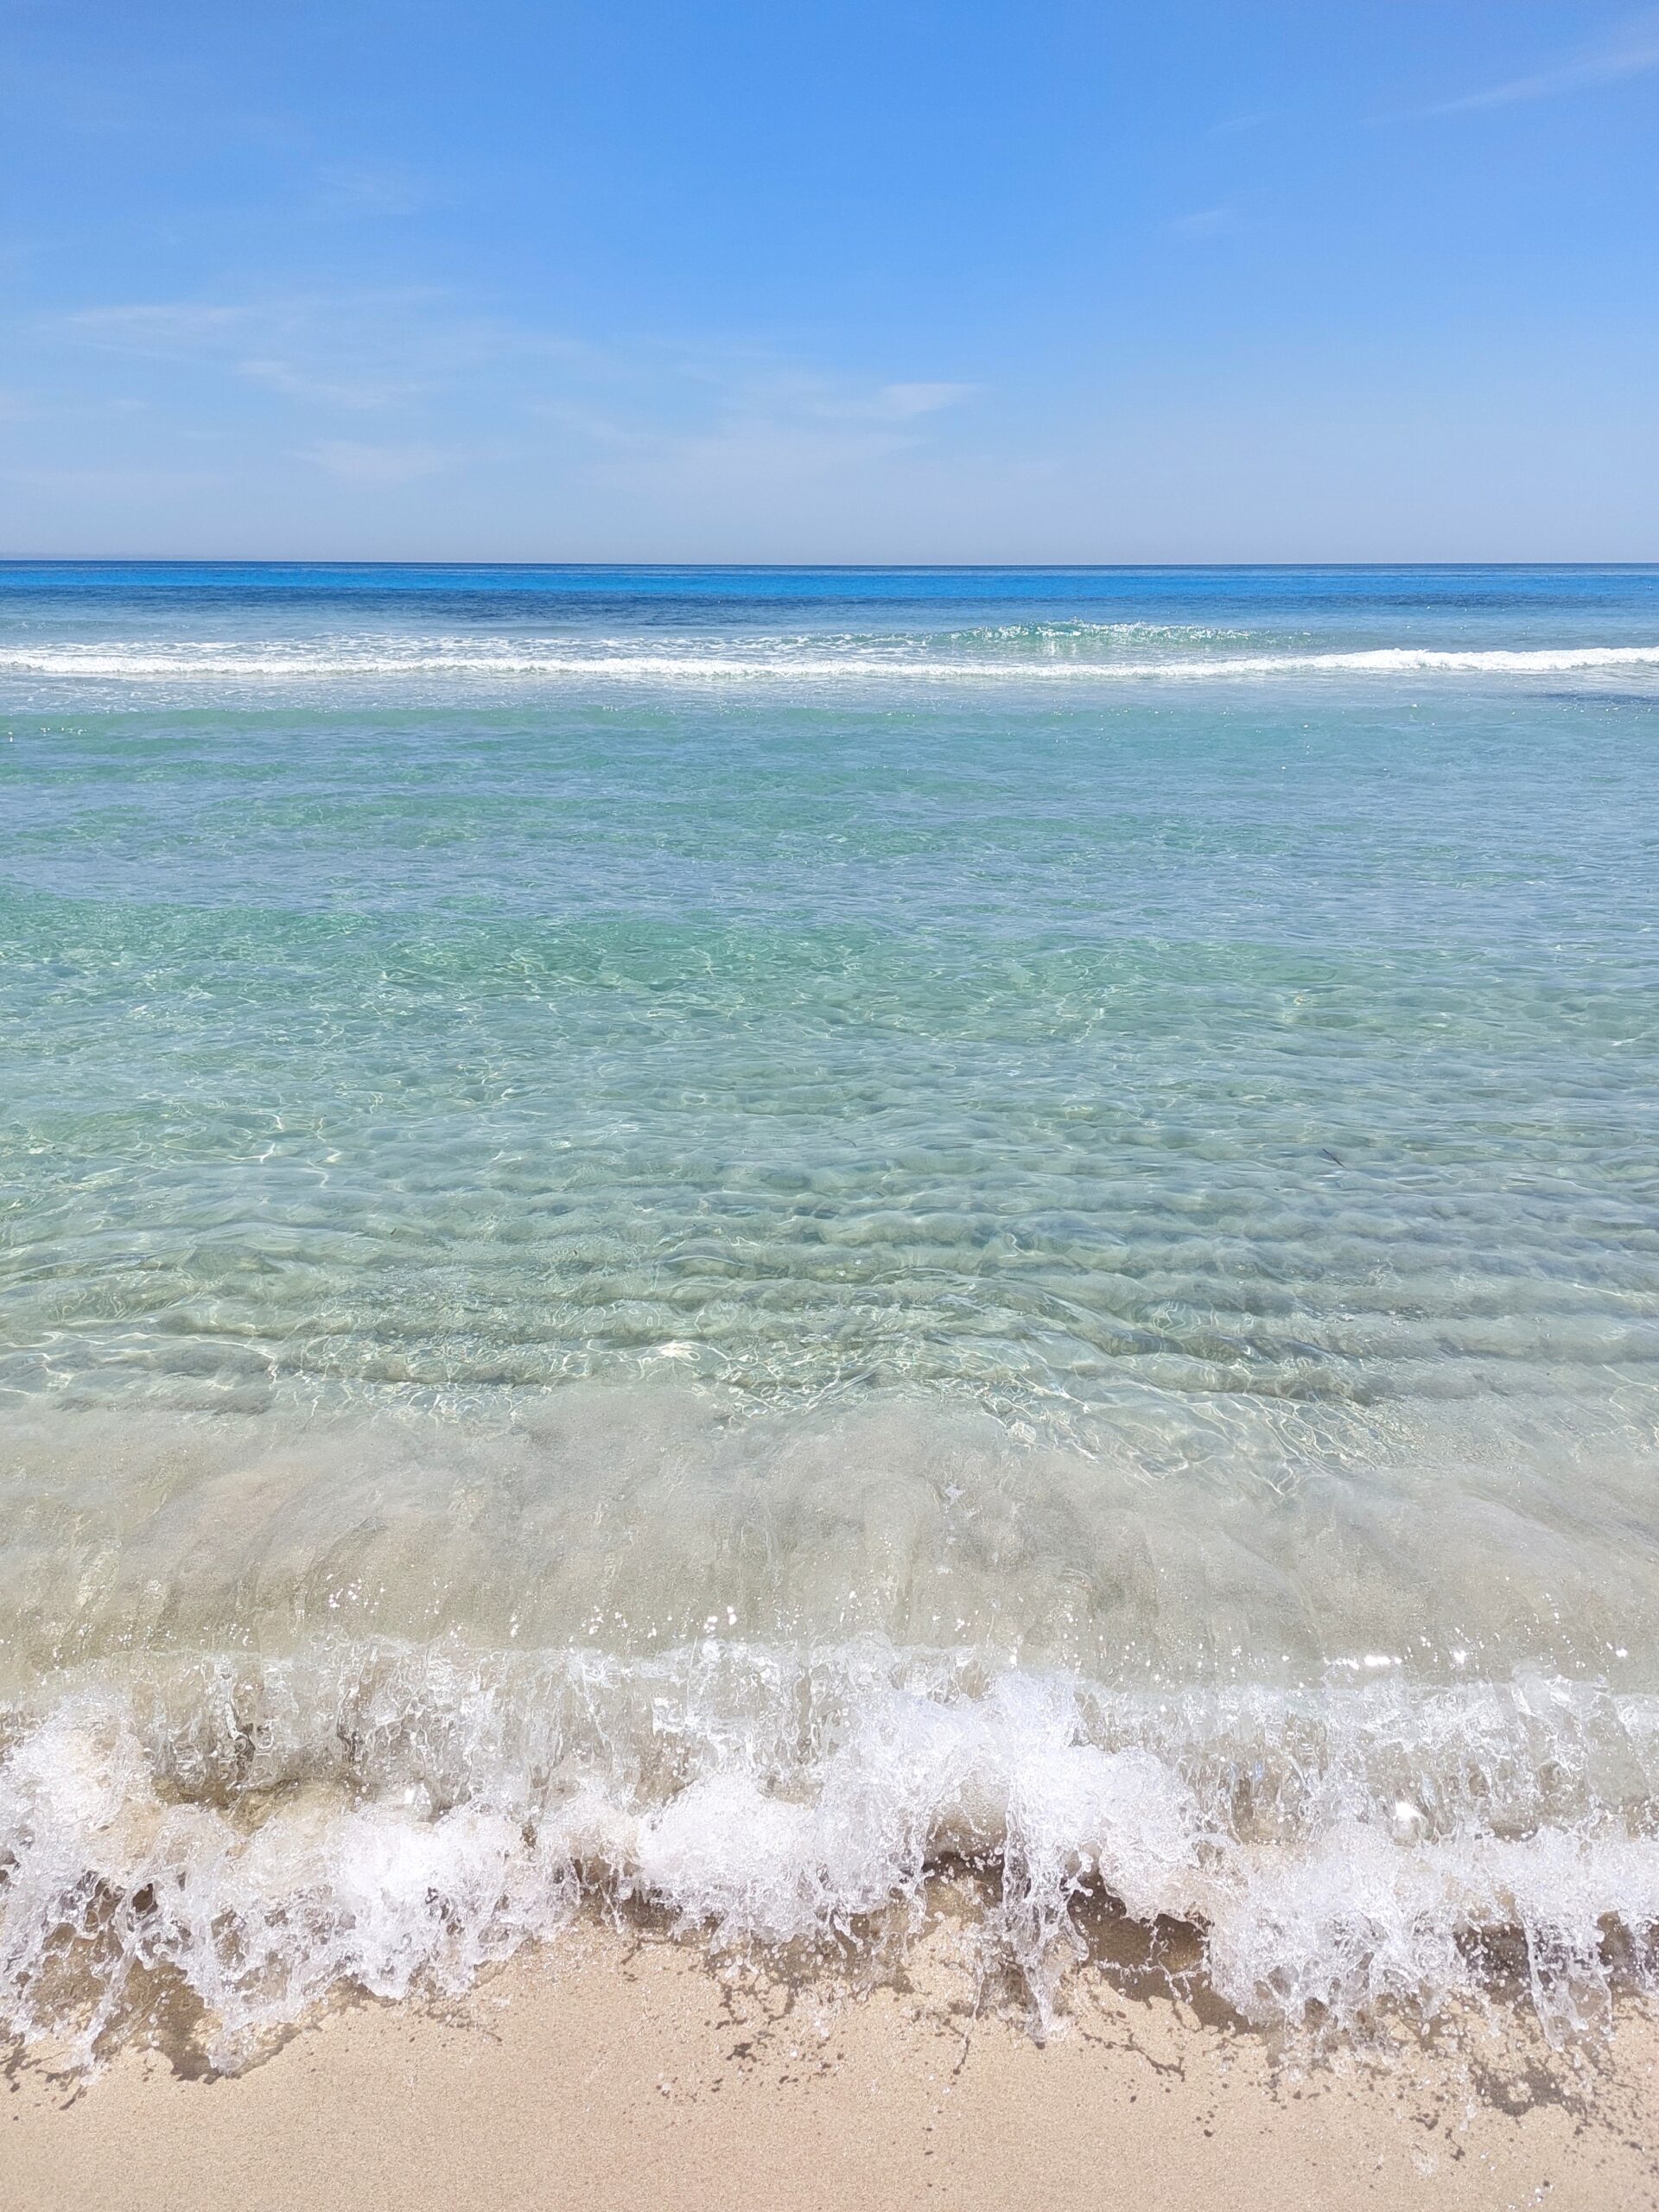
Morning:Siracusabeaches
It’s time to admire the sea, right in the Syracuse area. You can choose between the beaches of Fontane Bianche, Arenella or the Plemmirio Reserve, which are the closest to the city.
The best time for photos will be in the central hours of the day, when the high sun will bring out the colors to the fullest.
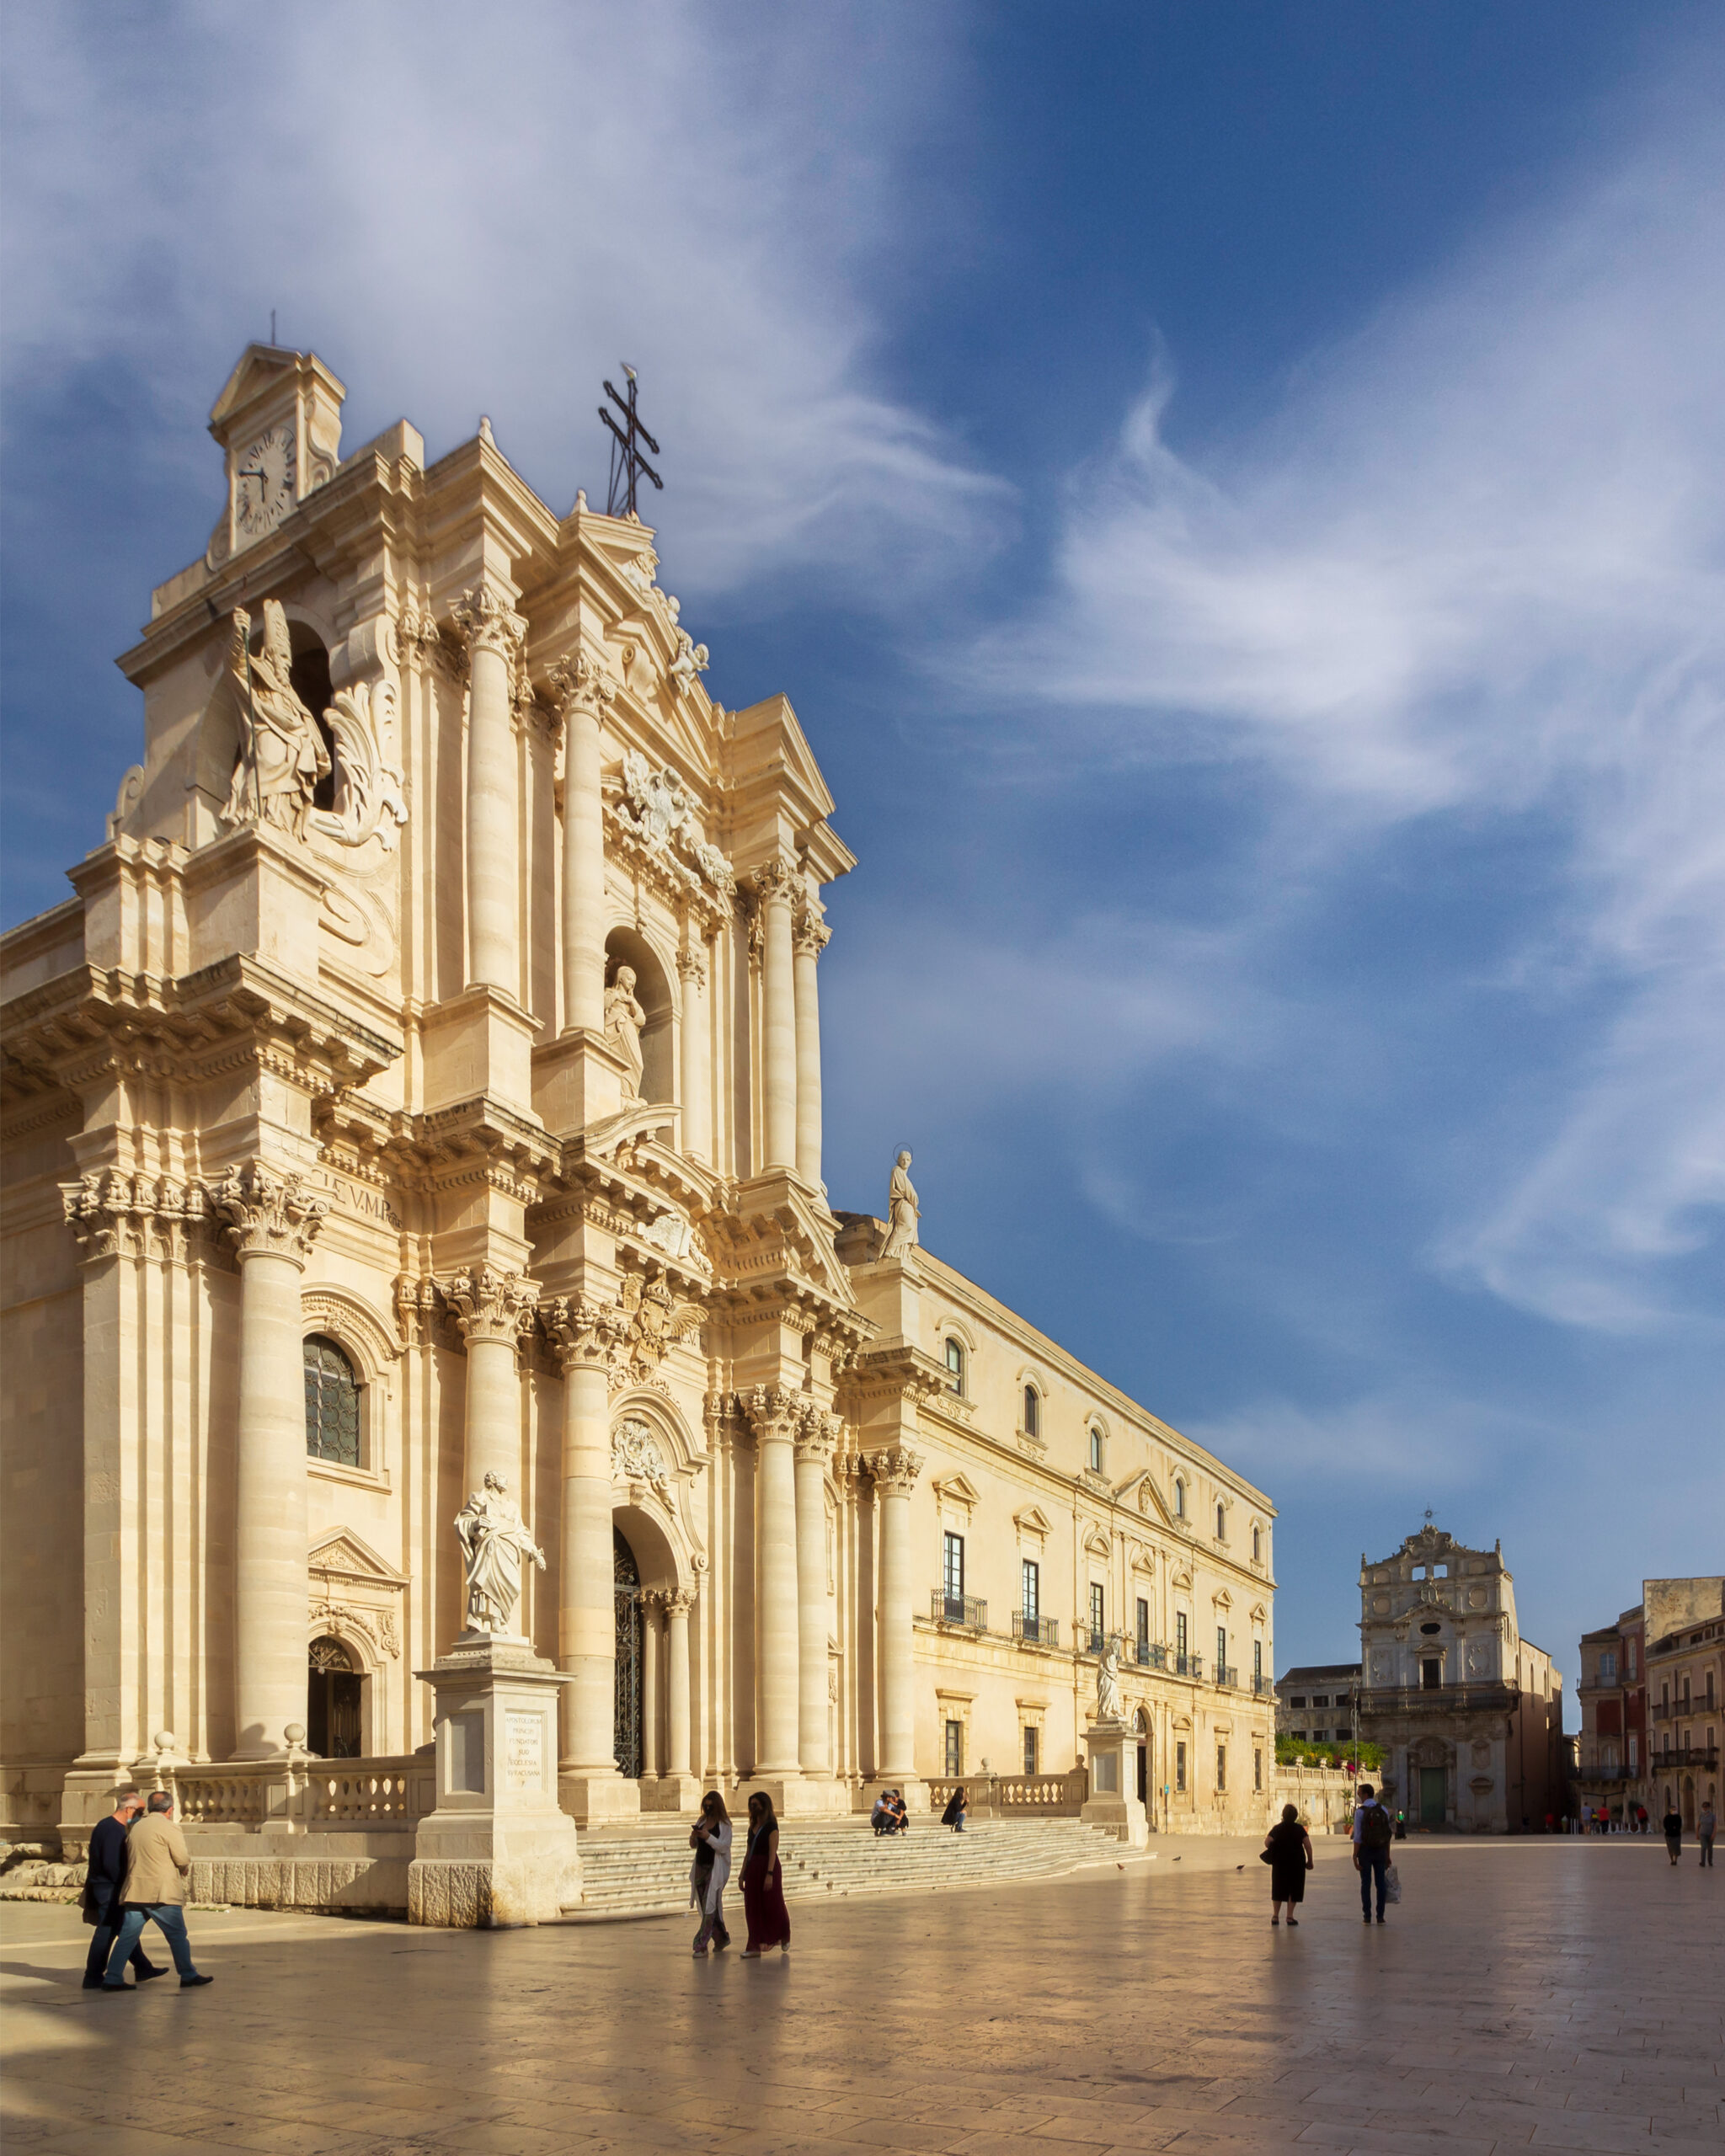
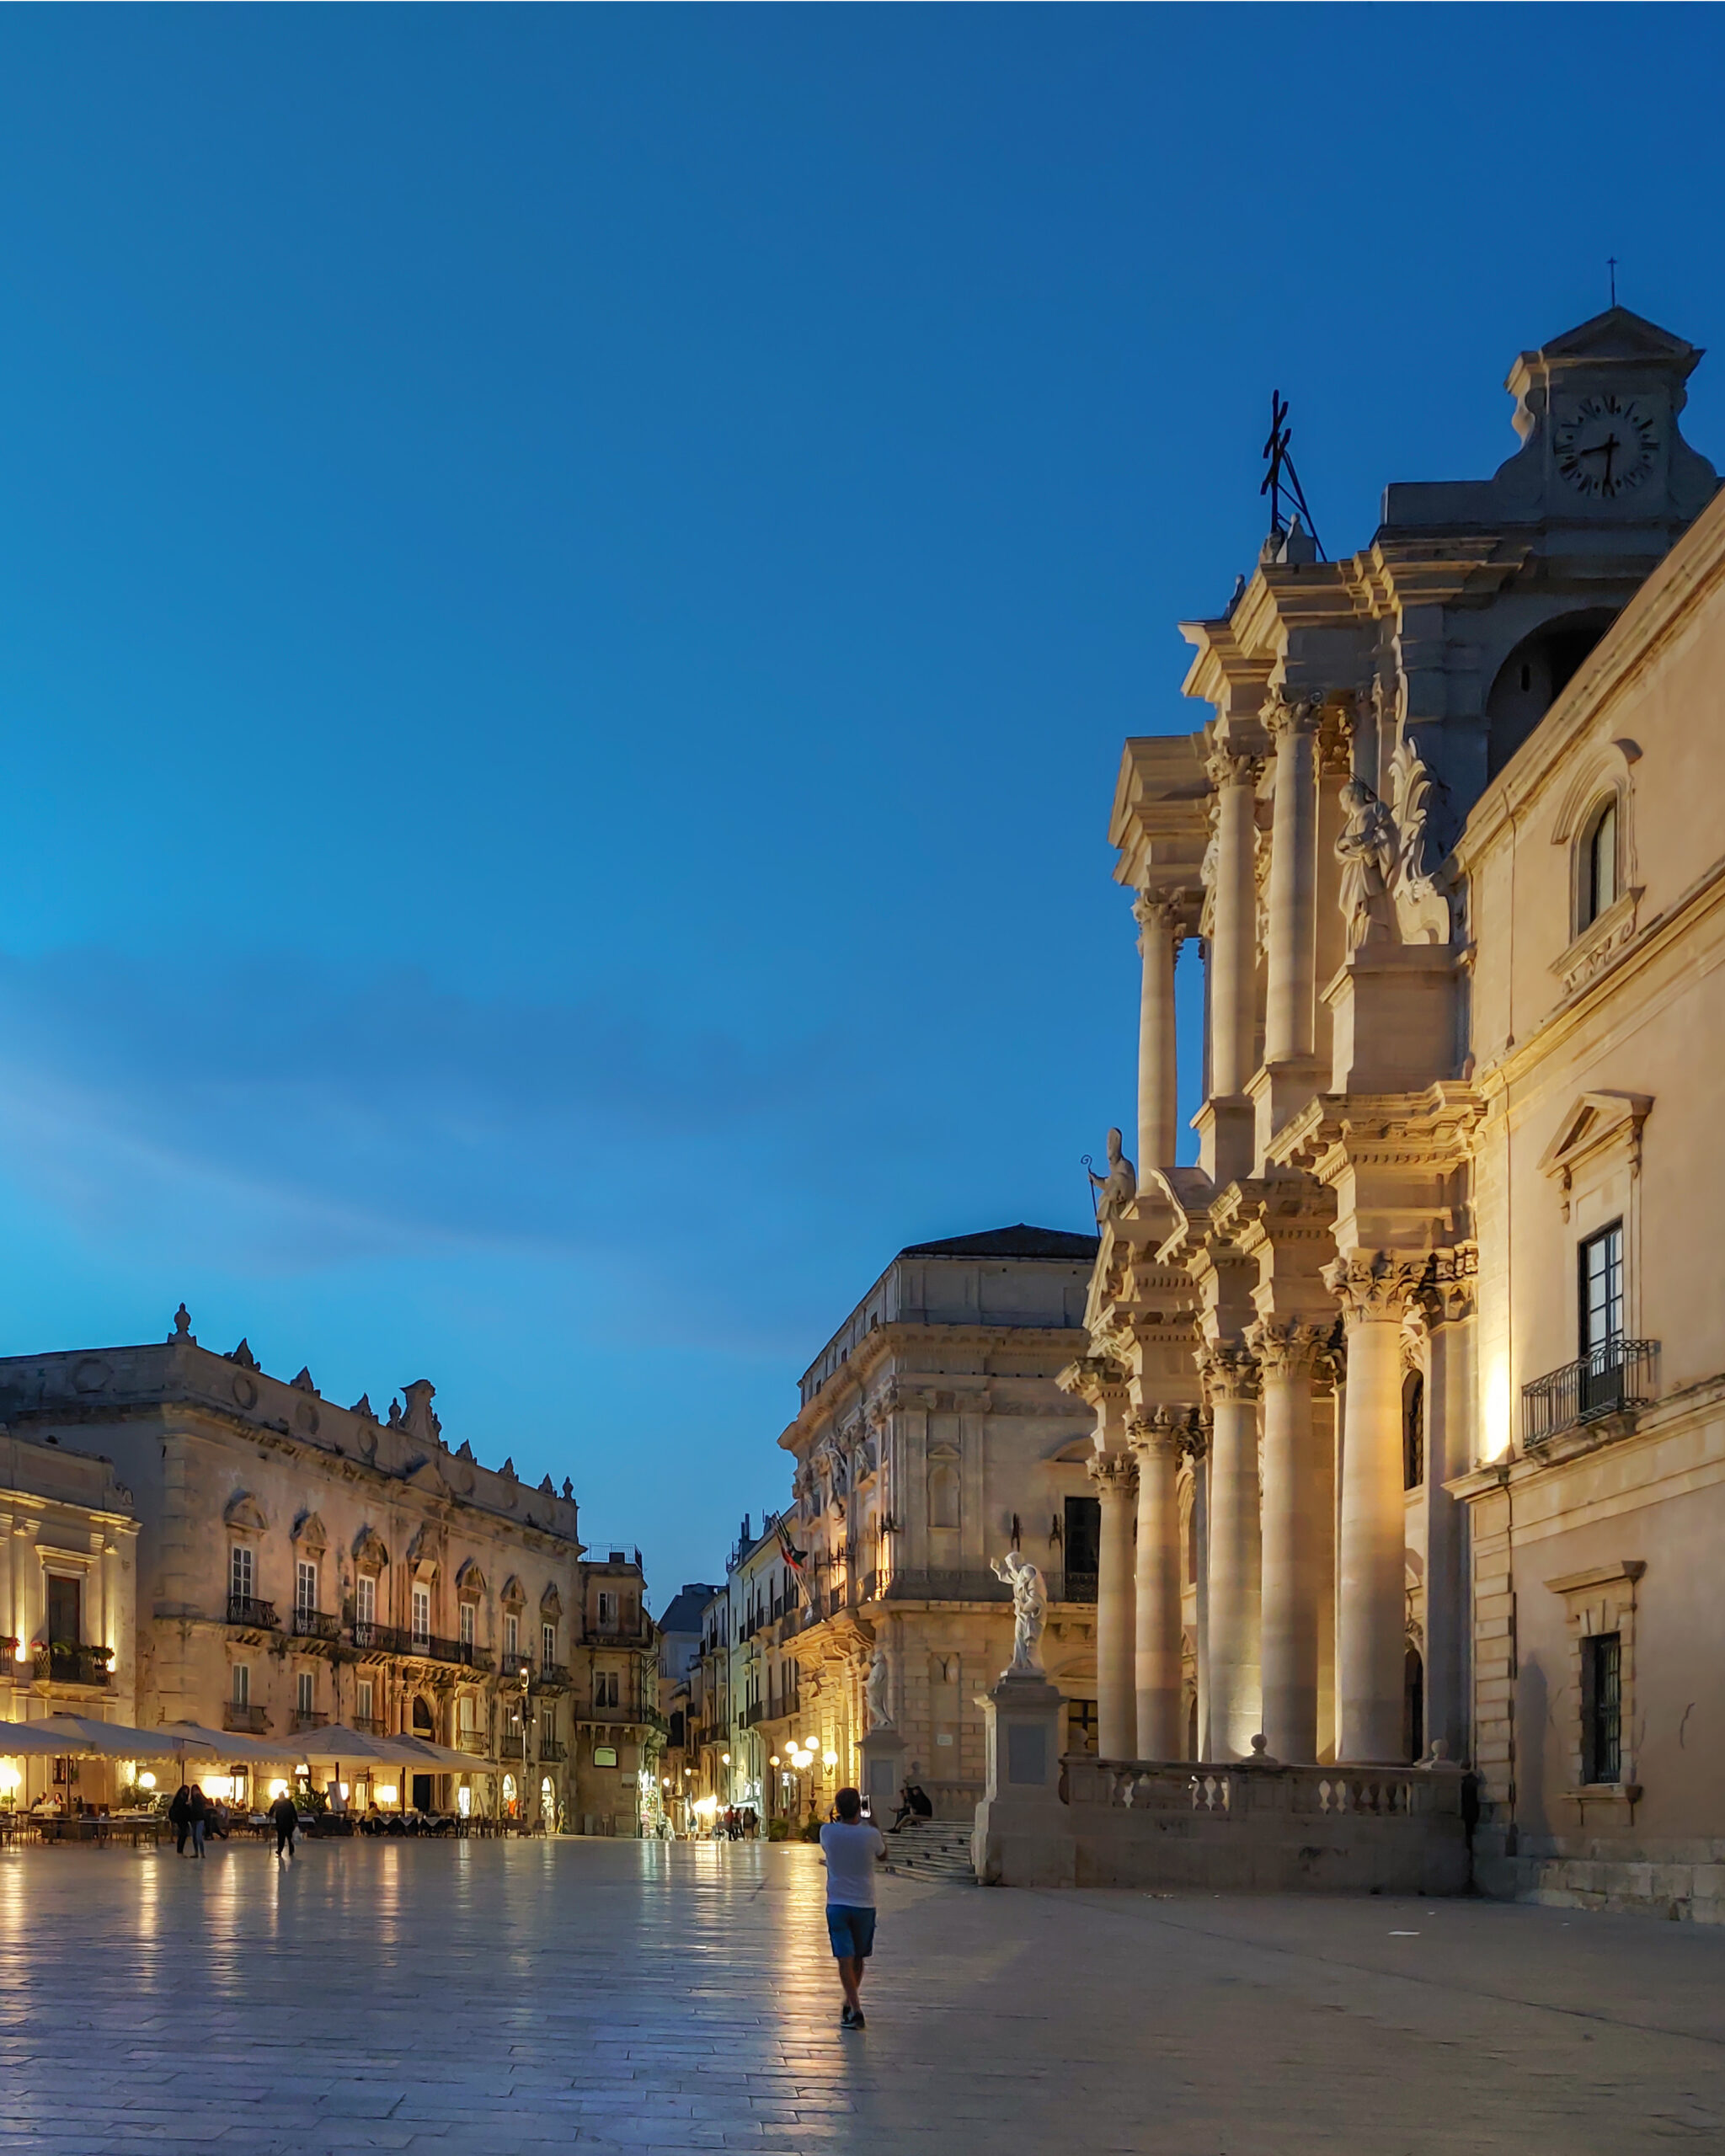
Afternoon and evening: Ortigia
Ortigia is the spectacular ancient part of Syracuse. Start from the remains of the Temple of Apollo in Largo XXV Luglio, walk along Corso Giacomo Matteotti and admire the Diana Fountain in Piazza Archimede.
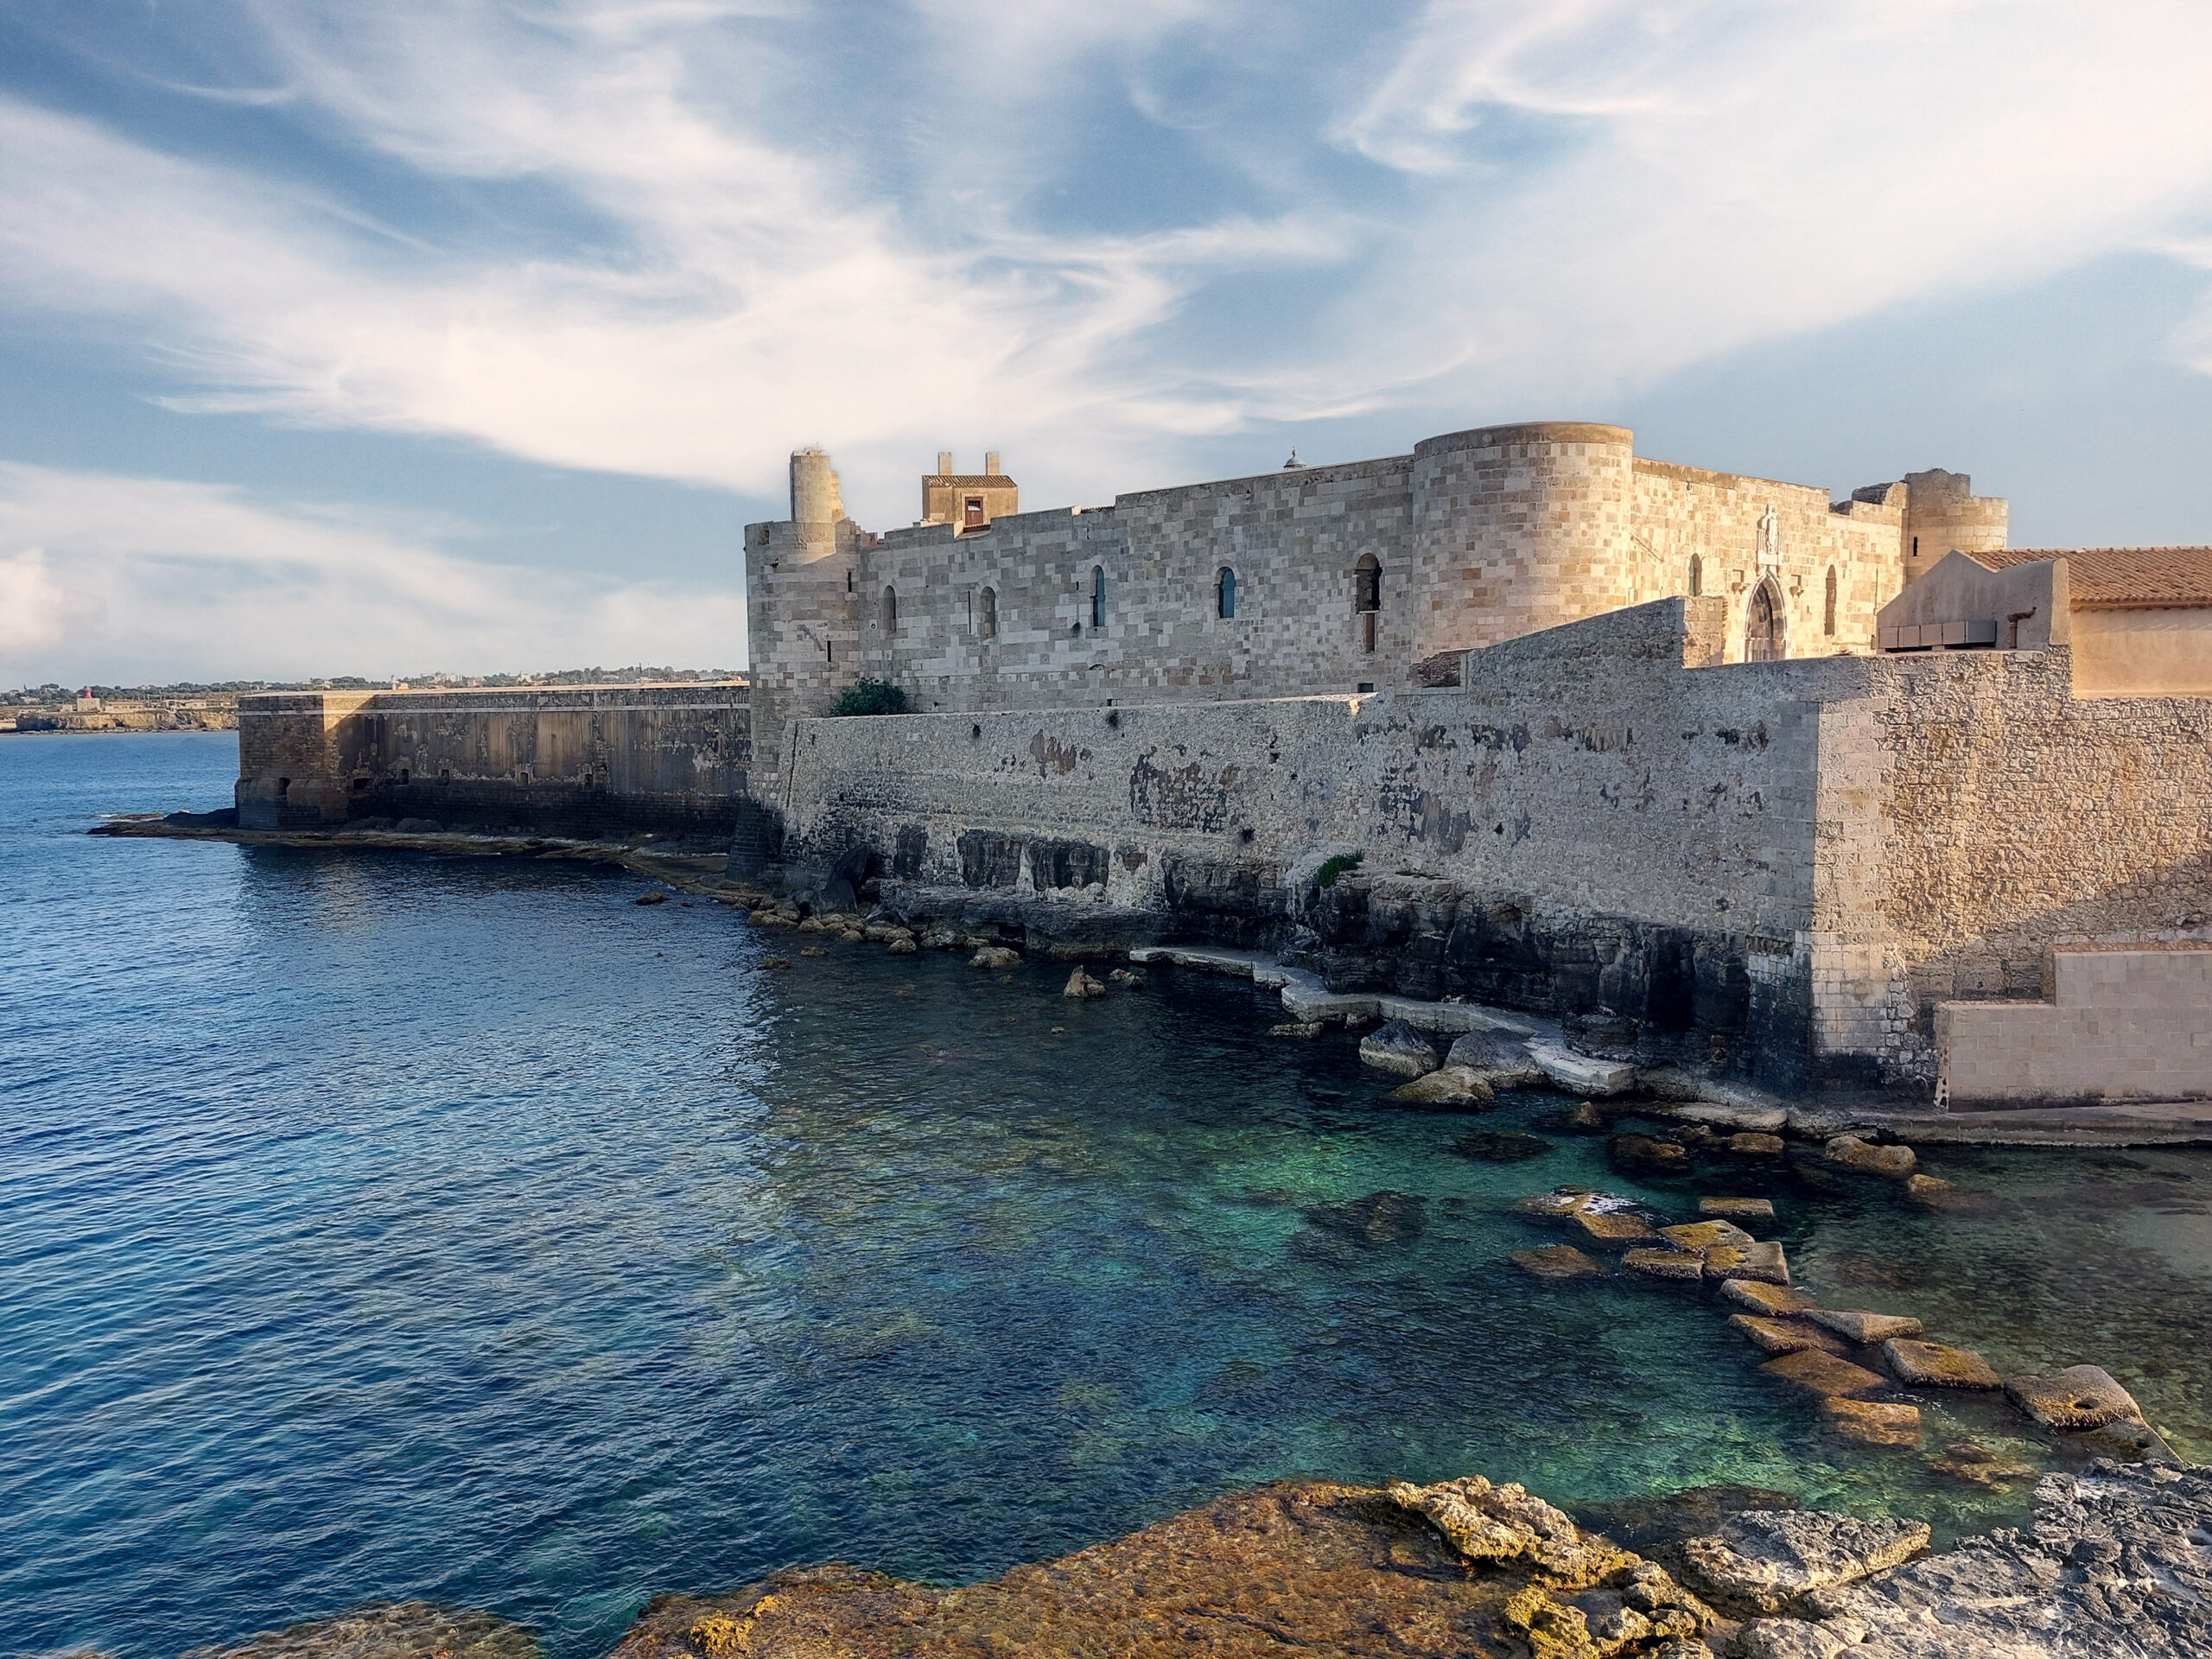
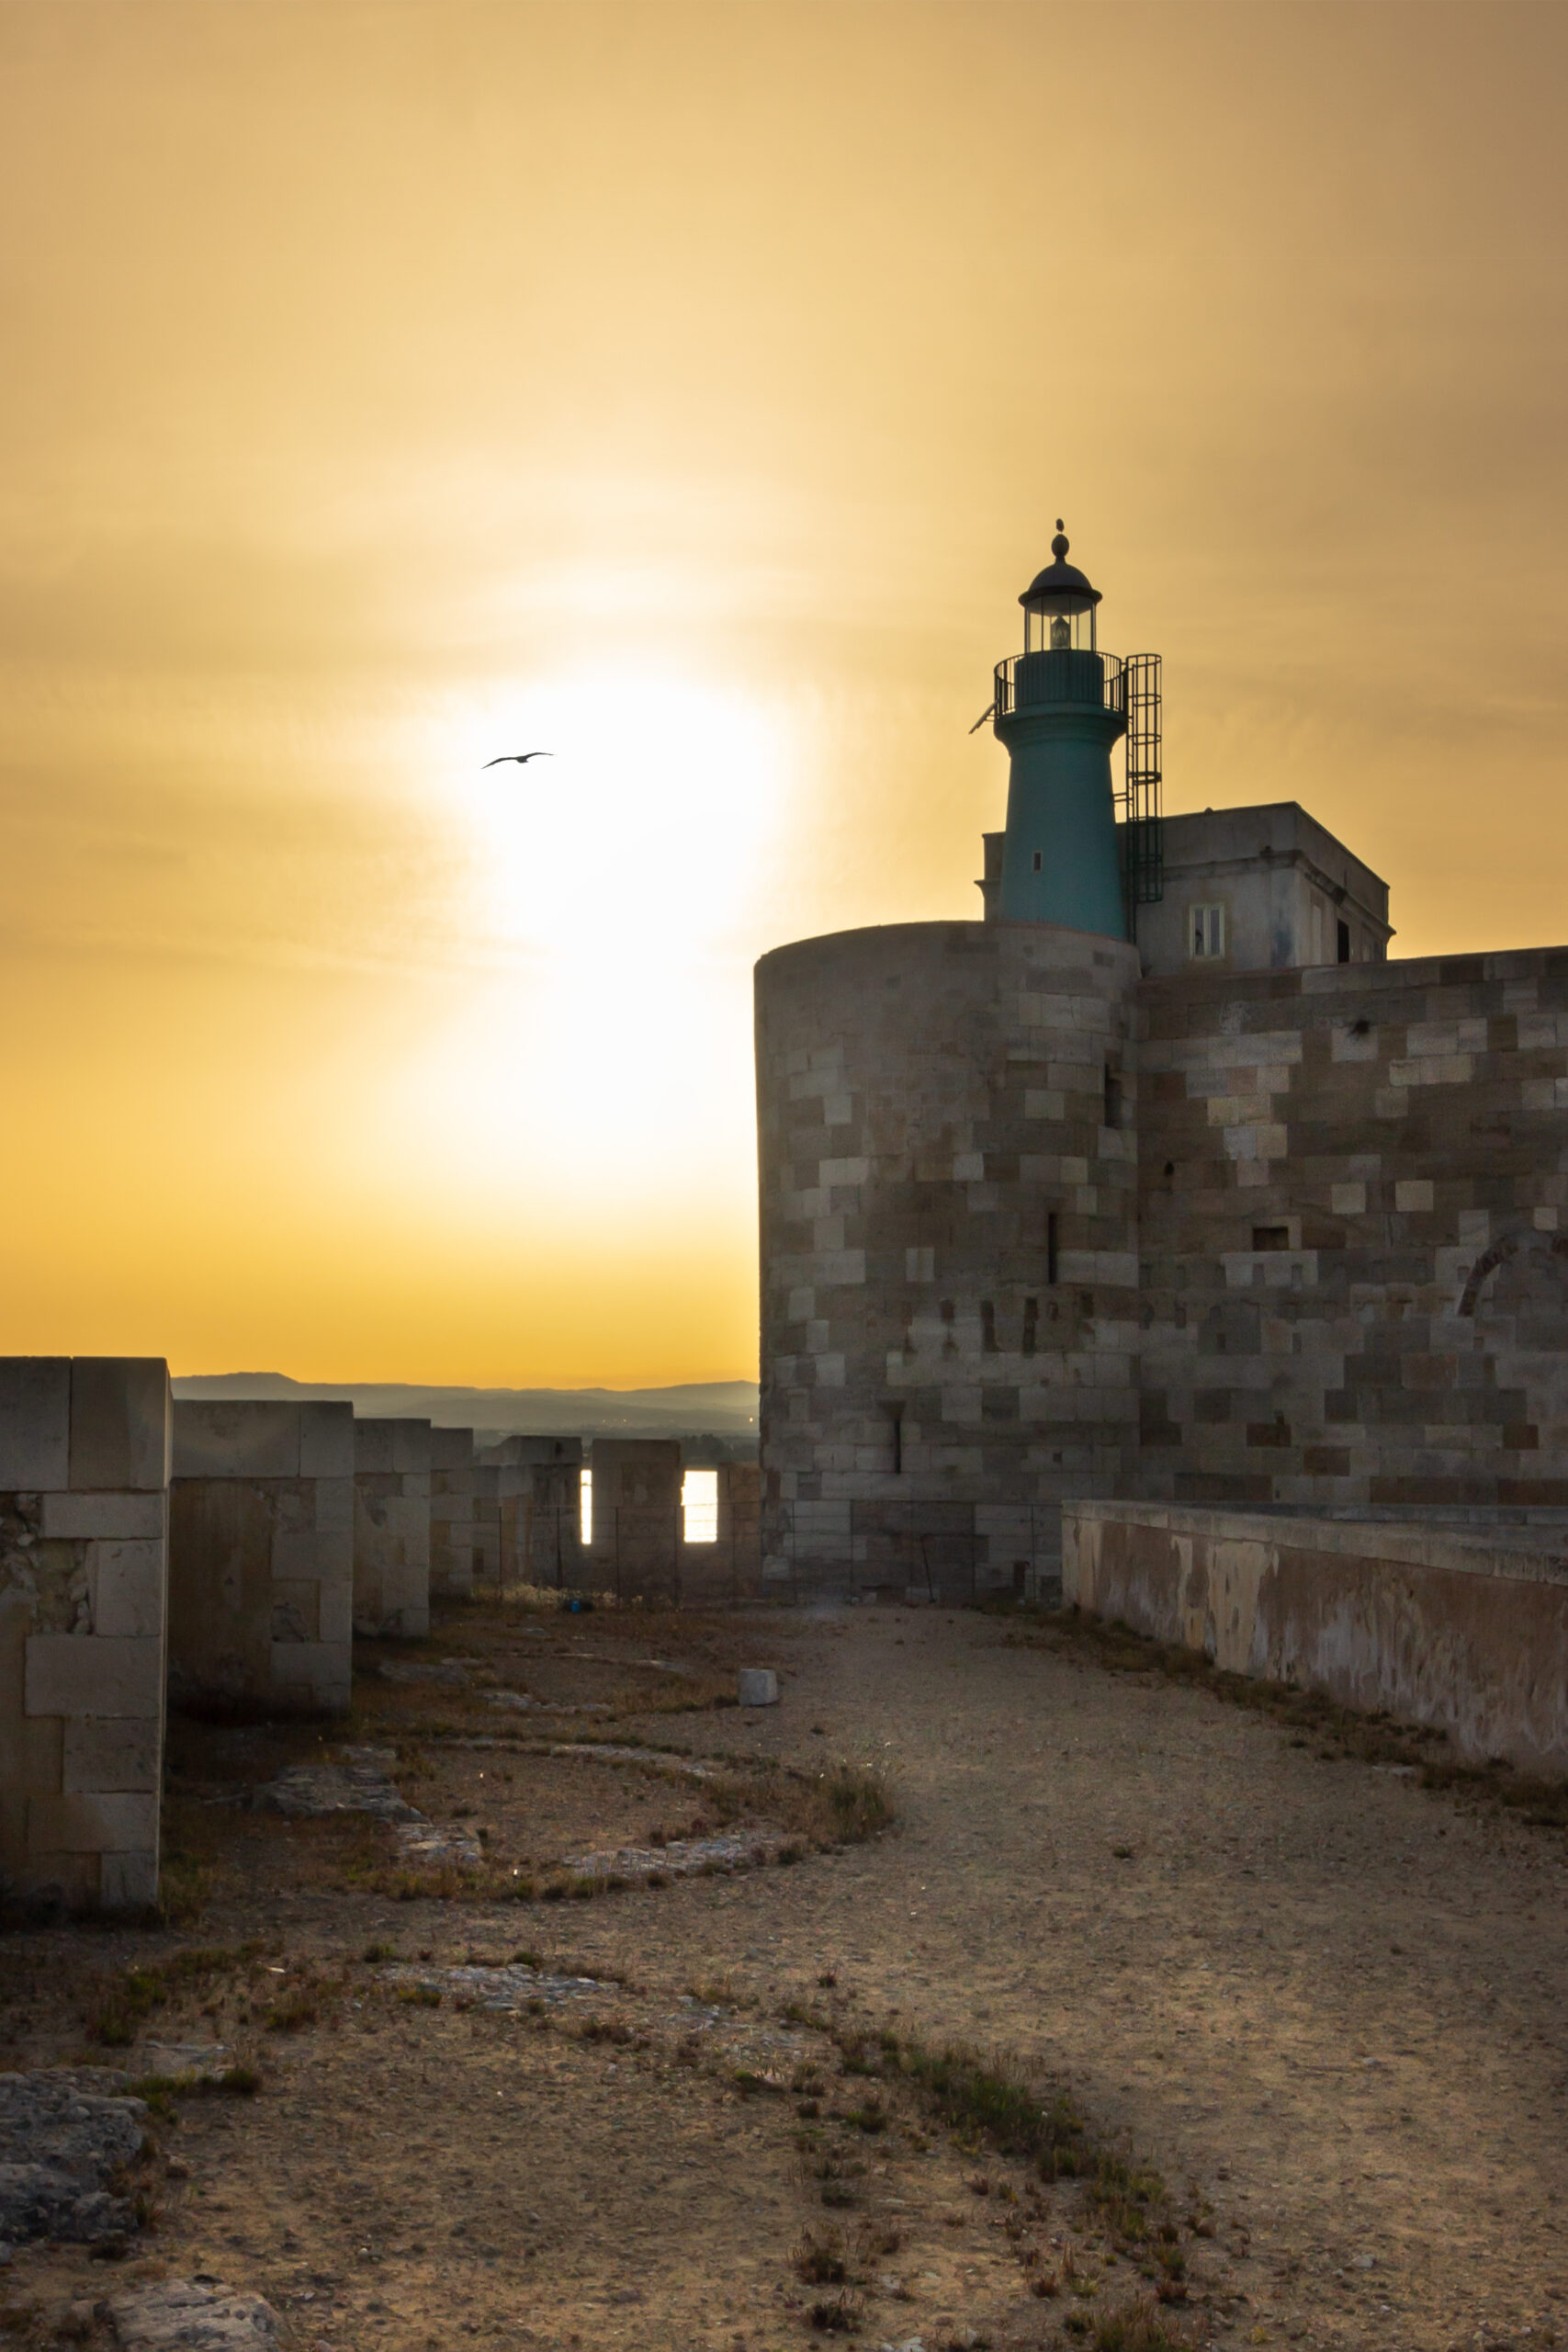
Then arrive in the suggestive Piazza Duomo and walk through the narrow streets of the city up to ManiaceCastle, which is worth a visit: the structure is beautiful and the view from the fortifications at sunset is amazing.
Leaving the castle, continue along the Lungomare Alfeo, observing the sun sinking into the sea and the sky turning red, until you reach Largo Aretusa. Along the walk, you can capture some glimpses of typical Syracusan life. In the evening, with the warm lights illuminating the white facades, Ortigia is truly exciting.
@giadaantonini_photography
@giadaantonini_photography
@giadaantonini_photography
@giadaantonini_photography
@giadaantonini_photography
@giadaantonini_photography
Day 5: Noto, Modica and Ragusa
A tour of the three historic centers declared a World Heritage Site by UNESCO.
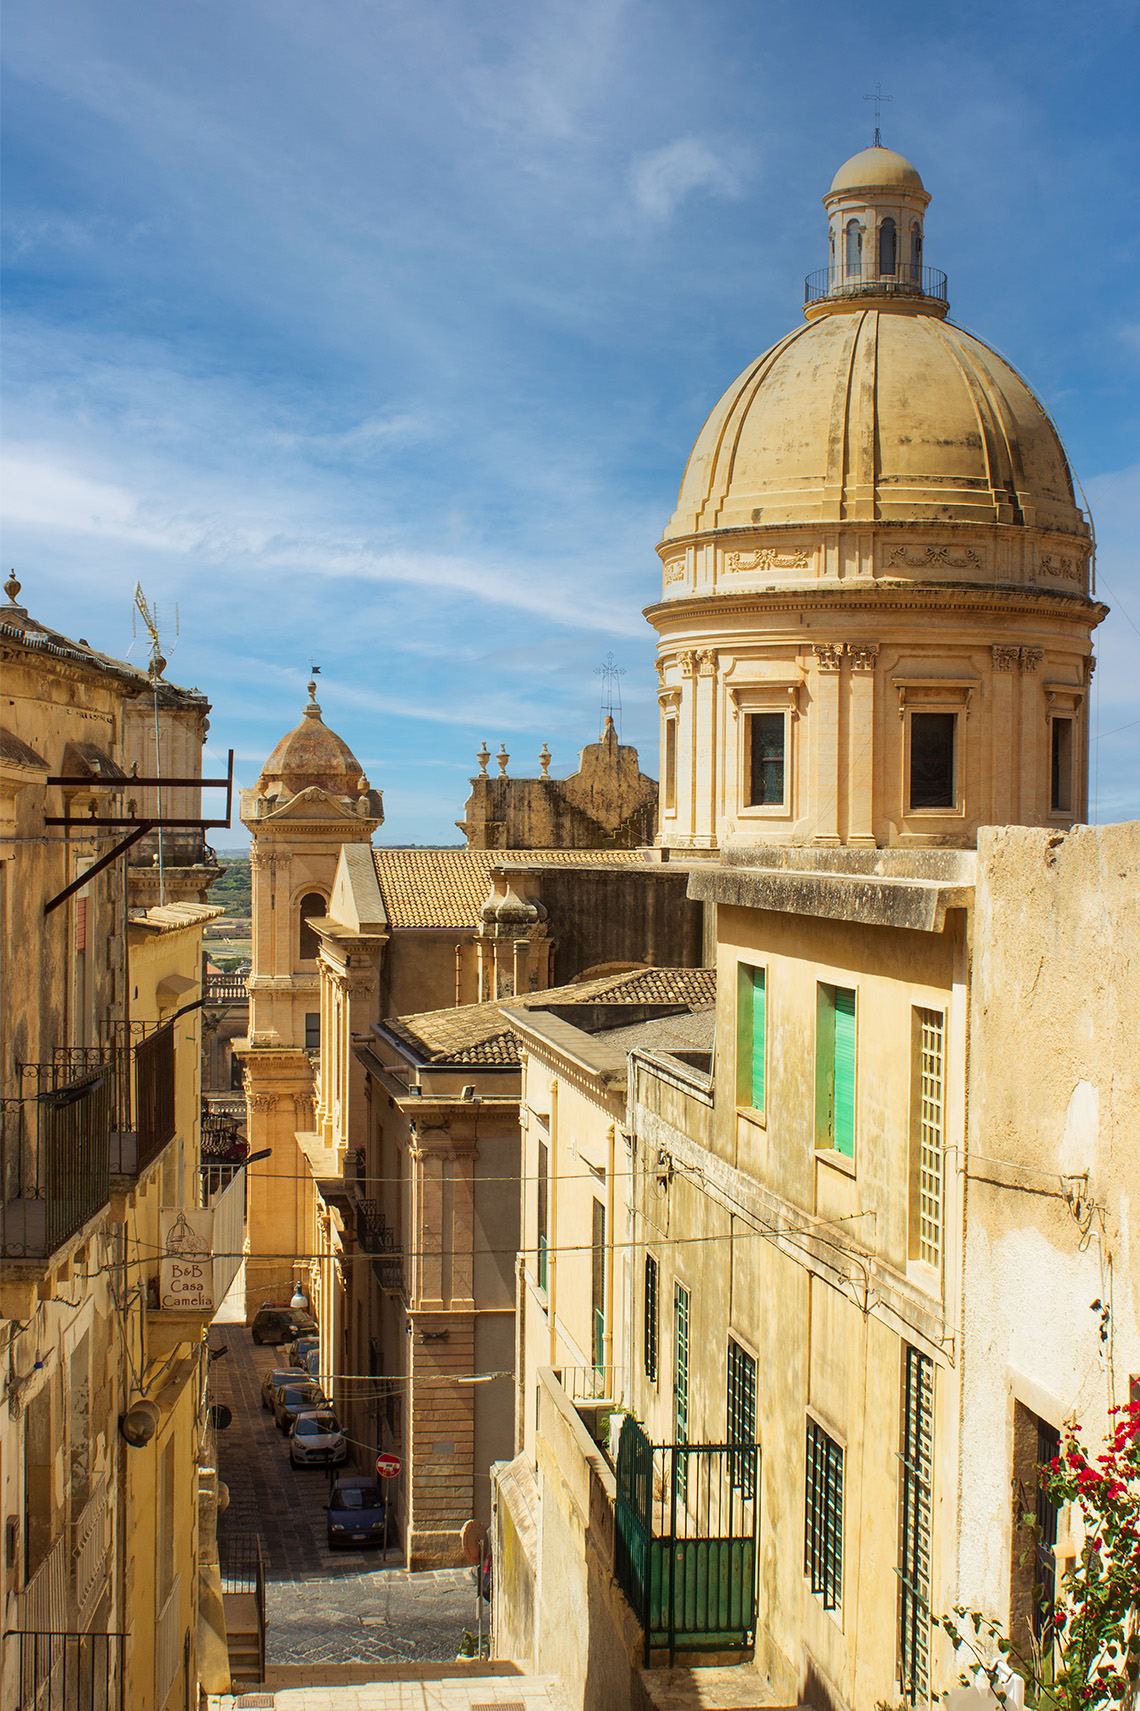
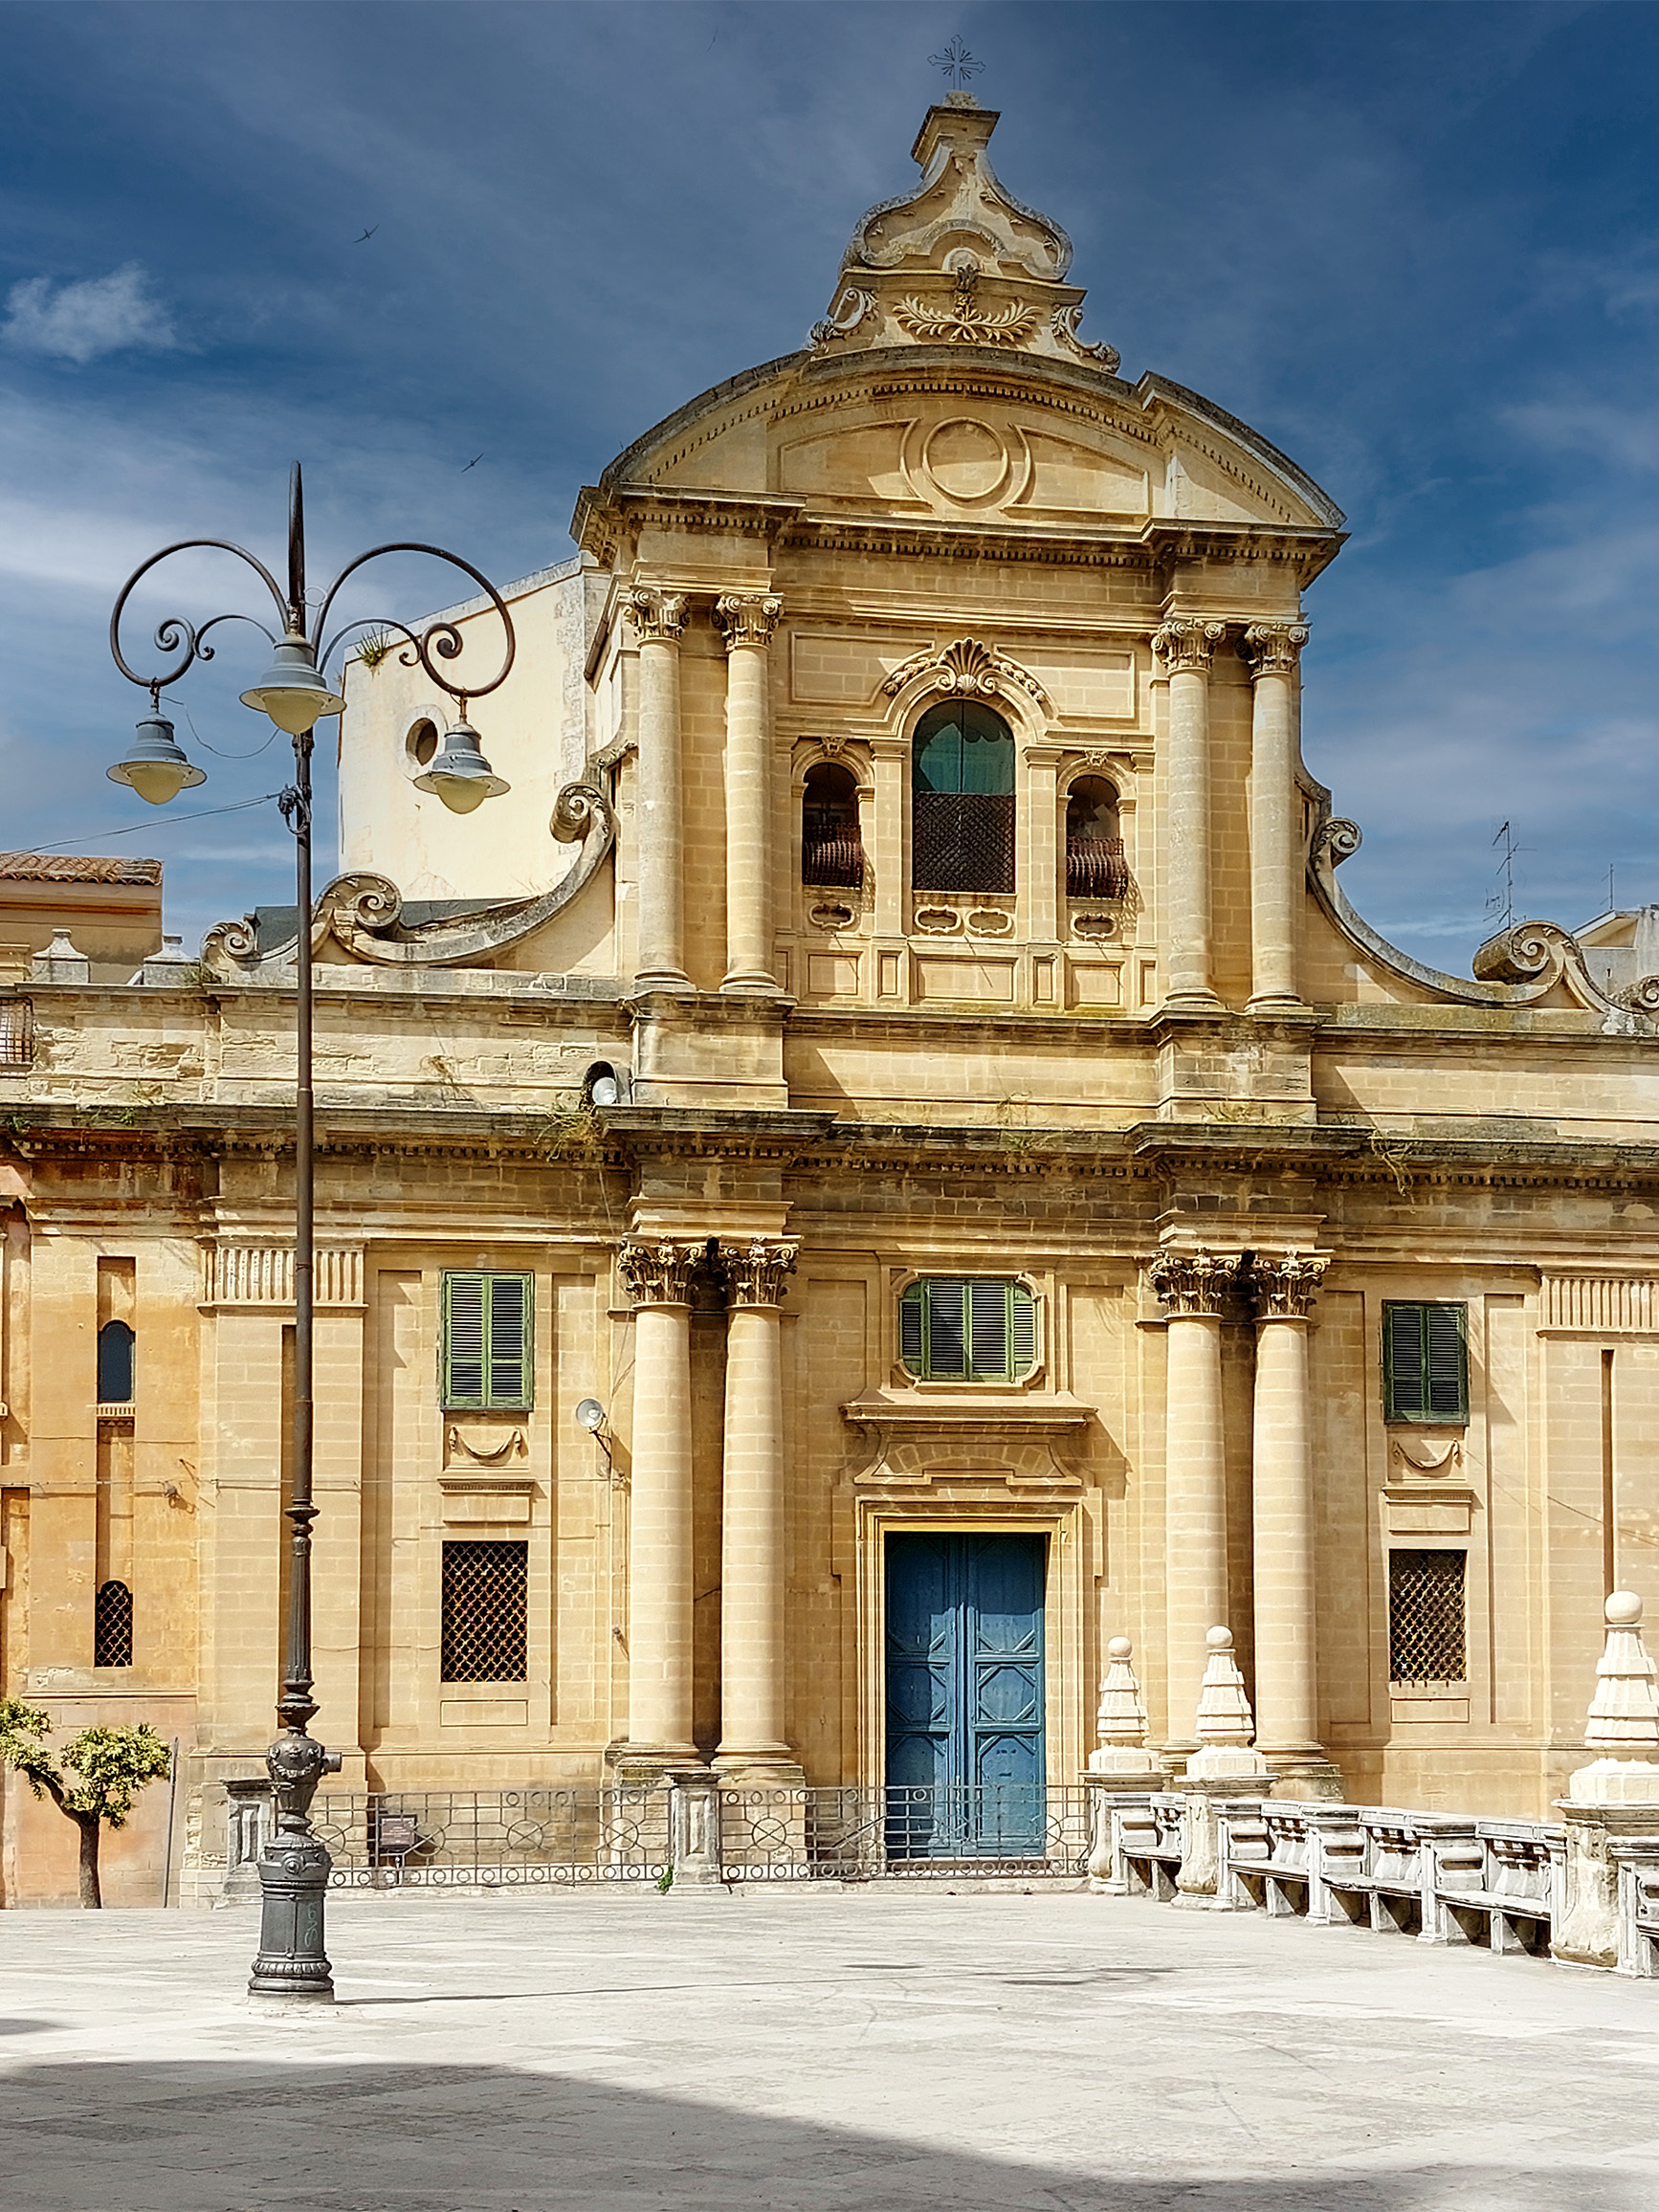
Morning: Noto
Spend about two hours visiting this wonderful city.
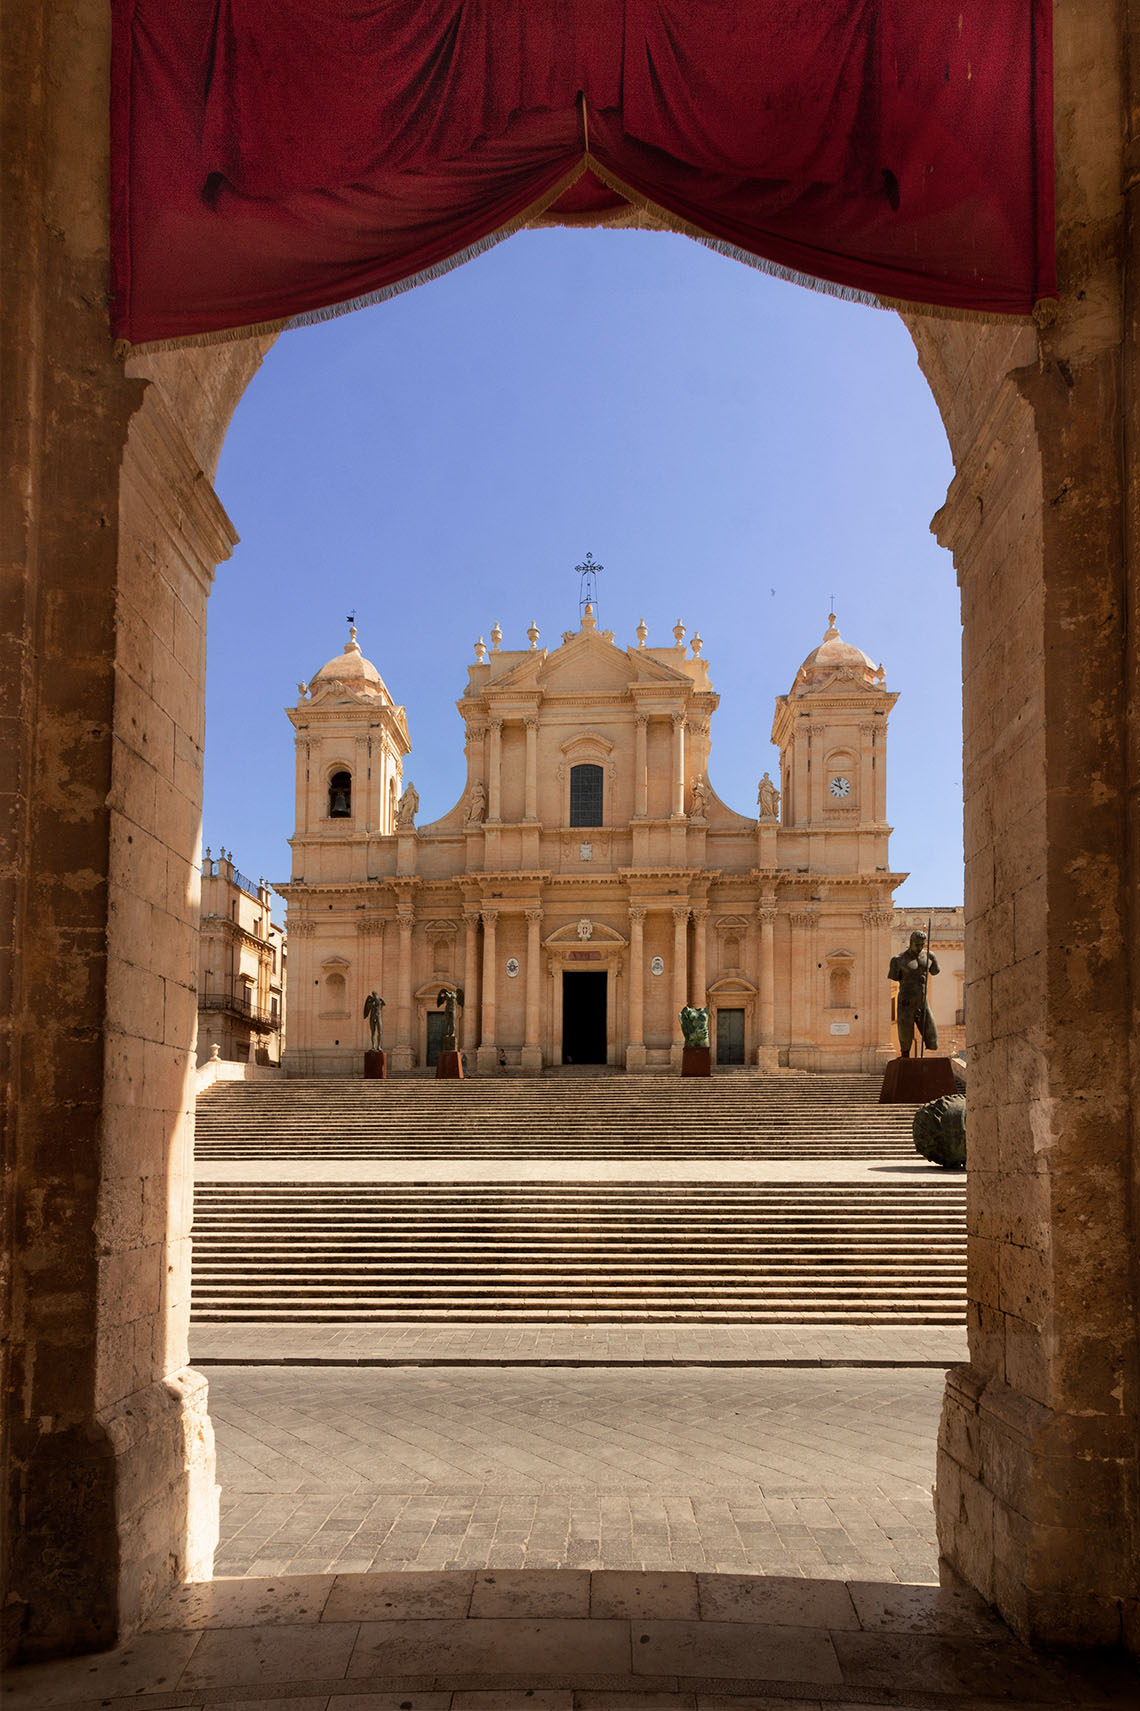
The first stop is the famous Cathedral ofSan Nicolò which faces the elegant Palazzo Ducezio.
If you are traveling in spring, I recommend checking the dates for the Infiorata di Noto (usually between the middle and the end of May), a unique event, during which Via Nicolaci is covered with incredible drawings made up of flowers, absolutely not to be missed.
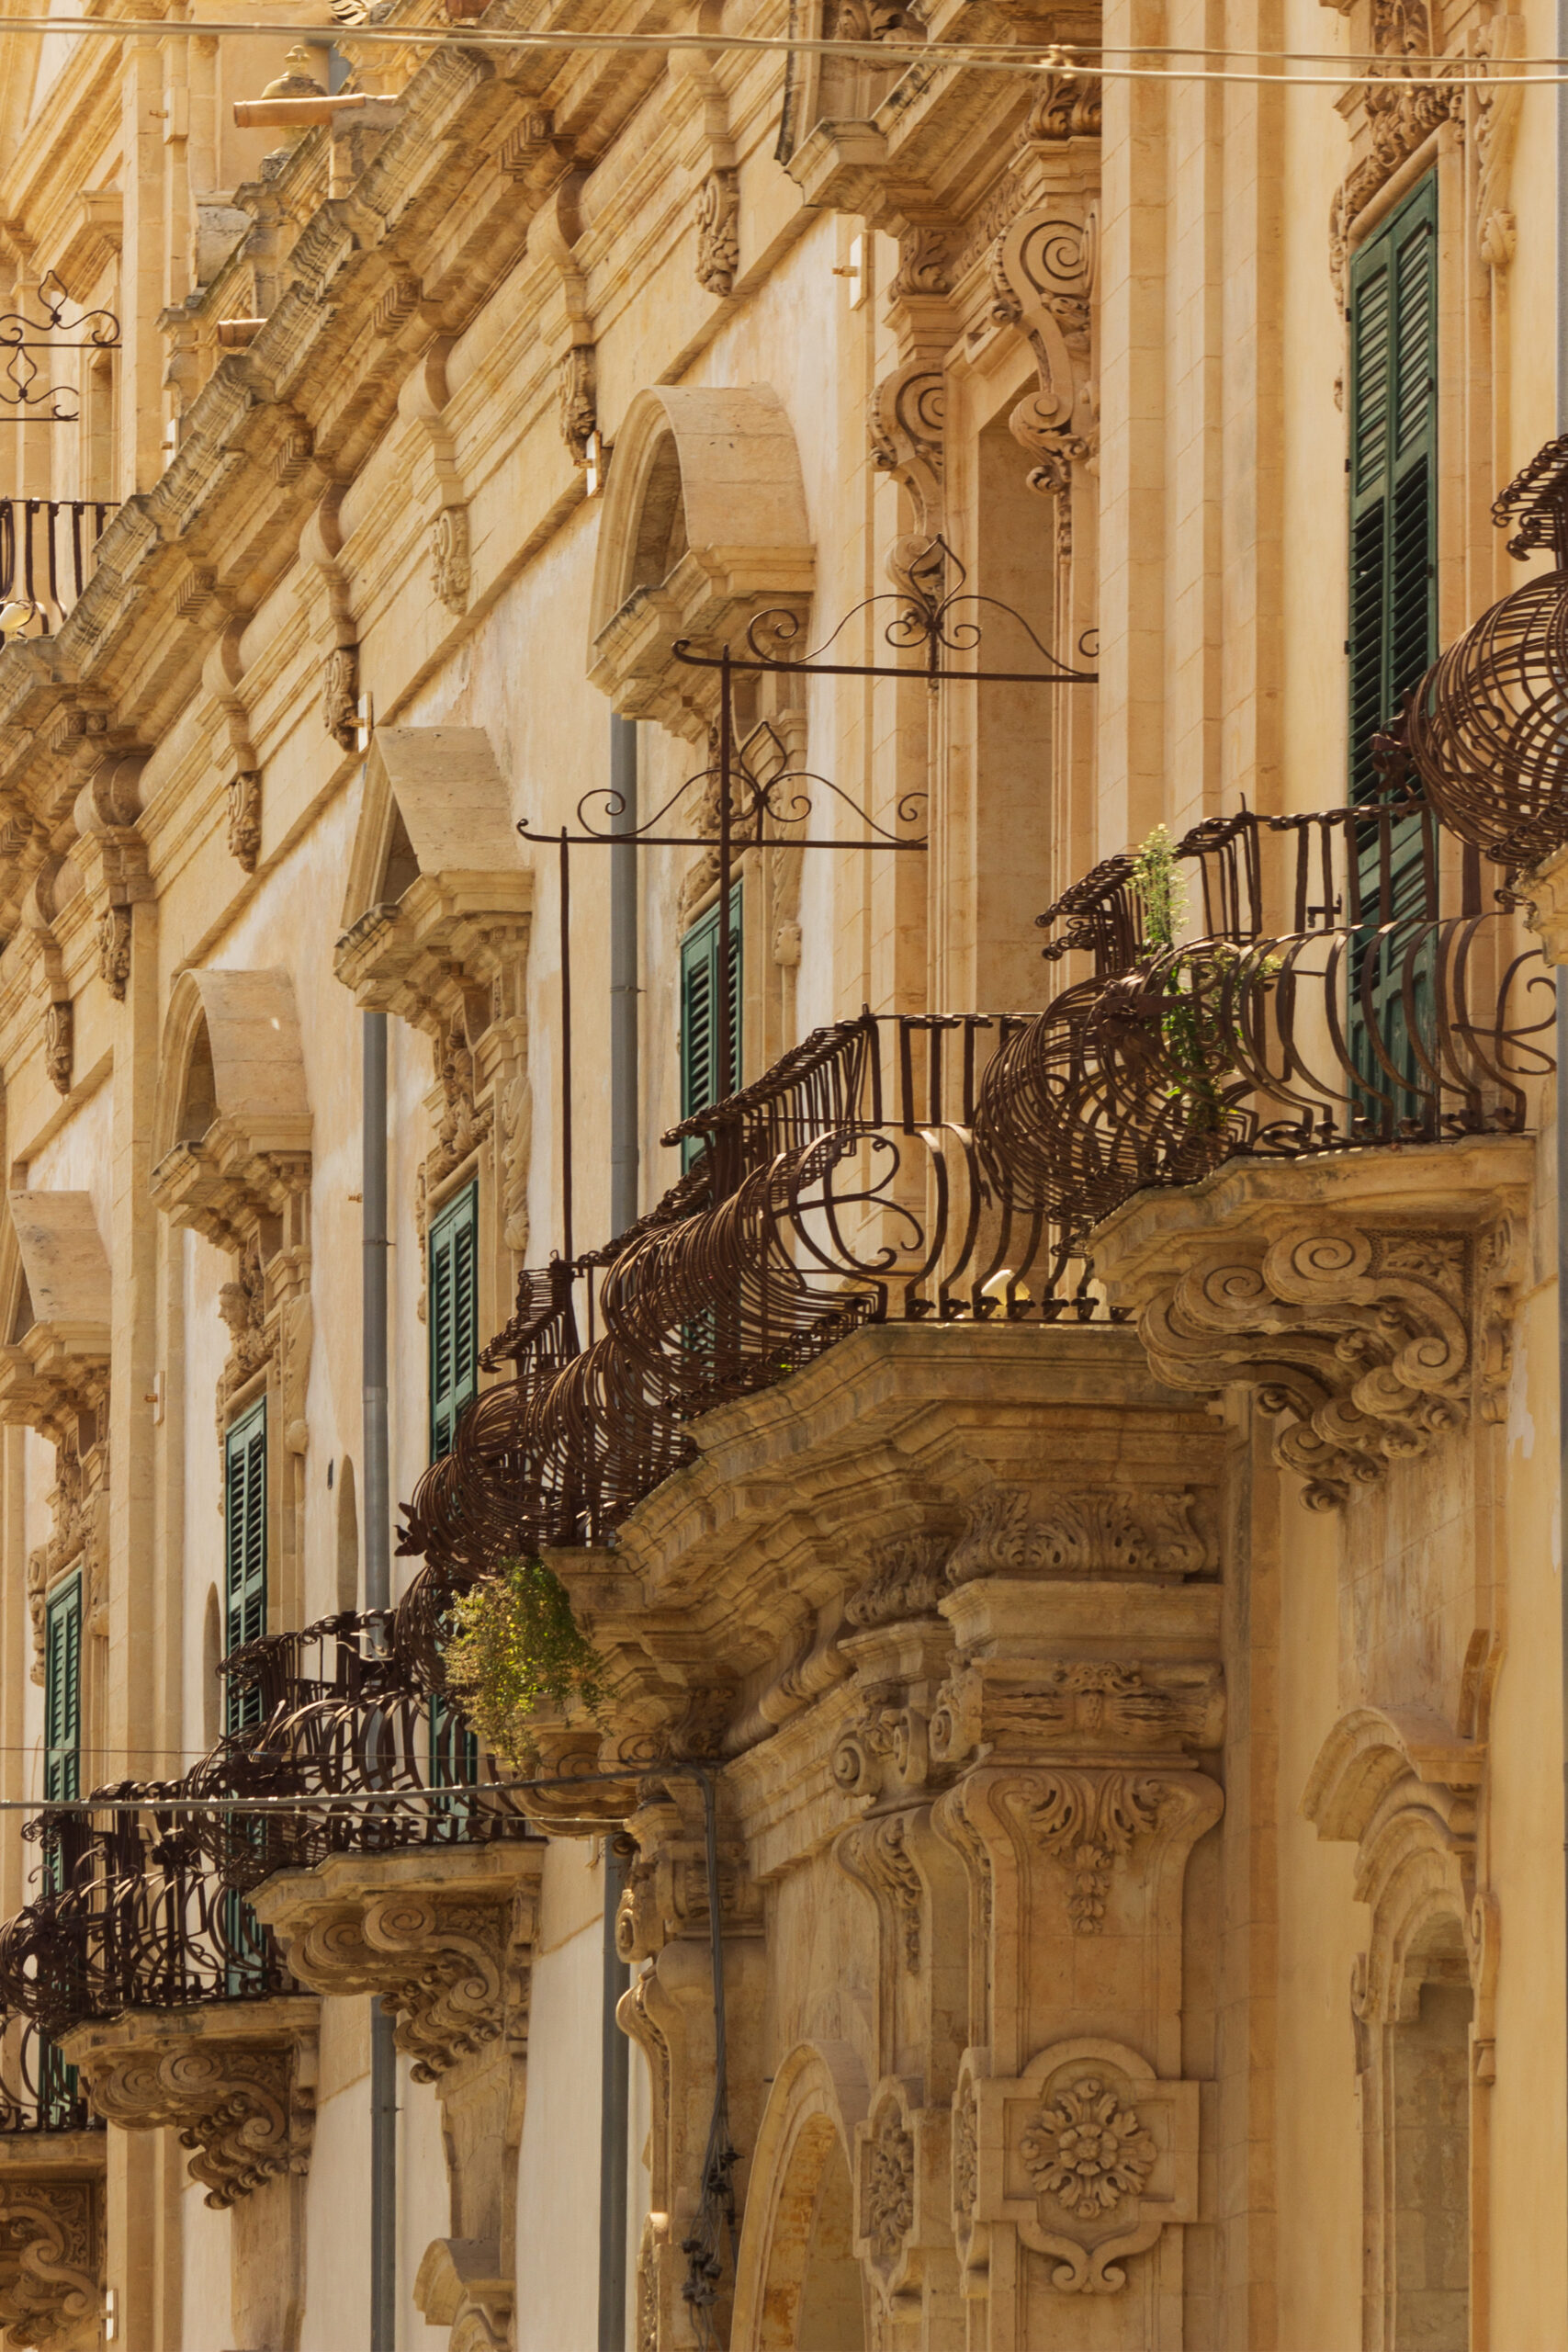
To take some nice photos and enjoy the panorama of the city, go up to the terrace of the Church of San Carlo al Pozzo, from which you have a beautiful perspective. Take a short tour through the streets of the city to discover the themed painted stairways and some panoramic views from the streets at higher altitudes. From here, with the zoom, you can capture architectural details and narrow views.
@giadaantonini_photography
@giadaantonini_photography
@giadaantonini_photography
@giadaantonini_photography
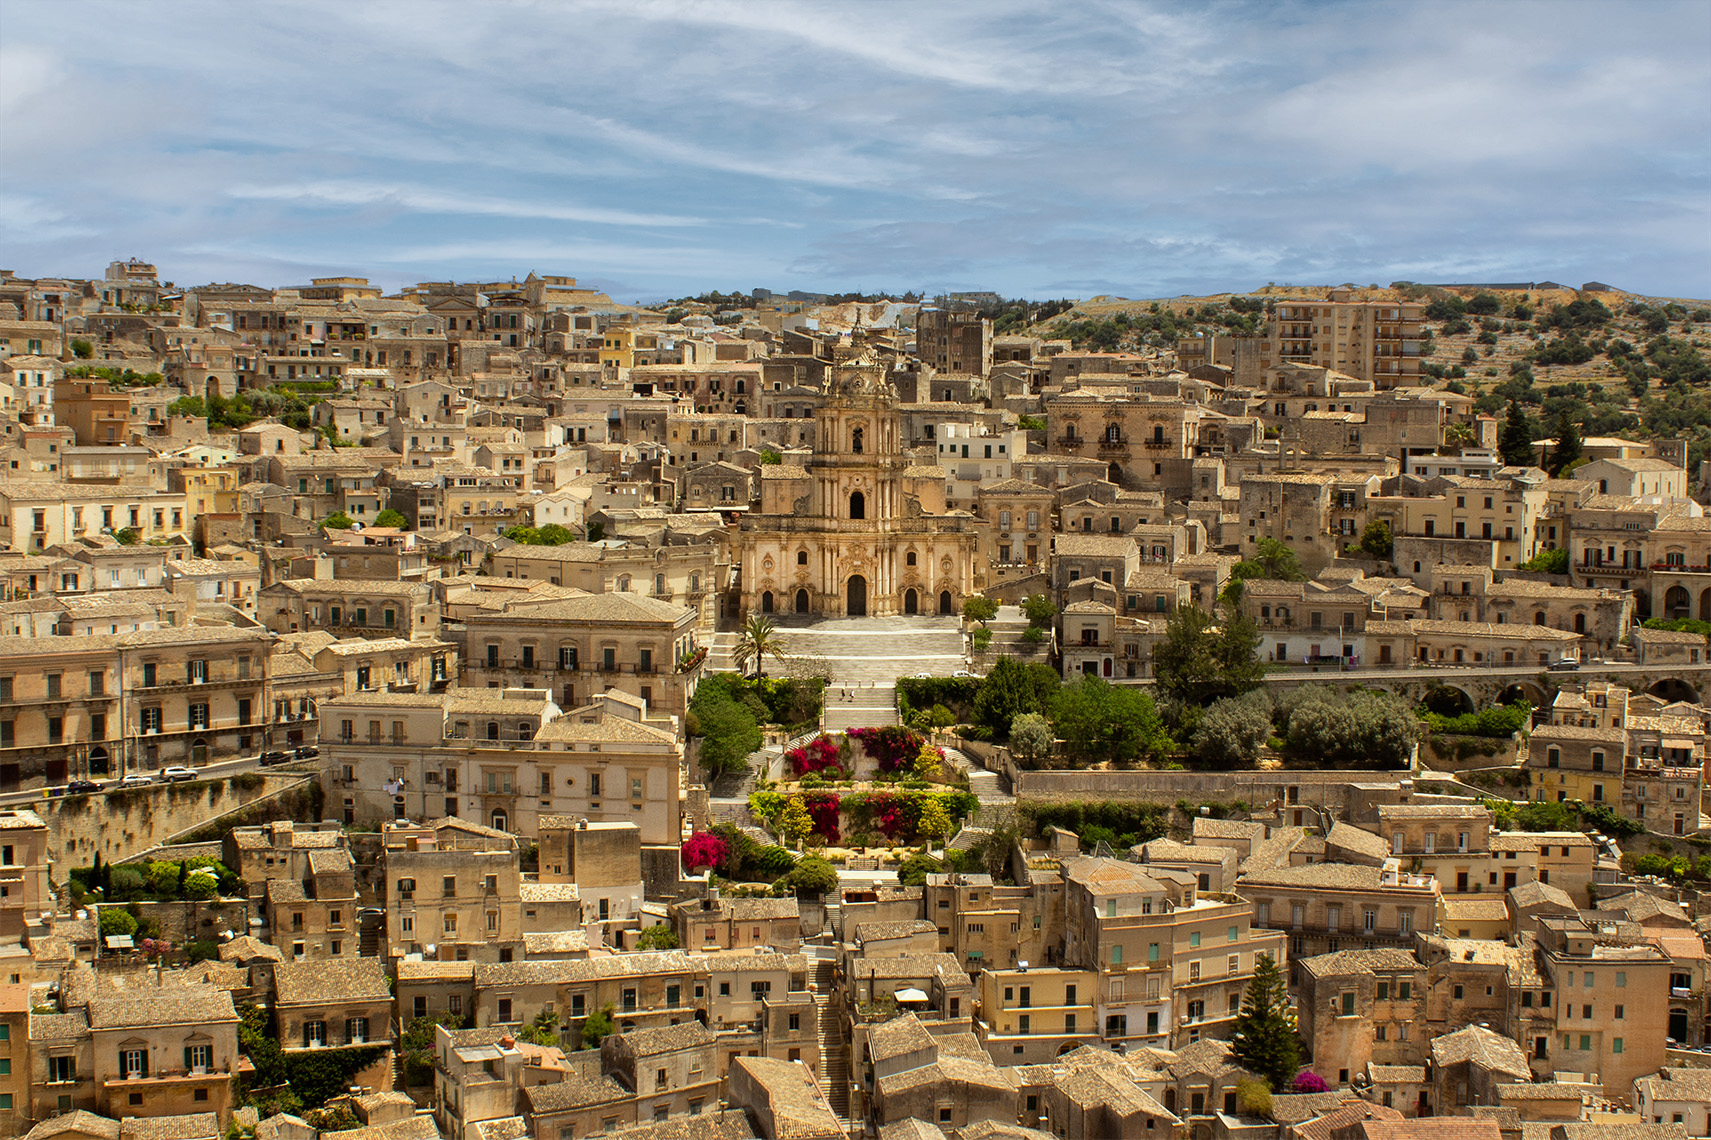
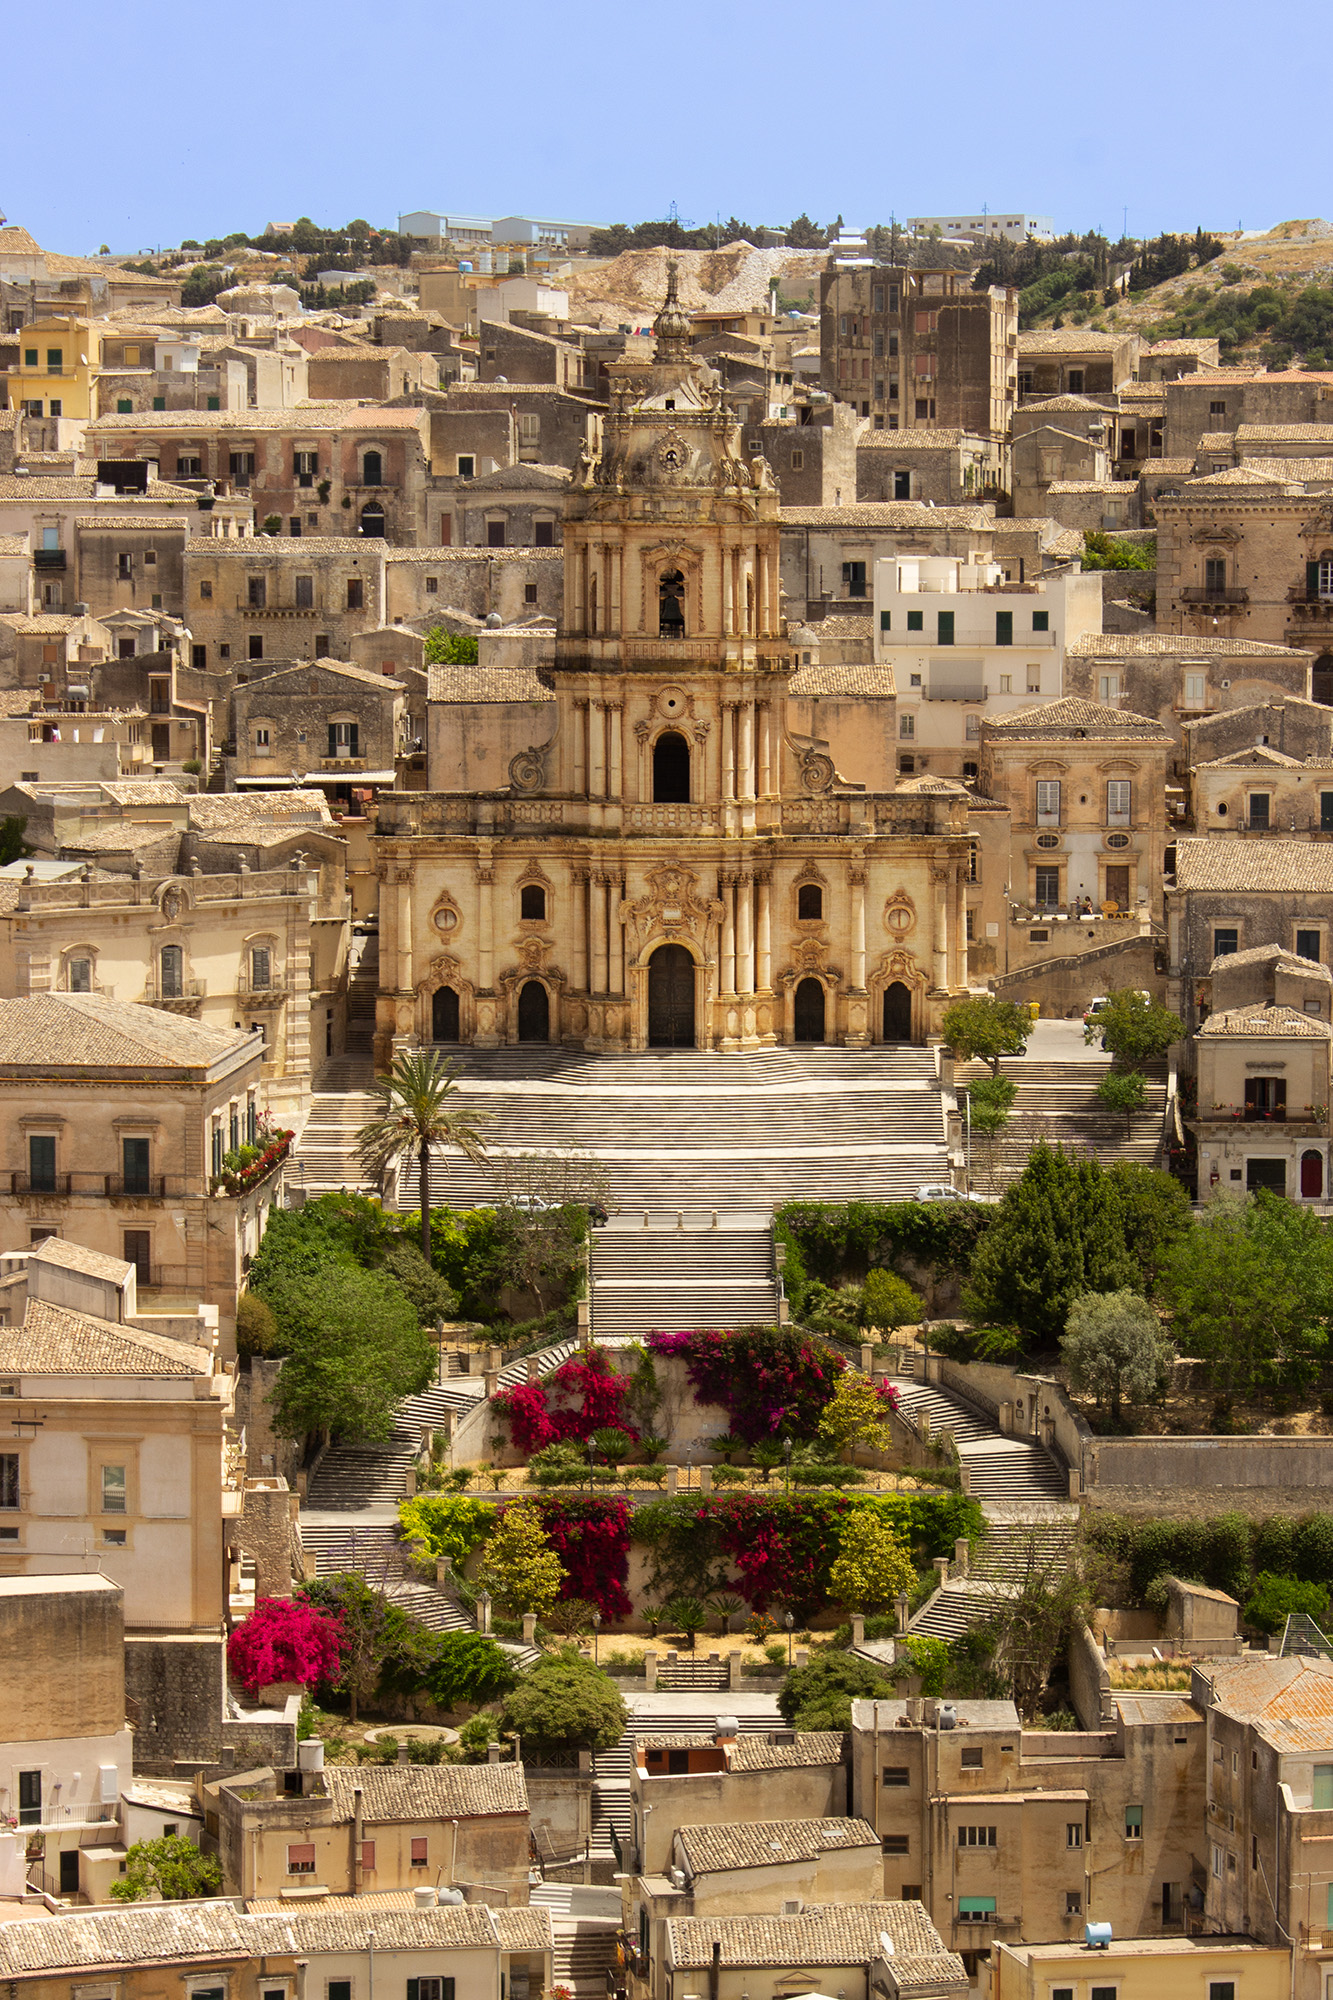
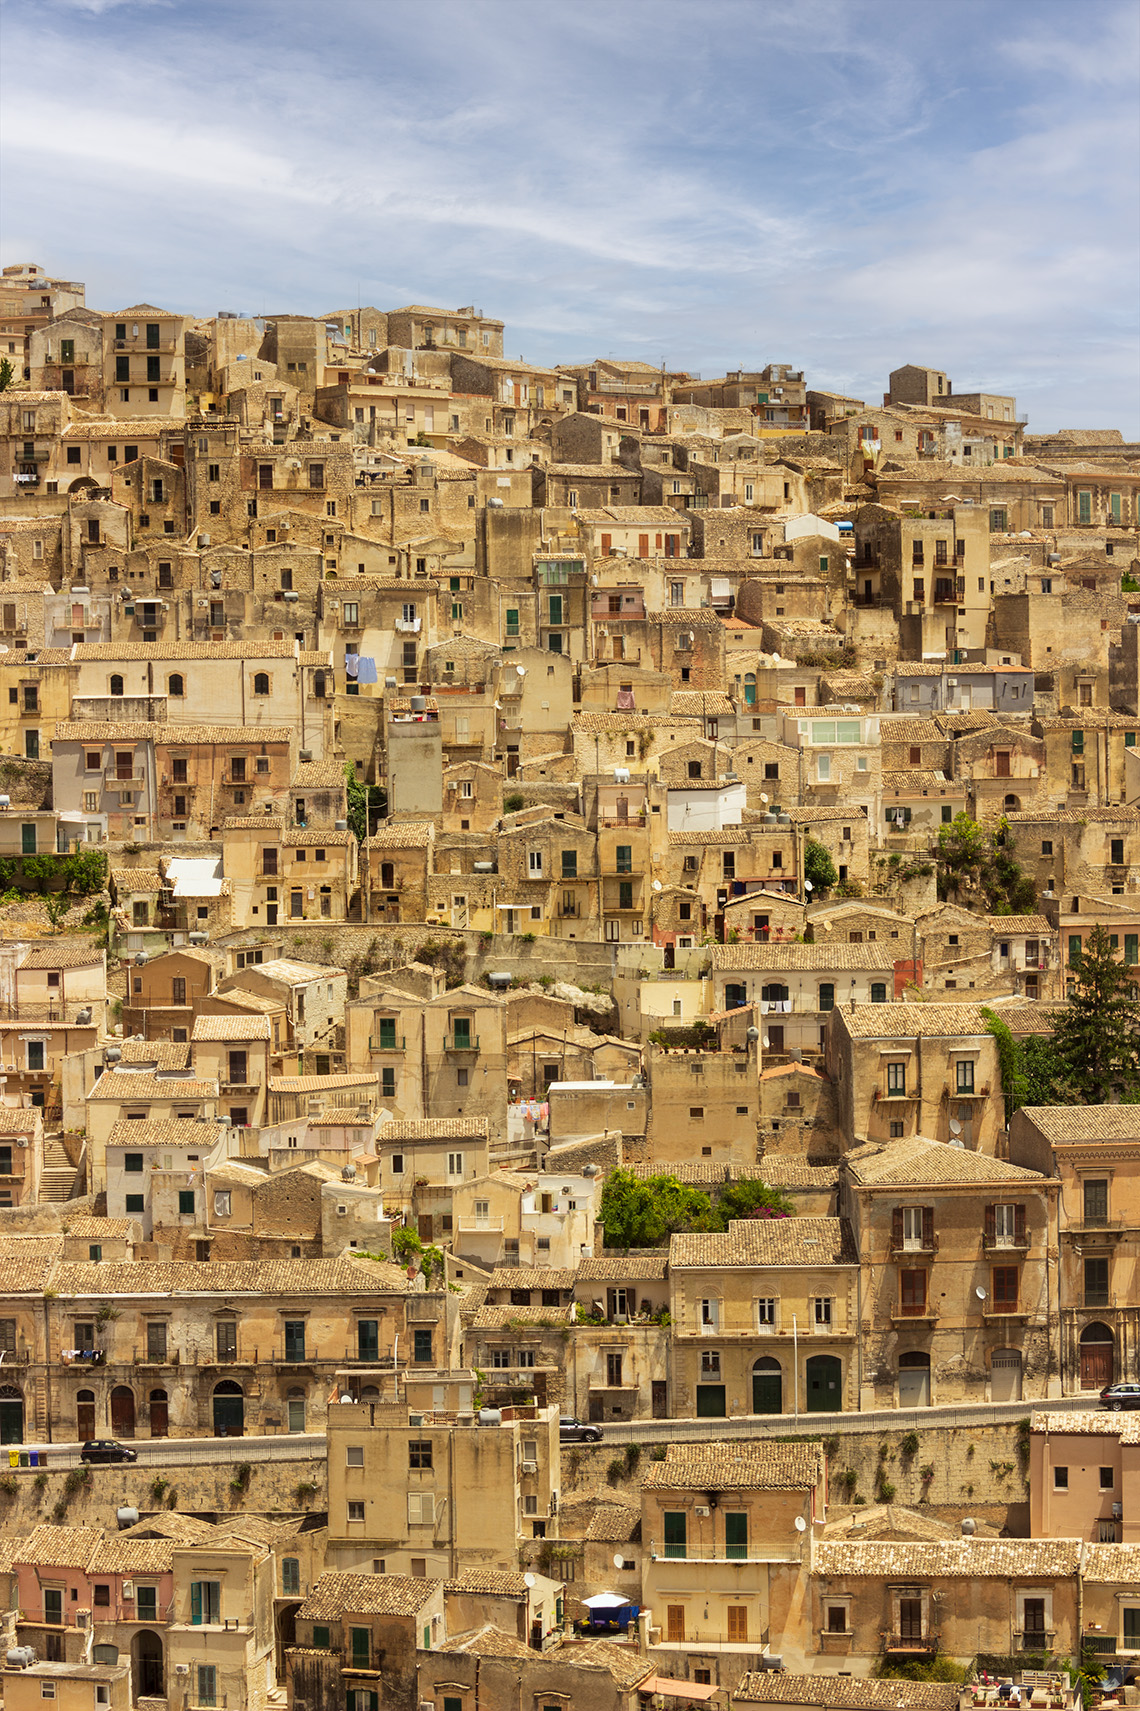
Central hours: Modica
Before arriving in the city, the beauty of Modica can be admired from some panoramic points, which in the central hours, when the sun is high in the sky, will give back wonderful colors and lights.
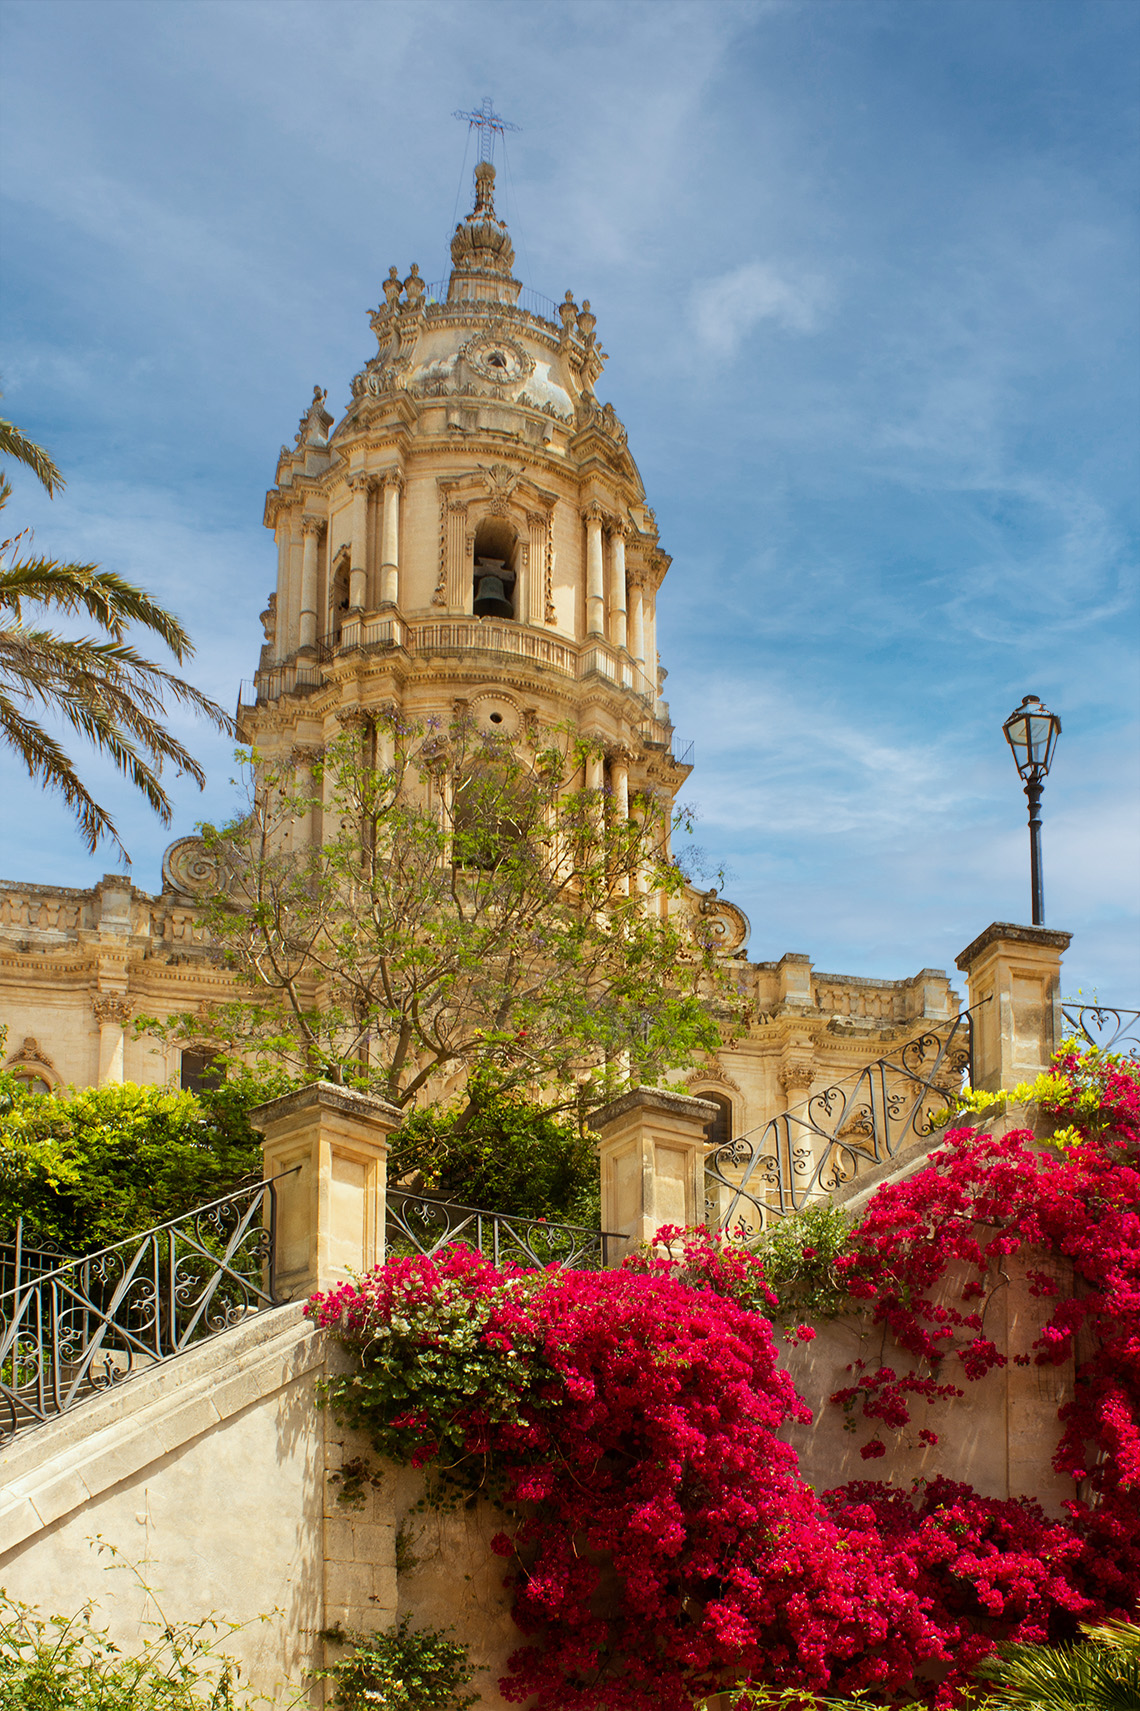
The first stop not to be missed is at the Belvedere di San Benedetto (beautiful even at sunset, with the evening lights). Another stop must be dedicated to Belvedere Pizzo, before climbing the stairs that lead to the suggestive Cathedral. Use the wide angle to capture the city as a crib, then, with the zoom, focus on some details of the streets and the roofs.
We recommend going to the small Bar del Duomo, where you can find yummy sandwiches with local ingredients and you can taste the great Modicachocolate granita, famous all over the world.
After a two-hour visit, including the lunch break, you can continue towards Ragusa.
@giadaantonini_photography
@giadaantonini_photography
@giadaantonini_photography
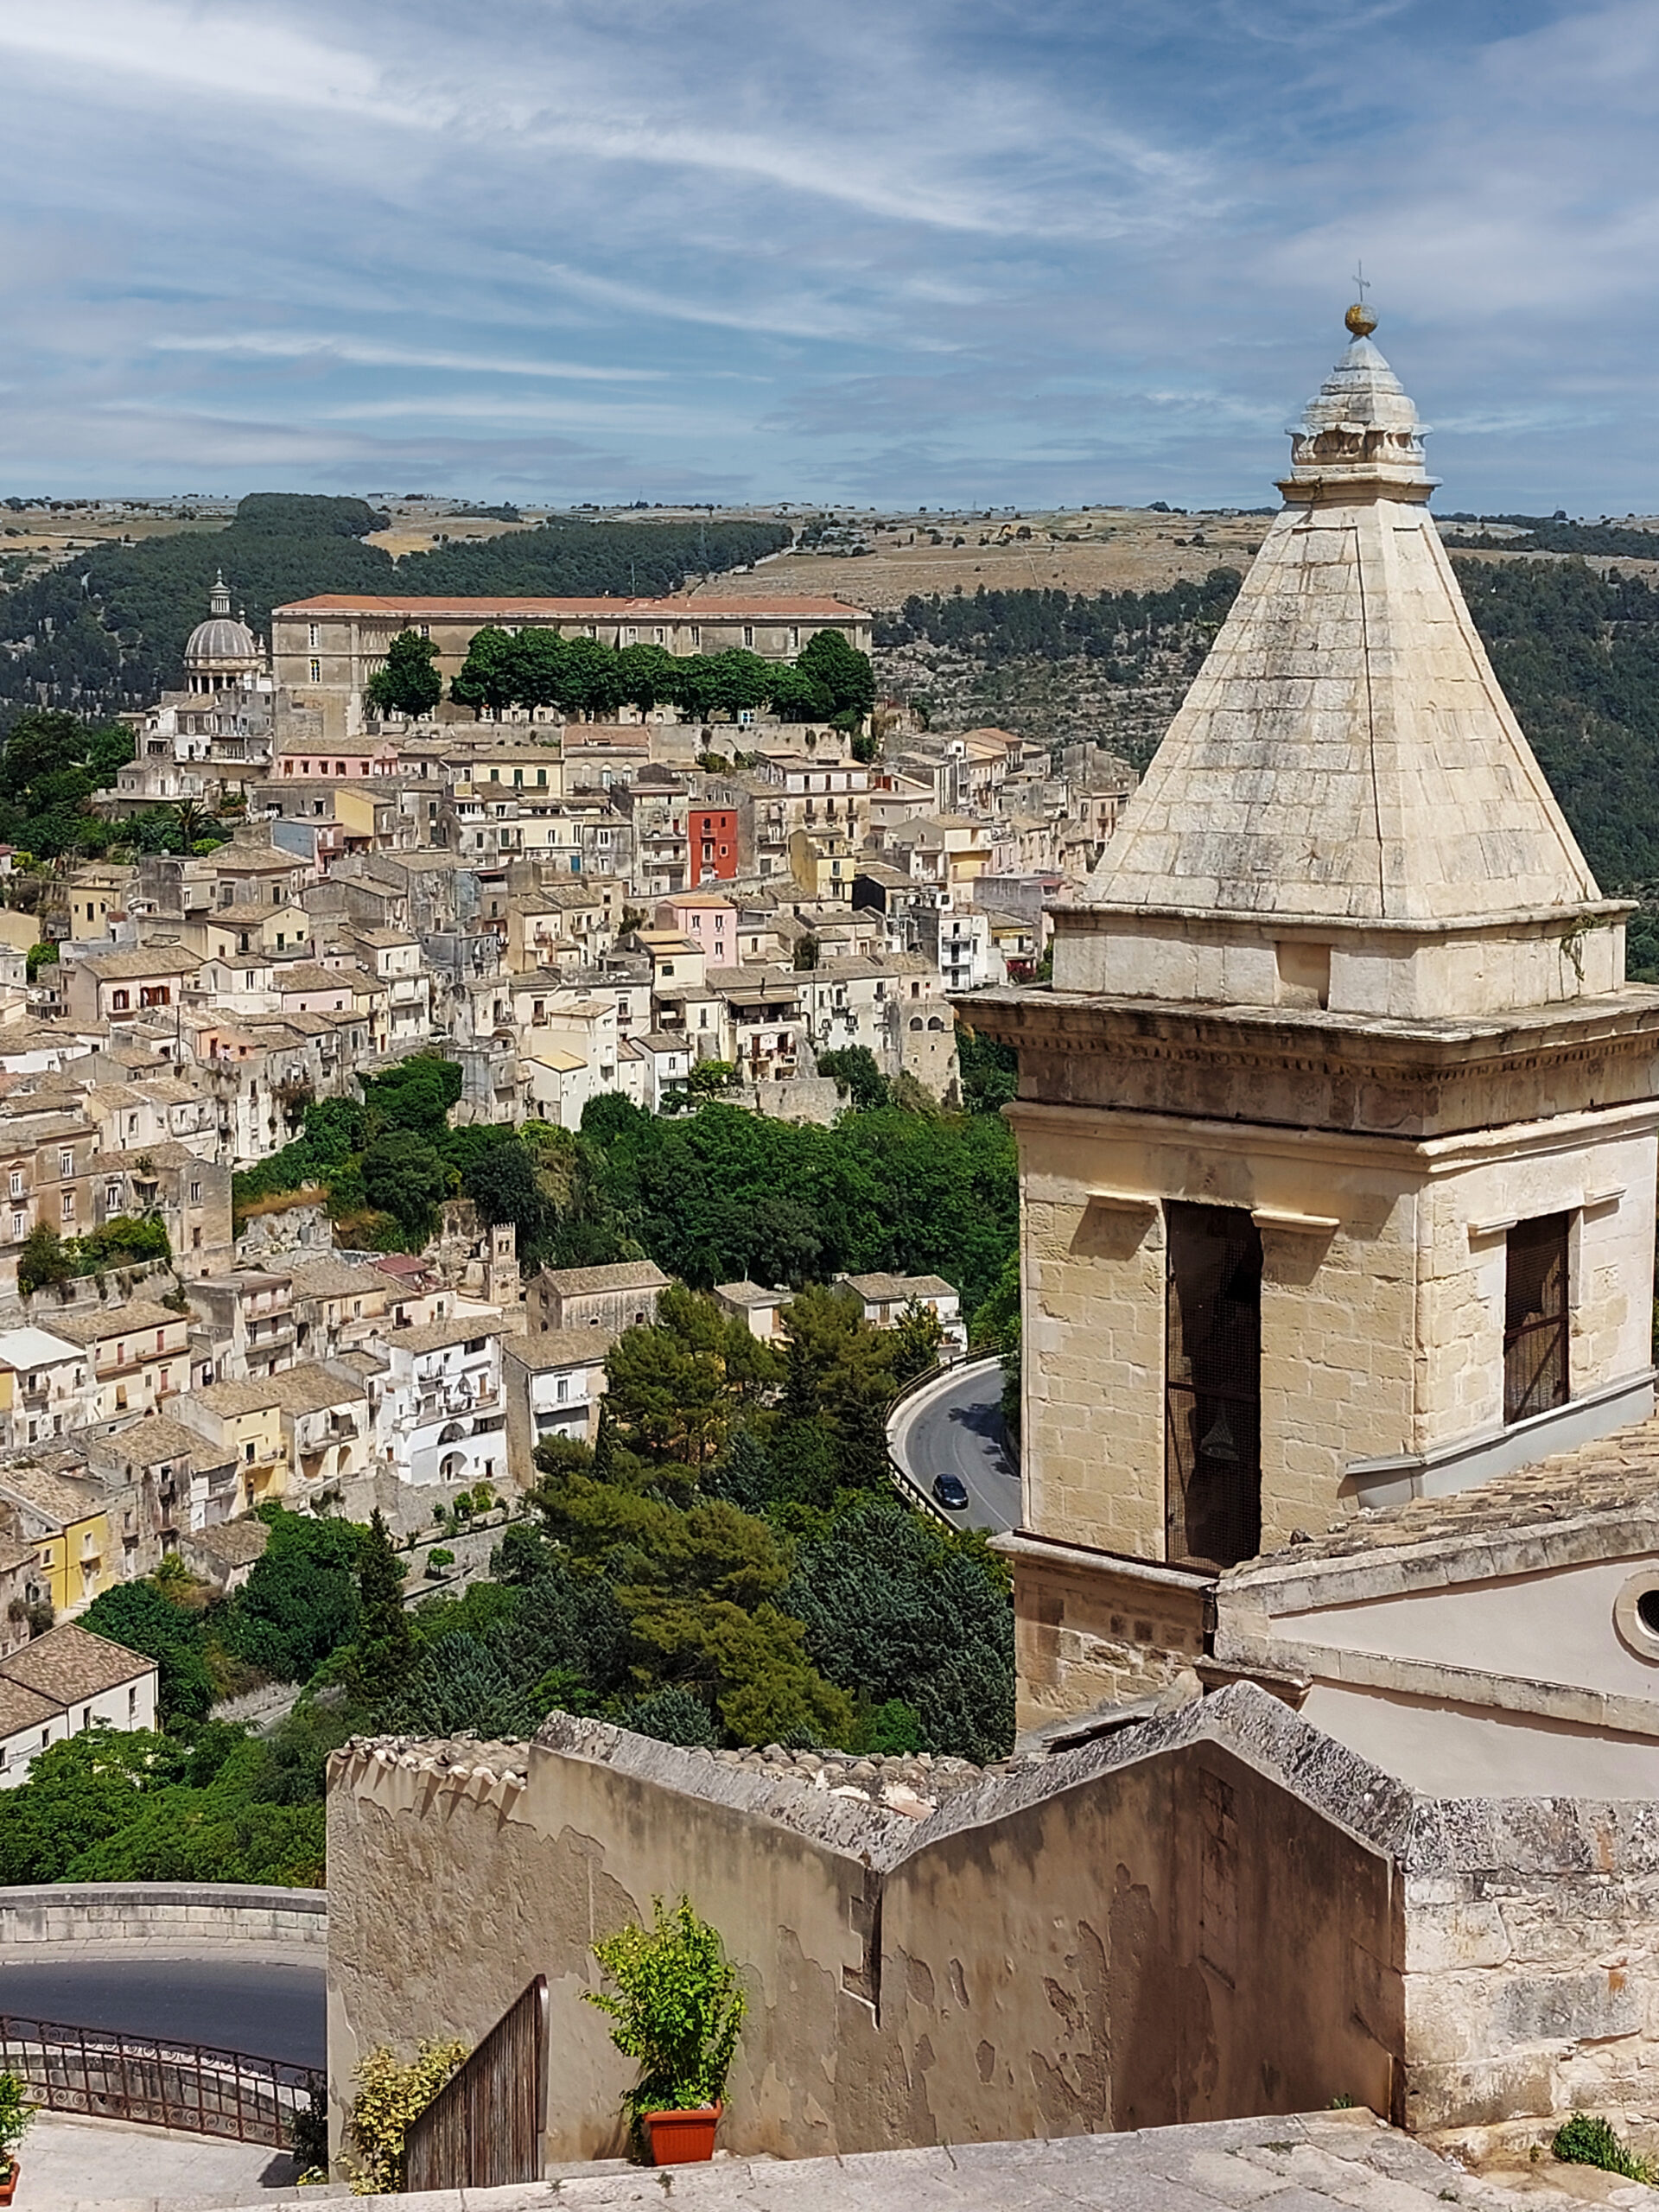
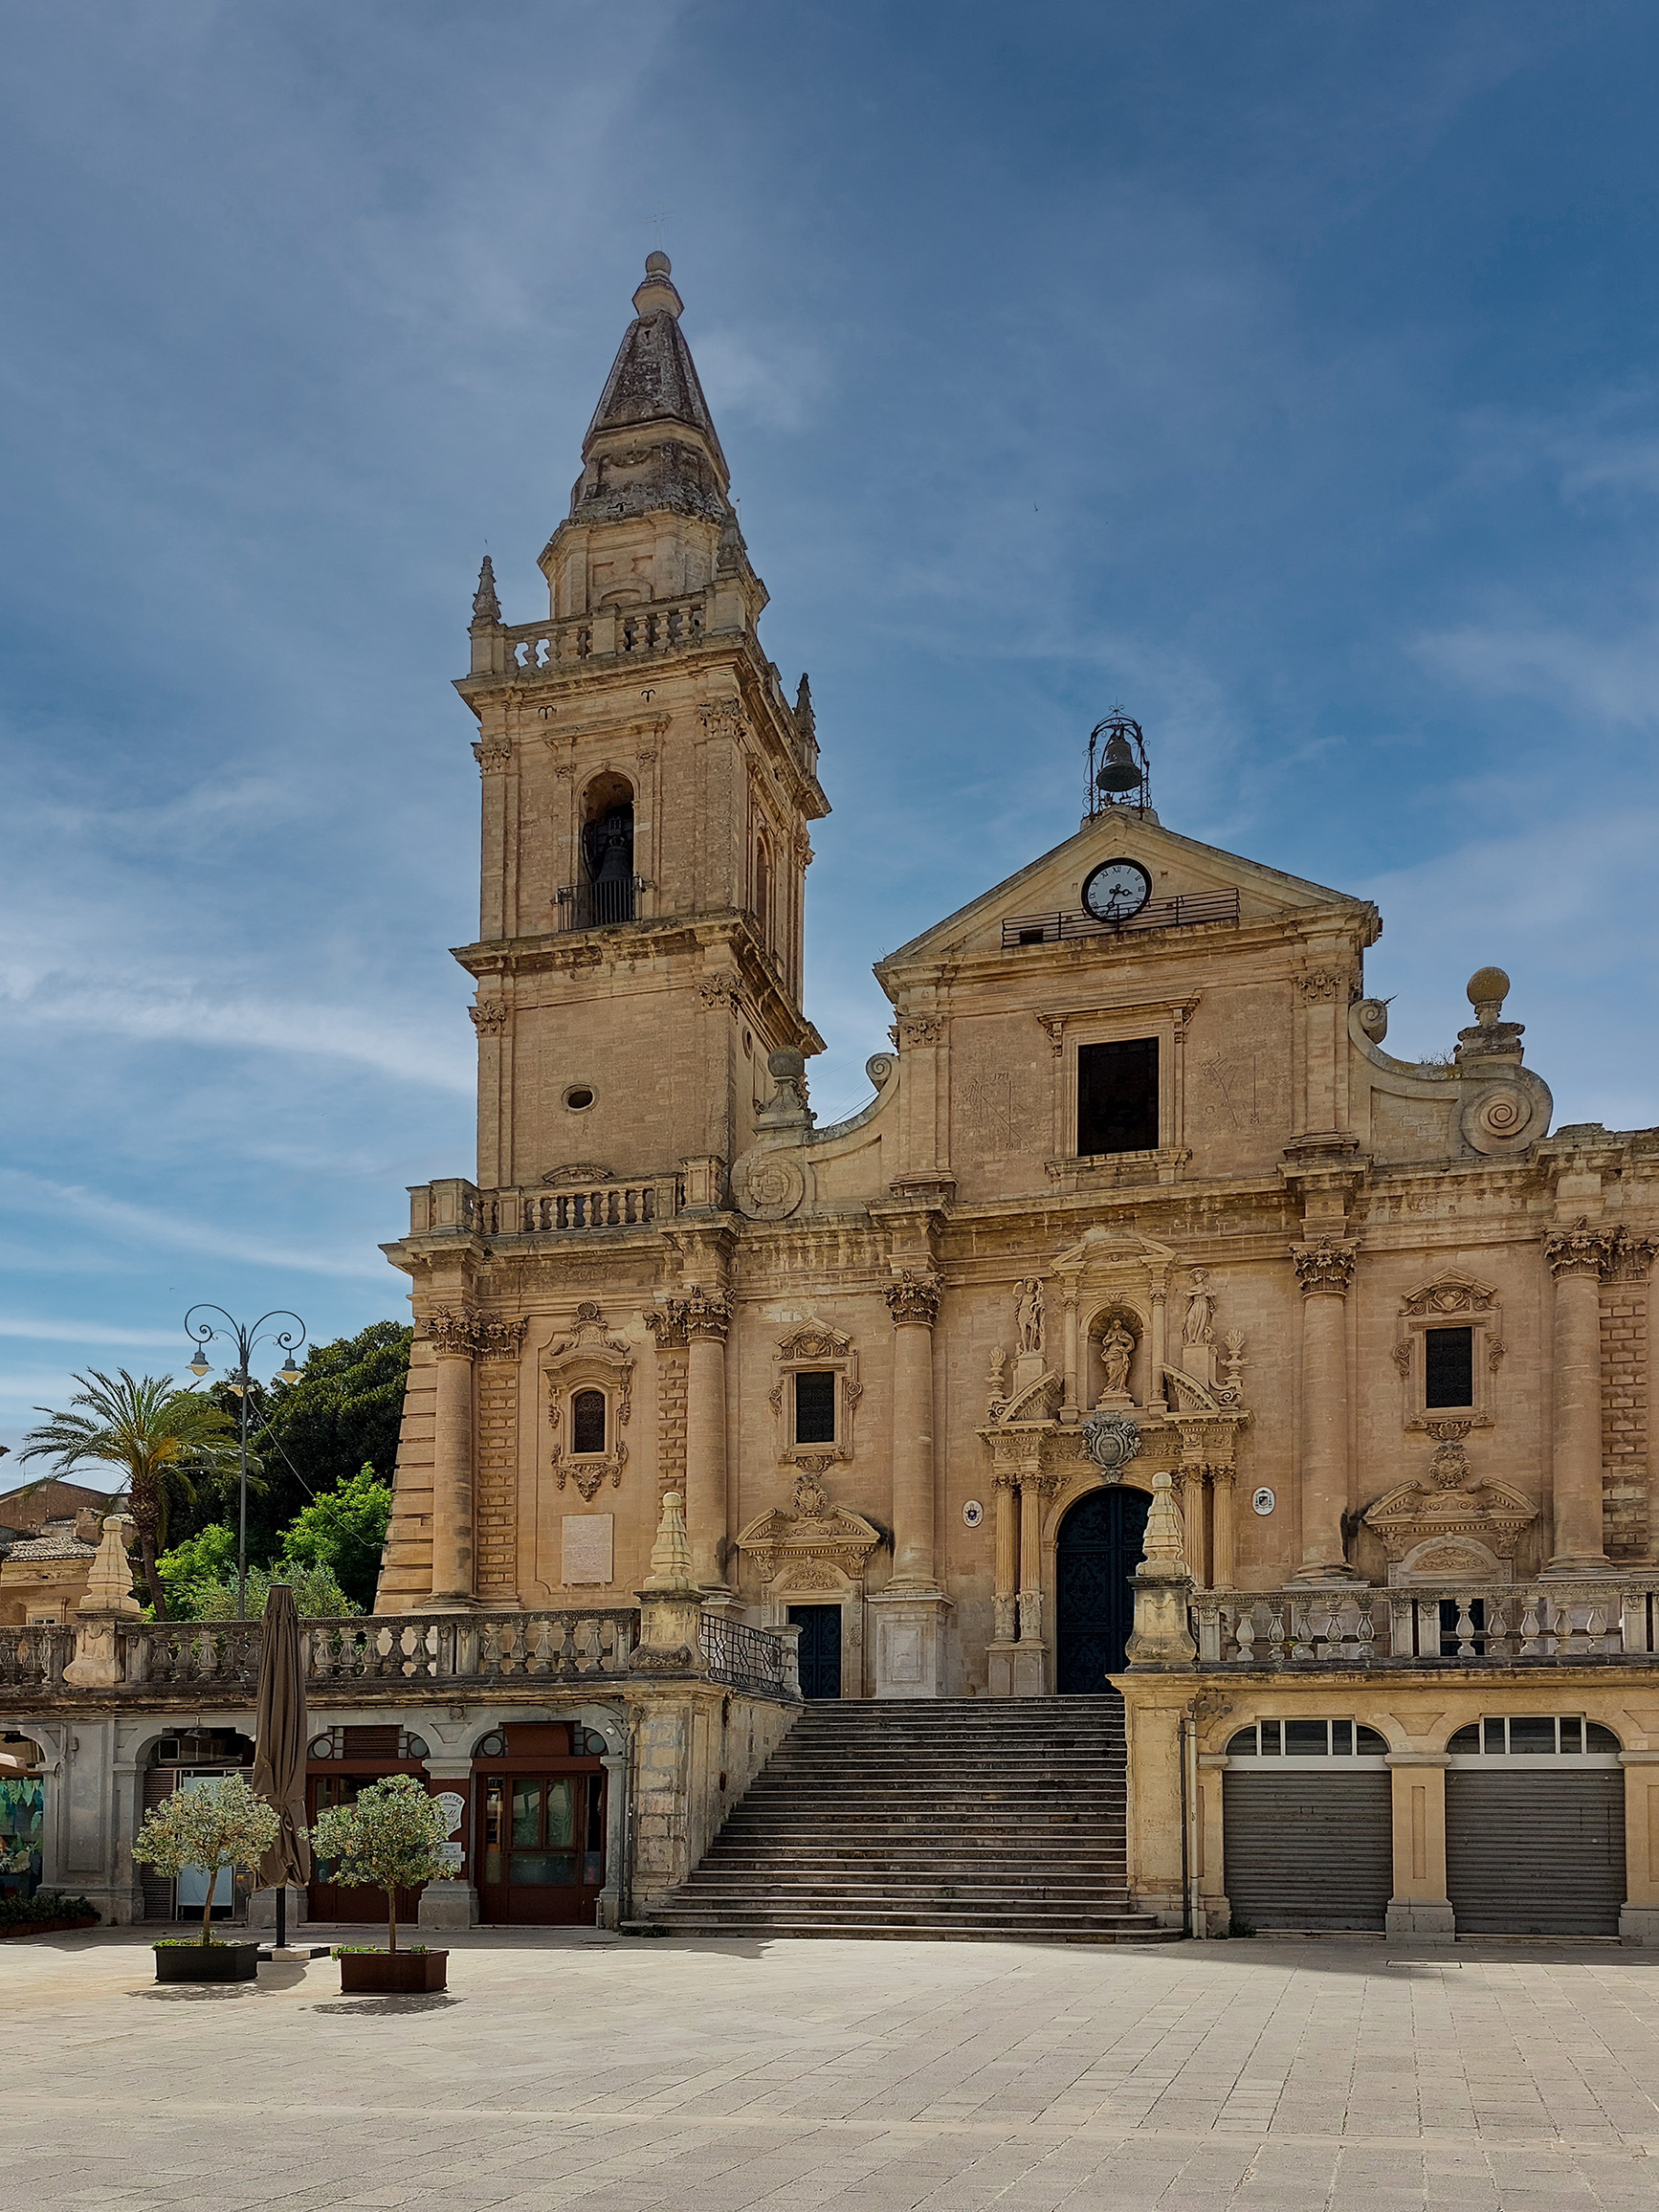
Afternoon: Ragusa
Also in this case, first of all, there are incredible points to admire the beauty of the city.
The first is along via Risorgimento, near the hospital, where you can see the view of Ragusa and Ragusa Ibla, the oldest historical nucleus. The second photographic stop is along the bends of Corso Mazzini, which offer a view of Ragusa Ibla with, in the foreground, the blue bell tower of the Church of Santa Maria dell’Itria. Give this dome a central place in your composition, or place it along one third of the grid (read more about composition on this article).
Once you have parked your car, go to the fascinating and panoramic Percorso delle Scale, from which you can reach the old city. Go up to Piazza Duomo, dominated by the imposing Baroque cathedral of San Giorgio and continue towards the Ibleo garden.
In the new part of the city, walk along Corso Italia and visit the Cathedral of Giovanni Battista.
@giadaantonini_photography
@giadaantonini_photography
@giadaantonini_photography
@giadaantonini_photography
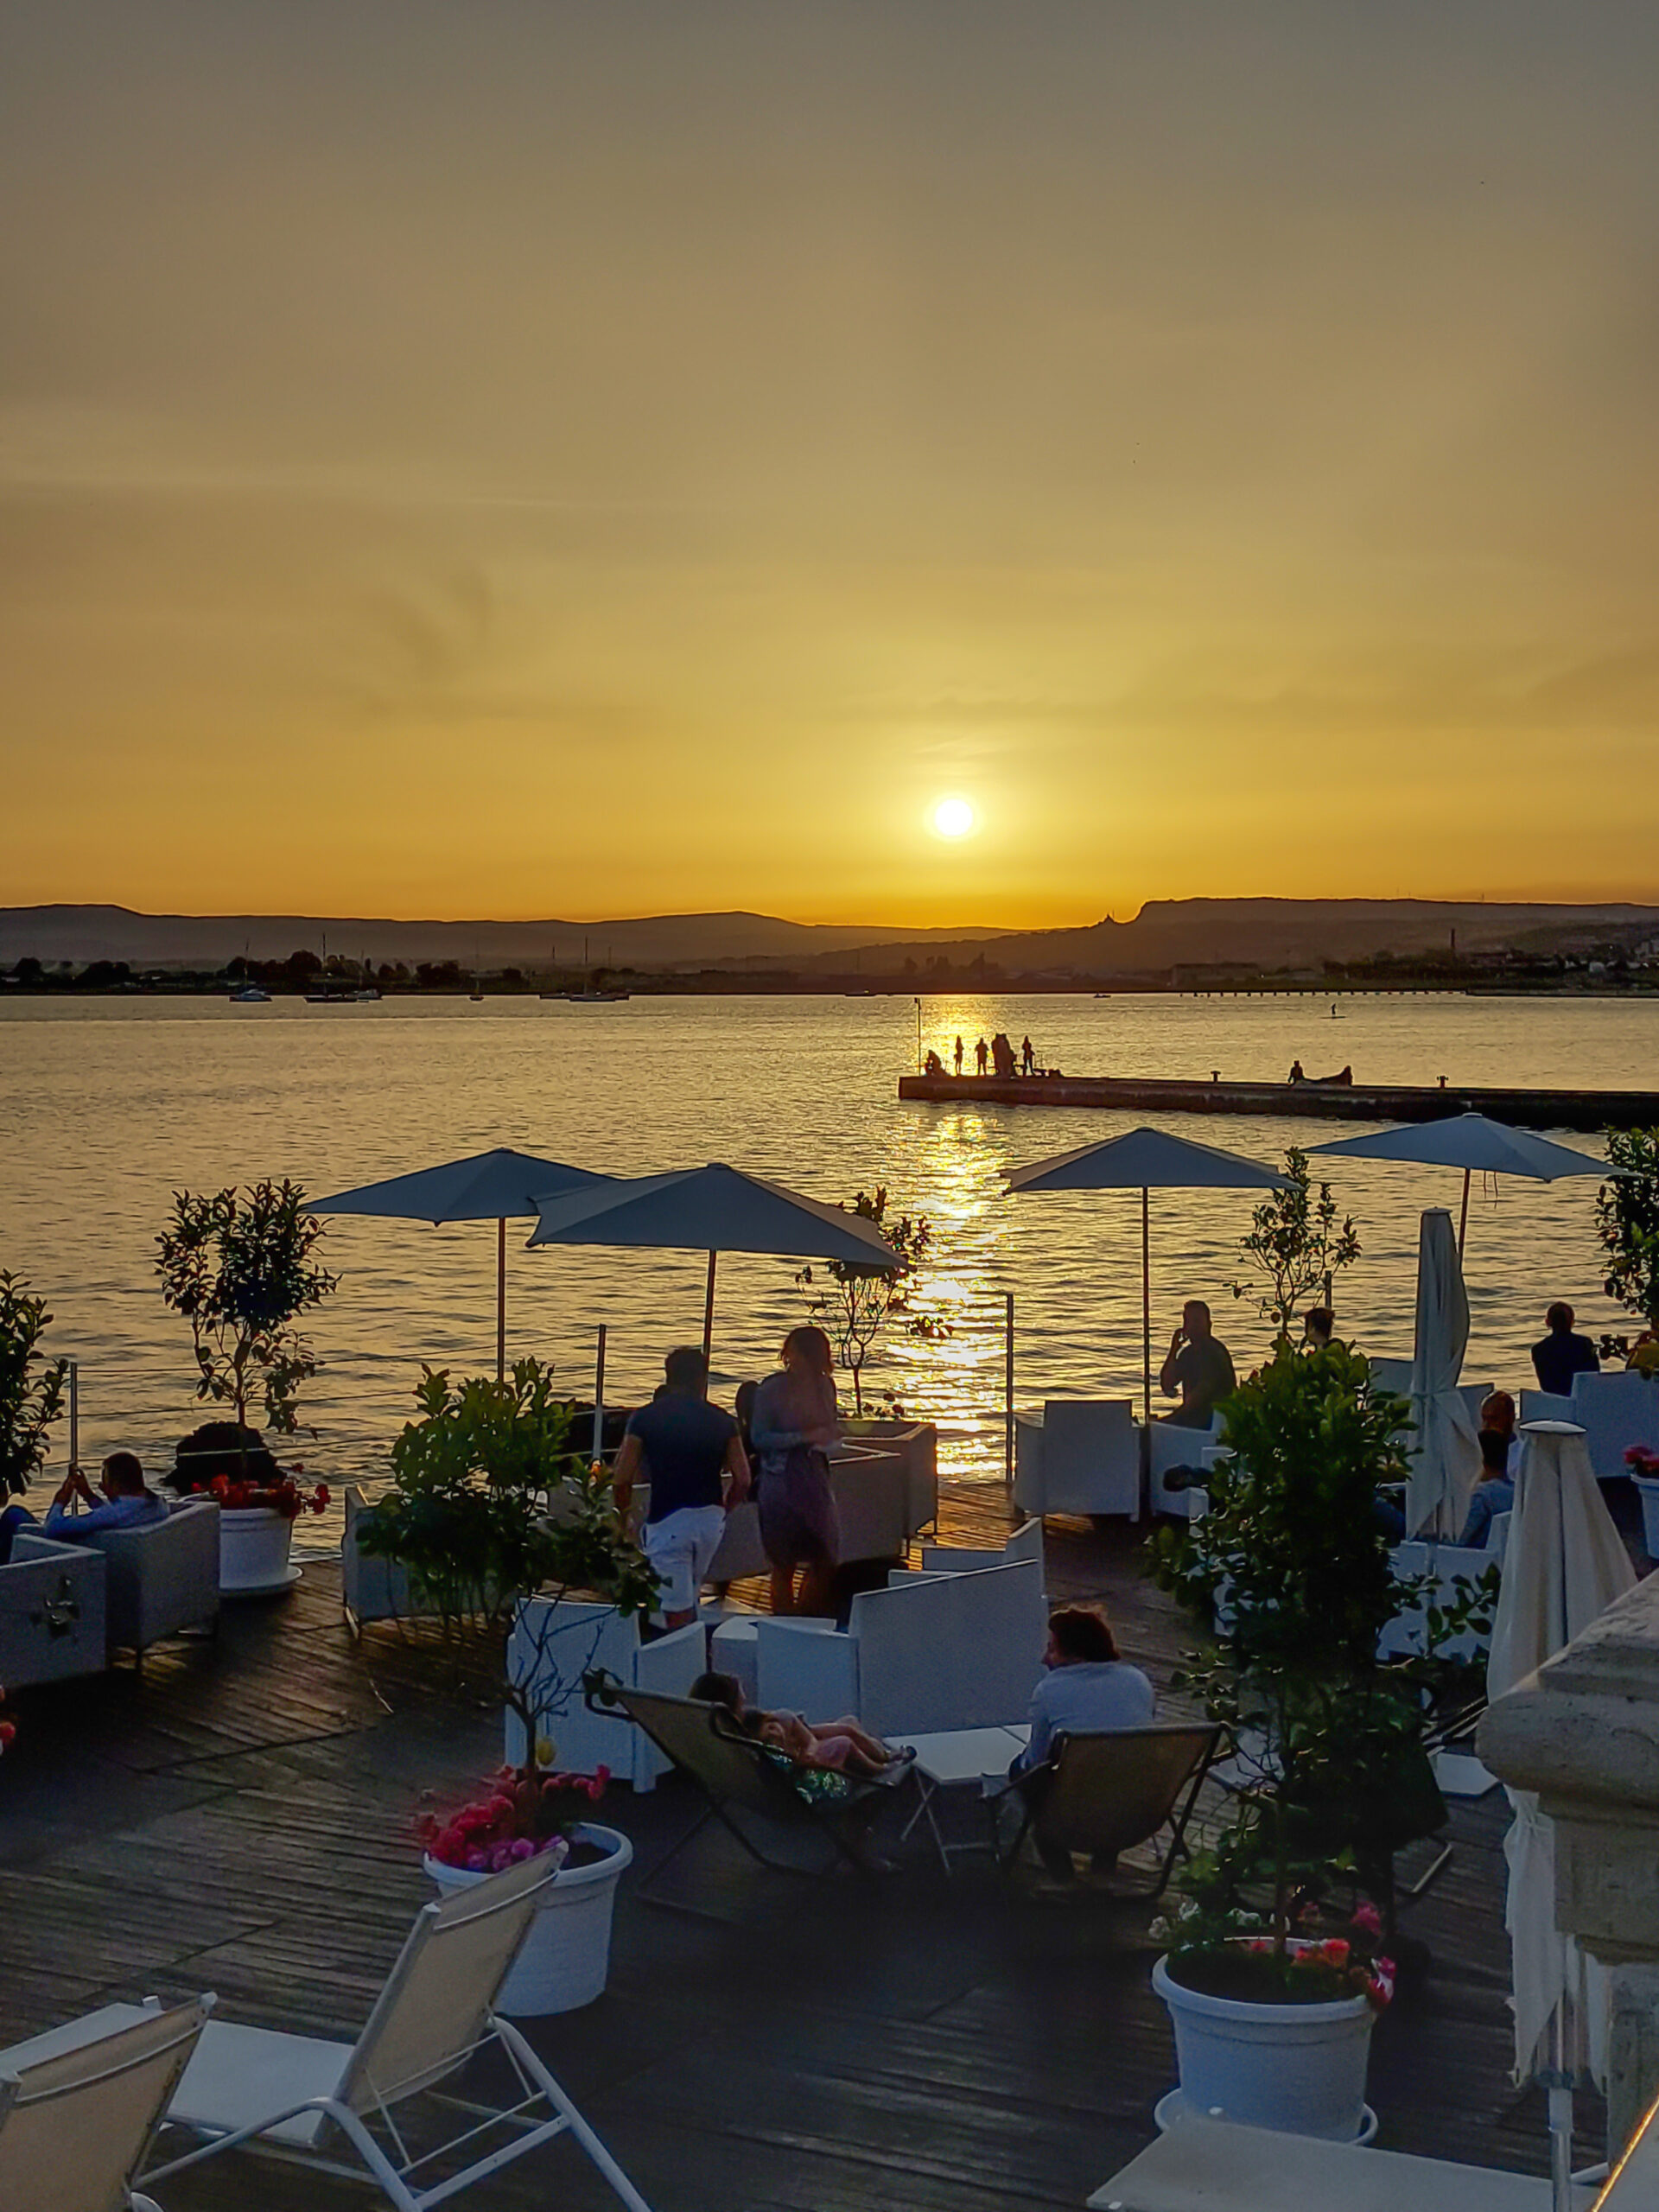
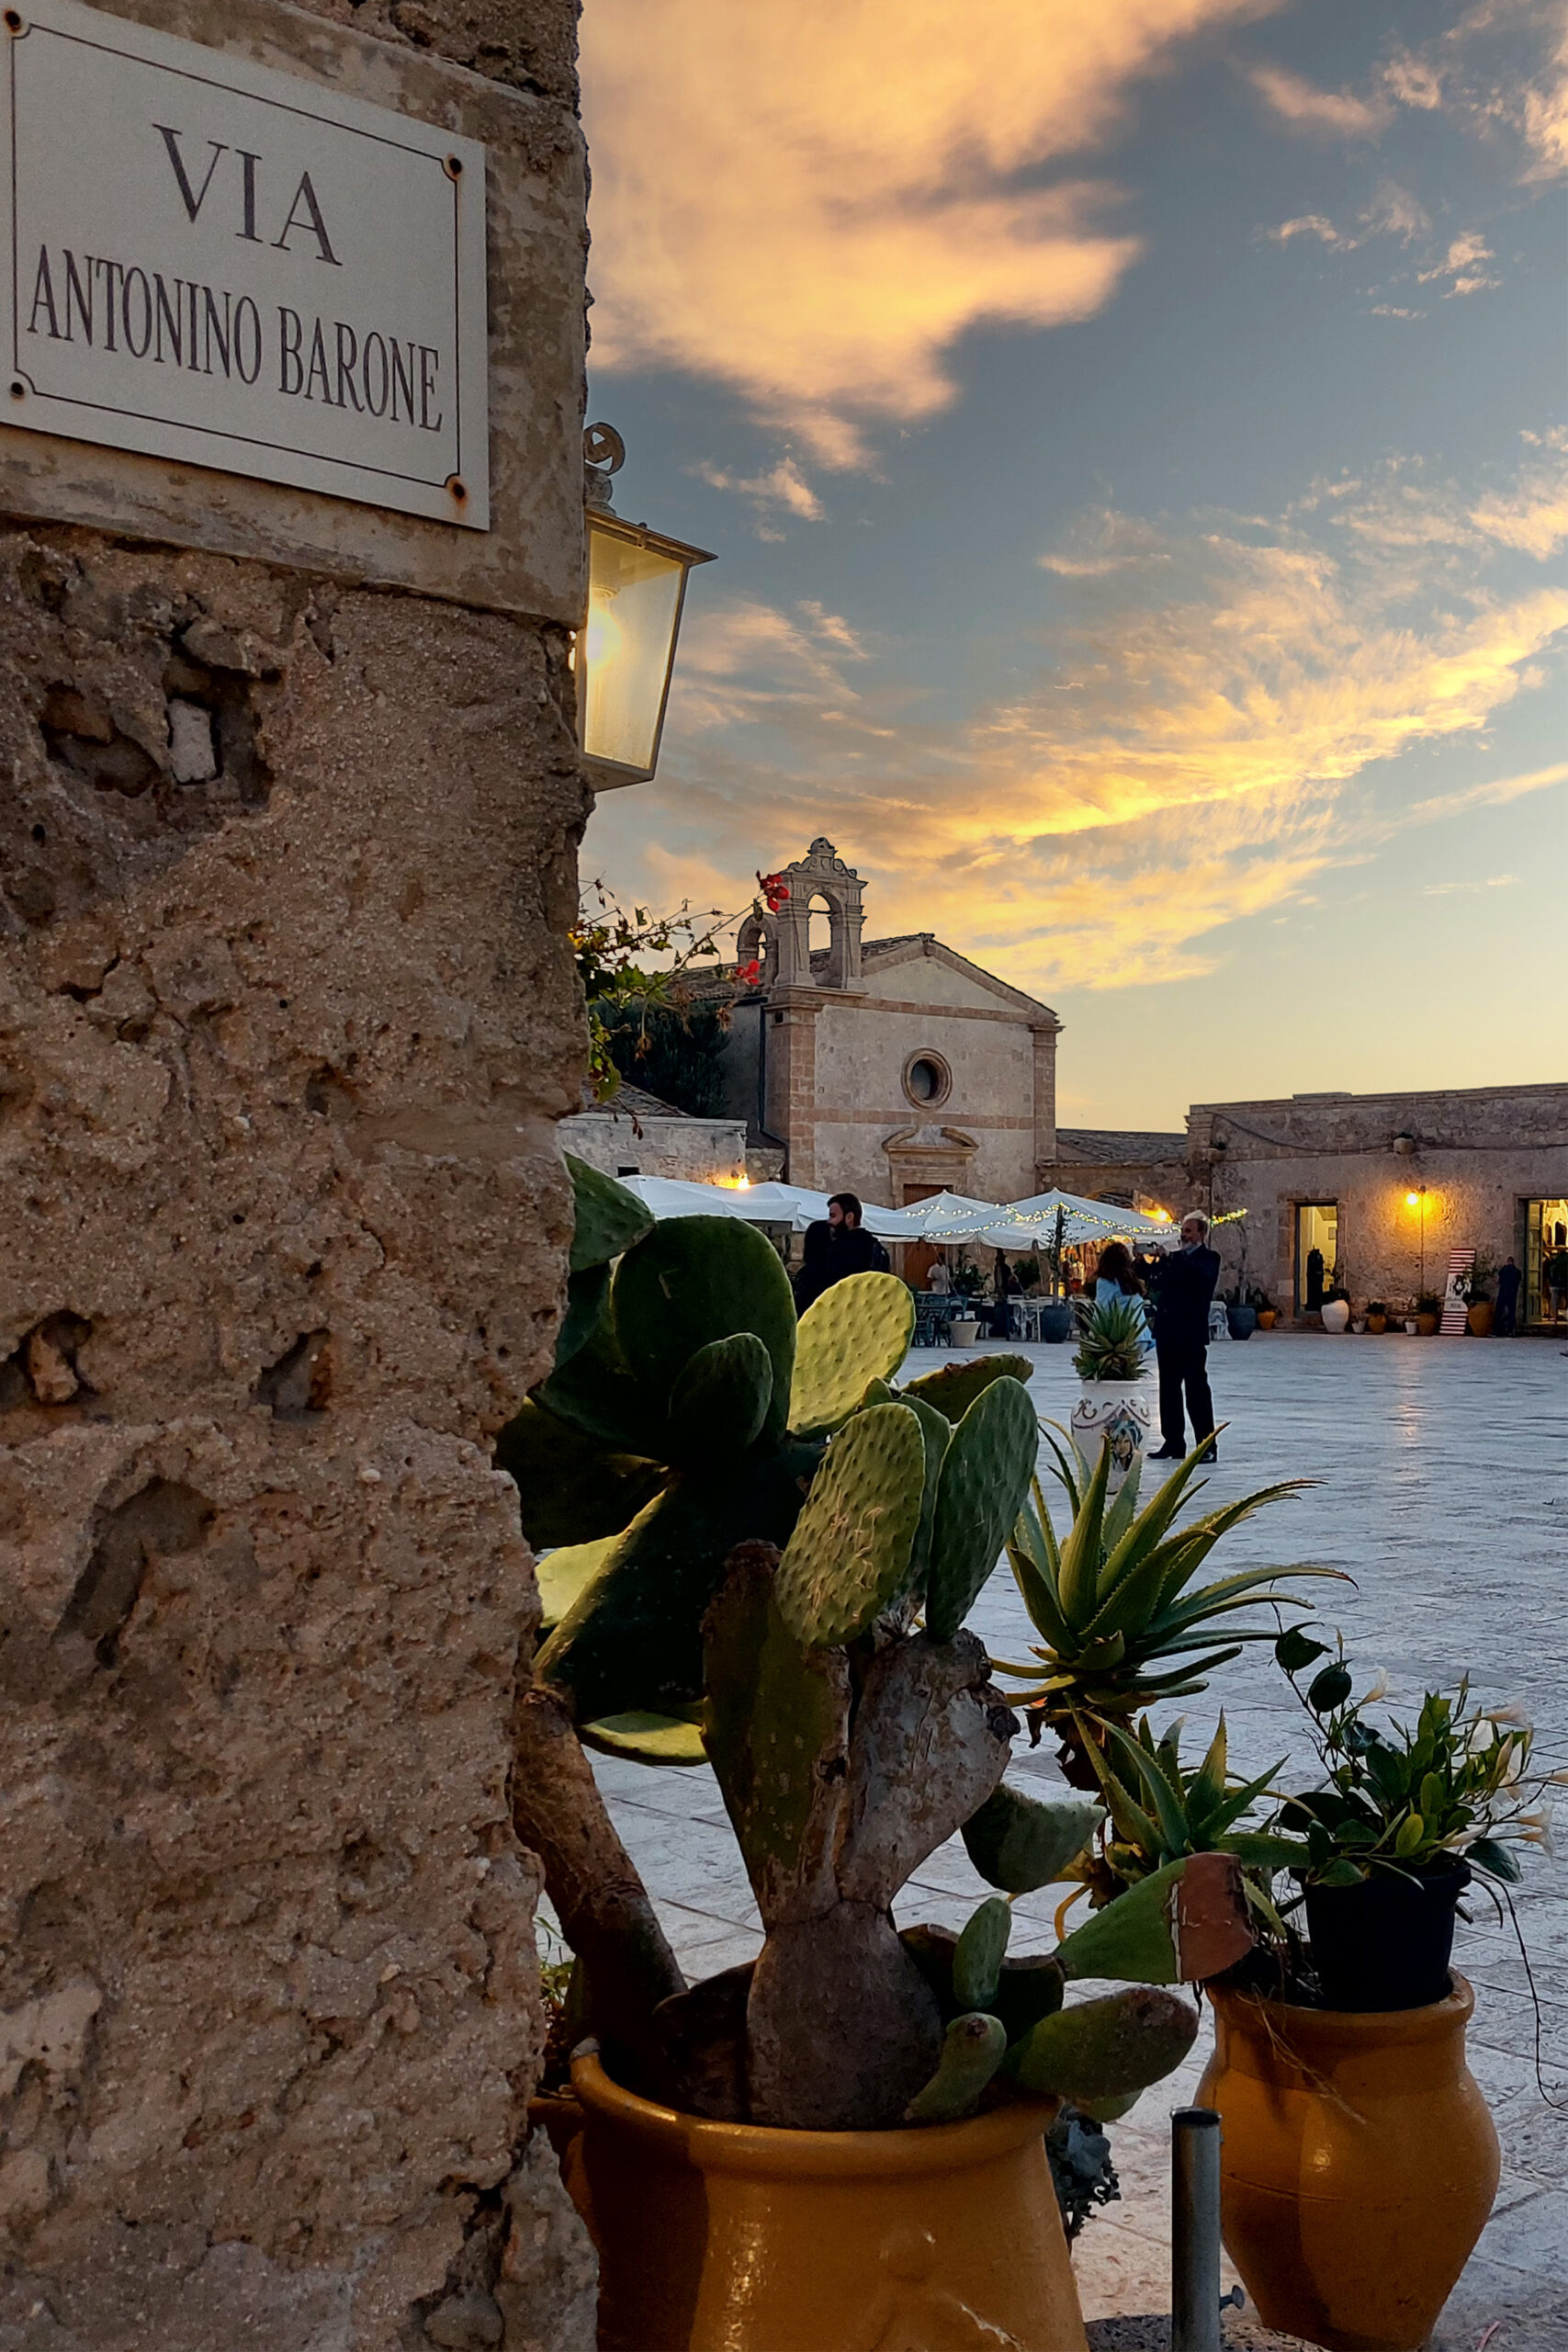
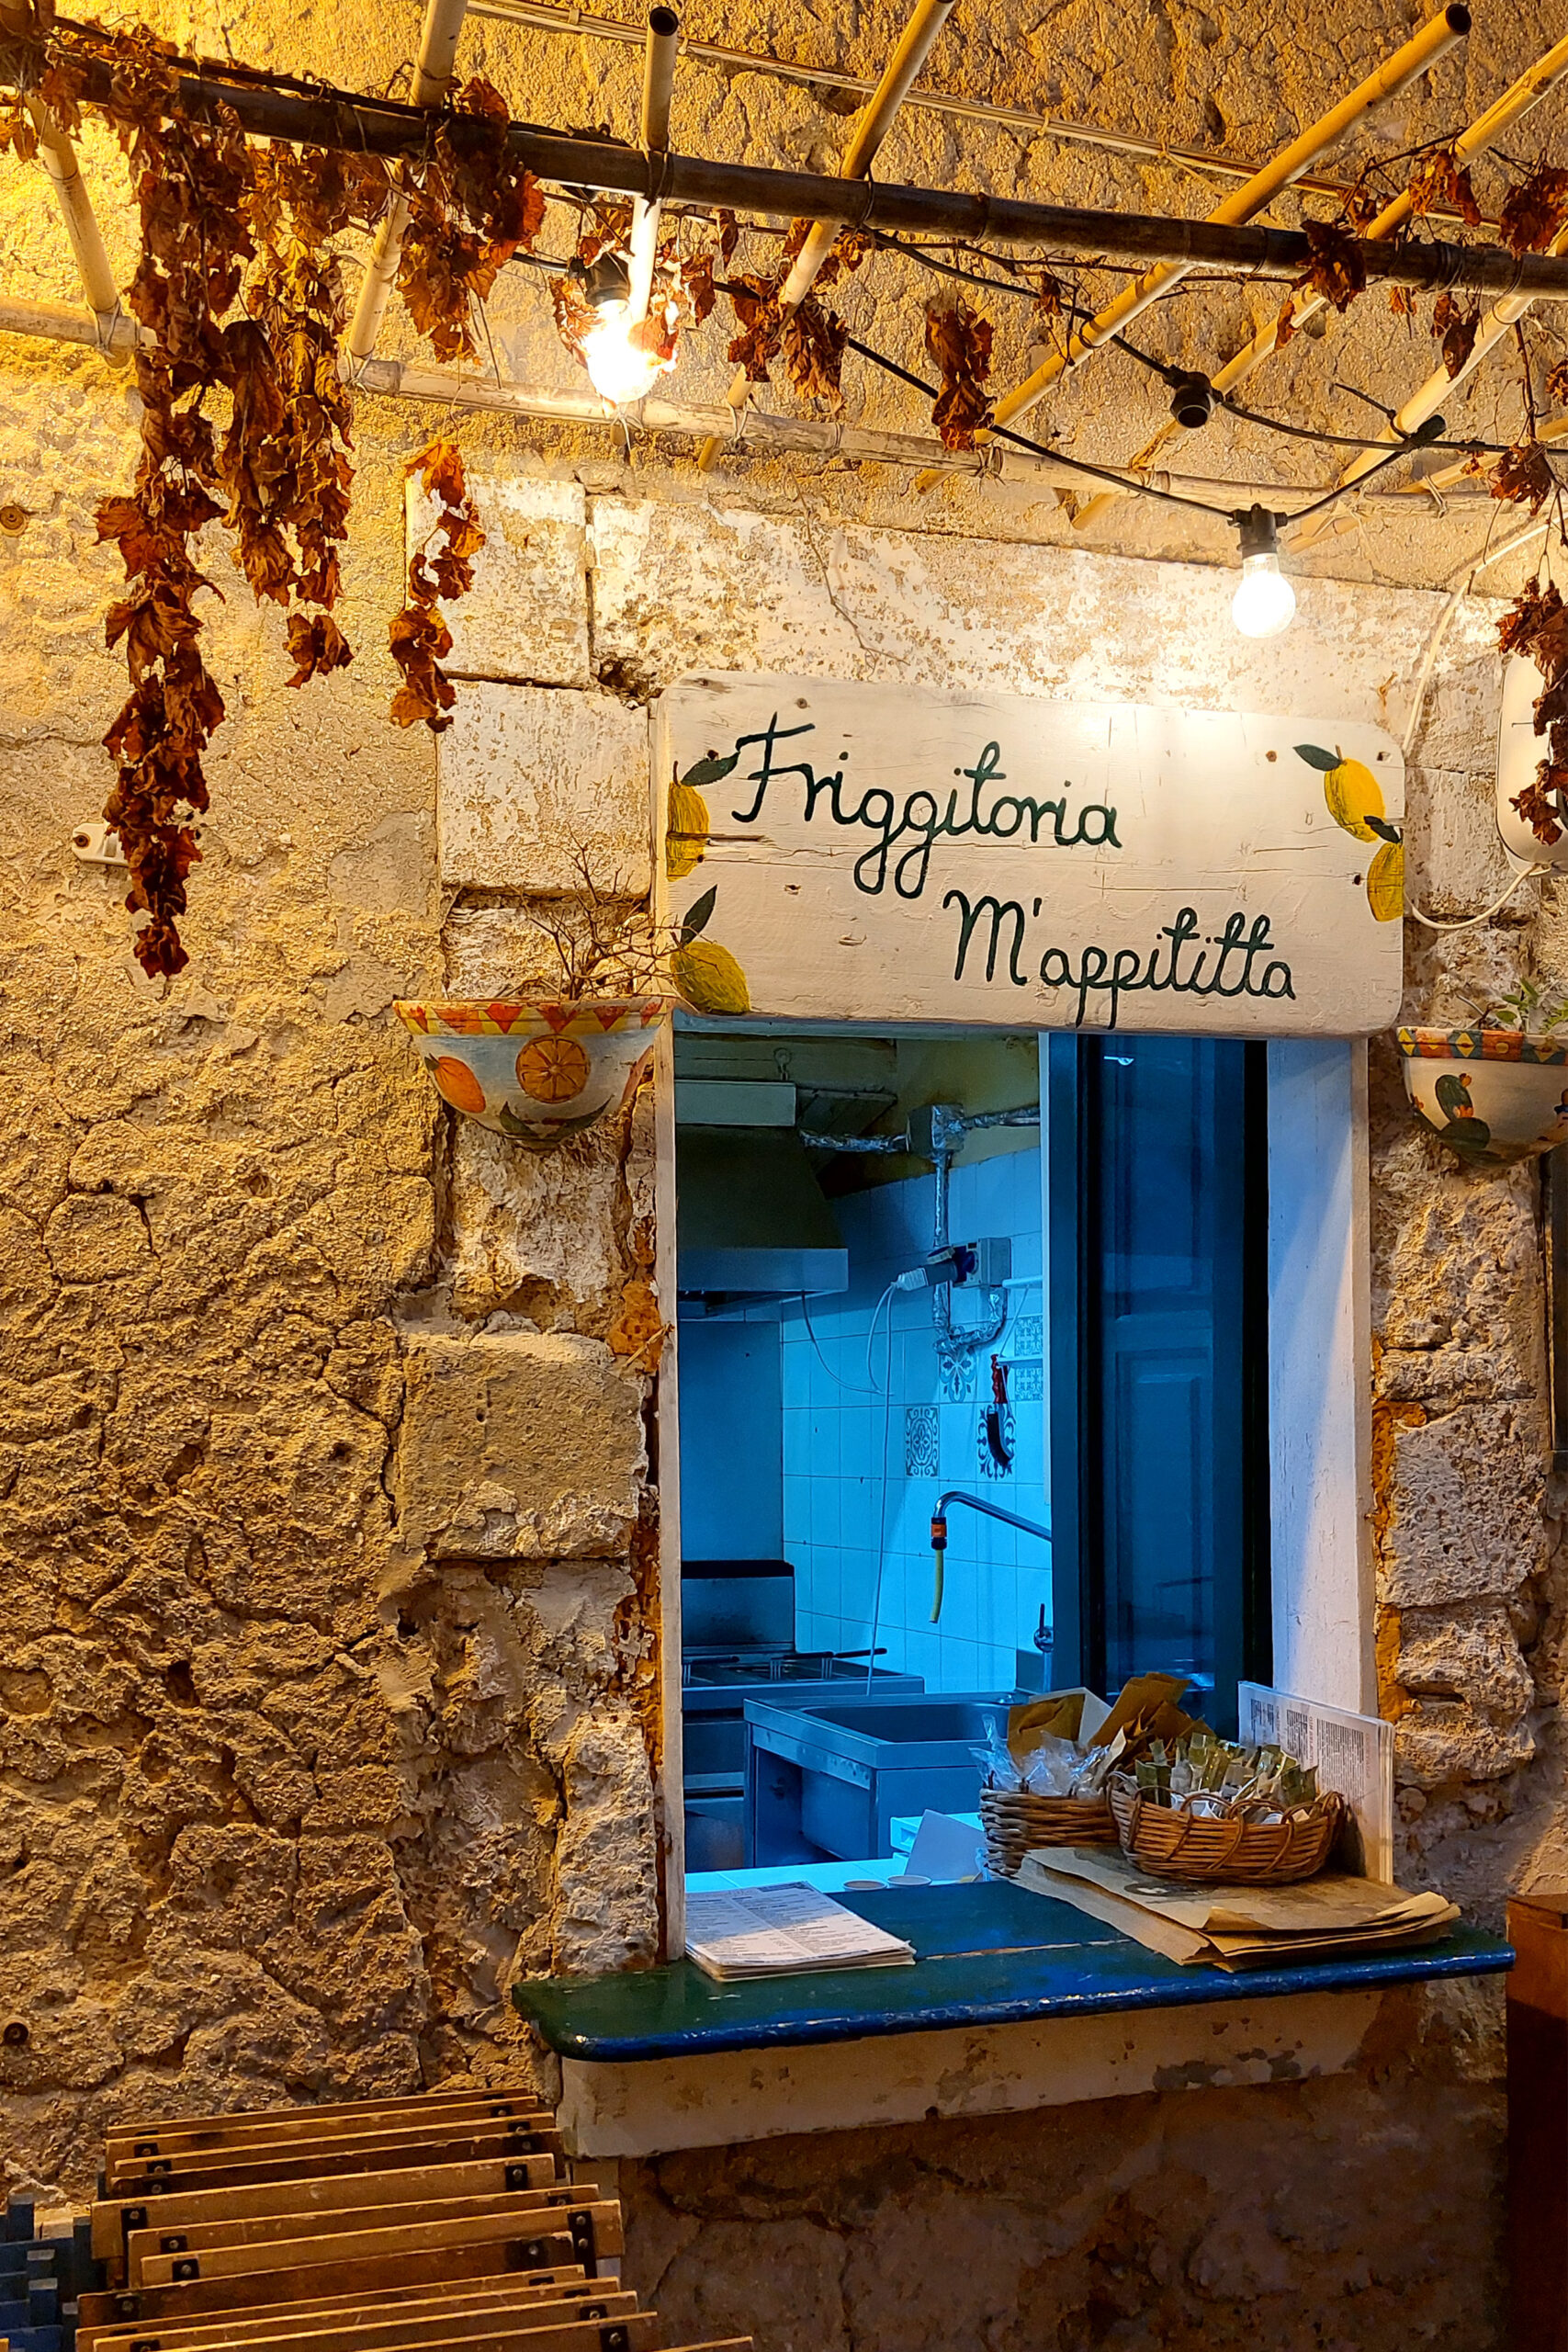
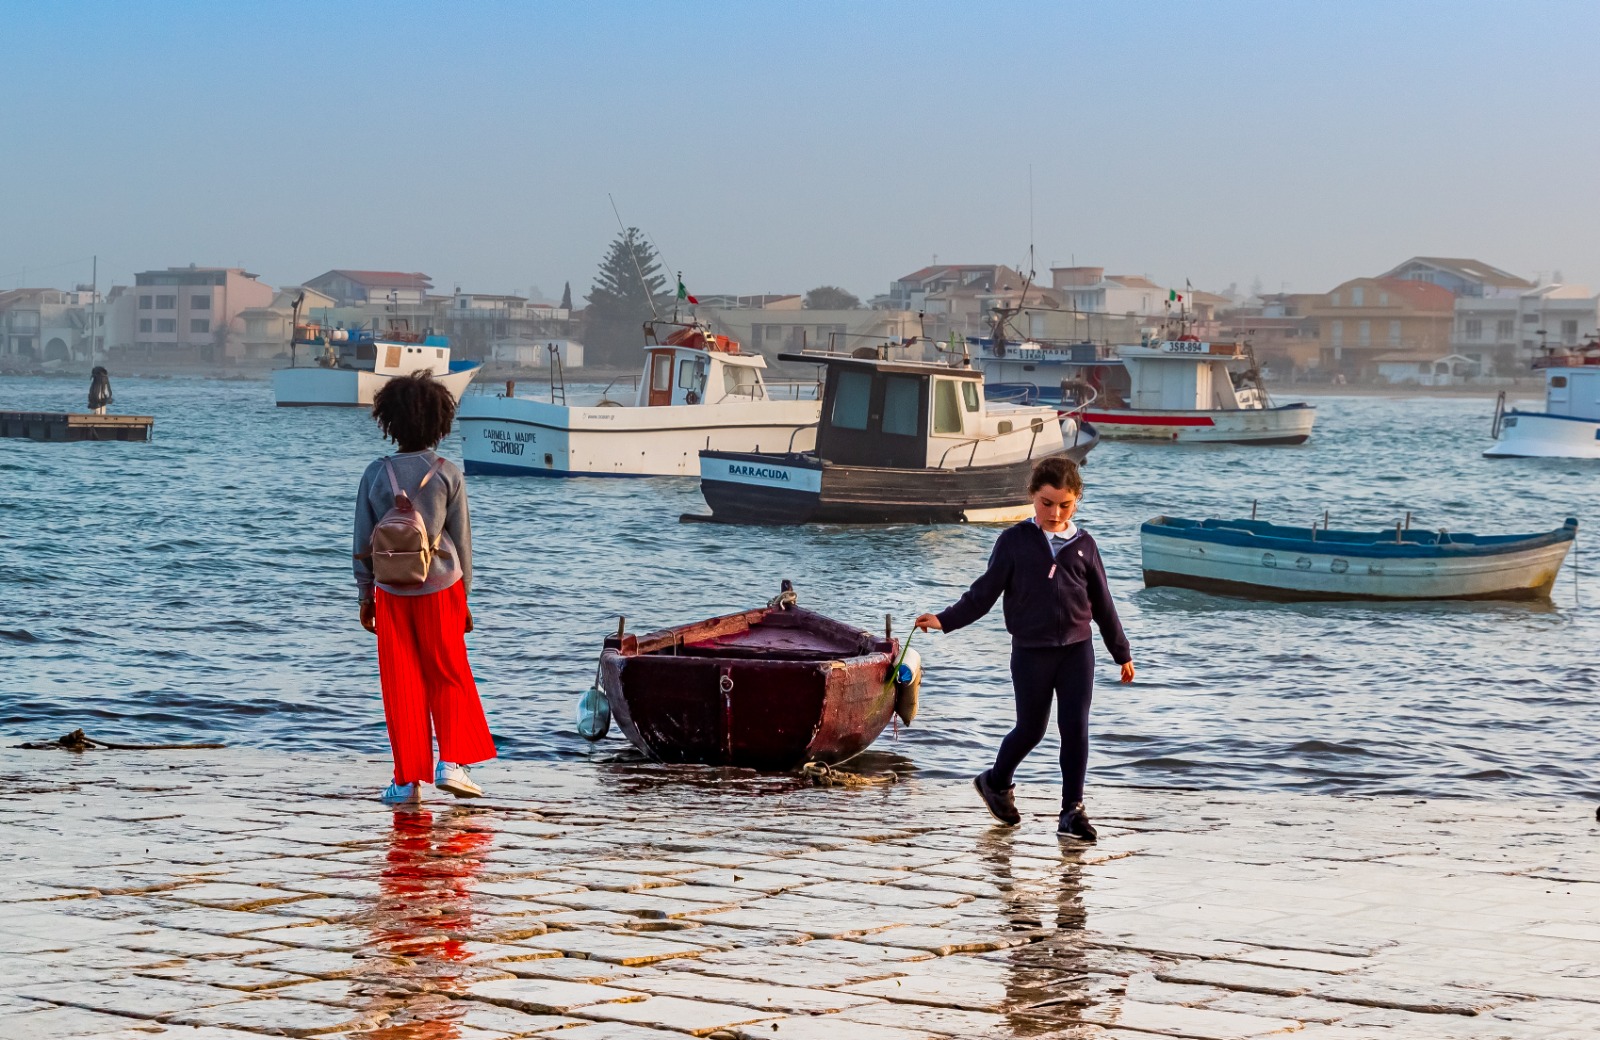
Sunset and evening: Marzamemi
At sunset you can choose to admire one of the three cities with the lights of the evening, or head towards Marzamemi, a wonderful fishing village with a magical atmosphere, full of bars and restaurants overlooking the sea that will give you a unique experience.
Here you can take wonderful photos at sunset. Choose a spot on the waterfront where you can capture the sun reflected in the water and a scene of life, perhaps with some children playing or a fisherman’s boat, or some details of the iconic restaurants.
@giadaantonini_photography
@giadaantonini_photography
@giadaantonini_photography
@damianocarpino_photography
Day 6: form Syracuse archeological park to the Scala dei Turchi
Morning: Syracuse
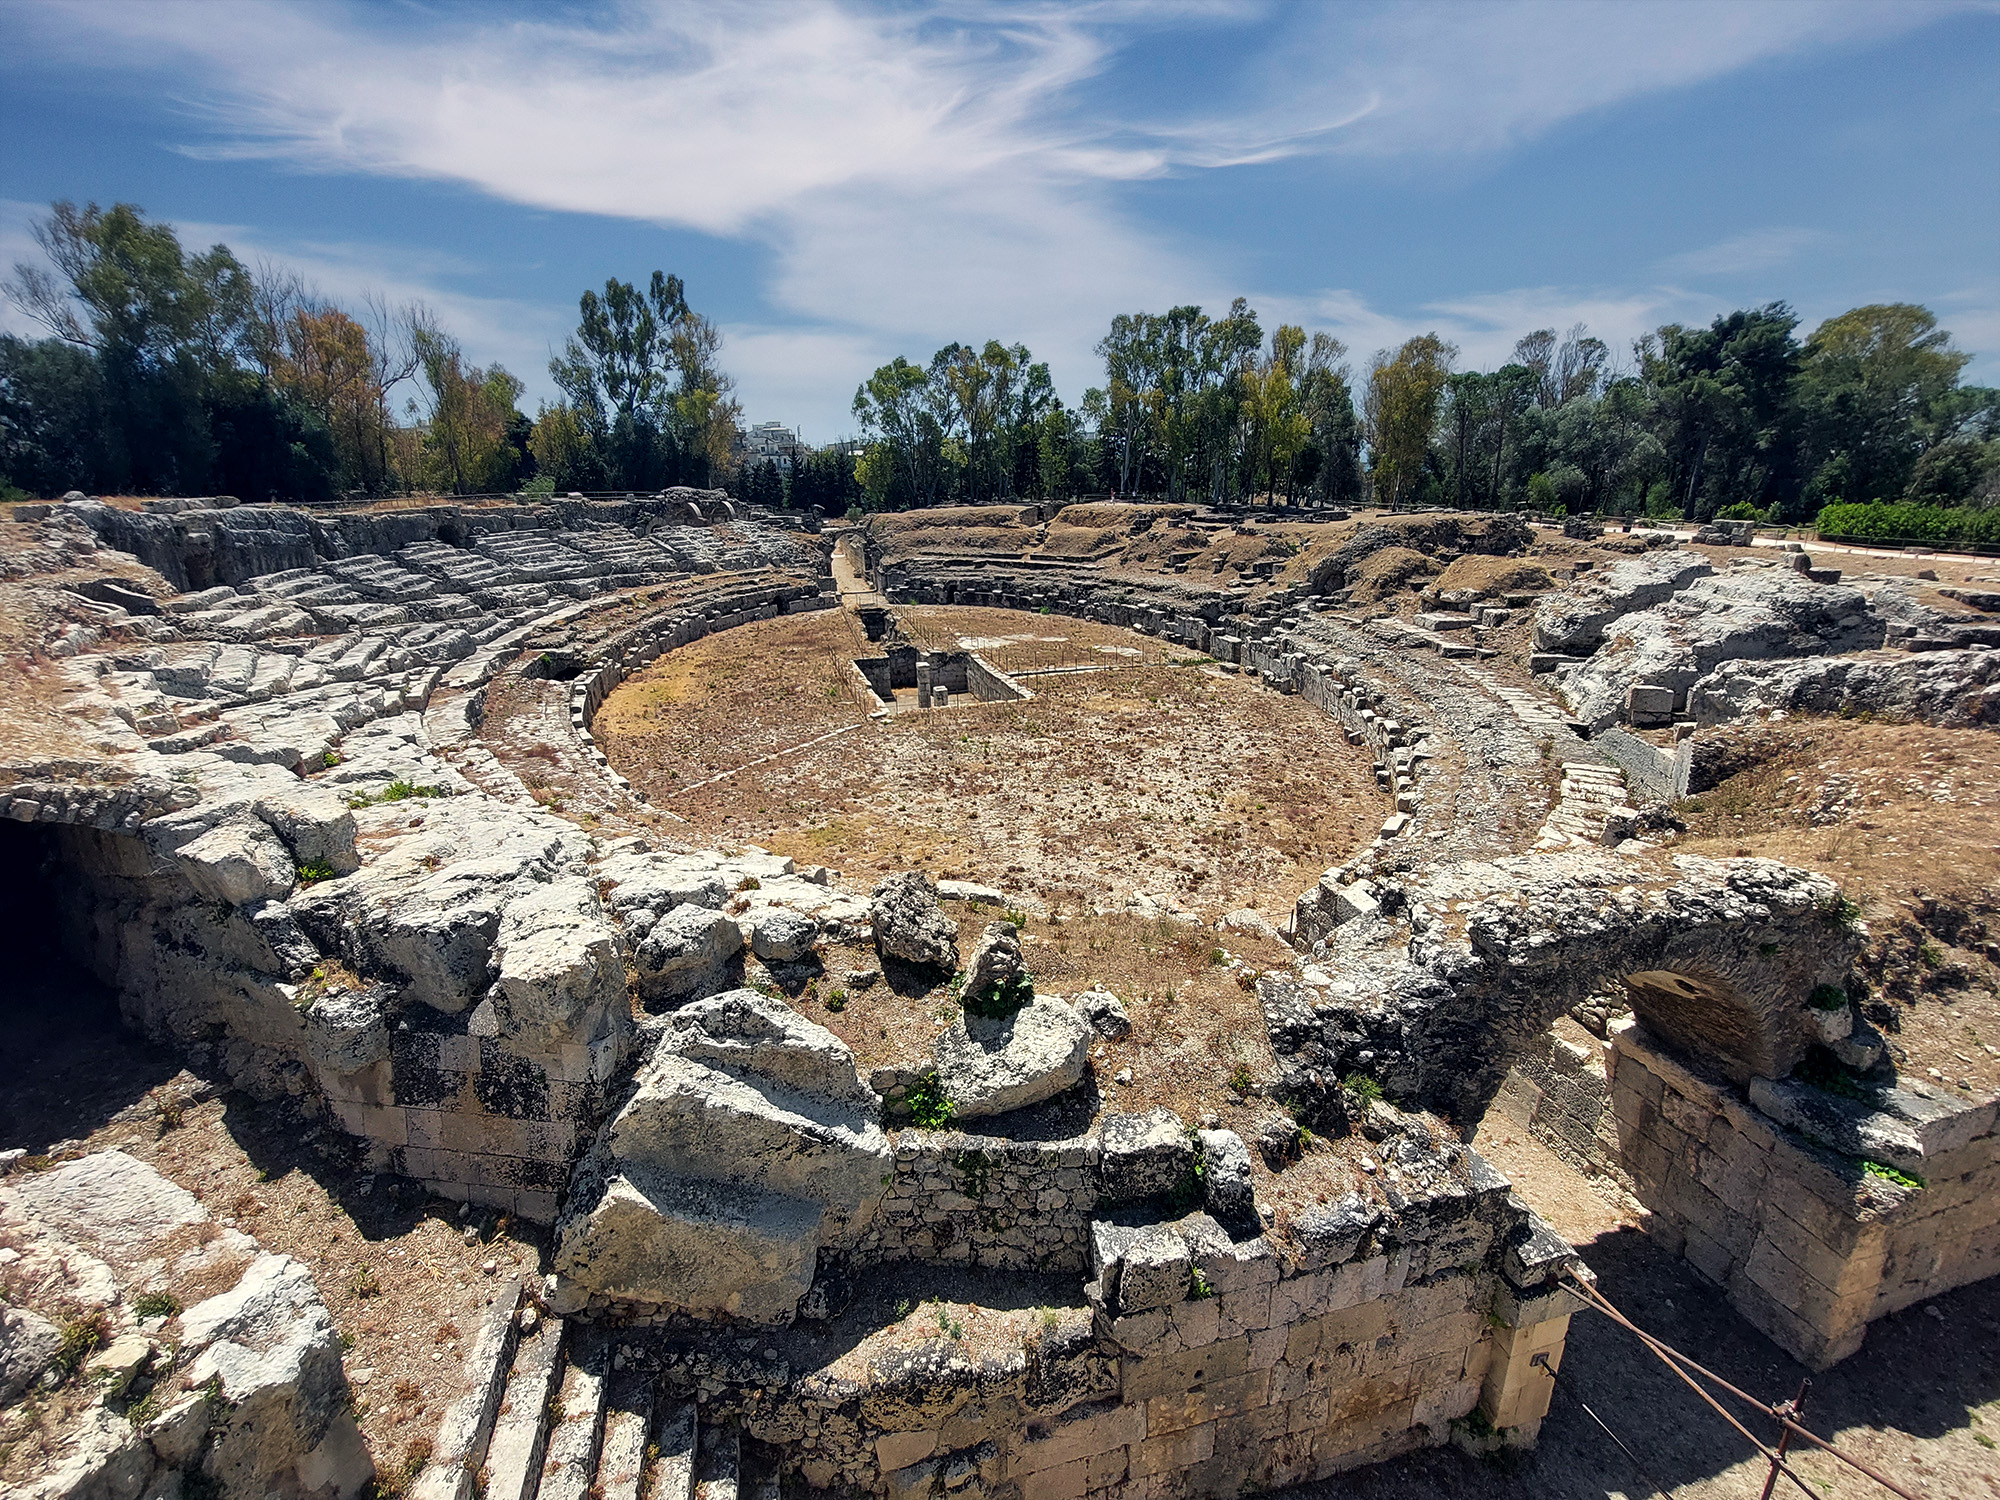
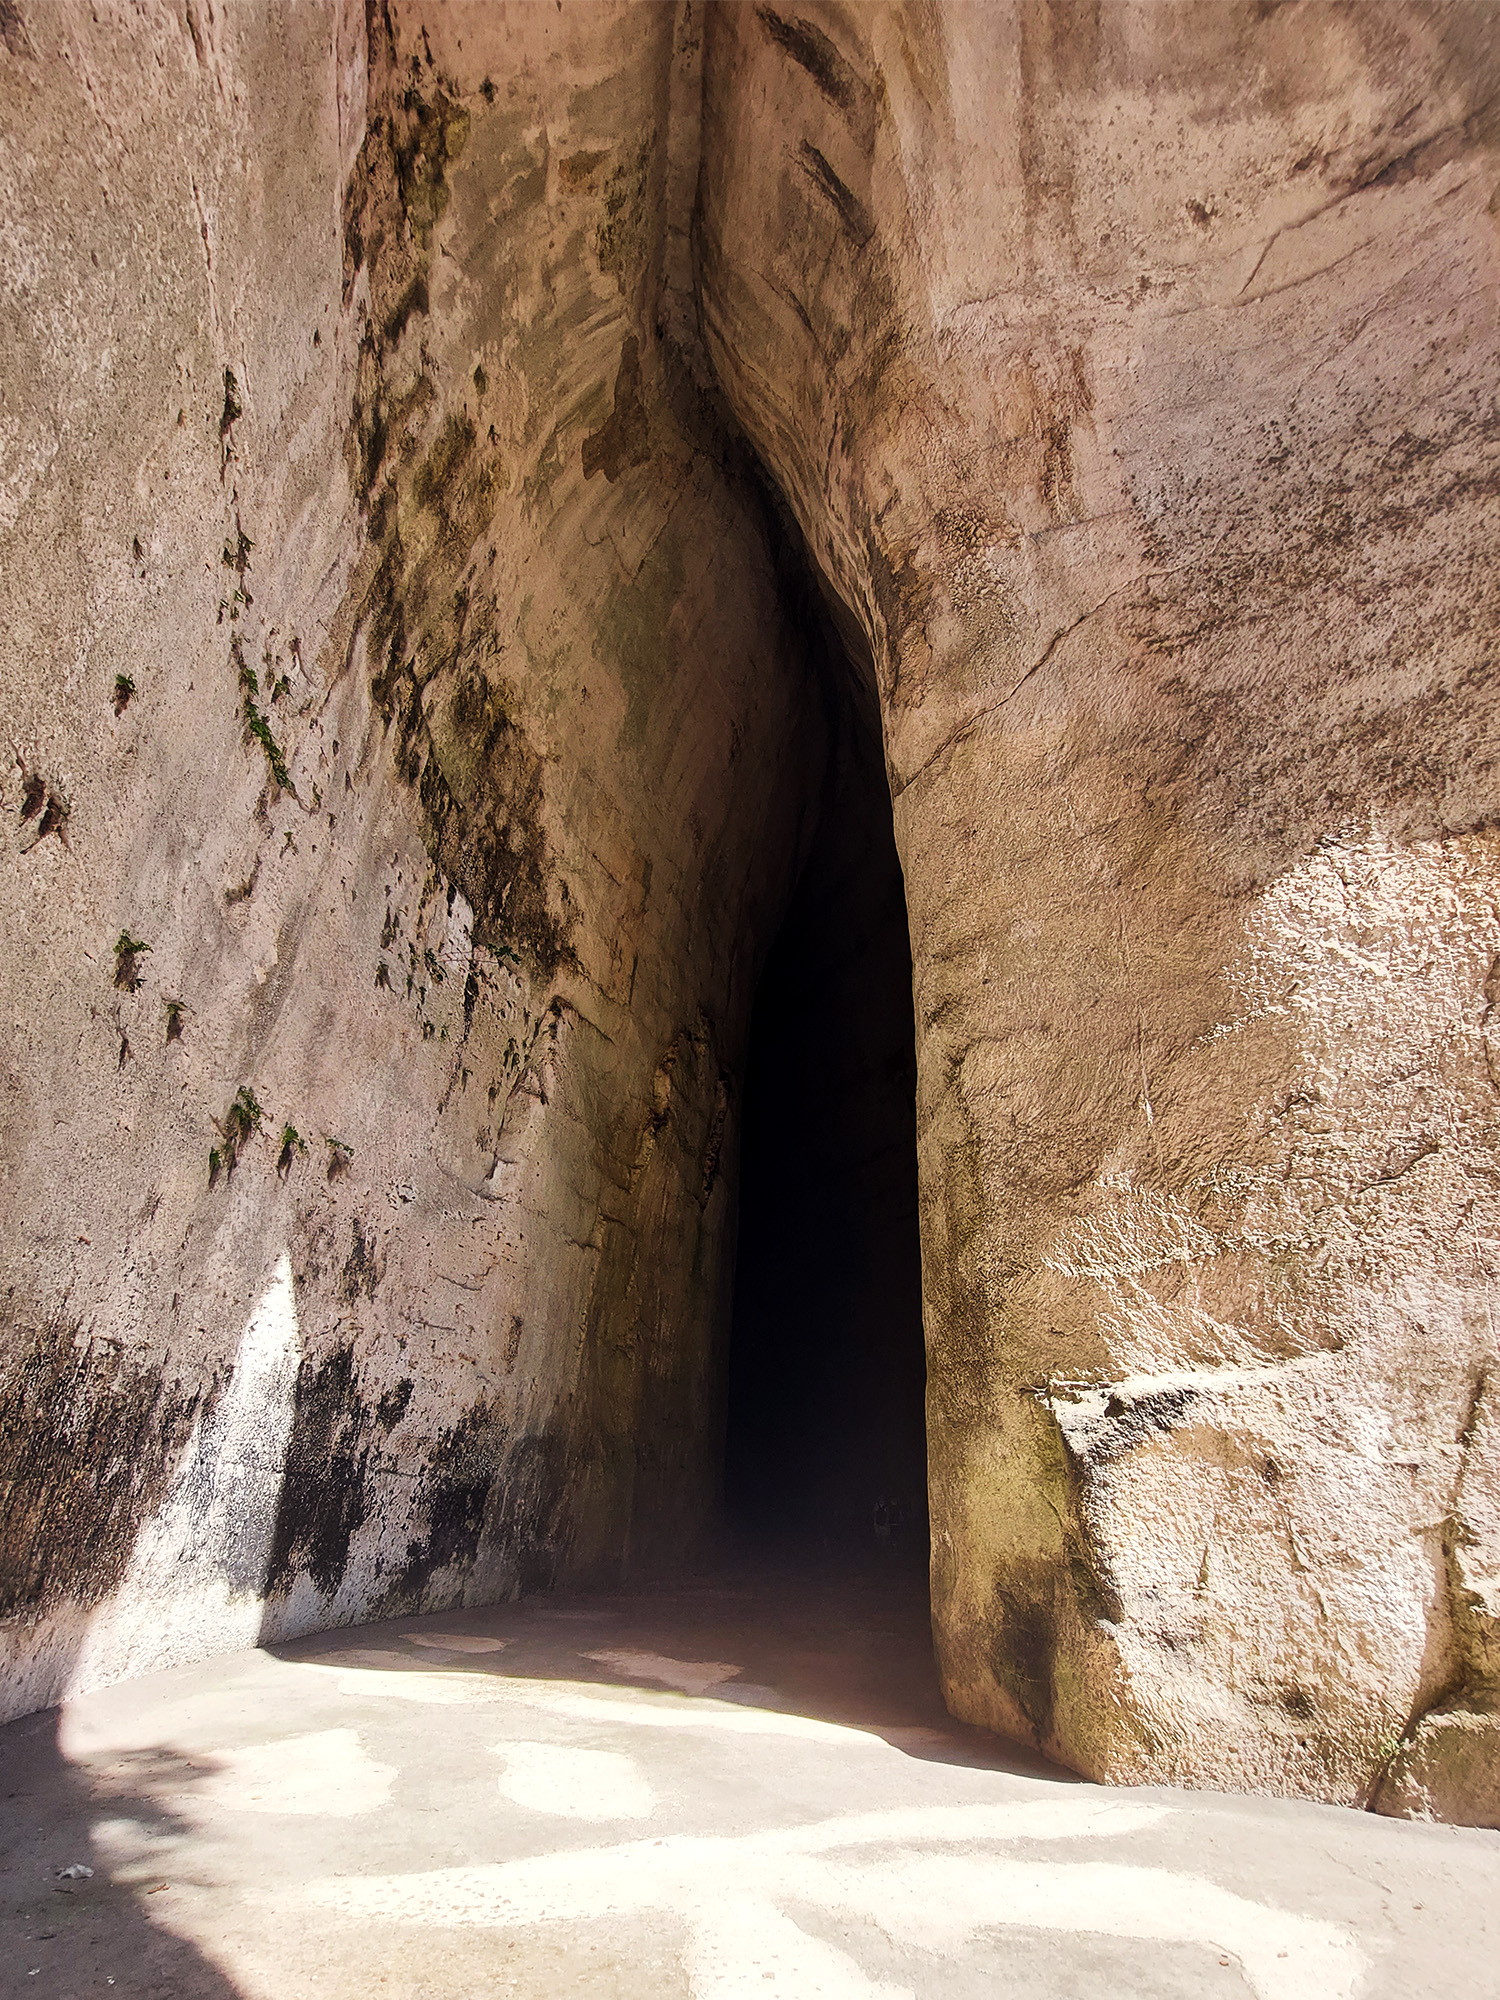
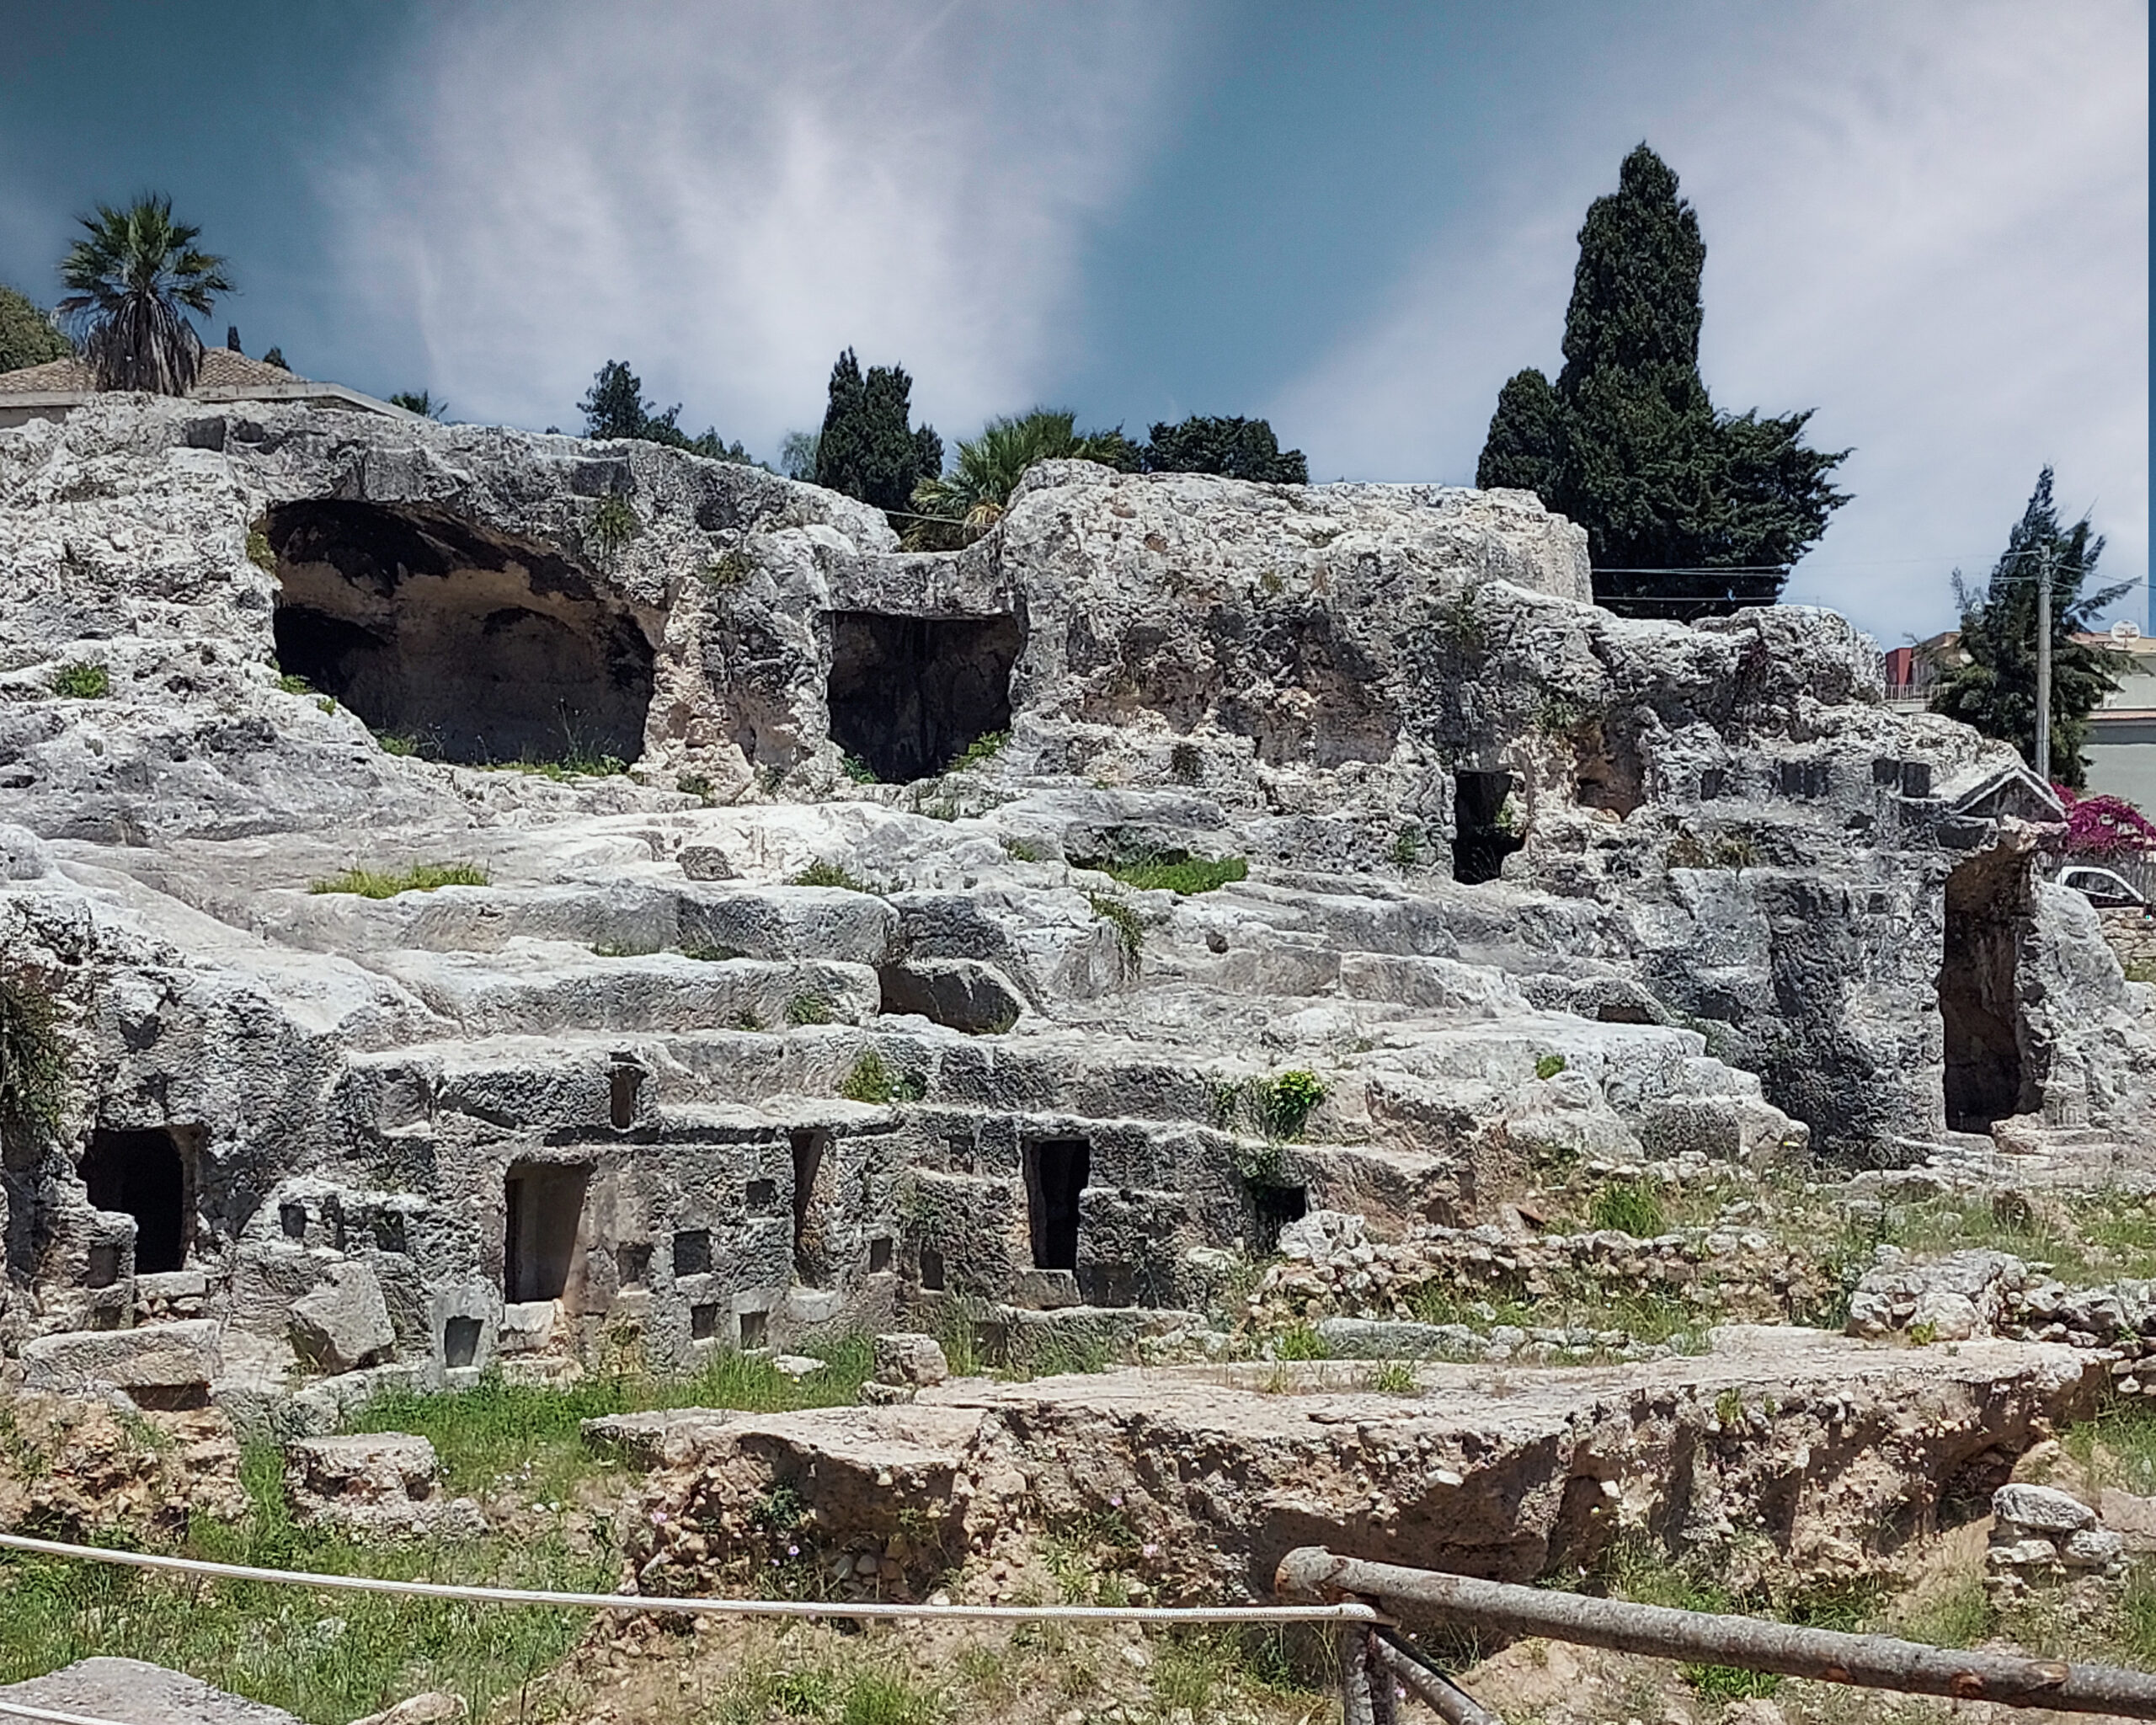
Dedicate two hours to visiting the Archaeological Park of Neapolis, where you can admire the famous Ear of Dionysus, the Roman Amphitheater and the Greek Theater.
We recommend a lunch with a sandwich at La Salumeria dei fratelli Burgio, well known in the city and highly recommended for the variety and quality of the ingredients.
@giadaantonini_photography
@giadaantonini_photography
@giadaantonini_photography
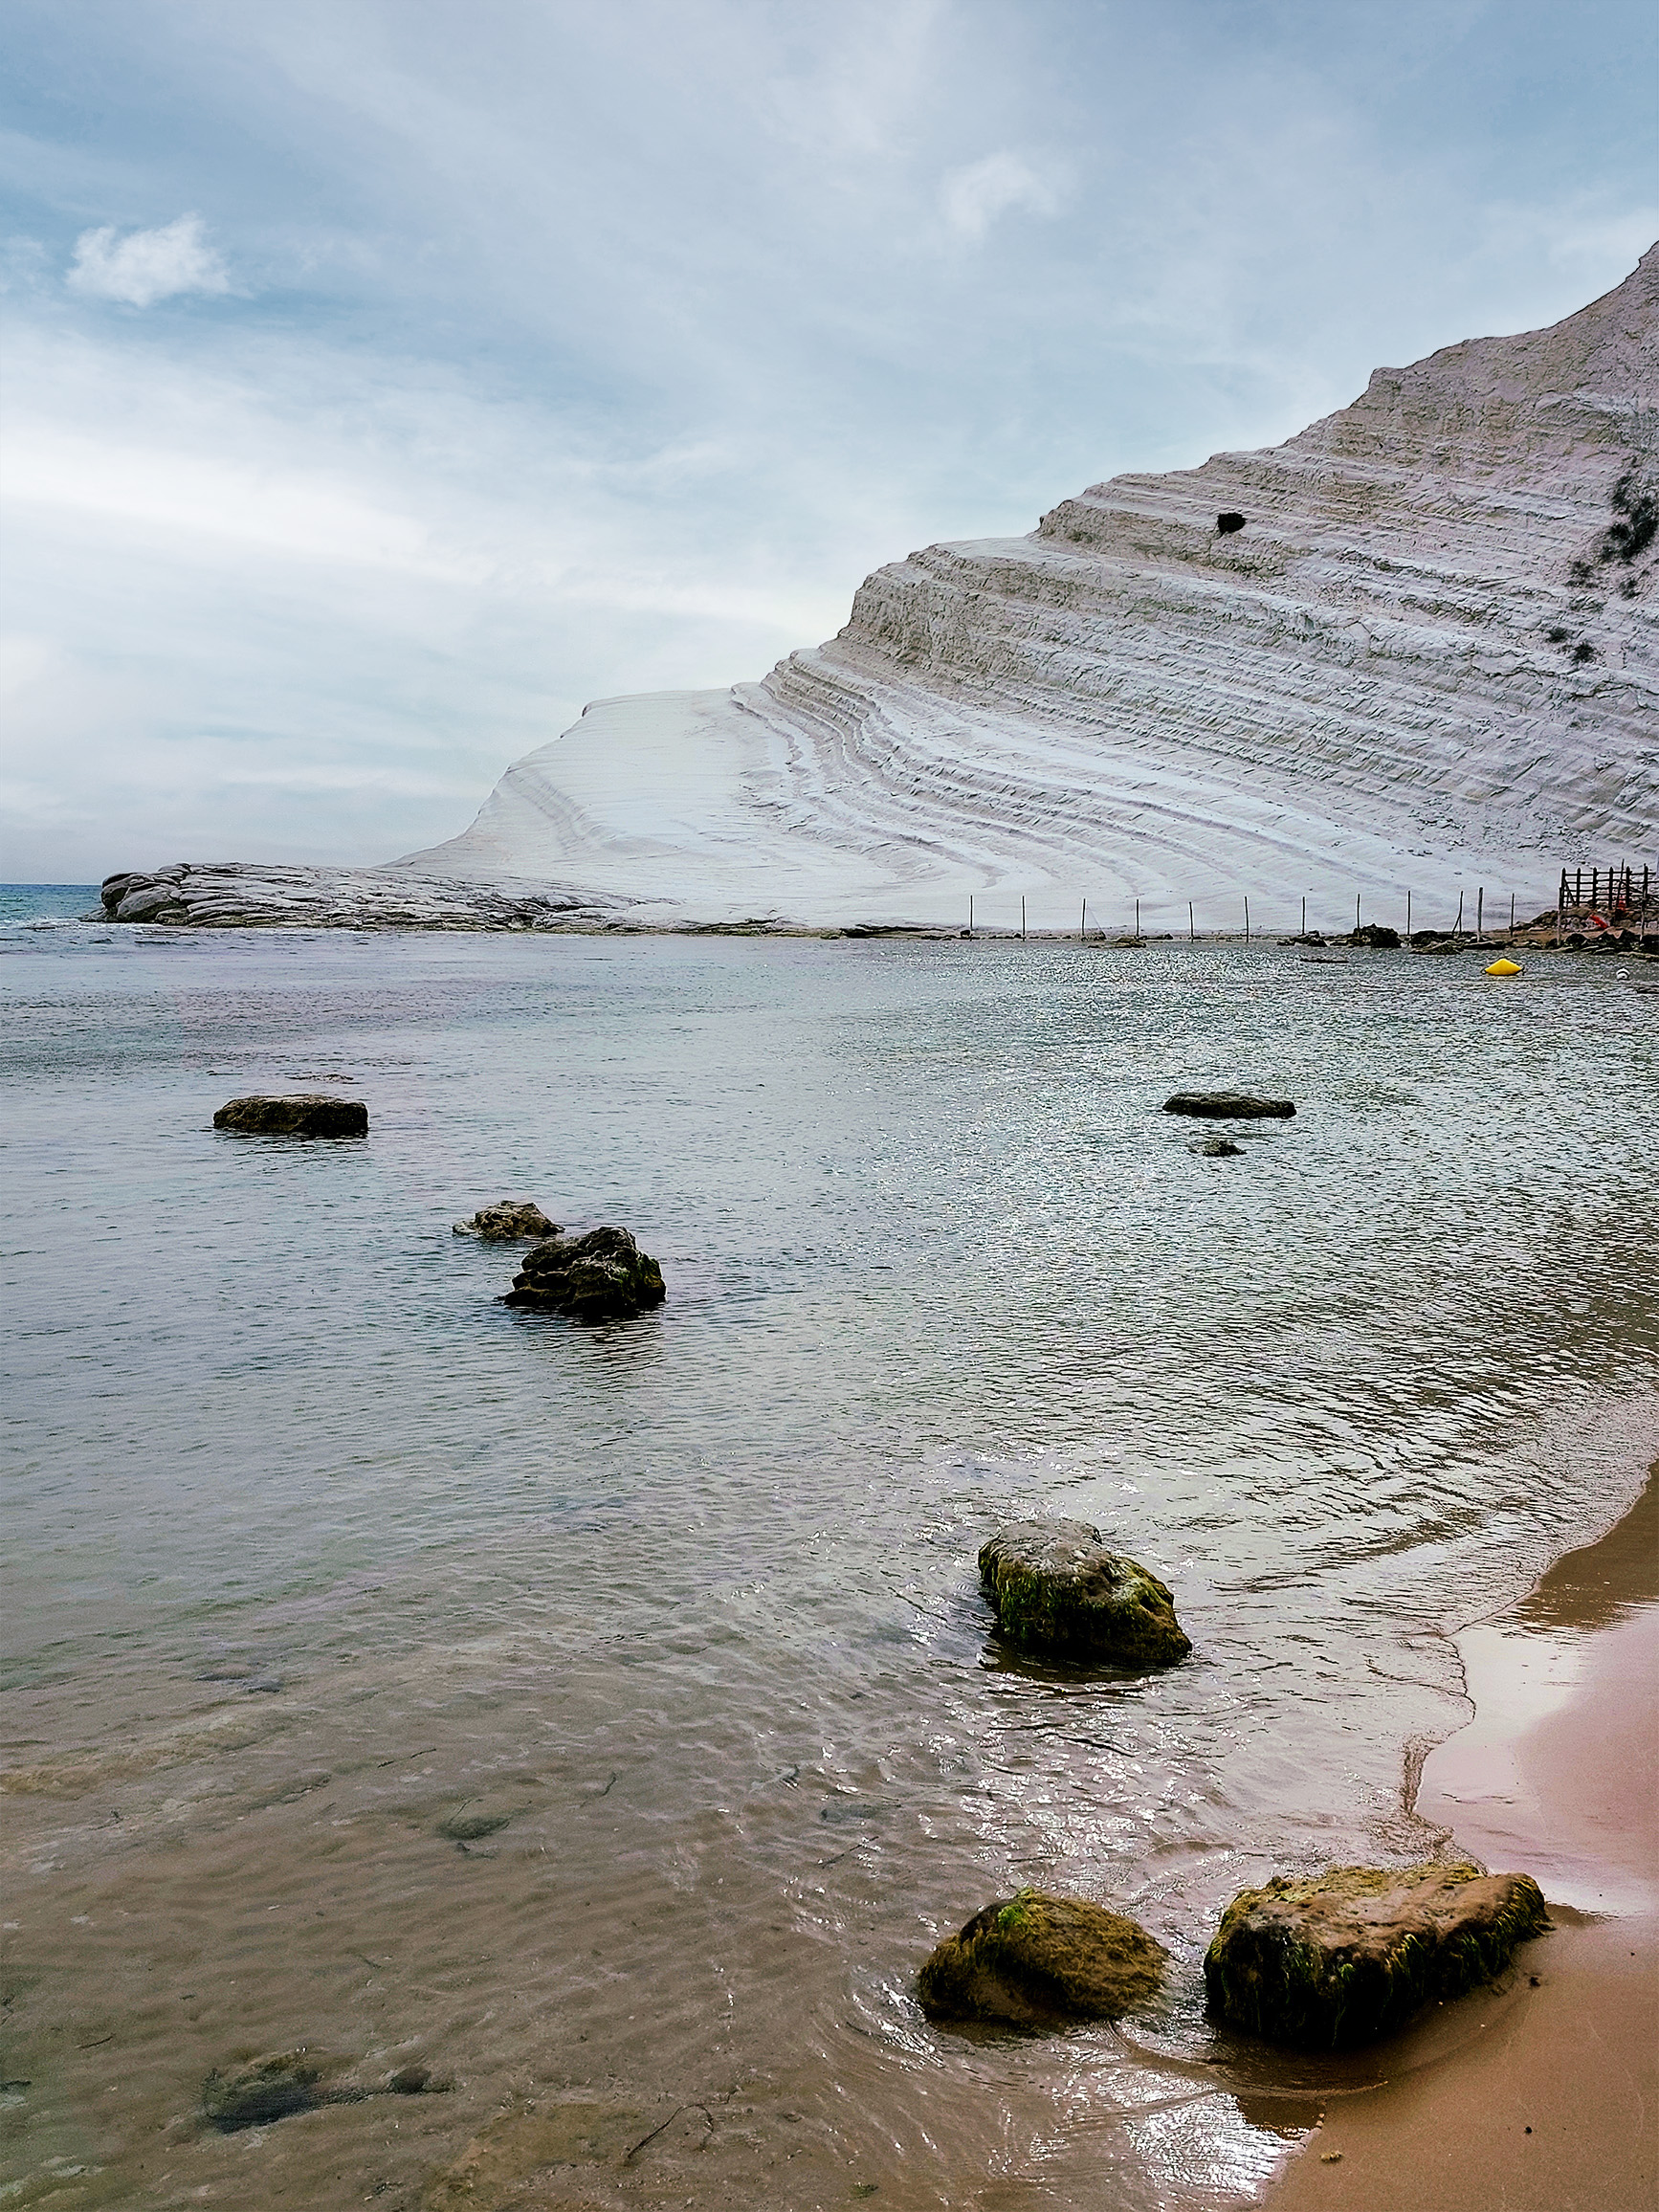
Afternoon and sunset: Scala dei Turchi
To get from Syracuse to Agrigento it will take about three hours by car.
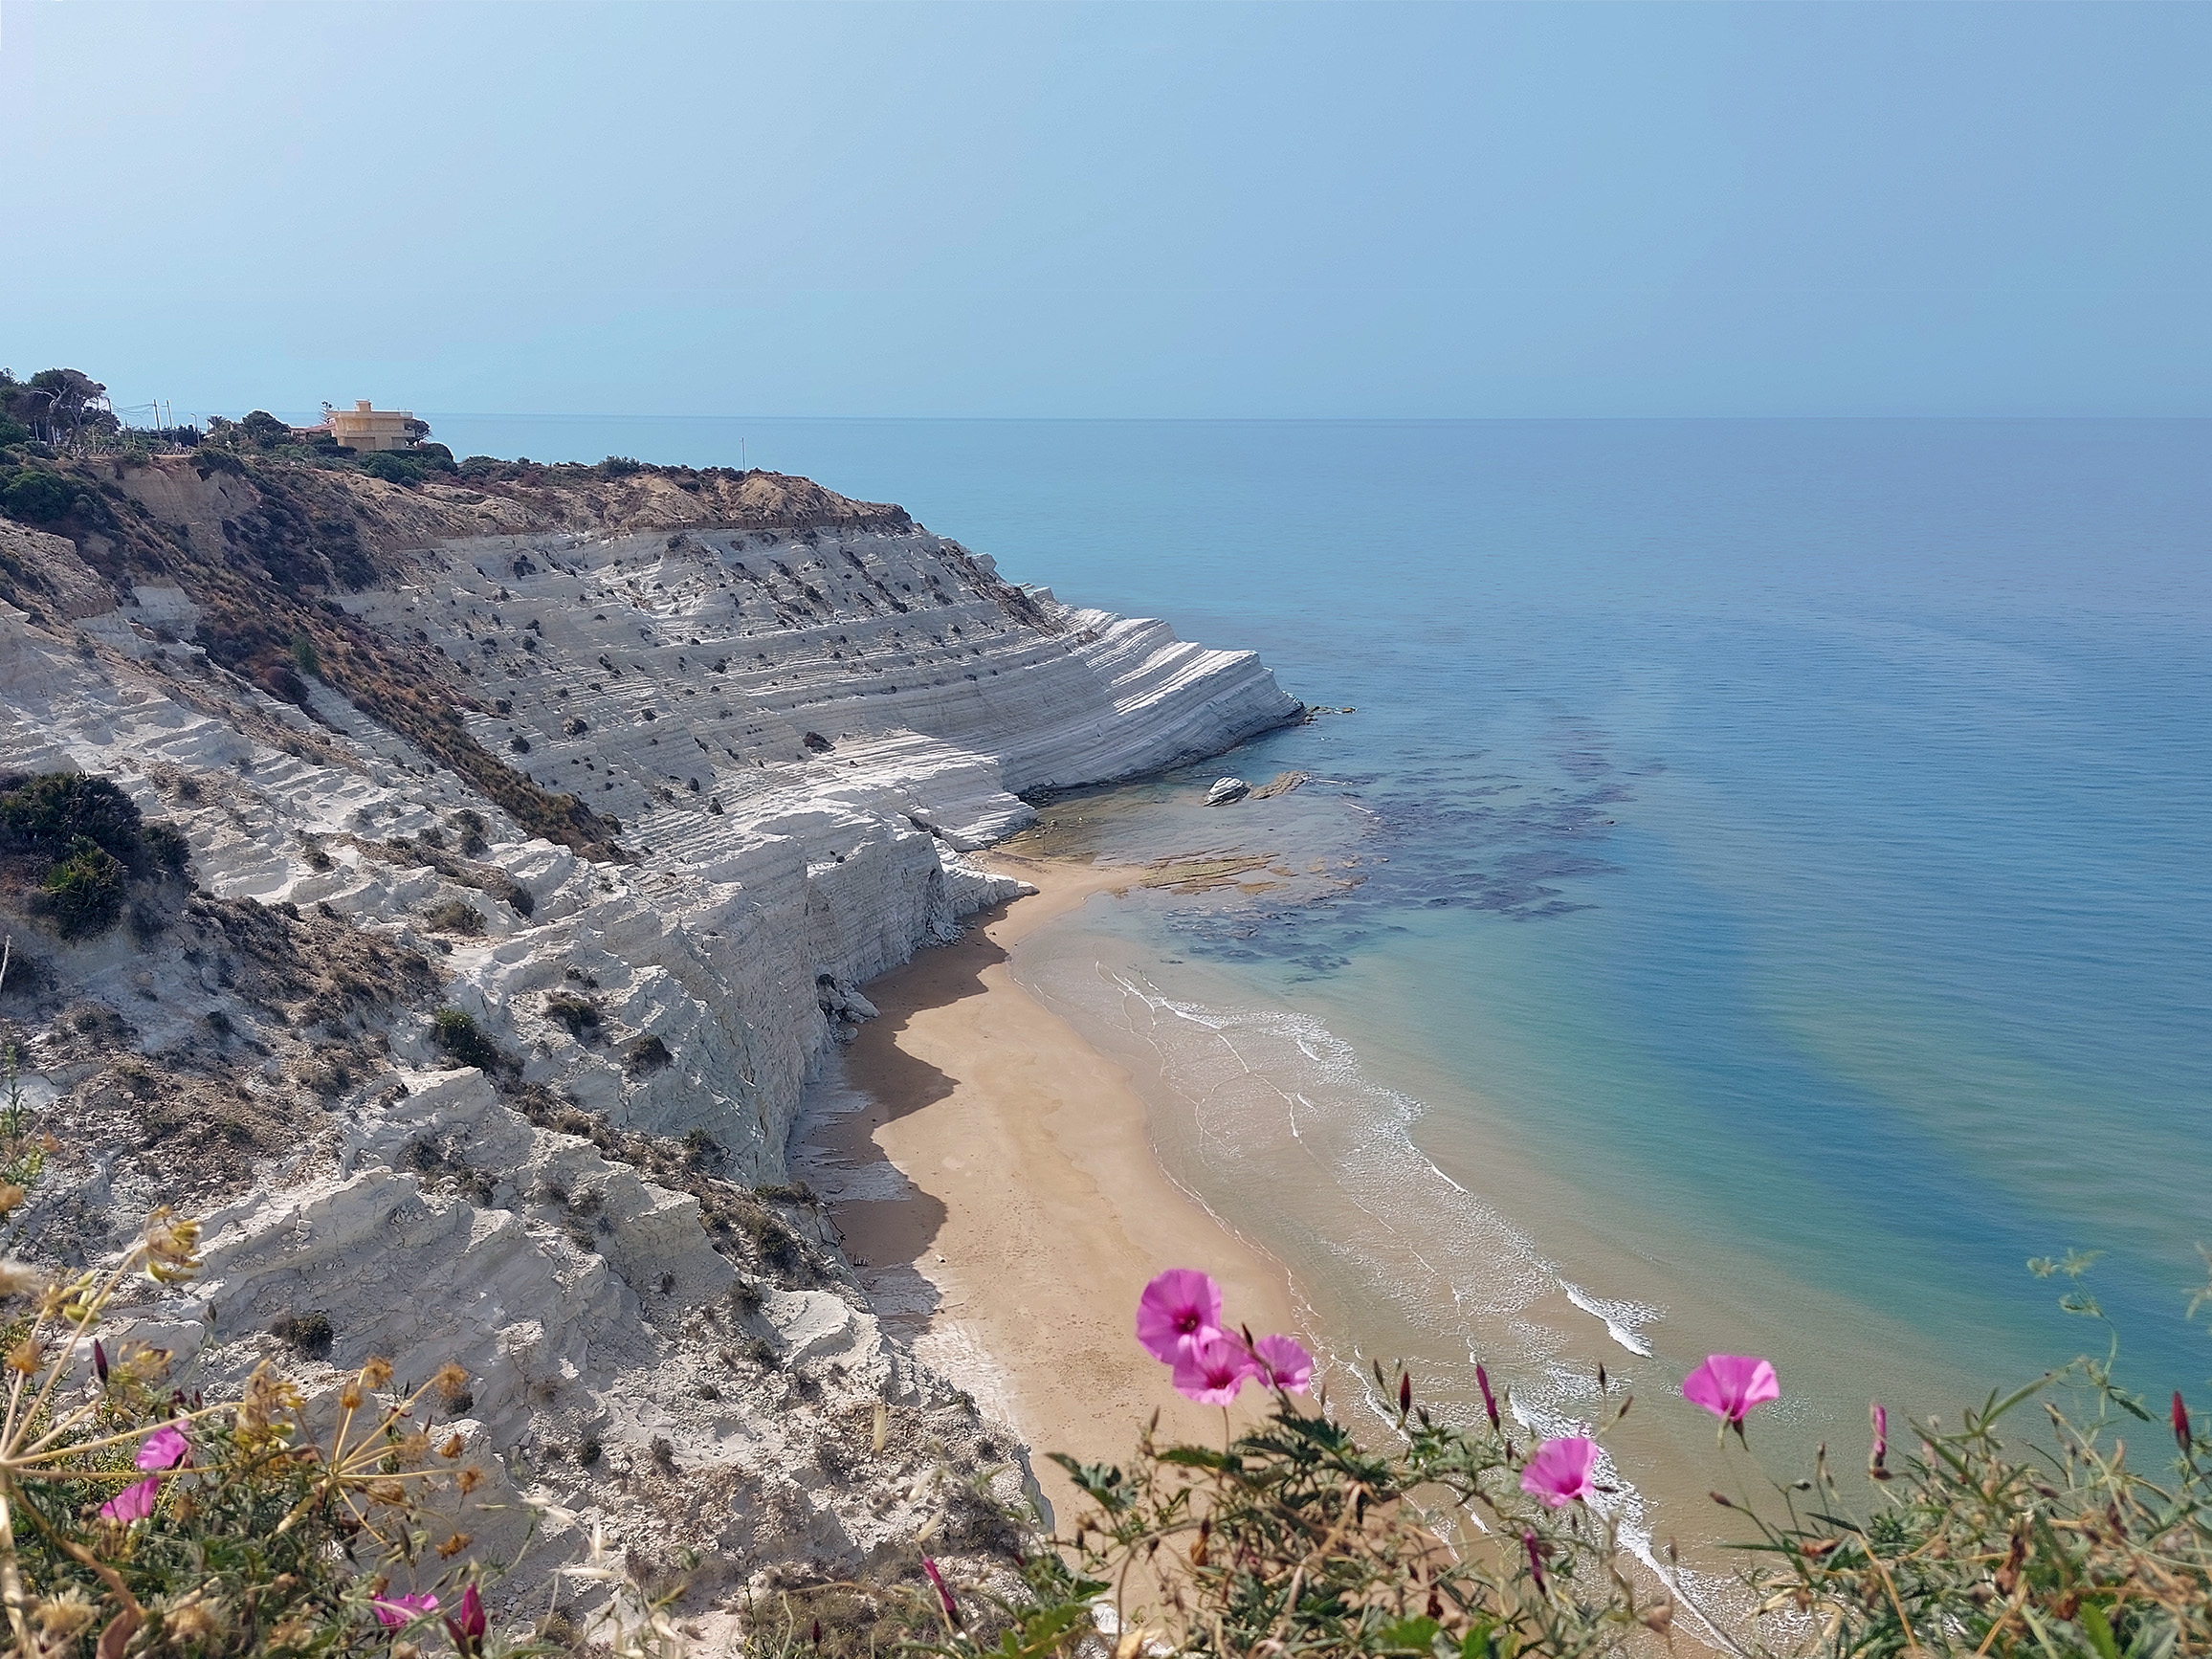
But you will be in time to enjoy the sunset from the imposing Scala dei Turchi, one of the most famous tourist destinations in Sicily. This white rock cliff that slopes slowly towards the sea can be admired and photographed in all its splendor from the viewpoint along the panoramic Realmonte – Porto Empedocle road and from the beach below. Furthermore, having recently been made safe, it is now accessible to the public and you can walk along its steps immersed in a magical scenery.
@giadaantonini_photography
@giadaantonini_photography
@giadaantonini_photography
Giorno 7: La Valle dei Templi e le saline di Marsala
Morning: Valley of the Temples
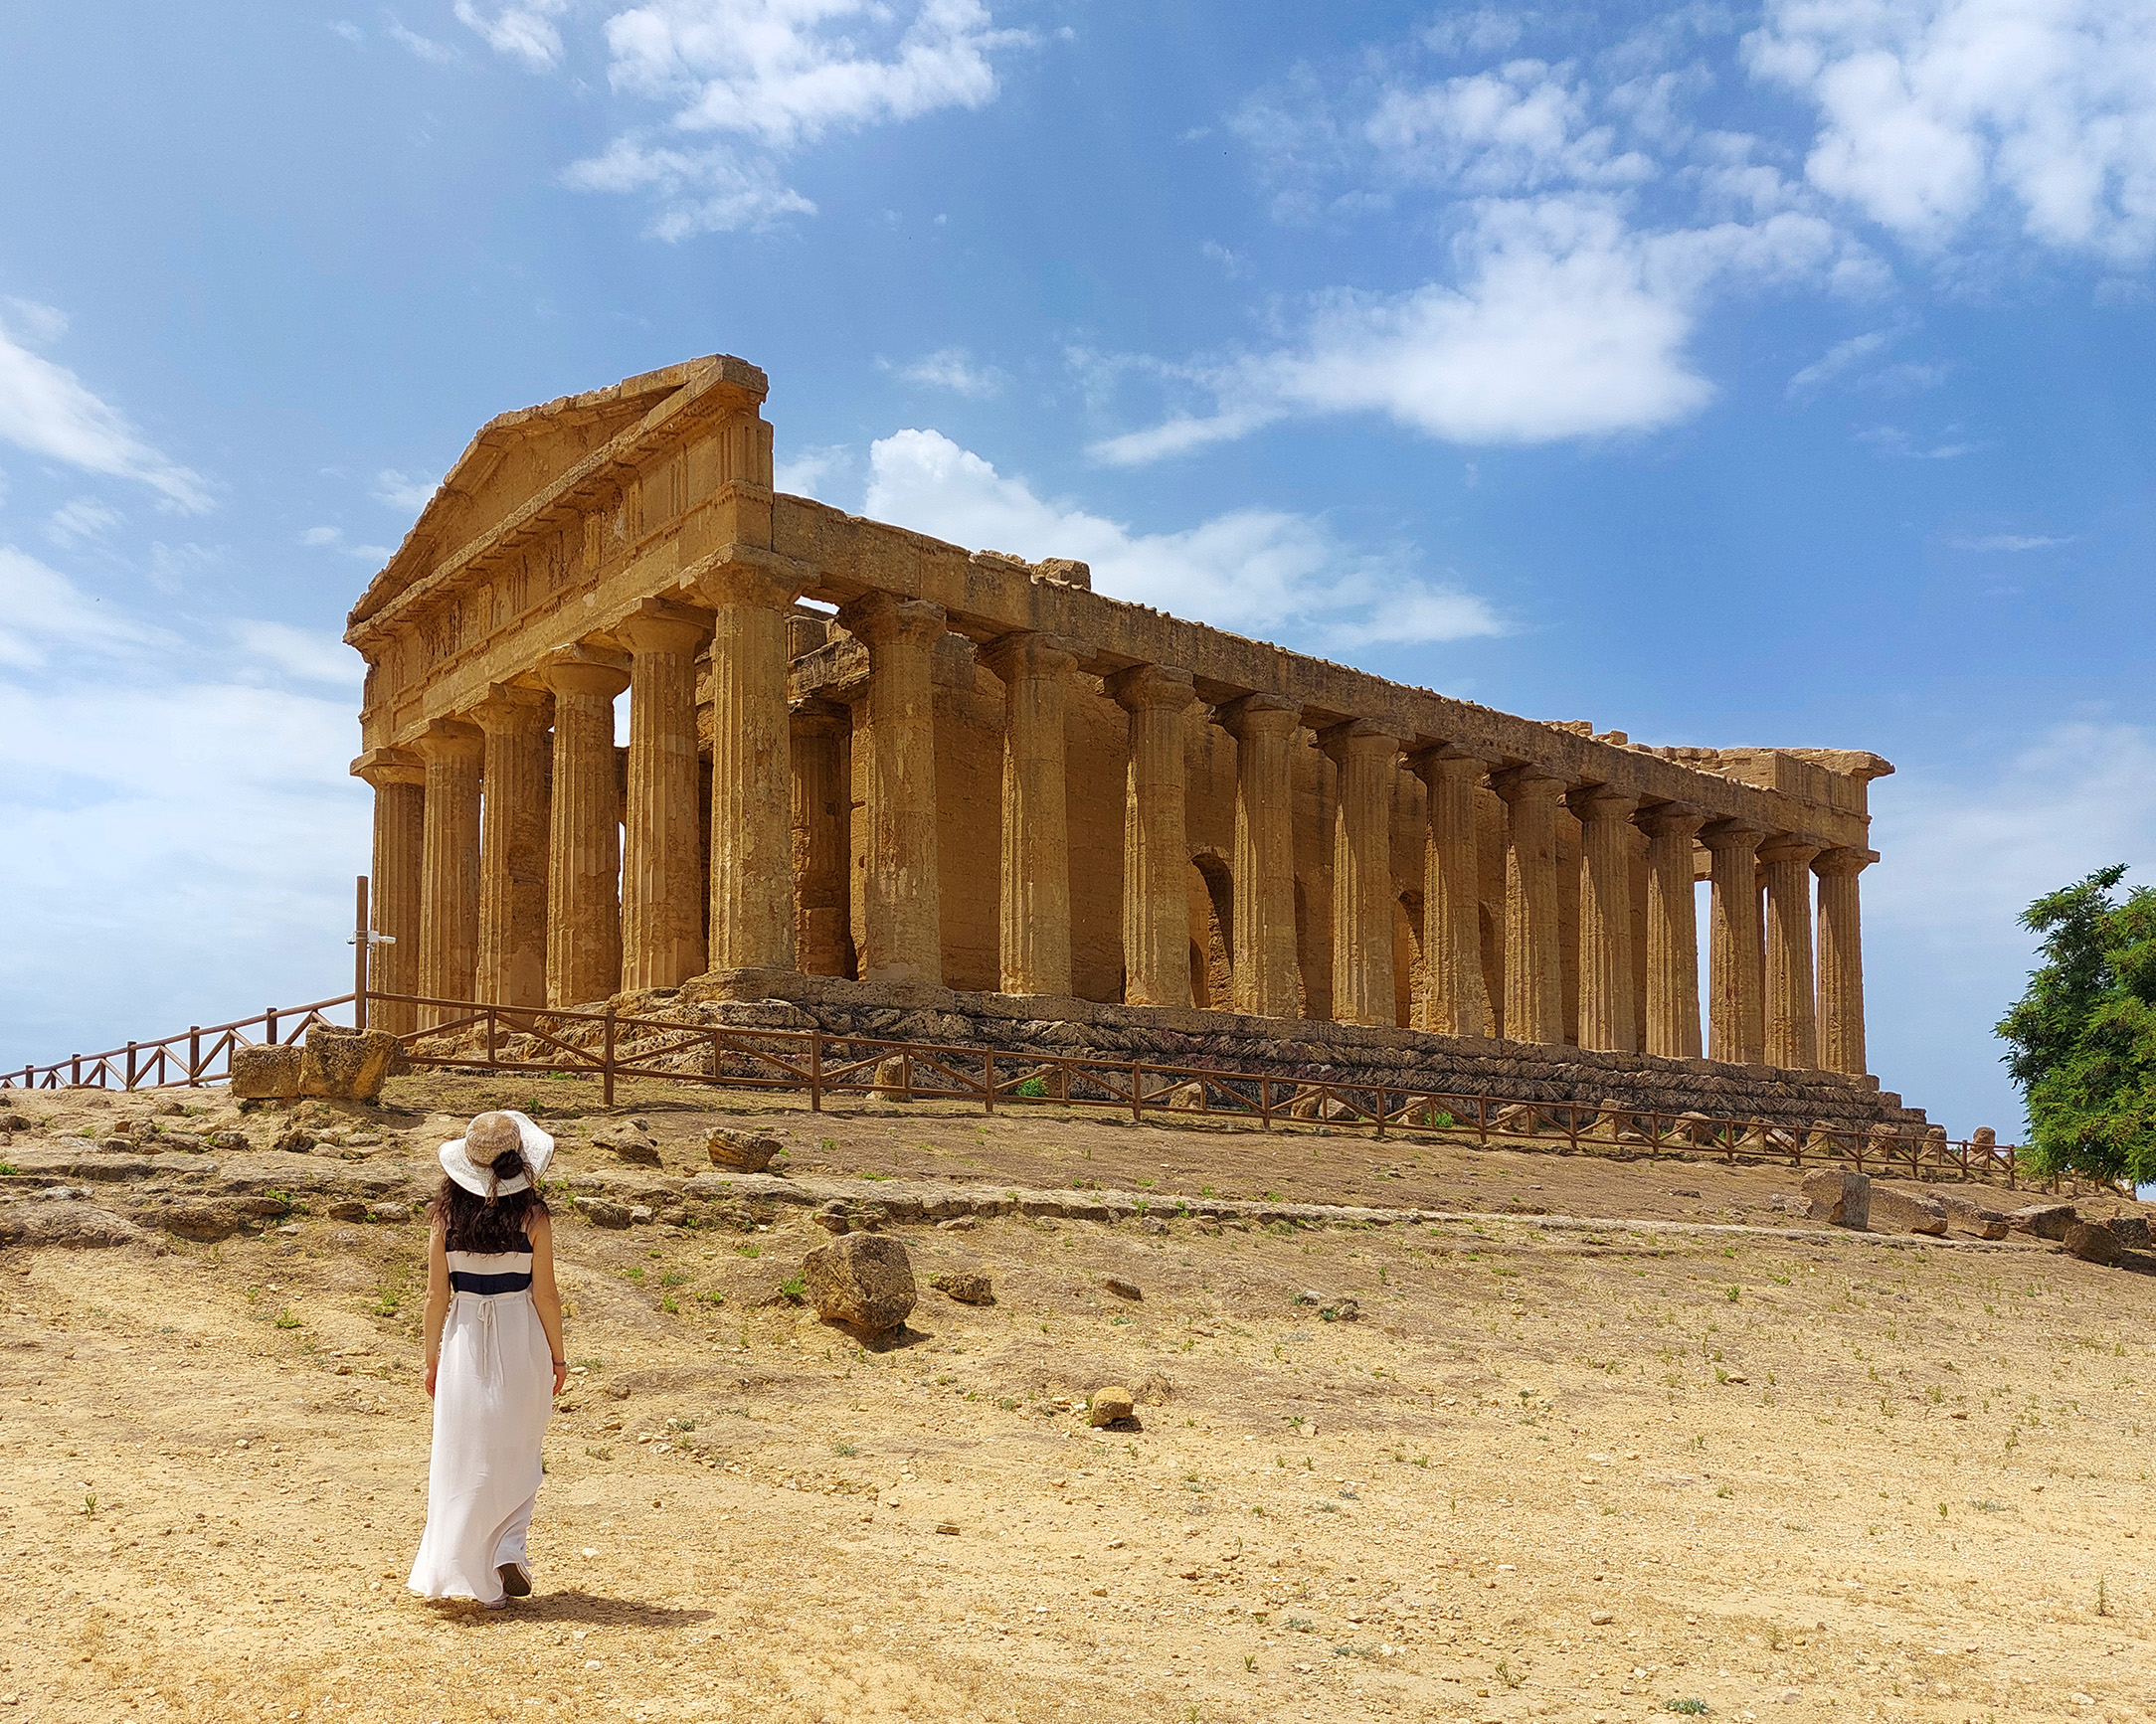
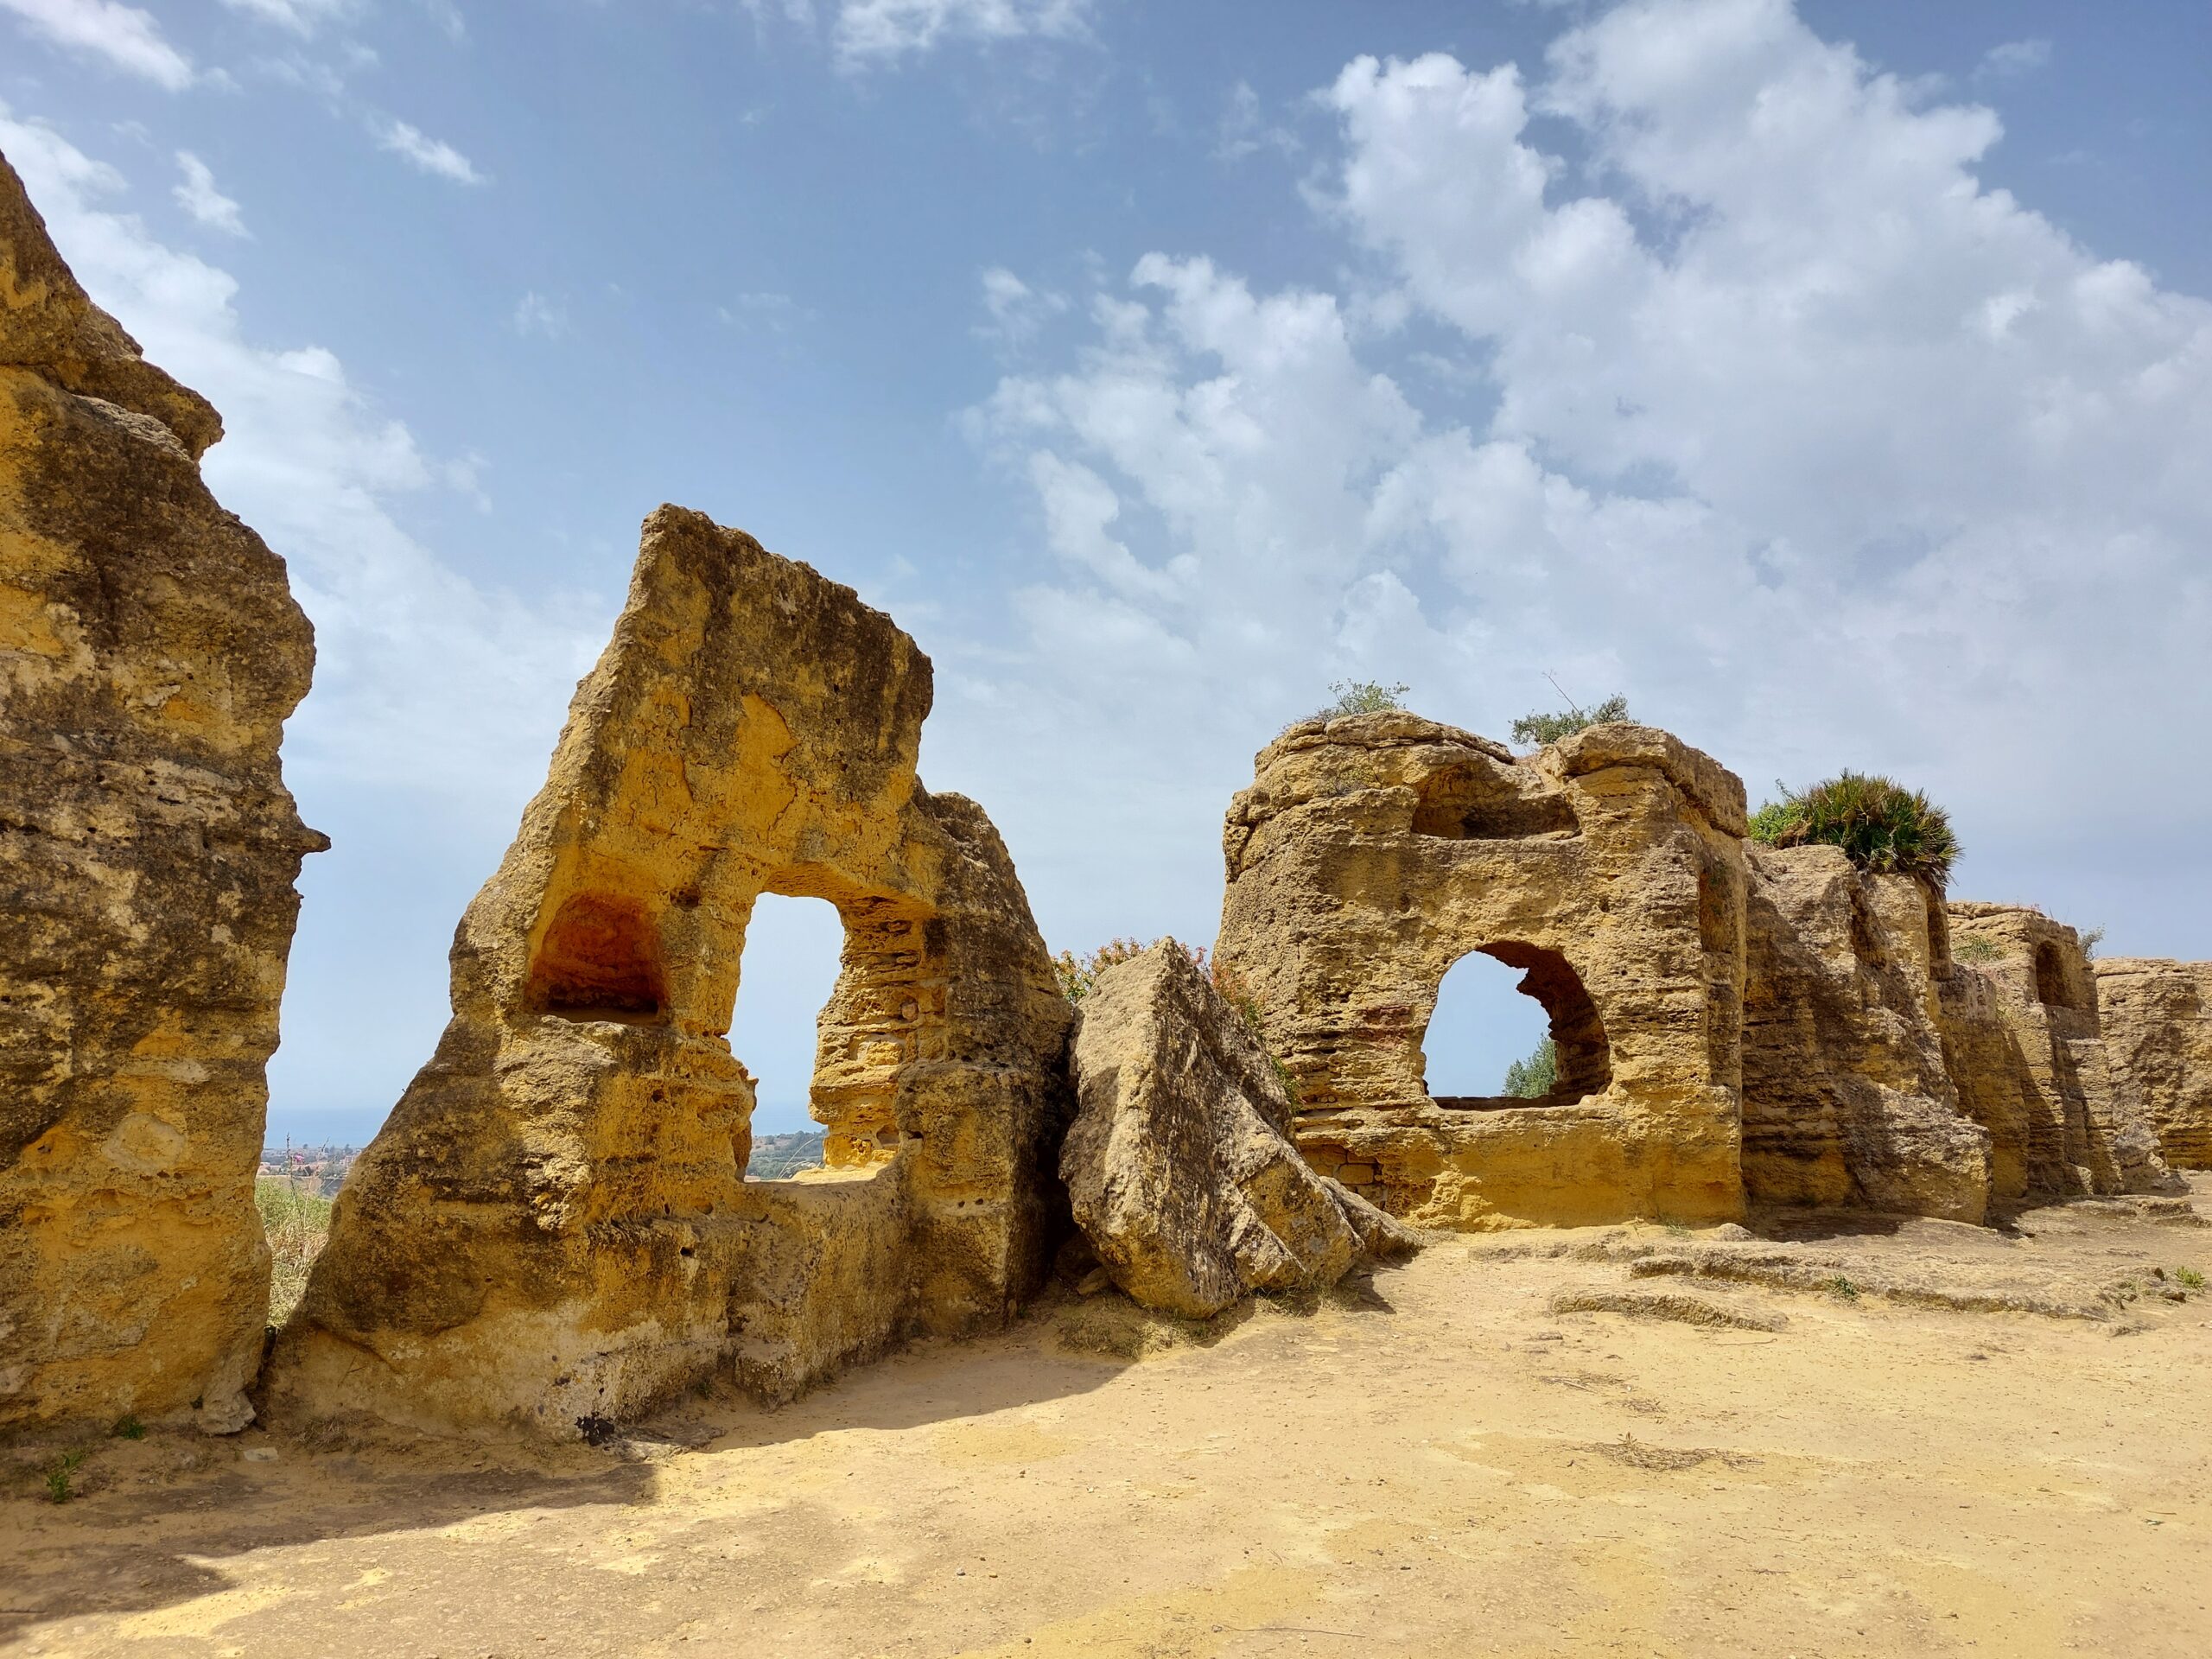
One of the essential stops on a trip to Sicily is certainly the Valley of the Temples in Agrigento, an incredibly fascinating and impressive site, where the history of Magna Graecia lives on thanks to the immense archaeological heritage.
We recommend buying tickets online from the official website and going to the entrance a little before opening, to avoid long lines and have the opportunity to capture the ancient temples without the crowd: you will get timeless shots. Use the zoom choosing a spot not so close to the temples: in this way you can respect the vertical lines, and if there is a person near the temple, you will have a perfect “wow” effect with proportions.
@giadaantonini_photography
@giadaantonini_photography
@giadaantonini_photography
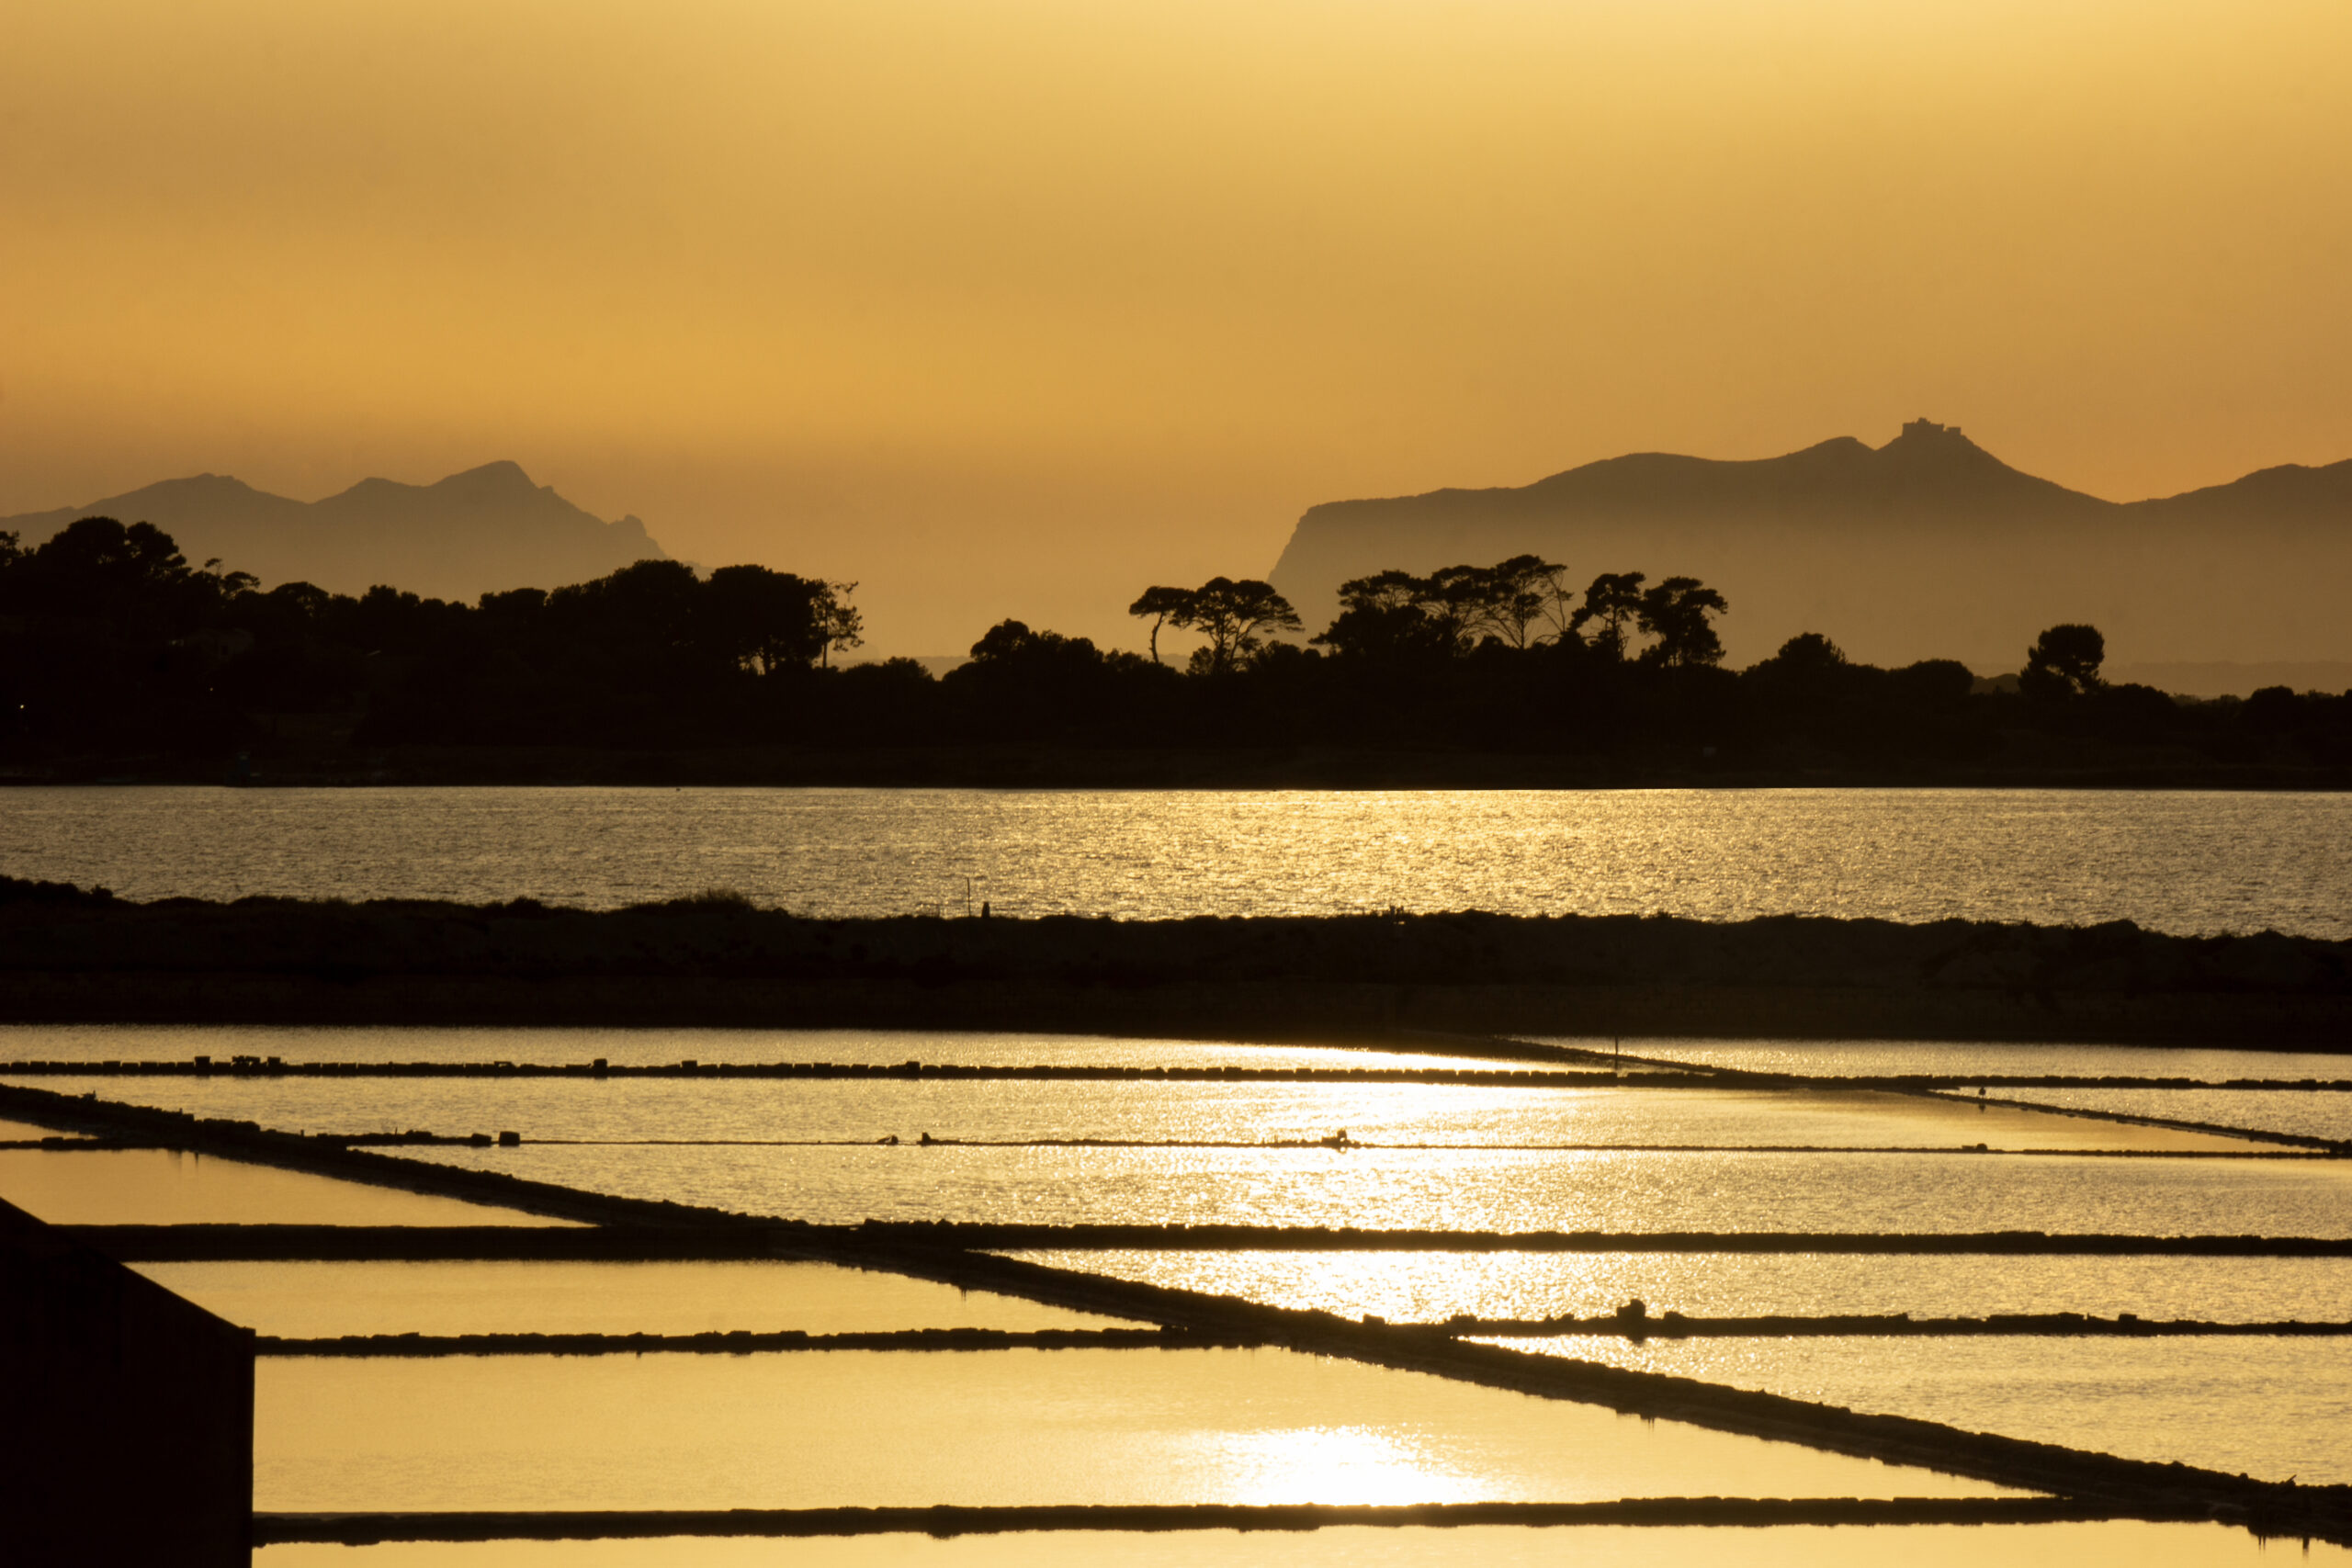
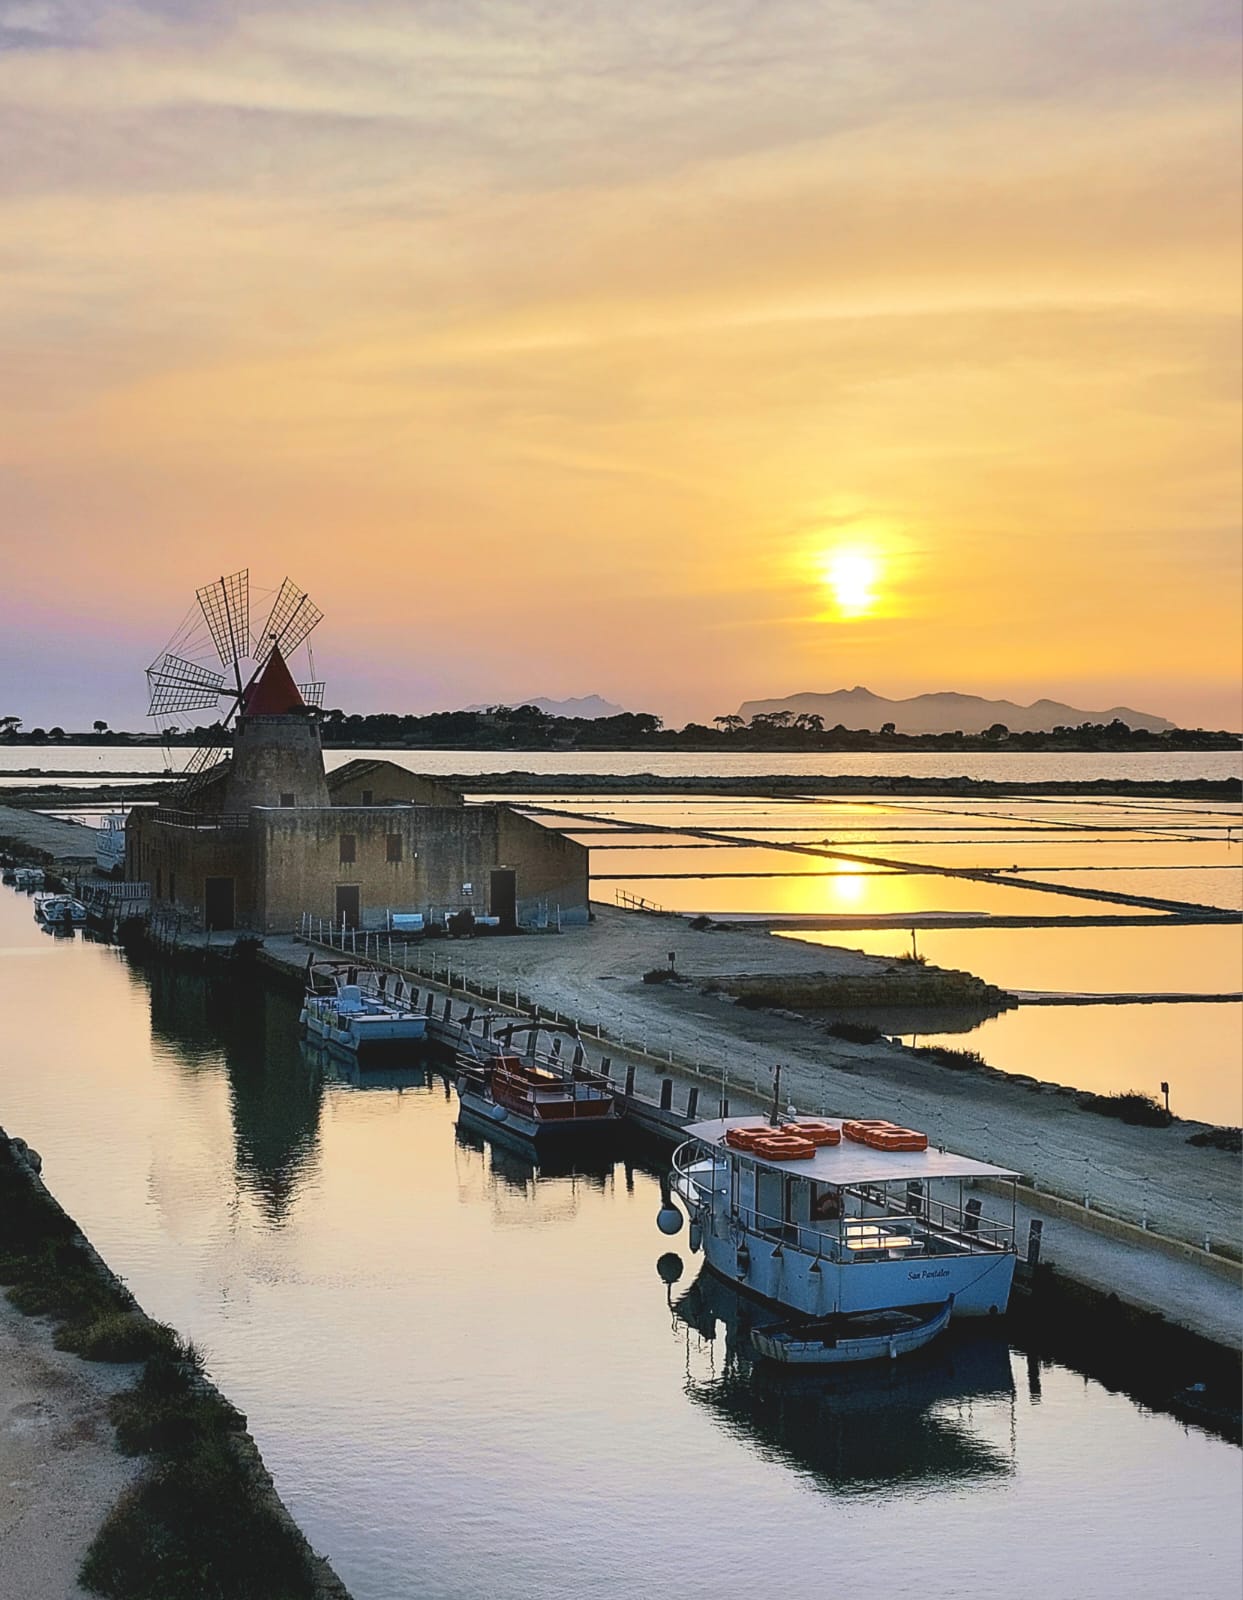
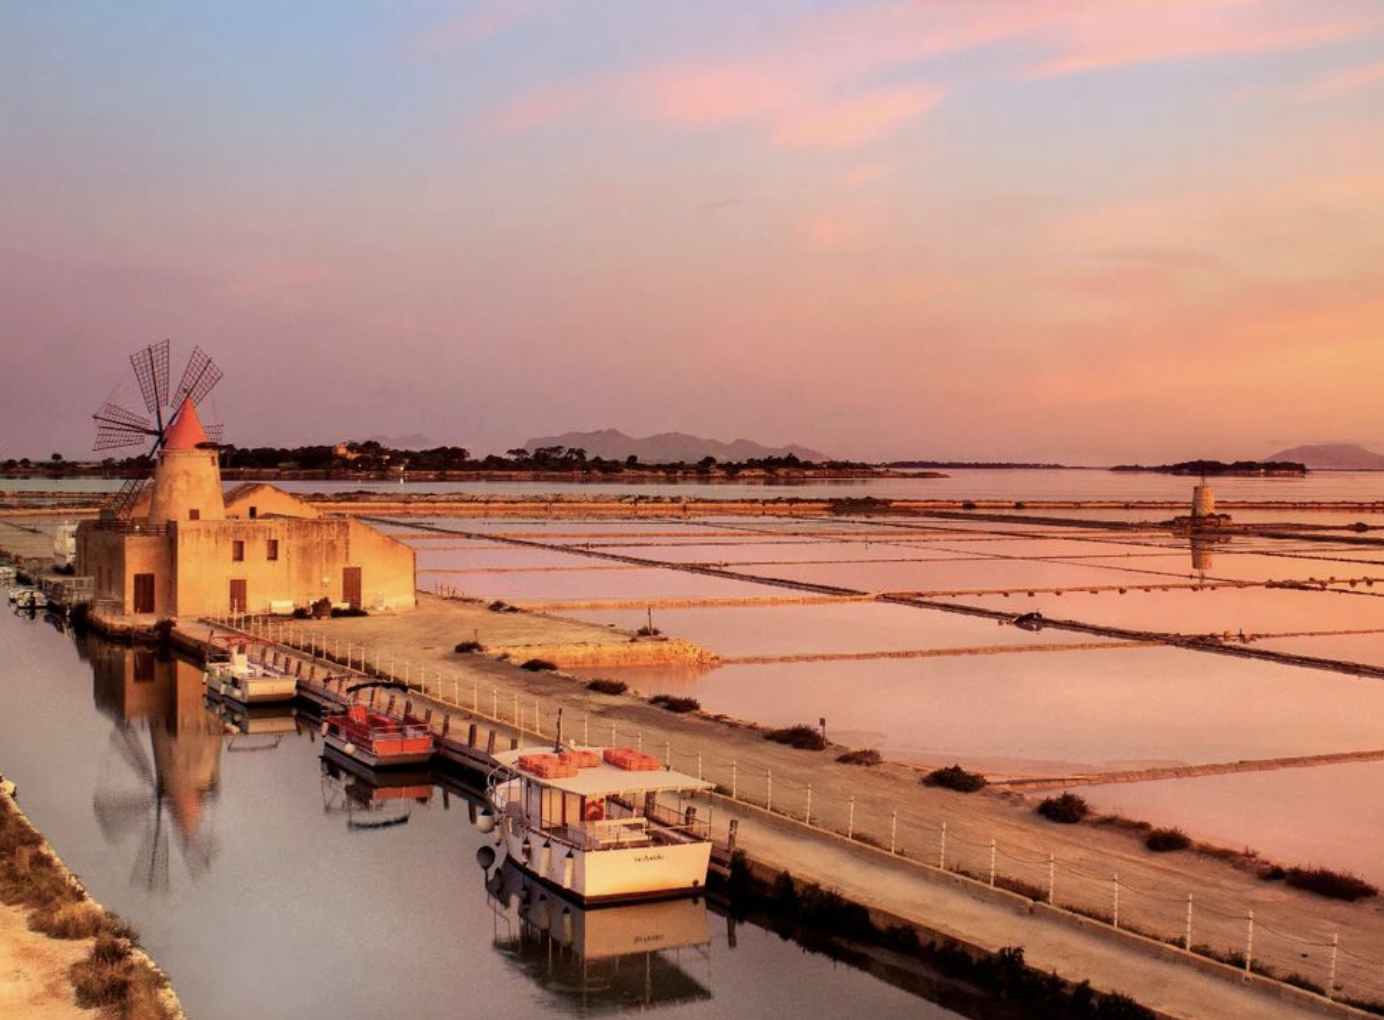
Sunset and evening: Marsala salt Pans
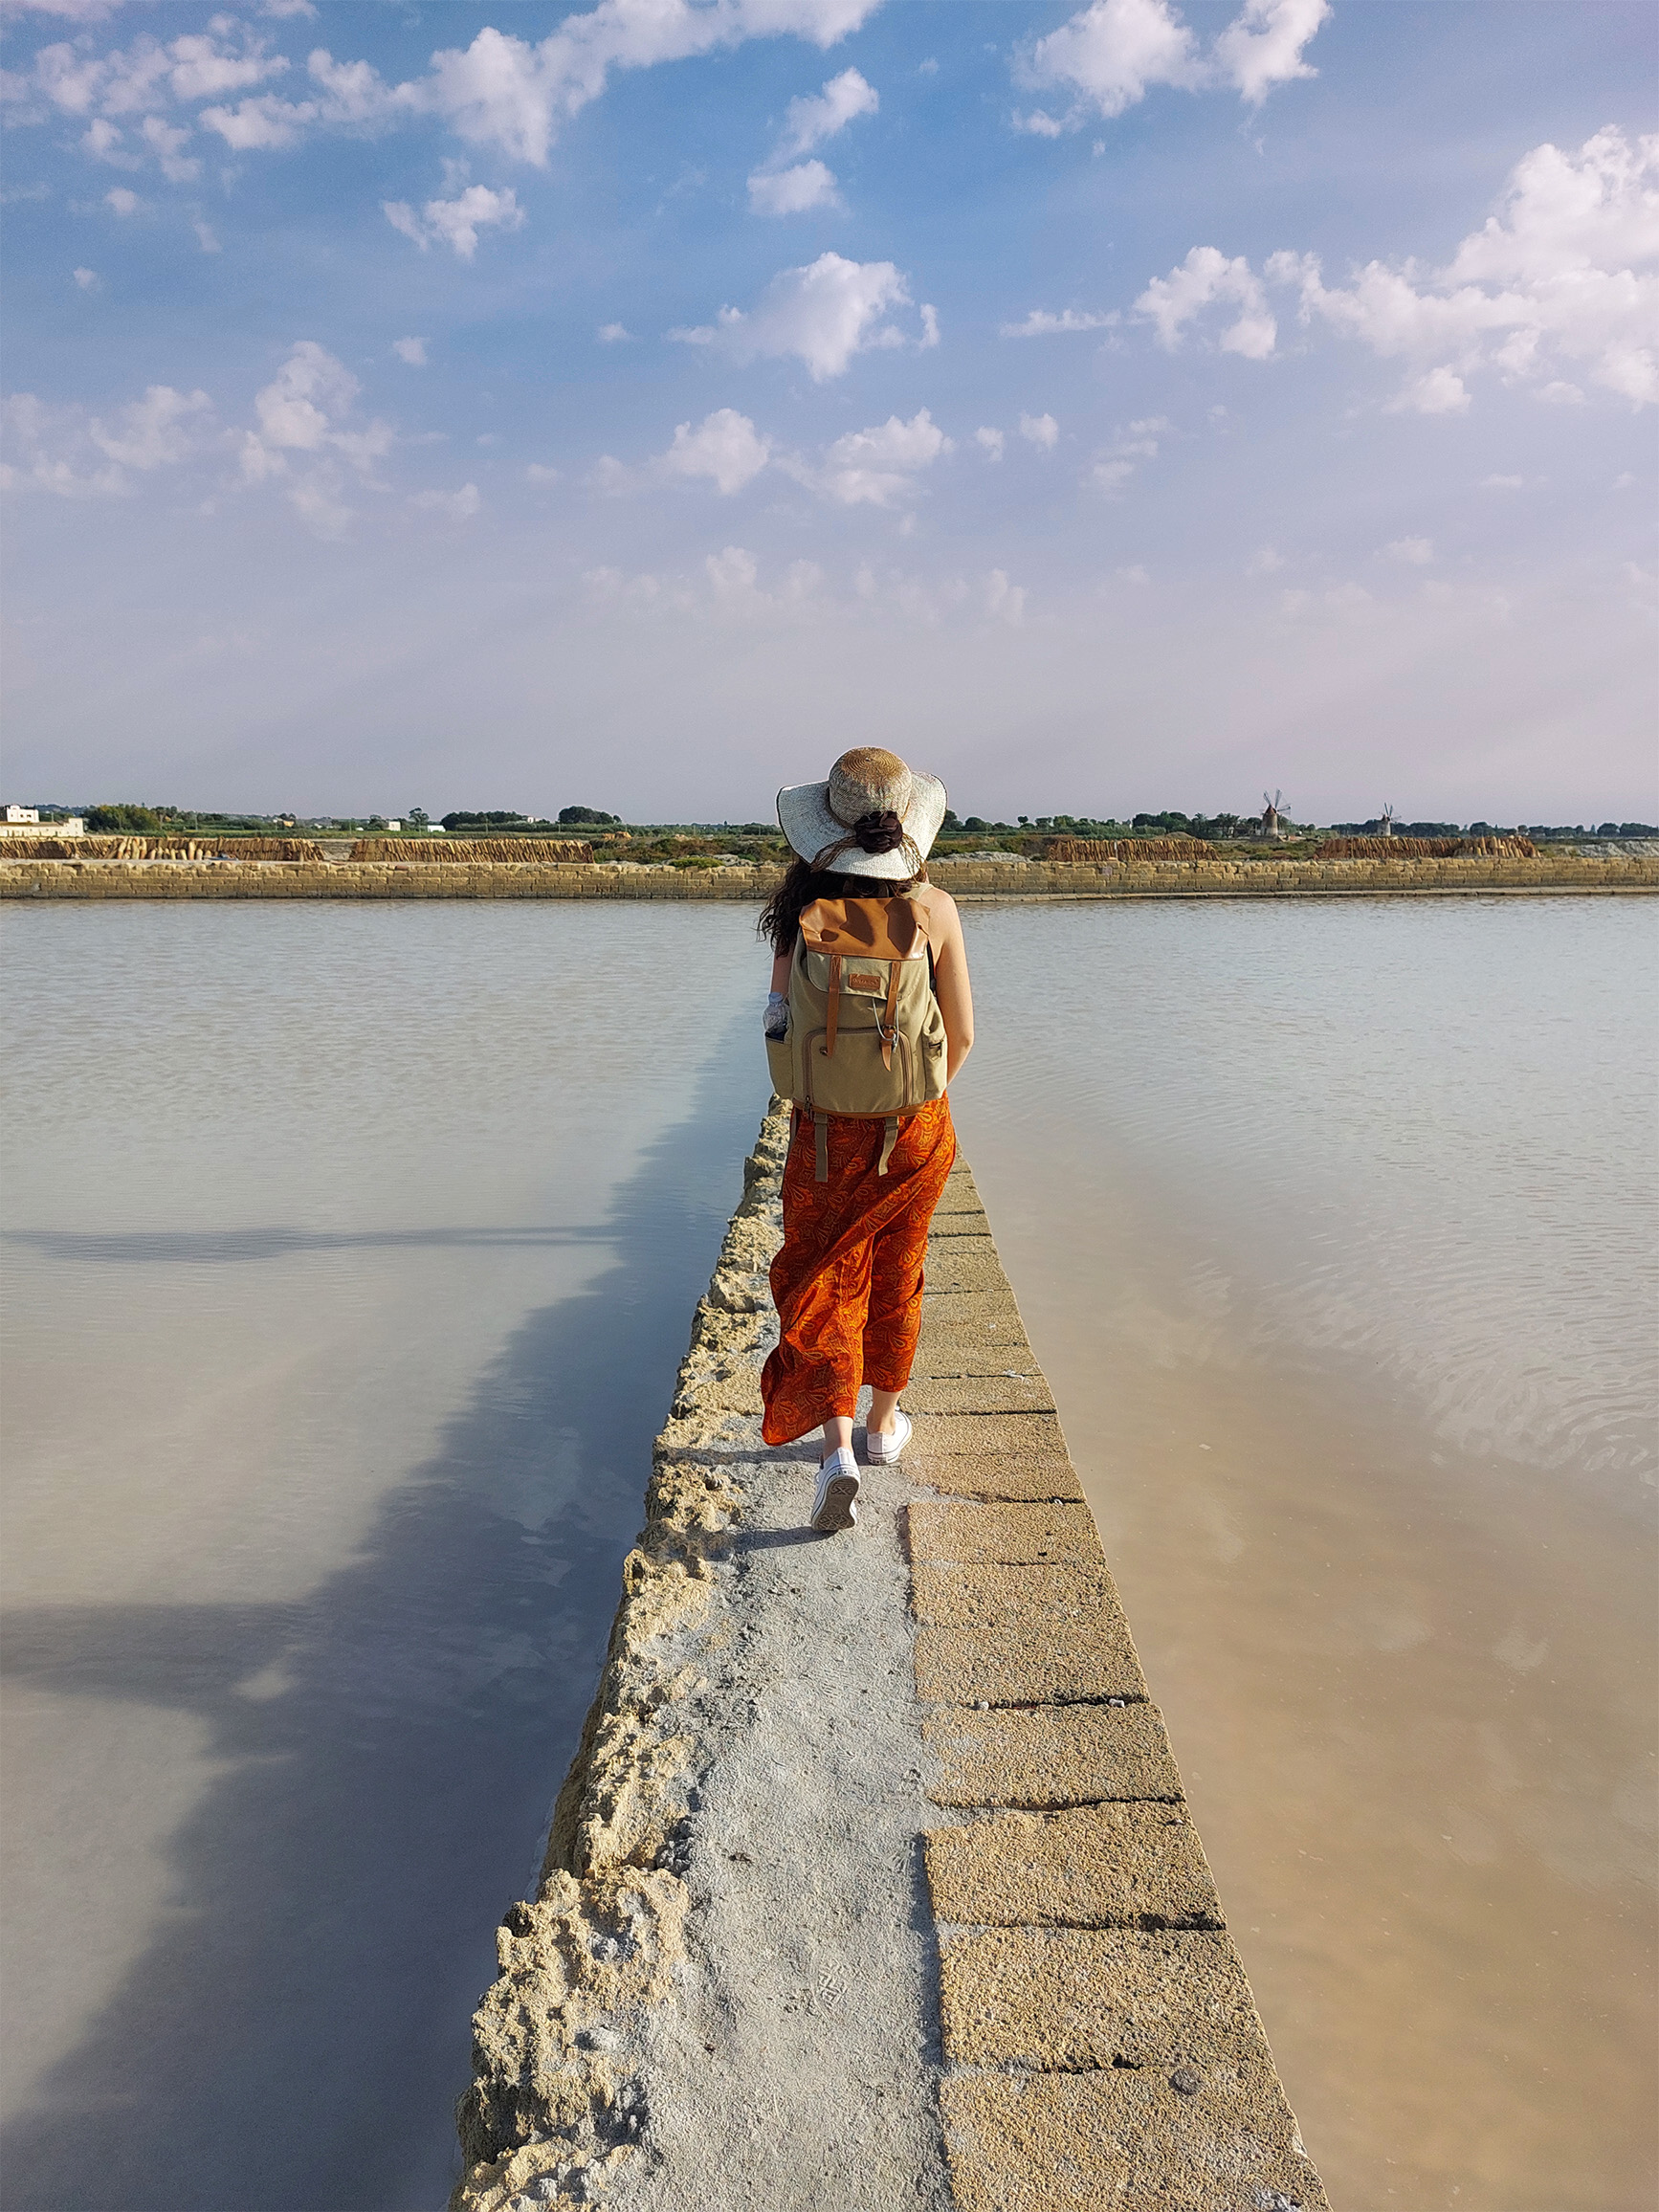
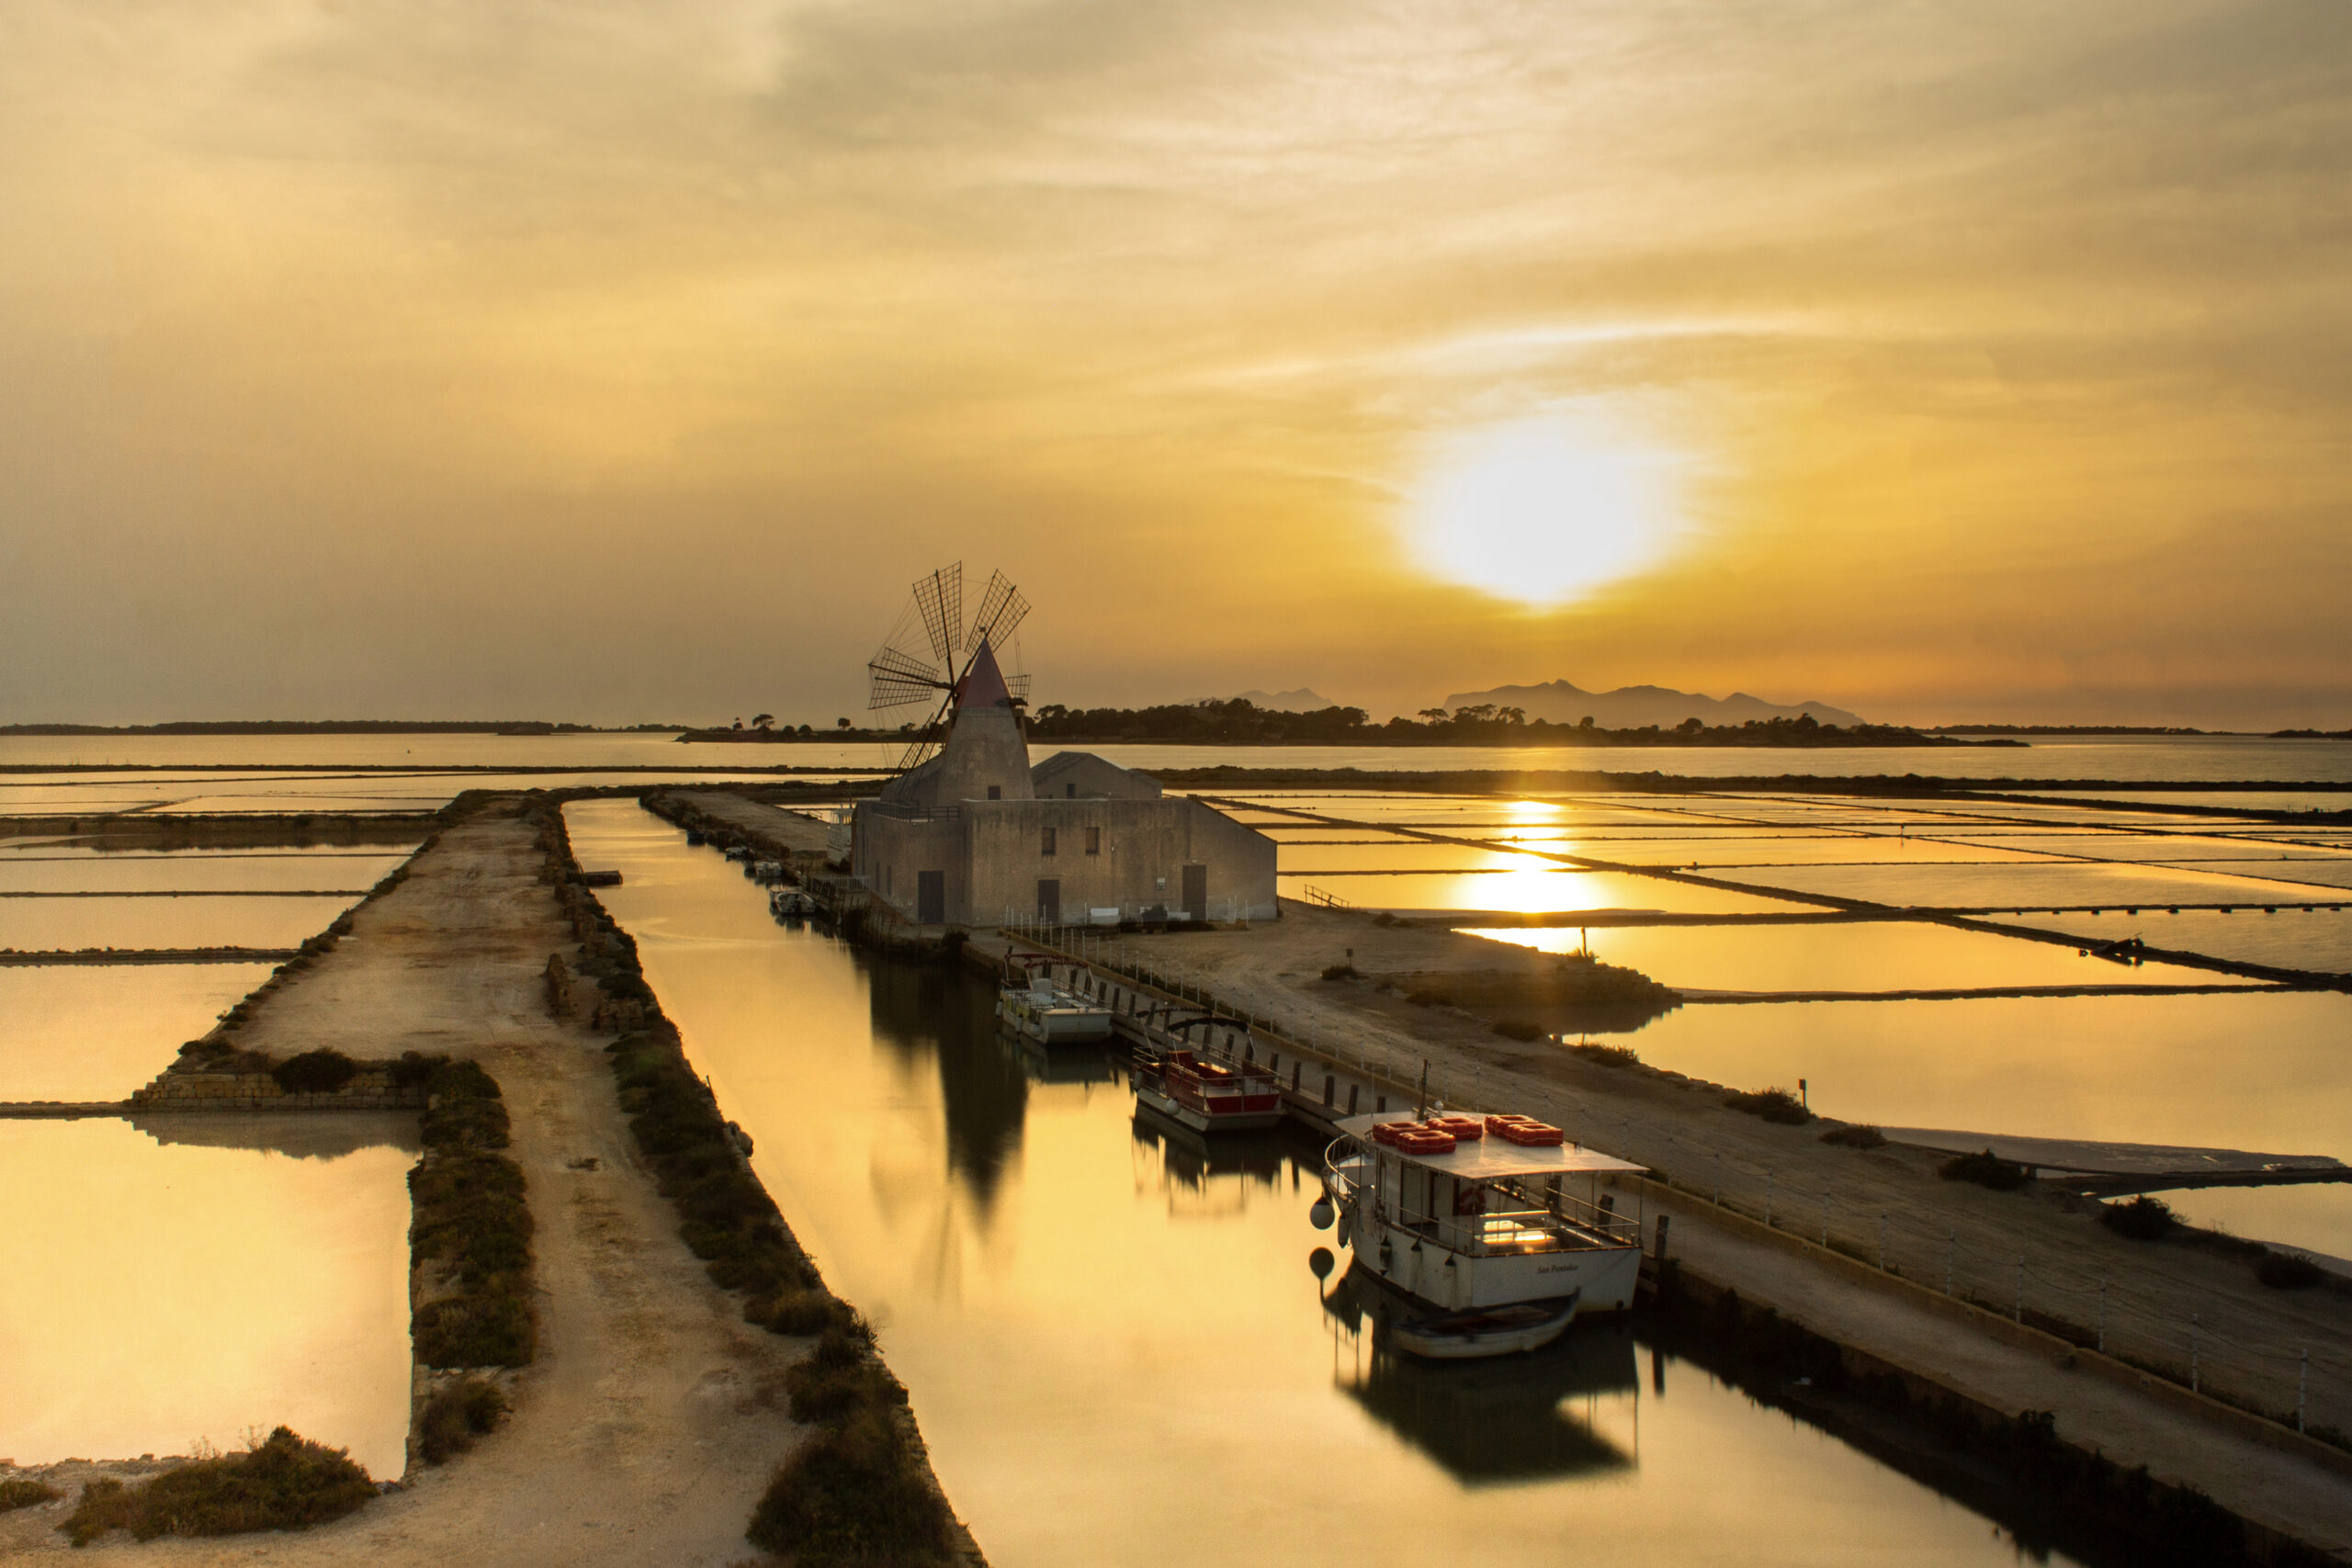
After the visit, leave for another great marvel, the Salt Pans of Marsala, one of the most evocative places of the entire journey. After two hours by car, a paradisiacal landscape will open, where the colors given by the salt tanks and the characteristic mills will be the protagonists in your photos.
Go to the Saline Ettore e Infersa (SEI), where you can live unique experiences walking among the salt pools and the mills and listening to the history of this place. Online you can discover and book all the experiences offered, which also include the wonderful landscapes of Isola Lunga, with nature trails and exclusive wellness programs.
Don’t miss the view from the roof-top bar, truly incredible with the sunset lights: an explosion of pinks and reds that merge between earth and sky, interrupted only by the dove-grey shades of the pool curbs and the mills.
@giadaantonini_photography
@giadaantonini_photography
@giadaantonini_photography
Day 8: Marsala and Erice
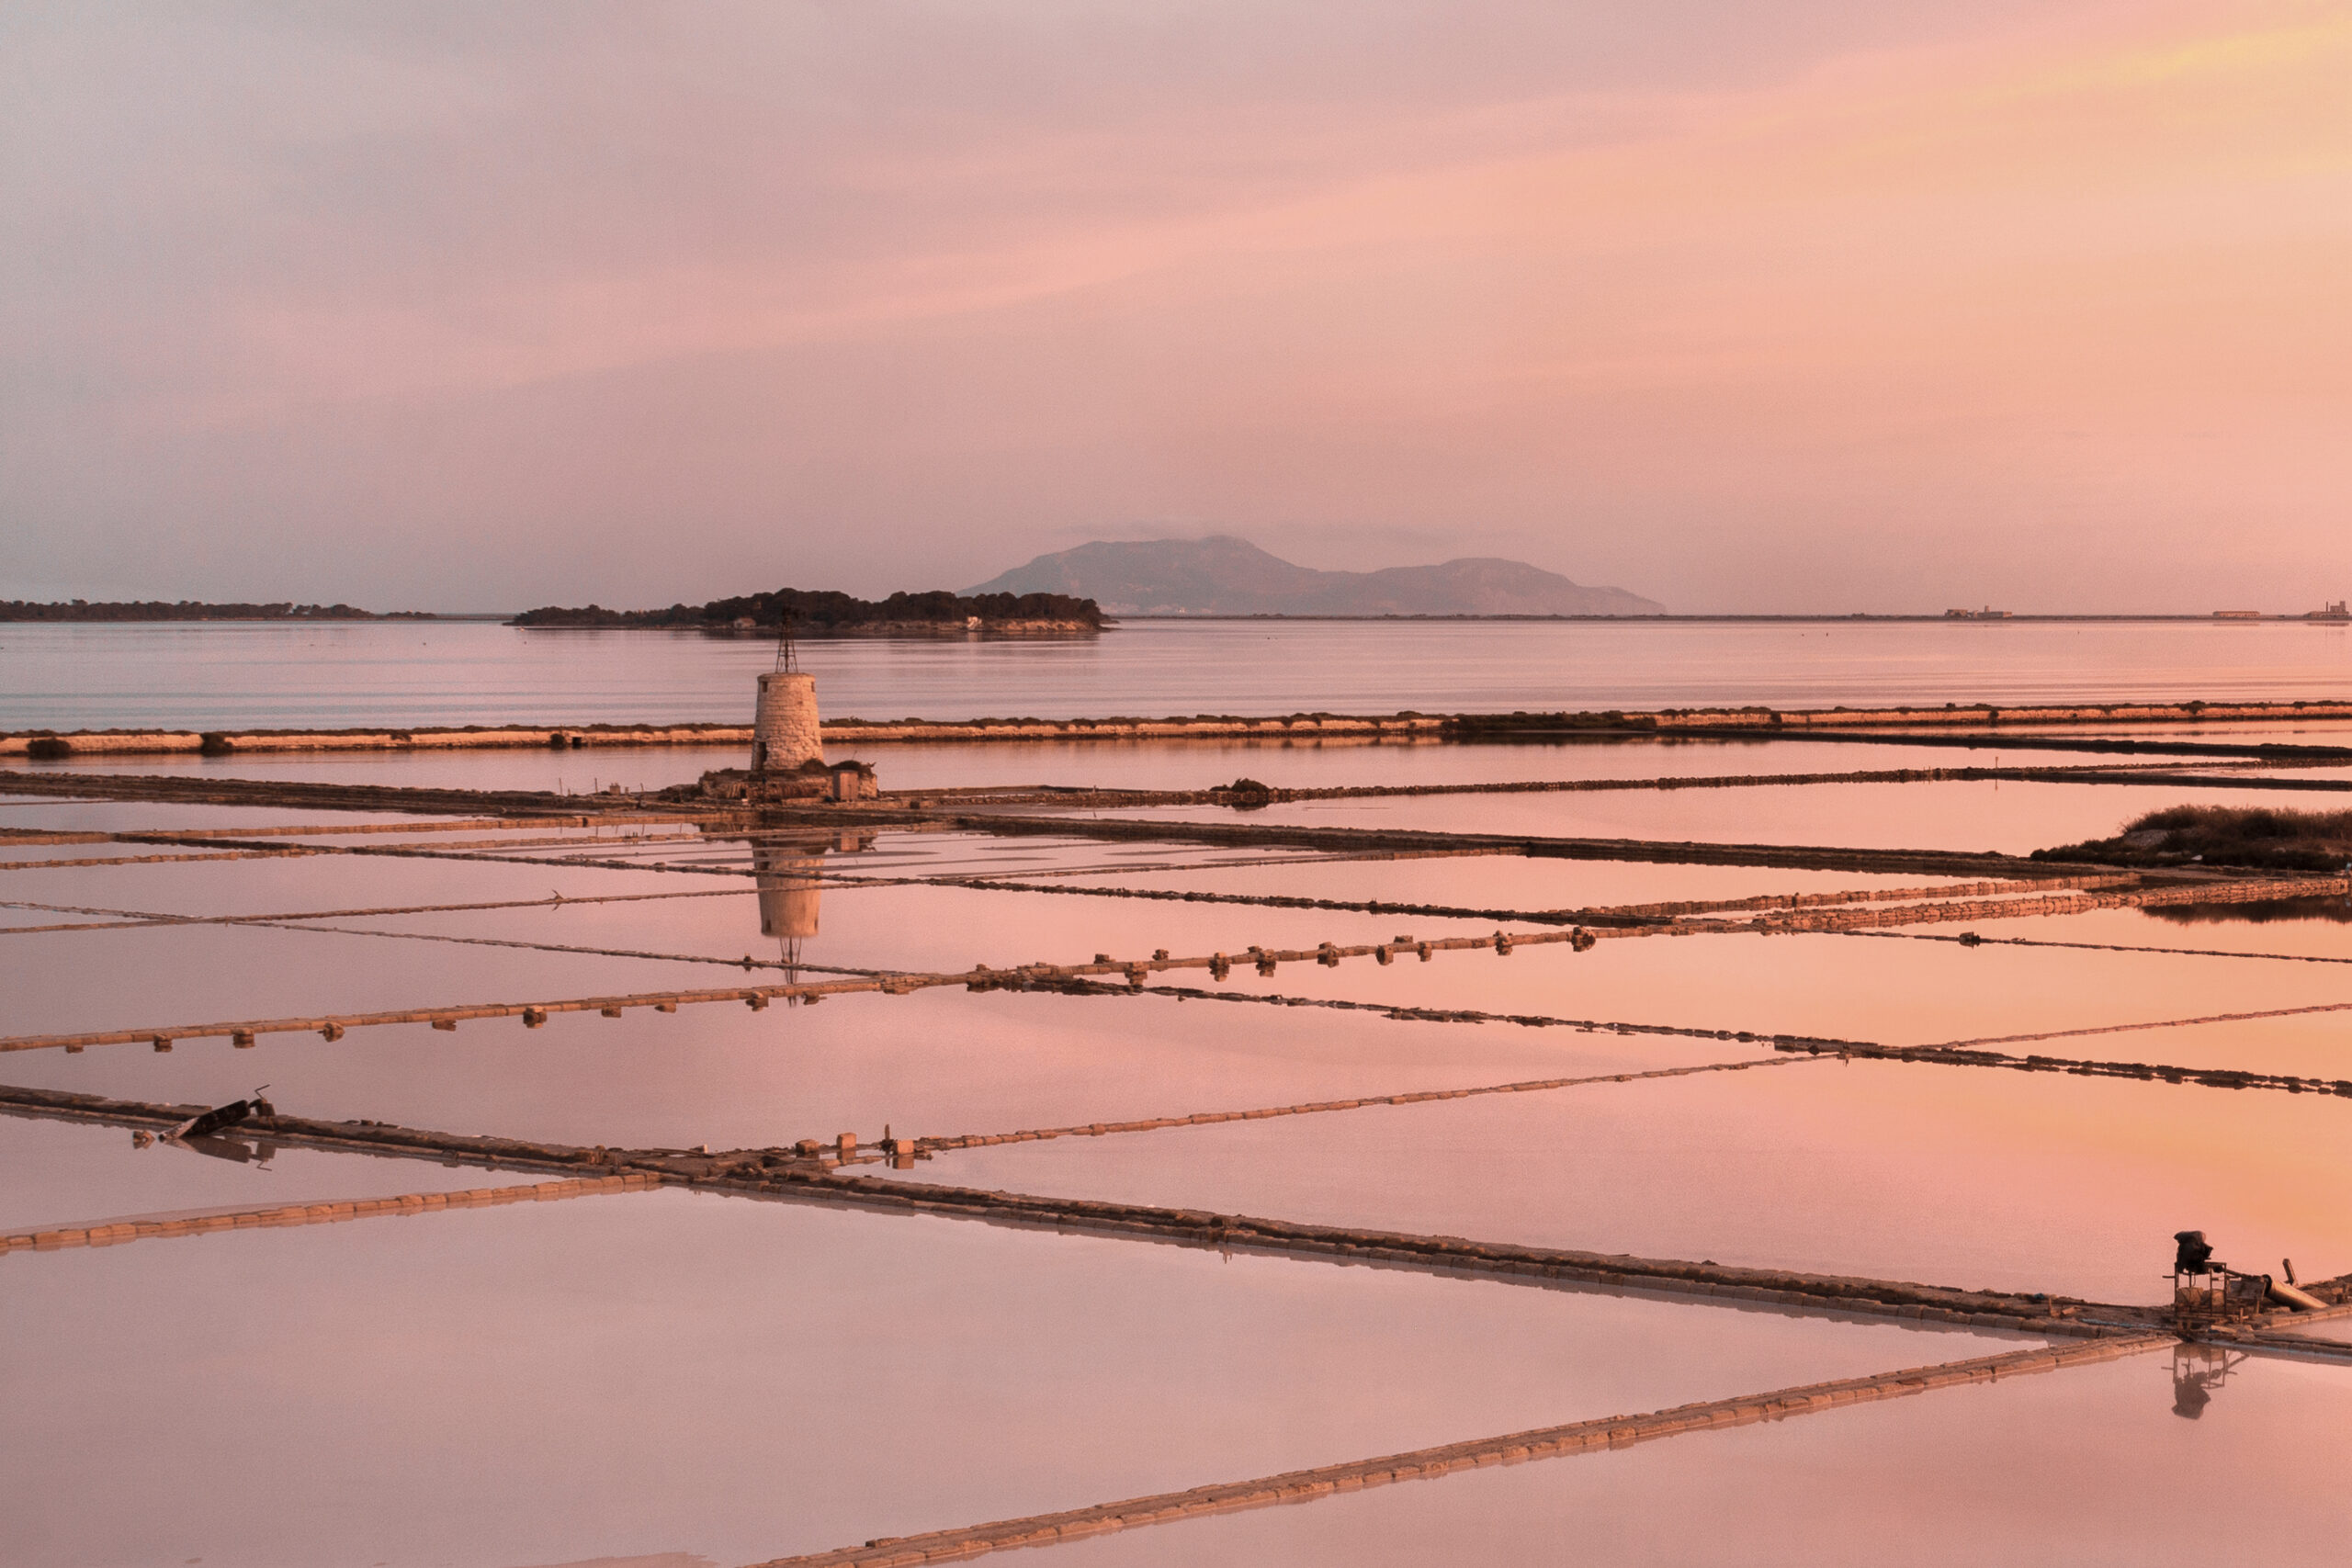
Sunrise: Marsala salt pans
Whether you are a photographer or not, it doesn’t matter, but the amazing view offered by the salt pans at dawn is worth waking up early. The silence, the colors, the shapes of this unique landscape, born from the careful fusion between nature and the hand of man, offers unforgettable emotions.
Take a car ride along Contrada Ettore Infersa and Contrada Spagnola, where characteristic views open up.
Morning: the beaches of Marsala
You could stop at one of the beaches in the area, between Lido Signorino and Playa Blanca and move to the center of Marsala for lunch, tasting one of the delicious arancini from the famous Ragona bakery, simply irresistible.
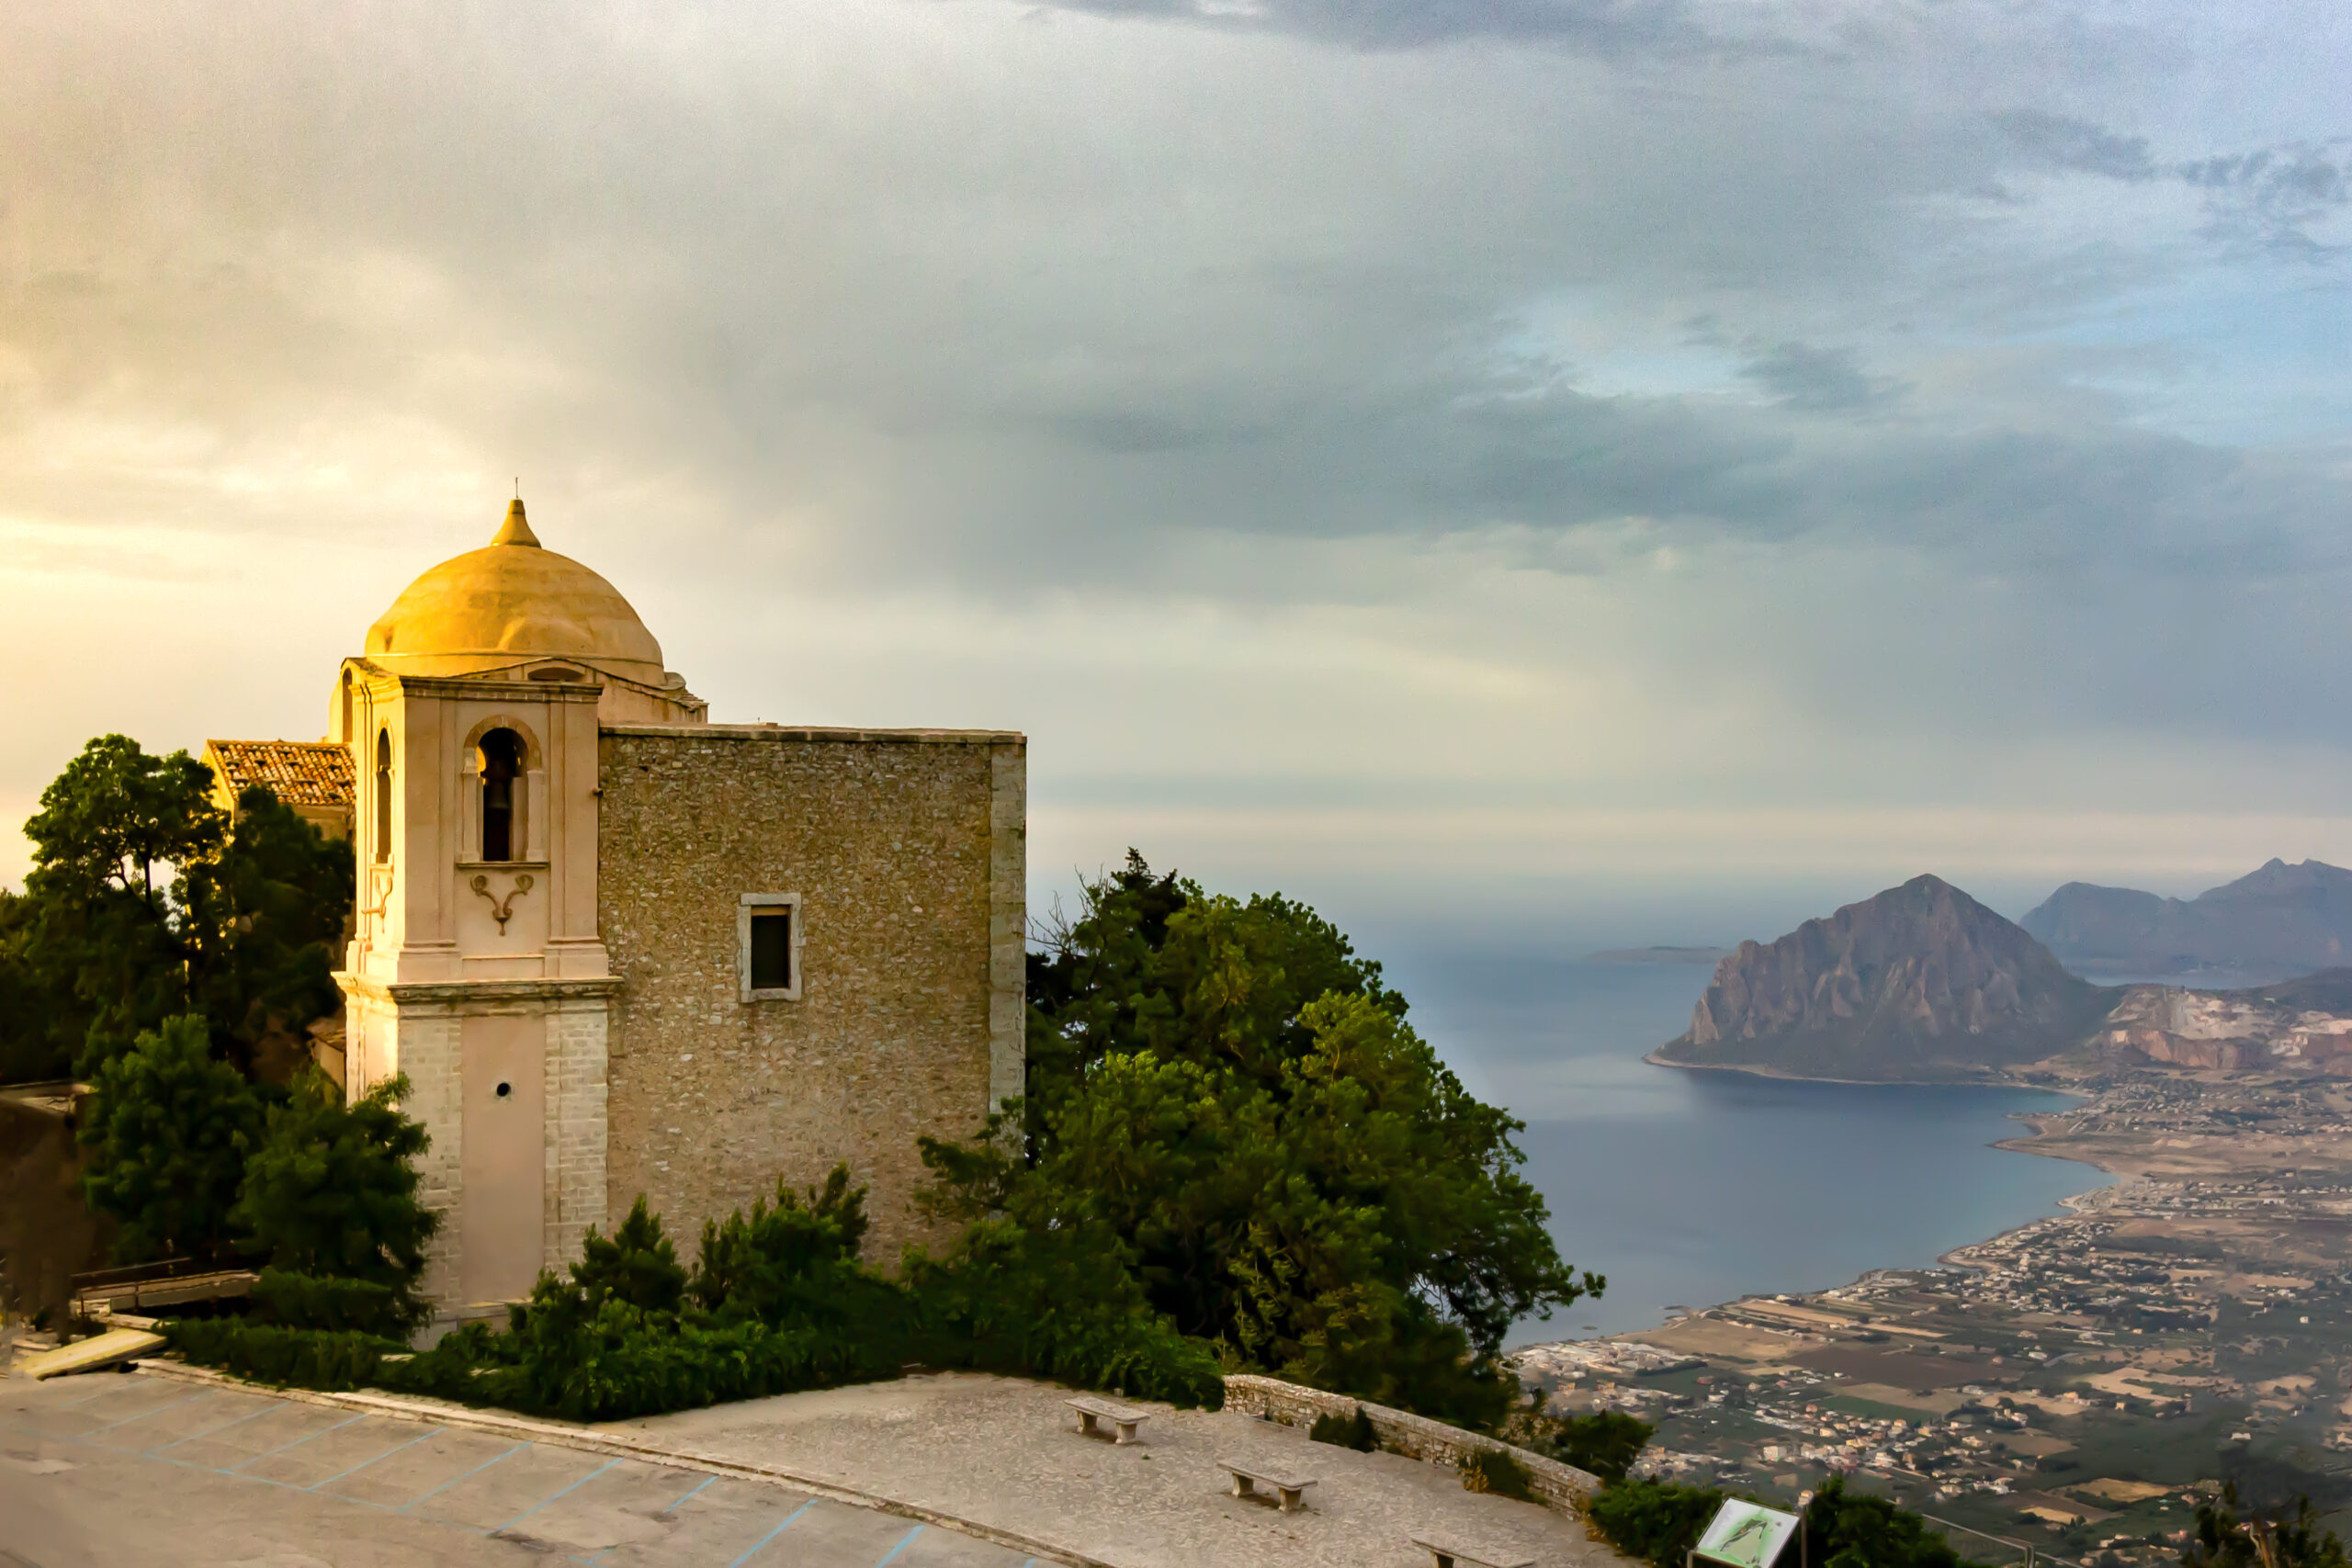
Afternoon and evening: Erice
Forty minutes from Marsala we find Trapani, the last stop on our itinerary.
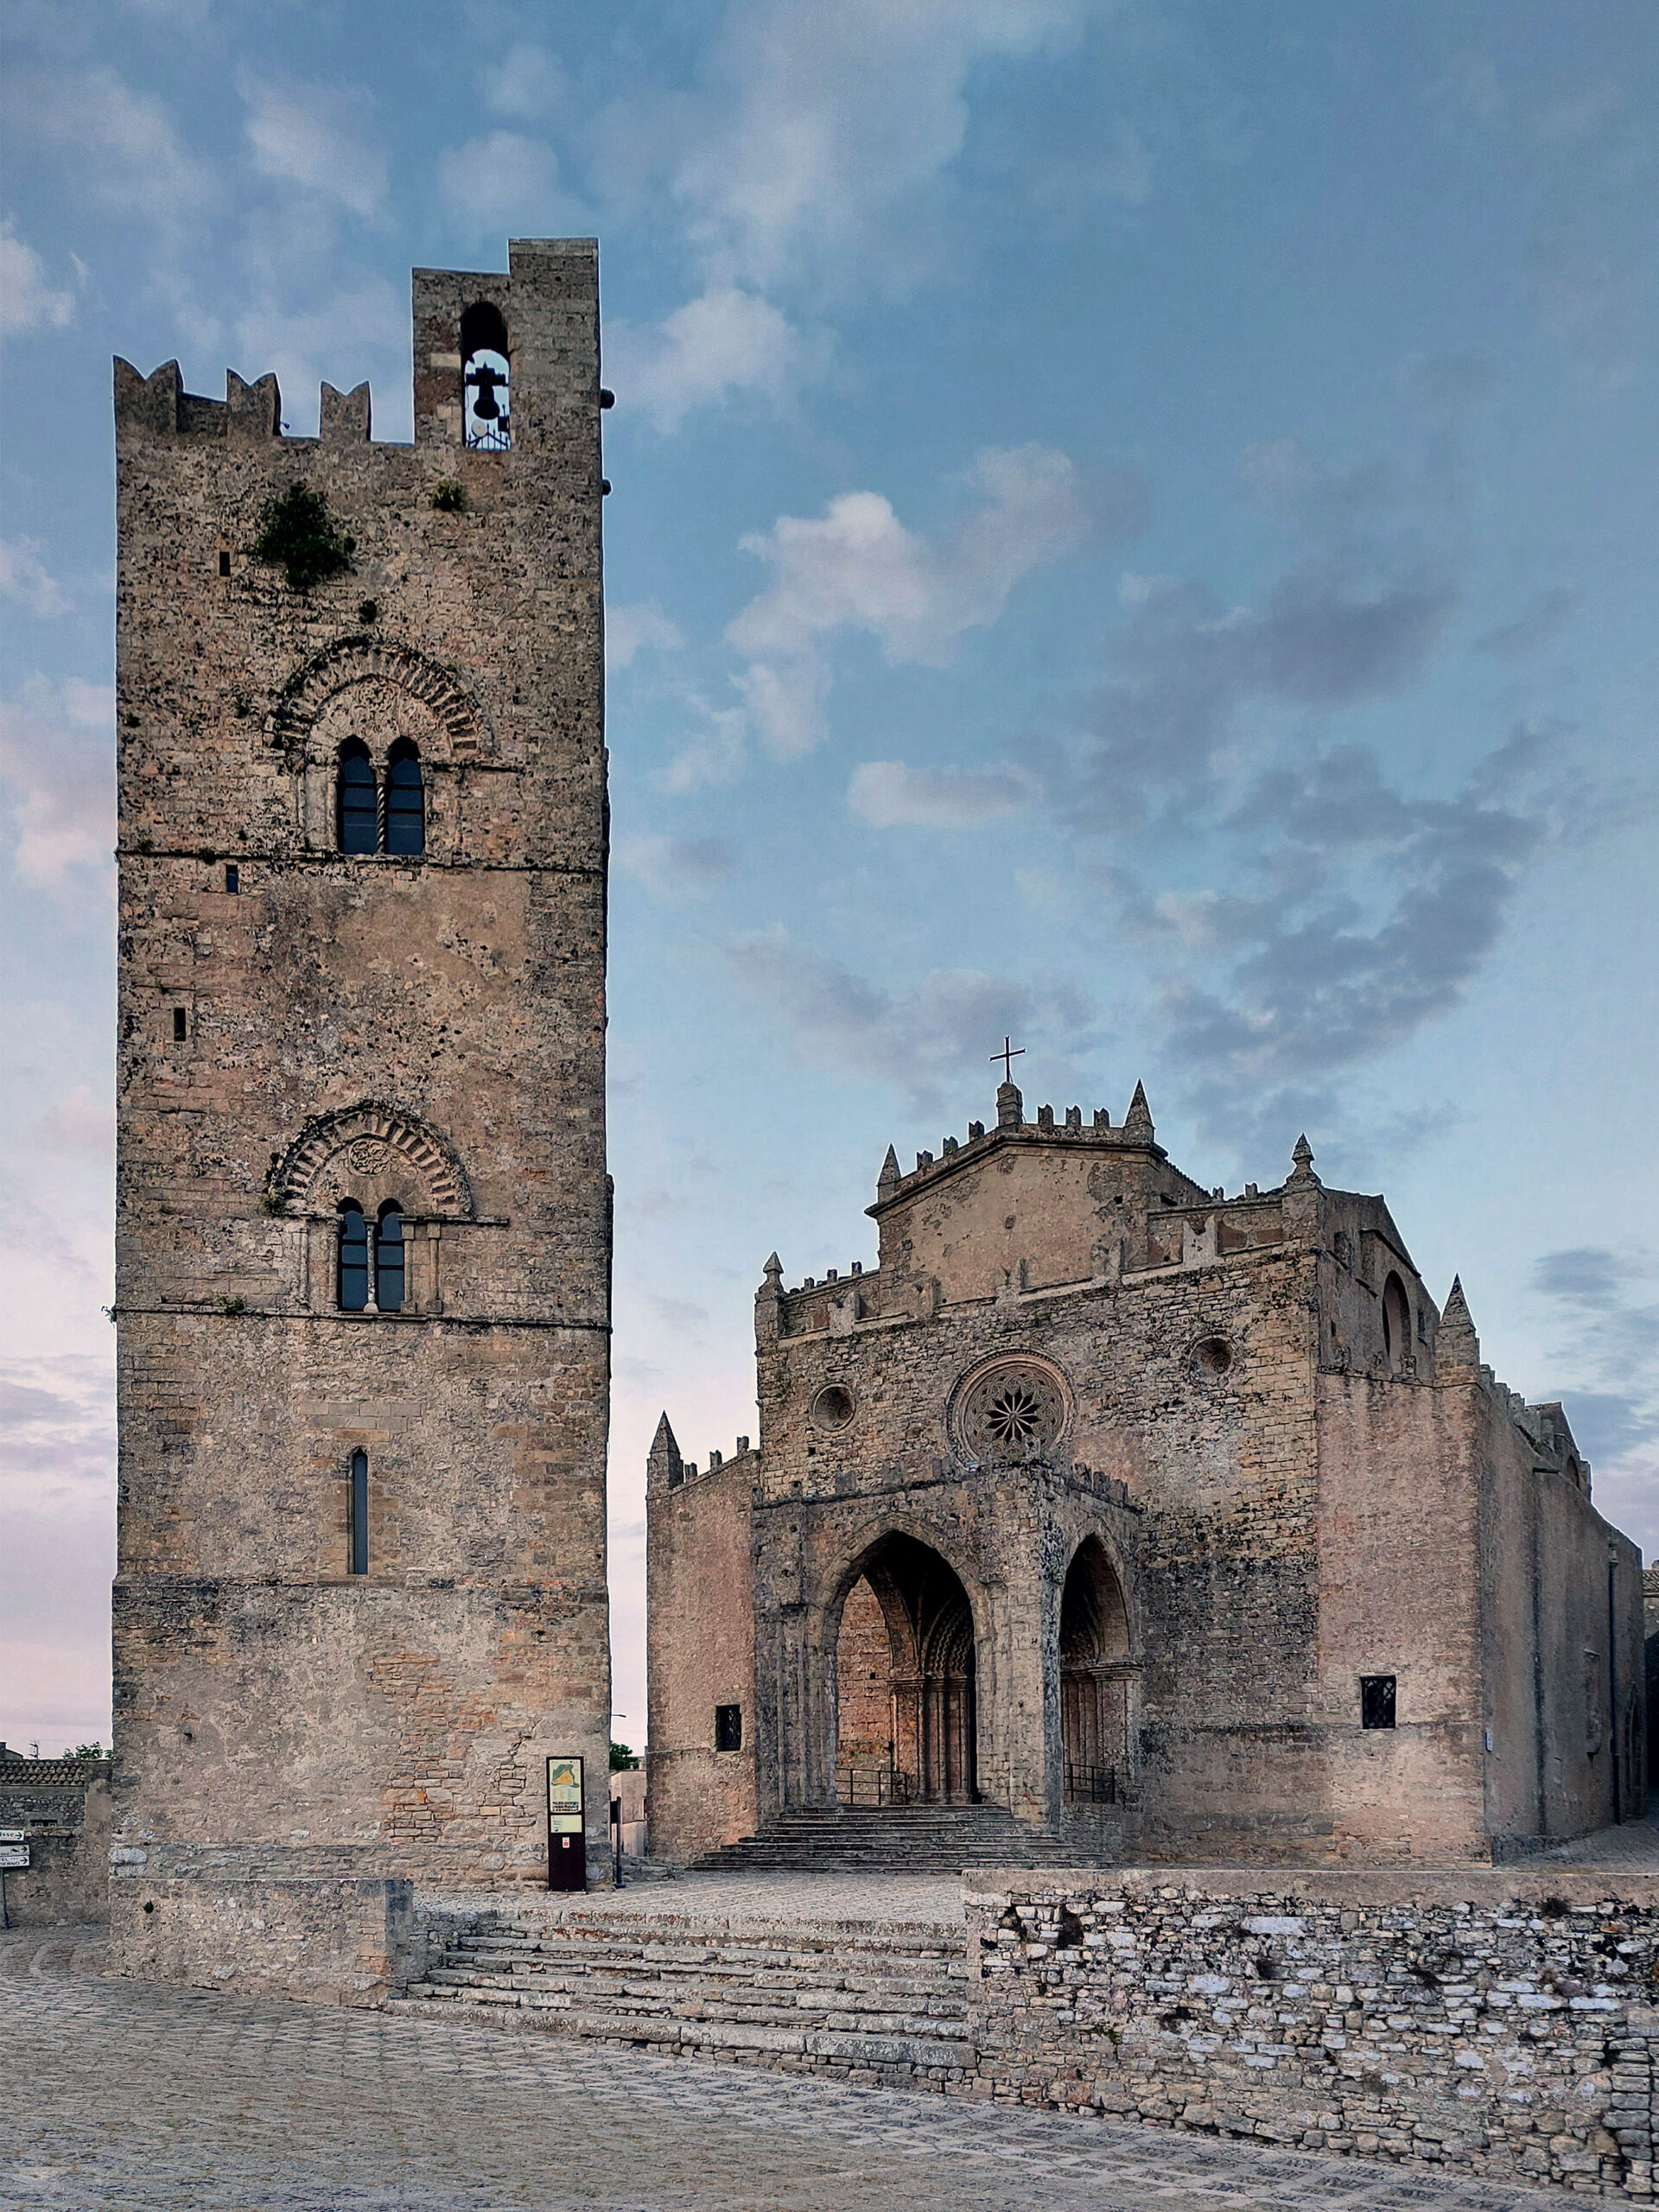
From here, by cable car or by car, you can reach the enchanting medieval village of Erice, on the summit of Monte San Giuliano, from which you can enjoy a fabulous view of the city and the sea.
Lose yourself in its winding alleys, remaining enchanted at the sight of the Cathedral and the Torre del re Federico, which stands next to it. Then continue to the Castello di Venere and the Balio gardens, which offer views as far as the eye can see towards the coast. We recommend having dinner and spending the evening here, among the small craft shops, clubs and pastry shops, which give off an inebriating scent.
You will need a wide angle to capture the whole tower and the church. Then use a medium focal length to focus on the details of the craft shops and the medieval architecture.
@giadaantonini_photography
@giadaantonini_photography
@giadaantonini_photography
@giadaantonini_photography
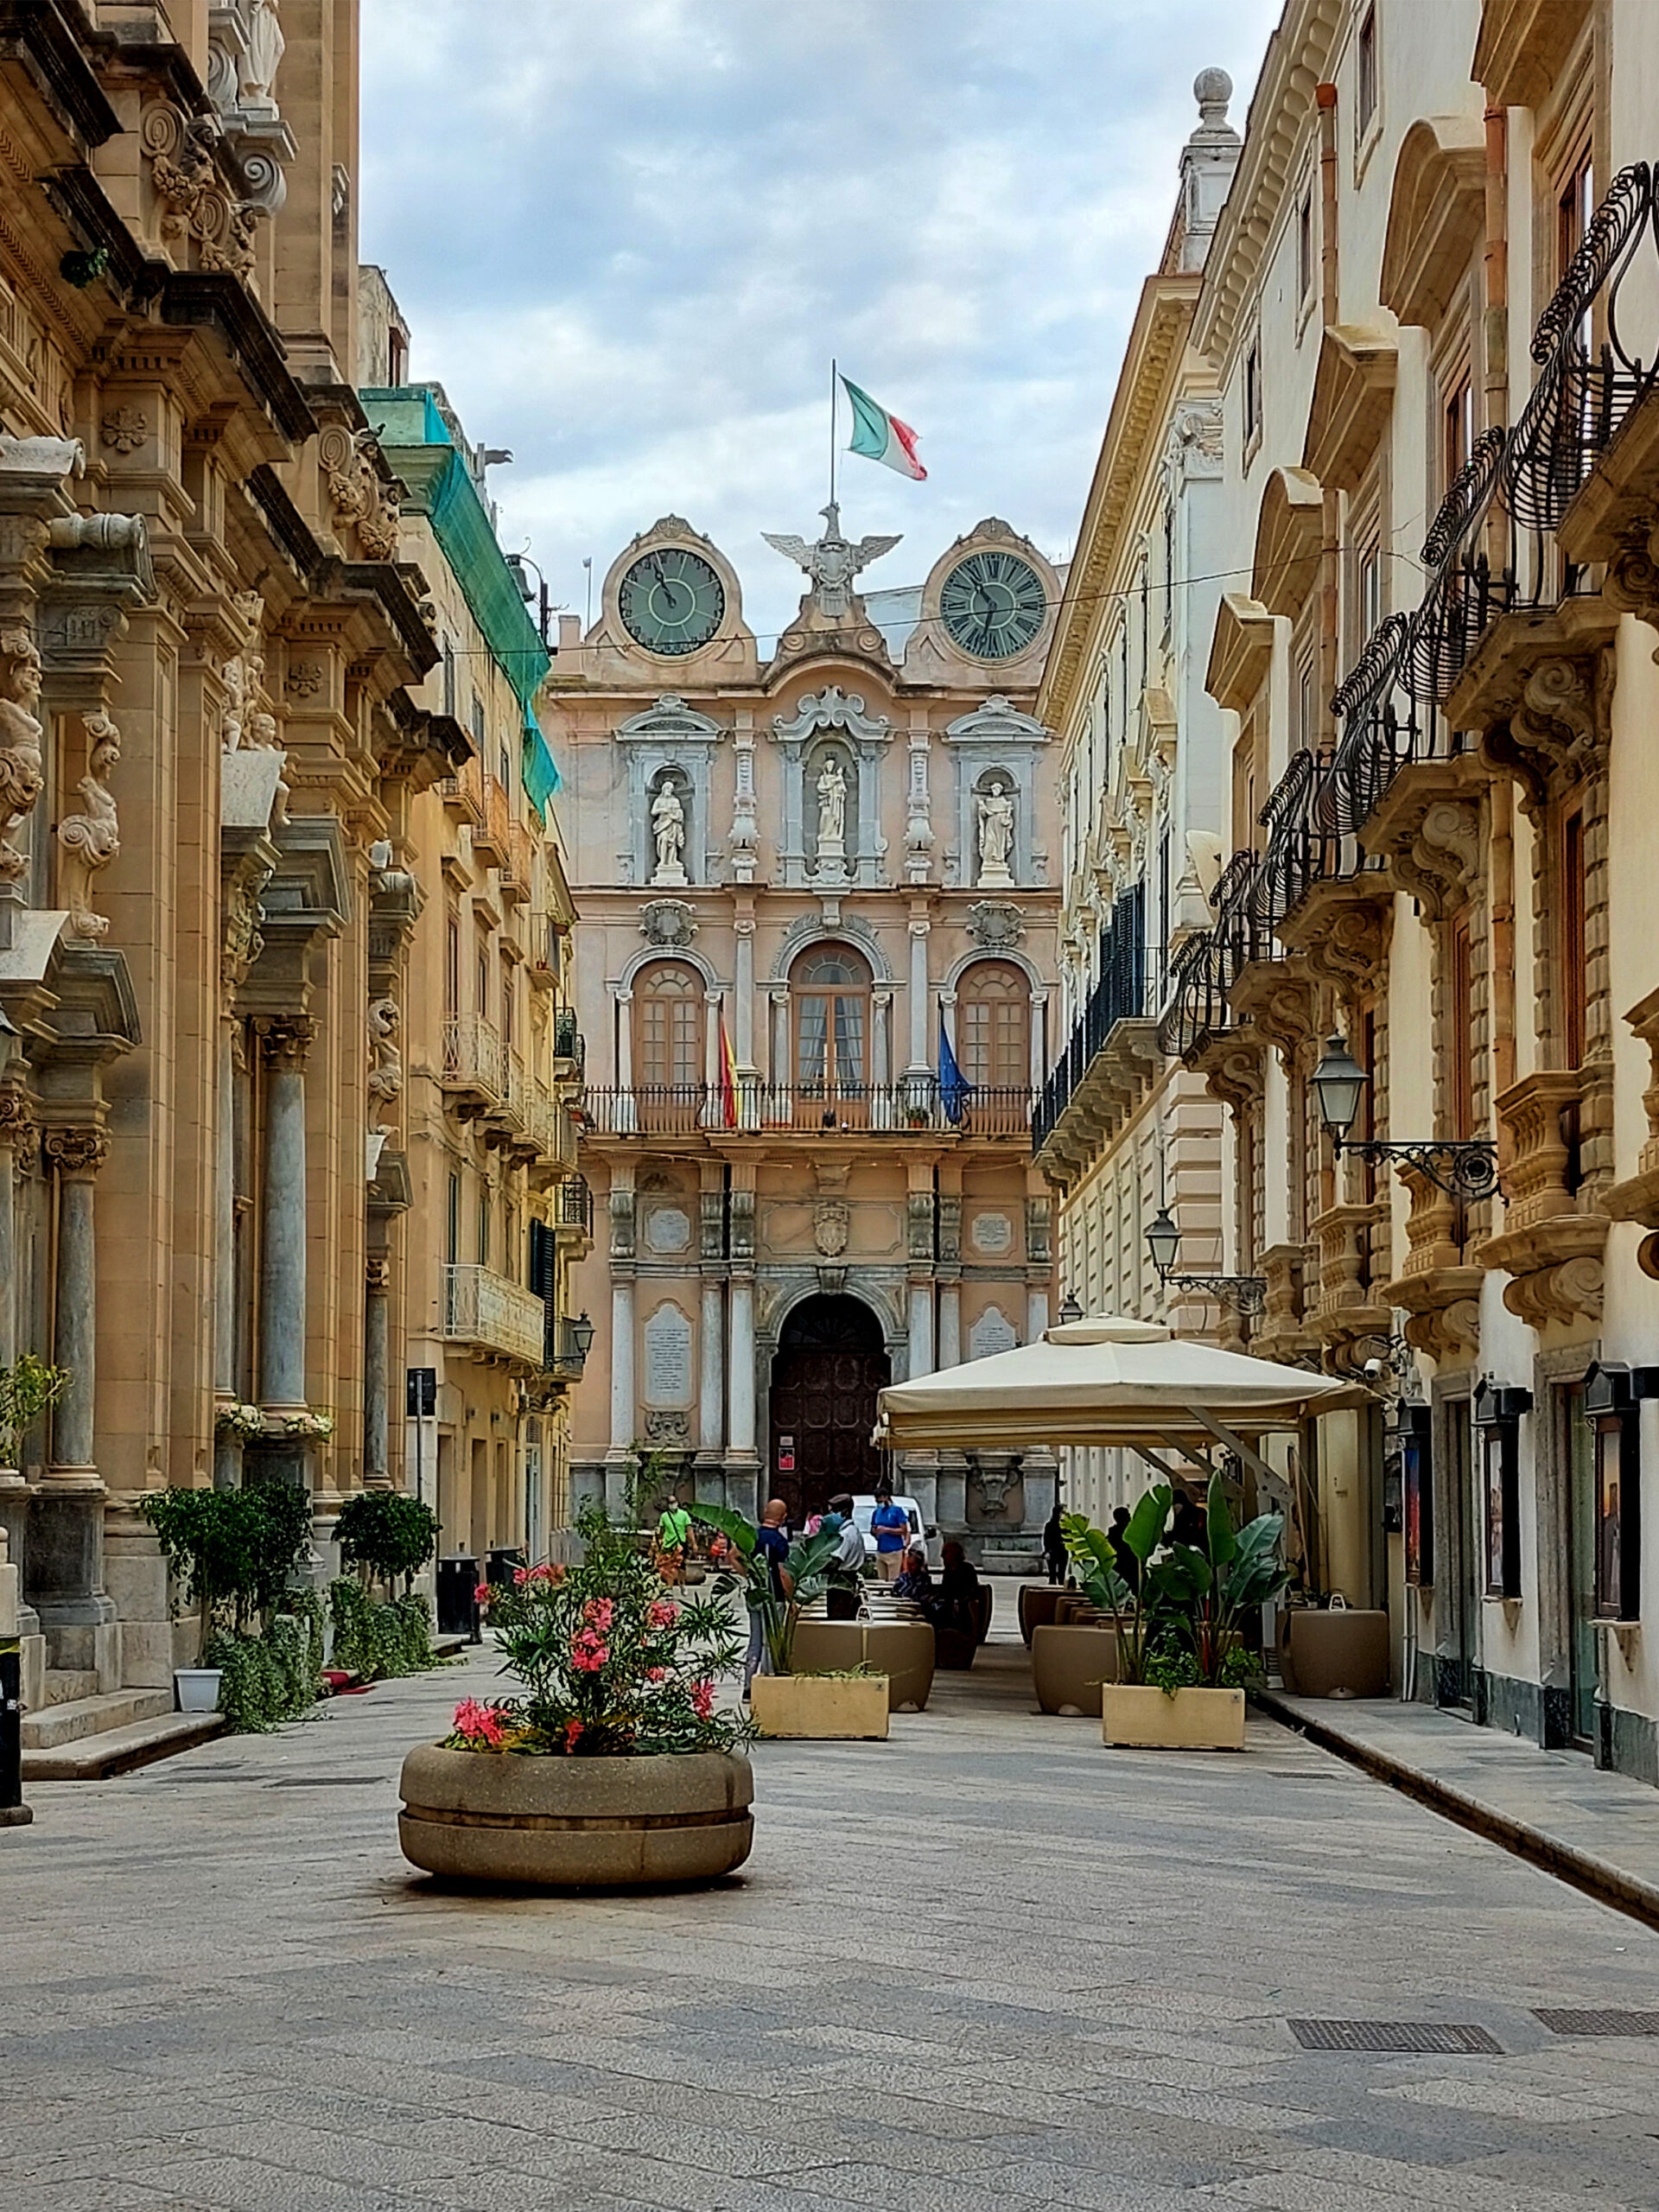
Day 9: Trapani
Morning: visit of the city
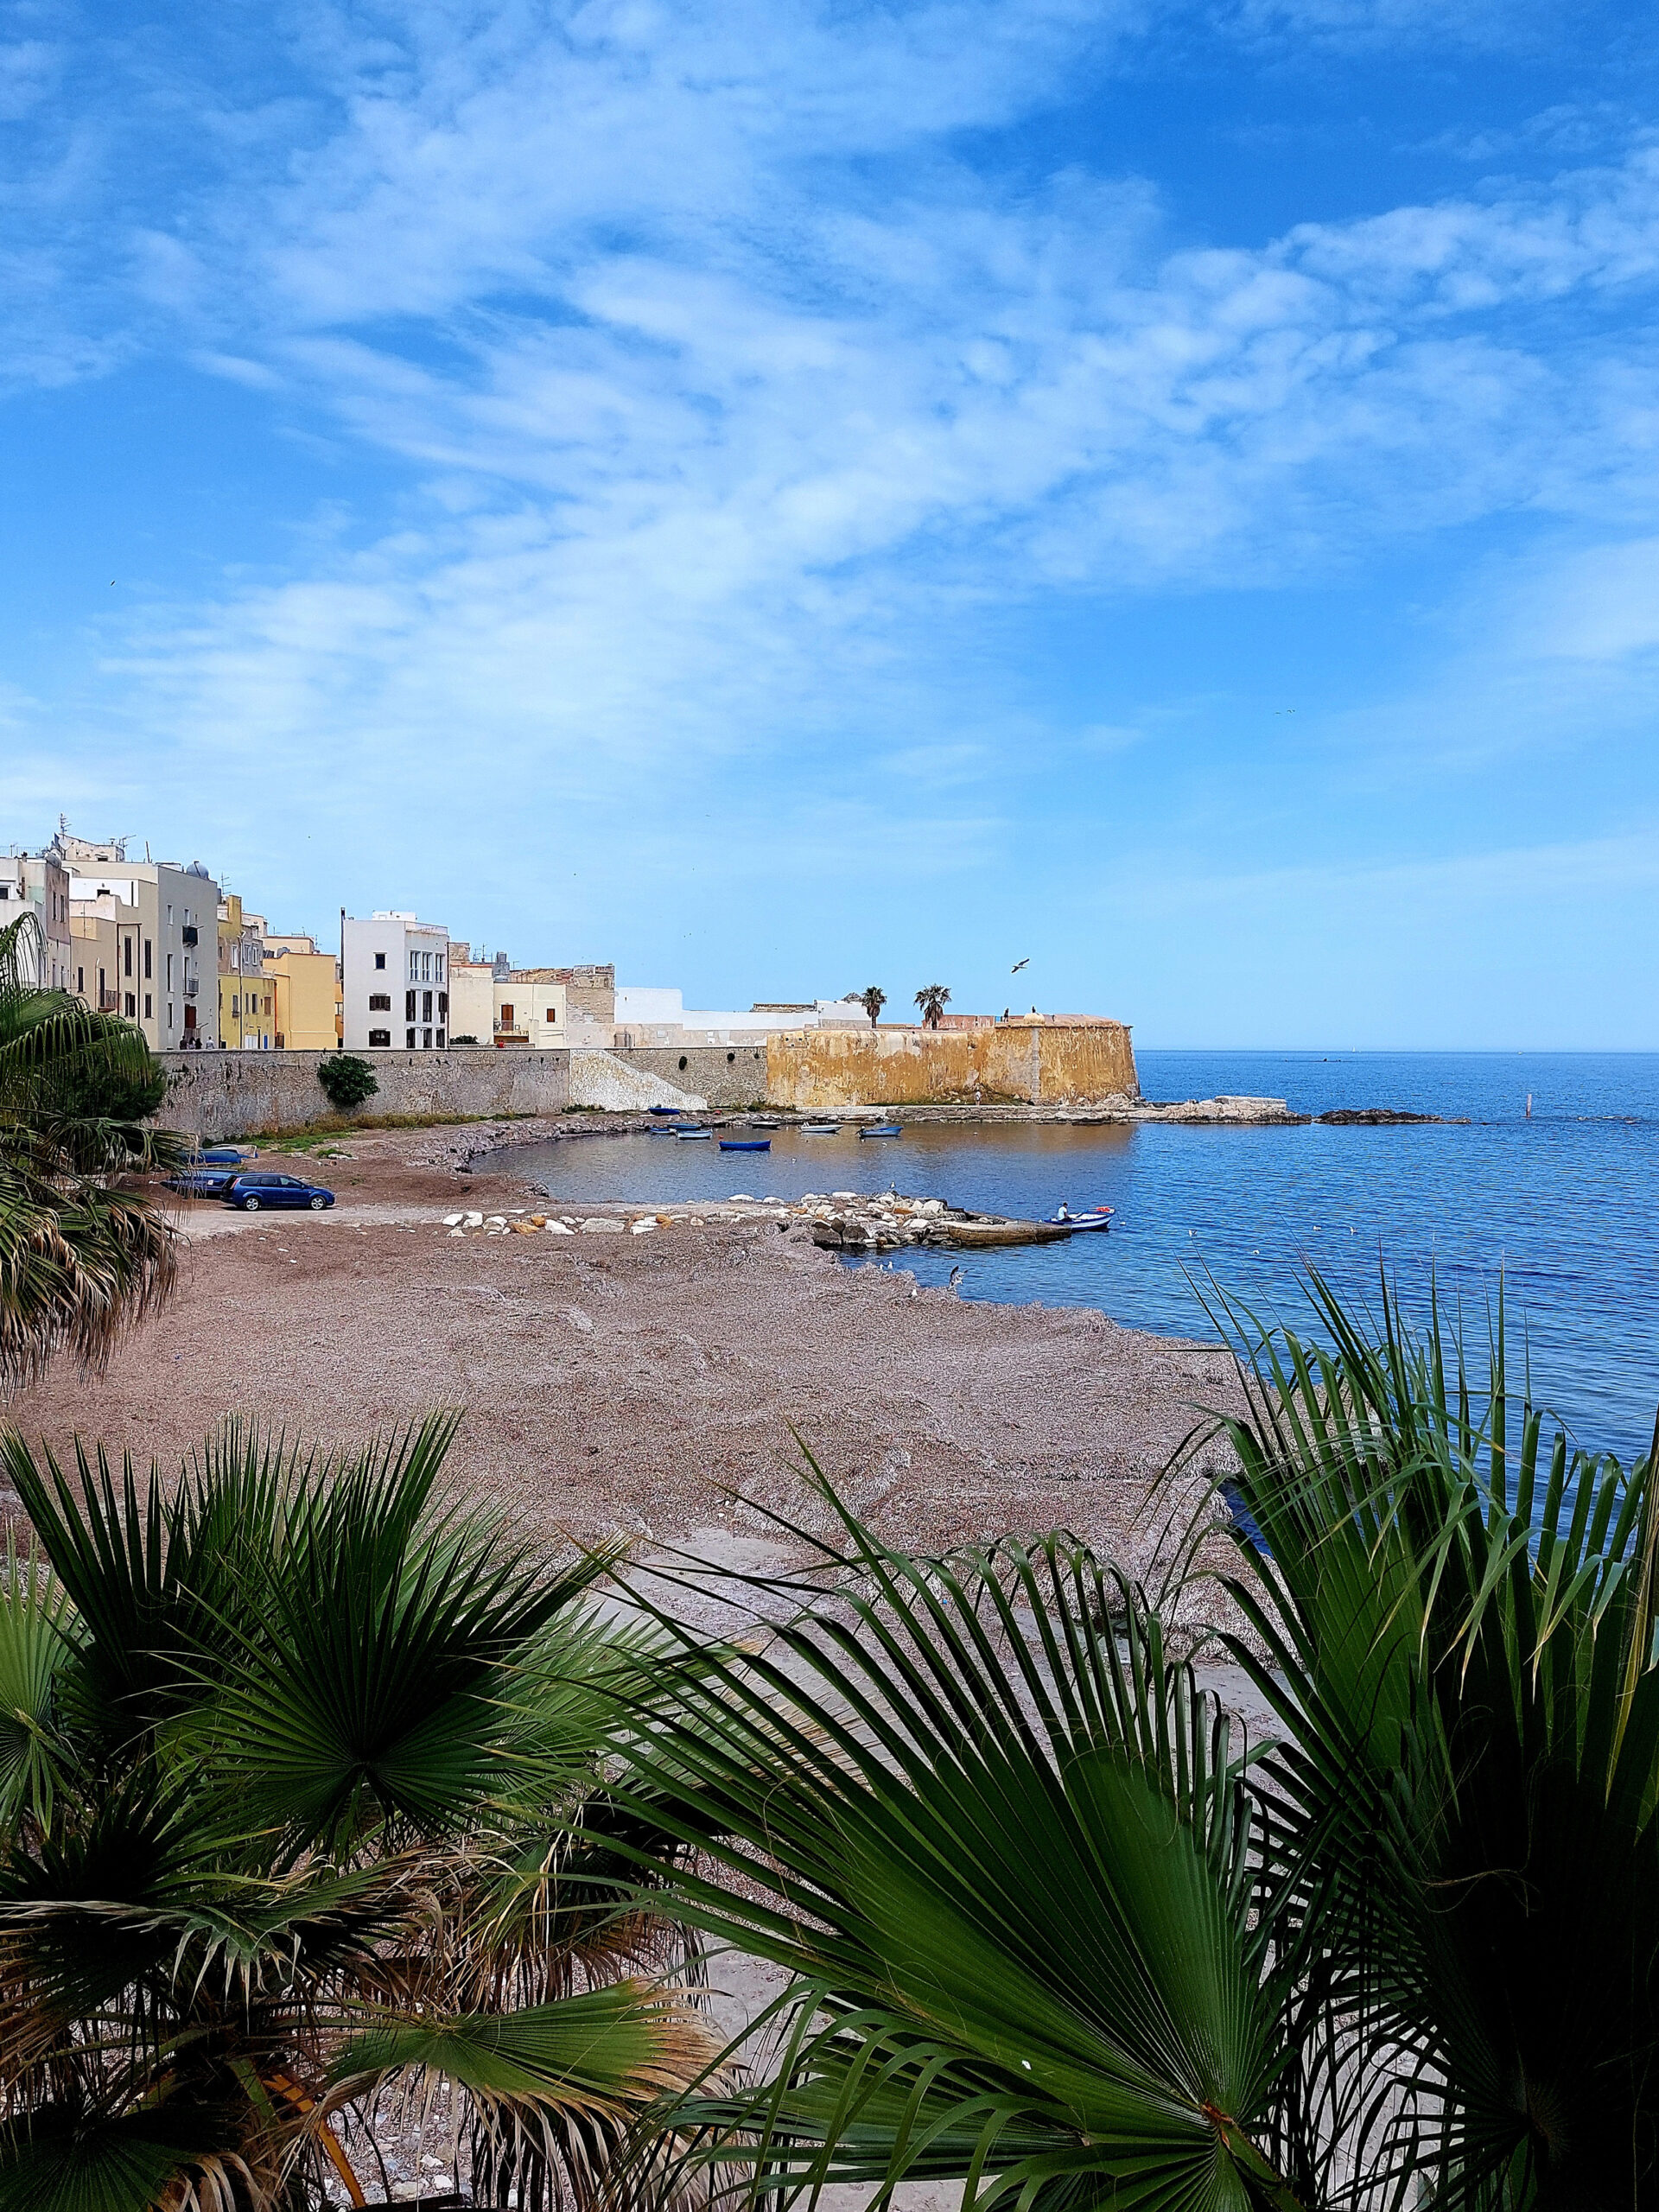
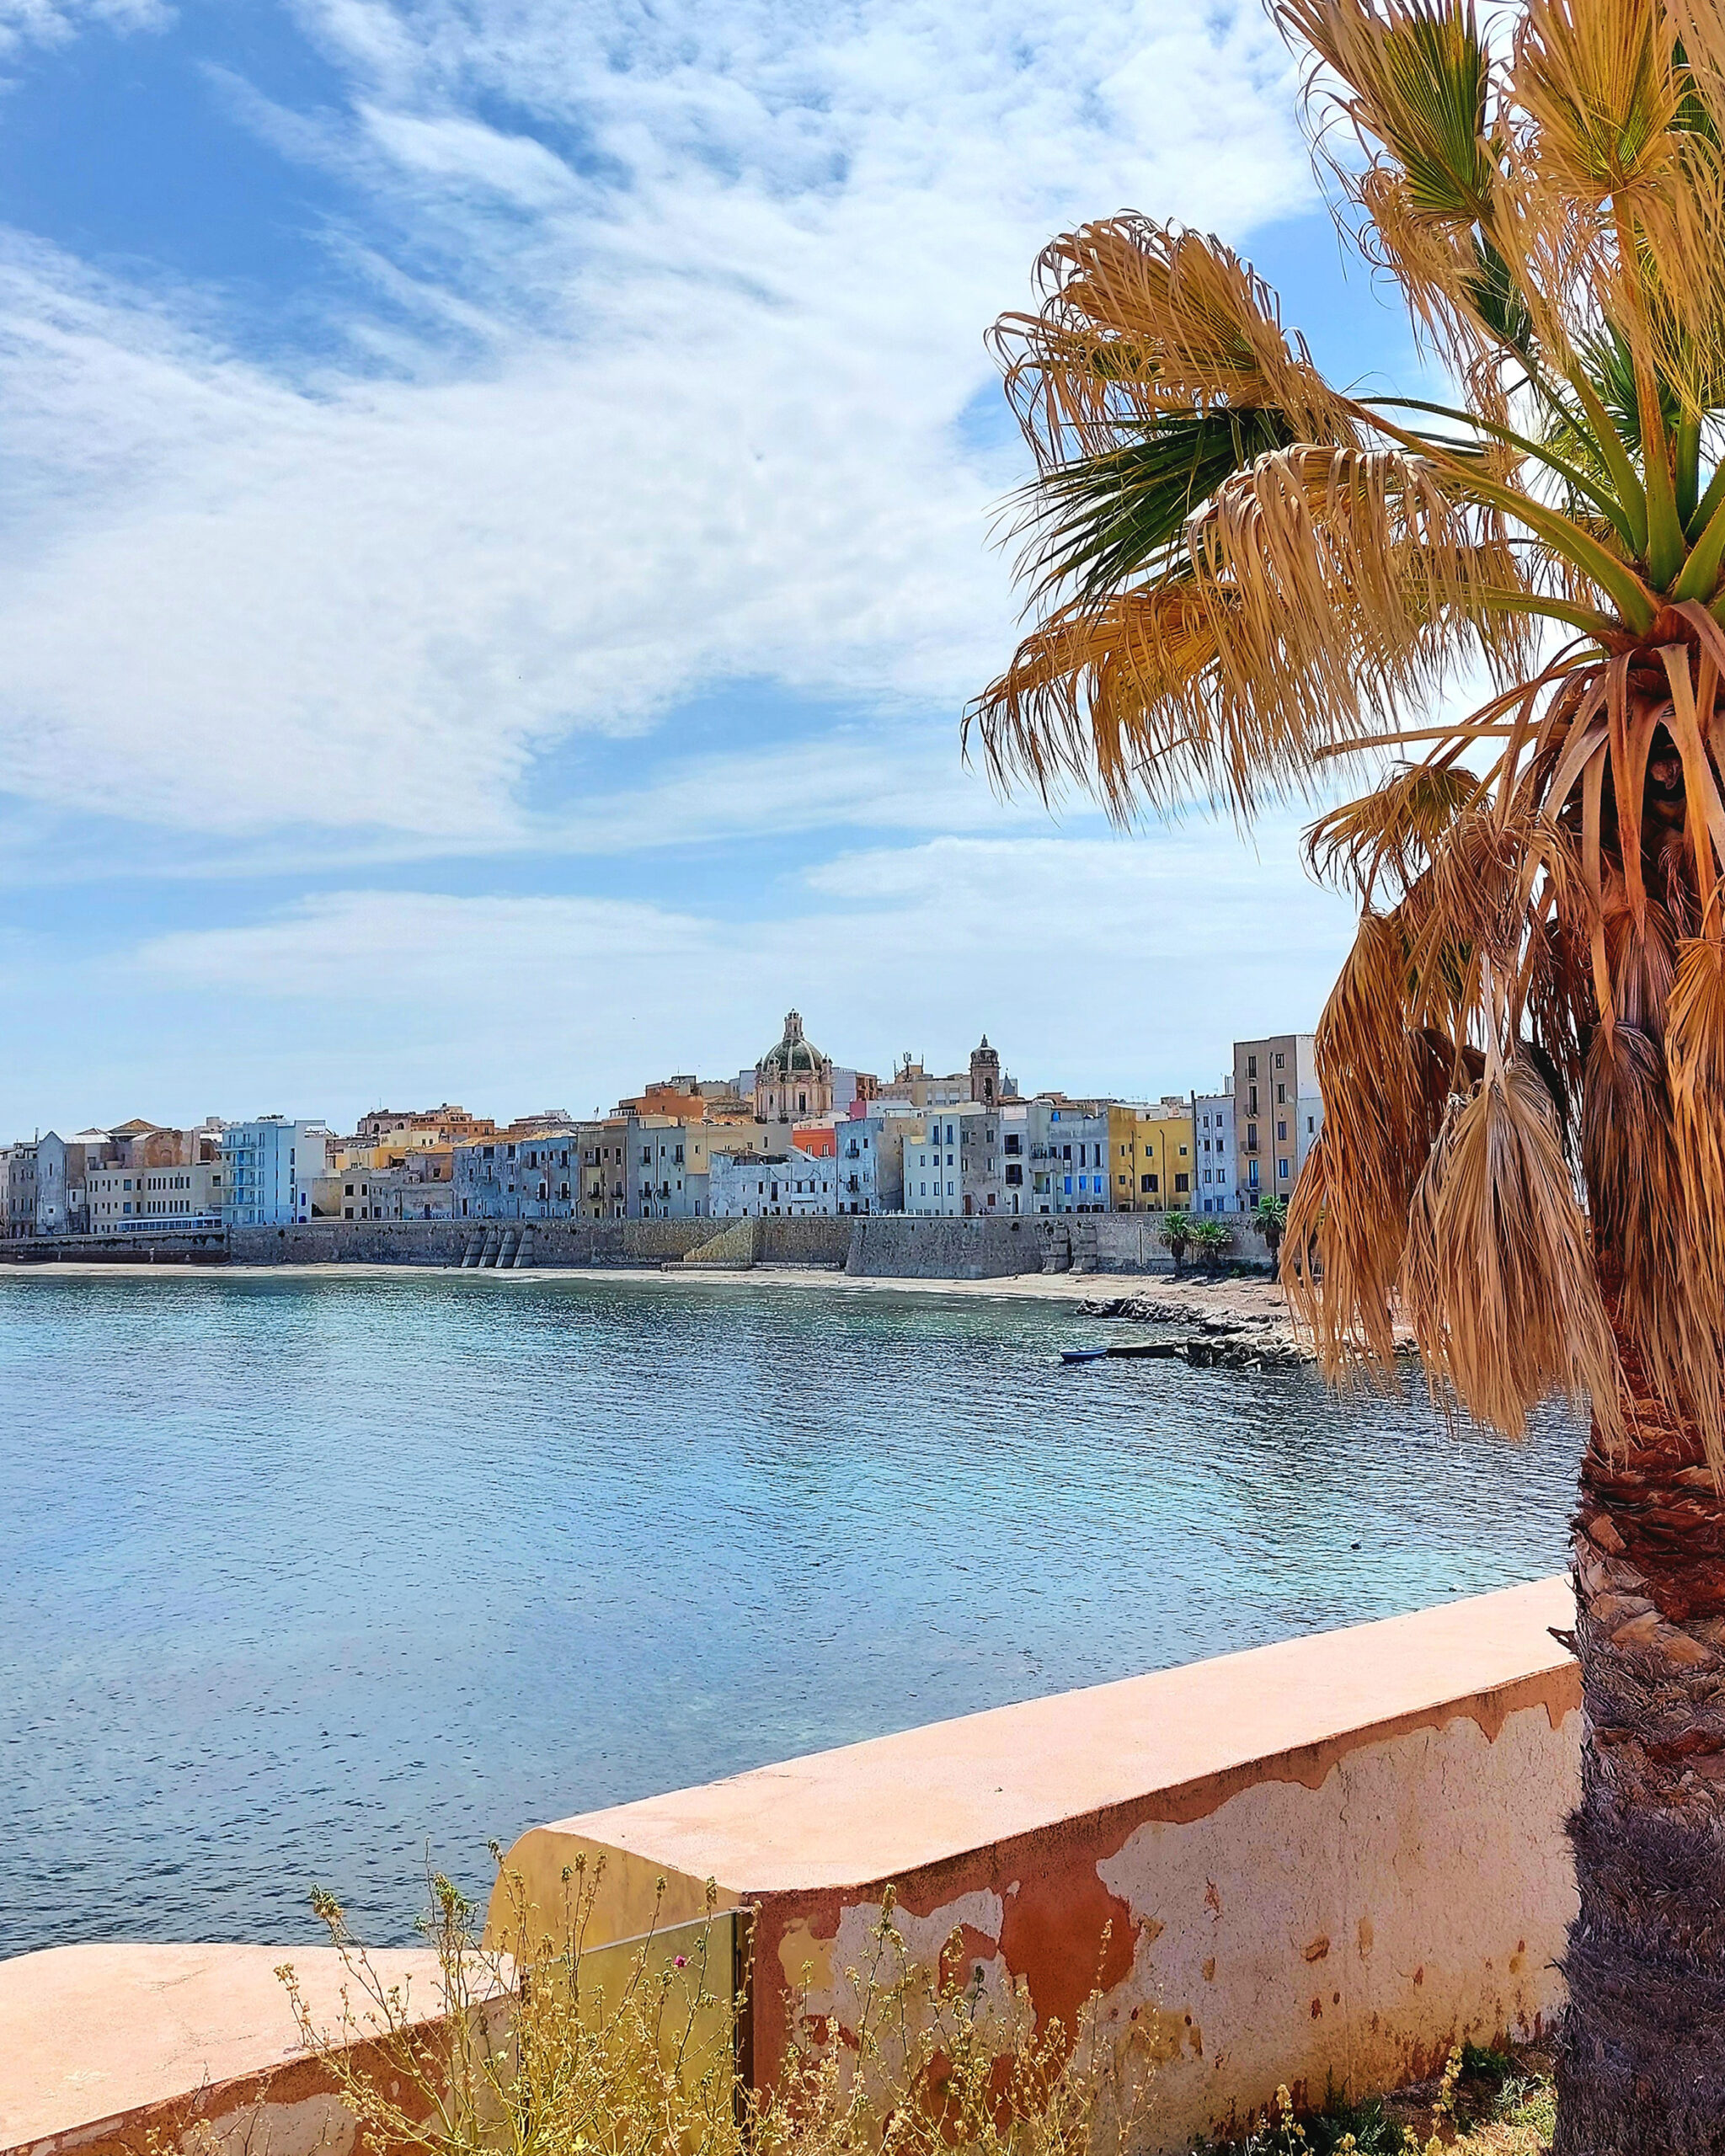
Trapani amazes with its colorful houses overlooking the sea and the old streets, where you can breathe the atmosphere of Sicily. Our advice is to go through the streets of the center, from Corso Italia, continue towards the Saturno Fountain, the Torre dell’Orologio and the Cathedral of San Lorenzo, until you reach the Torre di Ligny. Going back, choose the seafront roads via Mura di Tramontana Ovest and via Dante Alighieri, which offer spectacular views of the city and the sea.
Compose your shoot with the coloured facades and the waterfront, then stop also to photograph the elegant city streets. Be careful to respect the vertical lines.
Afternoon: the beaches
Even the beaches around Trapani are wonderful. Among these, the closest to the city is Lido San Giuliano, where you can relax before leaving again.
@giadaantonini_photography
@giadaantonini_photography
@giadaantonini_photography
@giadaantonini_photography
@giadaantonini_photography
Do you want to discover more?
For those who choose to stay a few more days and want to continue the itinerary, we recommend visiting the island of Favignana, with its crystalline sea, the area of San Vito Lo Capo and the Zingaro Nature Reserve, up to the wonderful city of Palermo. Nearby, don’t miss the majestic Cathedral of Monreale.
What are you waiting for?
Follow our tips and get ready for your next rip to Sicily!
If you like our article, write it in the comments and share it!
To not miss the next article and all the other travel and photography tips, subscribe to our newsletter!
Follow us on Instagram and Facebook and share your pics with the tag @imagomap or the hashtag #imagomap!
Looking at the settings of your camera or listening to photographers, you will have known that, in addition to JPEG, a very common format for saving photo files is RAW, now also in the most recent smartphone models!
But what are the differences between the two formats? And how to choose the best one for our photos?
Let’s compare them and try to understand together!
JPEG and RAW: what are them?
JPEG are raster files, meaning images made up of pixels, and are popular for sharing, creating, and viewing photos.
When a JPEG file is generated, it is subject to lossy compression, which means that all the nuances of color, and therefore the details, that the human eye can hardly see are eliminated, creating groups of pixels with homogeneous color.
When you take a JPEG image, you will have an 8 bit file. The number of bits represents the color depth of the image. Each pixel of an 8-bit image consists of a numerical string of 8 digits 0 or 1, which combined together determine a colour. In this way it is possible to have 256 (28) different combinations and therefore 256 shades of color for each of the three primary colours.
RAW files are still raster files, even if they are represented by code and require software processing to be converted into images.
When a RAW file is generated, it does not undergo any type of compression or data loss during recording. This means that it contains a large amount of data within it. All digital cameras can take photos in RAW format and now some of the latest smartphone models can do it too, making them ideal for amateur or professional photographers.
Digital cameras can shoot at 12 or 14 bit, depending on the type of camera, and this means that if we save the file in RAW, the color gradients will reach 4096 or 16384 for each primary color.
But let’s see the main differences, the advantages or disadvantages of the two formats and learn which one to choose in each situation.
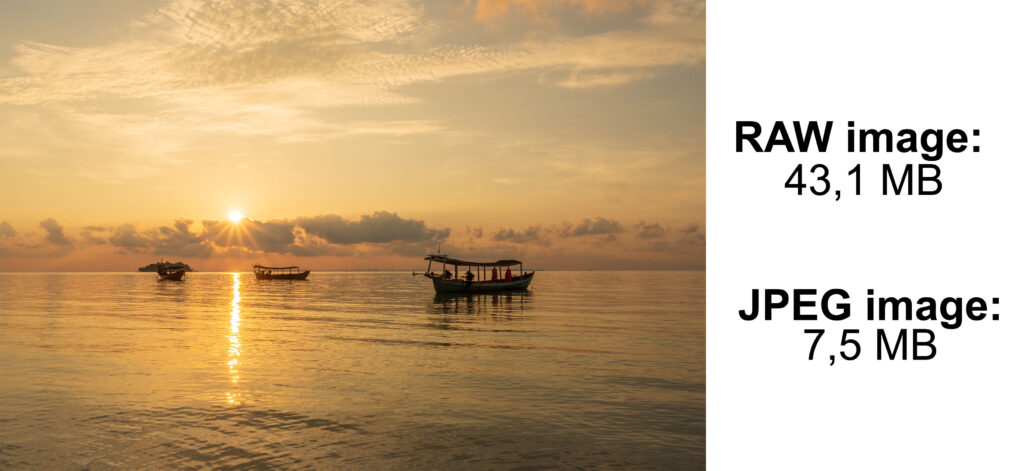
1. The weight
JPEG files are about 5-10 times smaller than RAW.
JPEG files are the most used for saving and sharing images online, they are light in terms of MB, which allows them to be opened, sent and shared quickly, while still maintaining good quality online.
RAW files, on the other hand, containing a greater amount of information, are much heavier. This means that uploading, sending and sharing take much longer. Furthermore, specific programs and software are needed to open these files, while JPEGs are universally recognized.
RAW files, for example, cannot be sent as simple email attachments, as they exceed the maximum capacity allowed and to manage them easily, the computer on which they are processed must offer high performance.
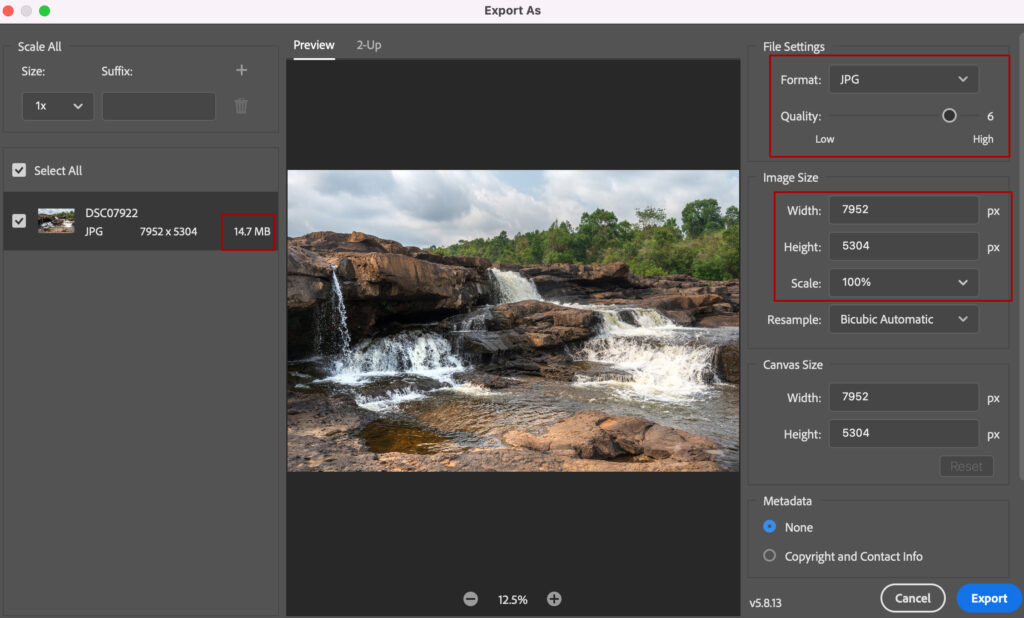
In the image below we report the weight in MB of the original RAW image taken with a Sony digital camera and the weight of the same file exported from Photoshop in JPEG. During export, there are various settings that can be modified to further reduce the weight of the JPEG, according to different needs, but we still start from a size 7 times smaller! The same image, used as the cover of this article, has been reduced to 1 MB, in order not to weigh down the page and maintain fast viewing times. Despite this reduction, for a website display, the quality is still enough.
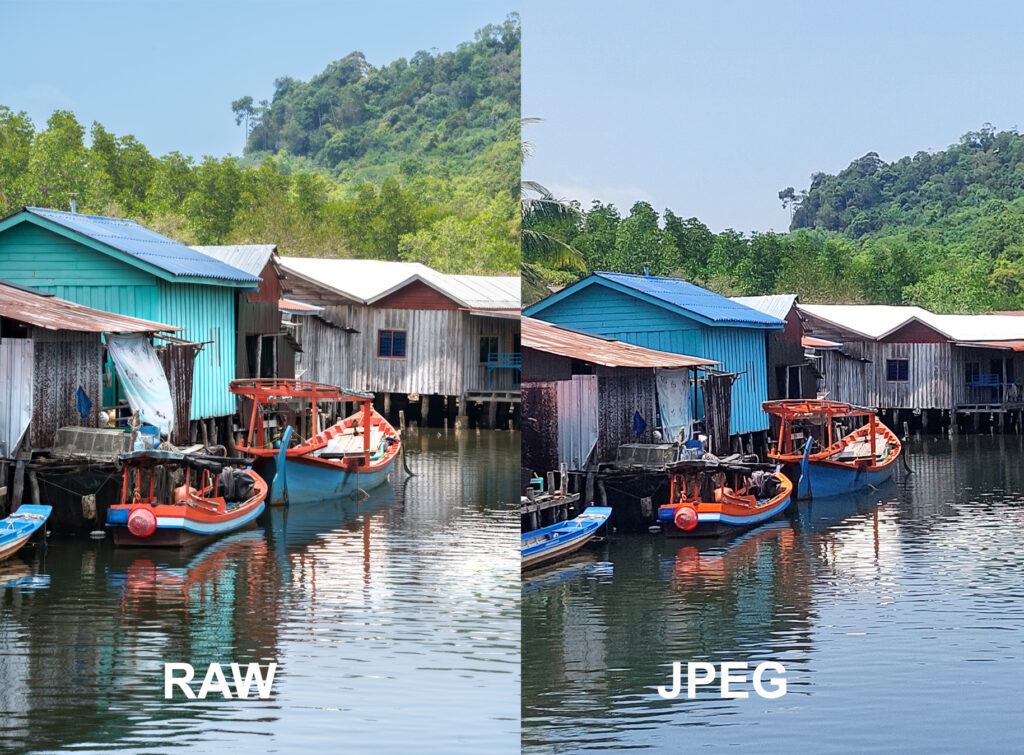
2. The quality
RAW files have higher quality than JPEGs. The choice depends on the use we will make of that photo.
JPEG files are subject to lossy compression, which means that some detail, and therefore image quality, is sacrificed to reduce file size and allow for easier management. However, this also alters the image, slightly modifying the colours. The quality of the JPEG file is still good for viewing from a computer or smartphone, for use on websites, which very often have limits on the weight of the uploaded images, for social networks or for printing in the classic smaller photographic formats.
But if we have to modify that image and process it with post-production software, or enlarge it dramatically, it is precisely the details that the JPEG loses, which do not allow us to continue viewing a quality file and a high definition image. This is where the RAW format comes into play.
In fact, this certainly guarantees a much higher image quality, because it doesn’t compress the data collected by the camera. It therefore has a multitude of more details and records millions more colors than a JPEG image, returning a wider range of colors and tones. This guarantees greater control over the image.
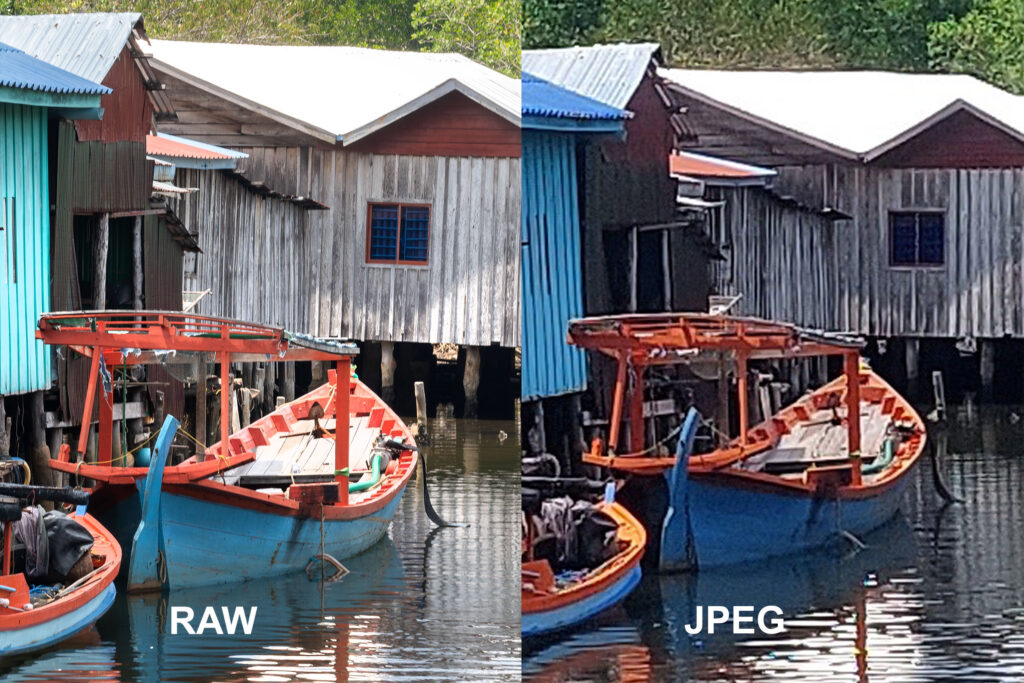
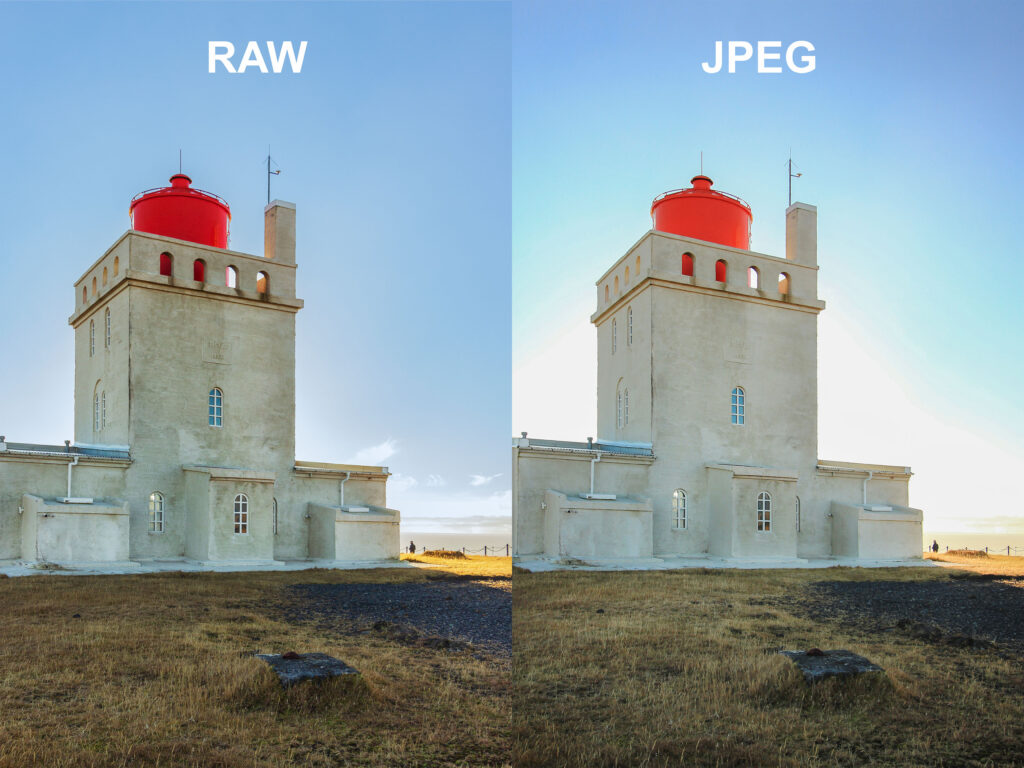
Below we compare two photos, one taken in RAW and one in JPEG, first in the original shot size and then in an enlarged detail. While in the first image it is more difficult to grasp the difference in quality, in the second it is certainly more evident. In this case, the photo taken in RAW format was first edited, enlarged and then exported in JPEG, while on the right the image already taken in JPEG was edited, enlarged and saved in the same format.
3. Photo editing
RAW is the best format for photo editing.
As we said before, if the image needs to be processed, post-produced, modified, altered, or printed in large dimensions (such as for a poster), surely RAW is the right format to choose to maintain the quality of the photo. This is why it is the format most used by professional or amateur photographers.
The high quality of the RAW file allows you to change a wide range of settings after shooting, ensuring maximum flexibility during editing.
Very often RAW images are processed in the main post-production programs, such as Photoshop and Lightroom and then saved in JPEG or other lossless formats, such as PNG or TIFF, based on the use that will be made of them.
Of course, to view and edit RAW files through a computer, it must have good performance, in terms of graphic memory and storage space.
Photoshop and Lightroom, as well as other editing programs, are also available in smartphone app format, in free and paid solutions. If our smartphone allows shooting in RAW, we will therefore be able to obtain excellent results after editing our photos, even without going through the computer.
Can you edit a JPEG with a photo editing program? Yes, it is possible, but in addition to having fewer editing options, the quality of the photo, if you make substantial changes, is compromised even more and you risk damaging the file, rather than improving it.
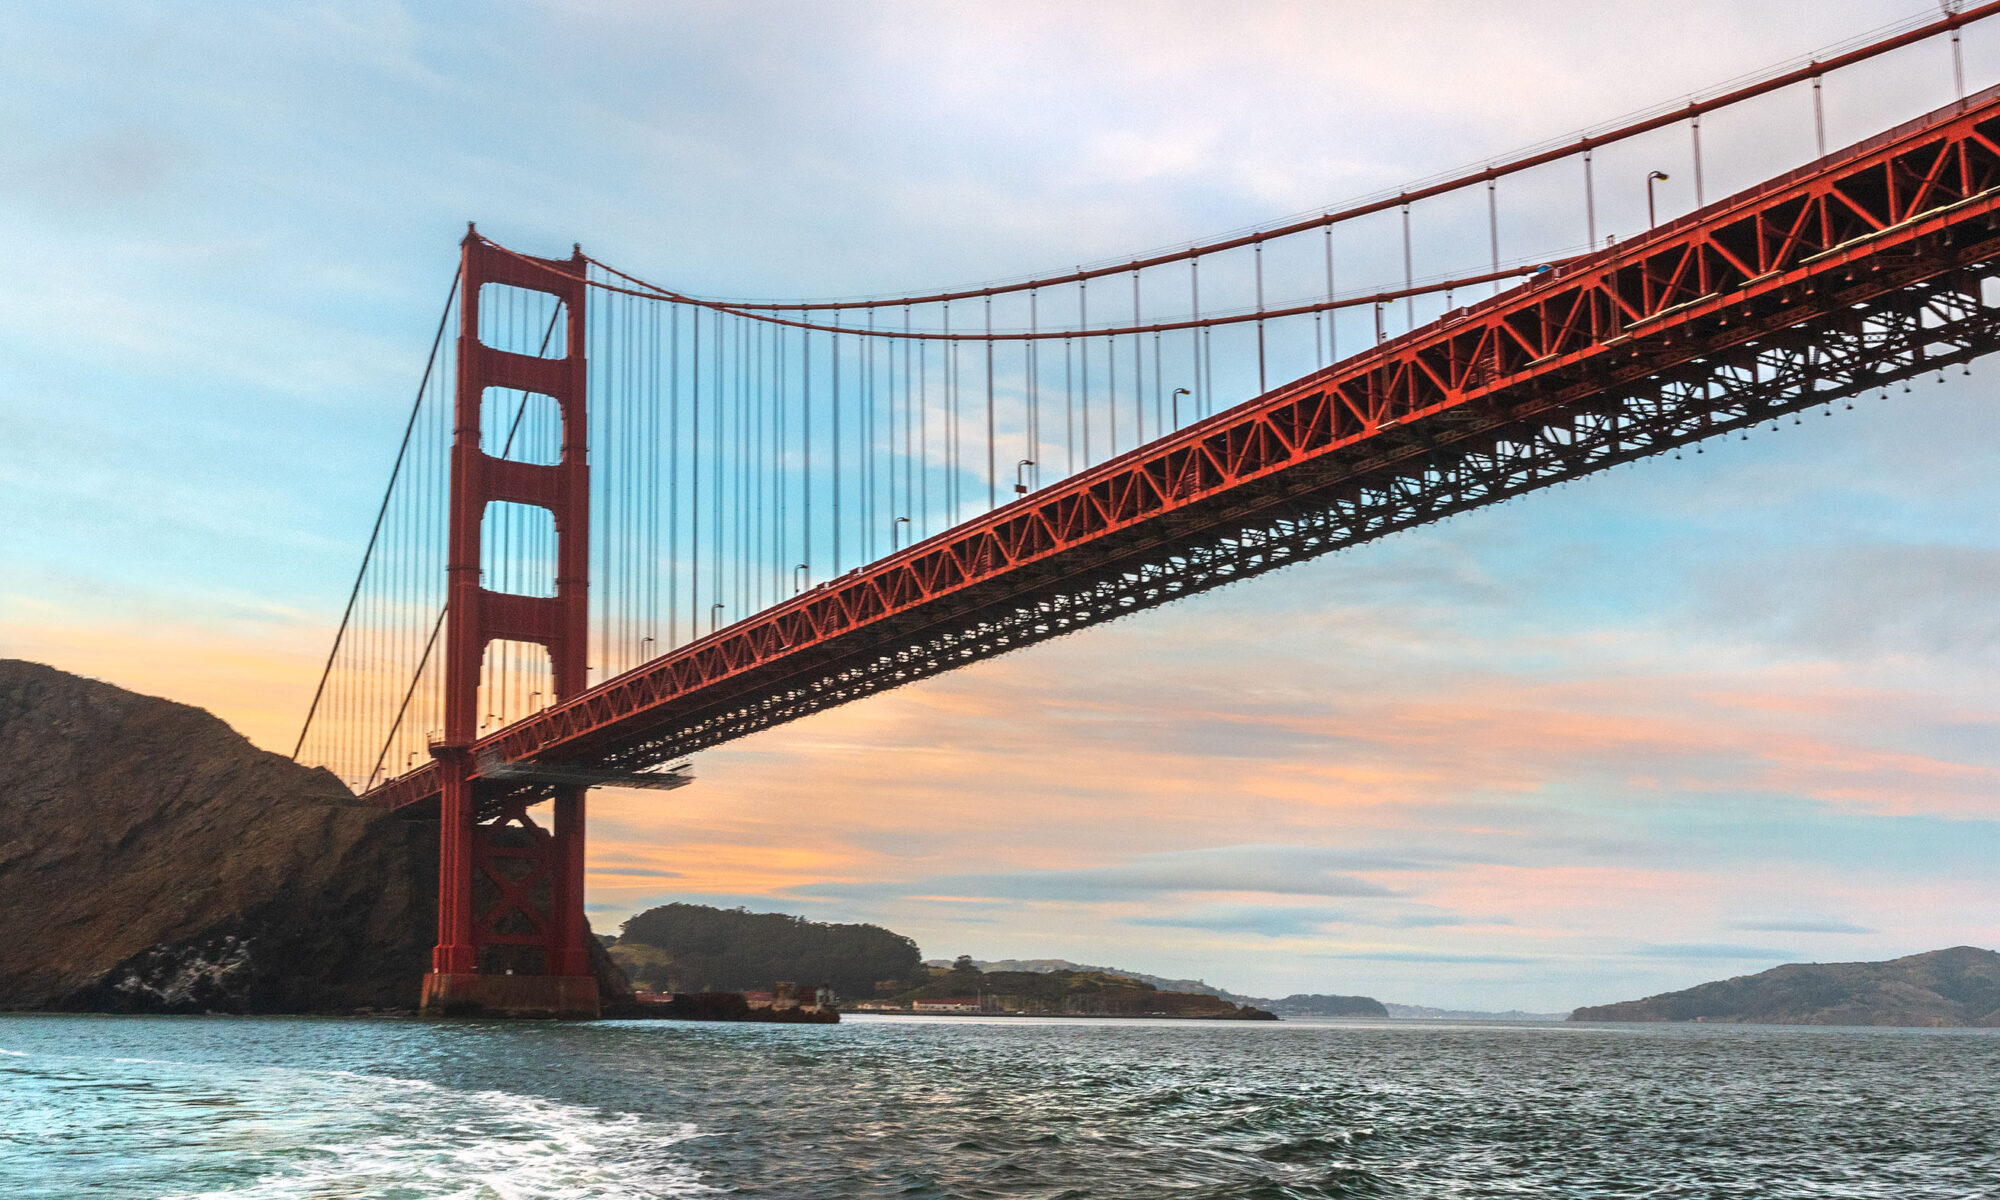
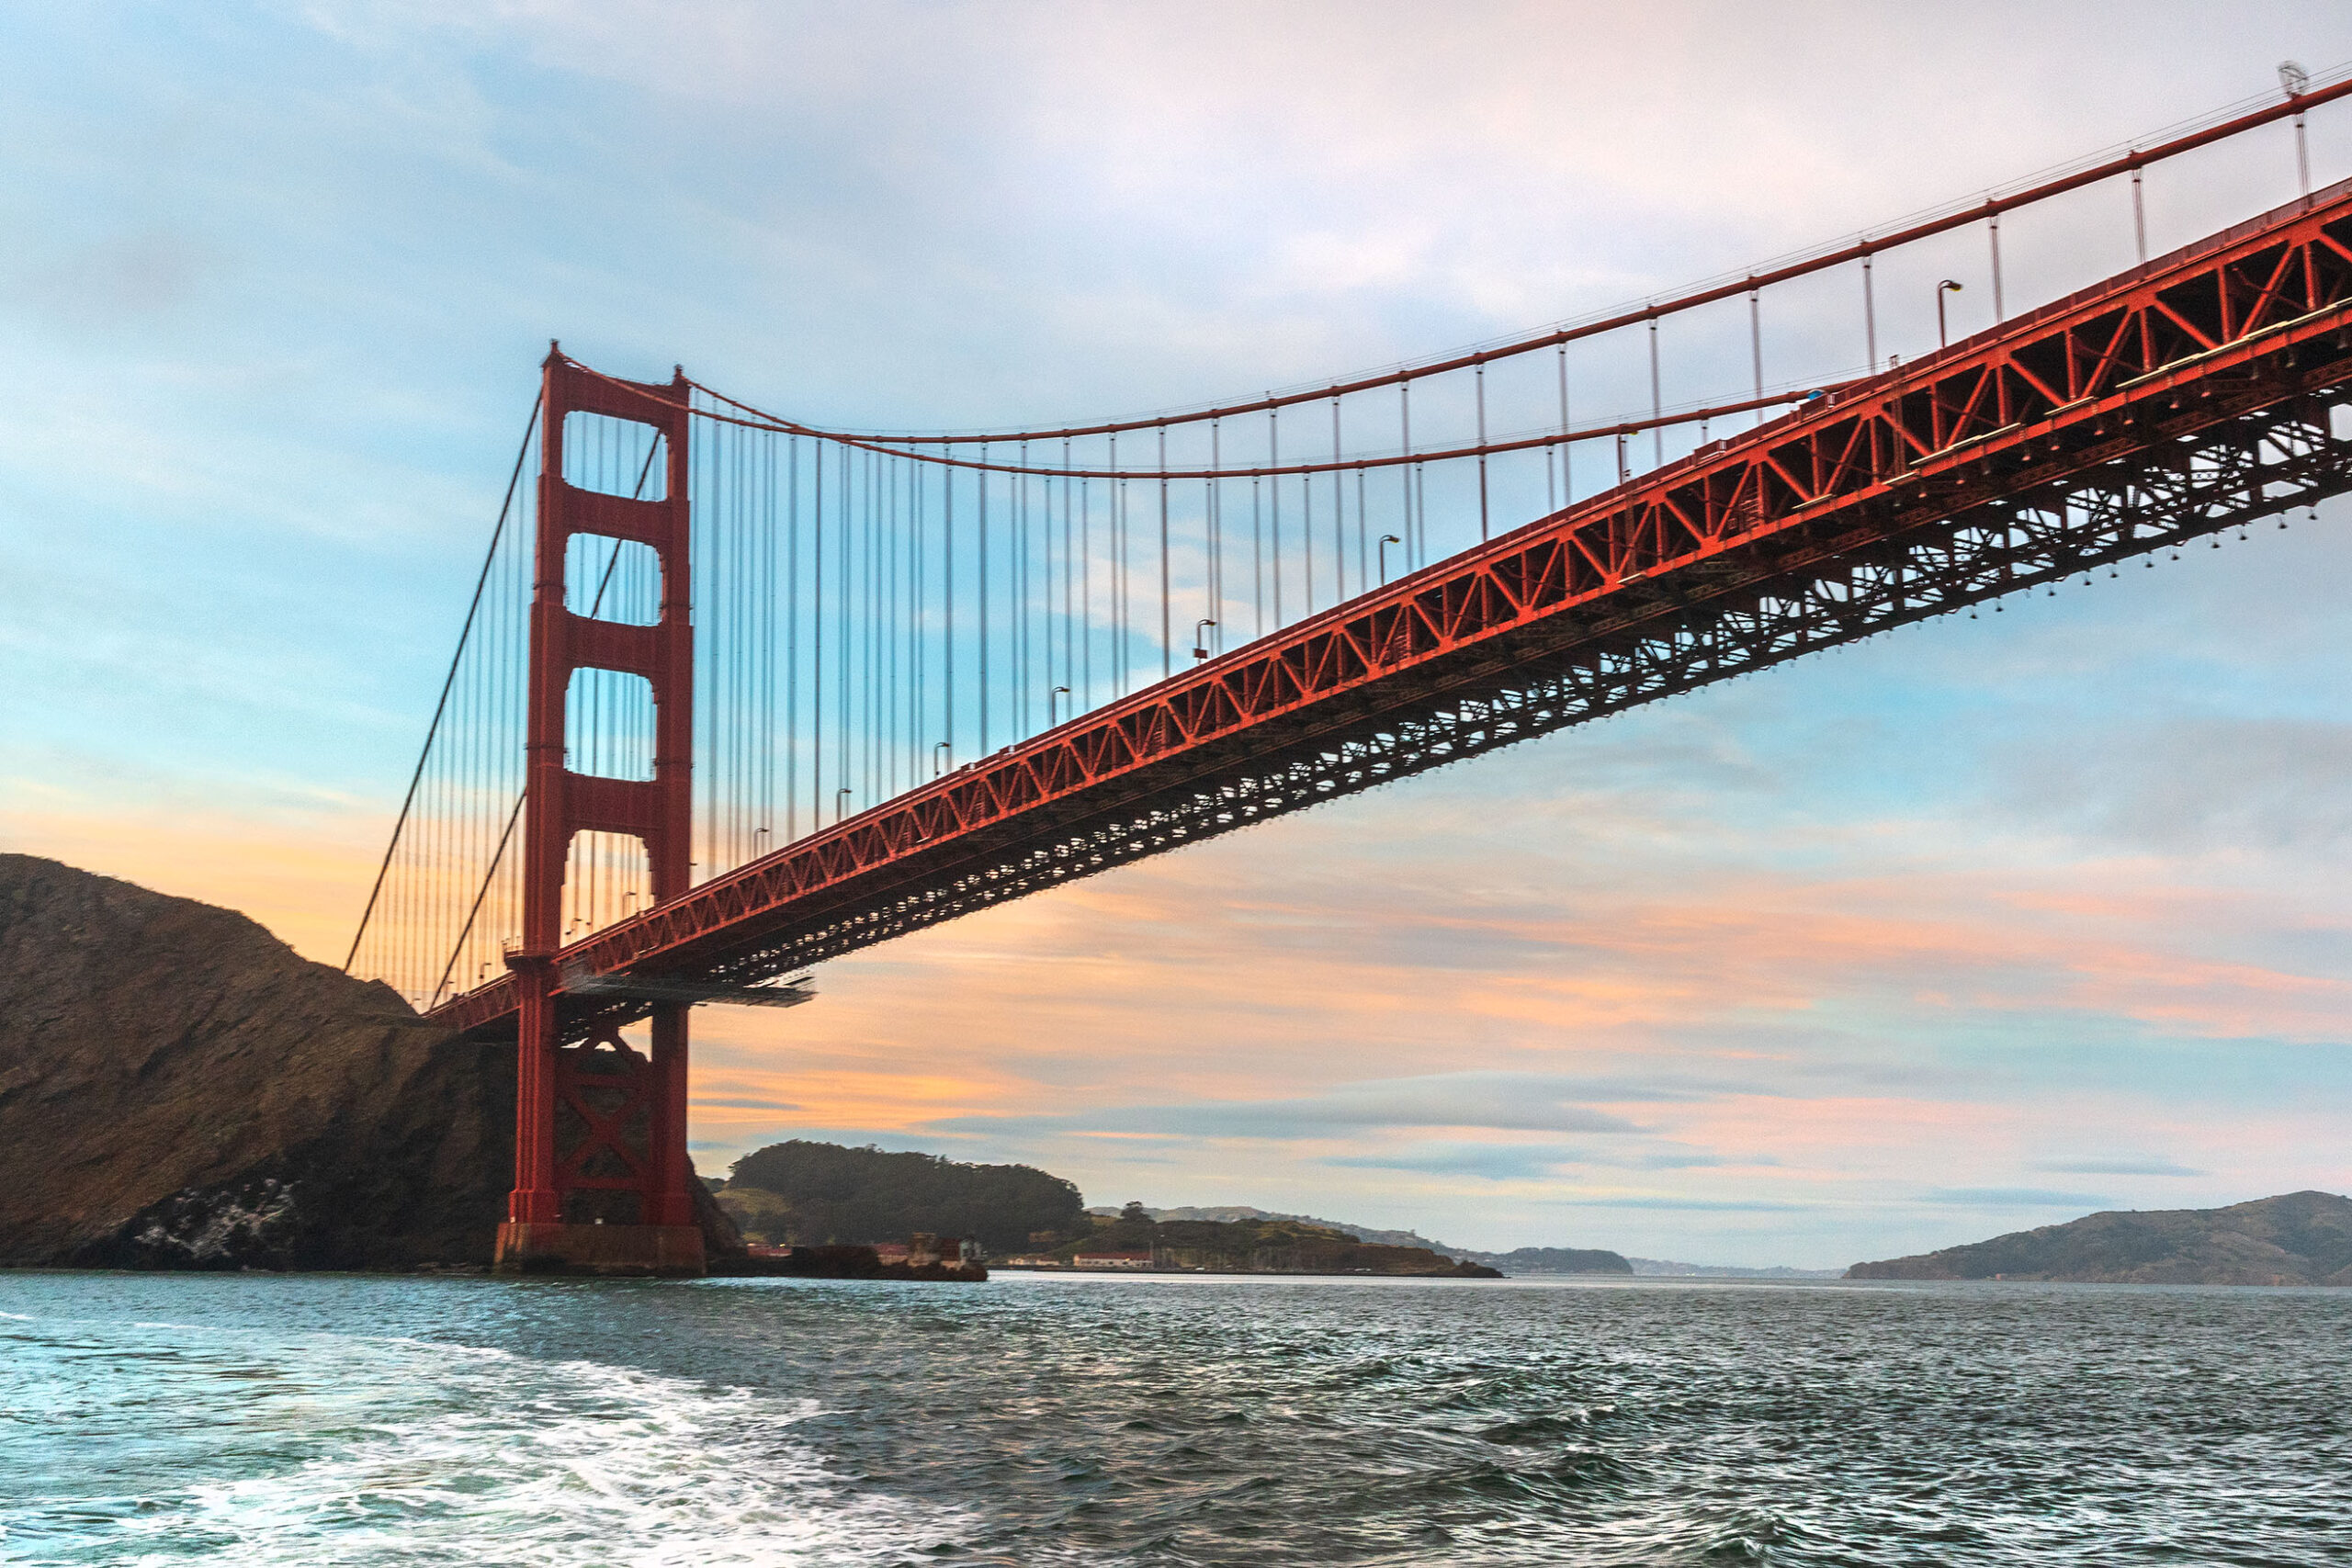
In the example below, the same photo was shot in both RAW and JPEG. After making the same changes while editing, it is clear the immense difference between a RAW file compared to JPEG. The areas of light (overexposed) of the sky on the horizon are not recovered in the JPEG (they remain white), while in the RAW the details of the scene become visible again. The RAW file also has many more details and shades of color. Just look at the main facade of the lighthouse.
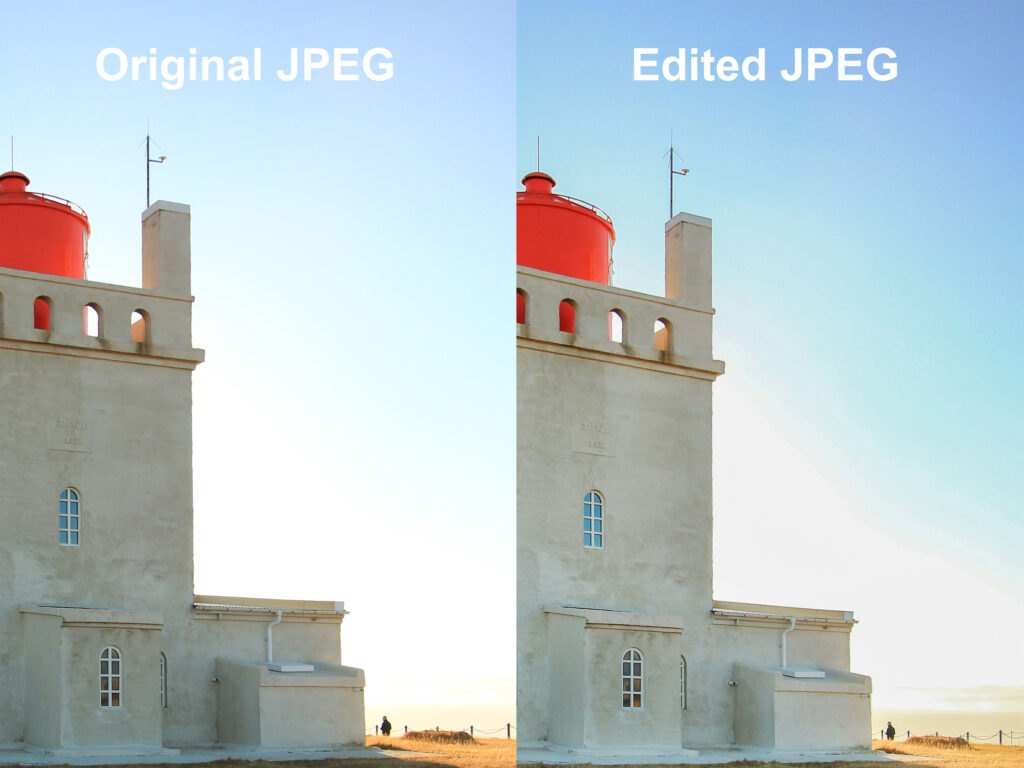
Below, a detail of the area of the sky damaged during the editing of the JPEG photo. Unlike RAW, post-production in JPEG has worsened the quality of the original JPEG file, altering the colors of the sky, which no longer has uniform shades, but bands of different tones with sharp divisions.
4. Usability
JPEG files are more convenient to use.
This is because not all photo viewing programs allow you to open RAW files. To view them, it will therefore be necessary to download specific software or convert them to JPEG. Furthermore, it may happen that we see RAW files in many different extensions, such as .CR2, .RW2, .NEF, .ARW, .SR2, .ORF, .PEF, .RAF, depending on the brand of camera used, which are not universally recognized as JPEG instead.
Furthermore, being much heavier, RAW files can slow down applications, unless the computer has good performances.
Given that usually these files are then sent, shared, uploaded to social networks or websites, most people who work with RAW files, once the editing is finished, save them in more manageable formats, such as the JPEG.
Once these points have been clarified, let’s now see some technical and practical aspects that will help us in passing from one file to another.
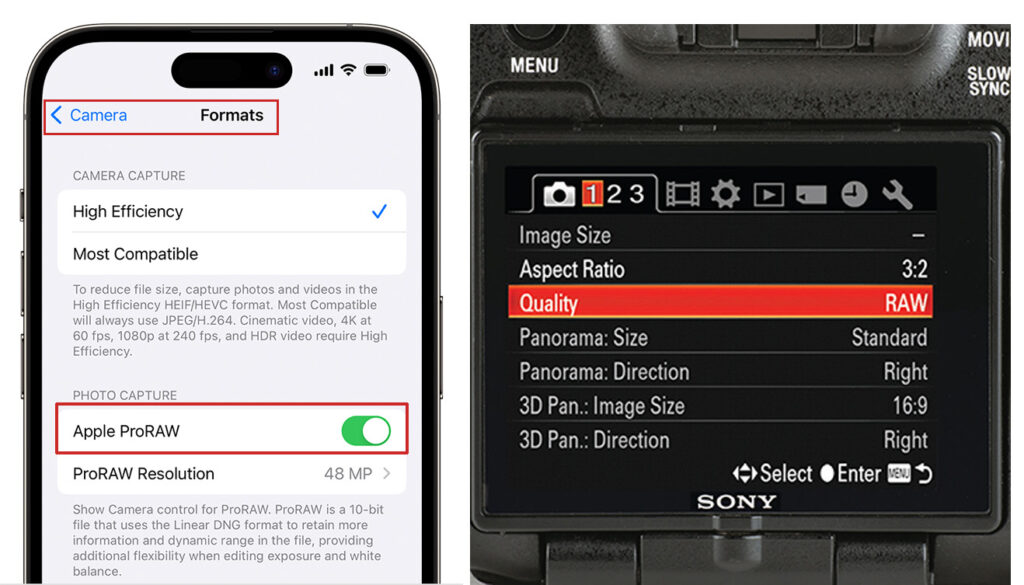
5. RAW or JPEG: how to set our devices
The format in which you want to shoot can be selected in all cameras and in the most recent smartphones, by accessing the settings menu. Naturally, since RAW files are much heavier, the maximum number of photos stored in the phone’s memory or in the camera’s SD card will drastically decrease. The choice will always depend on the use we want to make of them. In cameras, it is also possible to take a photo and save it in RAW+JPEG at the same time: in this way two files will be generated, a JPEG ready to use and a RAW to be worked on. Sometimes this choice can be very useful, but remember that in this way the memory space will run out even faster.
6. Converting a RAW file to JPEG
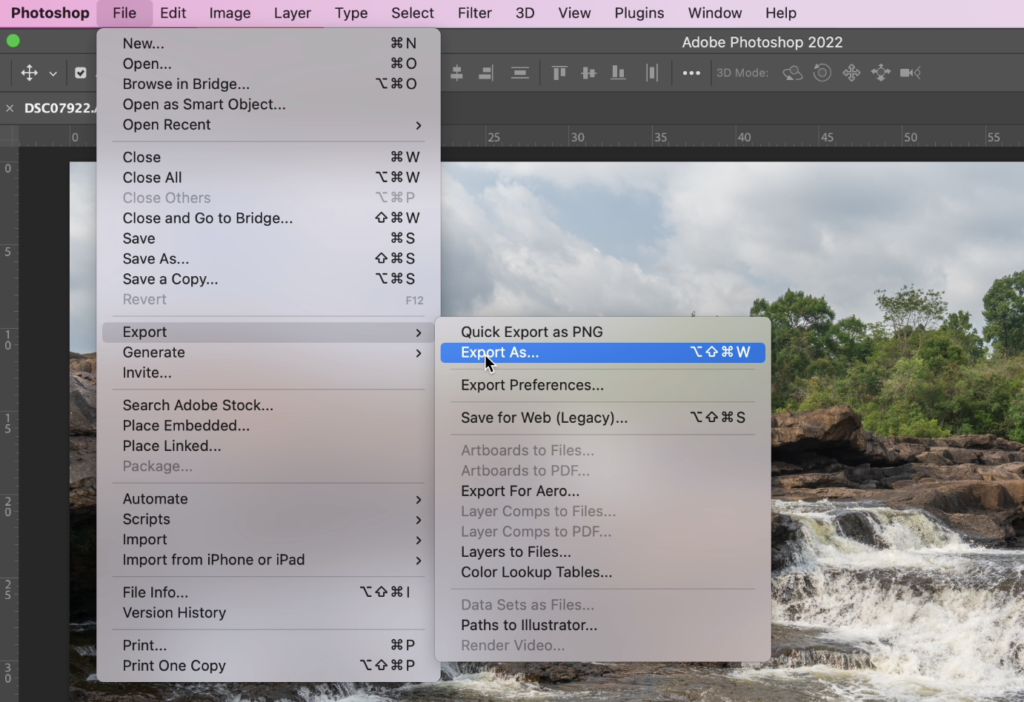
You can convert a RAW file to JPEG by opening it in an editing program and saving or exporting it in a different format from theFile window. In the images below, we see how to export a RAW file to JPEG with Photoshop. There are also some easy-to-use online apps where you can directly upload a RAW photo, by dragging it to the web screen, to convert it to JPEG or other formats.
If we need a higher quality than JPEG, especially in occasions such as large prints or fine art prints, or if we have to archive many files before editing, but we want to preserve their quality, we can choose to export the file in PNG or TIFF, which are subject to compression but lossless.
So again, the conversion depends on the use of the file.
After clicking Export As…, you’ll find a screen where you can choose whether to export to JPEG or other formats, a preview on the left of the file size, and further settings on the right to change the weight and quality of your file.
7.JPEG or RAW? Some practical examples
Let’s see, therefore, some examples to choose when to shoot in JPEG or RAW.
If we’re taking photos that we’re not going to edit with post-production and we’ll have to use for social pages or online sharing, it’s perfectly fine to shoot in JPEG: so we’ll have files that are light and fast enough to view, share, download, upload online.
If, on the other hand, we intend to modify the file in post-production, also to use it on the web, or we want to print our photos, perhaps in fine art or simply in a format larger than the simple 10×15 or 12×18, such as posters, then we should opt for the RAW format.
Naturally, for all professional work, such as photos taken for events, exhibitions, graphic work or for any client, a minimum of post-production is practically a must, so the RAW format must be chosen.
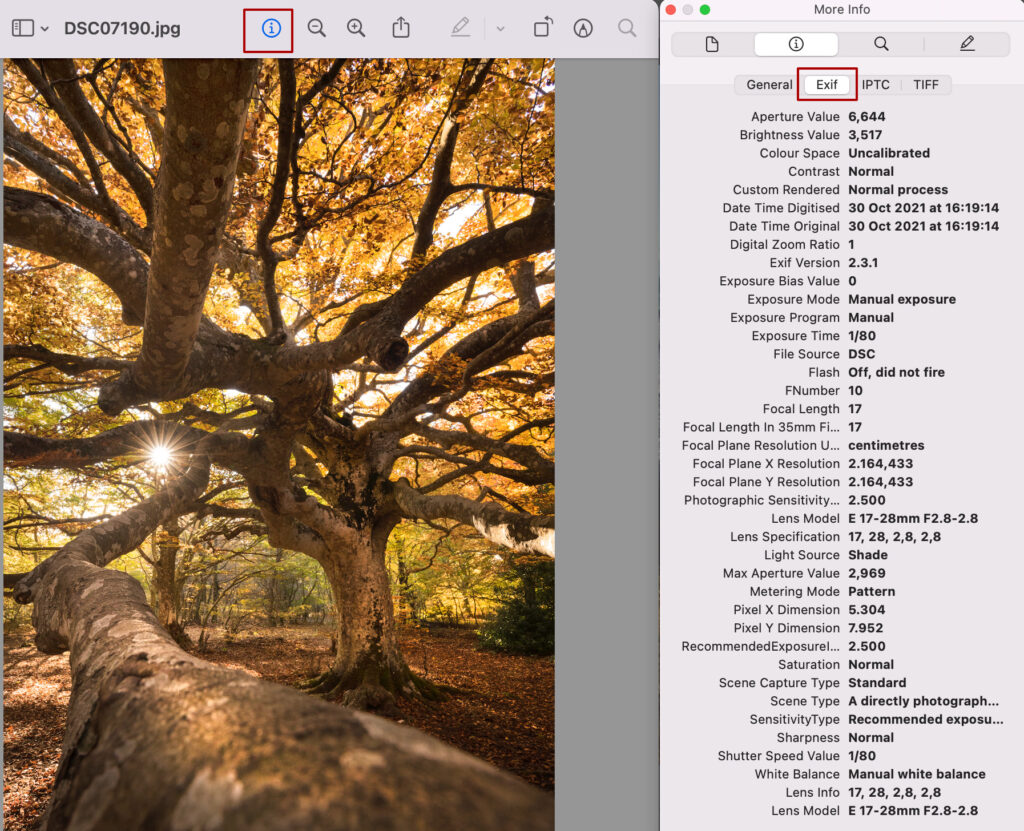
8. One last tip: the EXIF files
Every time we take a photo, the EXIF (Exchangeable Image File Format) data is associated with it, which provides informationconcerning the time and date of shooting, the make and model of the camera, the settings about the aperture, the shutter speed, the ISO, and even the geographic coordinates of the shooting location (where active or if can be activated) and copyright information (where entered).
These data, less detailed than digital cameras, are also present in photos taken with smartphones.
To view them, just access the properties of the photo taken, both from a smartphone and a camera. The EXIF data remains attached to the file even after exporting and editing, compressing and sending the files, unless you want to remove them on purpose with specific software.
These files are very useful for analyzing and verifying the images produced, for understanding the settings used in a photo that we like and for repeating them in similar lighting conditions. From EXIF files you can really learn a lot if you want to improve the technique, both by analyzing and comparing your own photos, taken with different settings, and by taking inspiration from the images of others, especially if you are approaching the manual settings for the first time.
What are you waiting for?
Follow our advice and tag us in your photos, we will publish them on our pages InstagramandFacebook.
If you liked our article, share it and let us know in the comments.
Come with us to discover the best places to photograph in San Francisco, follow our advice and take incredible photos!
San Francisco is an extraordinary city, which captures the heart of anyone who visits it. In addition to its beauty, its thousand landscapes and its thousand faces, it’s the beauty, the kindness and the hospitality of its population that give it a special atmosphere. San Francisco literally pulsates with life and transmits the character of its inhabitants, it’s cheerful, open, welcoming, varied, surprising, generous, chaotic and relaxing at the same time. San Francisco is not a city you see, it’s a city you live.
So how to enclose all this in your photos? Here is a list of spots not to be missed, together with our inevitable photo tips!
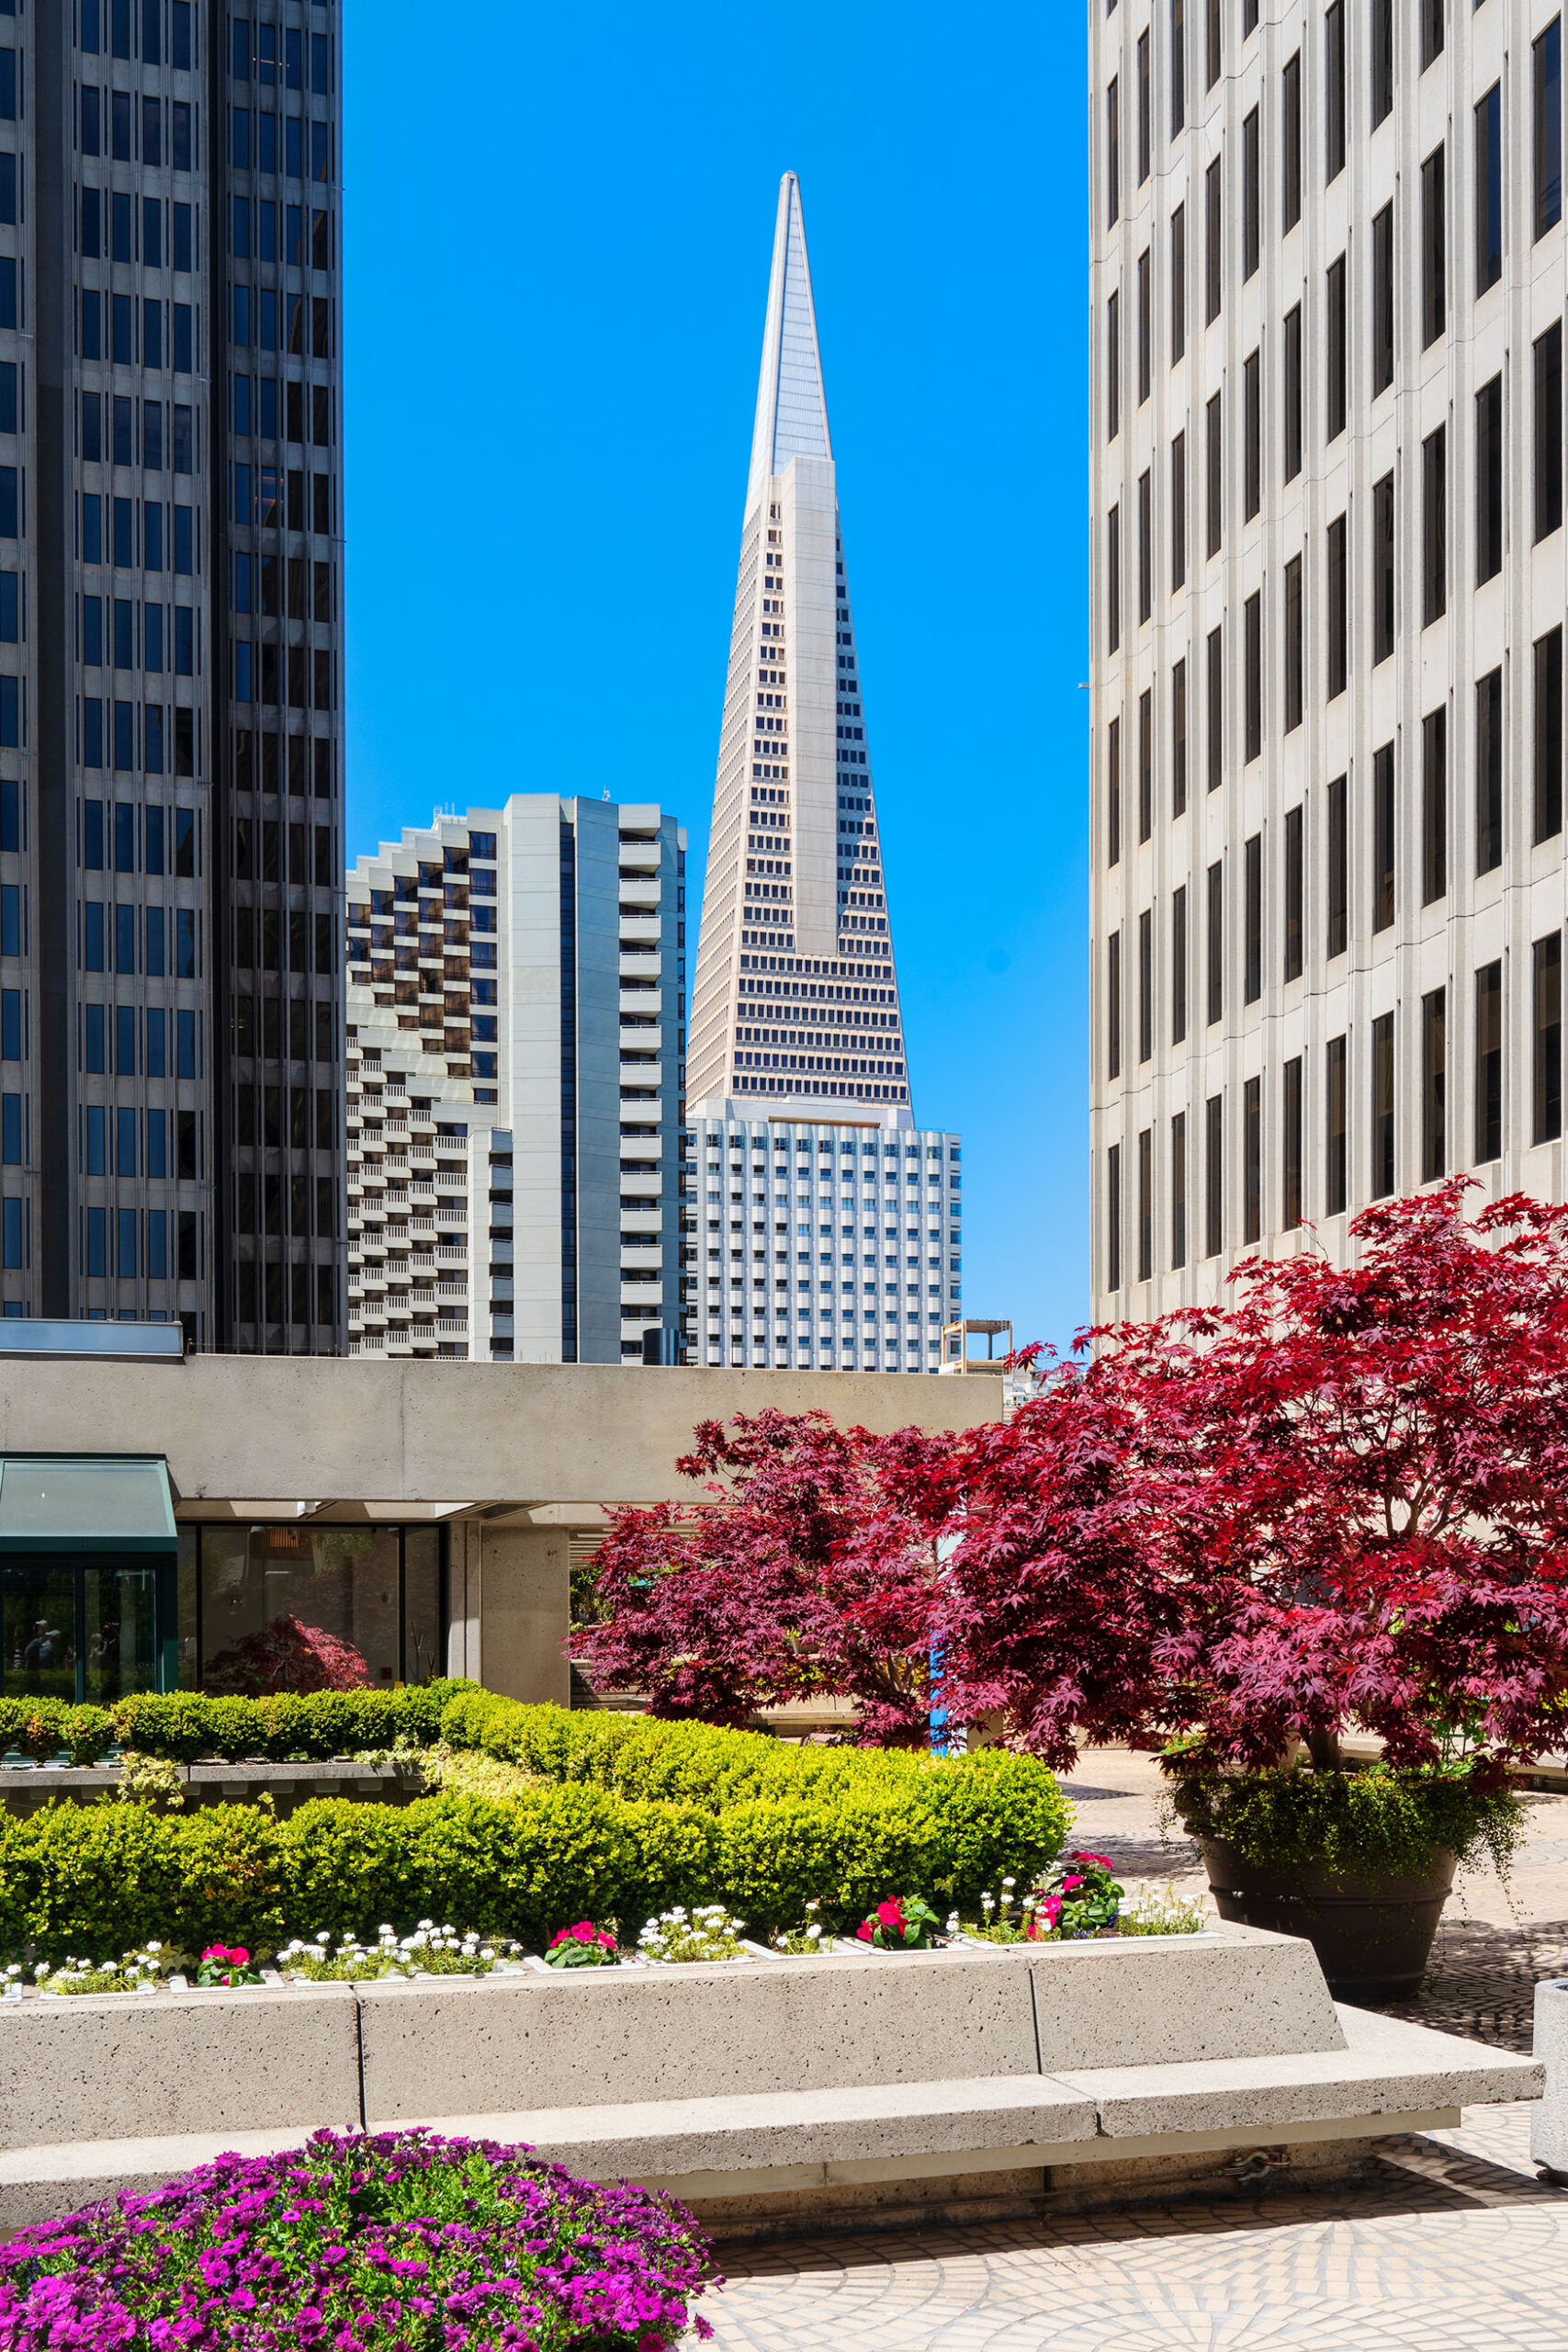
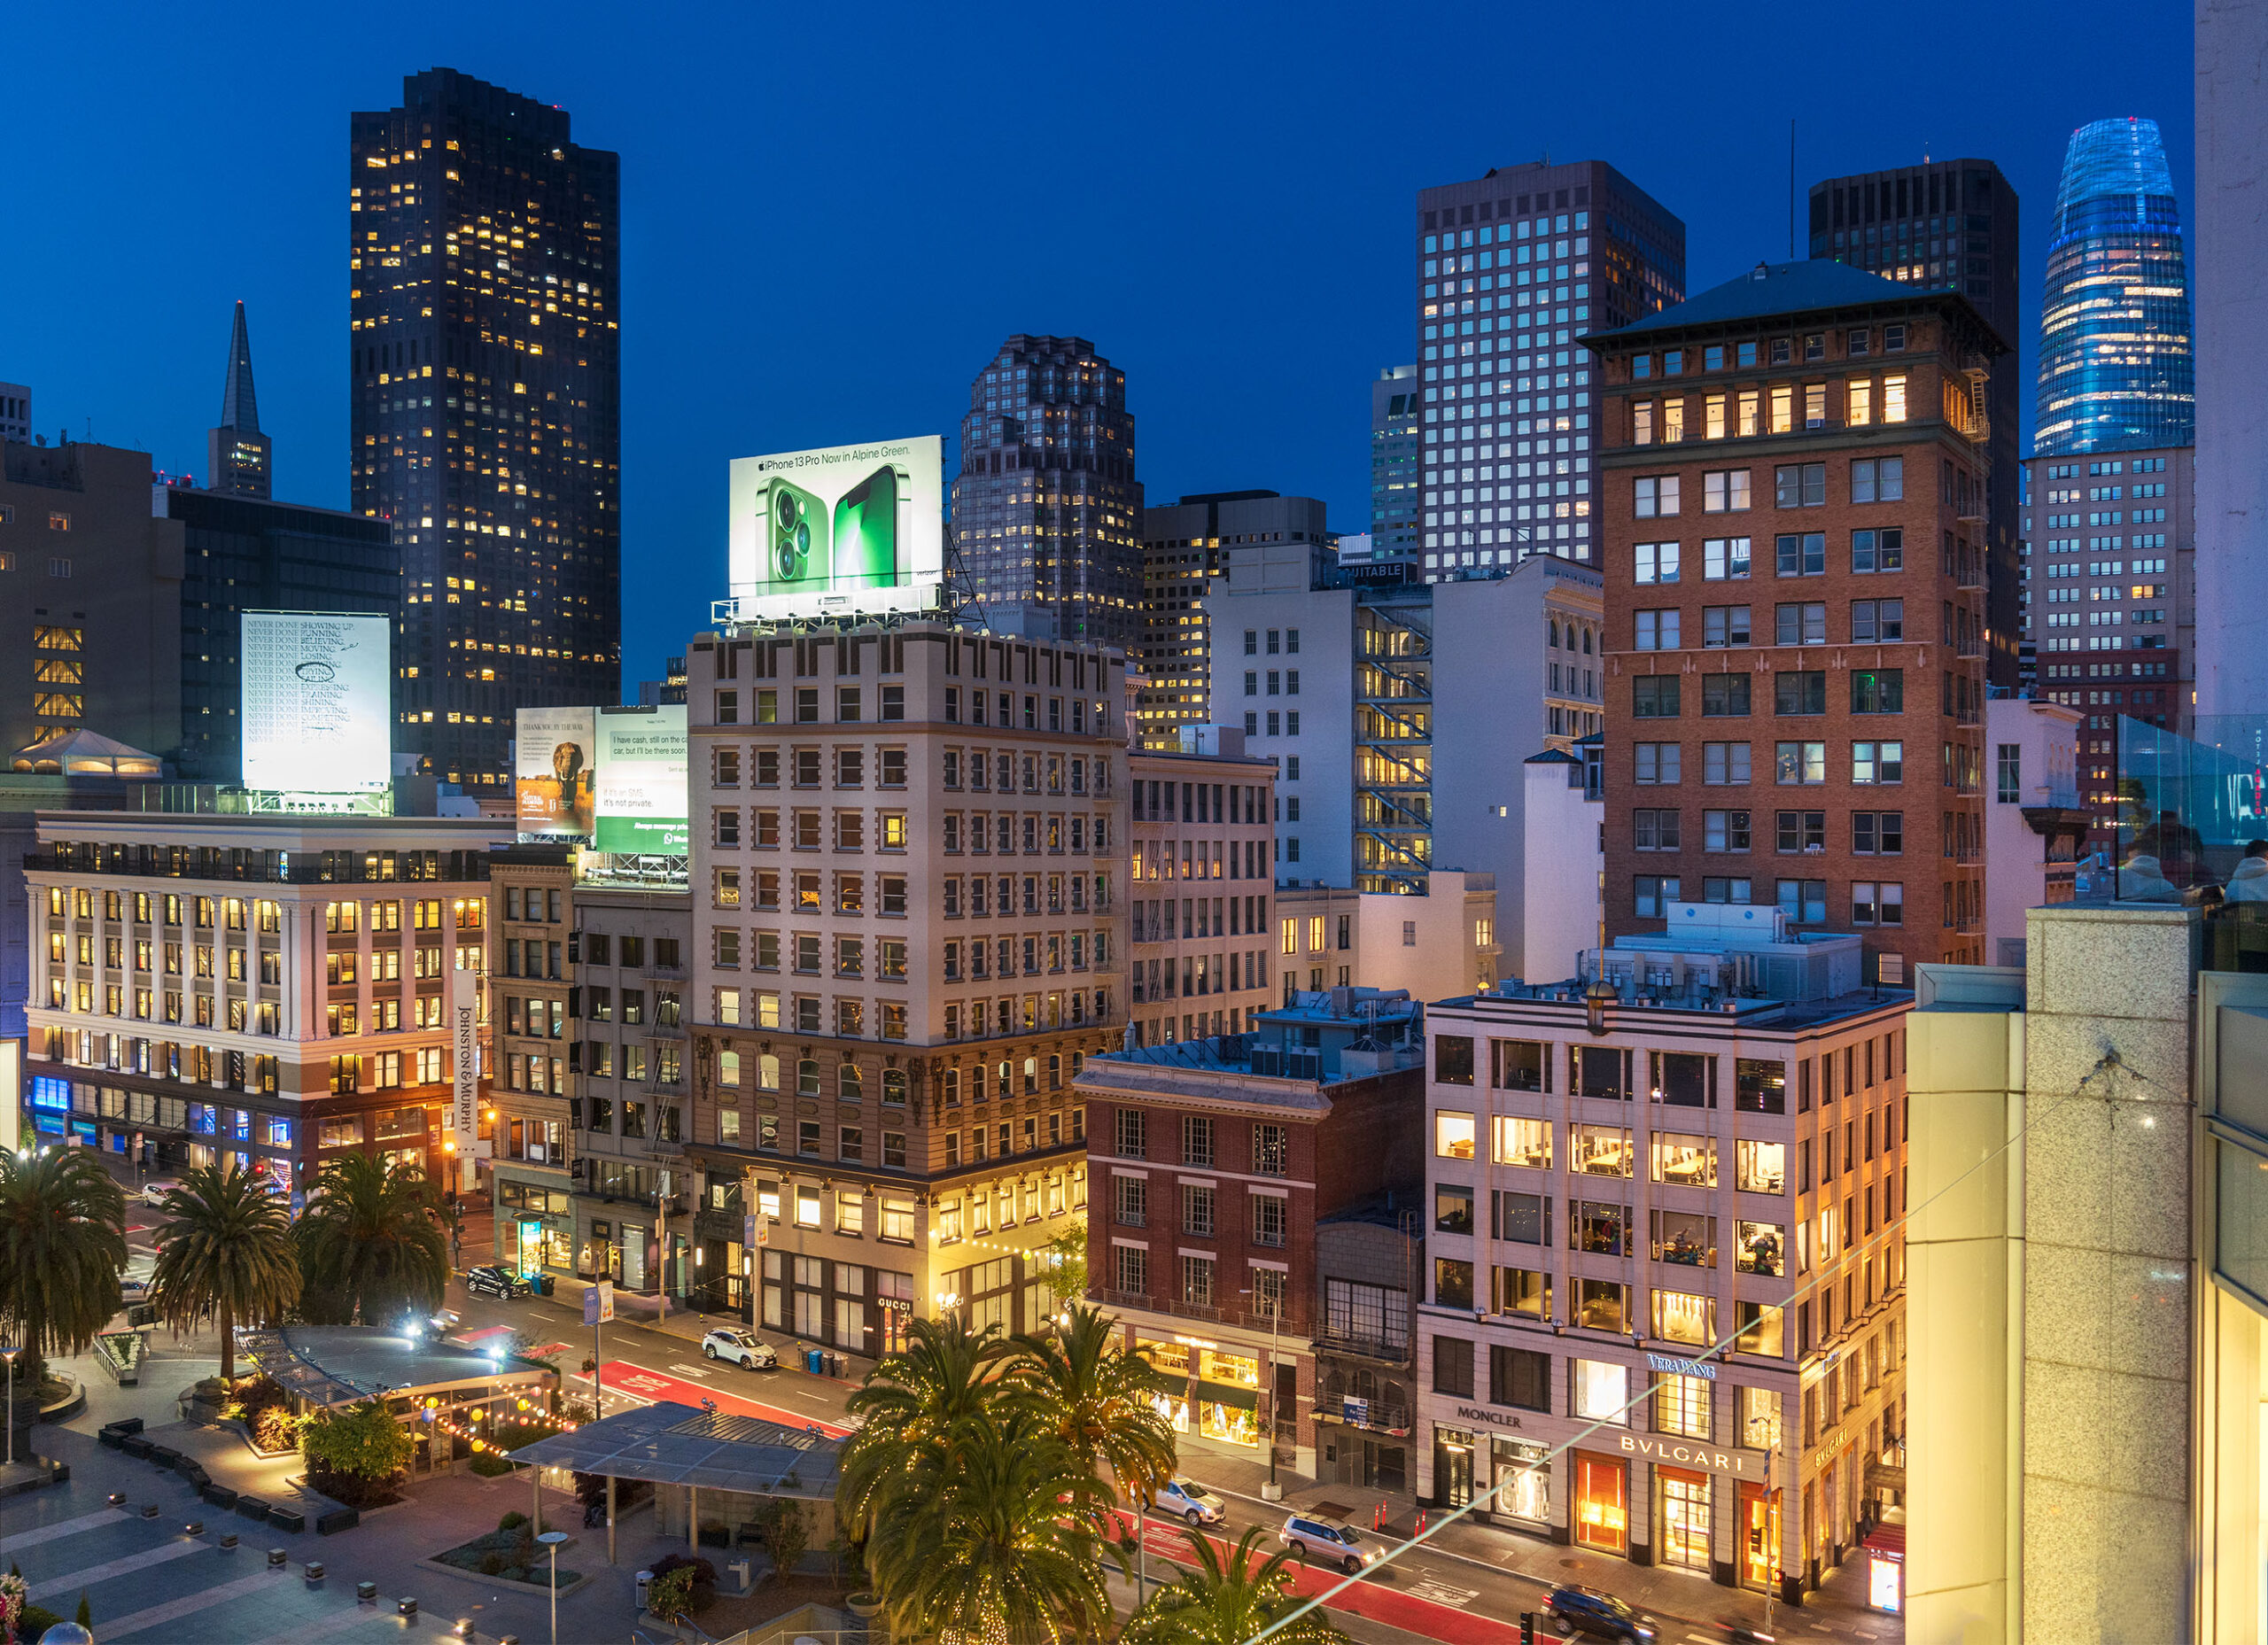
1. Chinatown and the Financial District
Starting from the central districts is the best way to dive into the heart of the city.
We have chosen to visit them with a free guided tour, which starts from Union Square, crosses Chinatown and the Financial District until you reach the Embarcadero on the bay.
The free walking tours can be found in many cities around the world, last about two hours, and thanks to the guidance of a passionate local, who will reveal anecdotes and curiosities to you, they offer a unique experience and are the best way to start discovering your new destination!
The San Francisco tour didn’t disappoint us, on the contrary it really thrilled us and left us with a great desire to discover even more about this fantastic city.
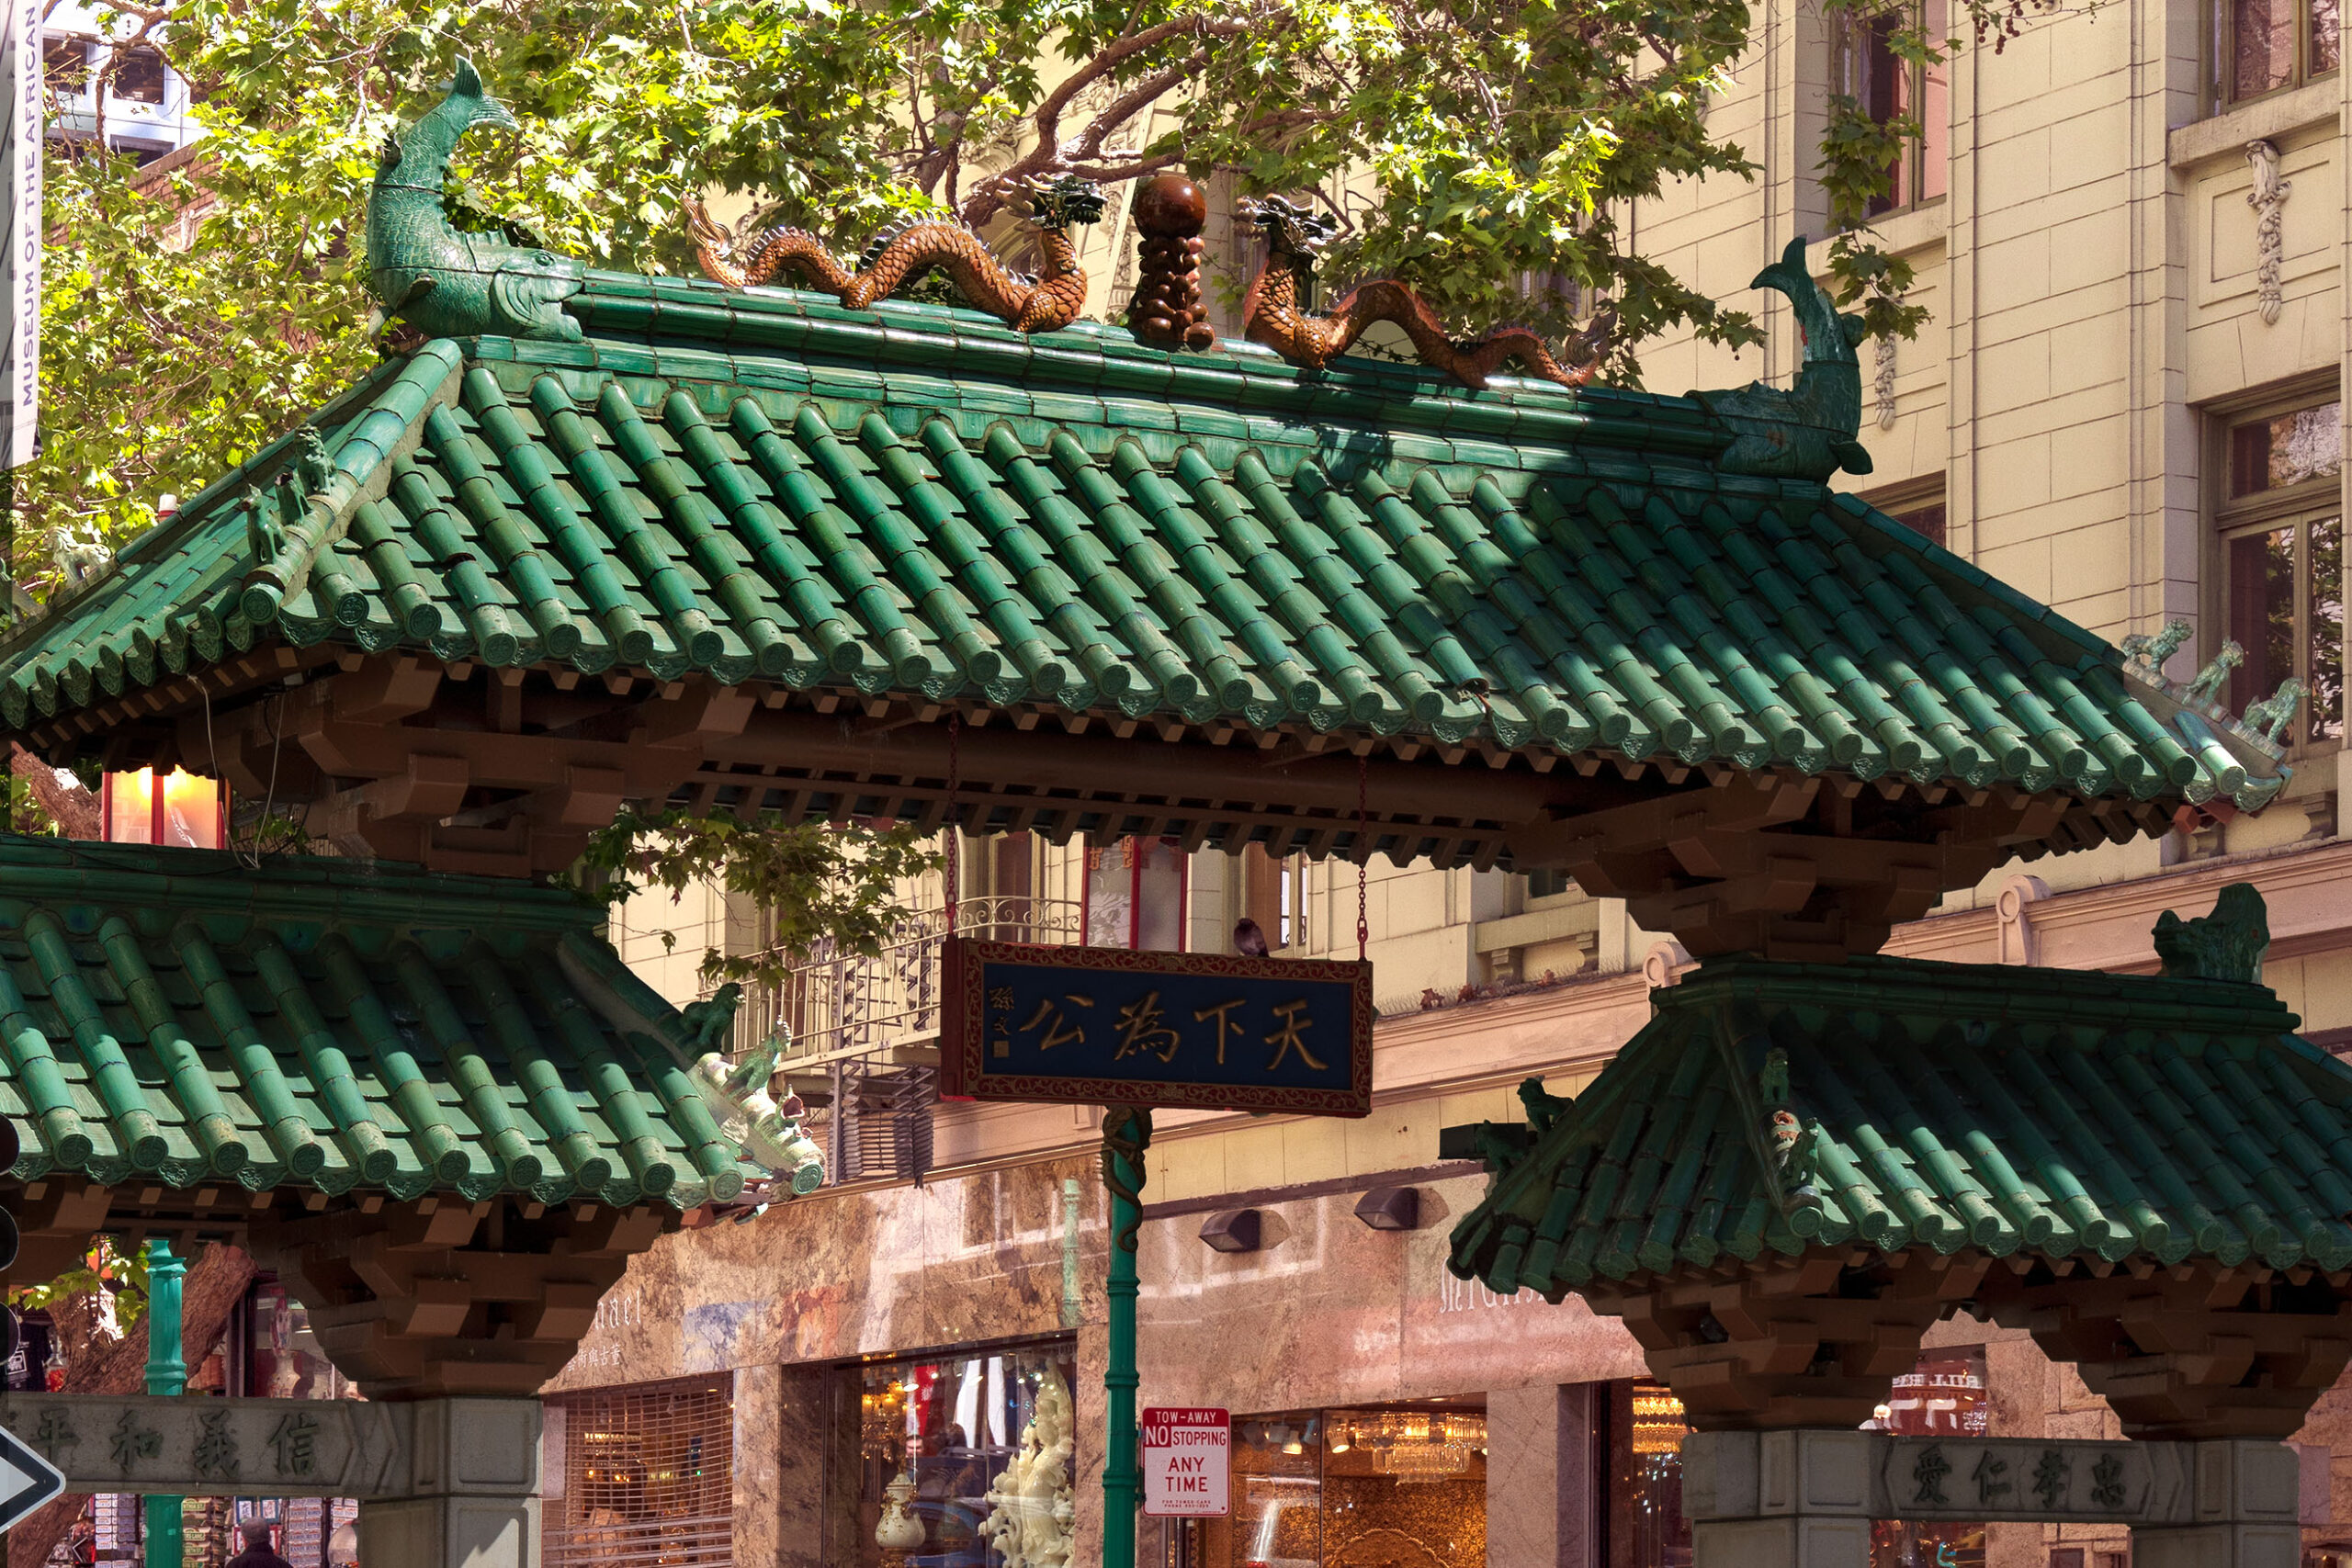
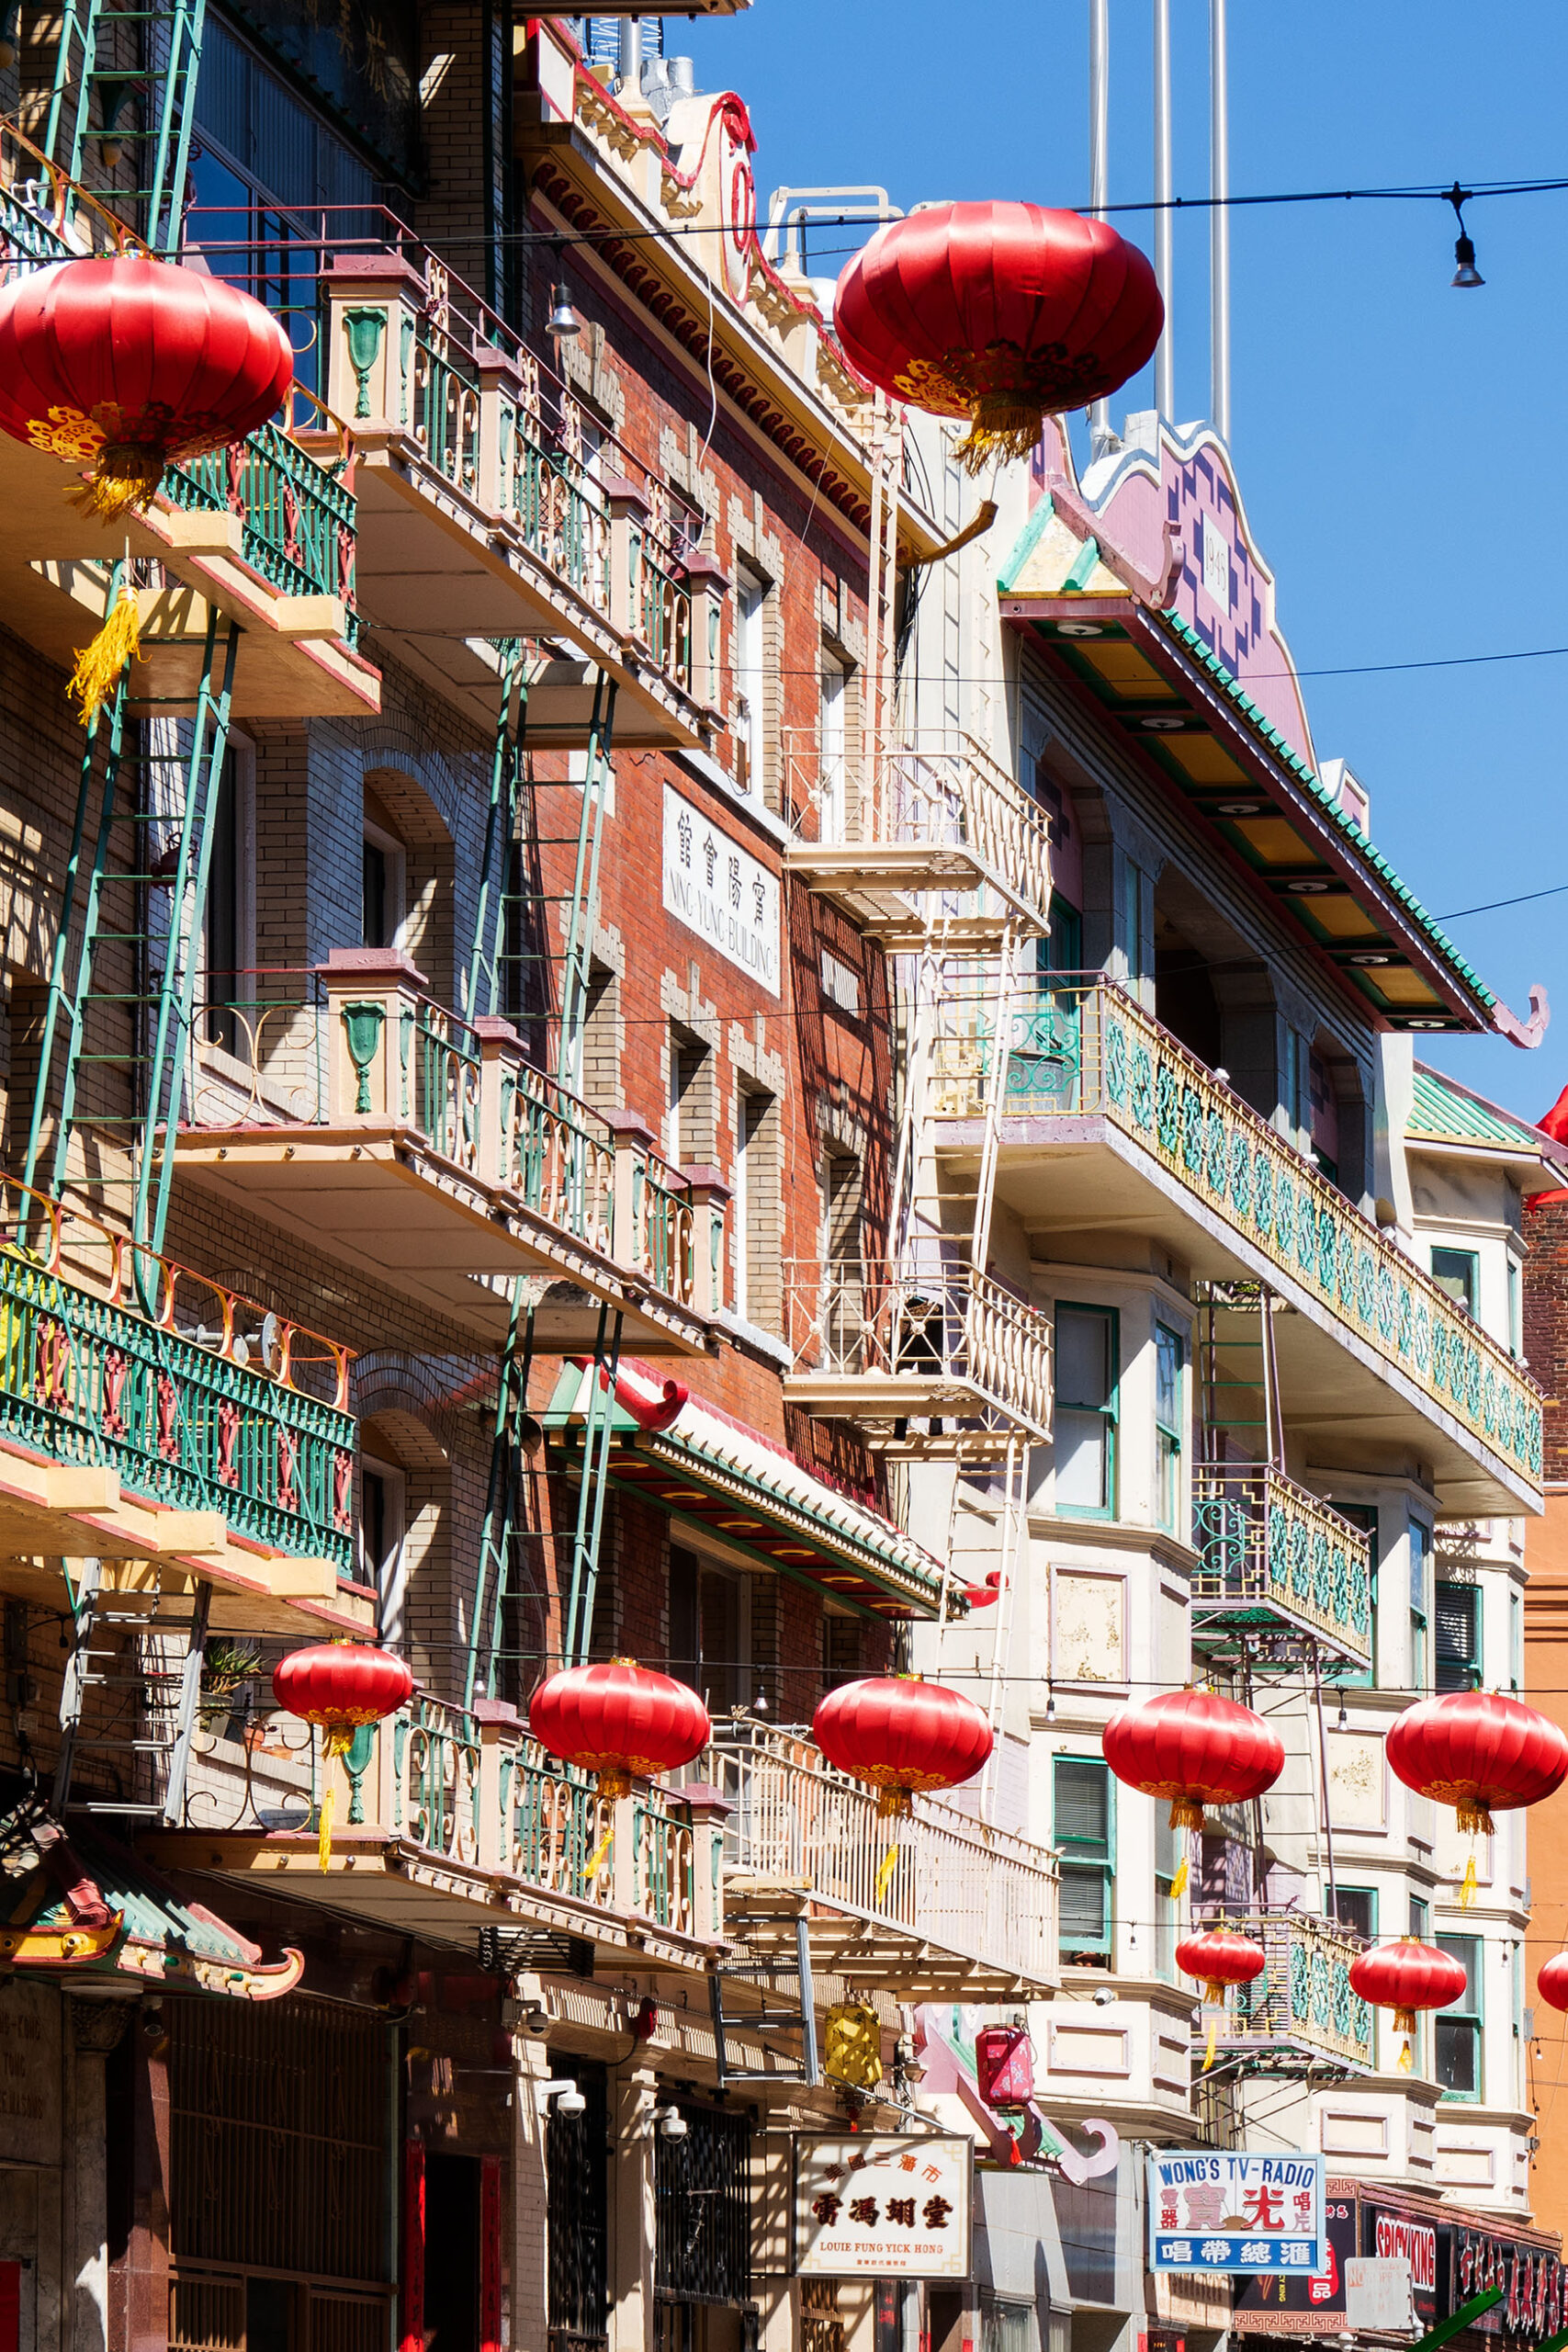
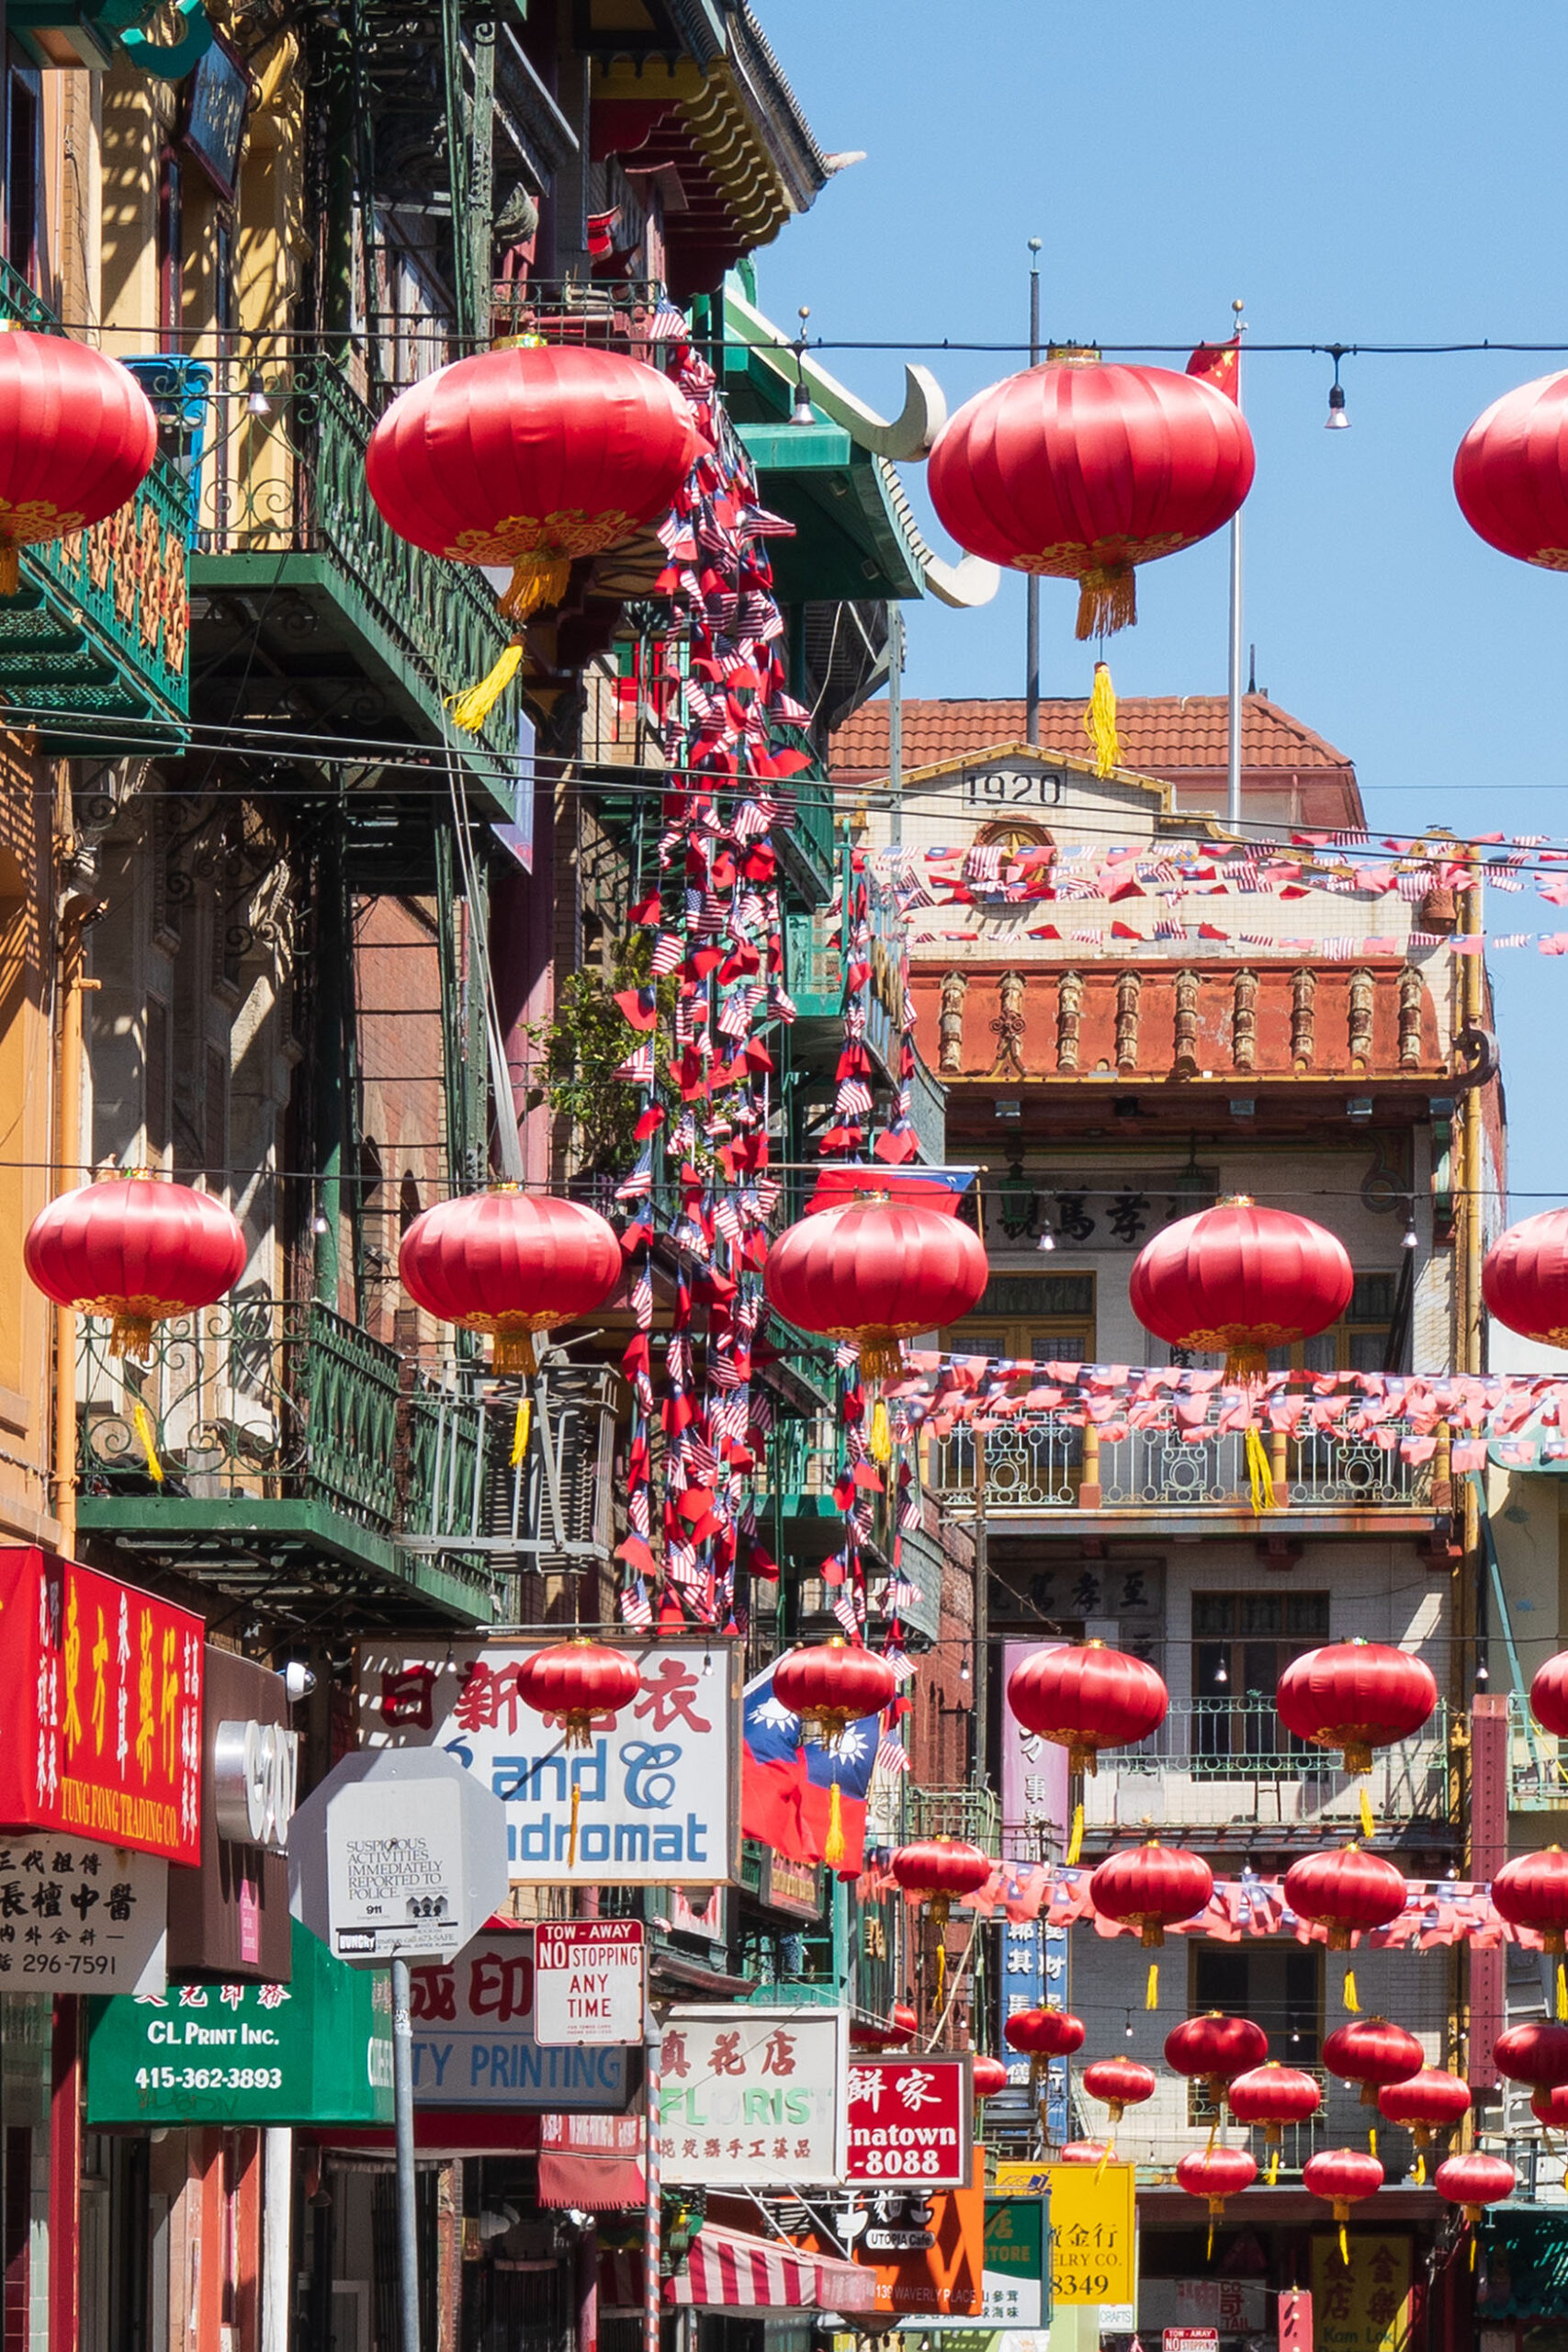
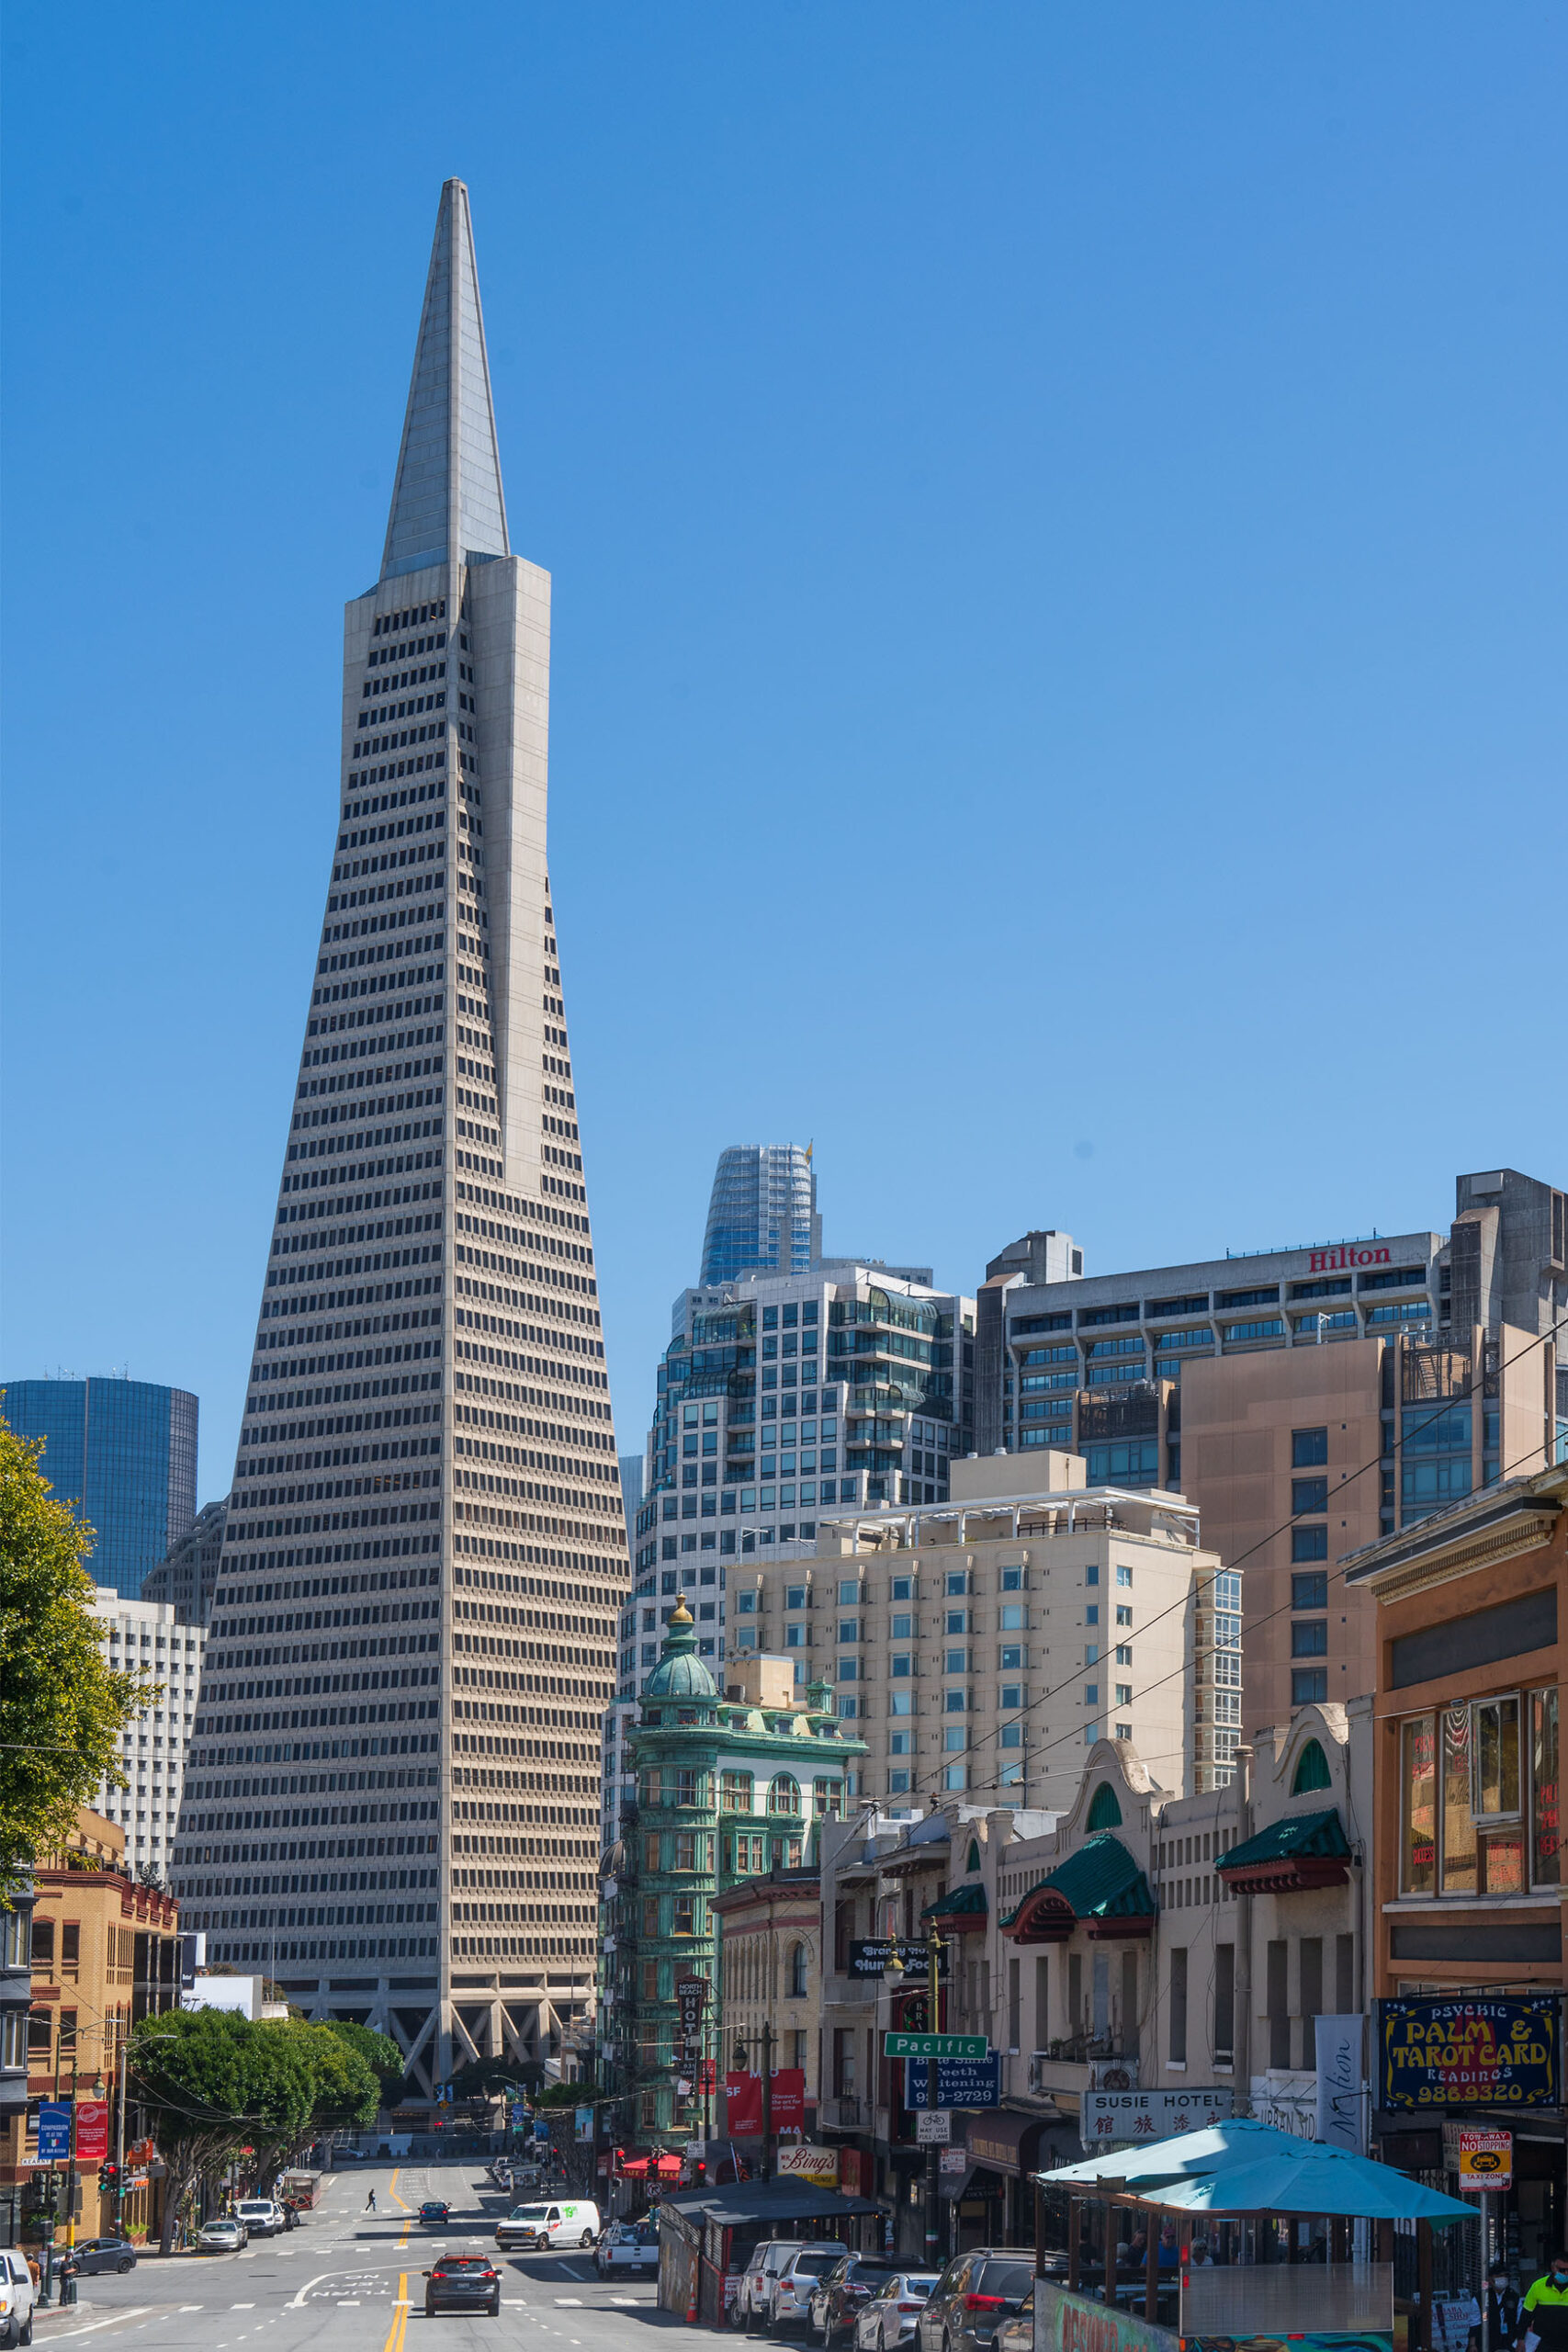
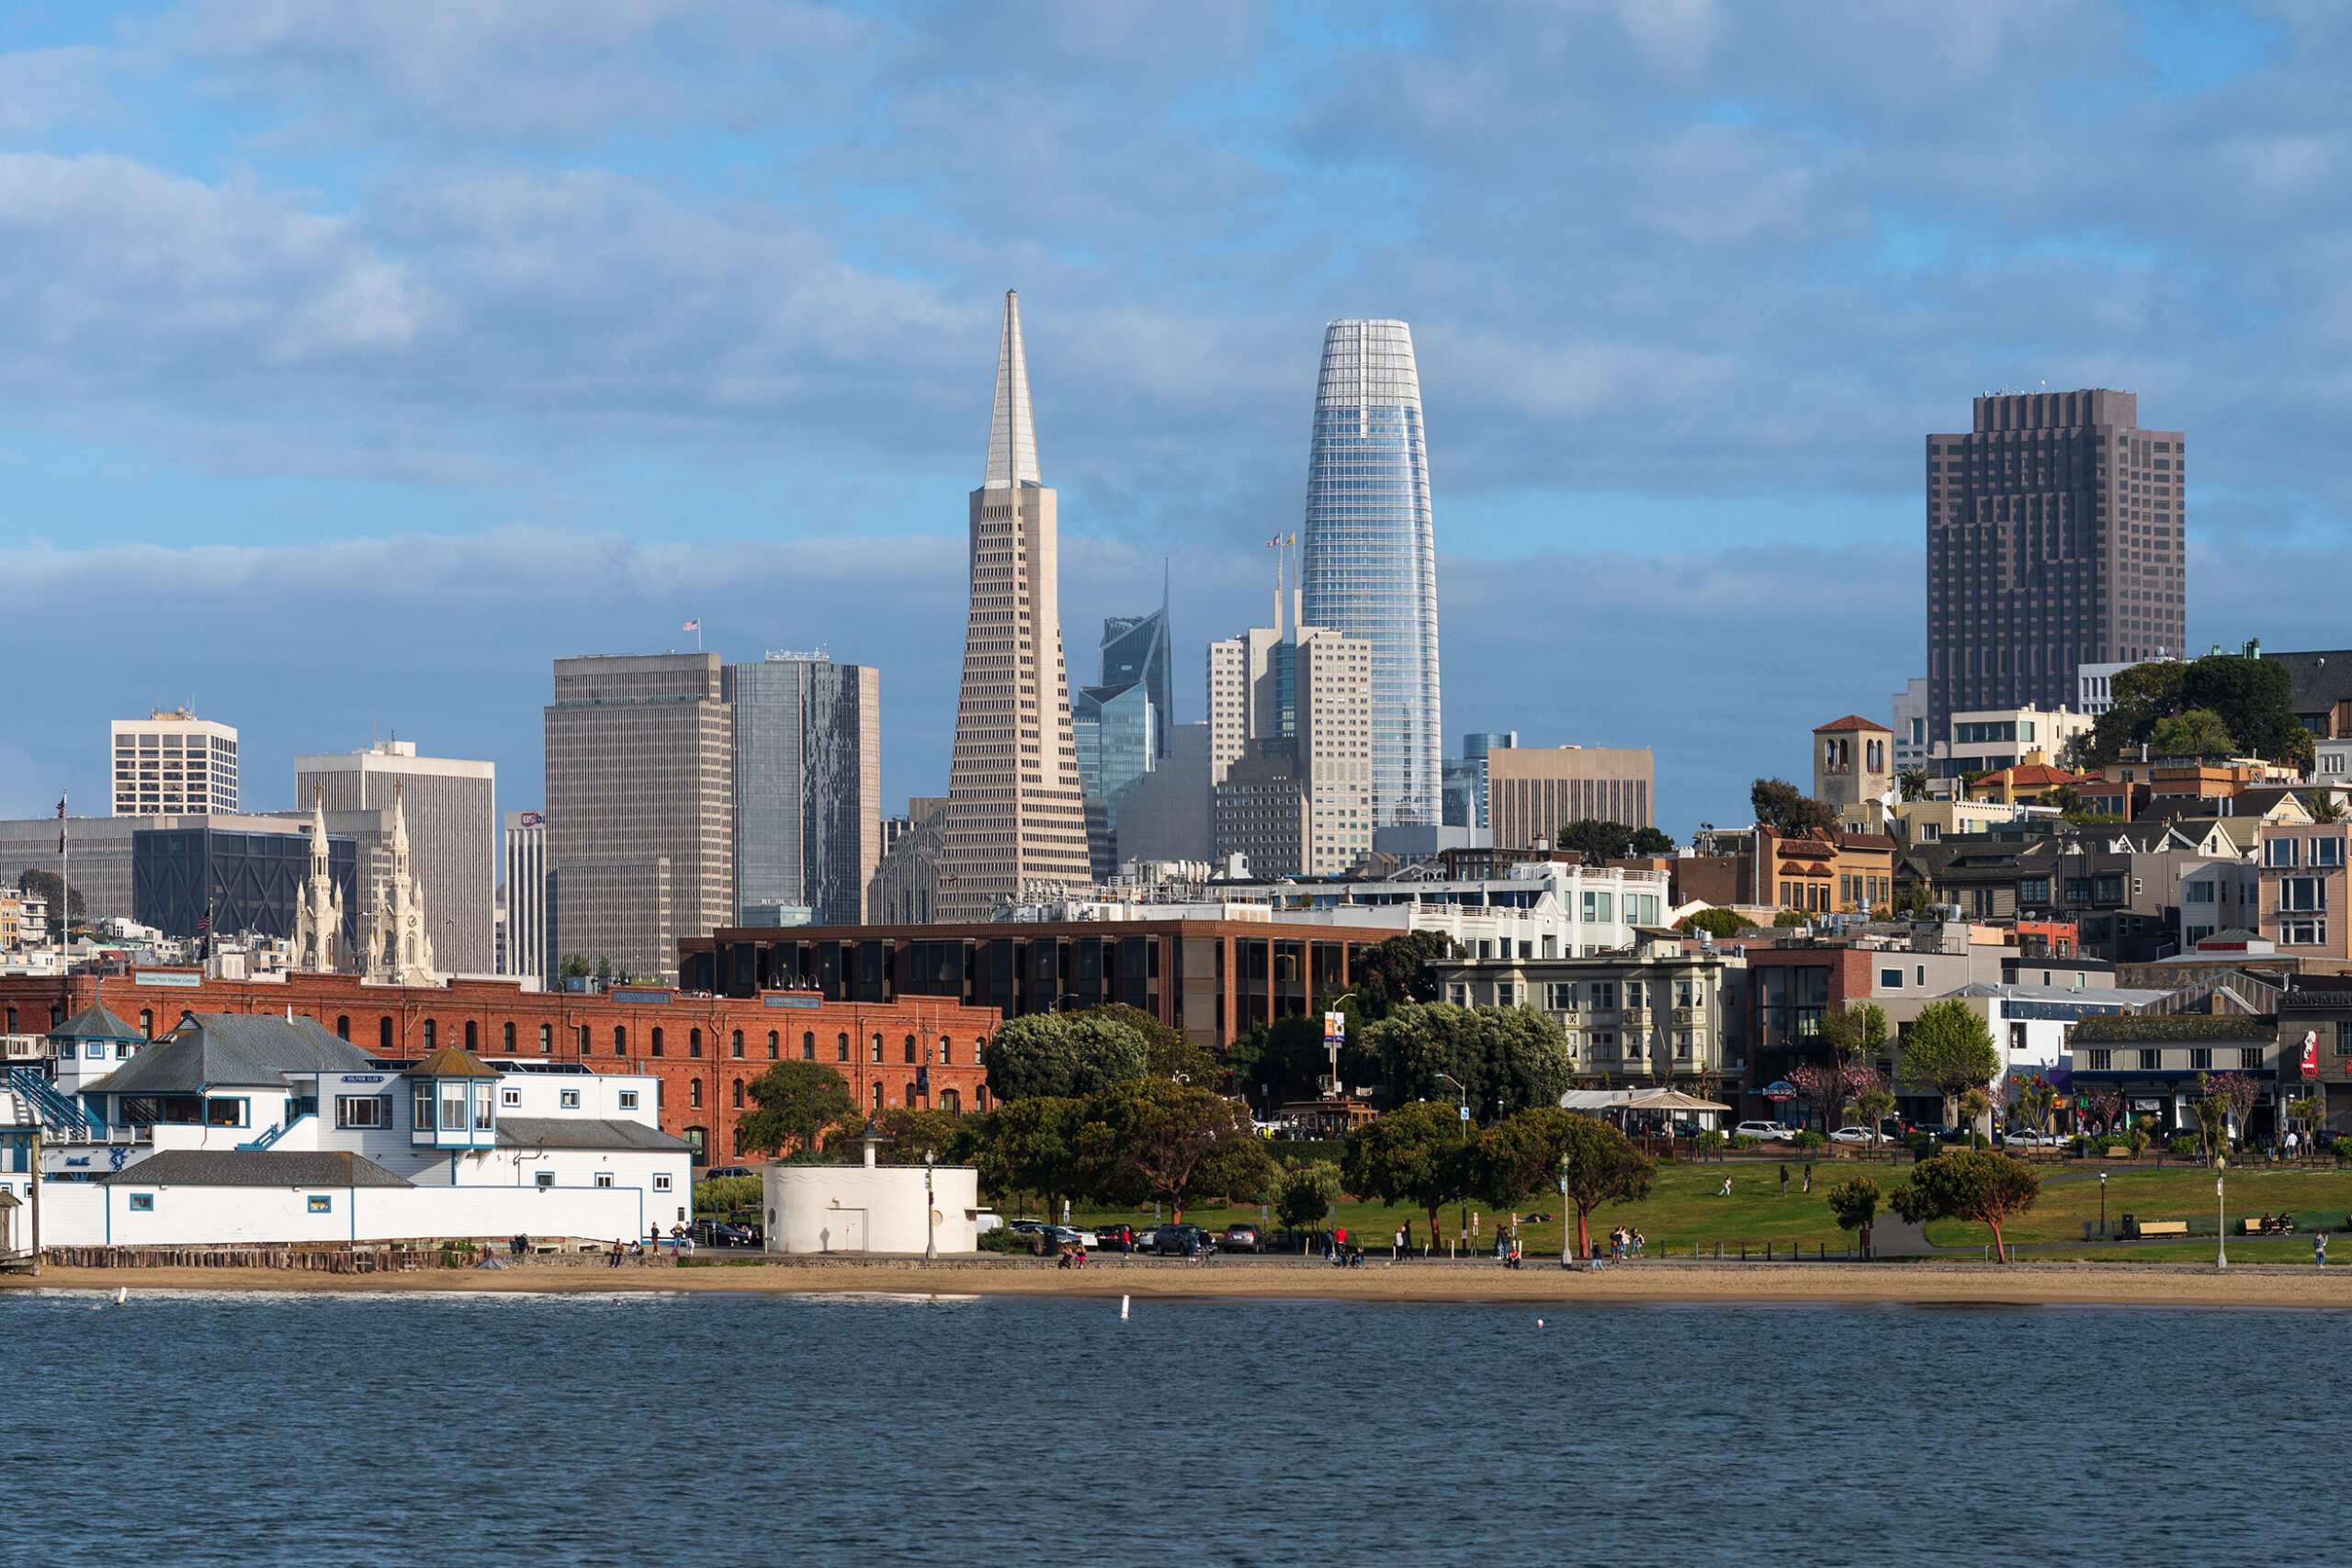
First stop, the streets of Chinatown, the largest Chinese community outside Asia and also the oldest in the United States, the one that has defined the style of Chinatowns, copied all over the world. A riot of colours, voices, shop signs and the characteristic fire escapes on the building facades. From here we move on to the Financial District, the neighborhood that represents the economic development of the city, with its emblematic Montgomery Street and the Transamerica Pyramid. This neighborhood was born out of the filling of a bay area, where commerce flourished. In fact, it’s said that, under the foundations of the skyscrapers, there are still the ancient boats on which the first fixed settlements were built! The buildings that can be admired now were almost all rebuilt after the strong earthquake of 1906, which destroyed a large part of the city.
Photo tips: focus on the main attractions, the facades full of signs and colors of Chinatown and the main buildings of the Financial District. Use the zoom to capture details, isolate and strengthen them. Look for a glimpse between the skyscrapers, or stay under them, well centered with respect to the facade, and raise the camera upwards, to emphasize the lines that soar towards the sky.
@giadaantonini_photography
@giadaantonini_photography
@giadaantonini_photography
@giadaantonini_photography
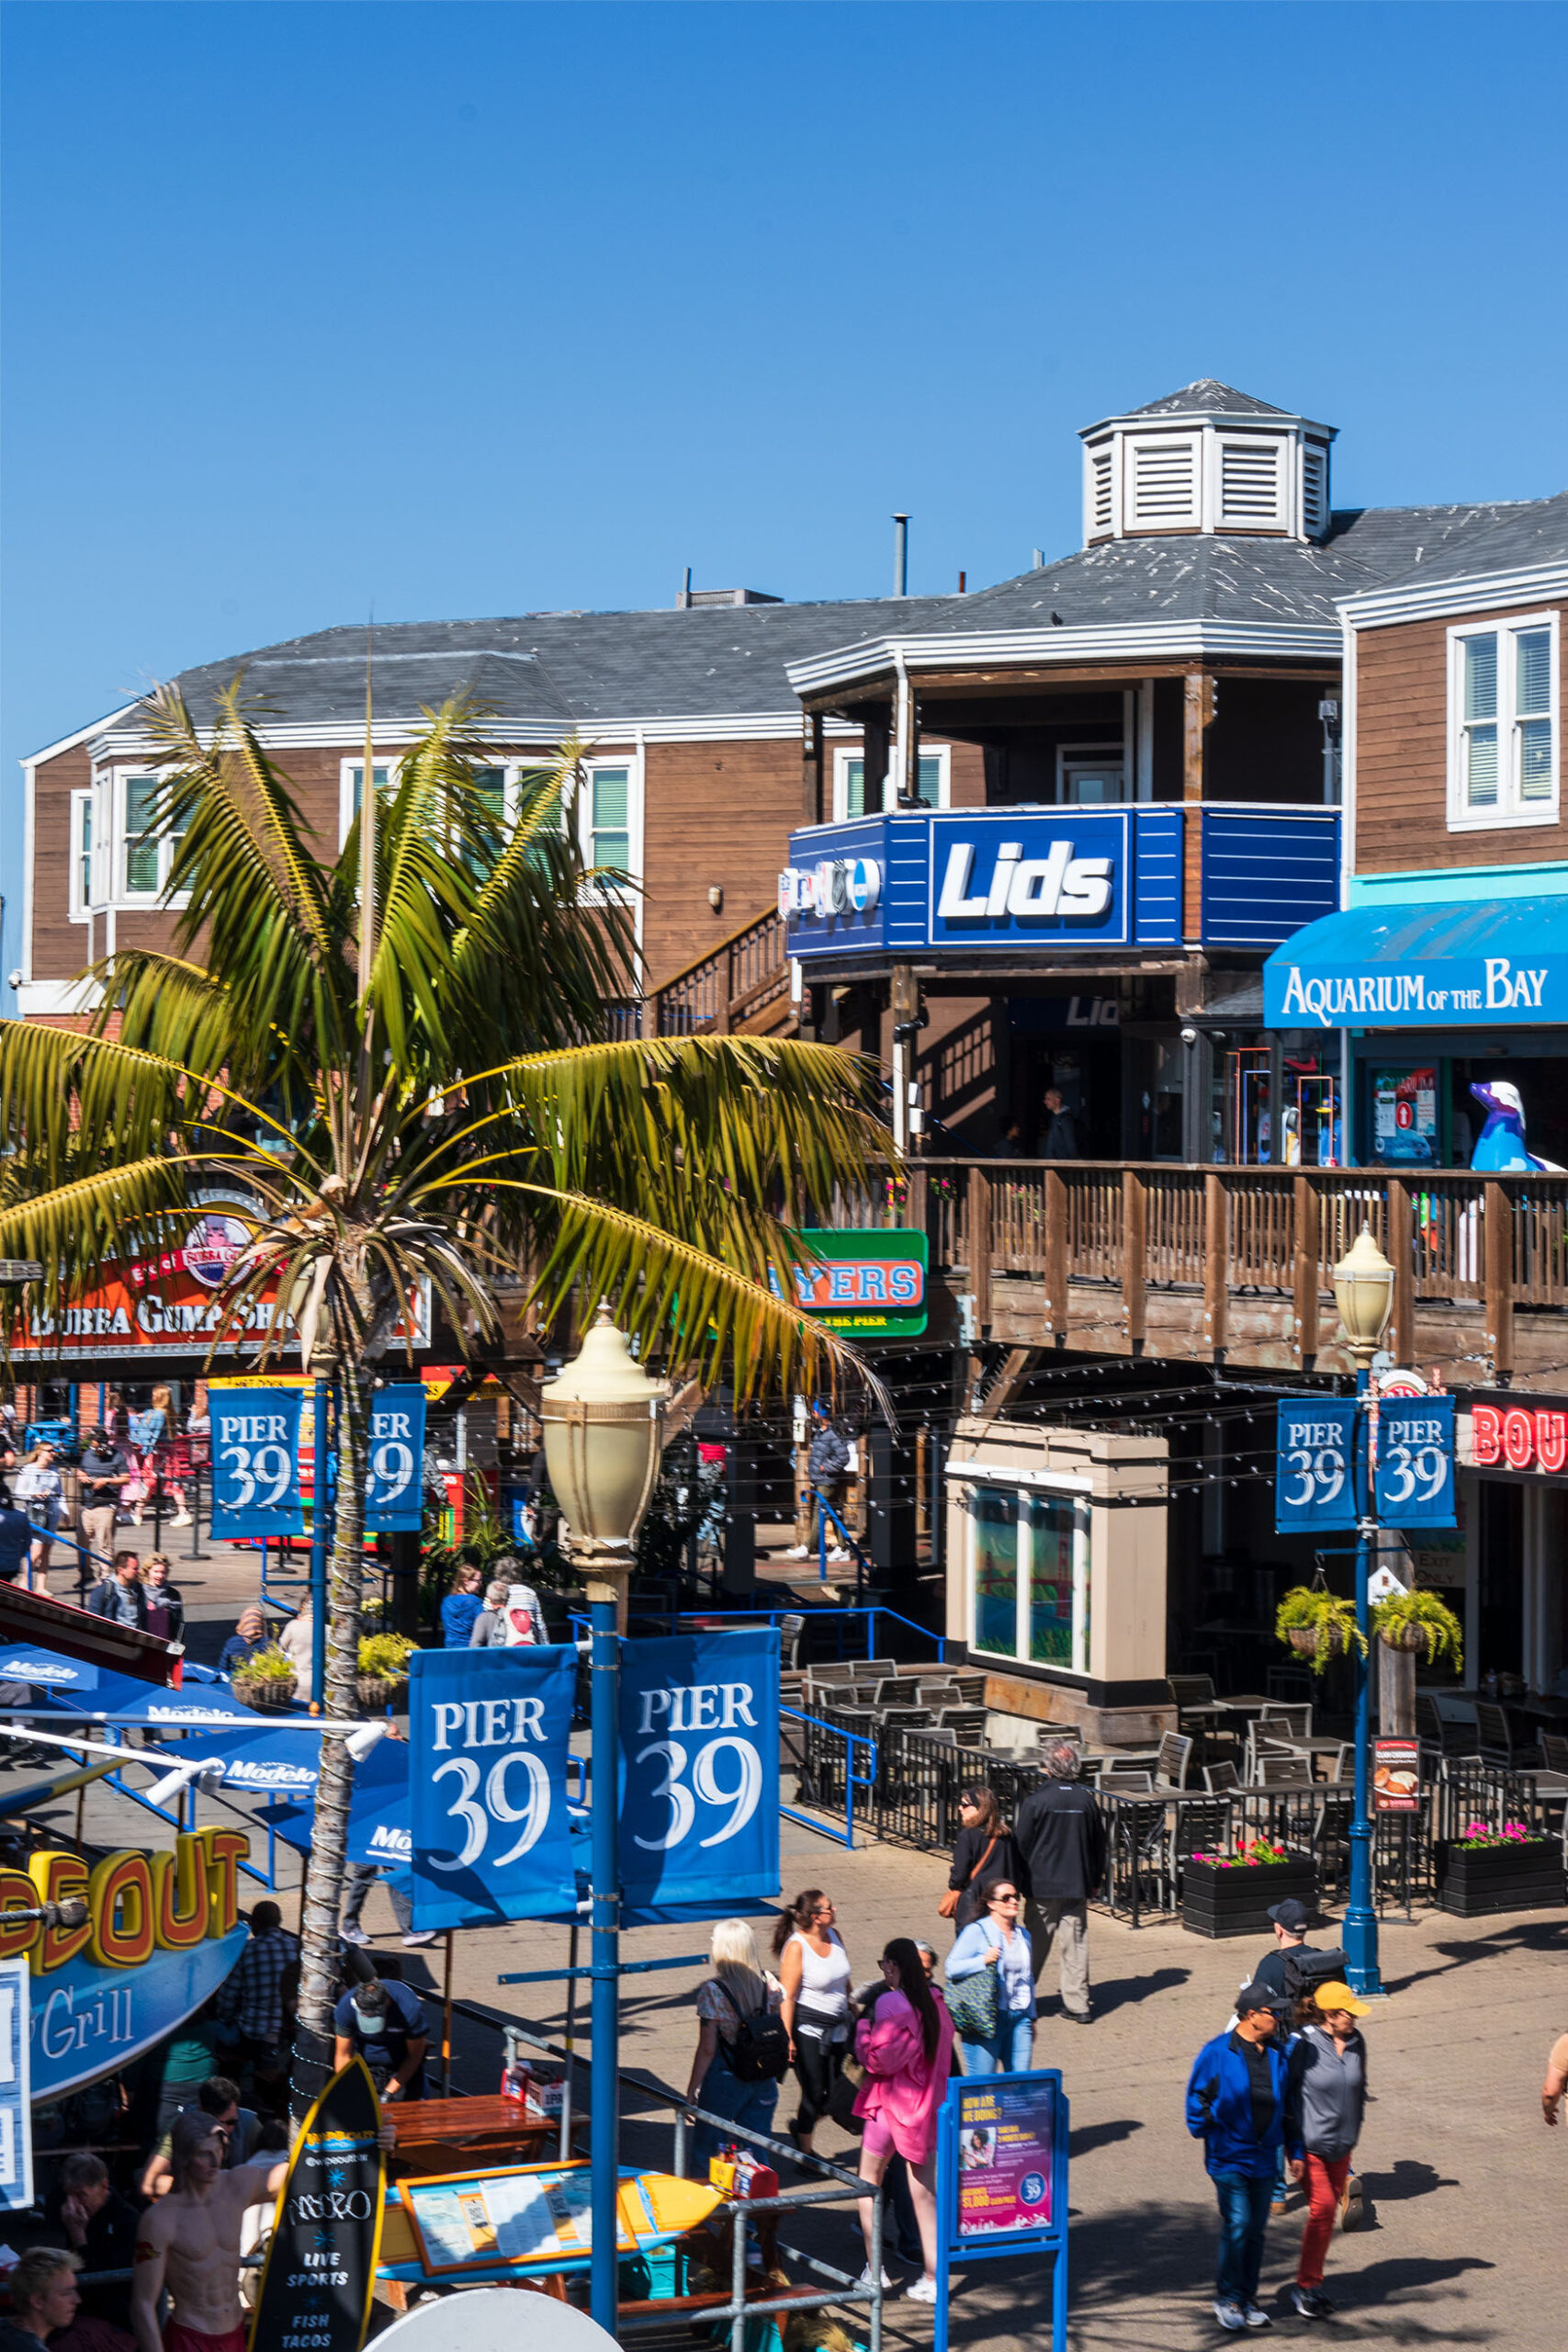
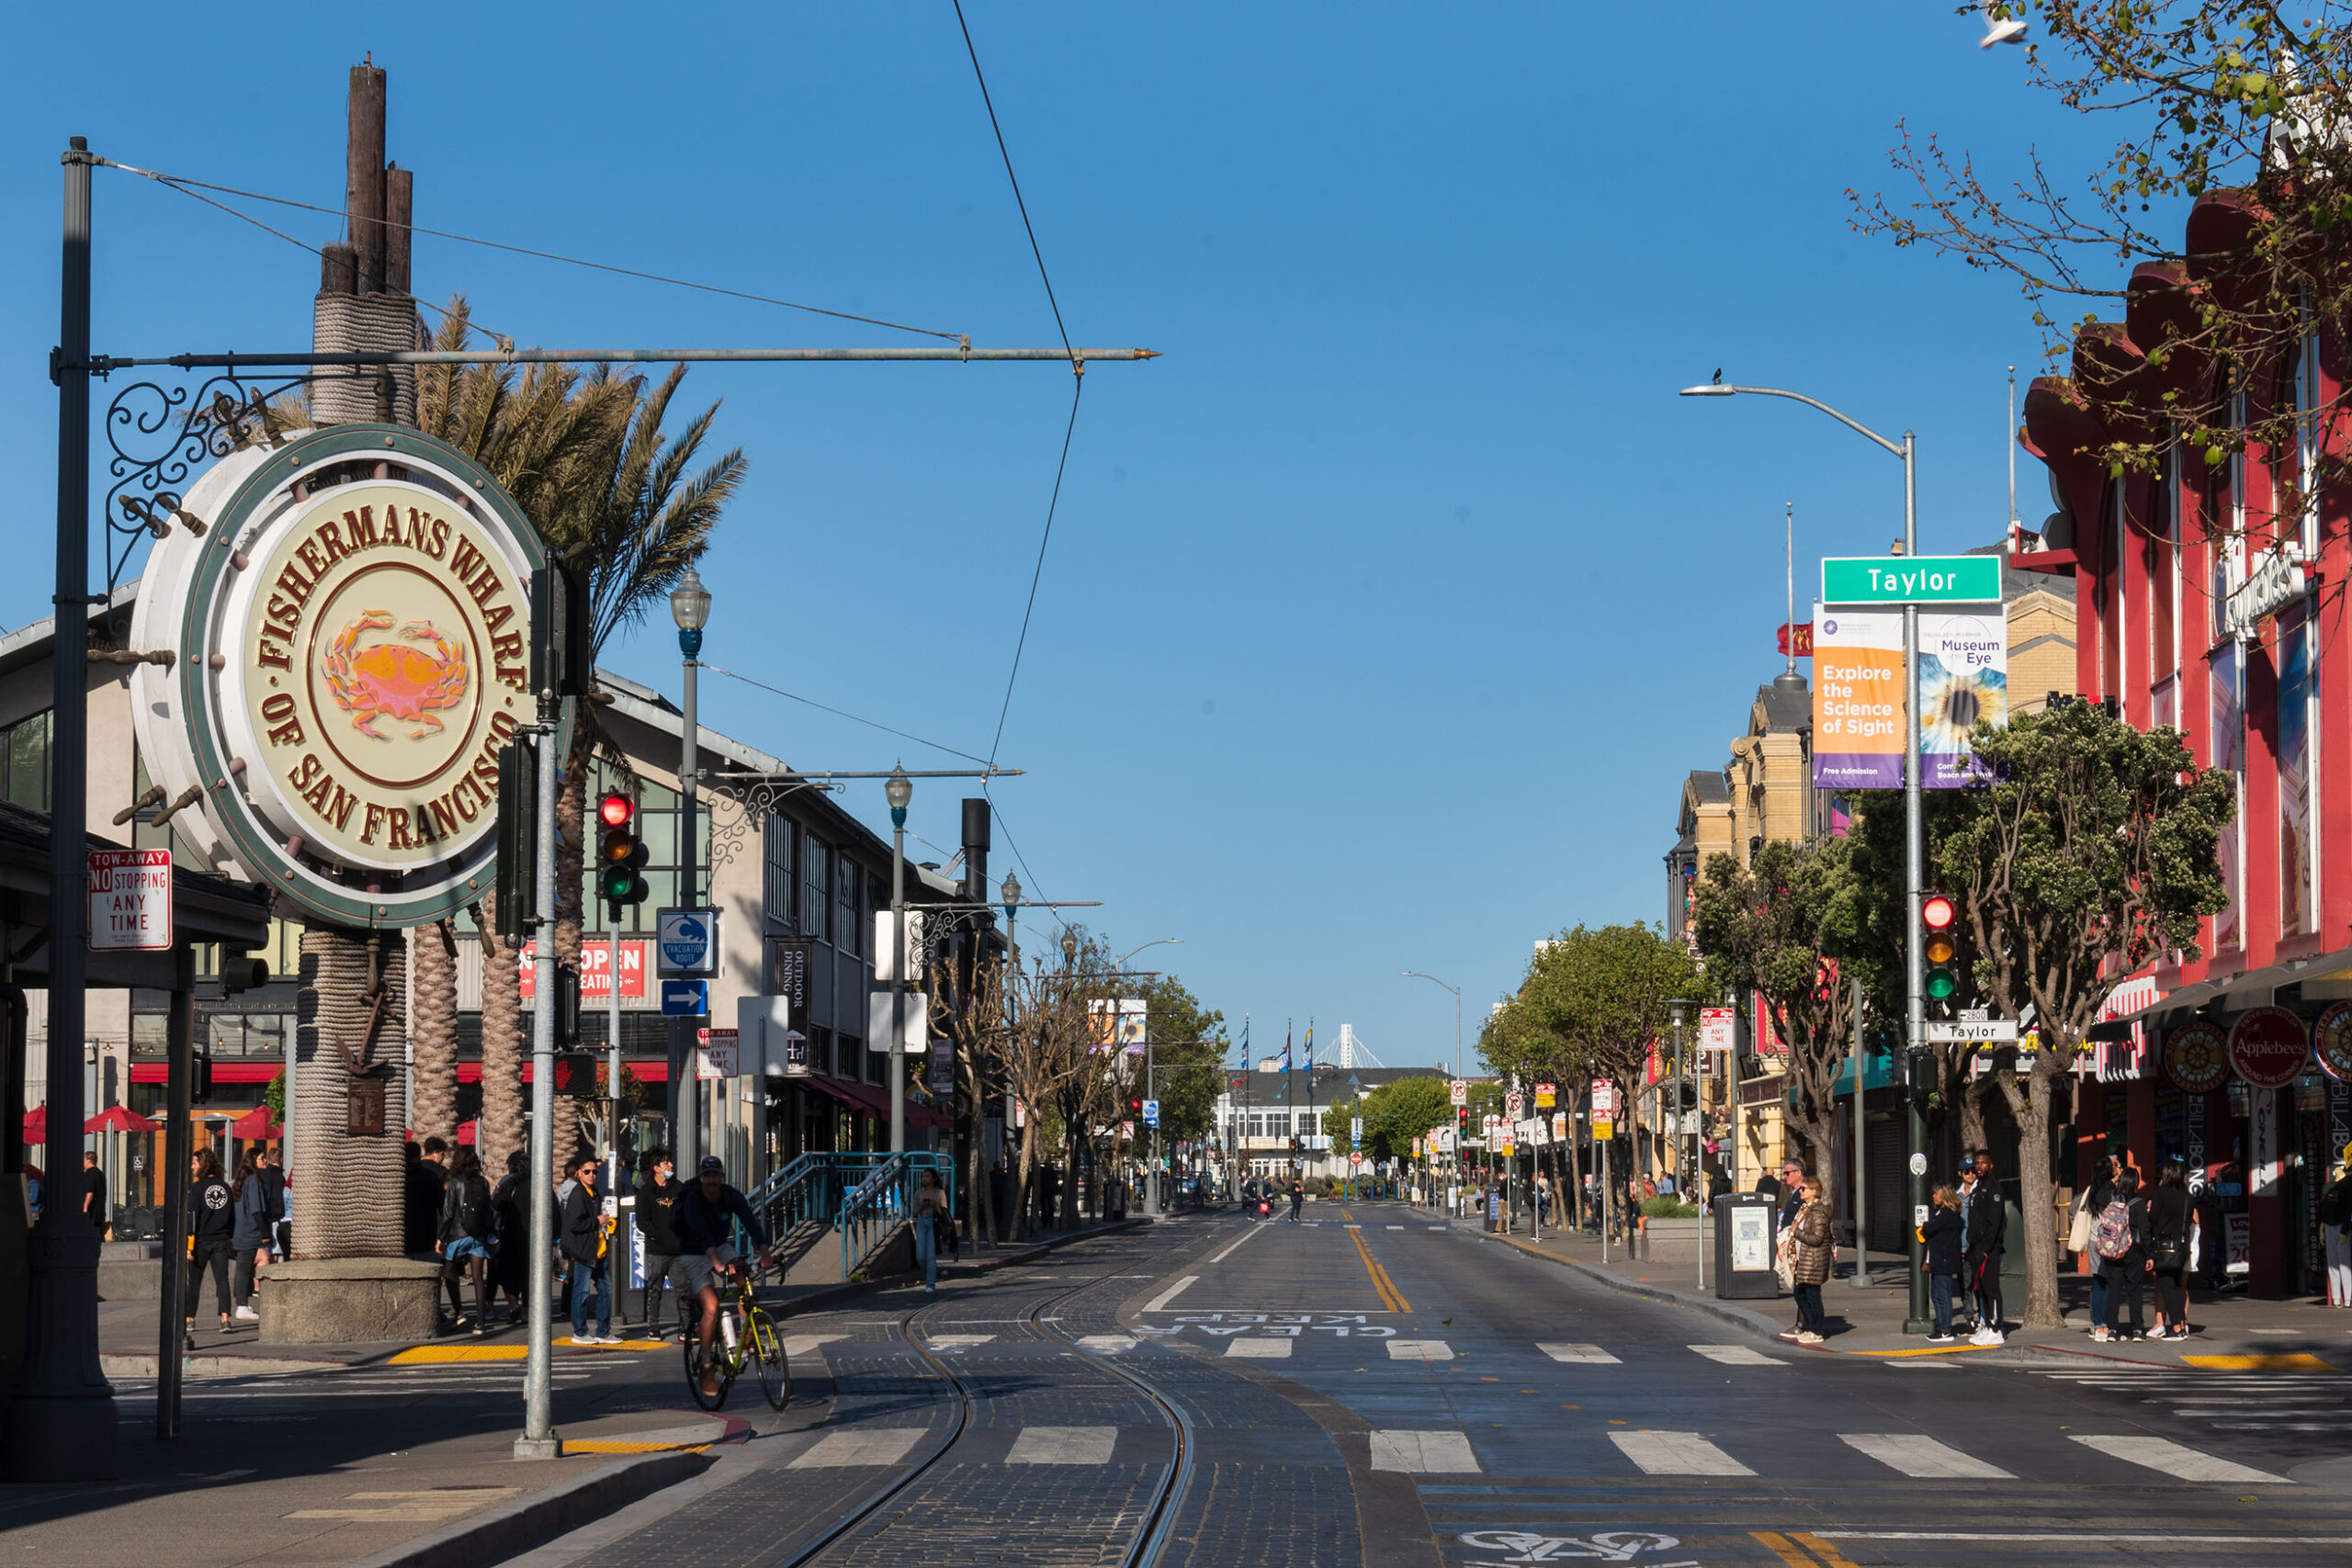
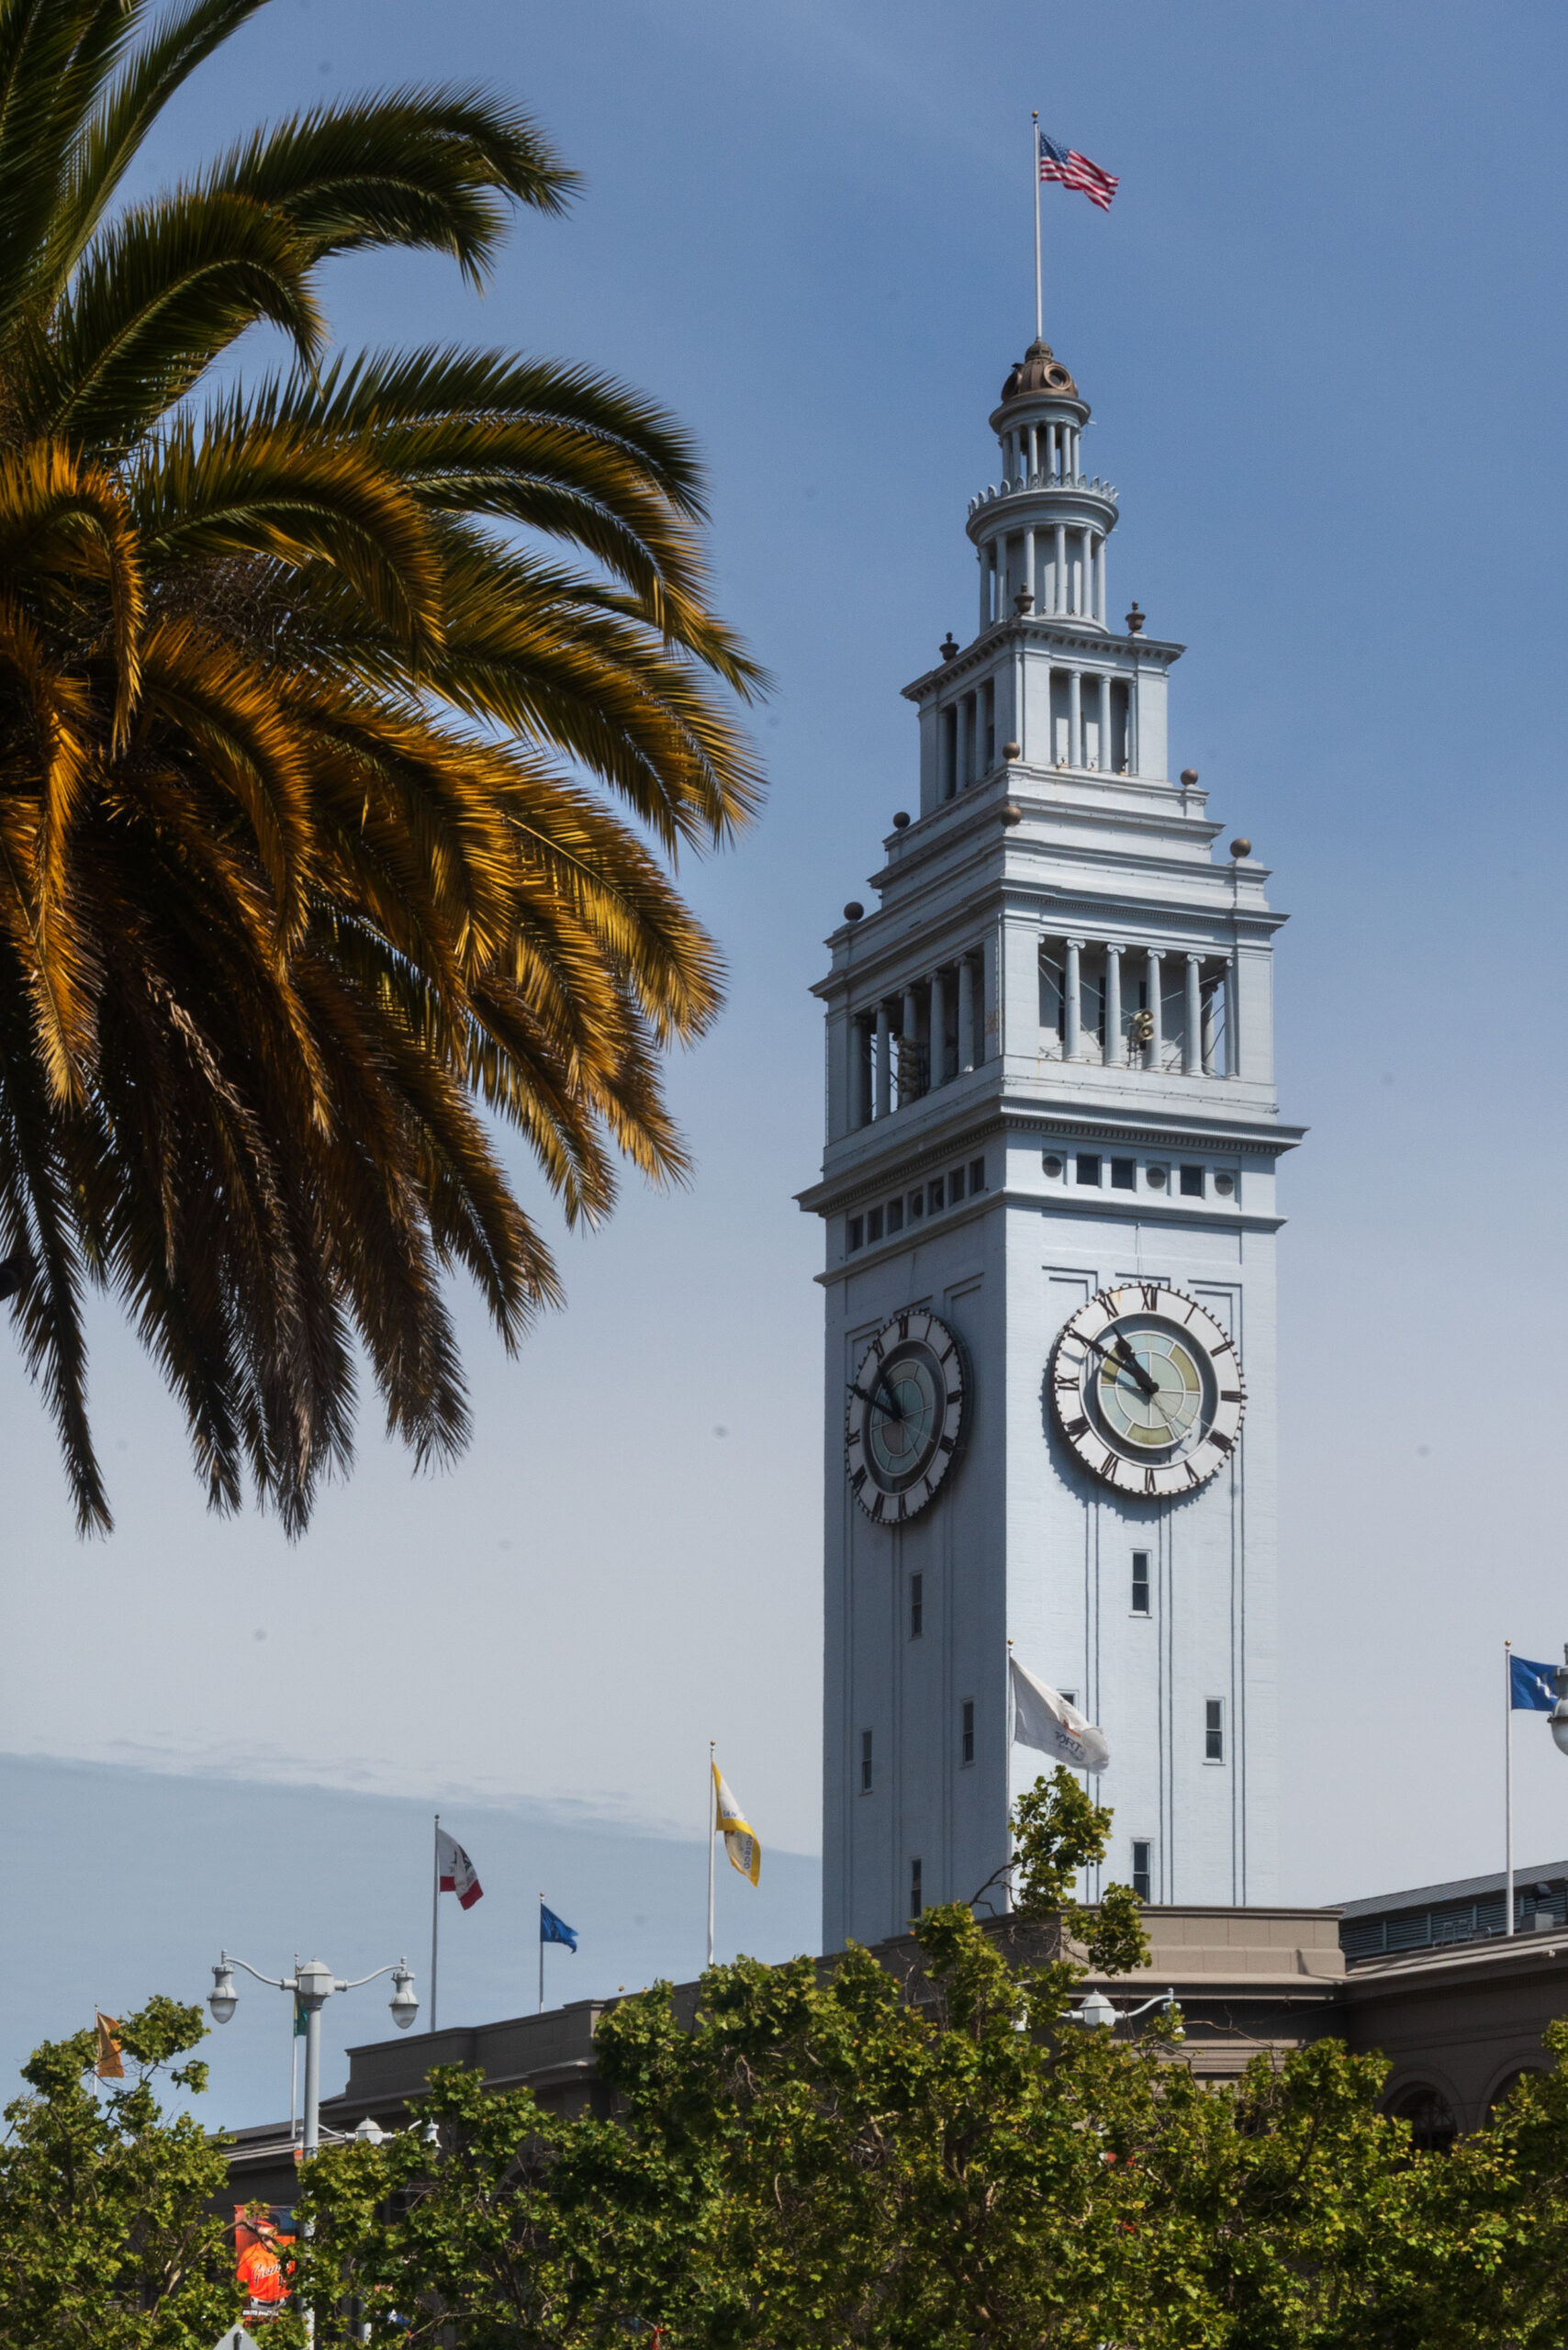
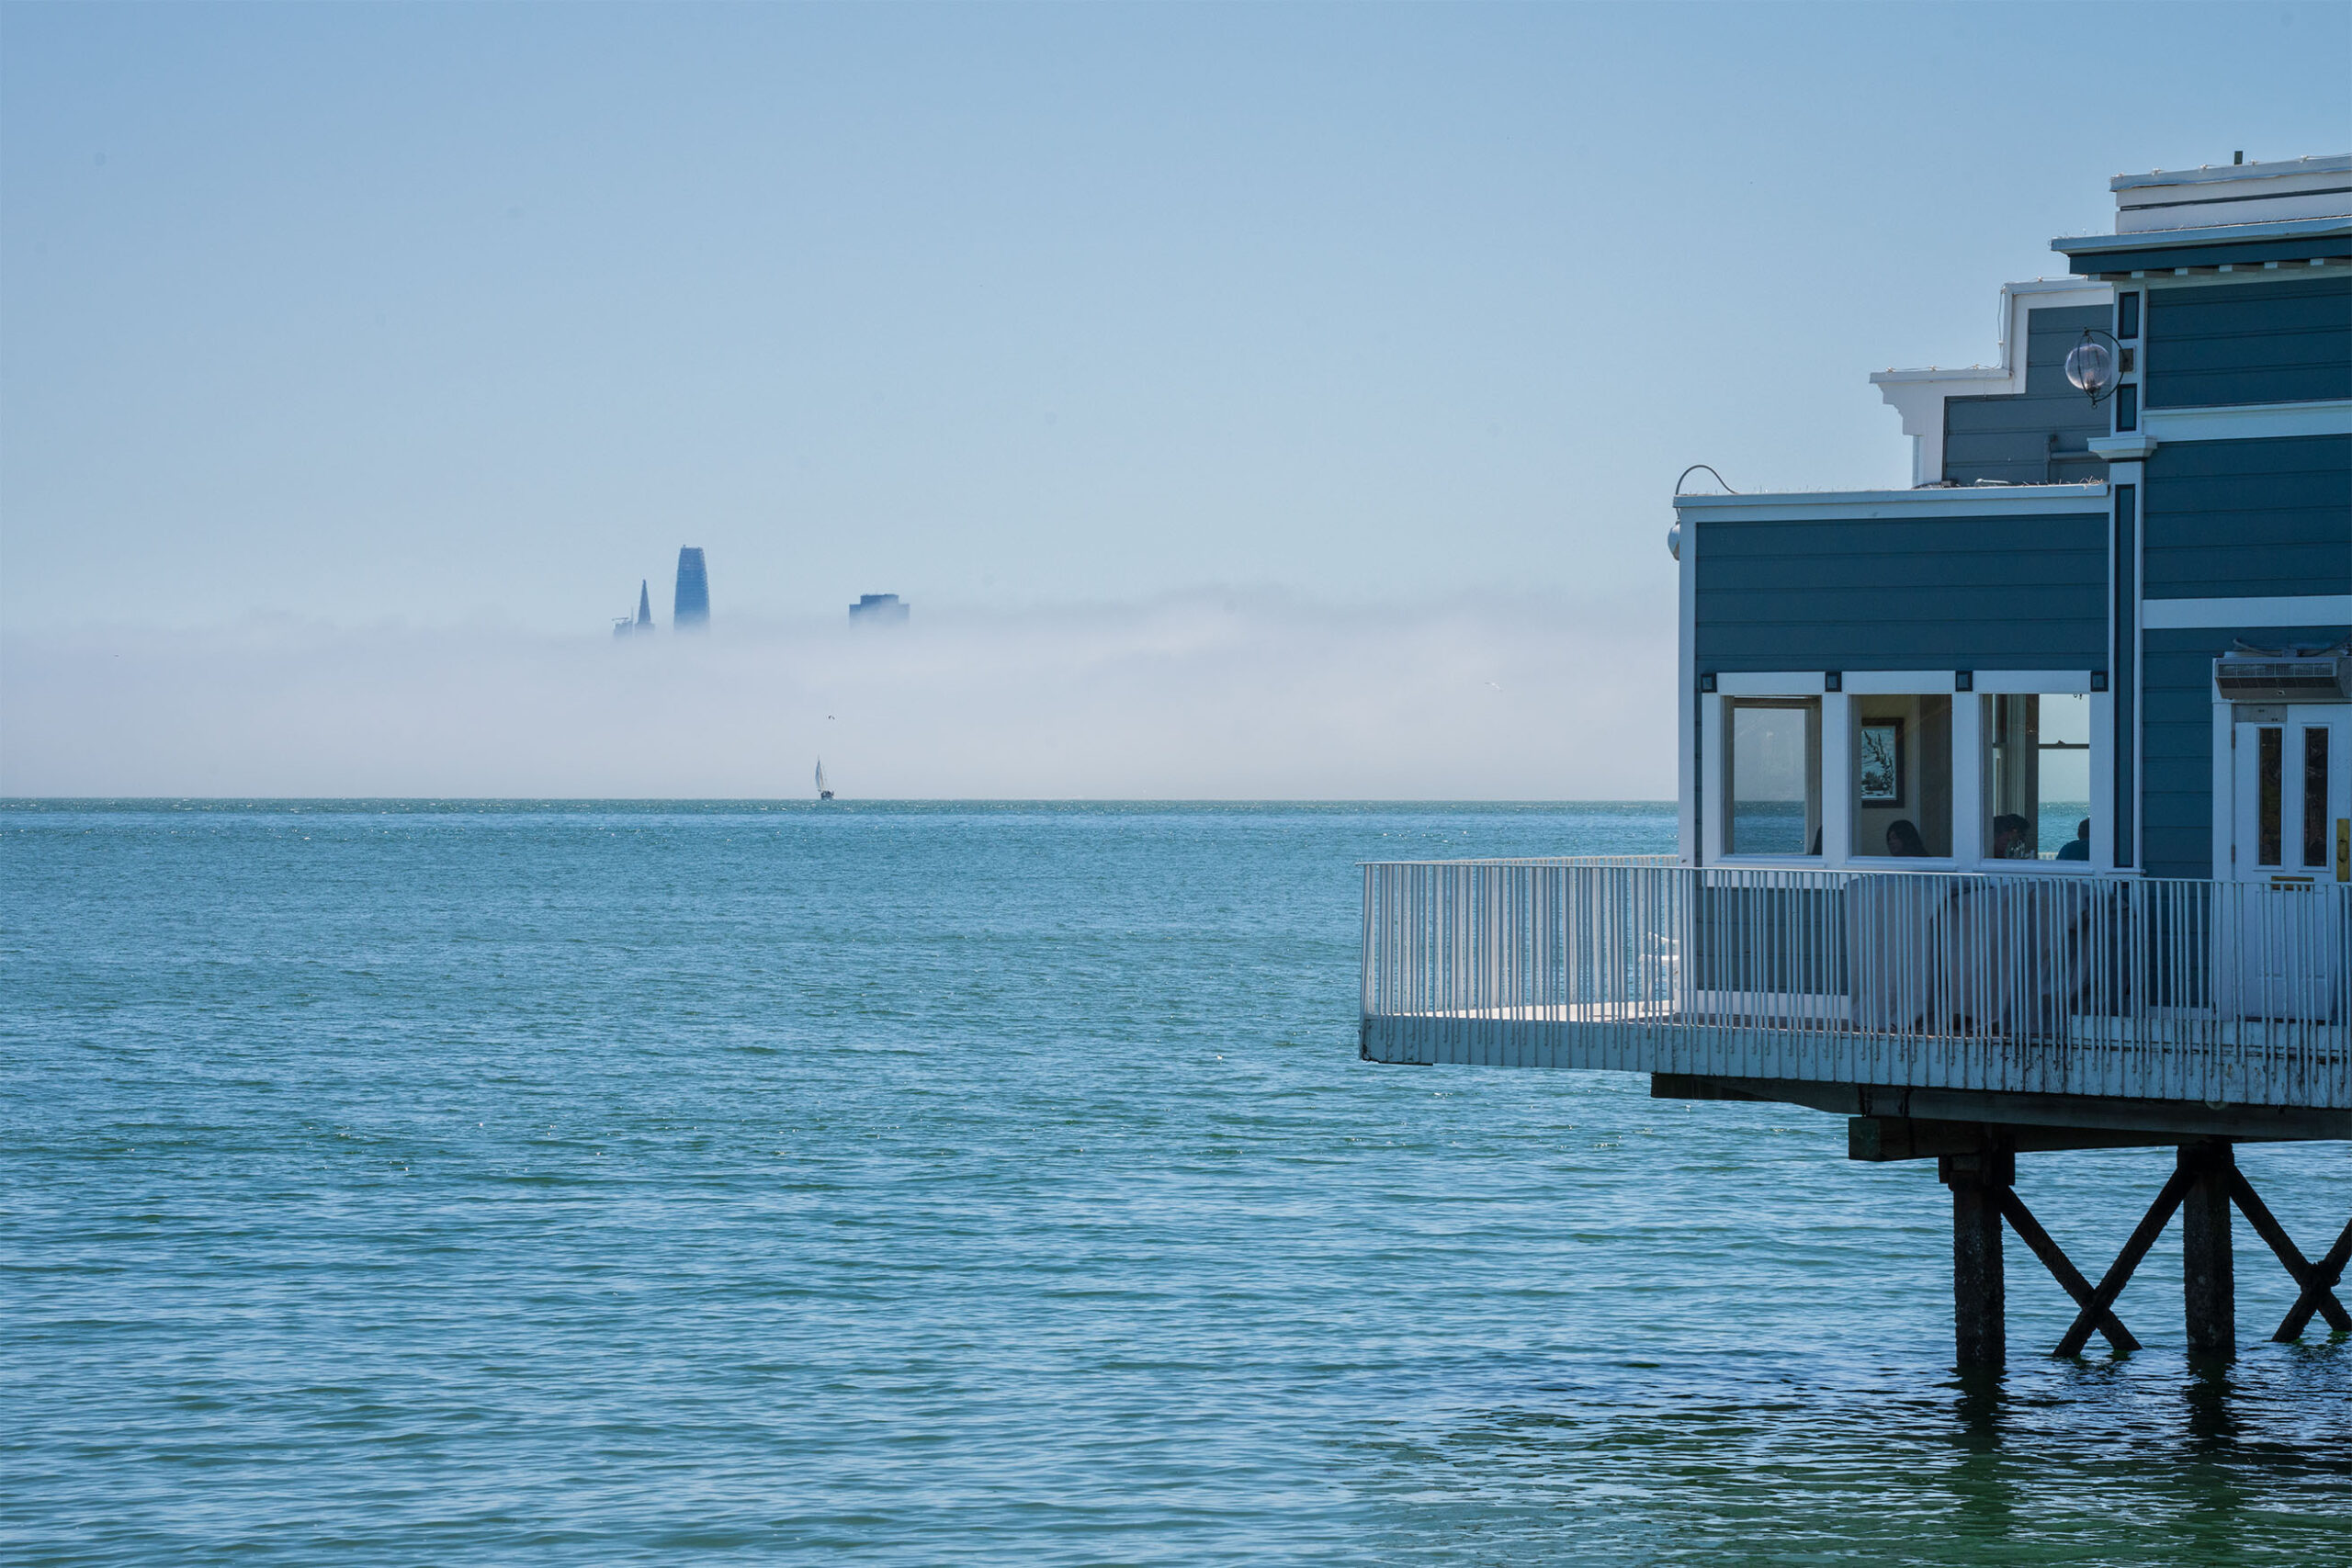
2. San Francisco Bay
From the Ferry Building to the Maritime National Historical Park, passing through the three main districts, the Embarcadero, Fisherman’s Wharf and Fort Mason, the bay area of San Francisco is a place to be fully experienced in all its aspects.
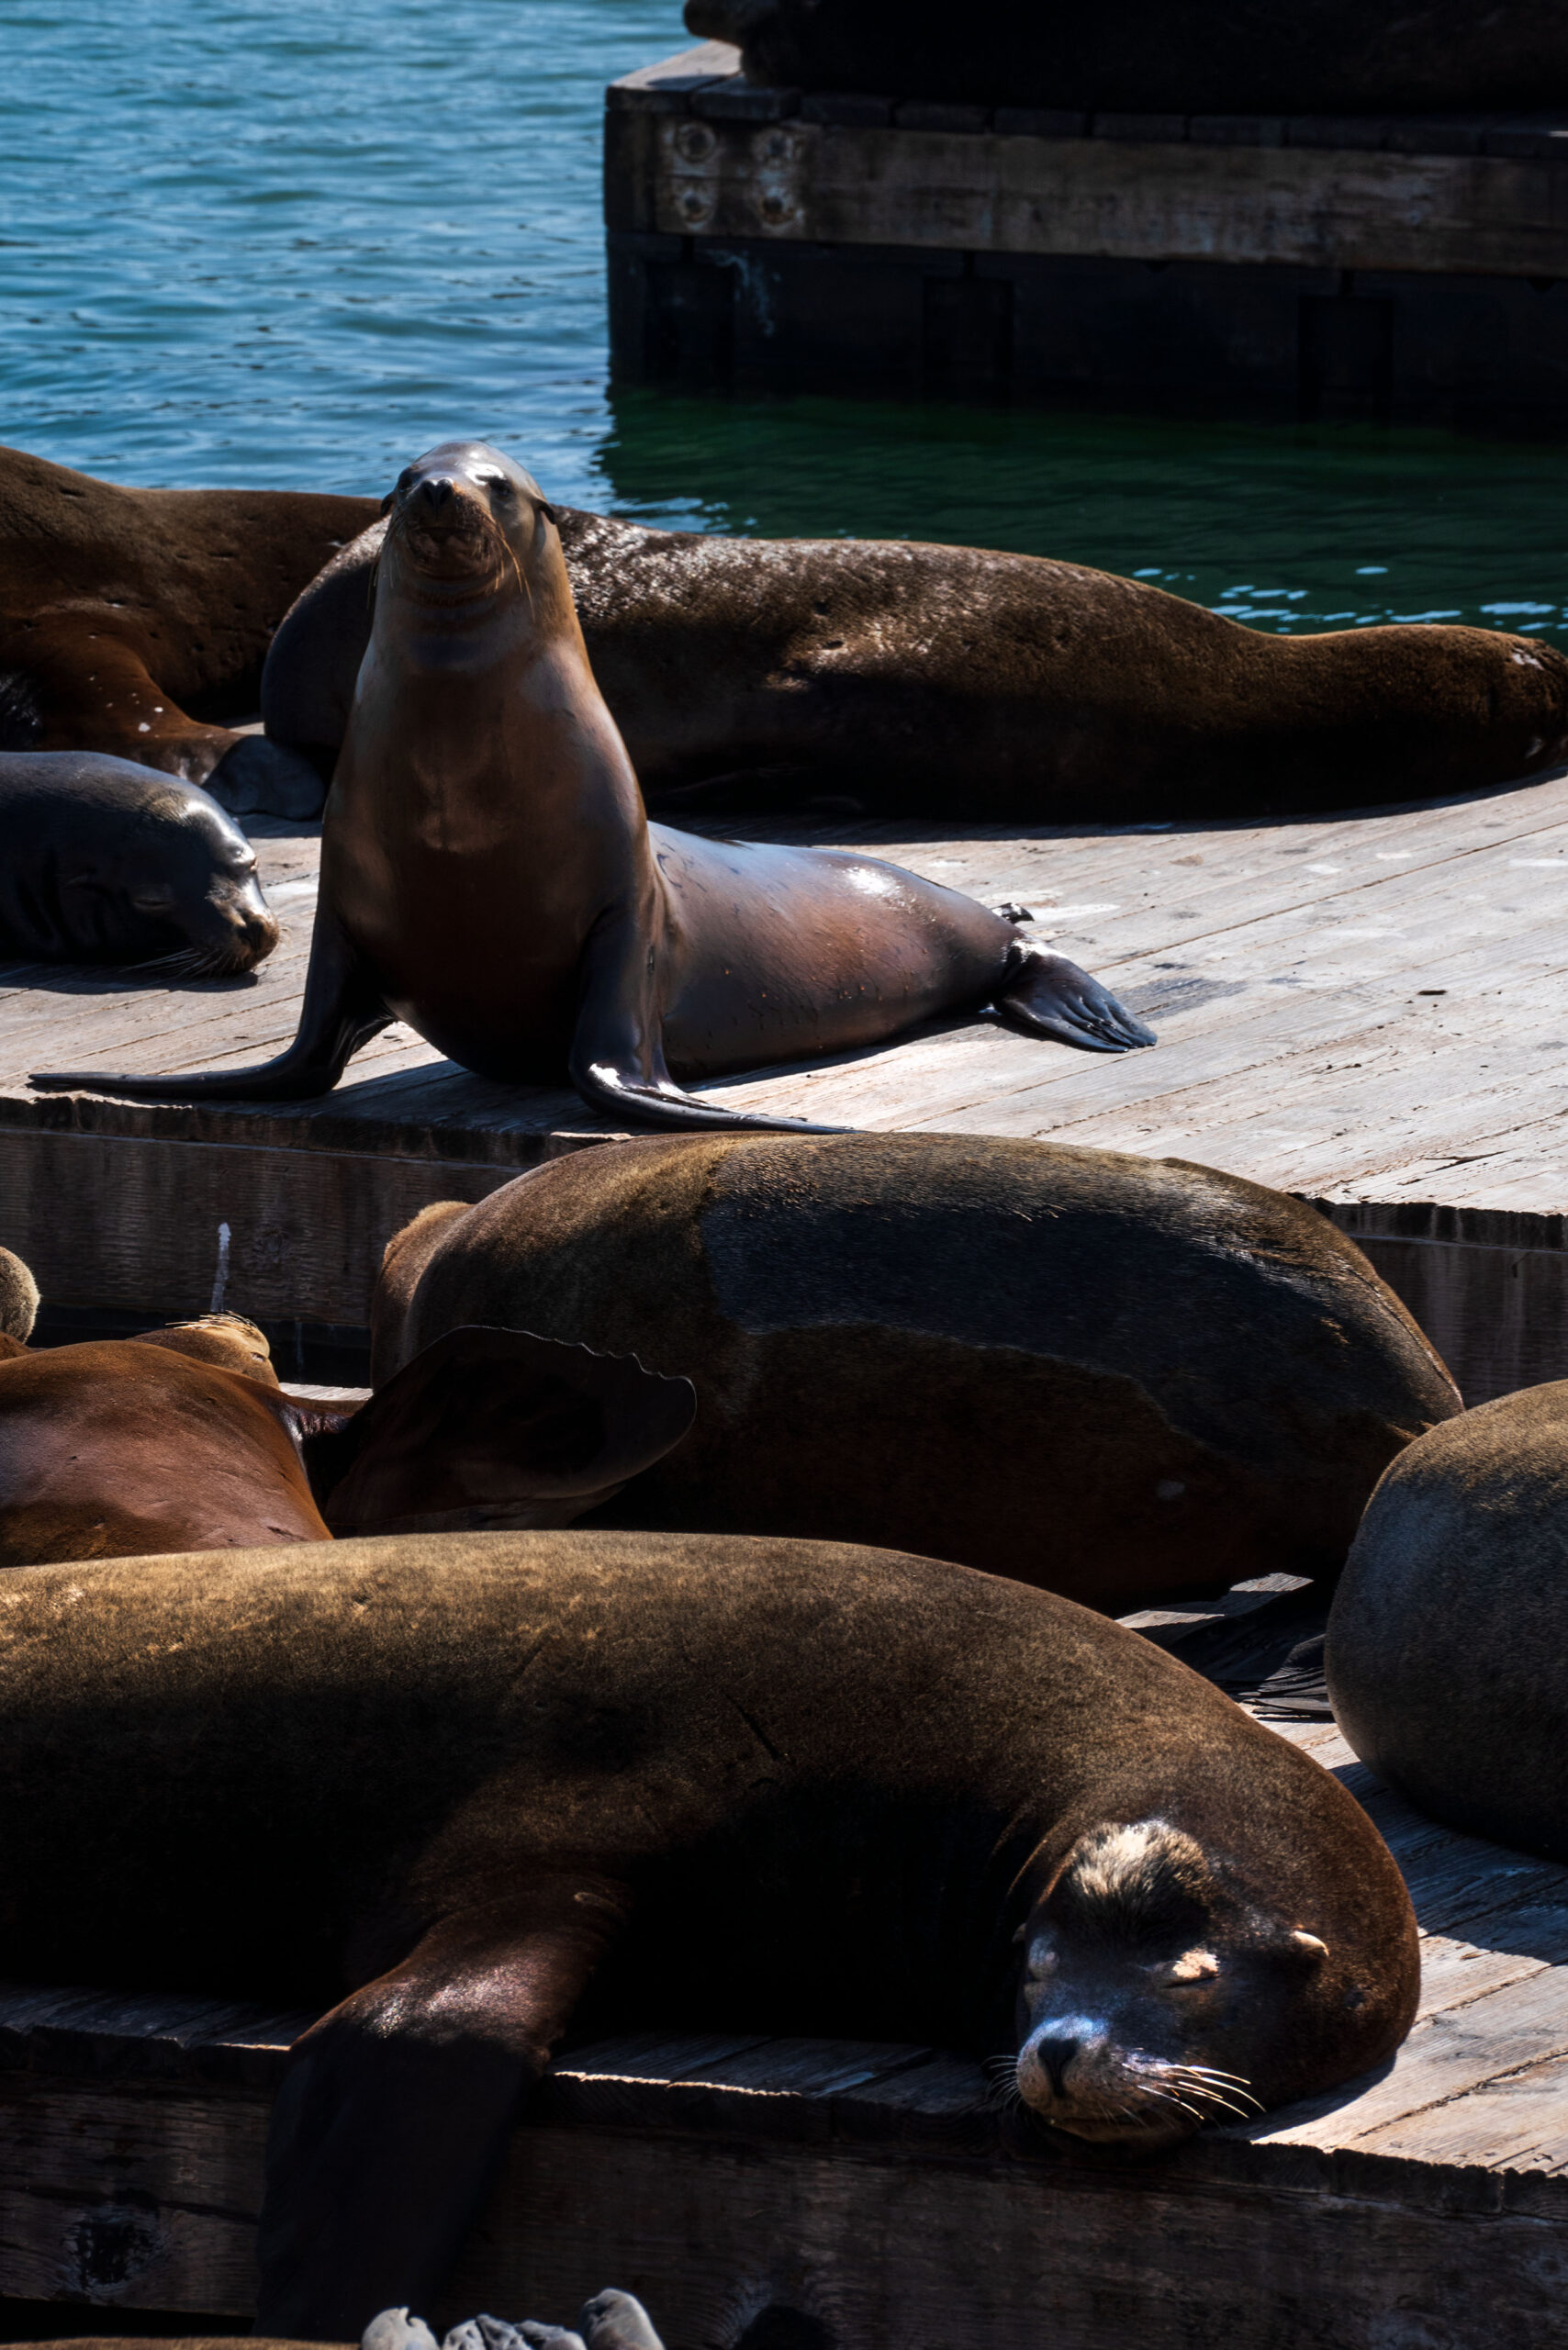
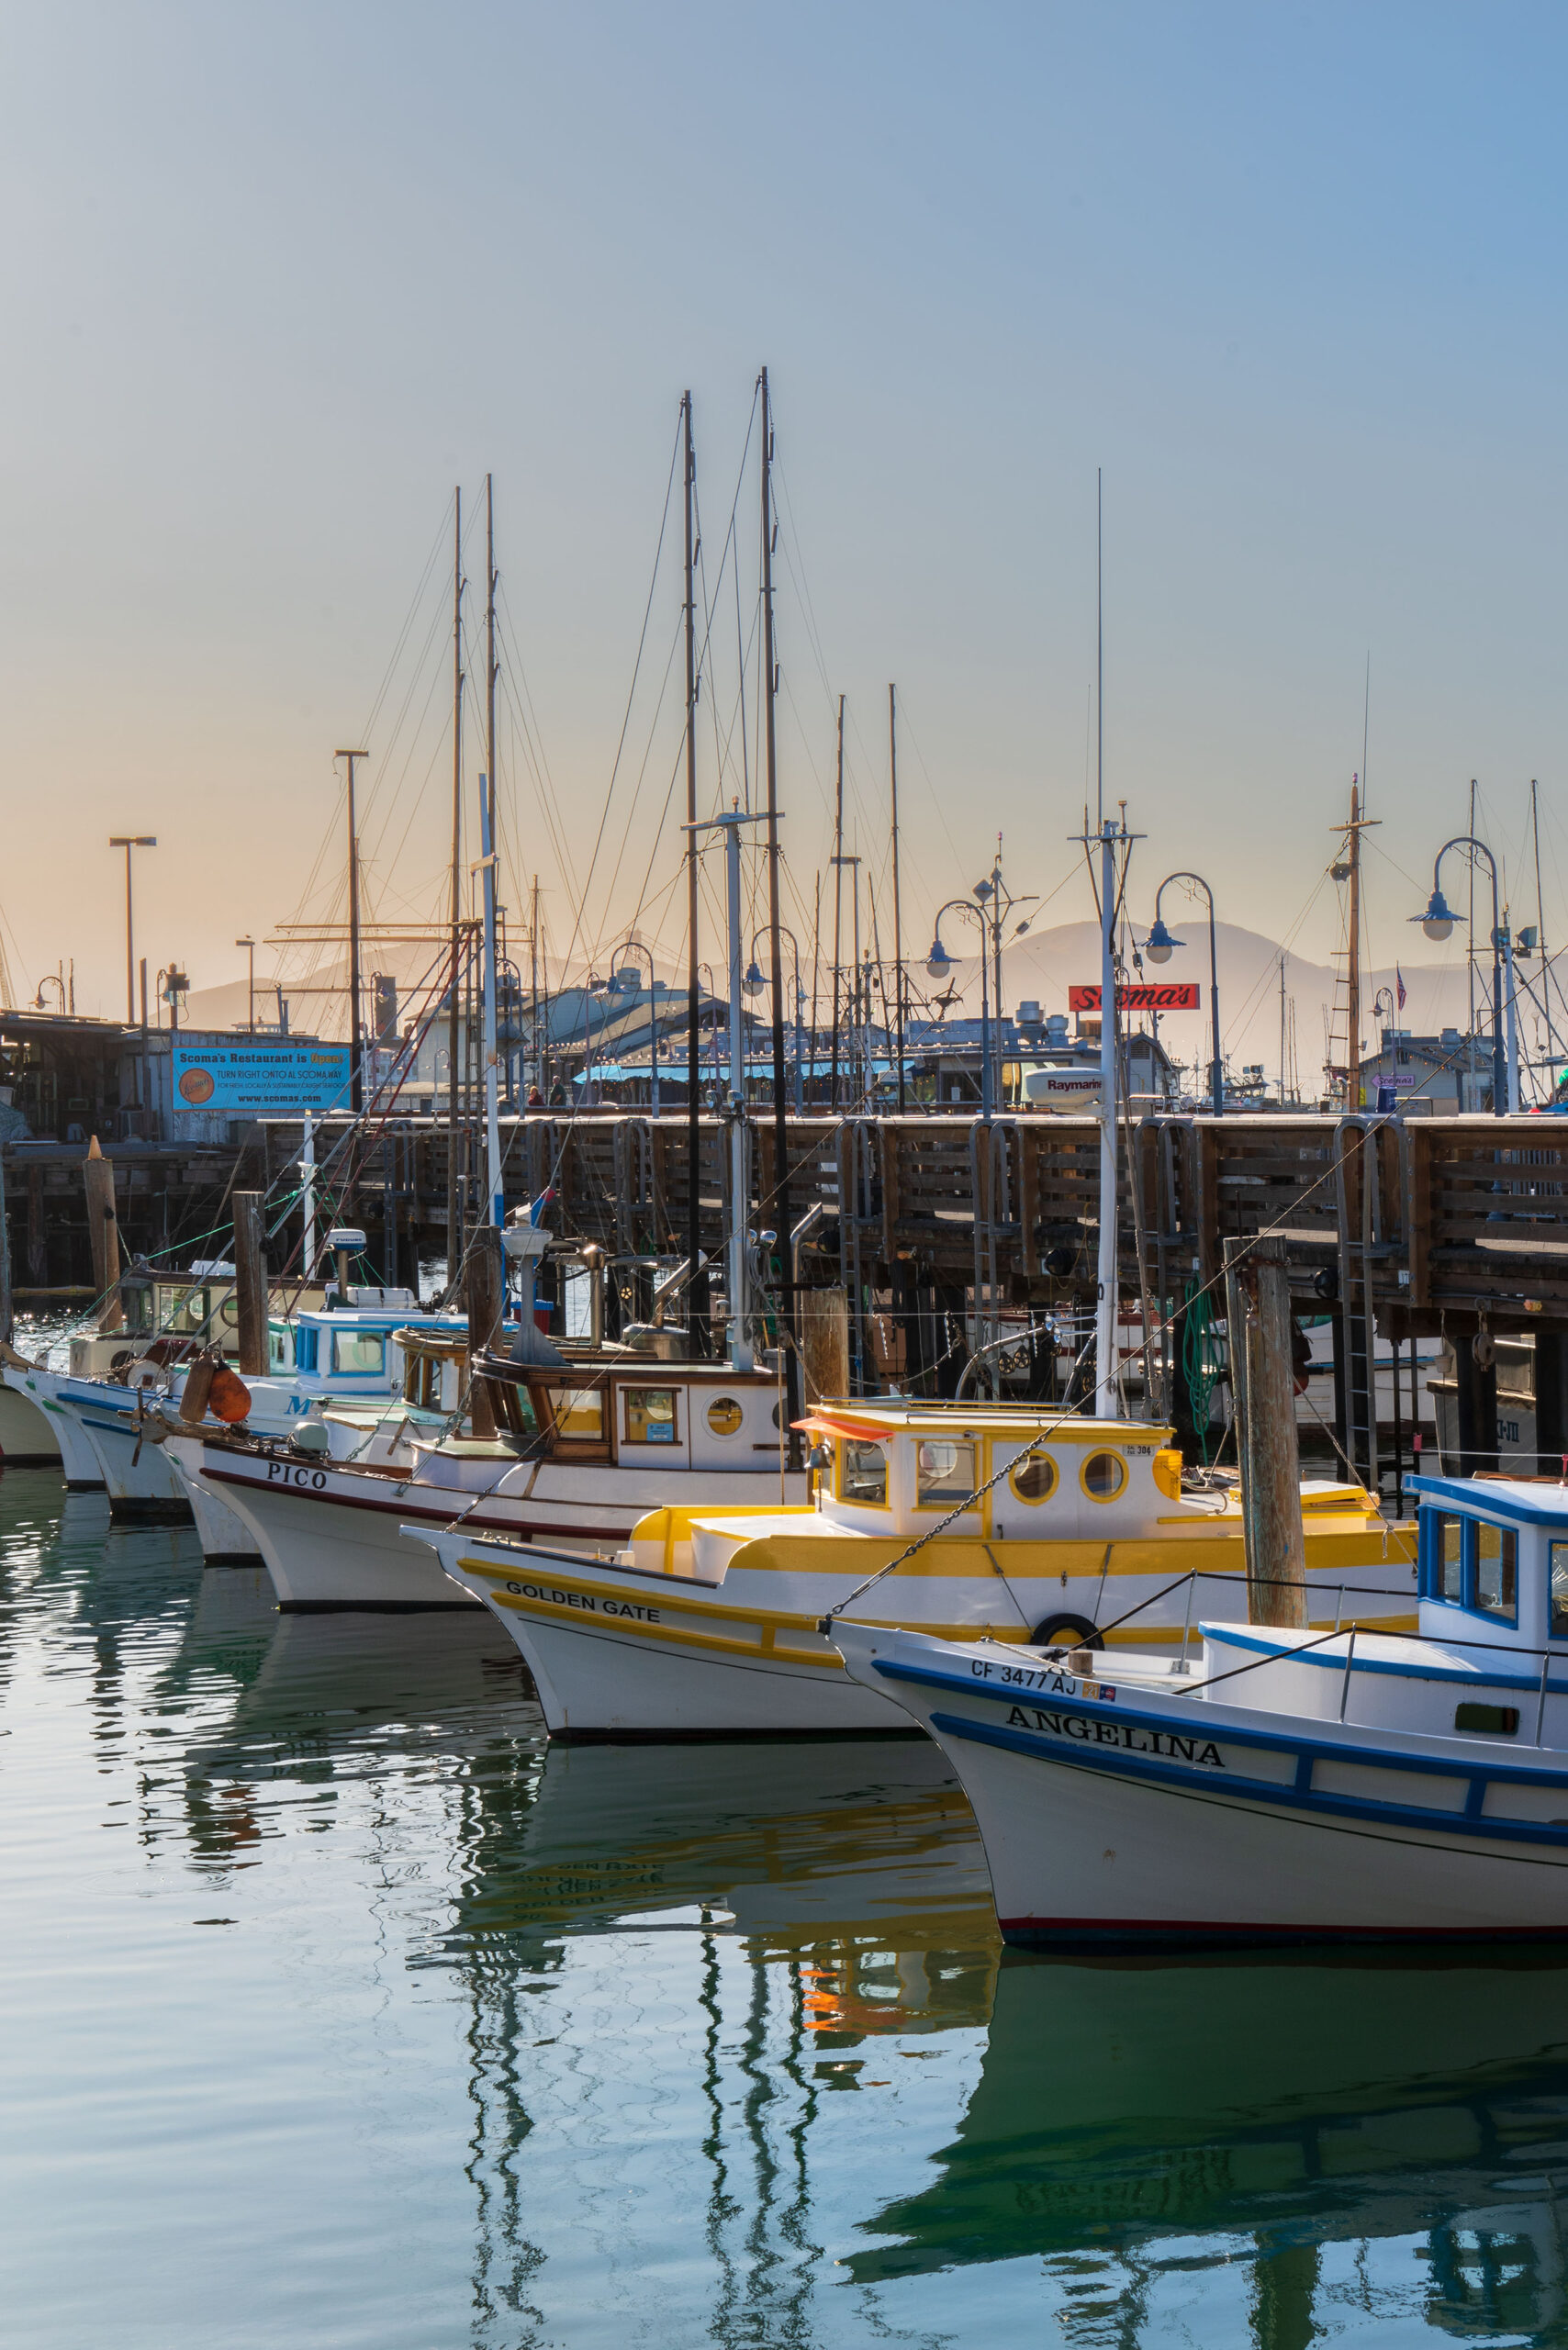
Between the shops, street food, fish markets, clubs, museums, walks along the Piers, seal watching at Pier 39, the bay offers a wide variety of attractions and is the hub of outdoor life open air of the city.
In Fort Mason, the Ghirardelli Square is also not to be missed, located in the complex of an old Italian chocolate factory, which has now become one of the most famous attractions in the city.
The last district to visit is Marina, very elegant with its luxury villas with a breathtaking design, overlooking the water. We suggest you enjoy a walk on Marina Boulevard, where the locals love to spend the last hours of light of the day, jogging, relaxing, walking their dogs on the immense expanse of greenery that separates the villas from the sea.
A fun way to visit the whole bay, also considering its extension, is to rent a bike and ride the beautiful cycle paths that cross the various districts, stopping at the points of greatest interest. In this way, perhaps at sunset, you can also get to the beach near the Golden Gate Bridge, or cross the bridge and continue to the wonderful town of Sausalito, and then go back on a ferry that is also used to transport bikes.
Photo tips: here you could focus on different elements, use the zoom to capture the details of the street food stalls and the market, or the wide angle to capture the lively context of the Piers. Spend some of your time photographing the seals at Pier 39, trying to isolate just a few of them, but in different poses. Also linger in the quieter Piers, where you will find colorful moored boats to capture.
@giadaantonini_photography
@giadaantonini_photography
@giadaantonini_photography
@giadaantonini_photography
@giadaantonini_photography
@giadaantonini_photography
@giadaantonini_photography
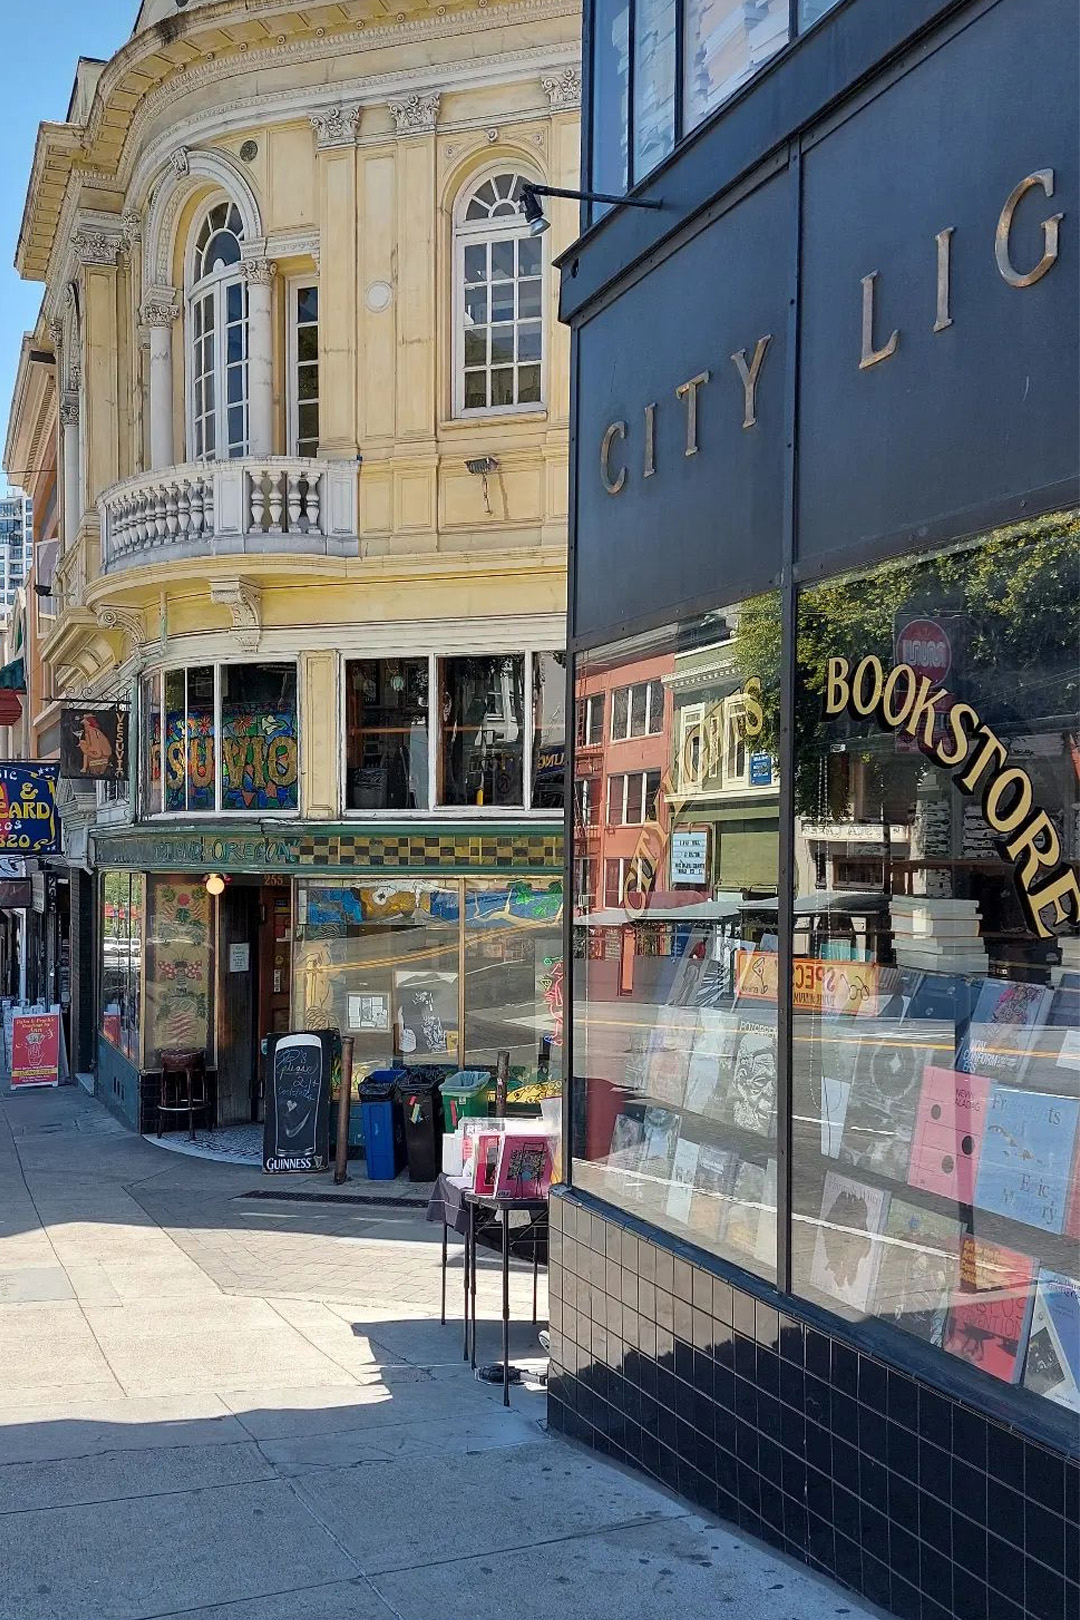
3. Little Italy and Castro
In the North Beach district there is Little Italy, a historic and vibrant neighborhood dedicated to Italian culture and cuisine. Here don’t miss the Beat Museum, with records, books, posters, photographs and magazines dating back to the period of the Beat movement and the City Lights Bookstore, the operational center of the Beat Generation. A short distance away, you will find the Vesuvio Cafè, a meeting point not only for exponents of the Beat Generation, but also for artists such as Bob Dylan, Paul Kantner and Francis Ford Coppola. There are also some interesting murals and other historic Italian venues along Columbus avenue. At the Caffè Trieste, for example, Francis Ford Coppola wrote the script for The Godfather.
Not far away, you can take a tour of Pioneer Park, accessed via the charming Greenwich Steps. Along the climb you will be able to meet the characteristic colored parrots that inhabit the park. Once at the top, you will come to Coit Tower, one of the city’s landmarks, where you can go up to admire the view.
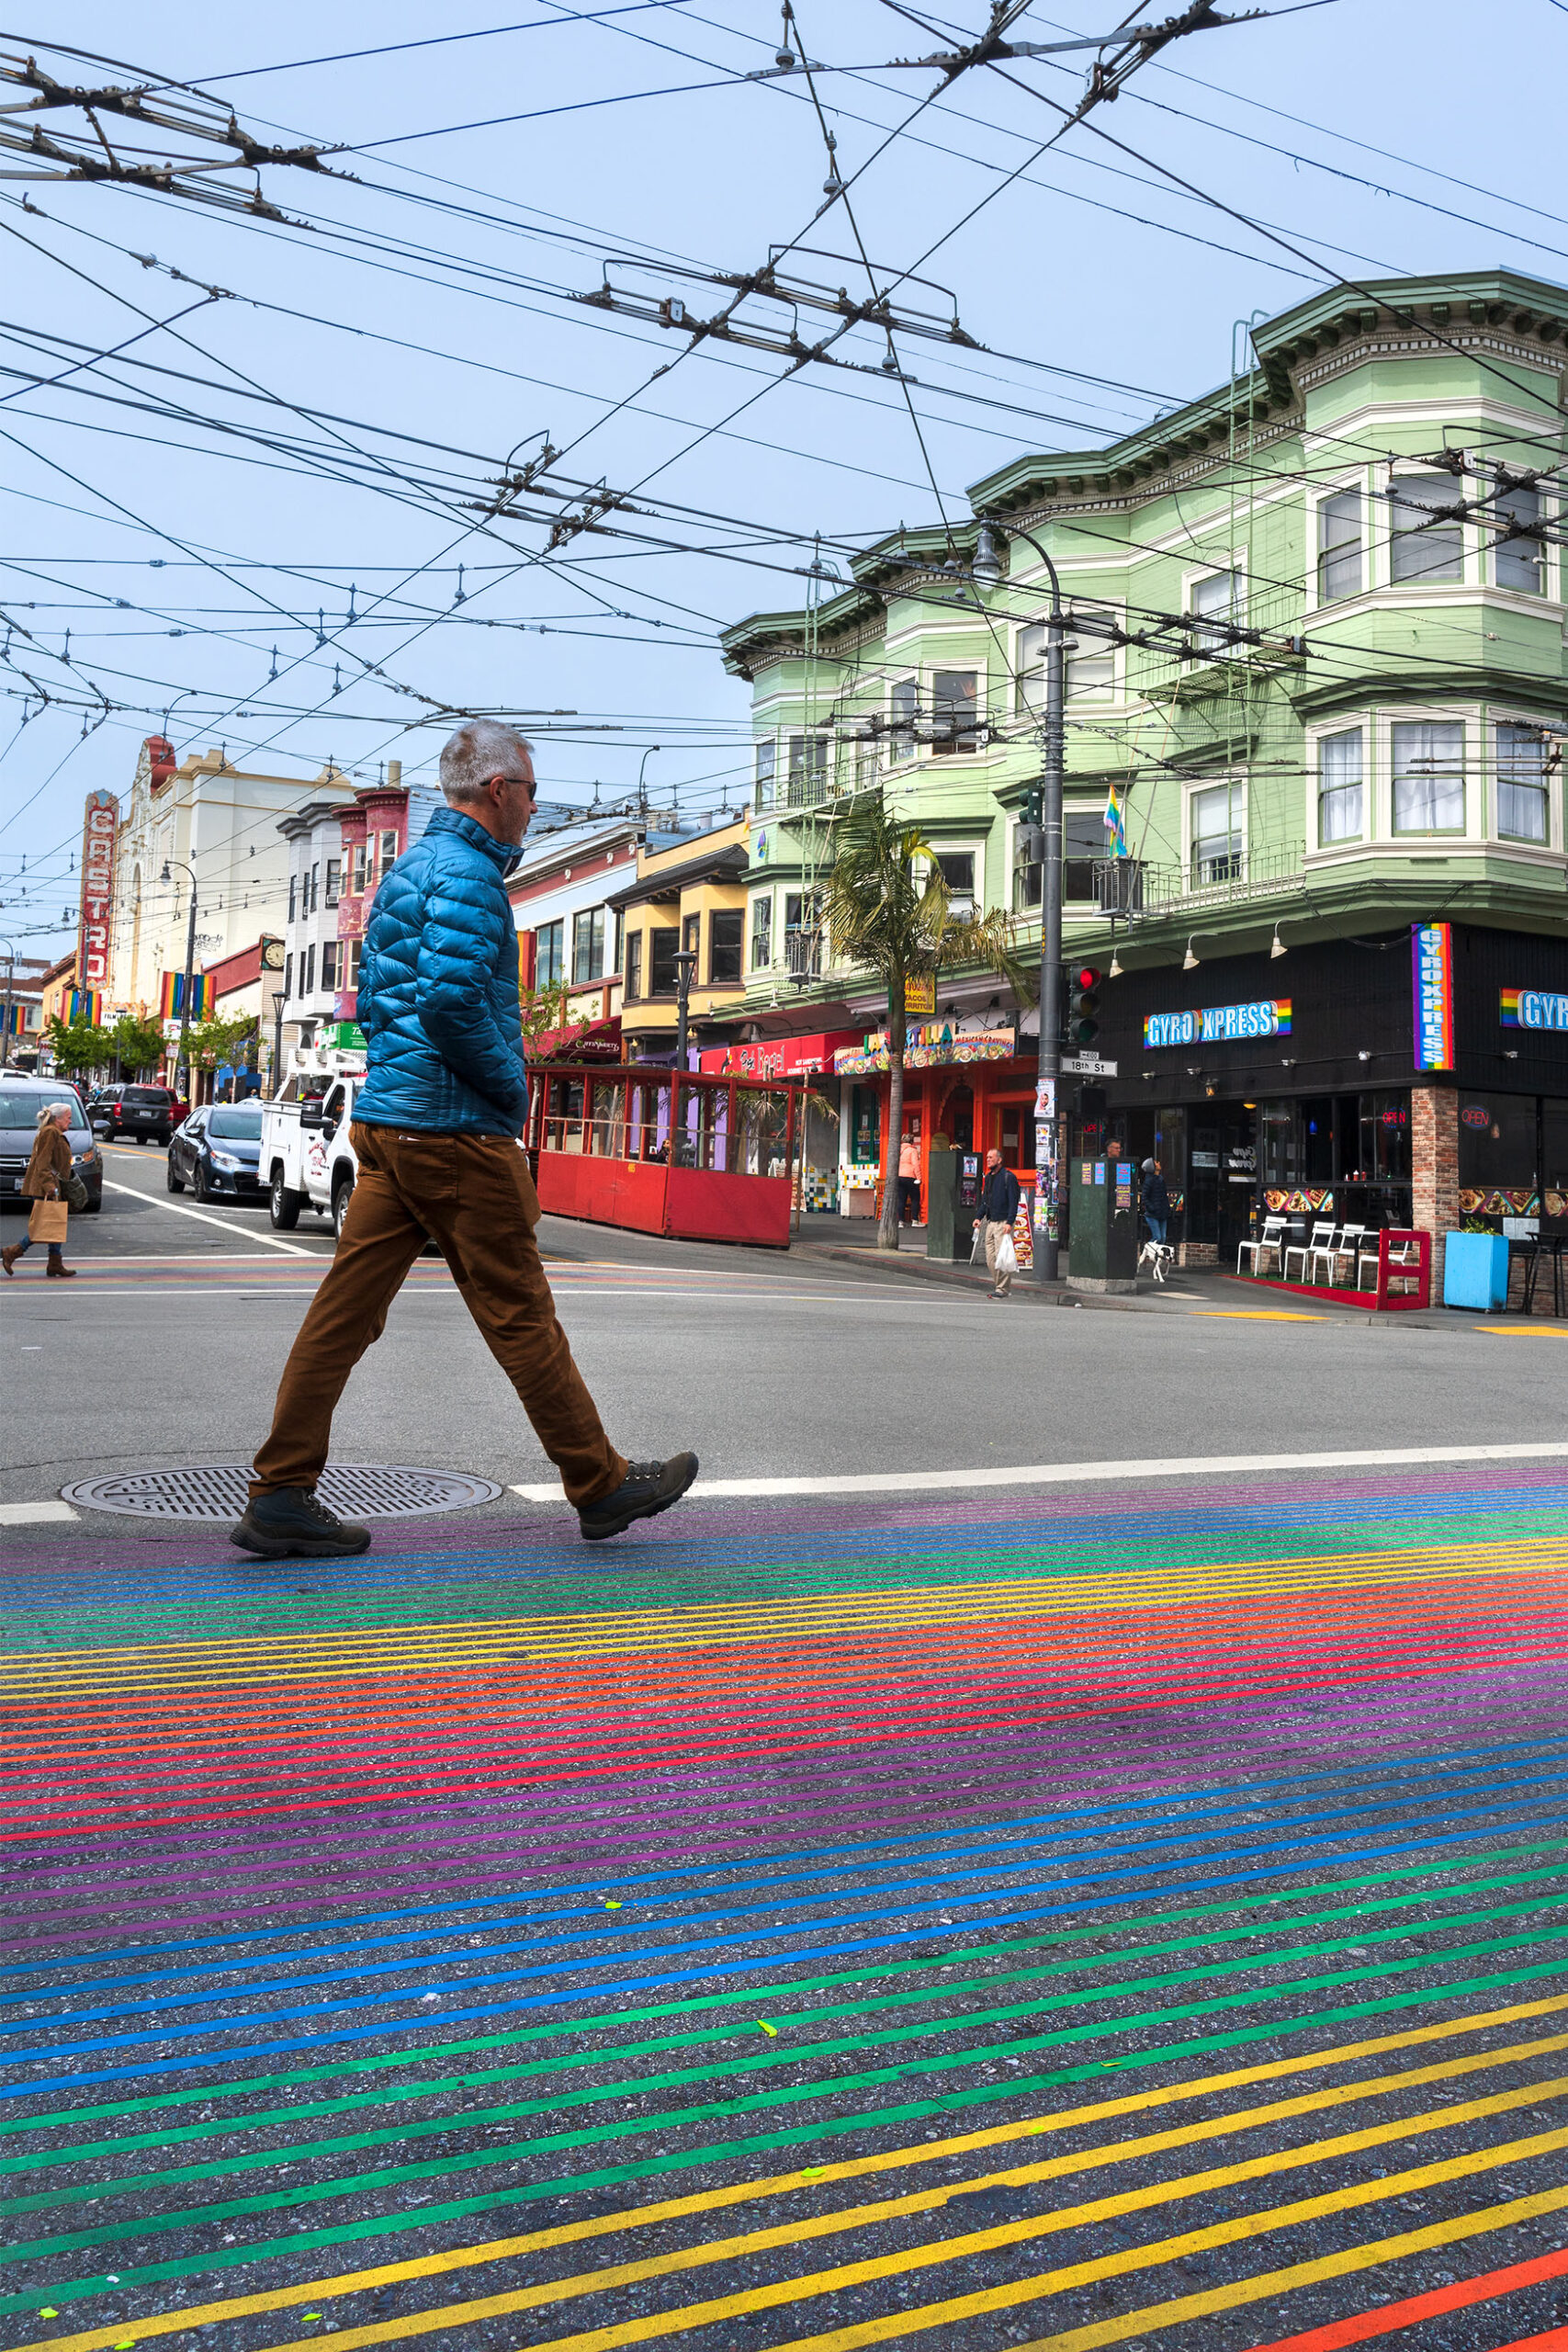
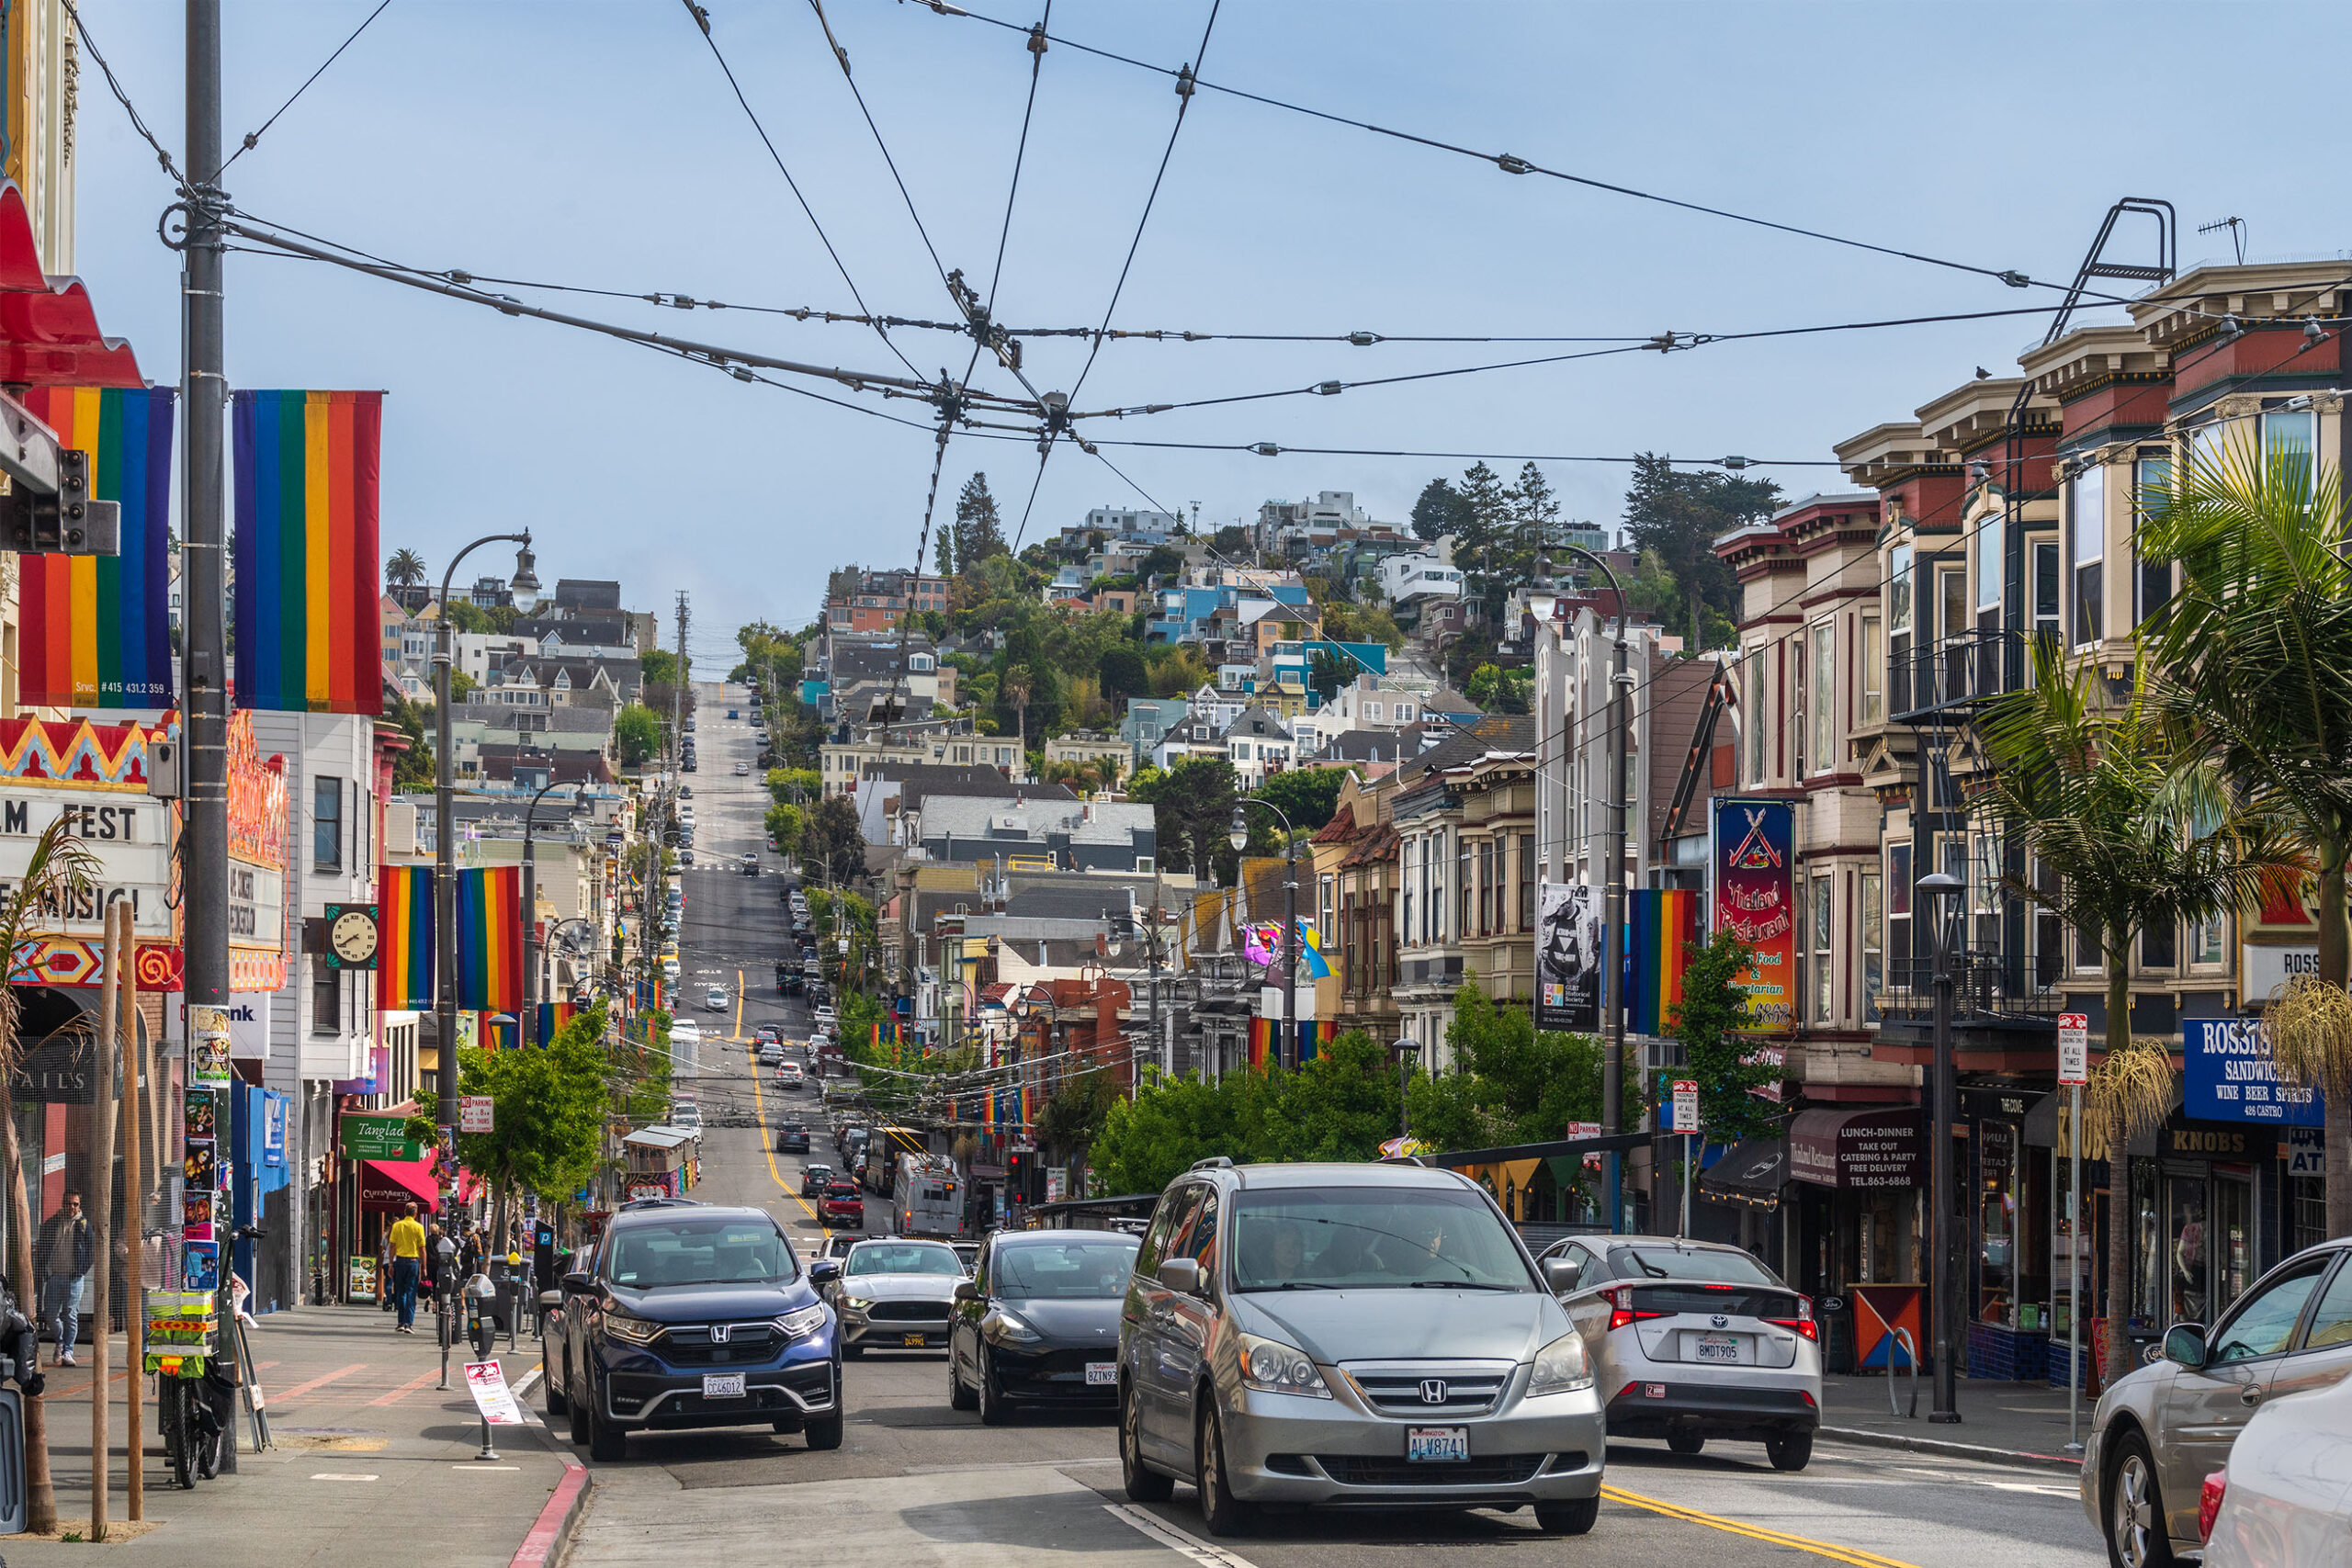
Another district to absolutely visit is the lively Castro, home of the LGBT community, where the rainbow flag was born, whose shades can be found on the buildings, in the murals, in the pedestrian crossings. Castro Street is the heart of the neighbourhood, where shops and clubs open up at the foot of the typical and colorful Victorian row houses.
Photo tips: as in other neighborhoods, focus on the most famous attractions, the details of the buildings, the most important features that can tell the story of that place. The colors of Castro and the Italian clubs of Little Italy, for example. Use mostly zoom, or a medium aperture, if you’re close enough. Remember not to tilt the camera, to avoid distortion of the vertical lines. To learn more about this and other composition tips, read this article.
@giadaantonini_photography
@giadaantonini_photography
@giadaantonini_photography
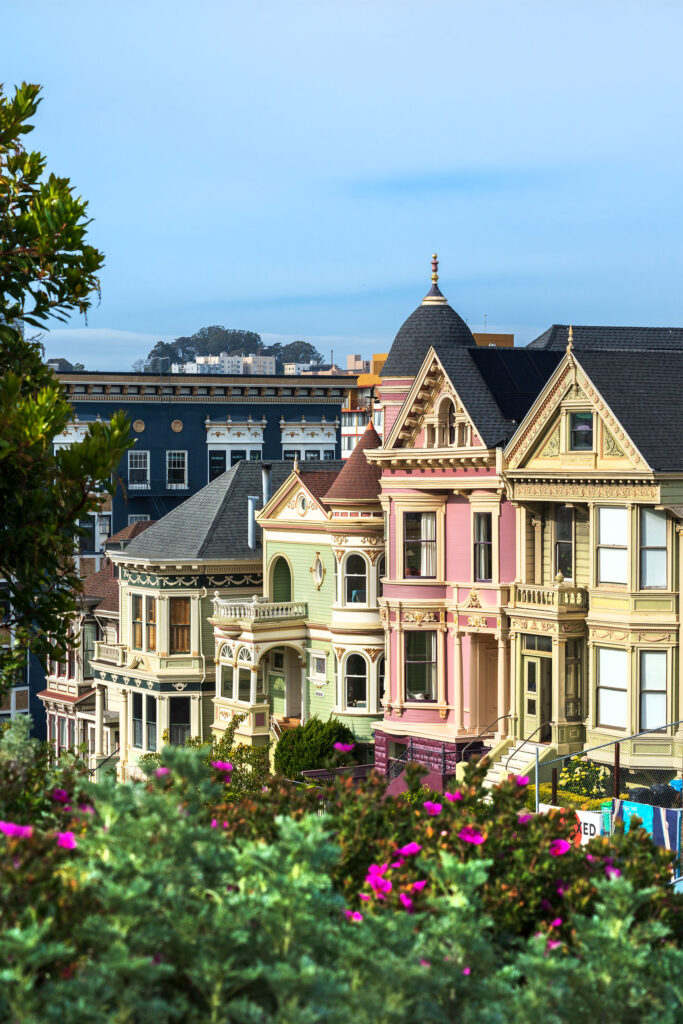
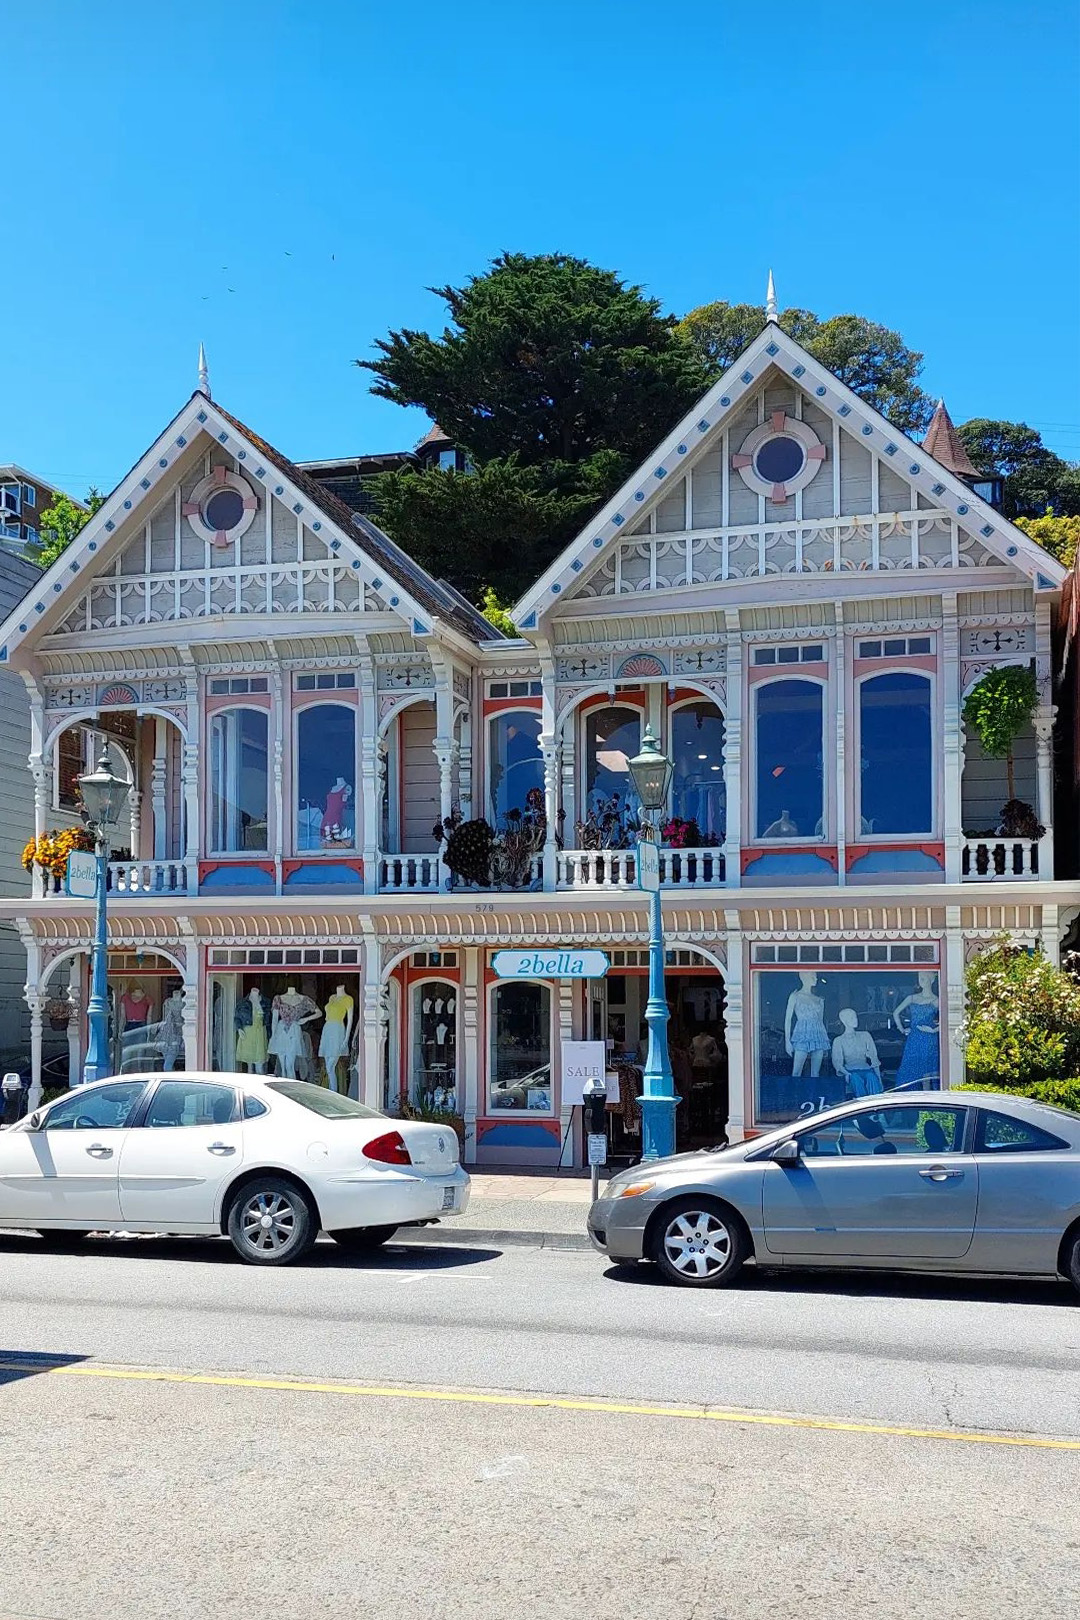
4. Alamo Square and the Painted Ladies
San Francisco’s colonial and Victorian architecture is truly fascinating. The small villas in the Marina area and along the internal streets of the city prove it. But the most famous and immortalized are certainly the Painted Ladies, also known as the Seven Sisters. You can find them in Alamo Square, a lovely hillside garden, where the locals love to stroll in the afternoon. These seven terraced houses, painted in different colors, built at the end of the 19th century, have become the symbol of the Victorian style in California and represent a perfect postcard of the city.
Photo tips: for a shot that expresses the contrast between the style of the Victorian houses and the skyscrapers, go up to the highest point of Alamo Square. Here, beyond the roofs of the Painted Ladies, there will be a wonderful view of the Financial District and the tallest buildings. This is the best place to shoot, either using a medium aperture or a zoom to capture some details.
@giadaantonini_photography
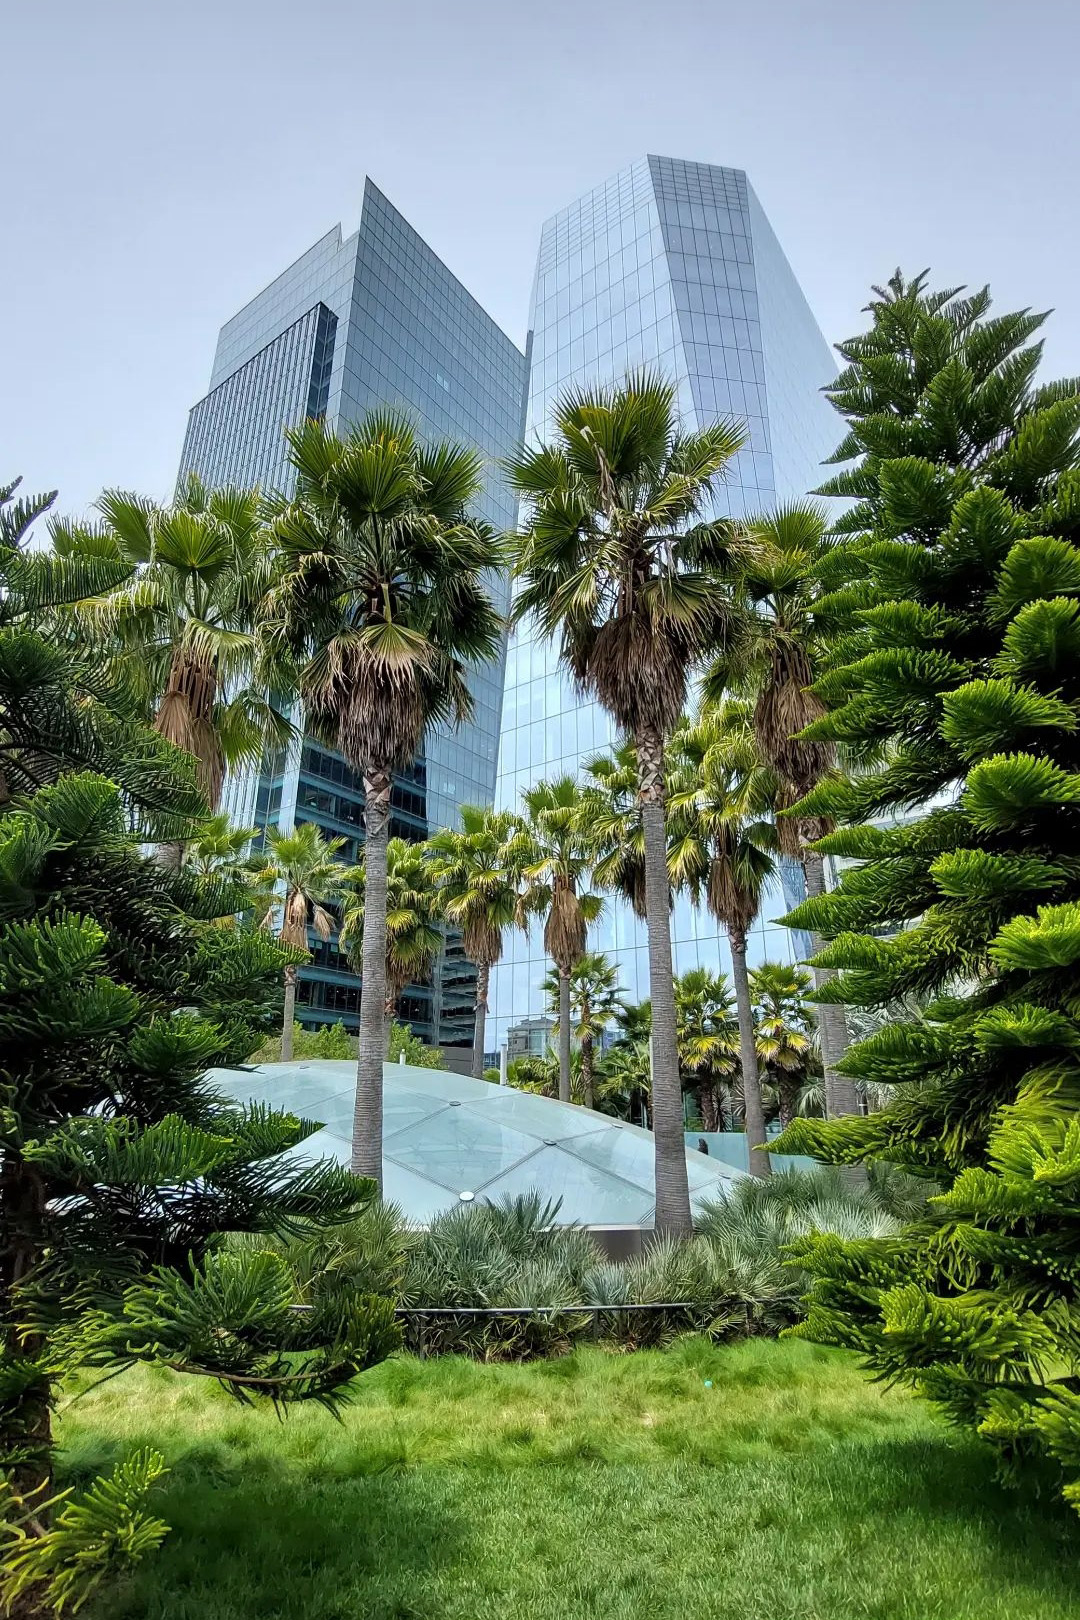
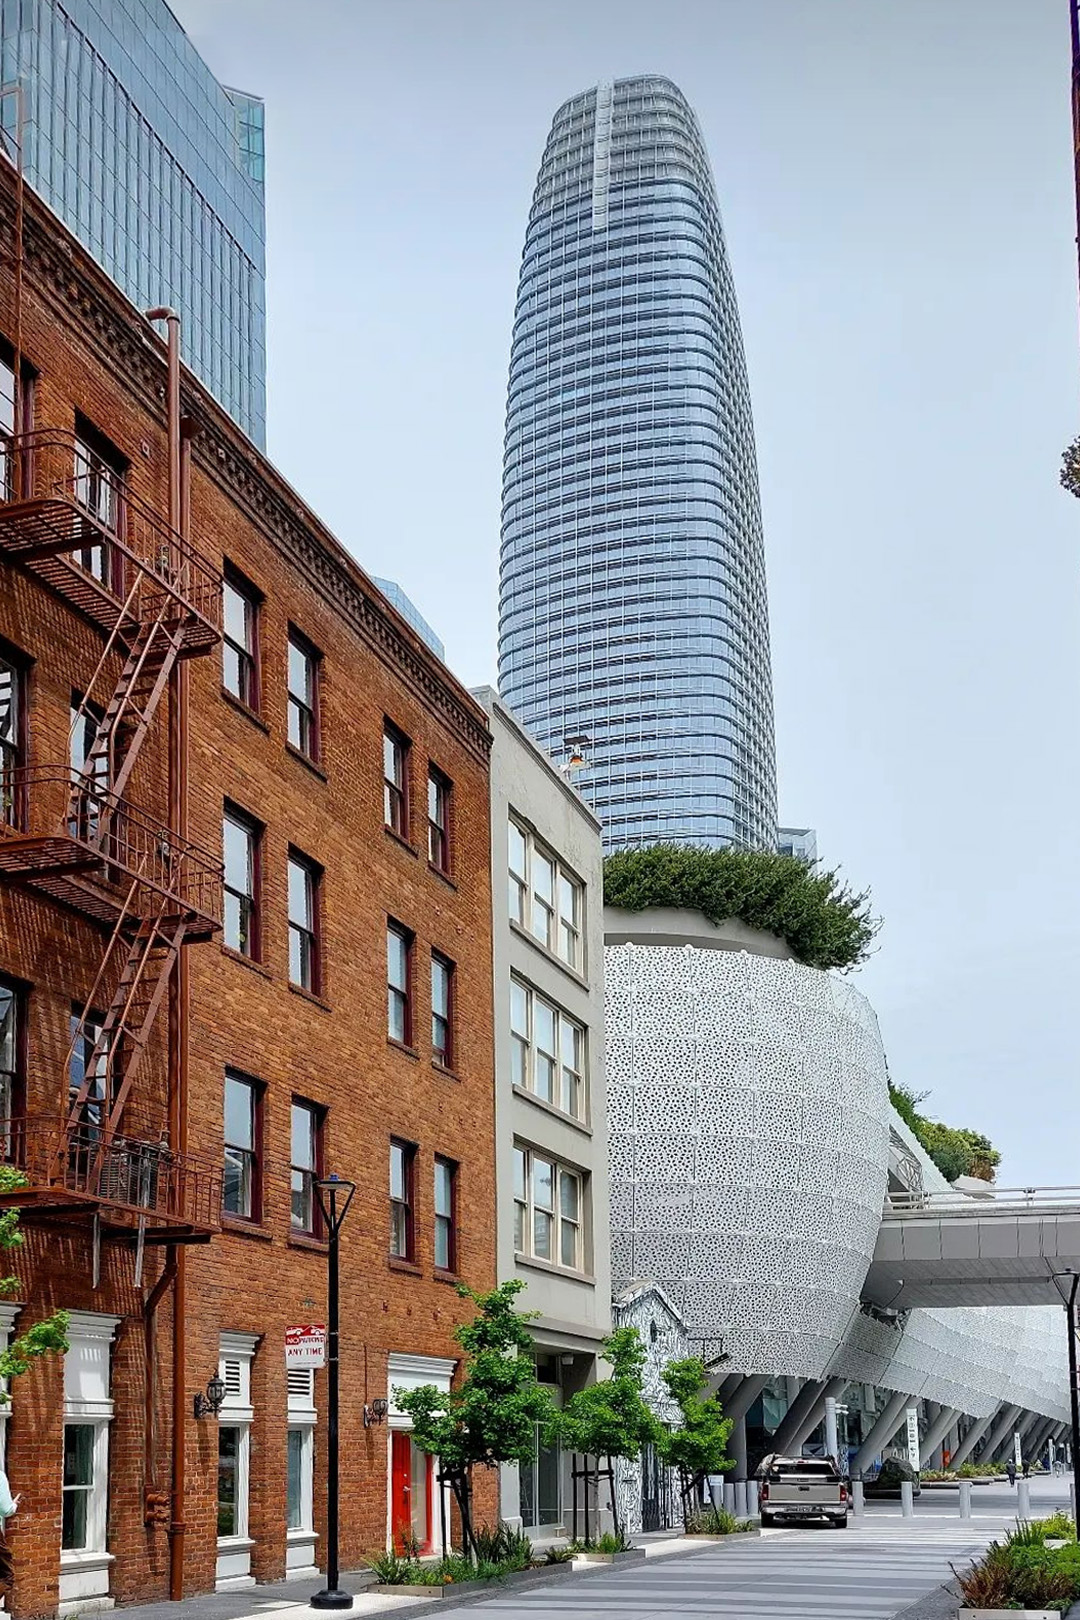
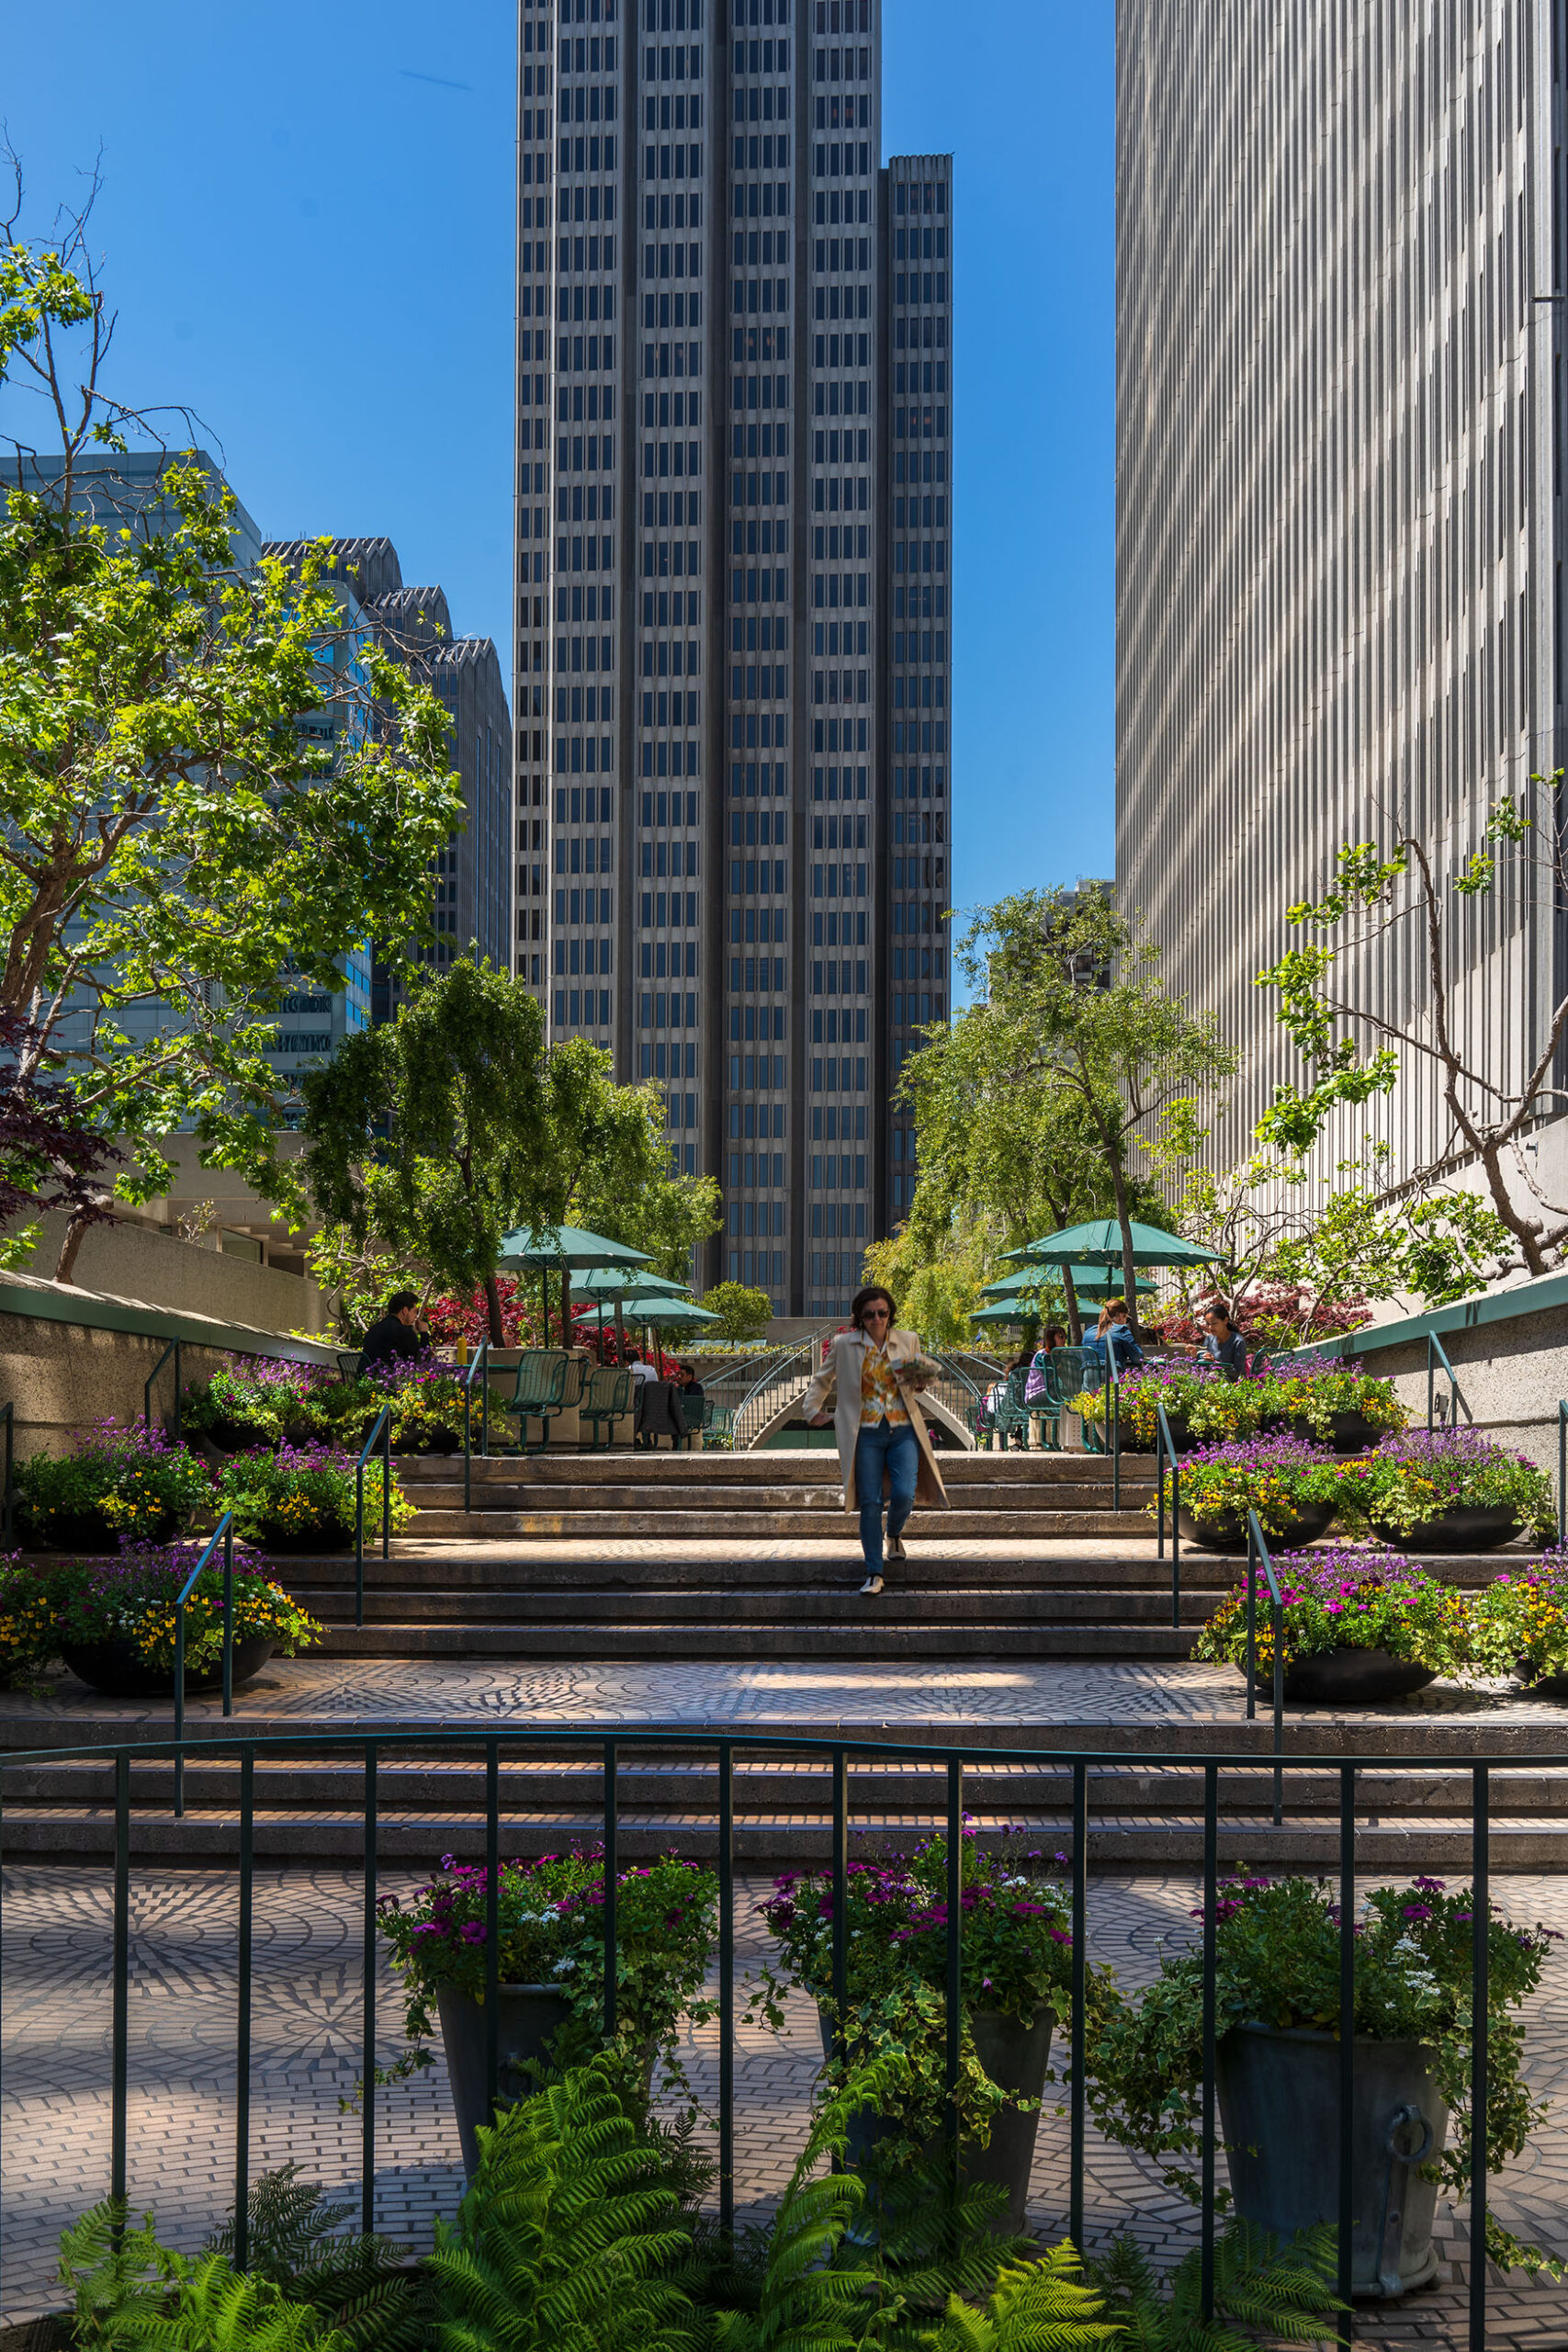
5. The secret gardens
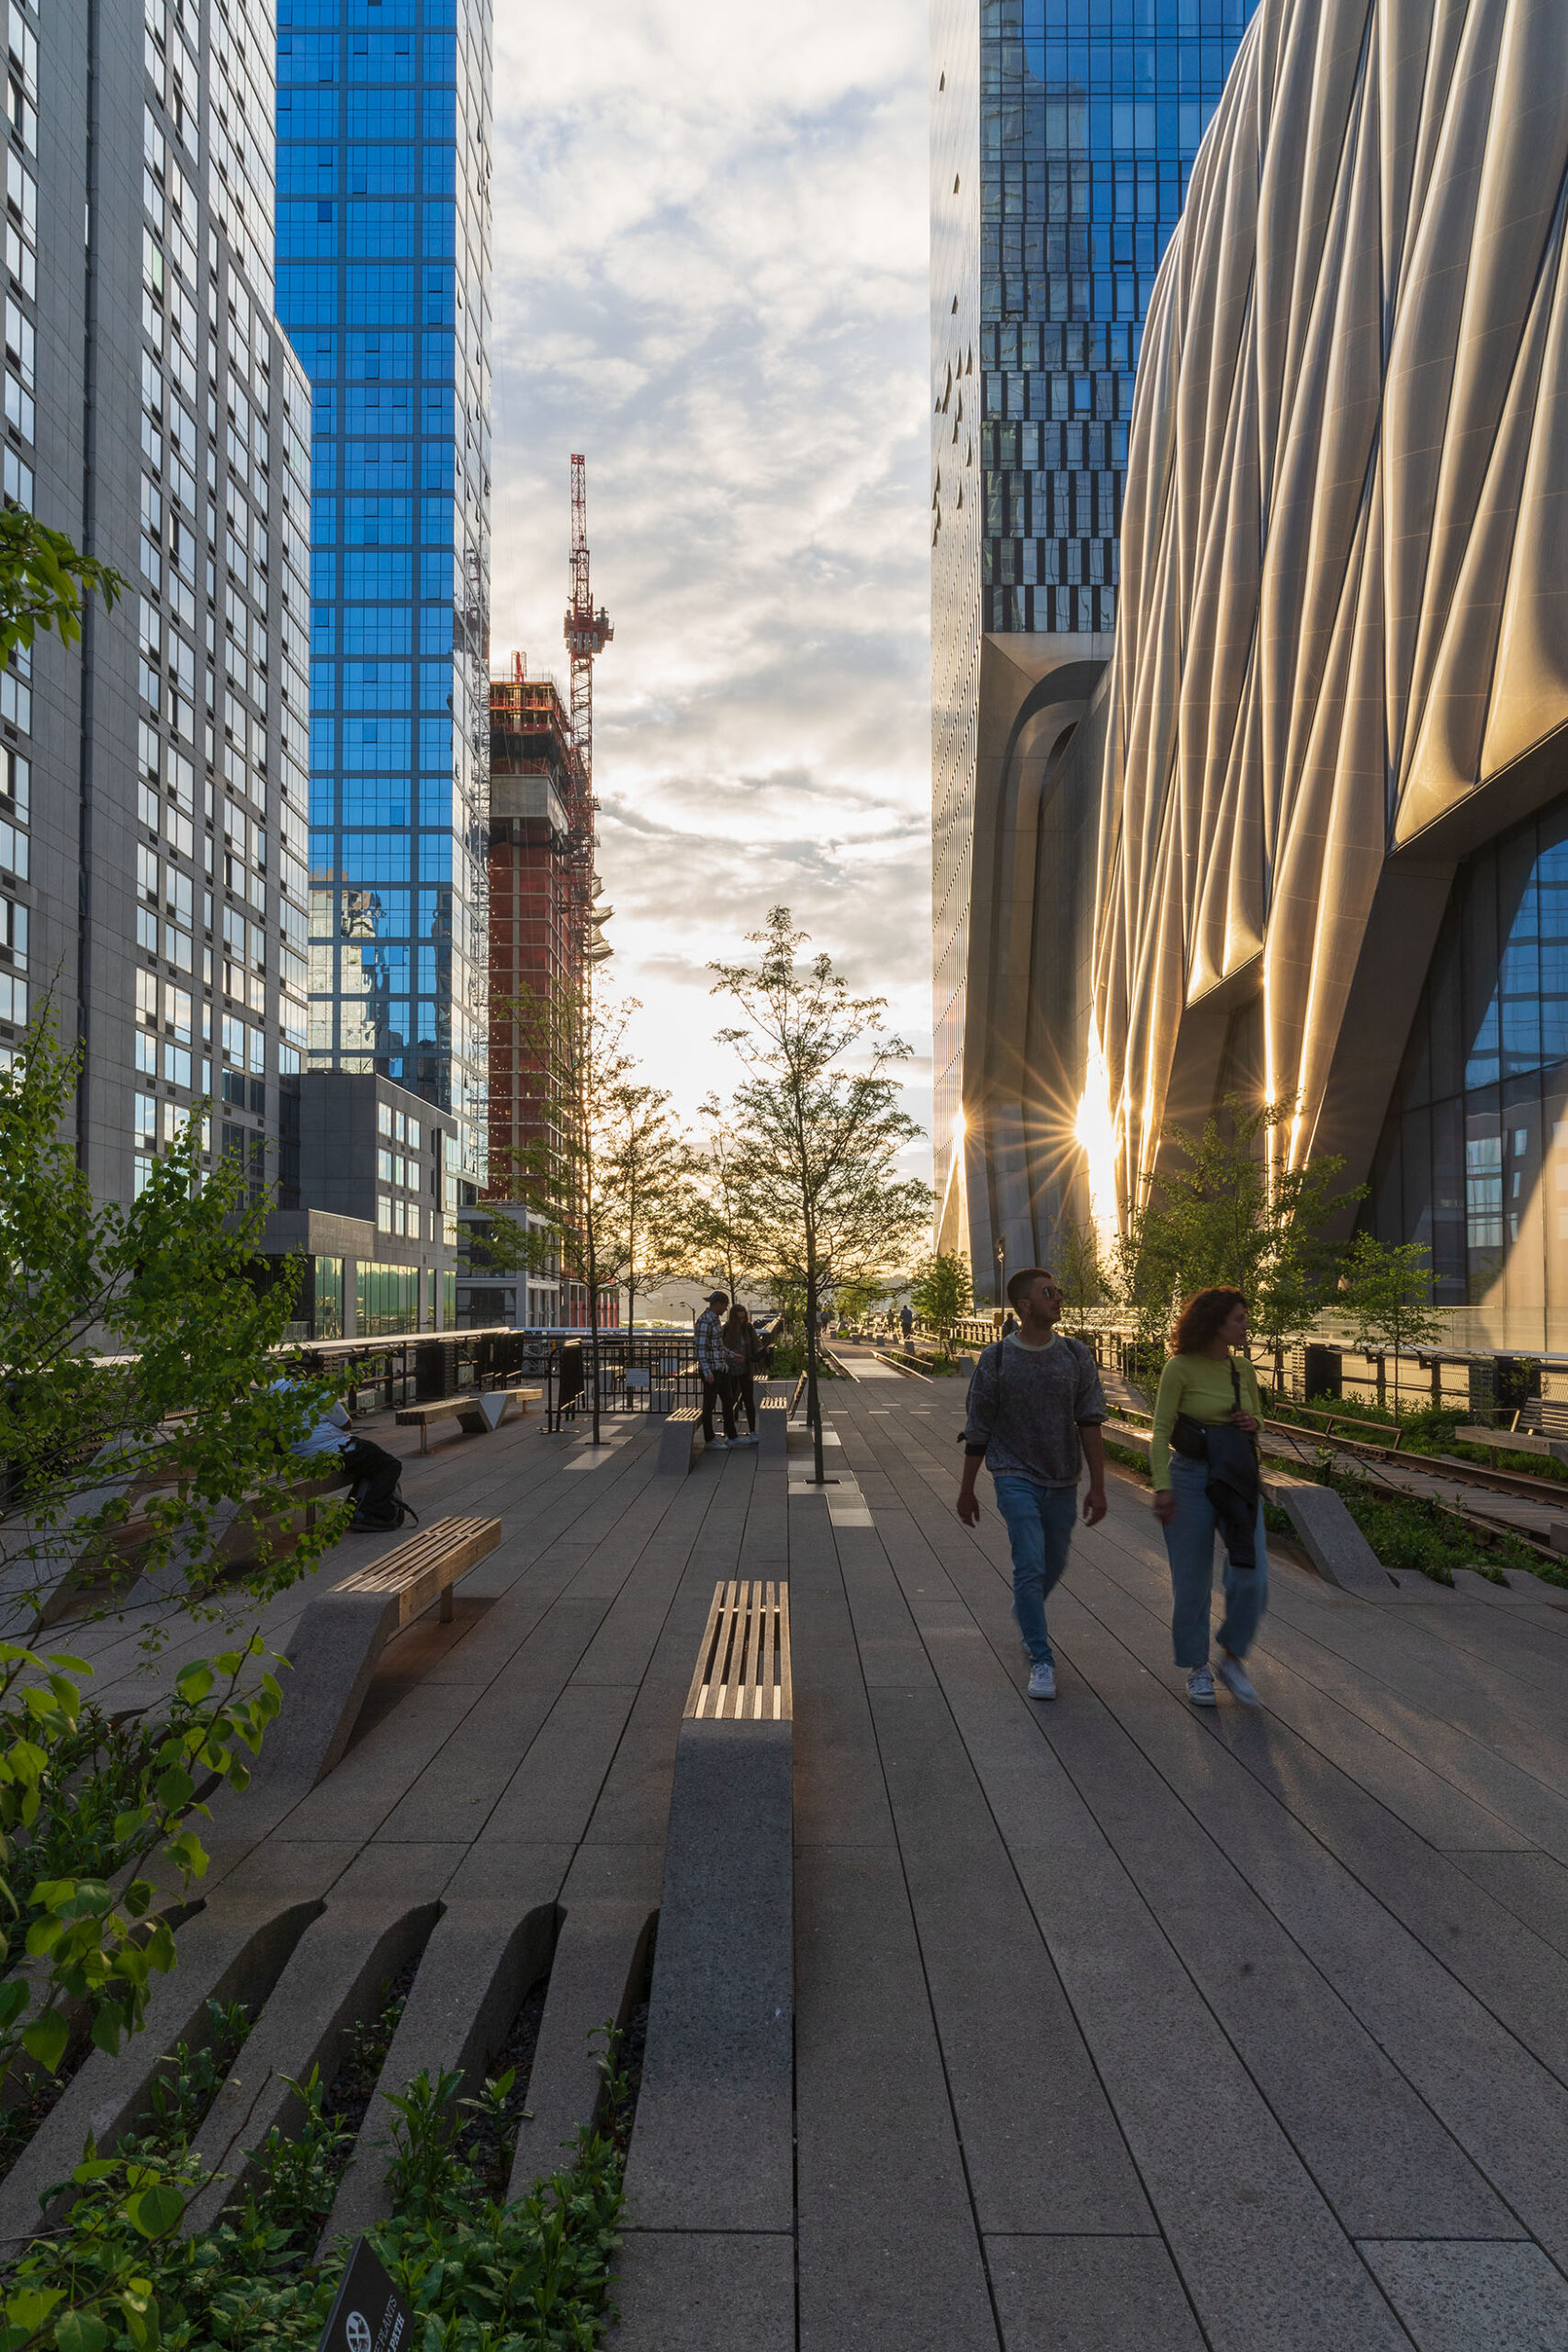
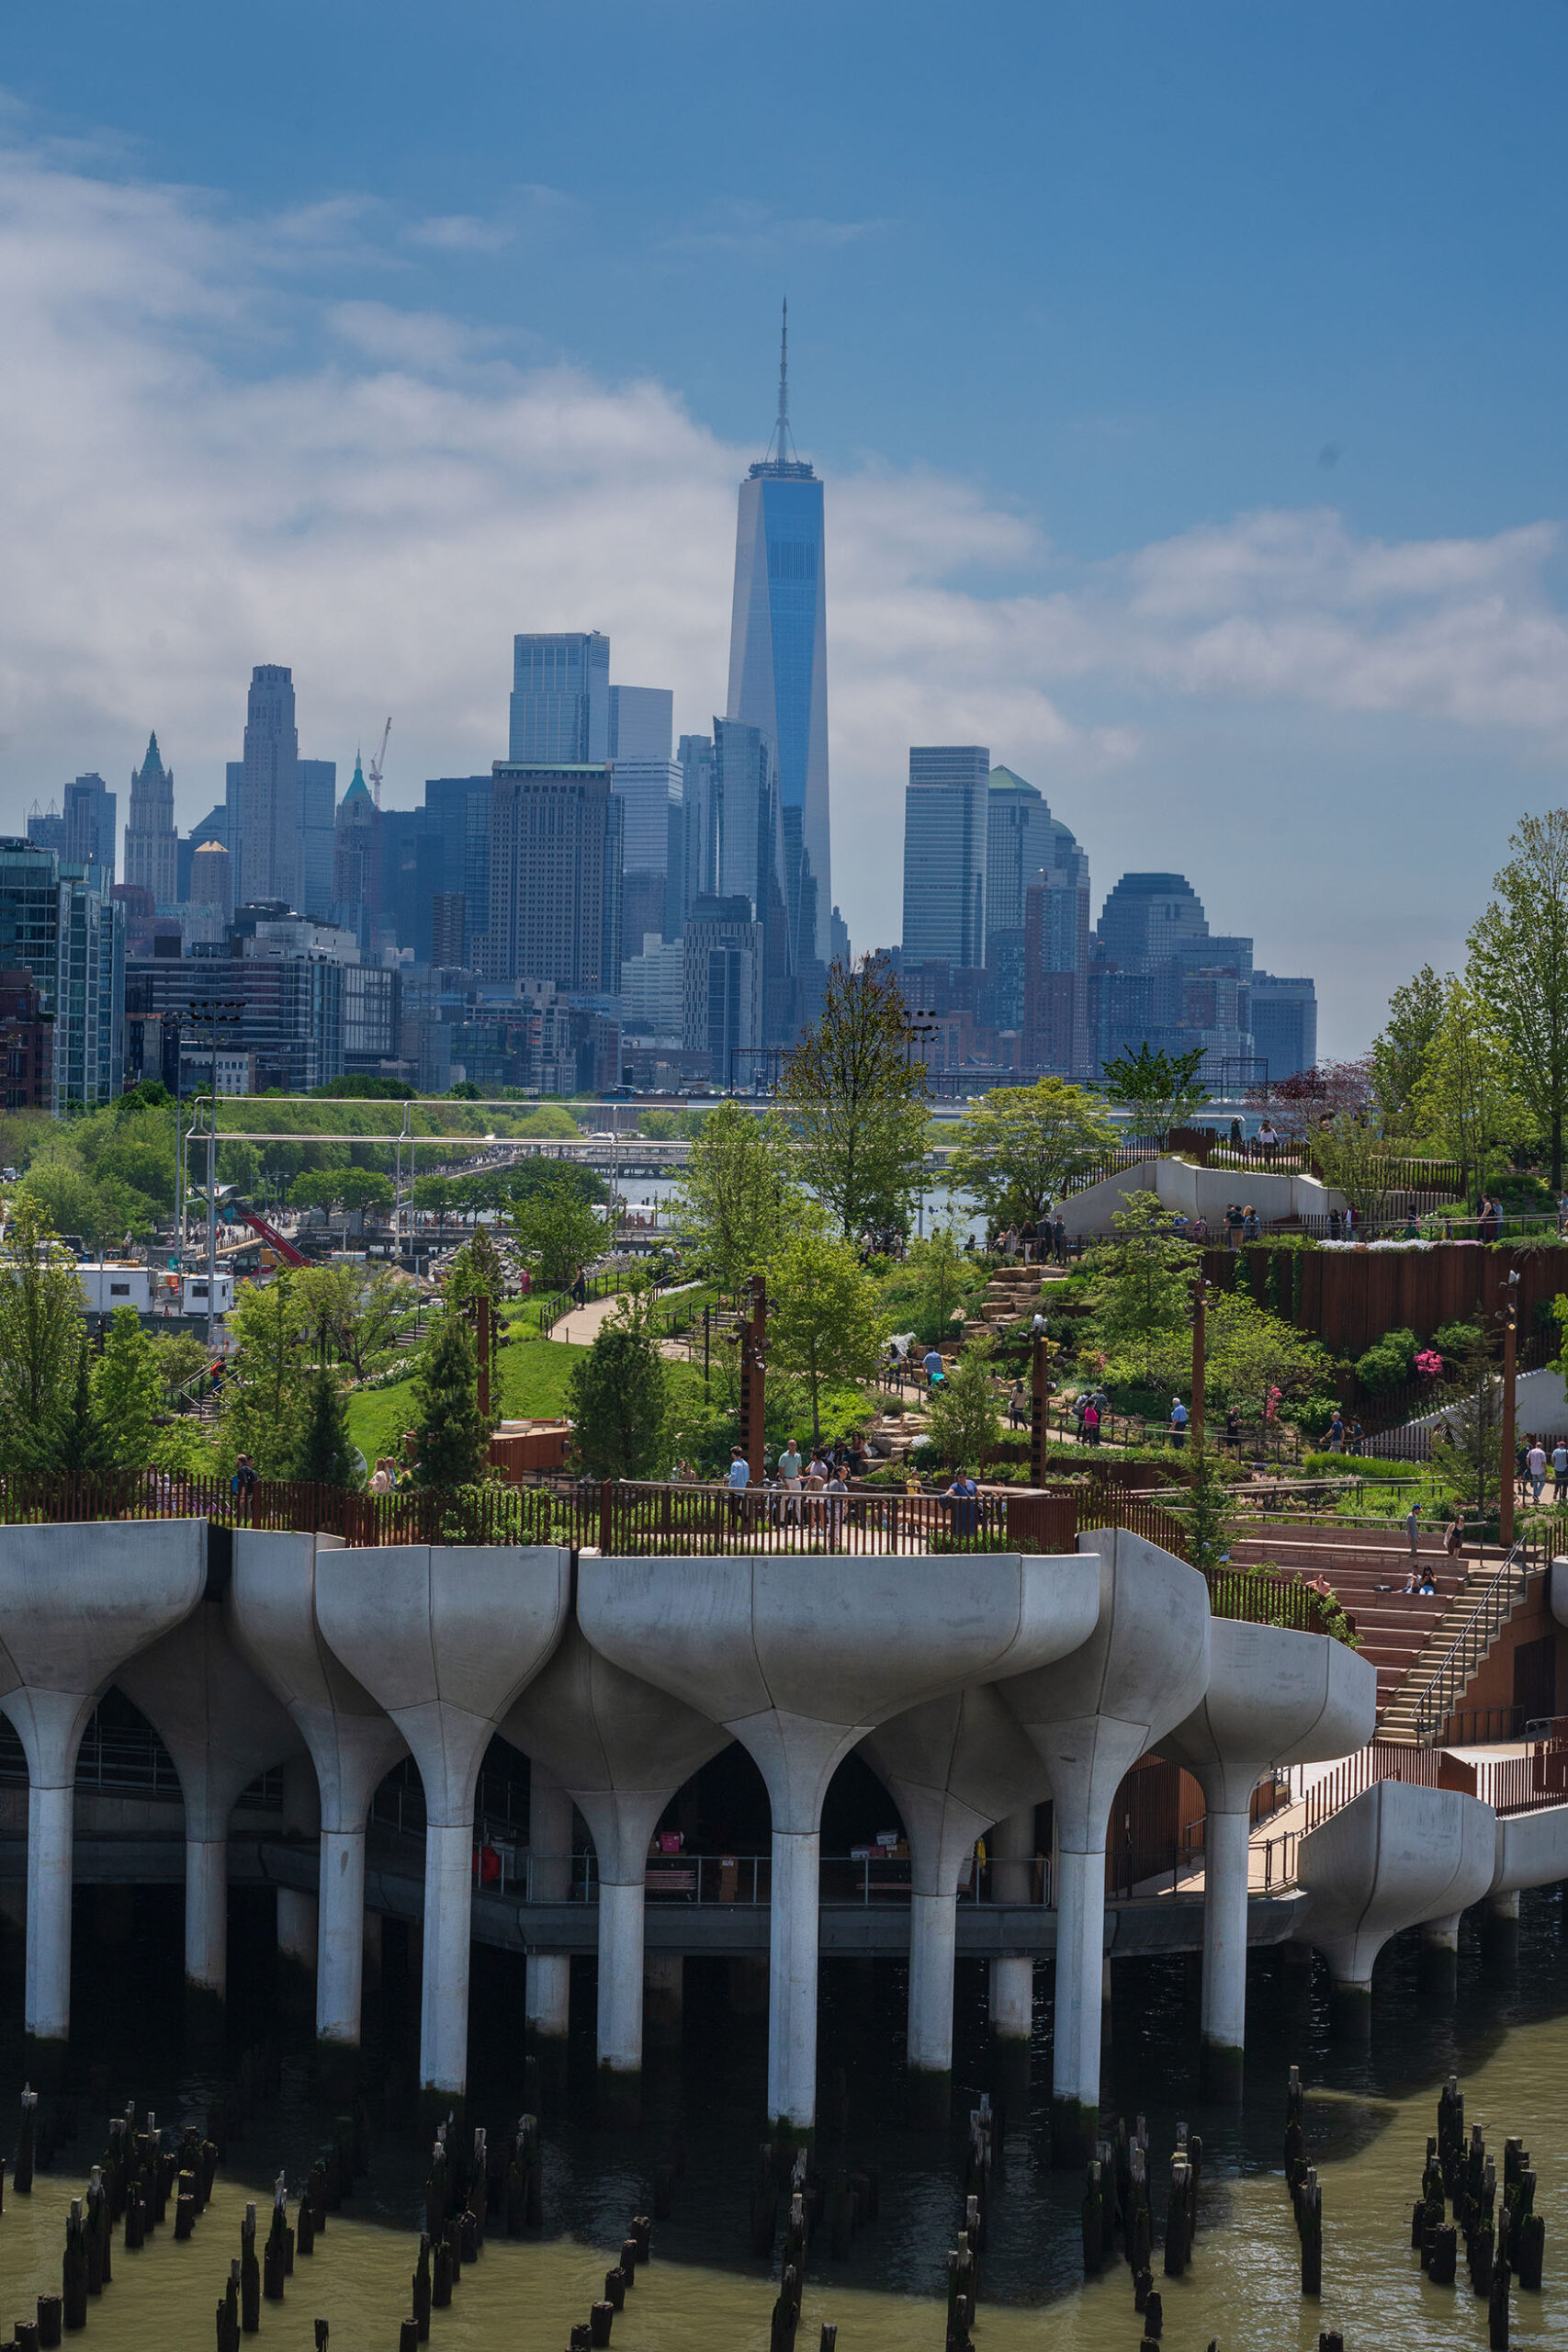
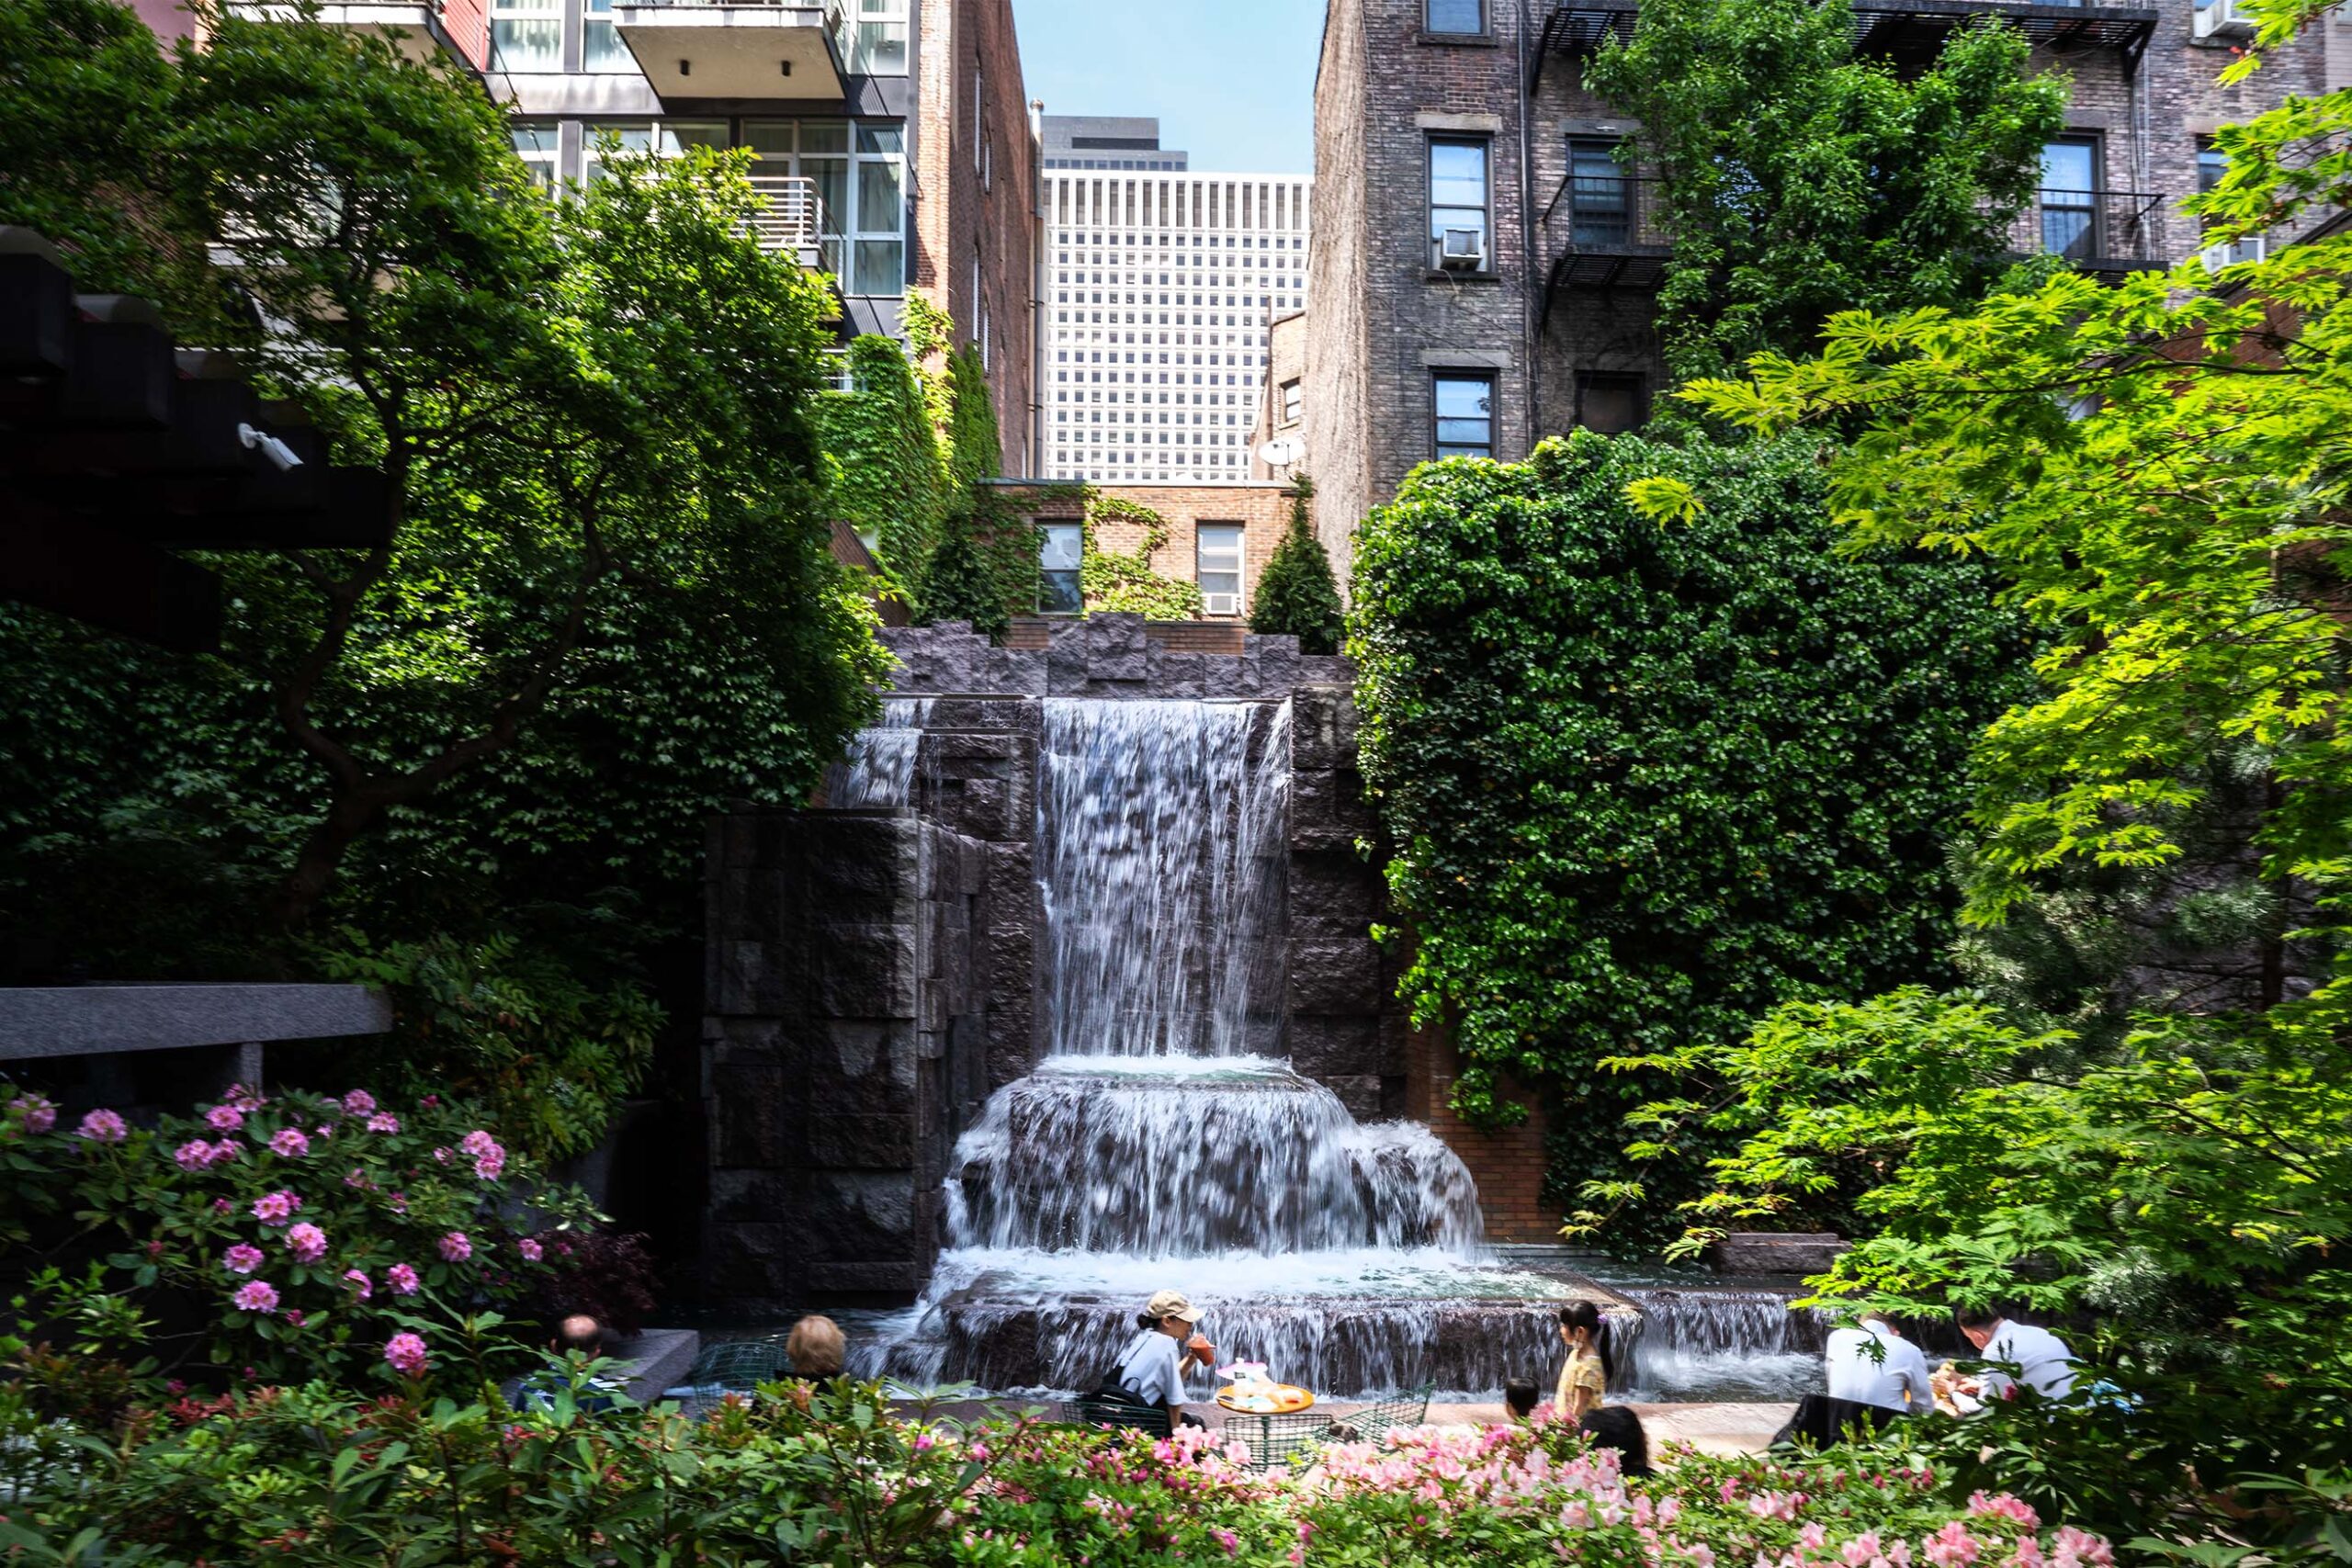
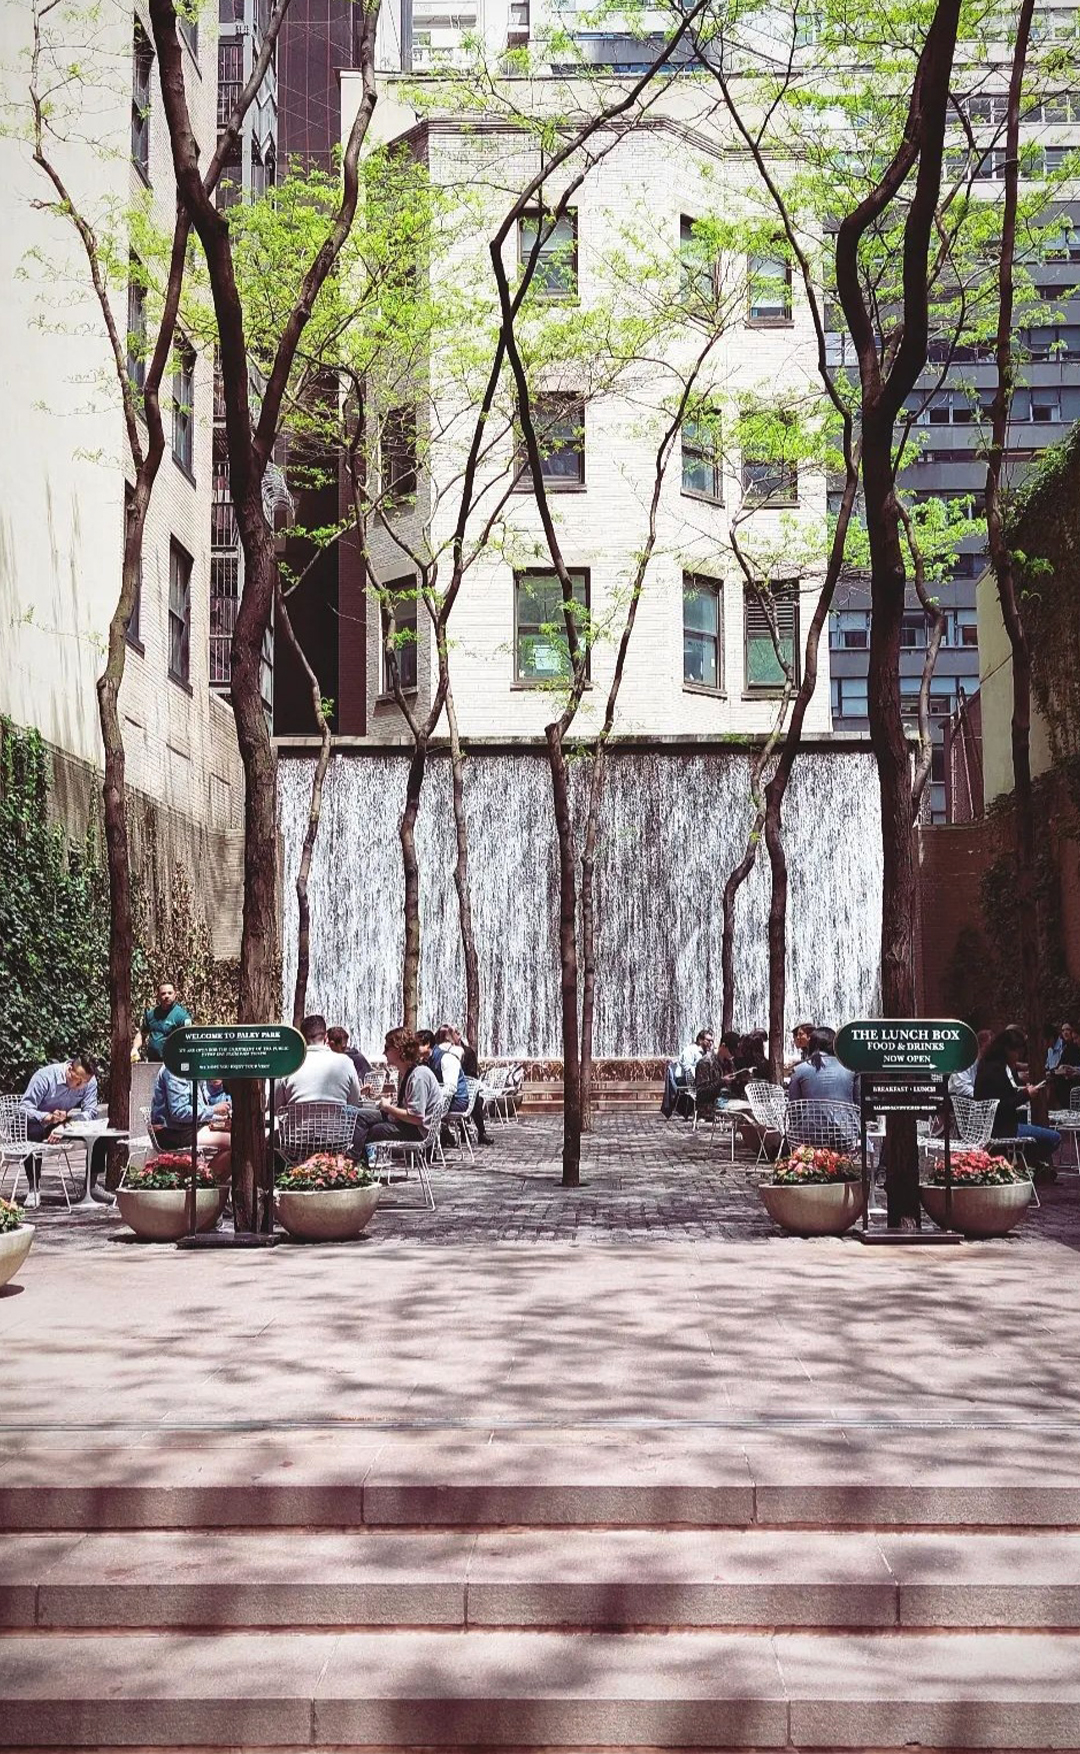
One of the peculiarities of San Francisco are the secret gardens, gardens built on platforms suspended between the skyscrapers, to give the neighborhood a pedestrian space and some greenery. Often, in fact, the buildings are so dense that there is not enough space on the ground floor apart from the street, or that they only leave narrow and shady spaces. For this reason, these gardens are often created, some private, others accessible but often hidden, almost invisible. They are real oases of peace, where thousands of employees can relax during their lunch break, take a walk or work outdoors.
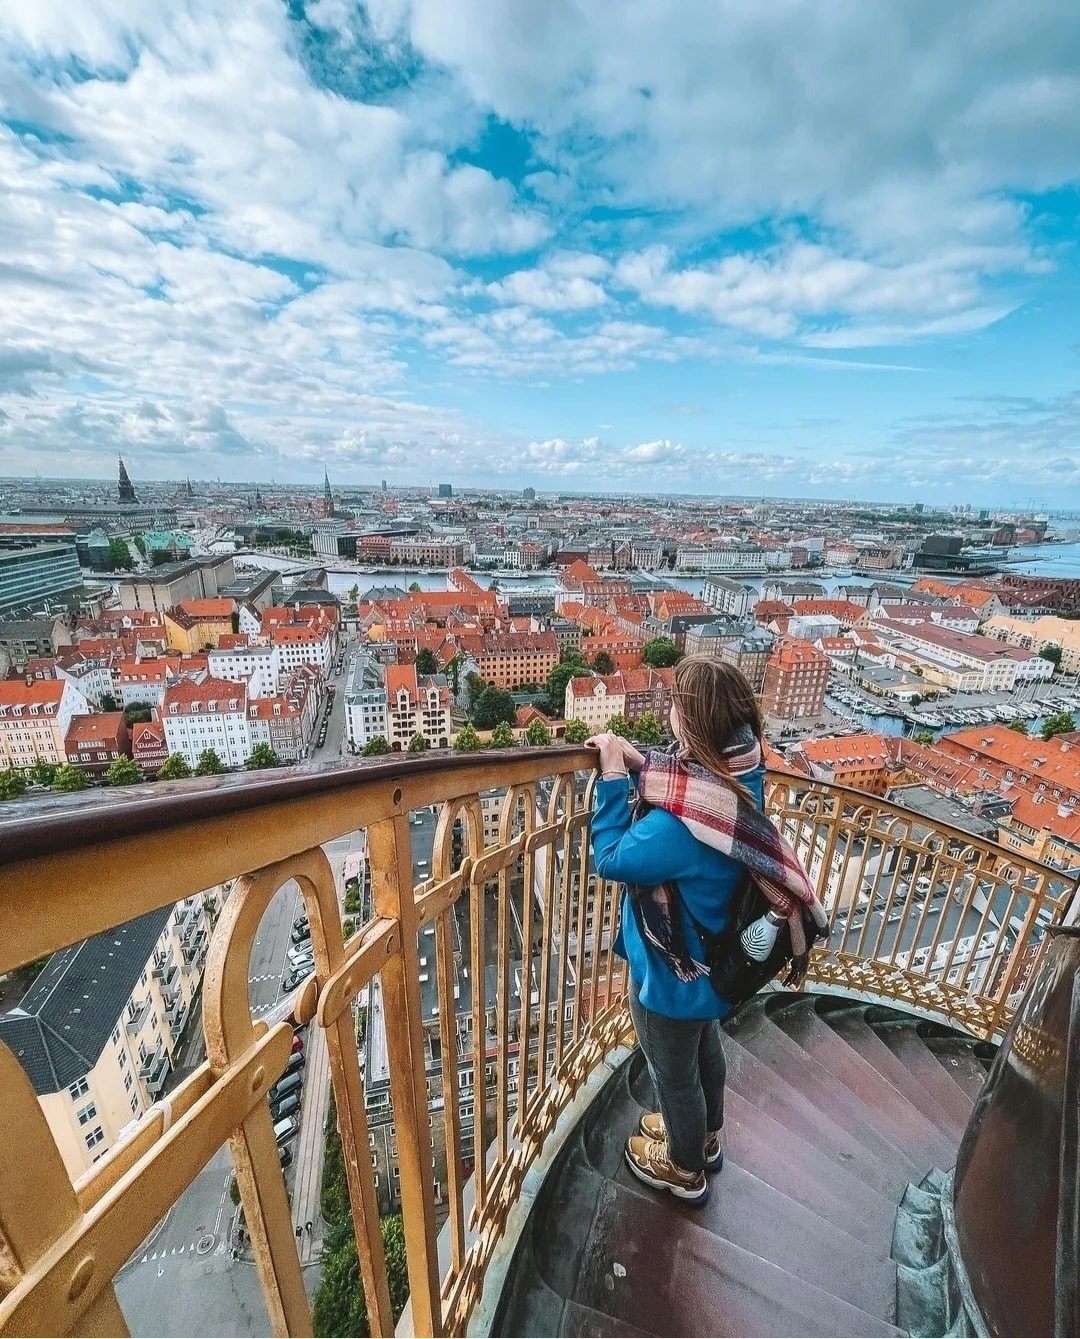
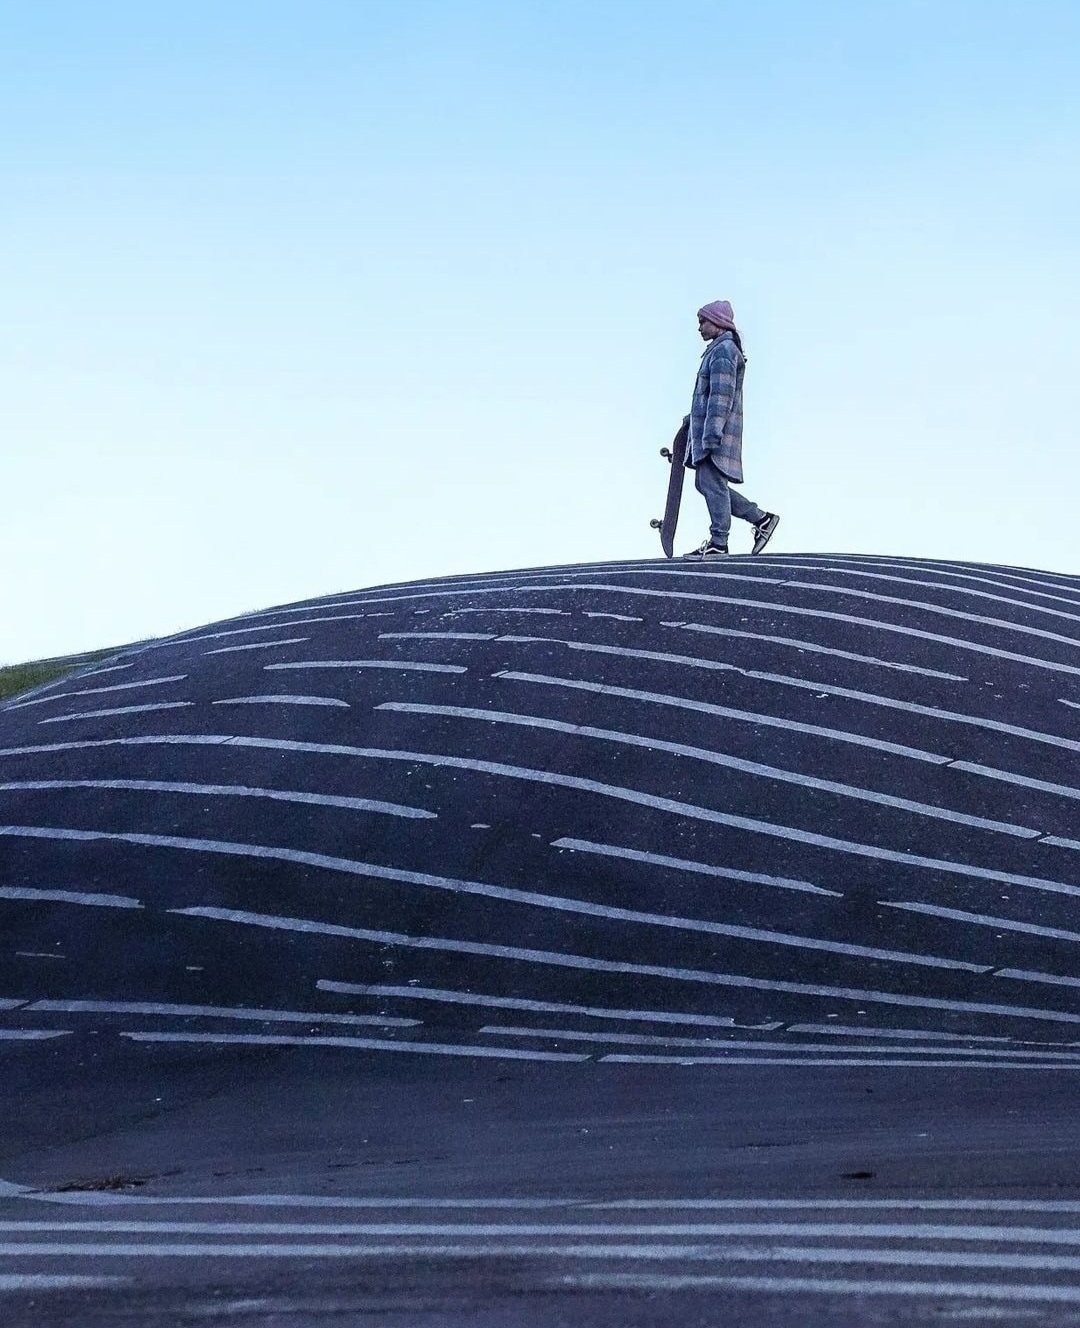
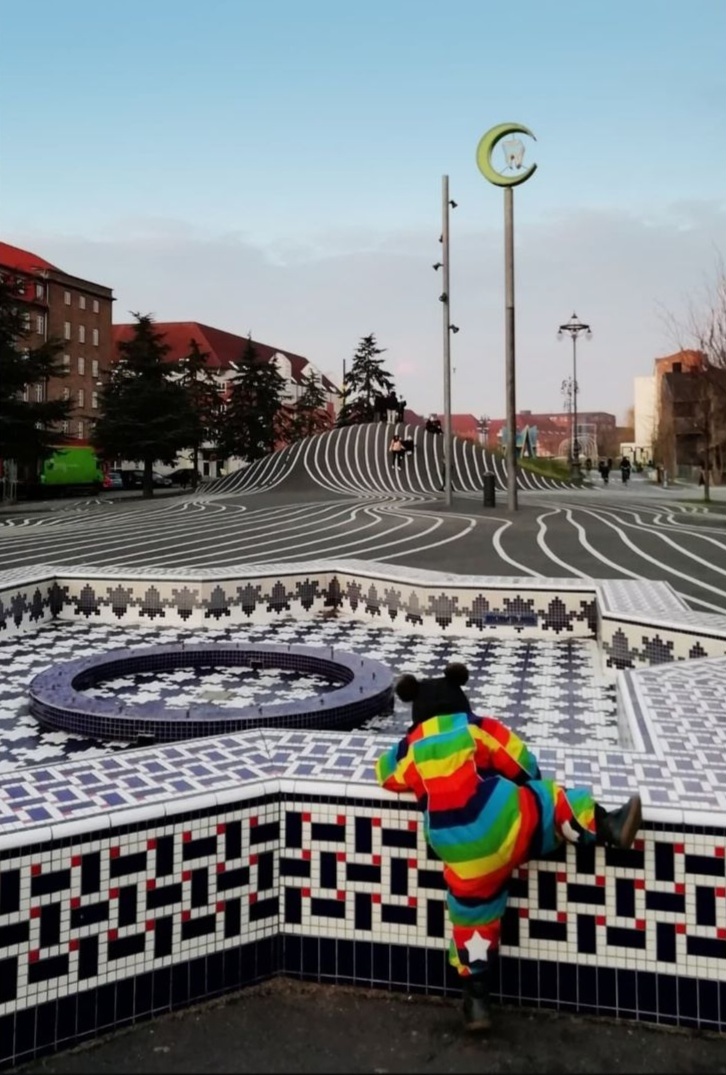
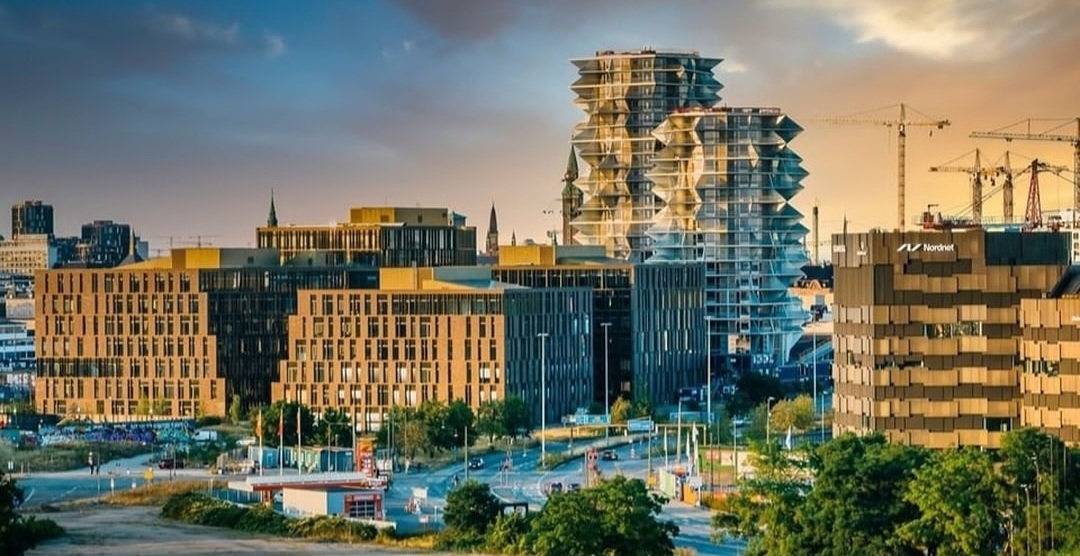
An example is the suspended path of Whaleship Plaza. Going along it, you arrive at a terrace overlooking the bay and the Embarcadero. Recently built and absolutely not to be missed is the incredible Salesforce Park in the Bay Area, suspended over a bus interchange station, with its futuristic design and its immense botanical garden that literally leaves you breathless.
Photo tips: wide angle is one of the best ways to capture the beauty of these places enclosed by skyscrapers and to render their proportions. At Salesforce Park you can also try macro photography, to capture the thousands of vegetation species present. Play also with the light between the skyscrapers and its reflections on the glass facades.
@giadaantonini_photography
@giadaantonini_photography
@giadaantonini_photography
@giadaantonini_photography
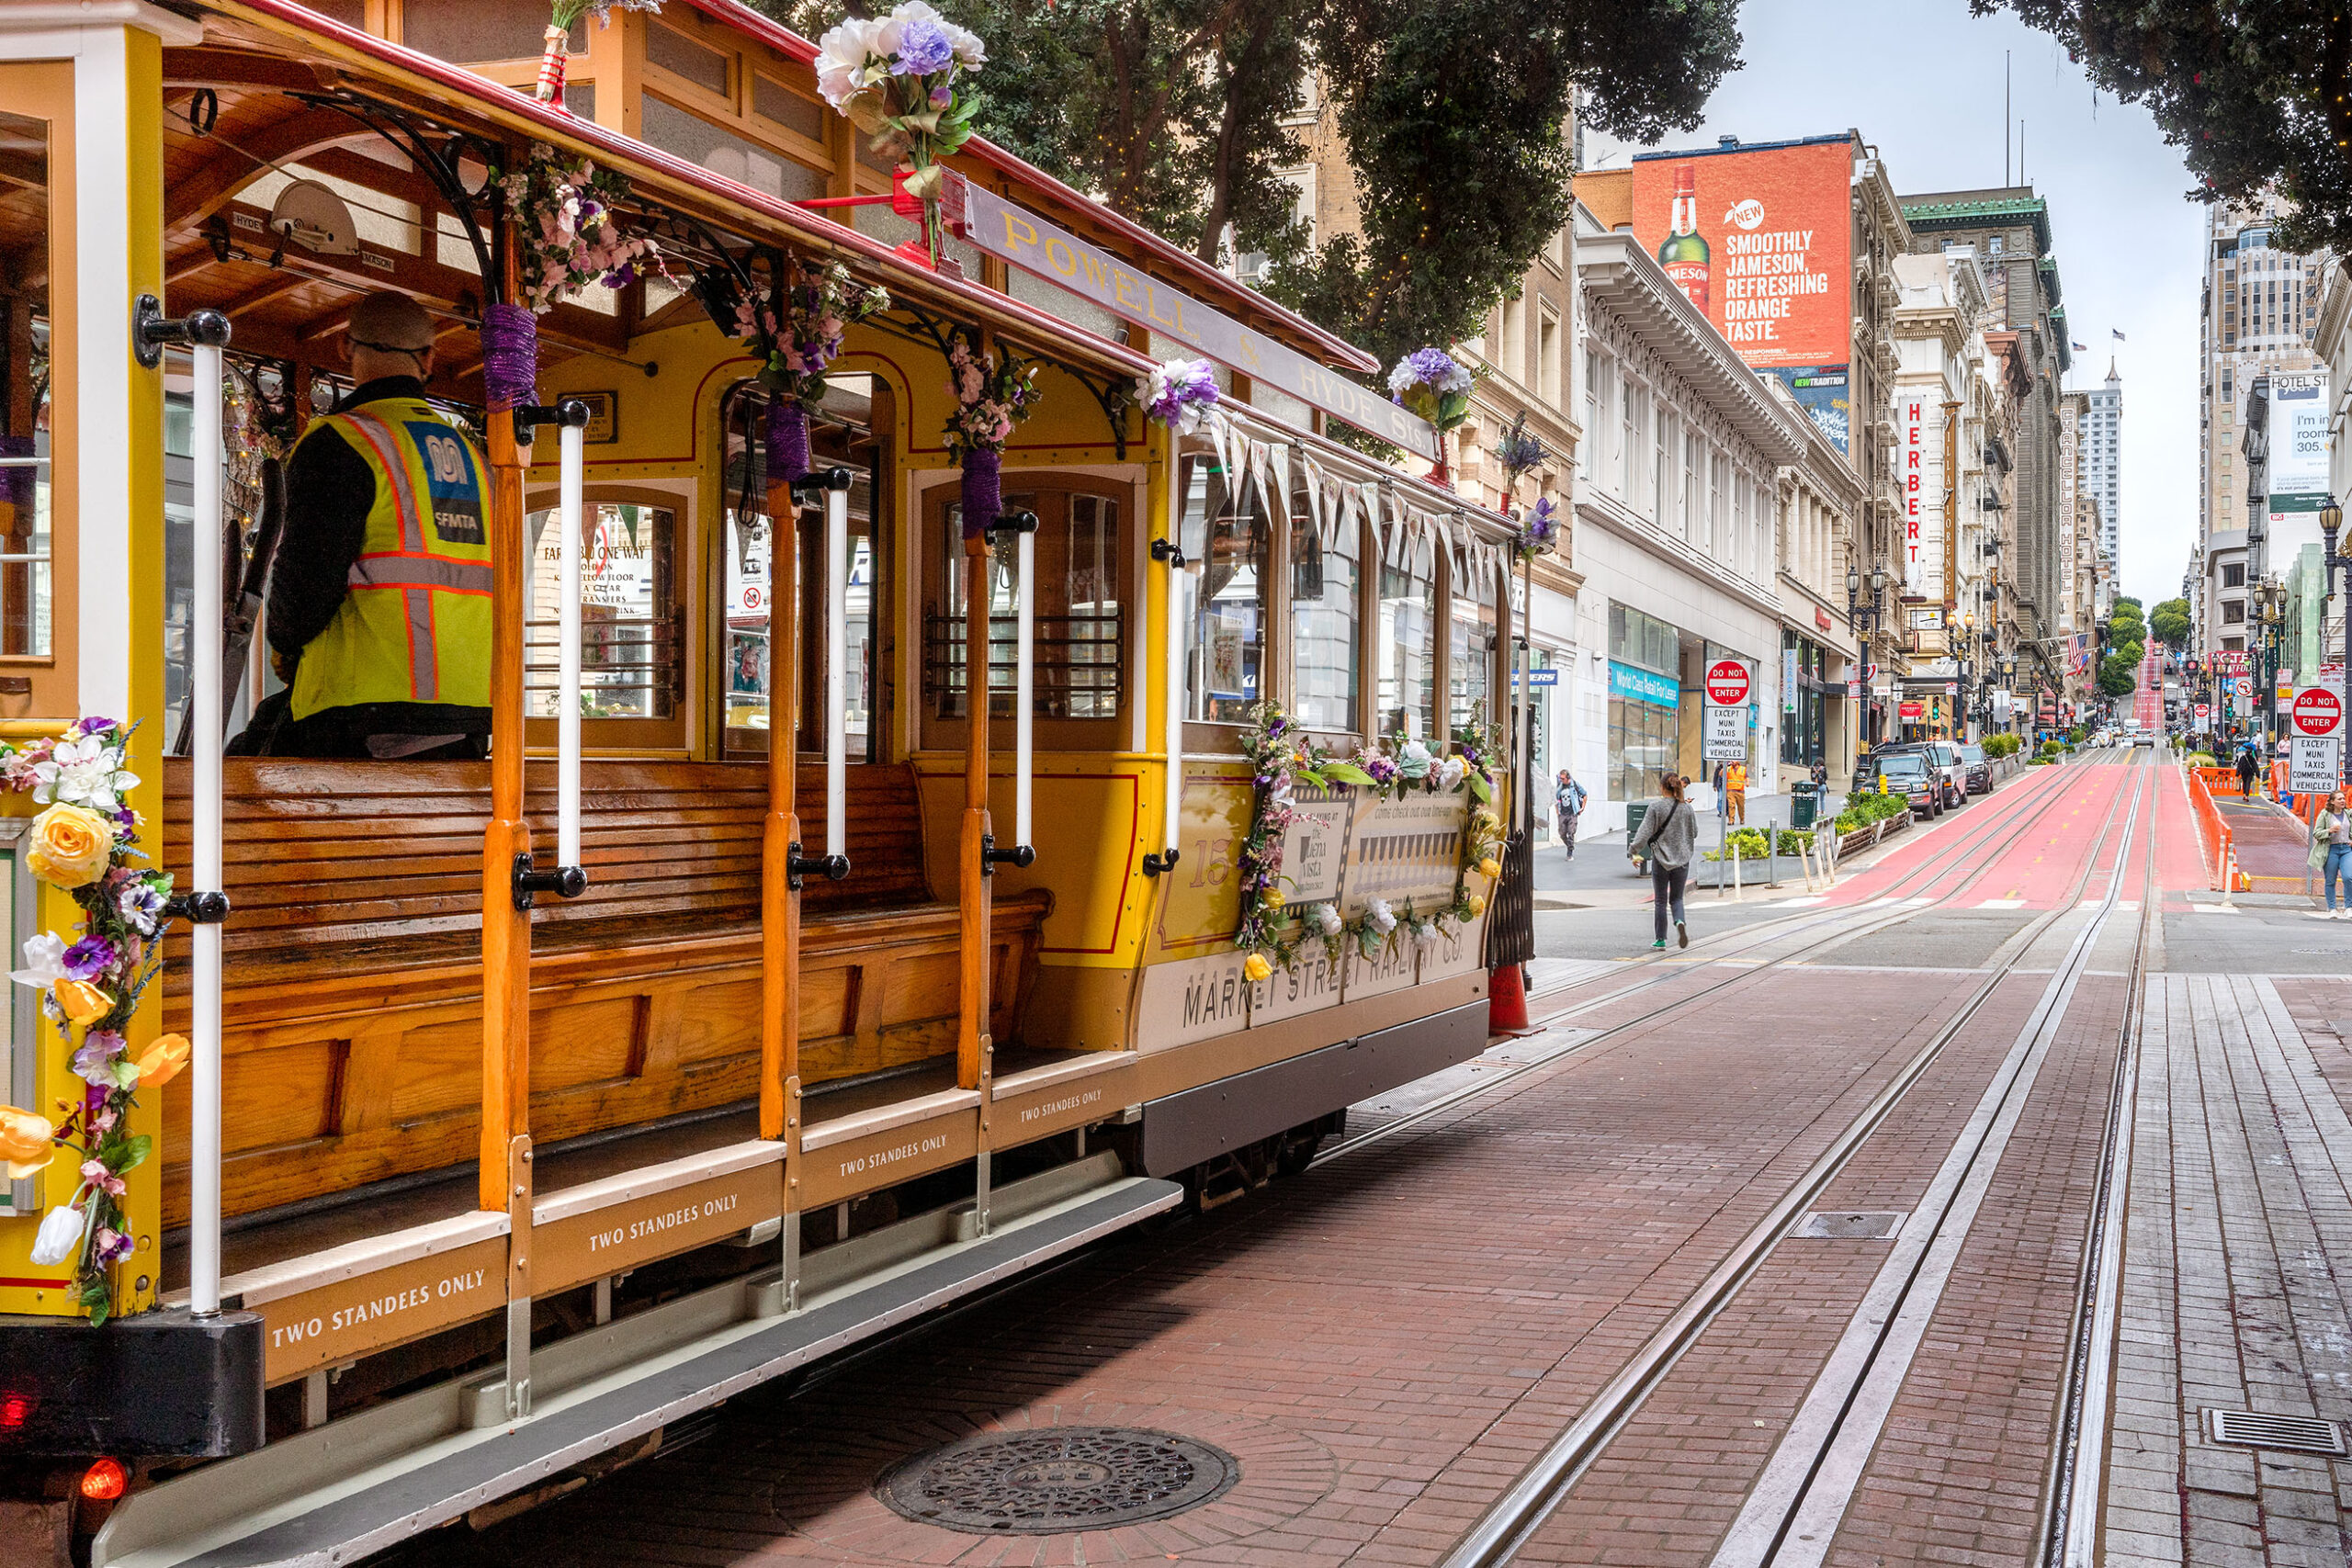
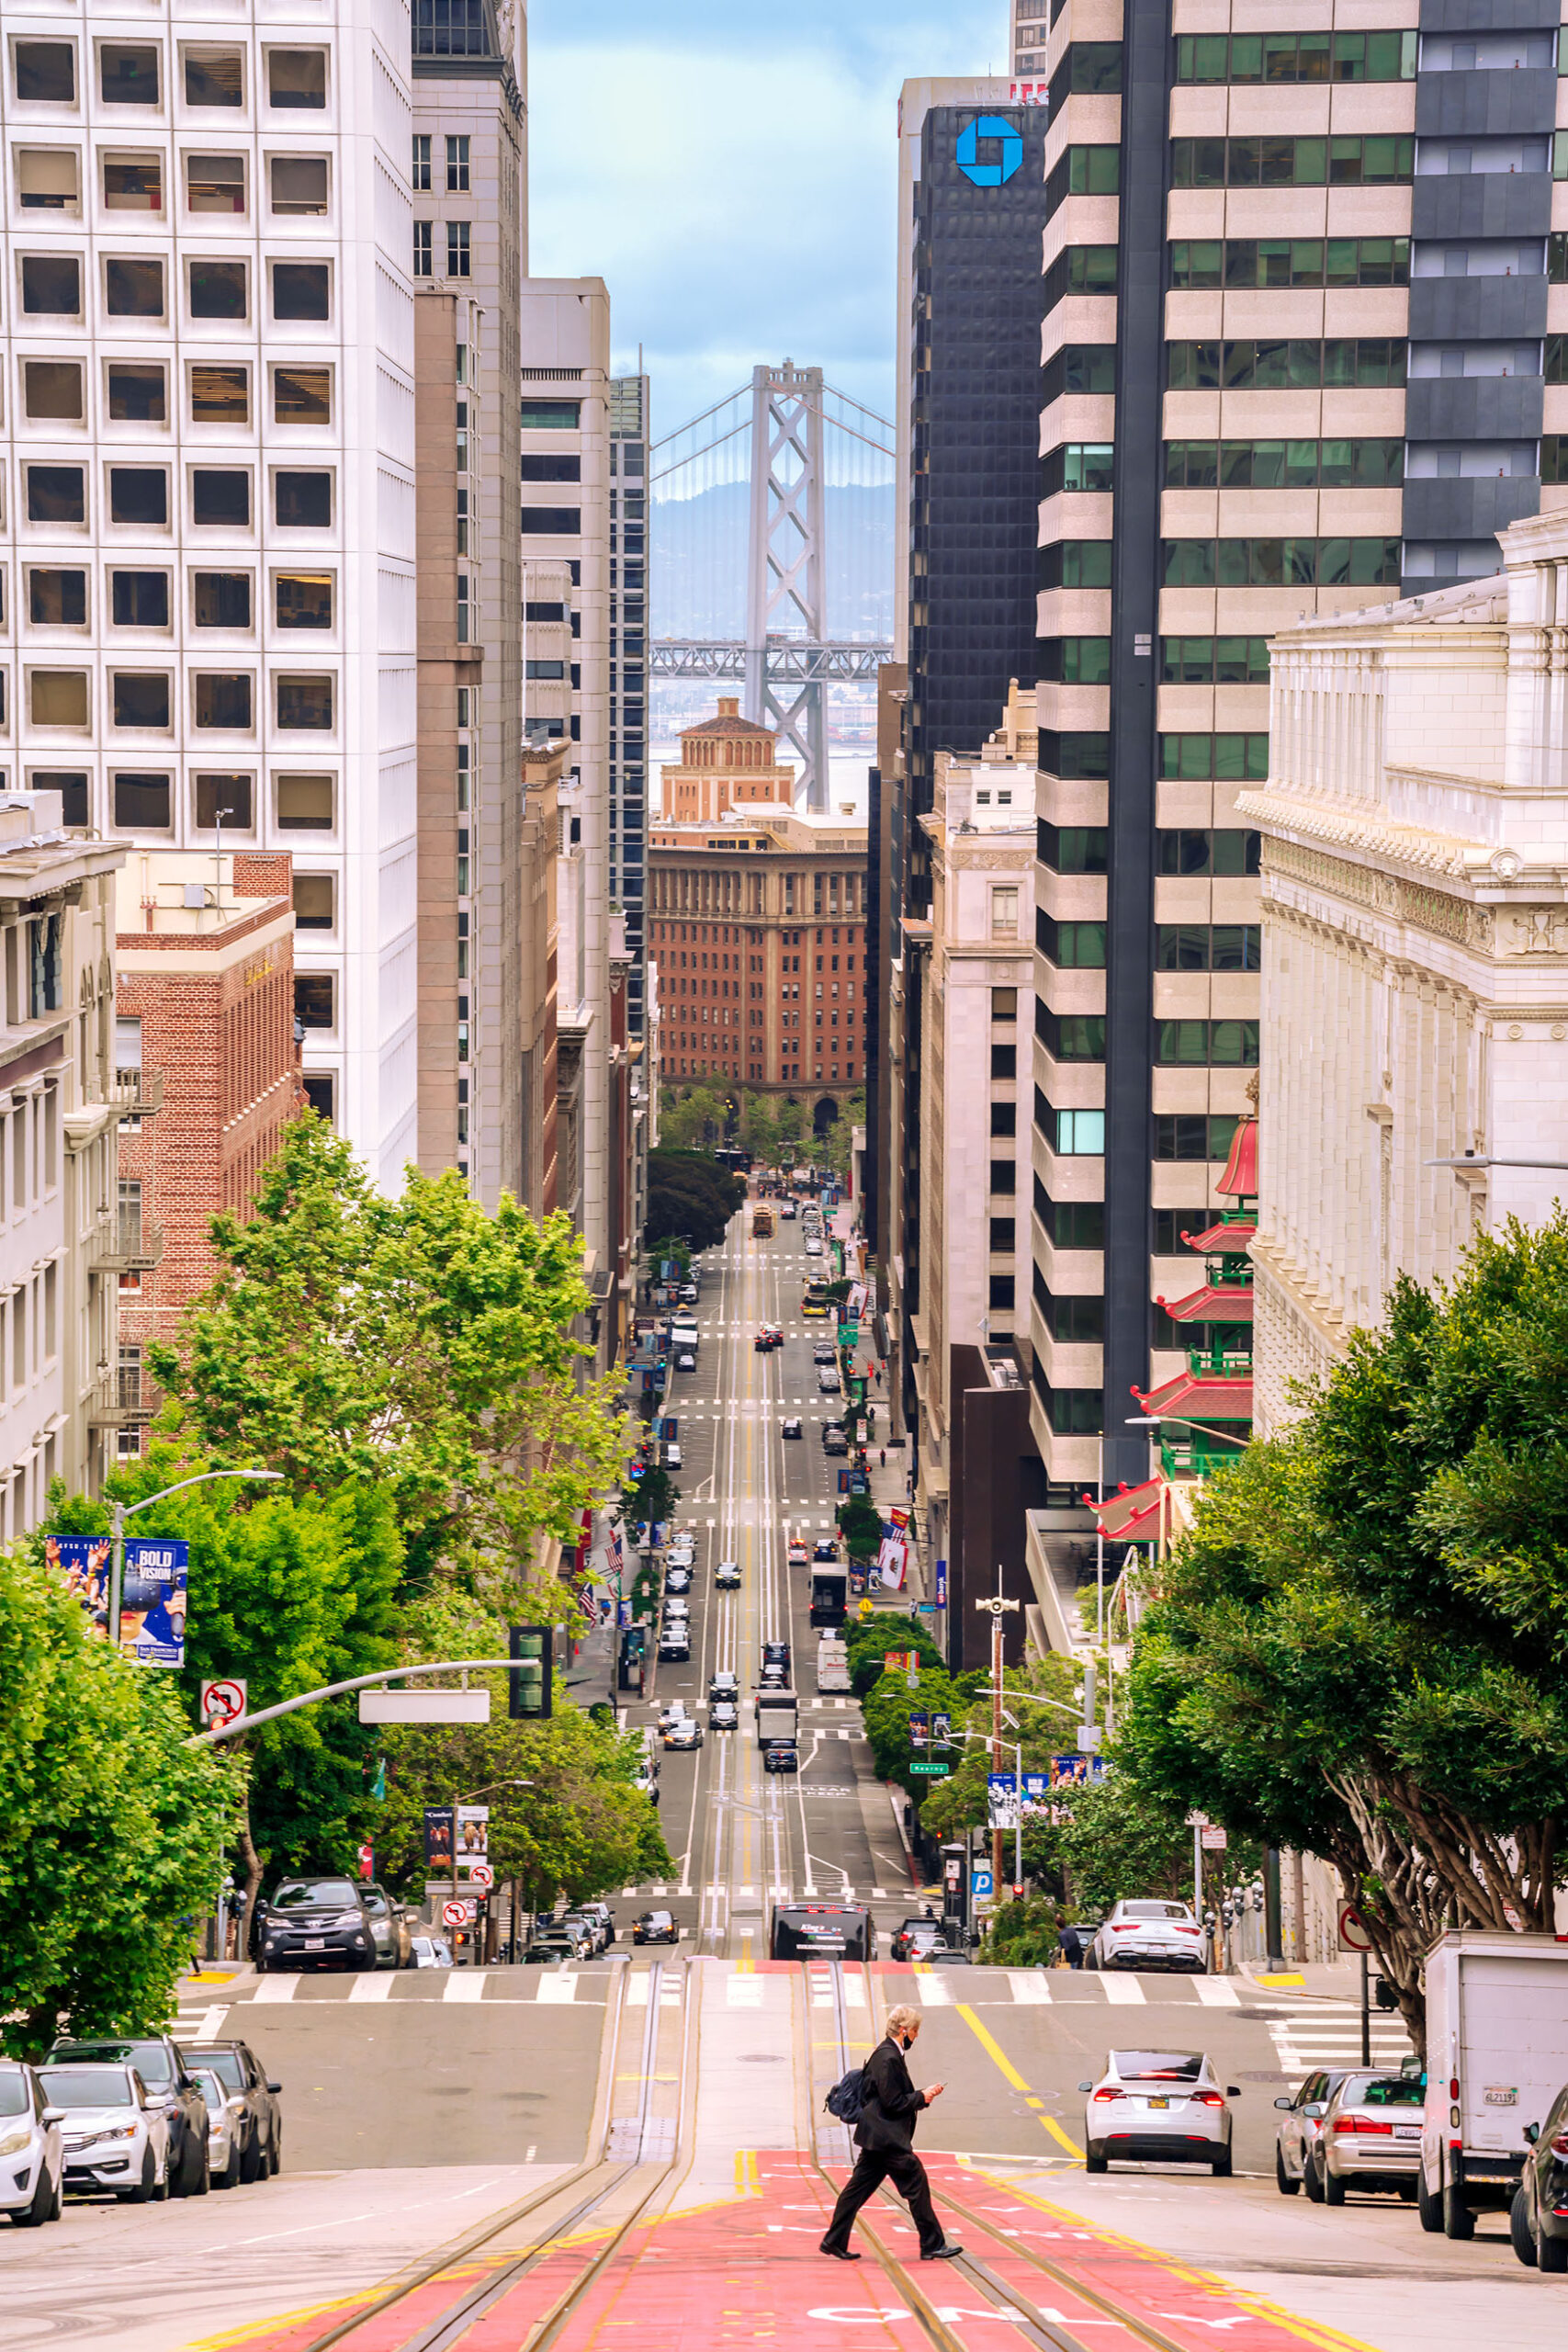
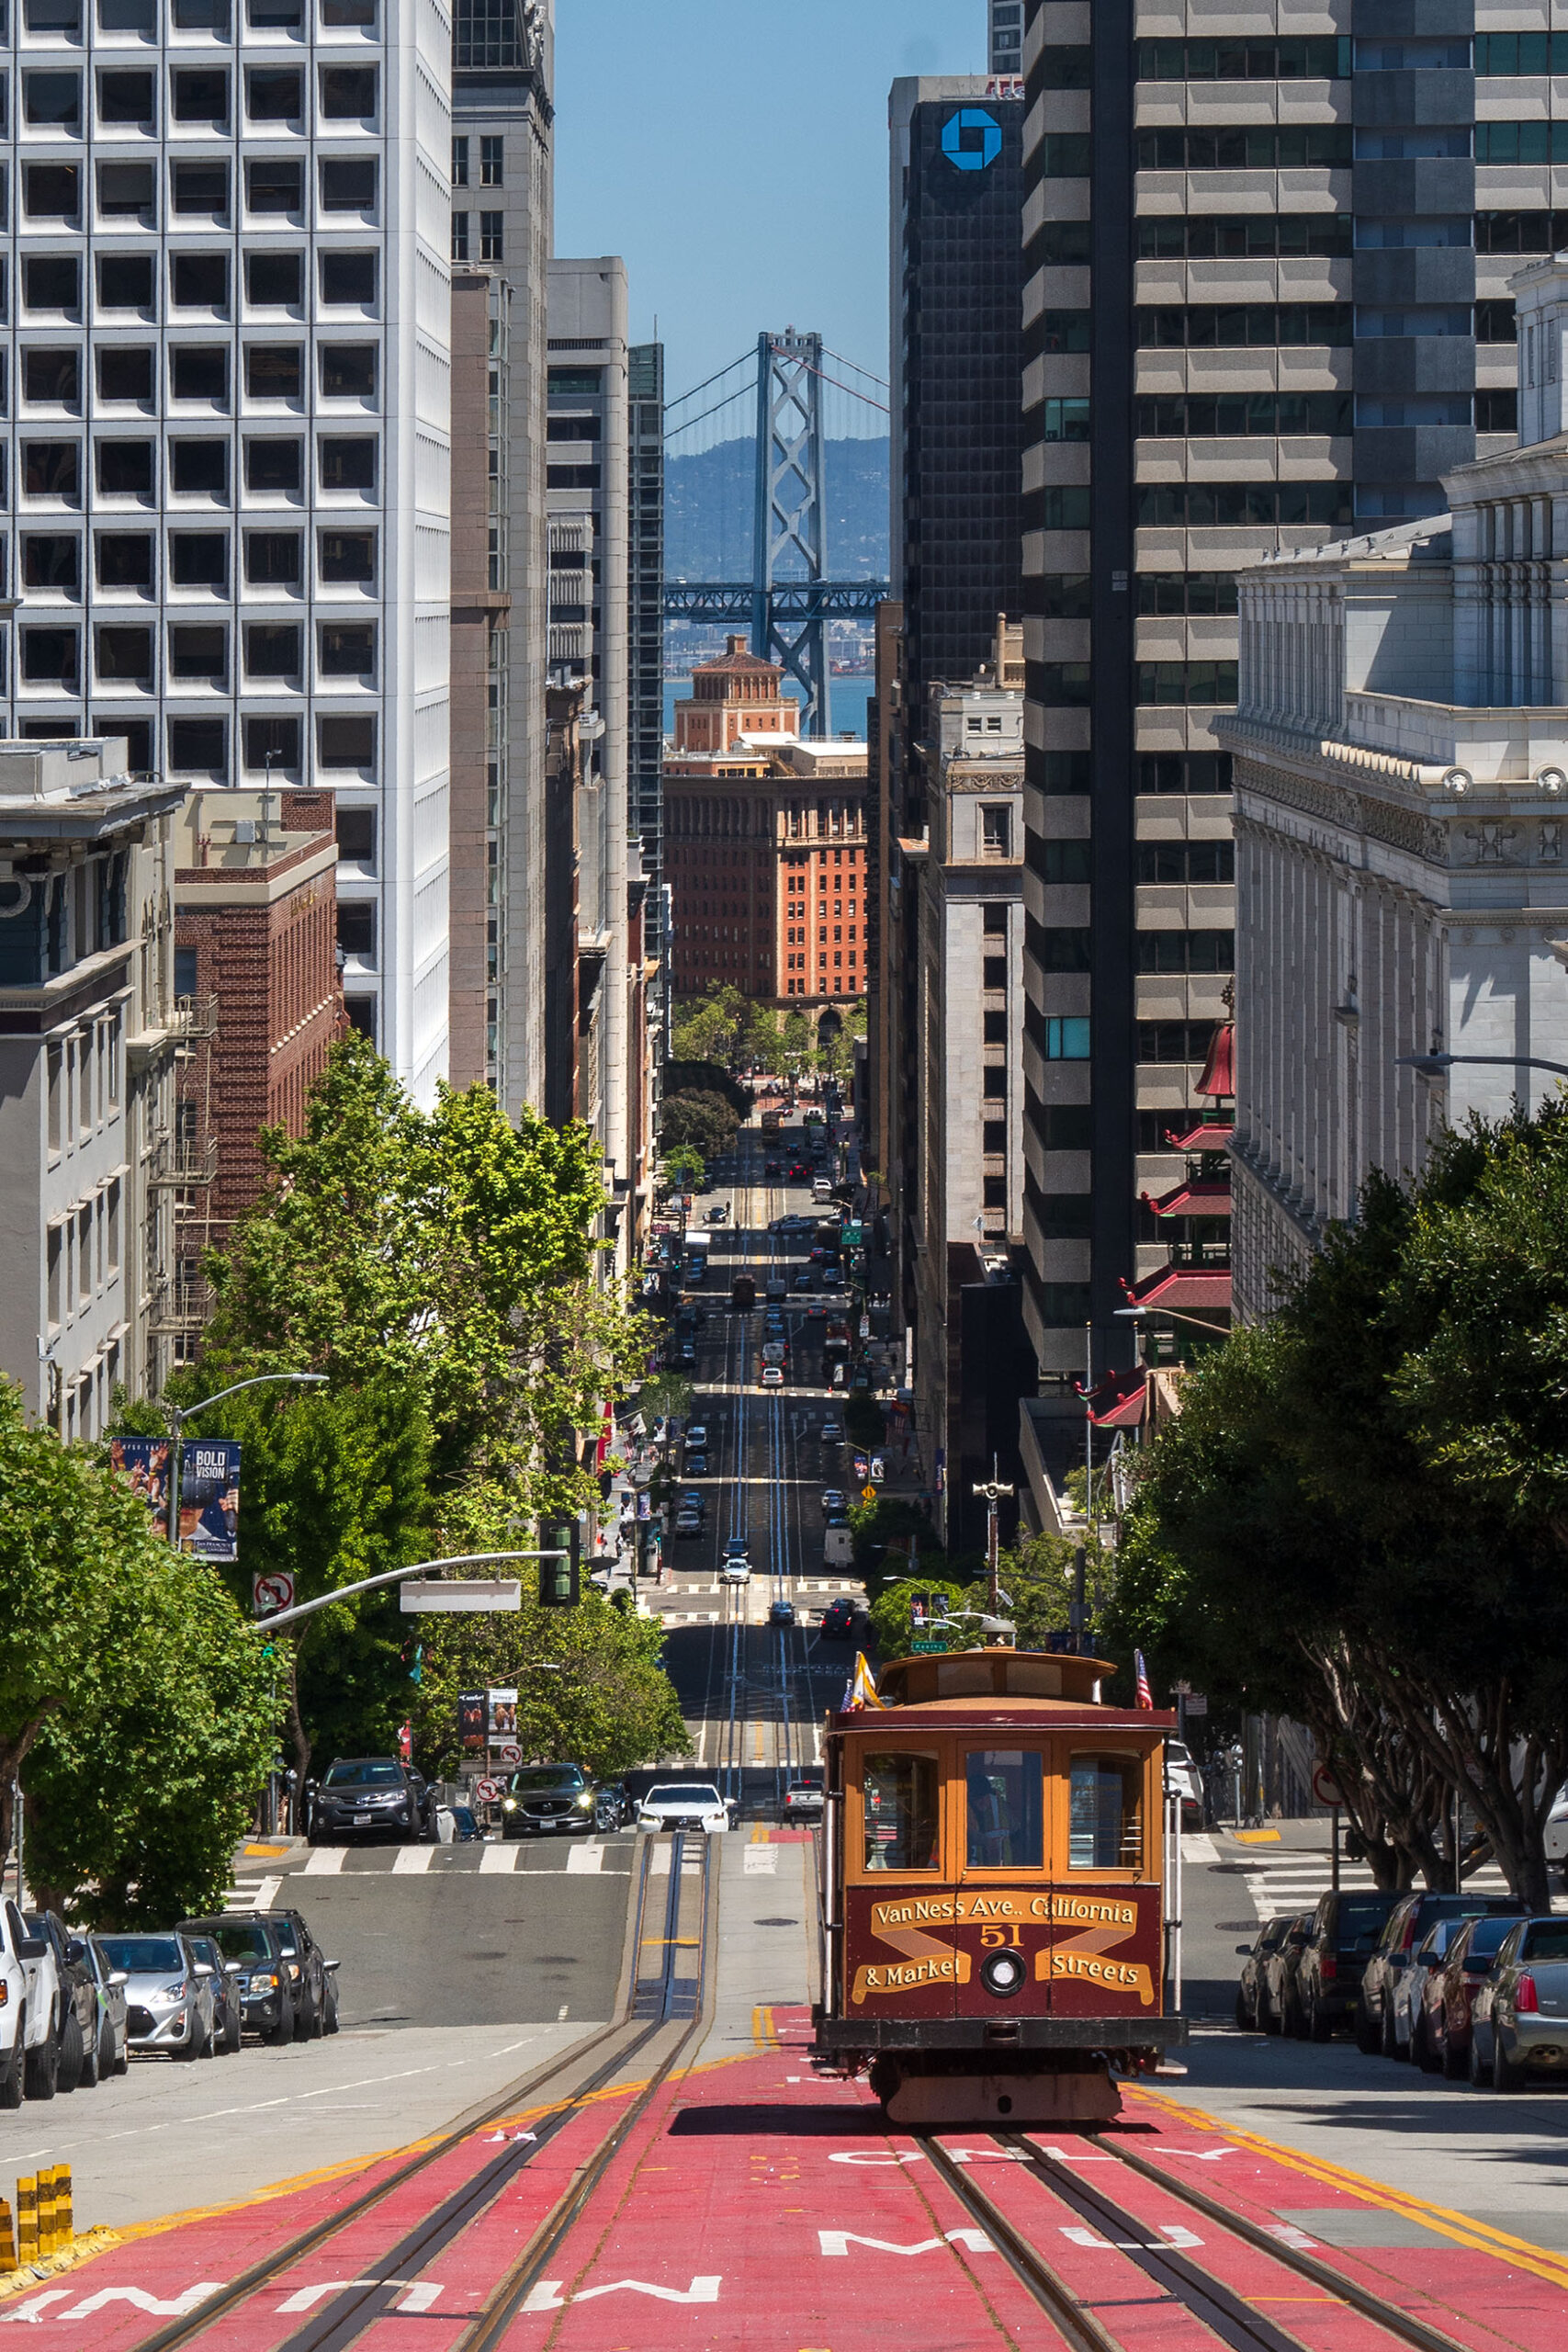
6. The cable cars
If you’re in San Francisco, you absolutely have to take a ride and discover the city’s magic from cable cars. They are the famous old open trams, where you sit on the edge, facing the landscape, because the center is occupied by the old driving mechanism that the driver controls with skill.
The cumulative day ticket allows an unlimited number of trips, ideal for enjoying the city from every angle. Starting from one of the final stations, such as that of Ghirardelli Square or Powell station, you will cross the streets and the ups and downs that have made them famous all over the world.
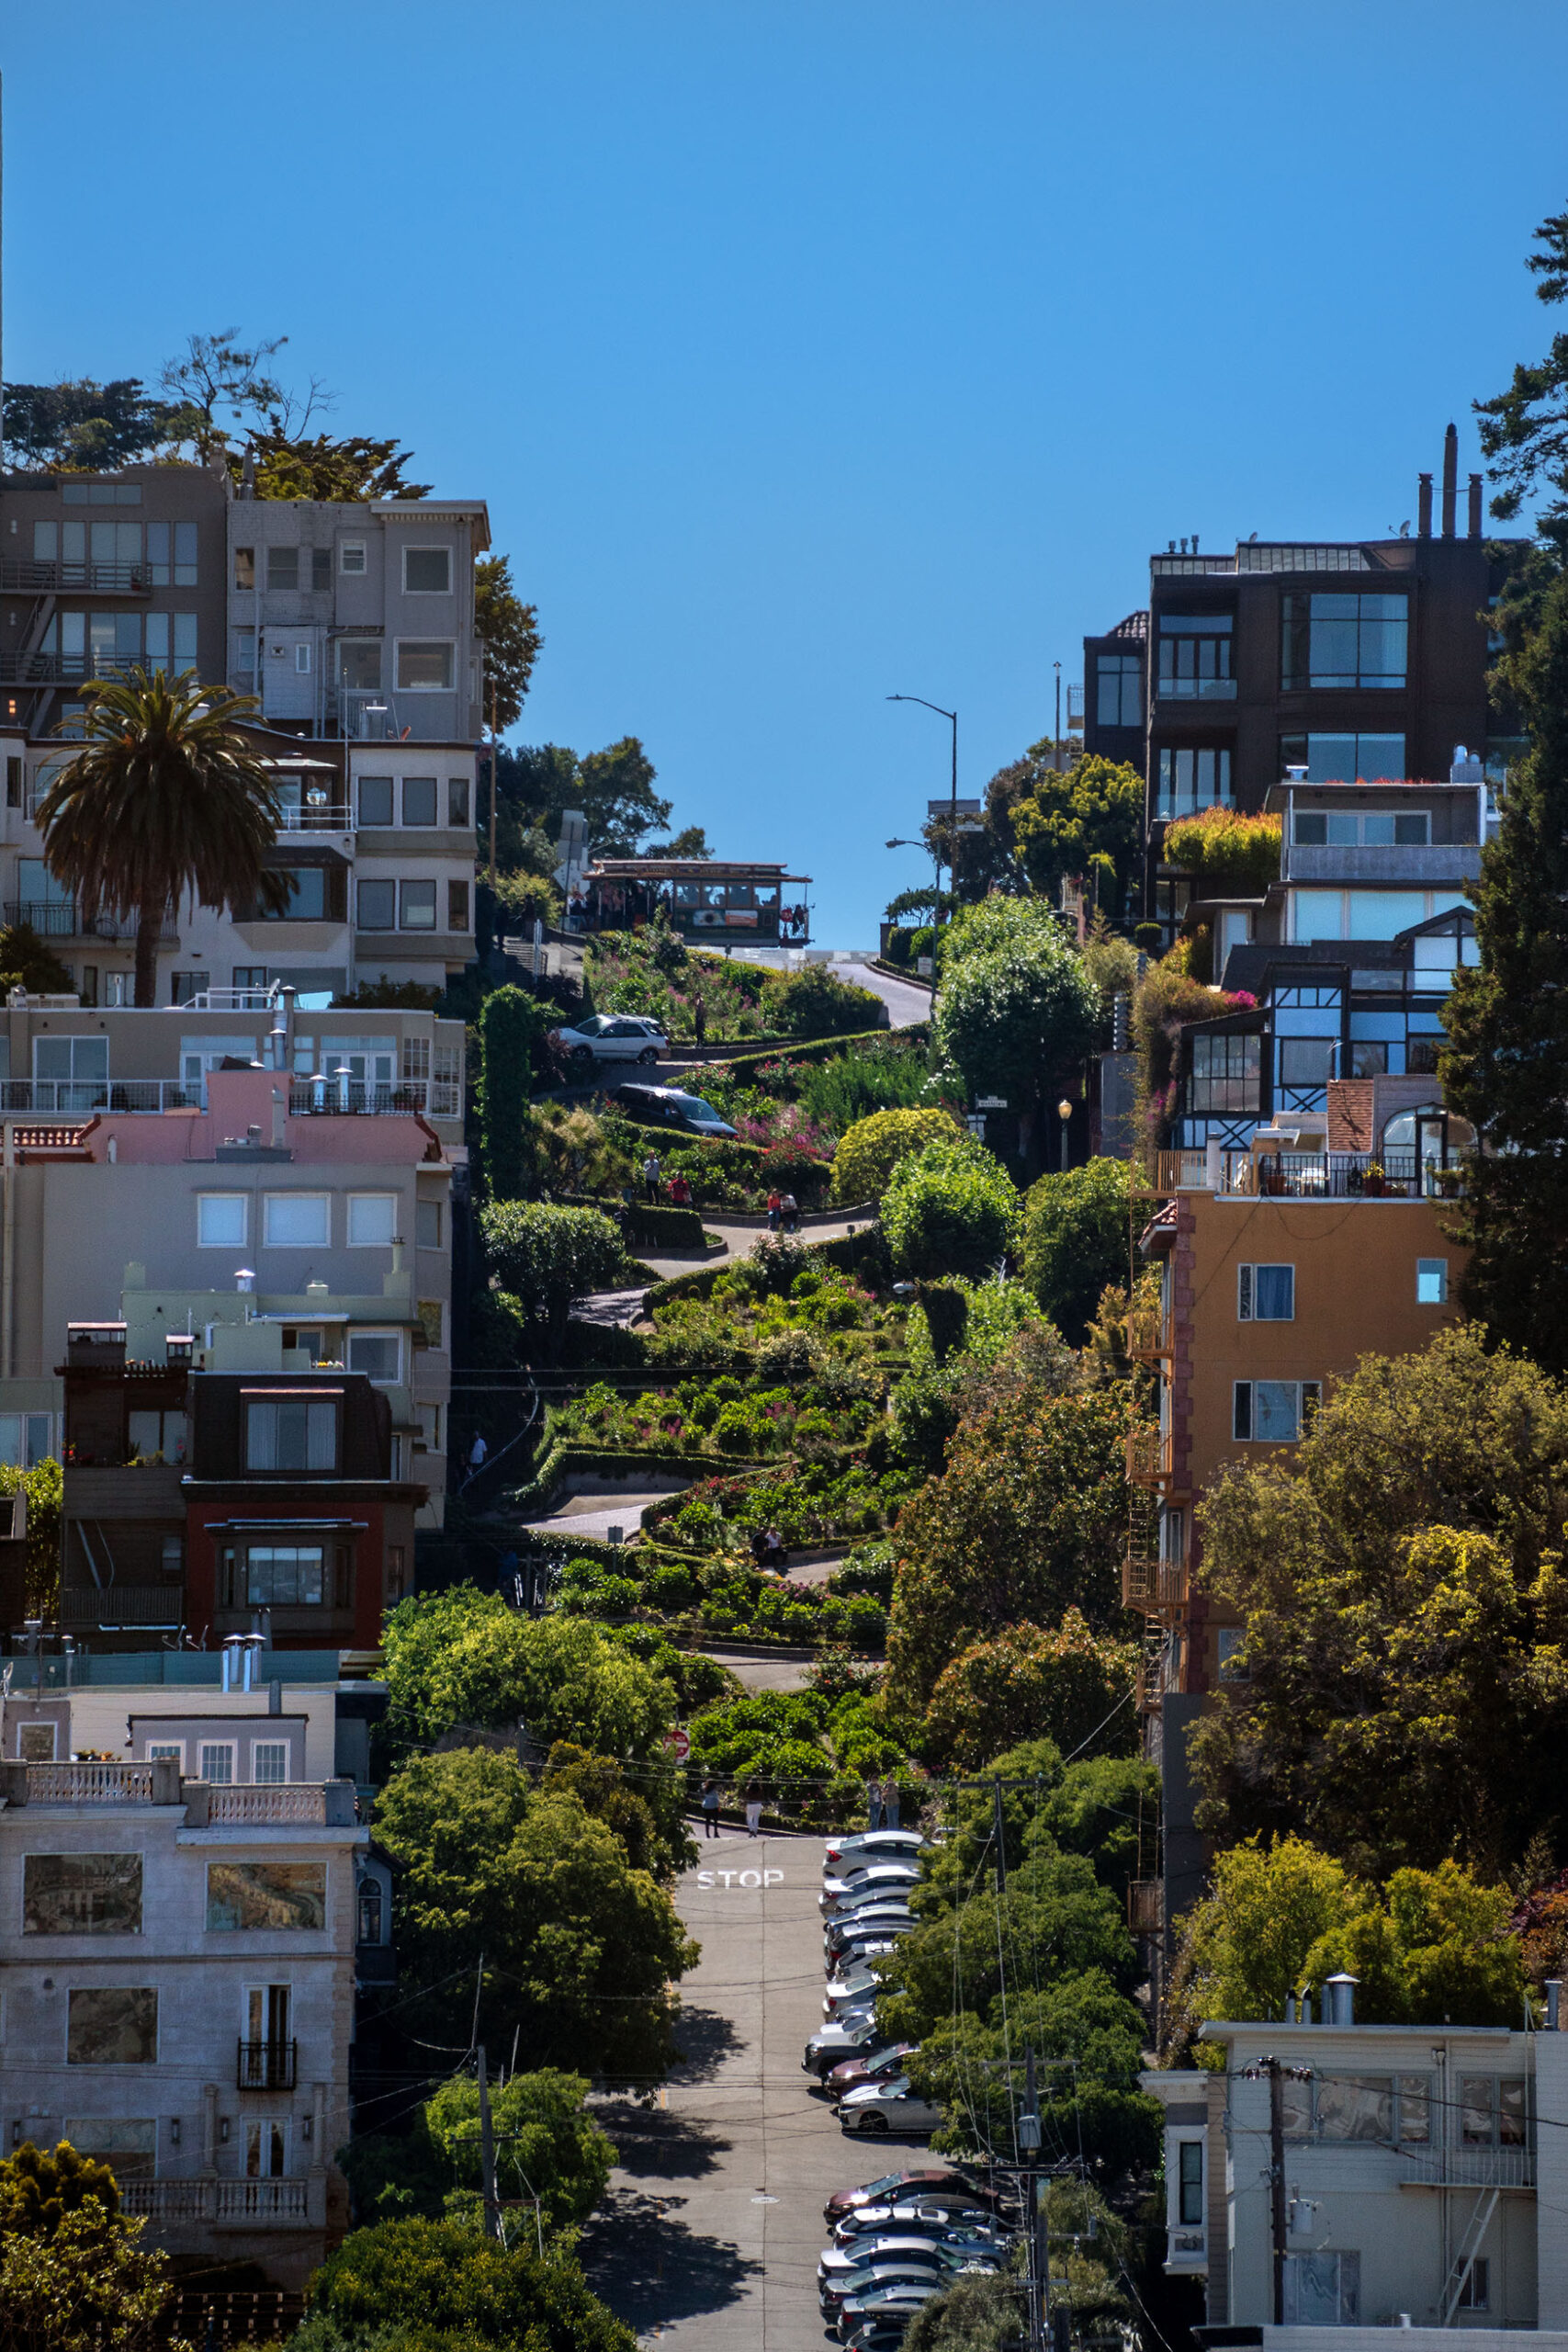
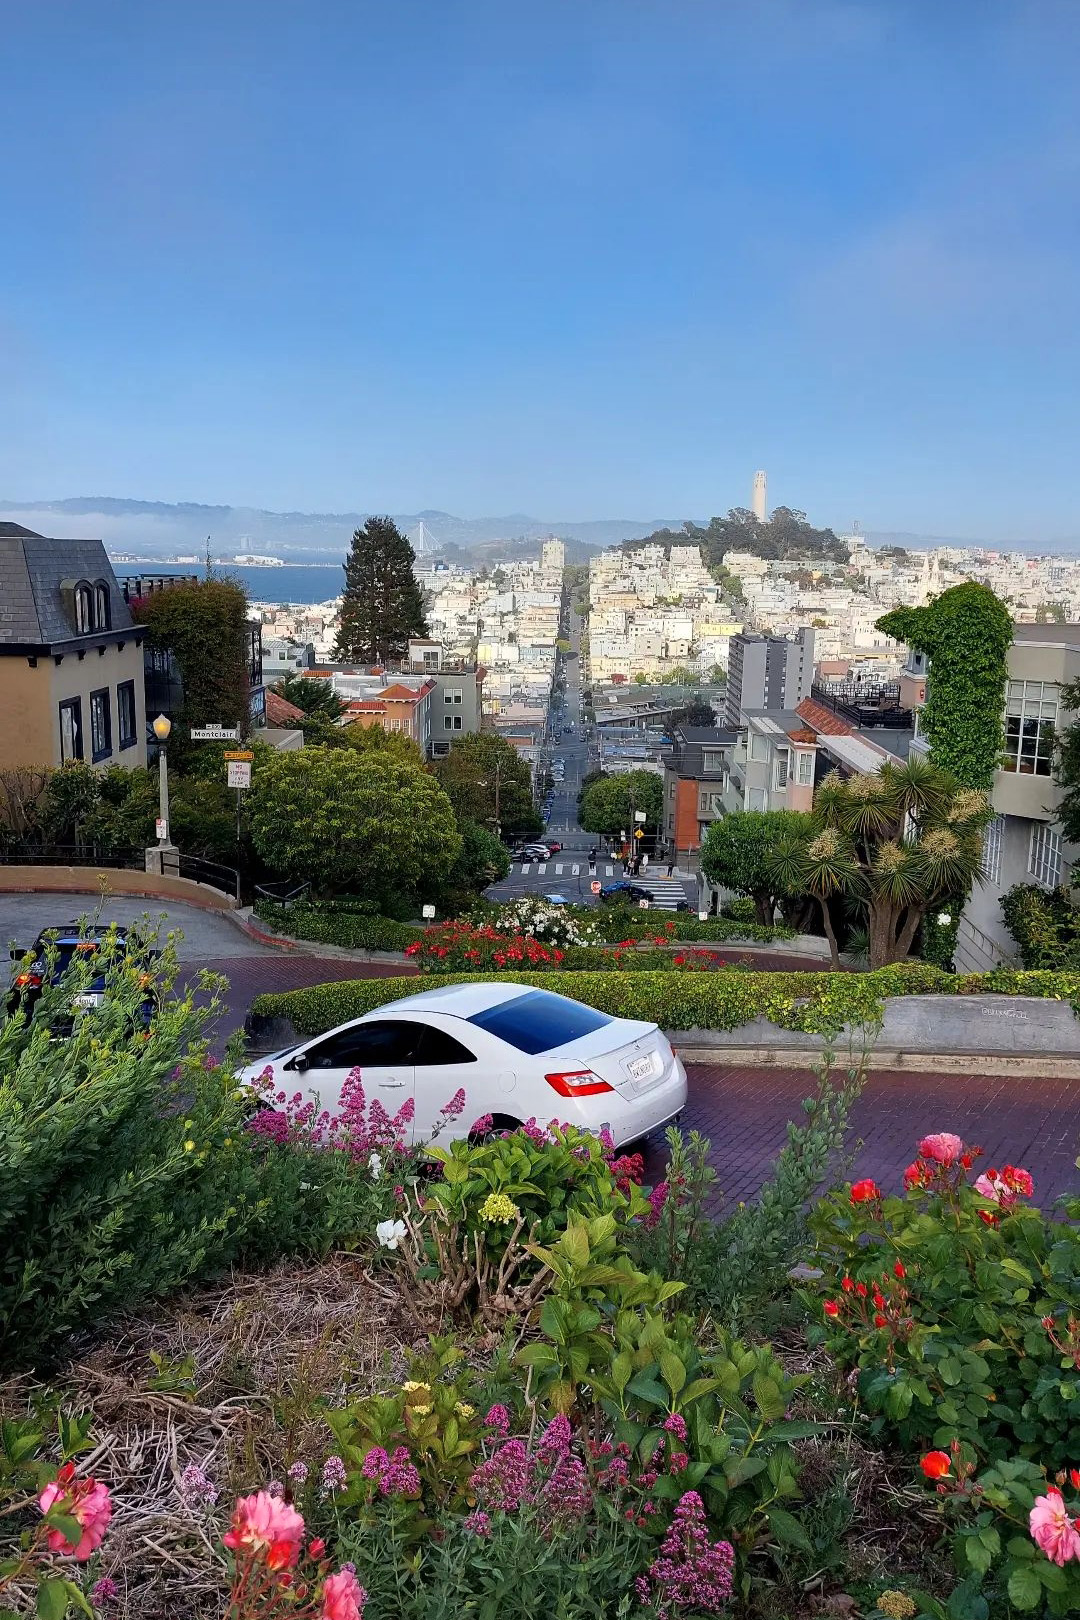
From Powell station, get off at the Hyde St. & Lombard St. stop, just to admire and photograph this road, universally famous for its continuous curves that soften the steep climb. On the sides of the road, you will find well-kept flowerbeds and accesses to luxurious villas.
One stop not to be missed is California Street, another postcard of the city, which offers an exciting perspective towards the Oakland Bay Bridge in the background. Also get off at Union Square, one of the city’s main squares. From here you can go up to the Cheesecake Factory roftoop and, in addition to delighting your palate with a good slice of dessert (we also recommend the pizza margherita, really good and cheap!), you can admire and photograph the view over the square, perhaps with the lights of the sunset.
Photo tips: first of all, take a complete ride on the cable car, to study the best spots to photograph. While on the go, use fast shutter speeds to capture some interesting sights. If you stop on California Street, paying close attention to the traffic, when the traffic light for cars is red (so as to be safe), stand in the center of the roadway to take a symmetrical photo of the road with the skyscrapers to the sides and the bridge in the background. Try playing with the optical effects given by the ups and downs of the road (with the zoom you will be able to lose the proportions and create interesting effects). Bring the camera close to the road surface for original images. Take a cable car ride even with the evening lights. Often at the stop lights you will be able to capture fascinating panoramas. If you are not stationary and do not have a support, do not use long shutter speeds, even if there is little light. In this case, try with a big aperture and raise the ISO (based on the quality of your camera), or use your smartphone, which can more easily guarantee you quality shots in those light conditions. Lombard street is very difficult to photograph up close. Try, therefore, to capture it with the zoom from afar, in particular from the intersection of Lombard St. and Stockton St.
@giadaantonini_photography
@giadaantonini_photography
@giadaantonini_photography
@giadaantonini_photography
@giadaantonini_photography
@giadaantonini_photography
@giadaantonini_photography
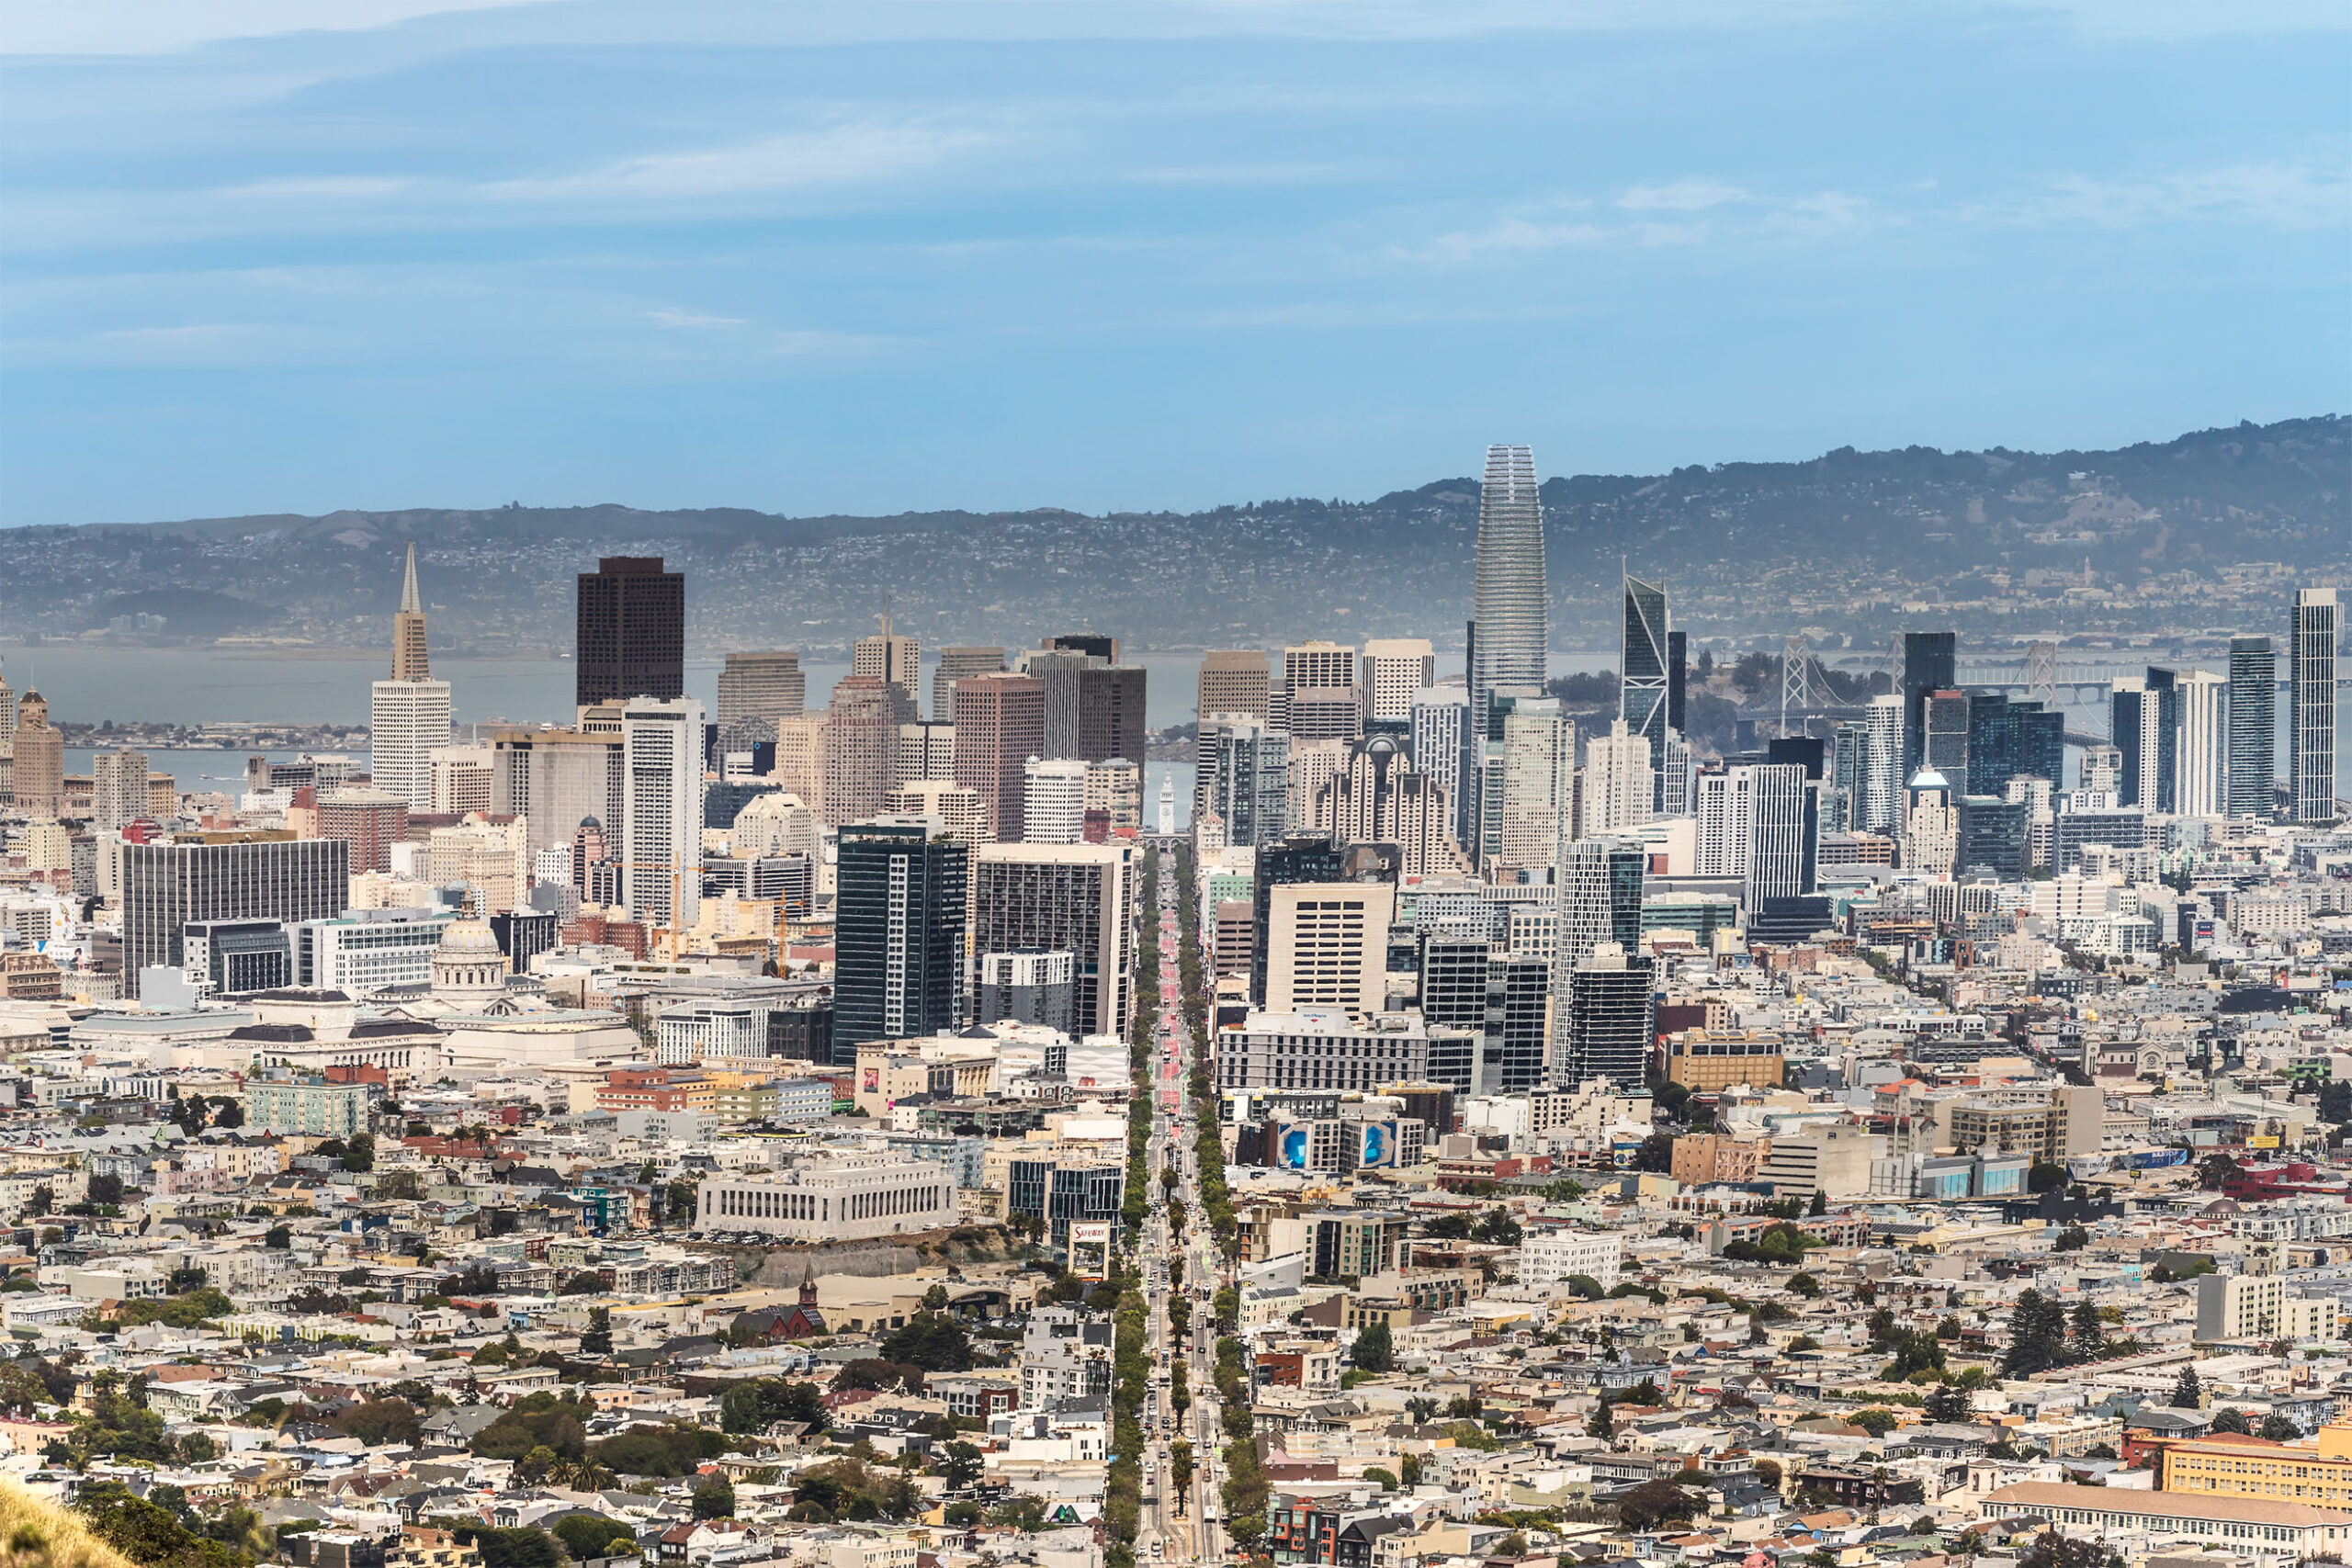
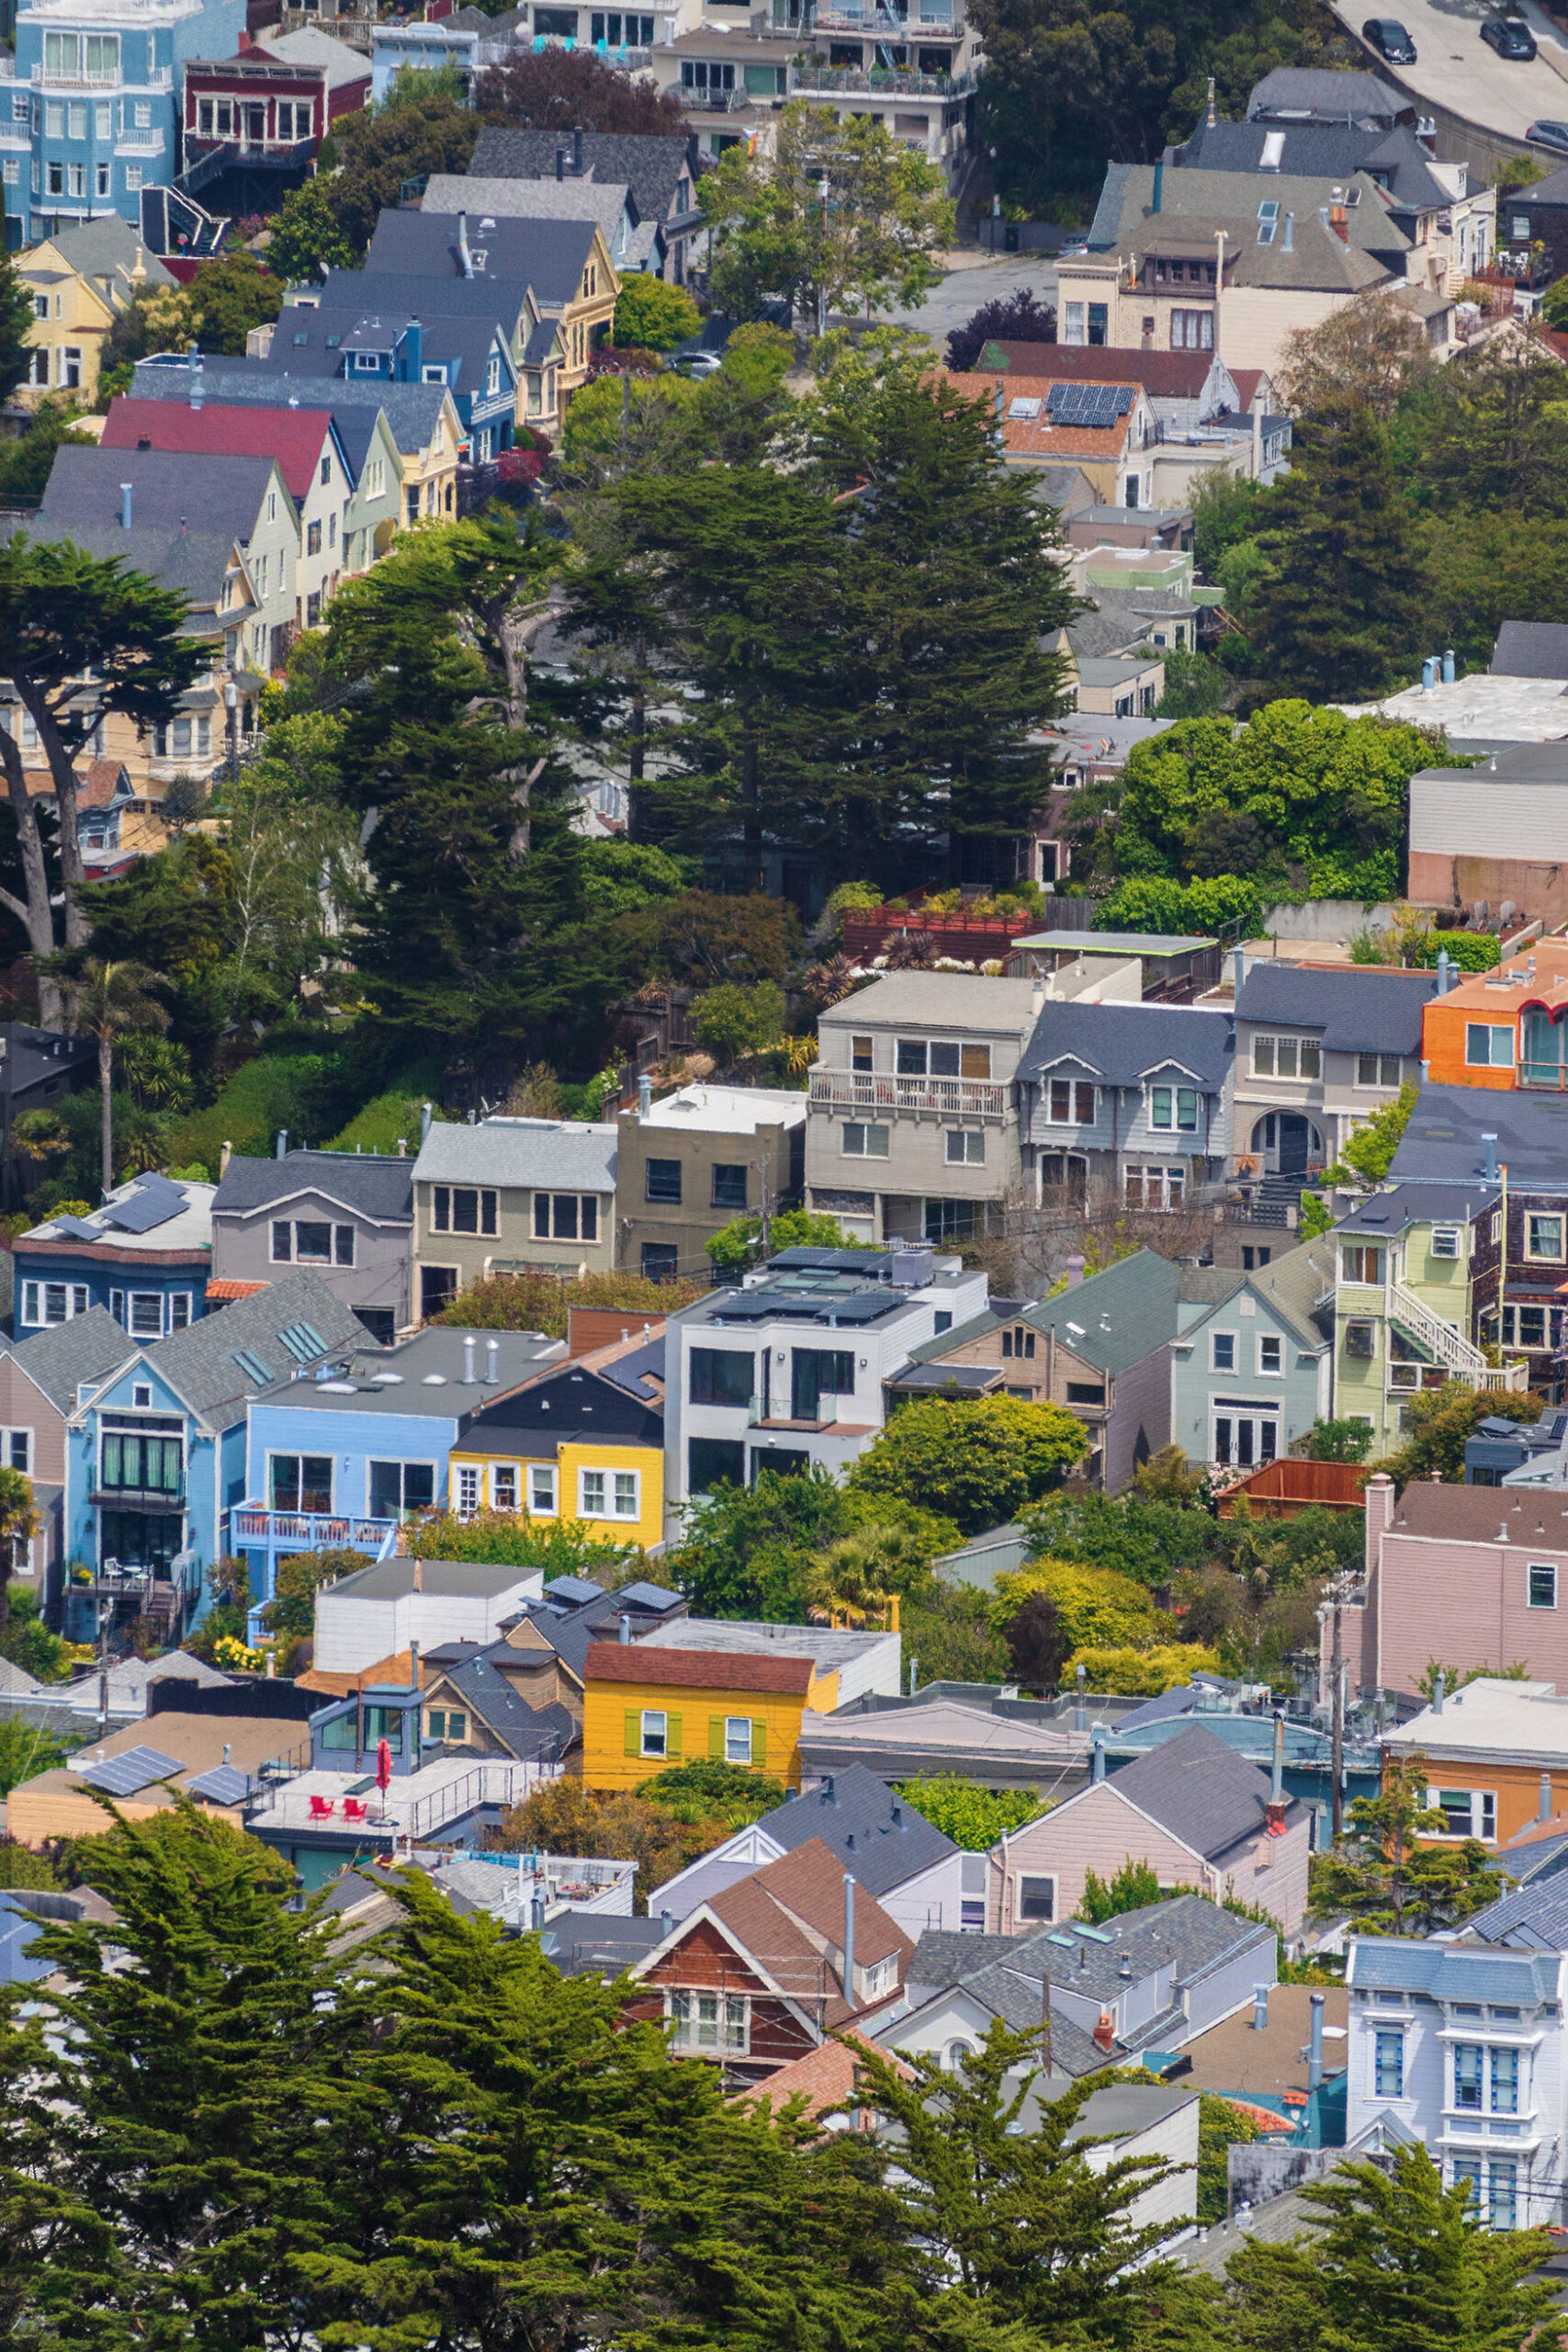
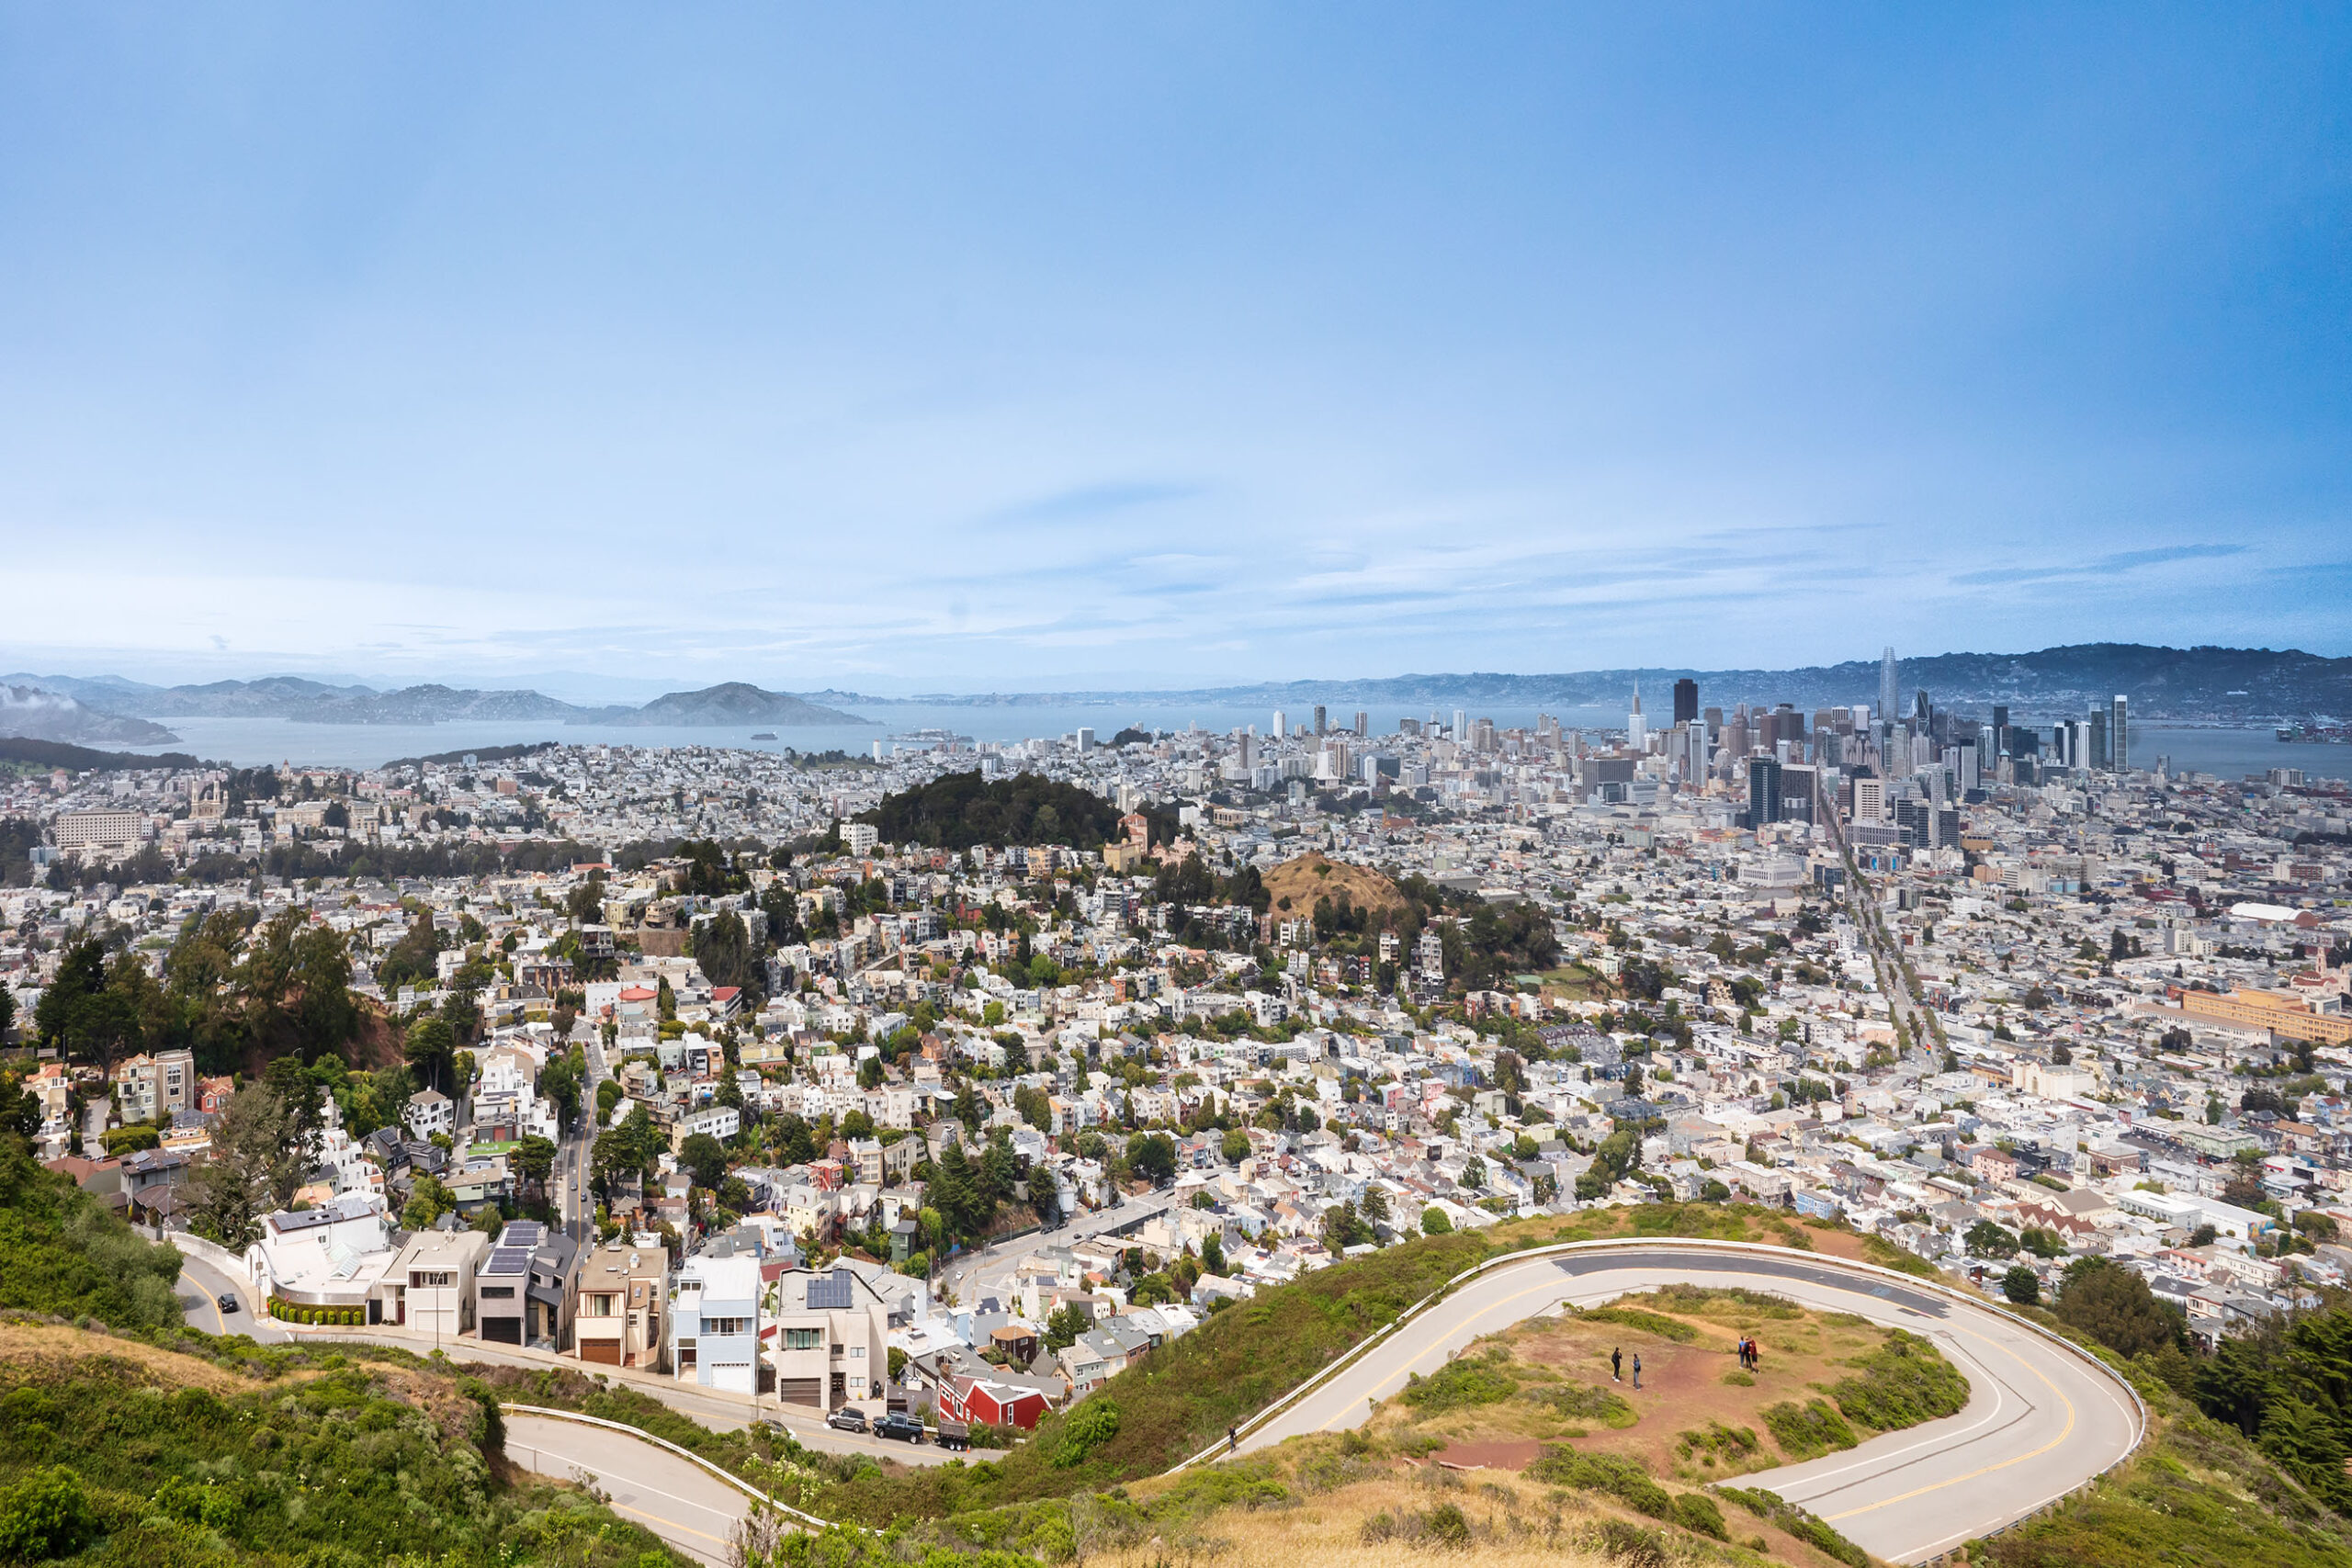
7. The panoramic hills
To admire the view over the city, if you feel like walking a bit, you can choose to climb one of these three hills overlooking the city and the bay: Twin Peaks, Mt. Davidson or Mount Sutro. We chose the former and the view was truly breathtaking! These hills can be reached easily by bus and the walks are quite easy.
If, on the other hand, you have a car or a motorcycle, or even a bike if you’re fit, a panoramic road not to be missed is the Colzenman road, on the other side of the bay, in the Marin Headlands. The road is accessible by crossing the Golden Gate Bridge. From here you can go on panoramic treks on foot or by bike, or you can simply enjoy a breathtaking view of the bridge and the entire San Francisco skyline from above.
Photo tips: as with all panoramic points, use a medium aperture to capture the entire panorama, and a good zoom, especially in the absence of mist, to isolate some emblematic buildings.
@giadaantonini_photography
@giadaantonini_photography
@giadaantonini_photography
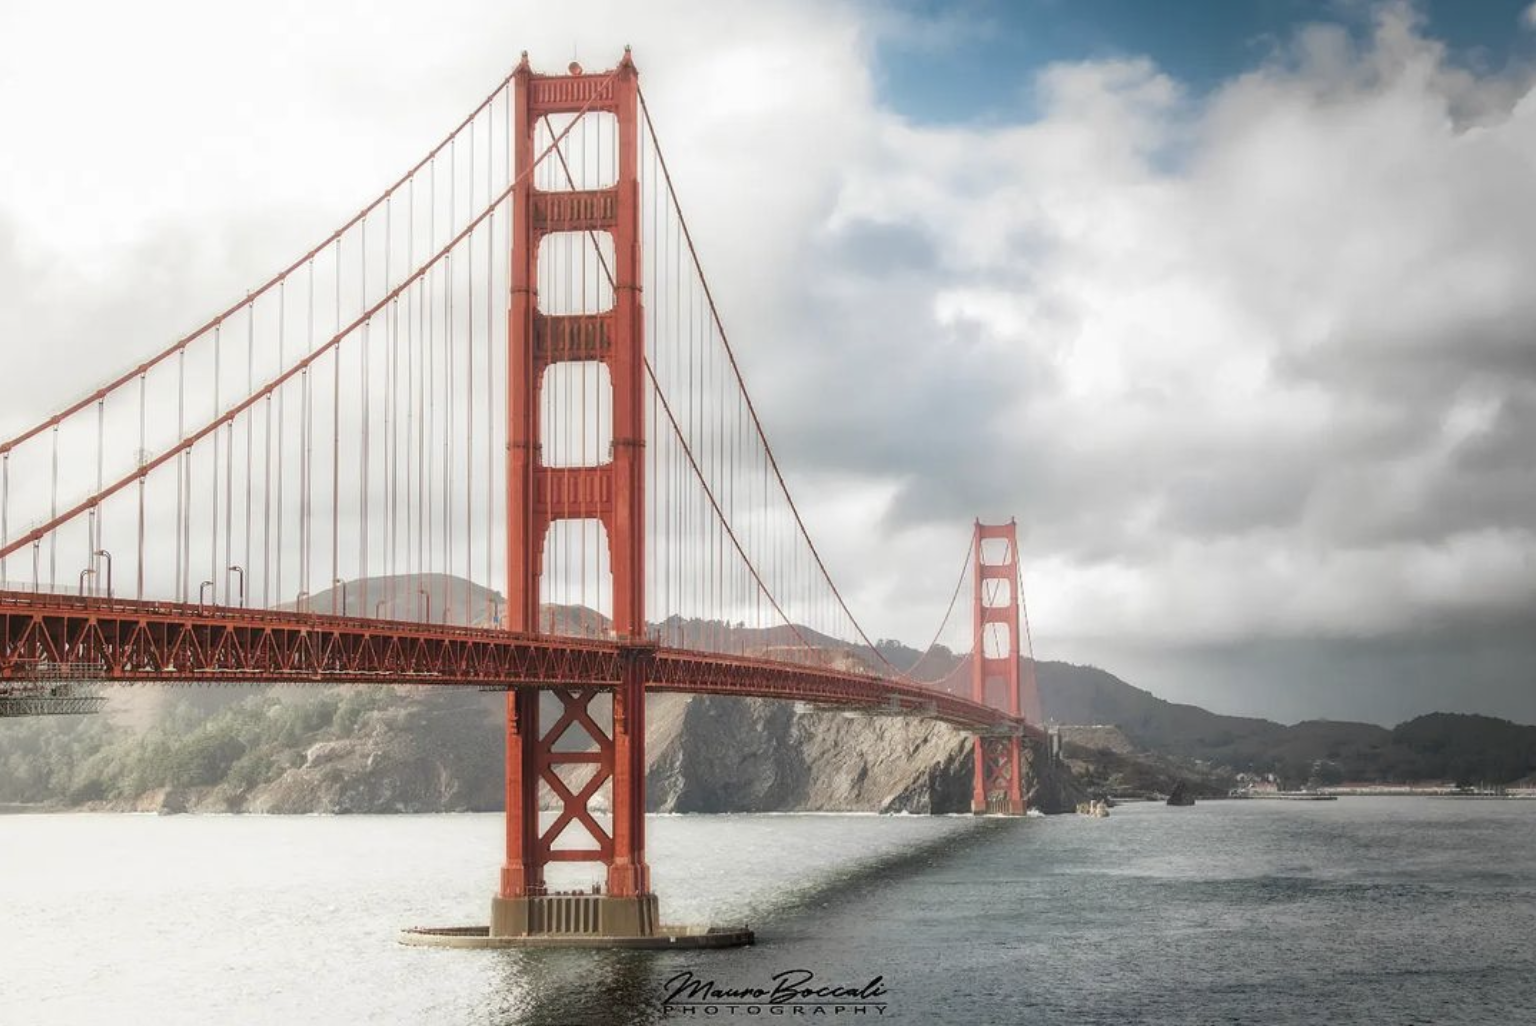
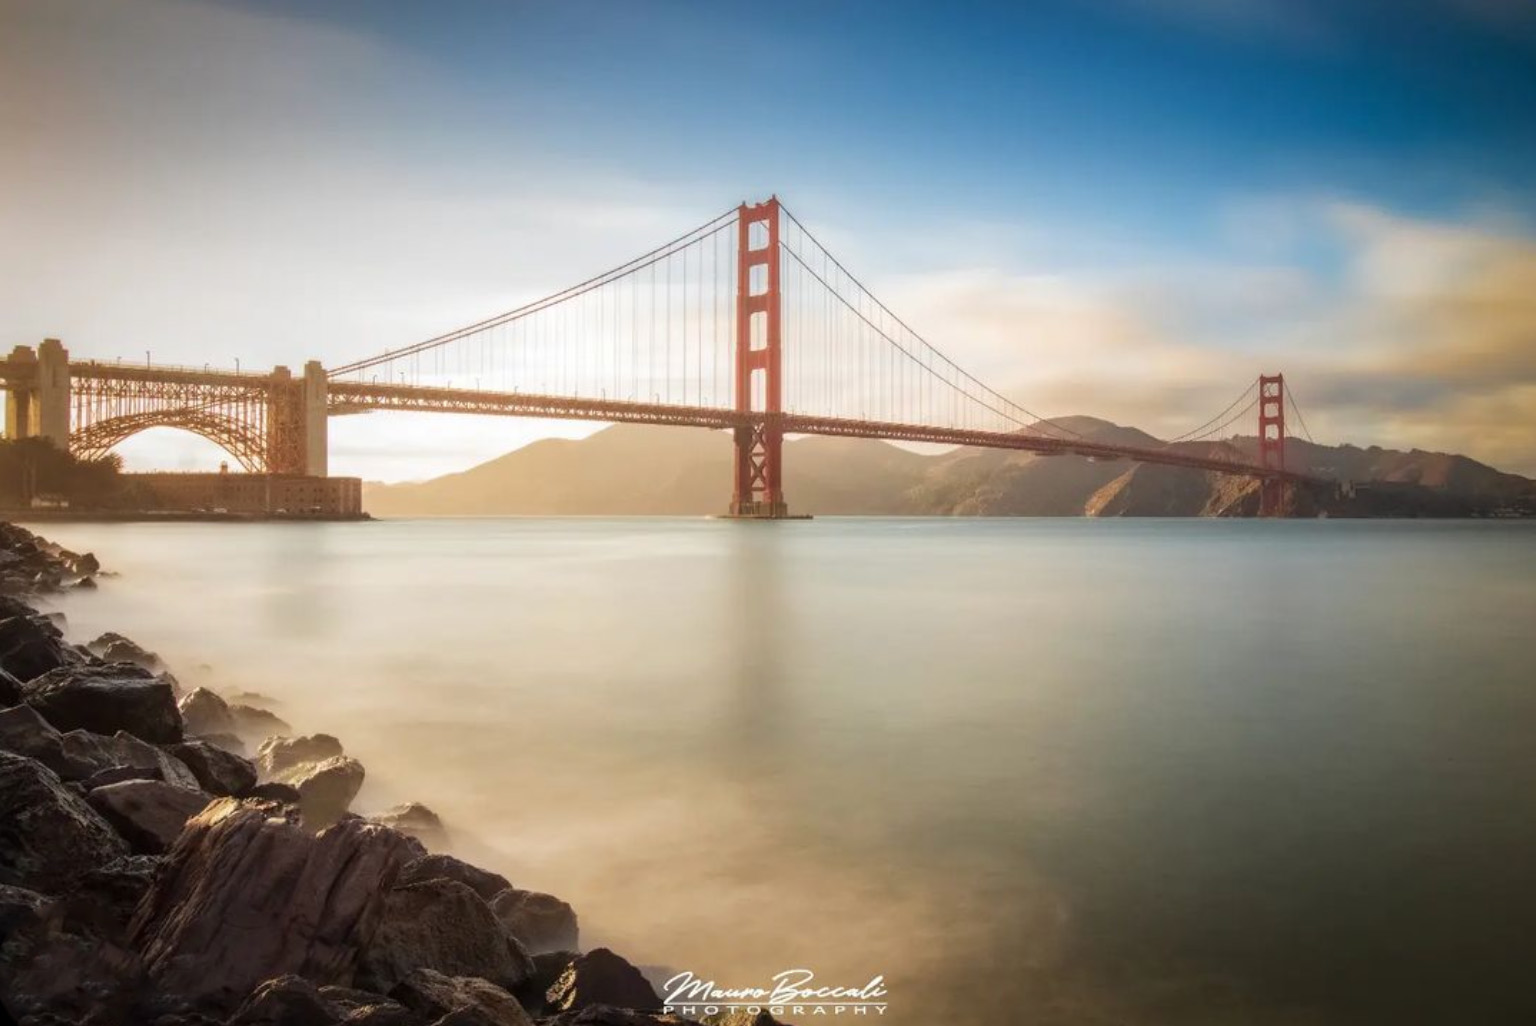
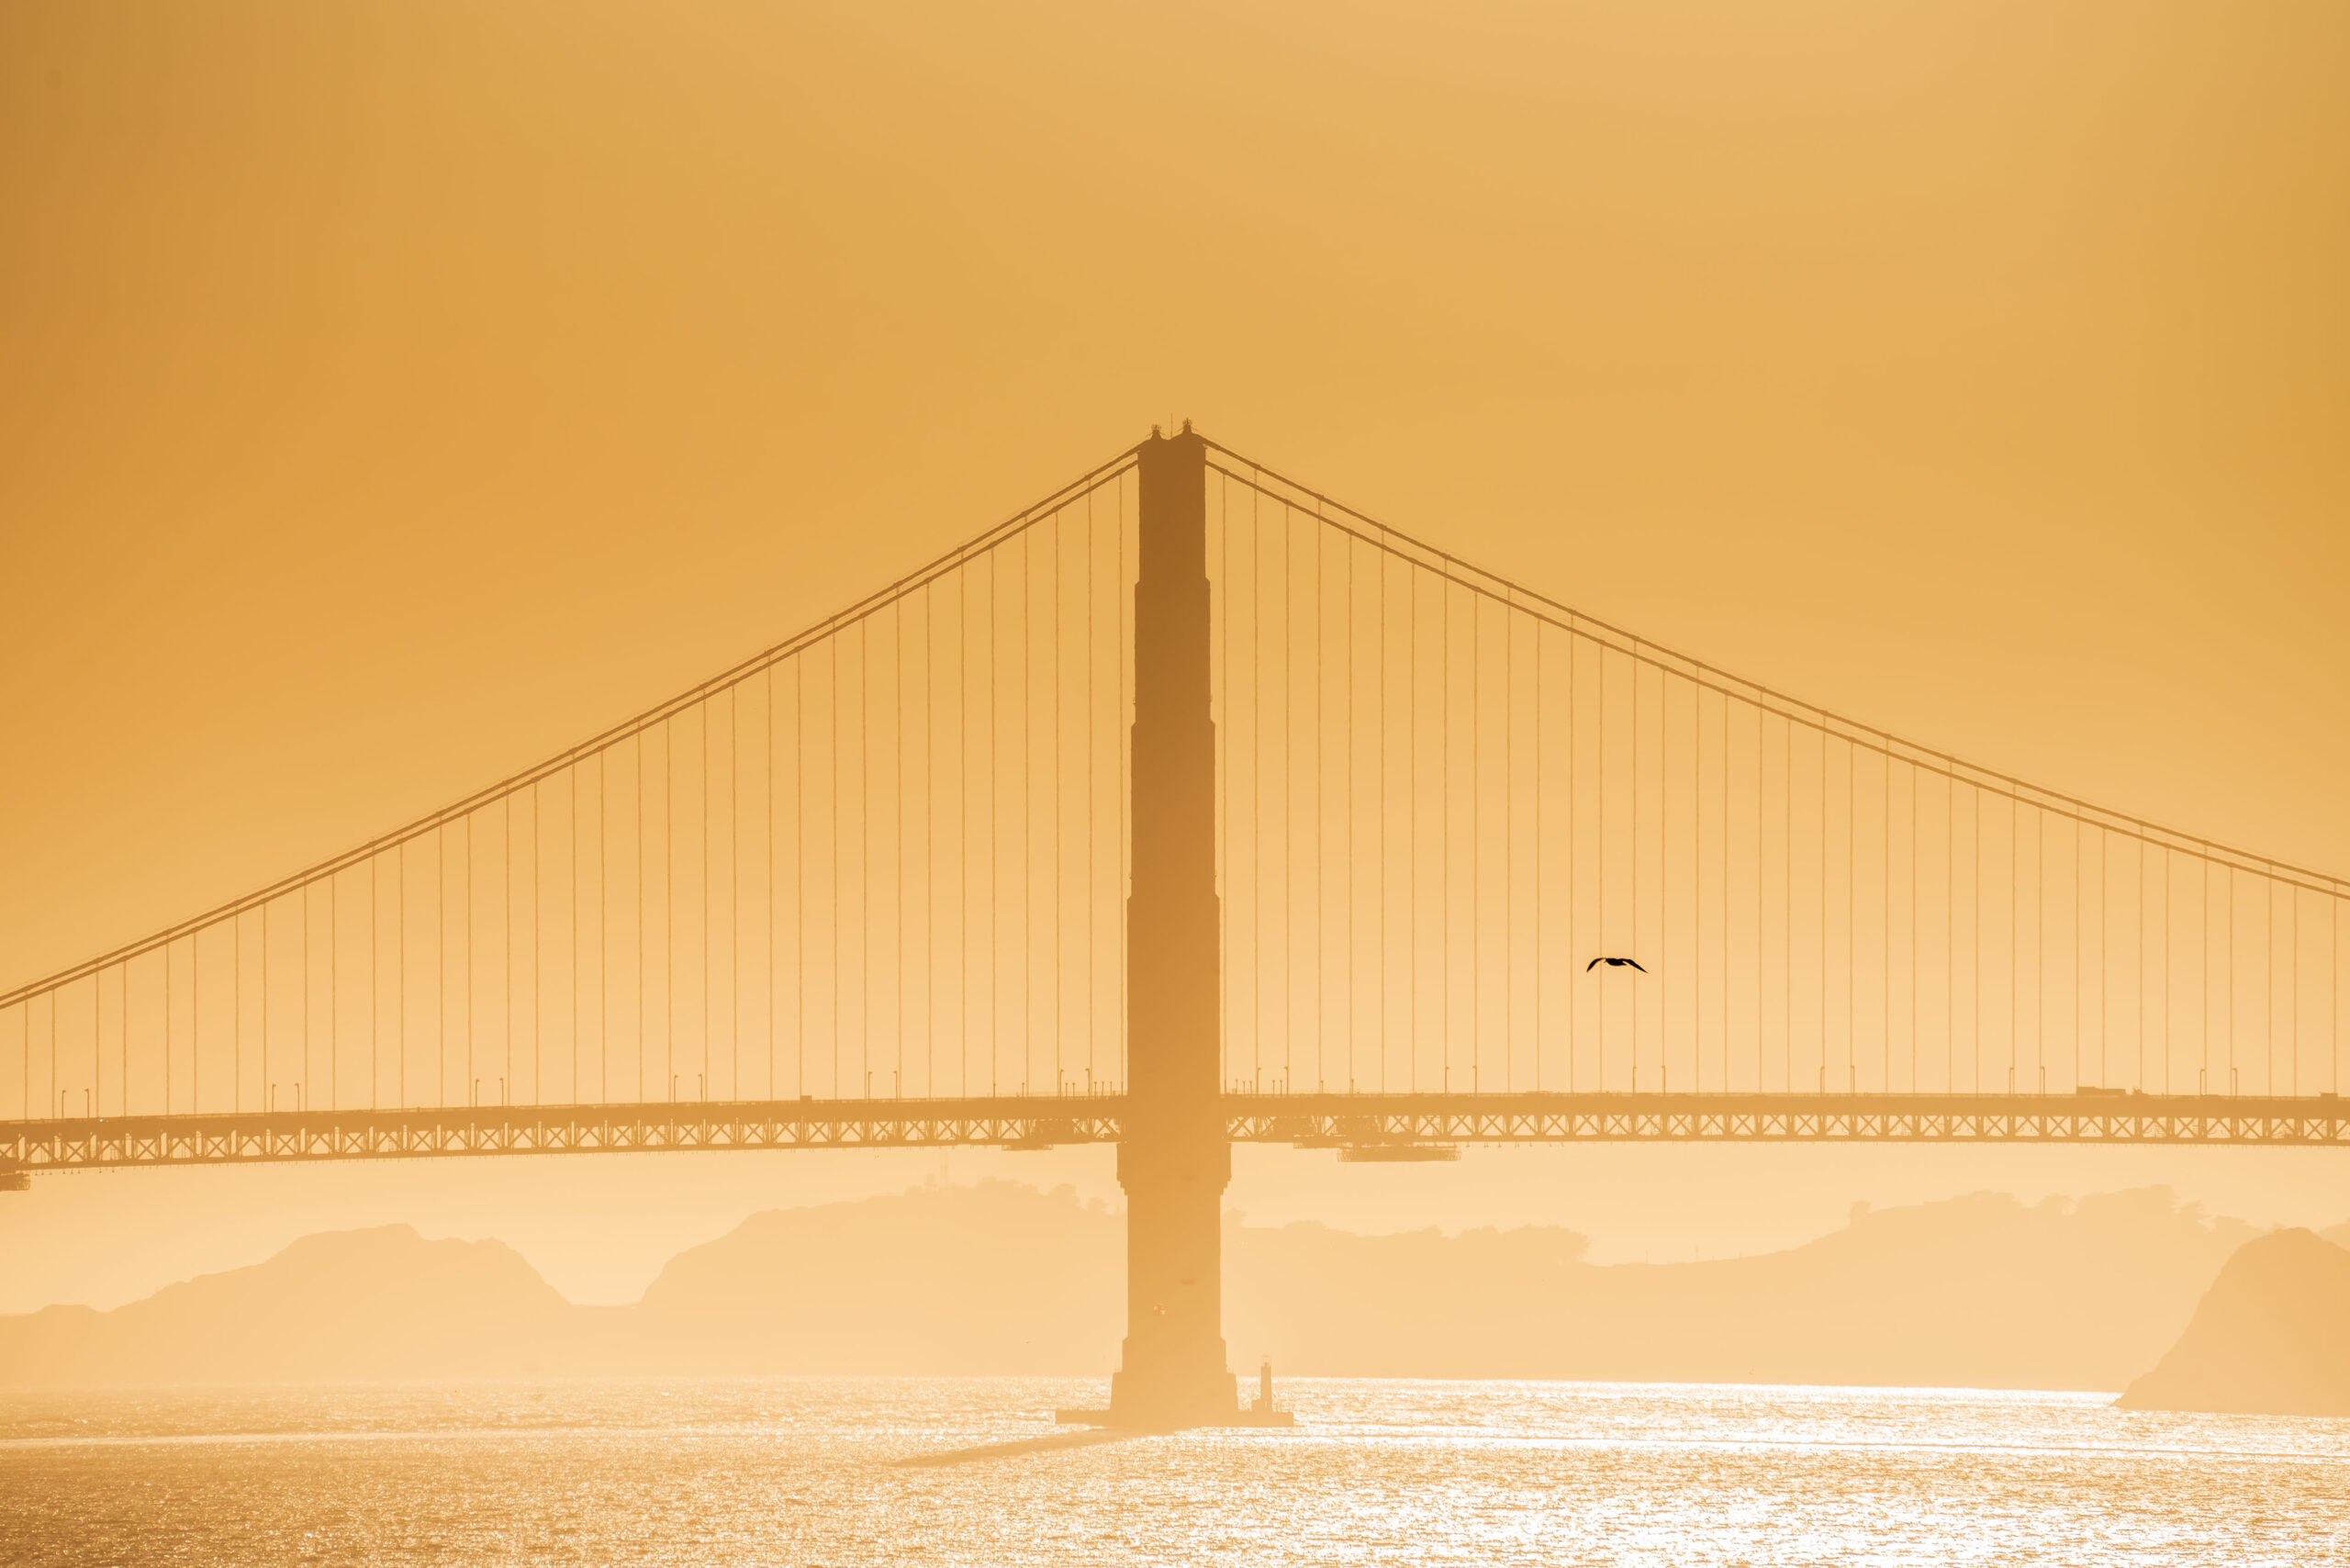
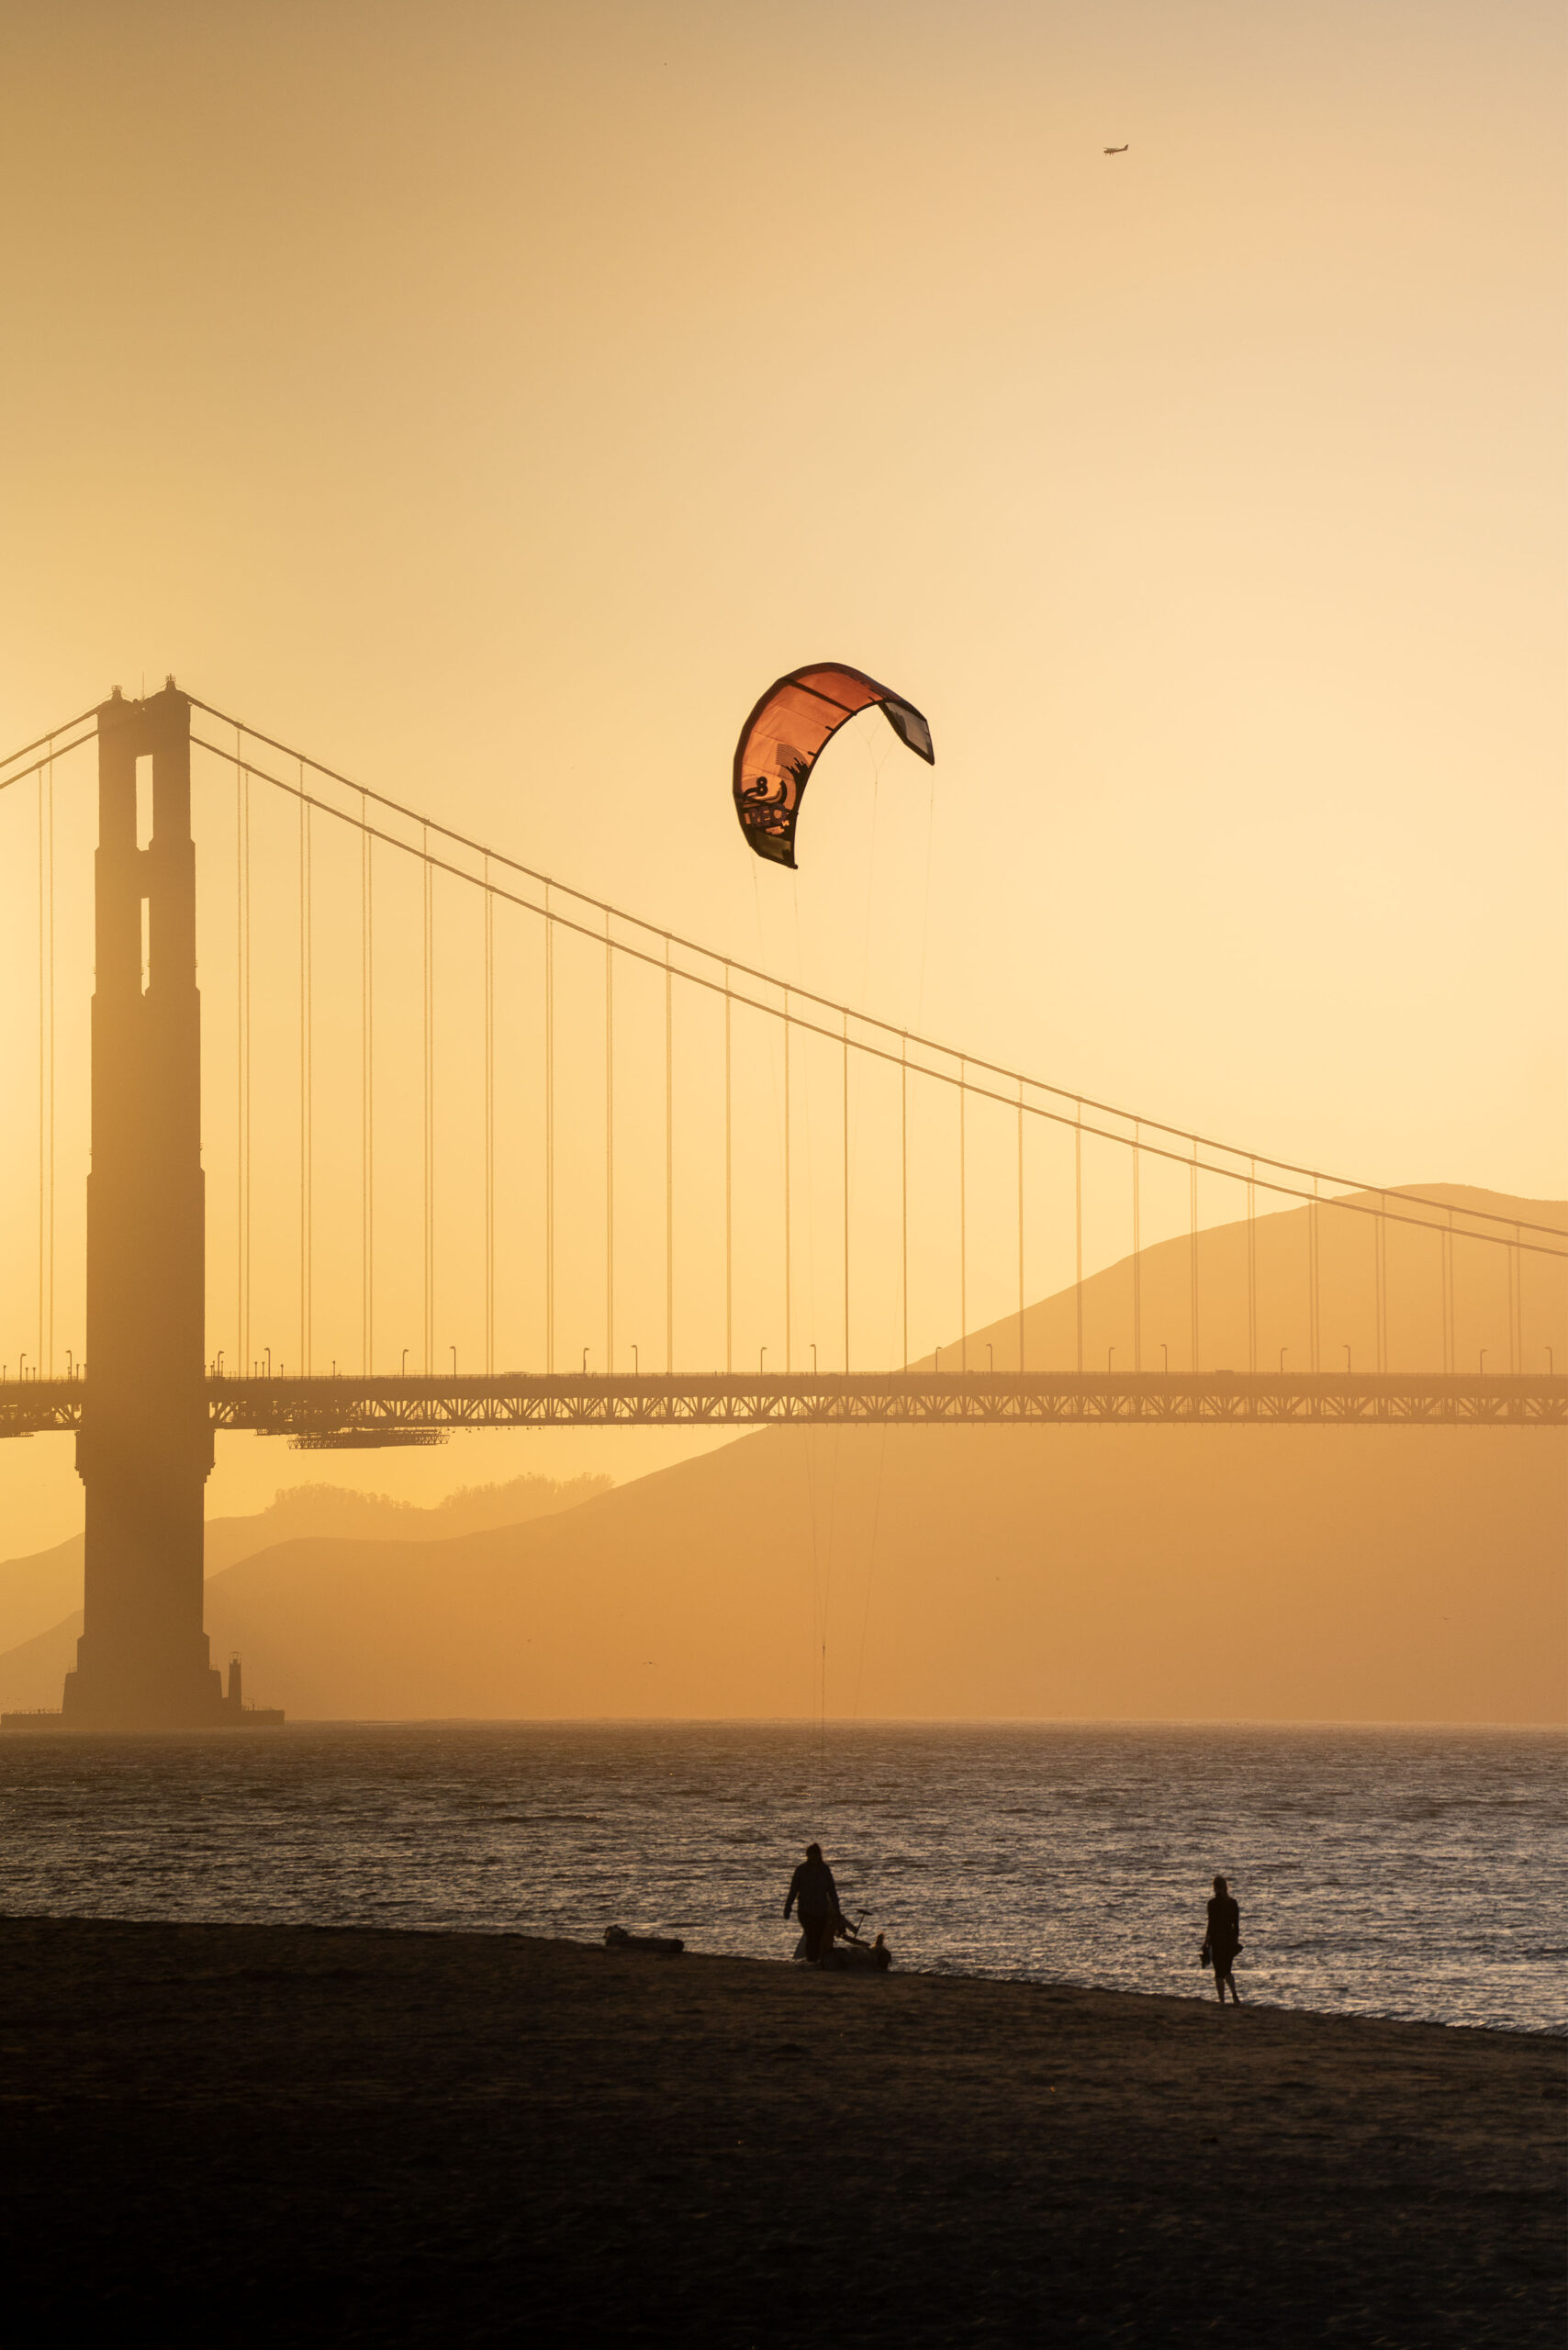
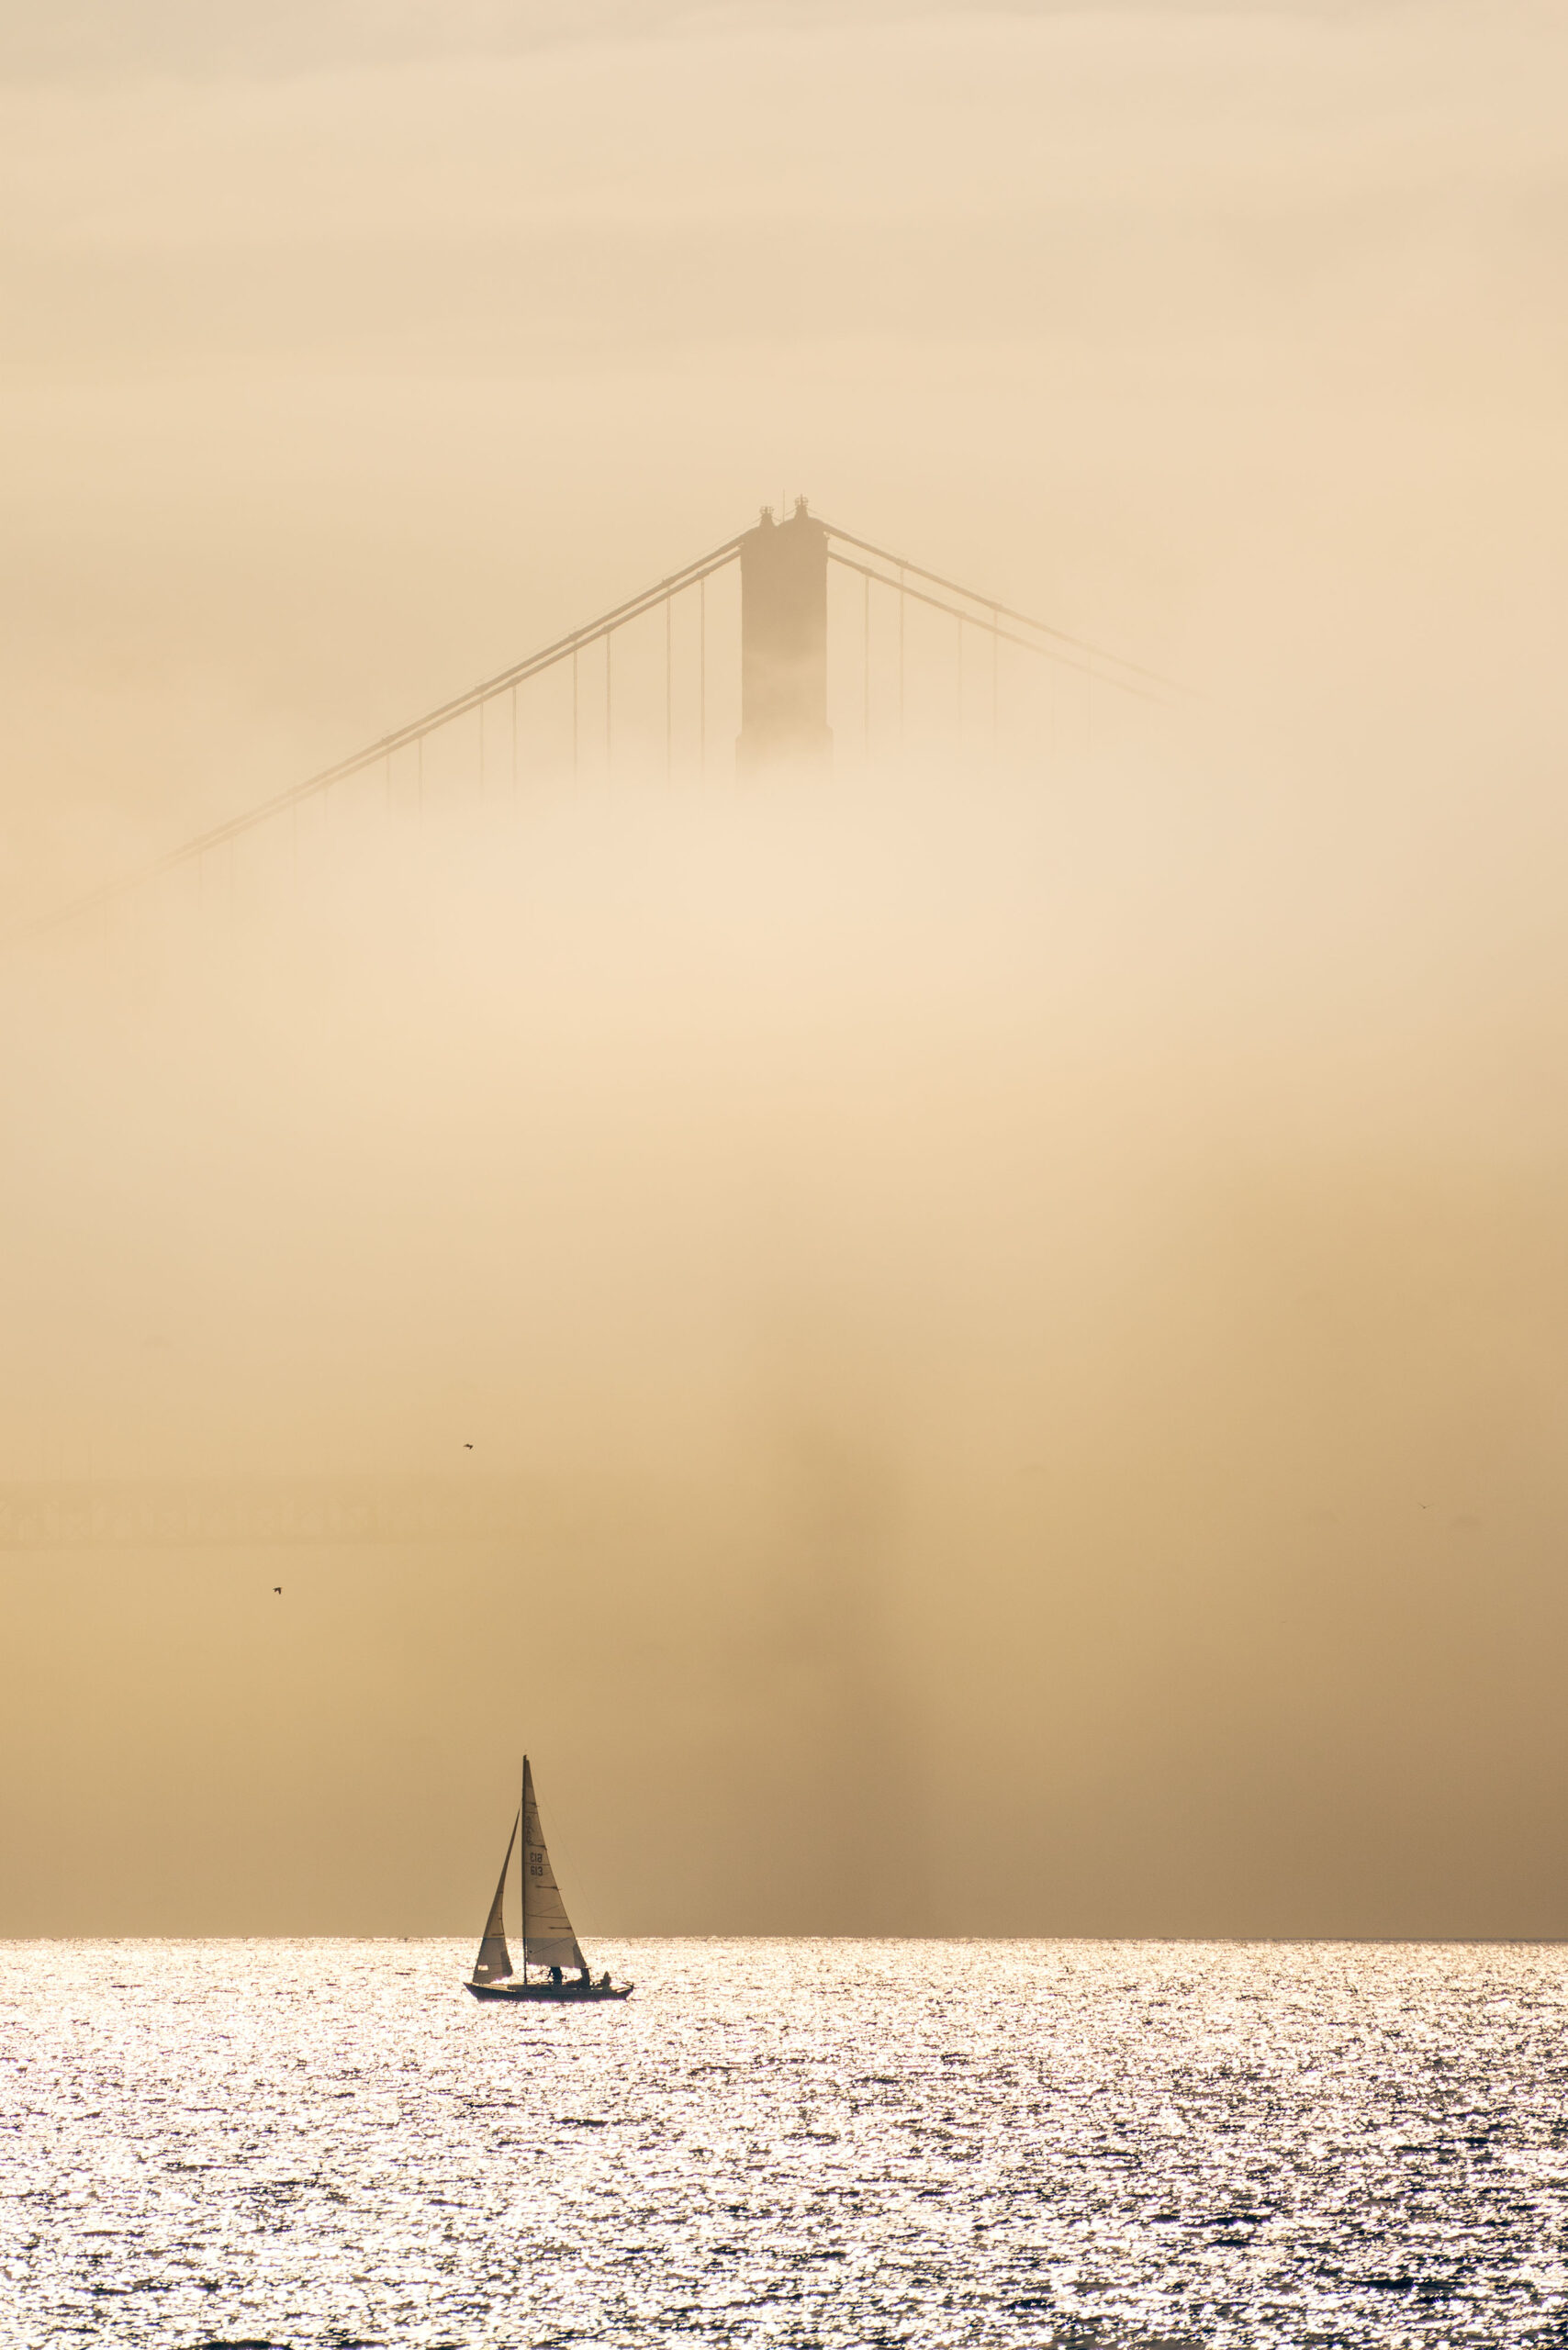
8. The Golden Gate Bridge and the Presidio
The Golden Gate Bridge is the undisputed symbol of the city and the most fascinating spot, with its famous red color and often shrouded in fog. When it was finished in 1937, it was the longest suspension bridge in the world. Crossing the bridge offers a unique emotion. It is possible to do it on foot, by bike or by car, checking the opening hours of the cycle and pedestrian gates. In addition to crossing it, it’s possible to admire it in all its splendor from different locations. First of all from the beaches, the Golden Gate Beach and the Baker Beach.
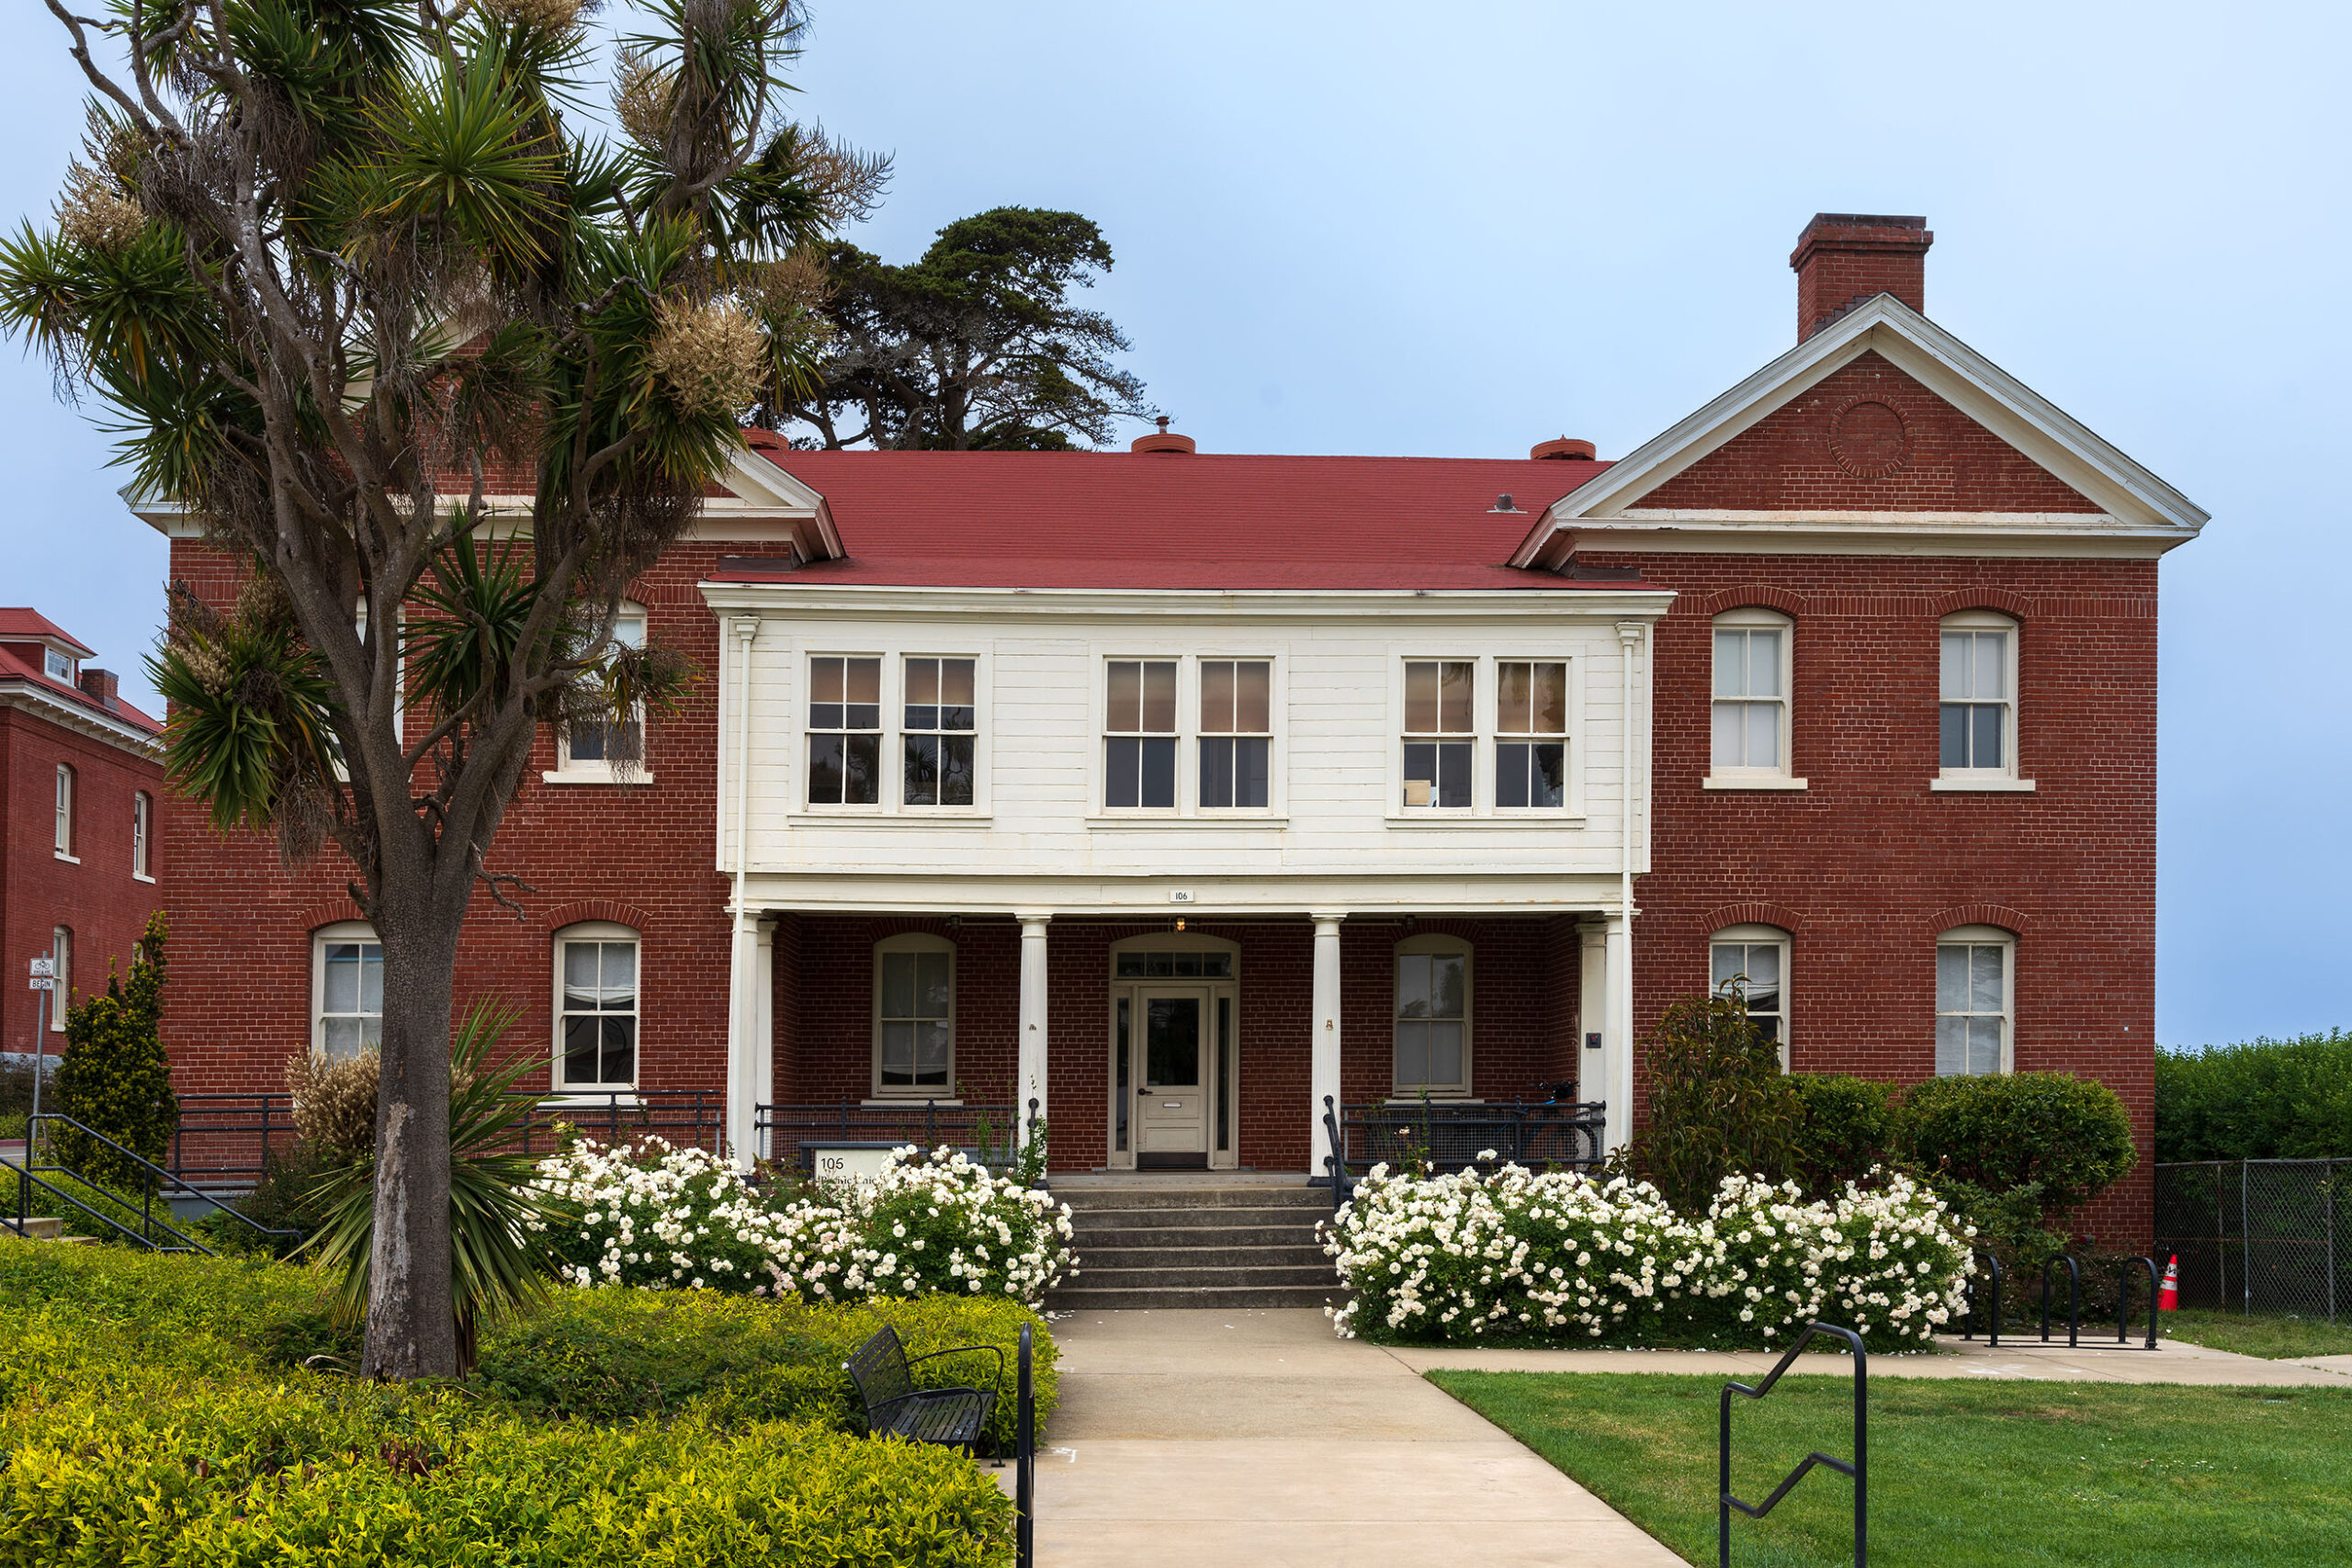
Secondly, there are many suggestive viewpoints from Presidio Park (Golden Gate Overlook, Pacific Overlook, Golden Gate Viewpoint). We recommend that you rent a bike to visit the park, which is very extensive, dedicating at least half a day to it. The park was established on the site of an old Spanish fort, where the US Army later settled. Visiting Presidio is like entering another world and going back in time, getting lost among the historic military lodges, surrounded by well-kept gardens. Here you can walk in lush nature, visit museums, such as the really exciting Walt Disney Family Museum, or admire the views towards the bay and the bridge. Presidio is certainly among the most fascinating places in the city!
Photo tips: being able to photograph the bridge is not easy, as it is often enveloped in a very thick fog, which does not make it visible even up close! Therefore, take advantage of the first clear day to visit it, otherwise you might not succeed. Choosing the location you prefer, such as the beaches for example, you can use the wide angle to capture both the water and the bridge in its entirety and use long exposure to create a silk effect on the water (remember to bring with you the tripod!). Wherever you stop, use the zoom to capture some details of the incredible structure of the bridge. If you are lucky, at sunset time, you will be able to take wonderful photos. Use the grid, both in your smartphone and in your camera, to best compose the image with the rule of thirds (find out more in this article). In case of fog, when it starts to thin out, you will be able to take exciting shots of the structure suspended in the mist, in a magical atmosphere.
@mauro.boccali.ph
@giadaantonini_photography
@mauro.boccali.ph
@giadaantonini_photography
@giadaantonini_photography
@giadaantonini_photography
Typical houses in the Presidio Park.
@giadaantonini_photography
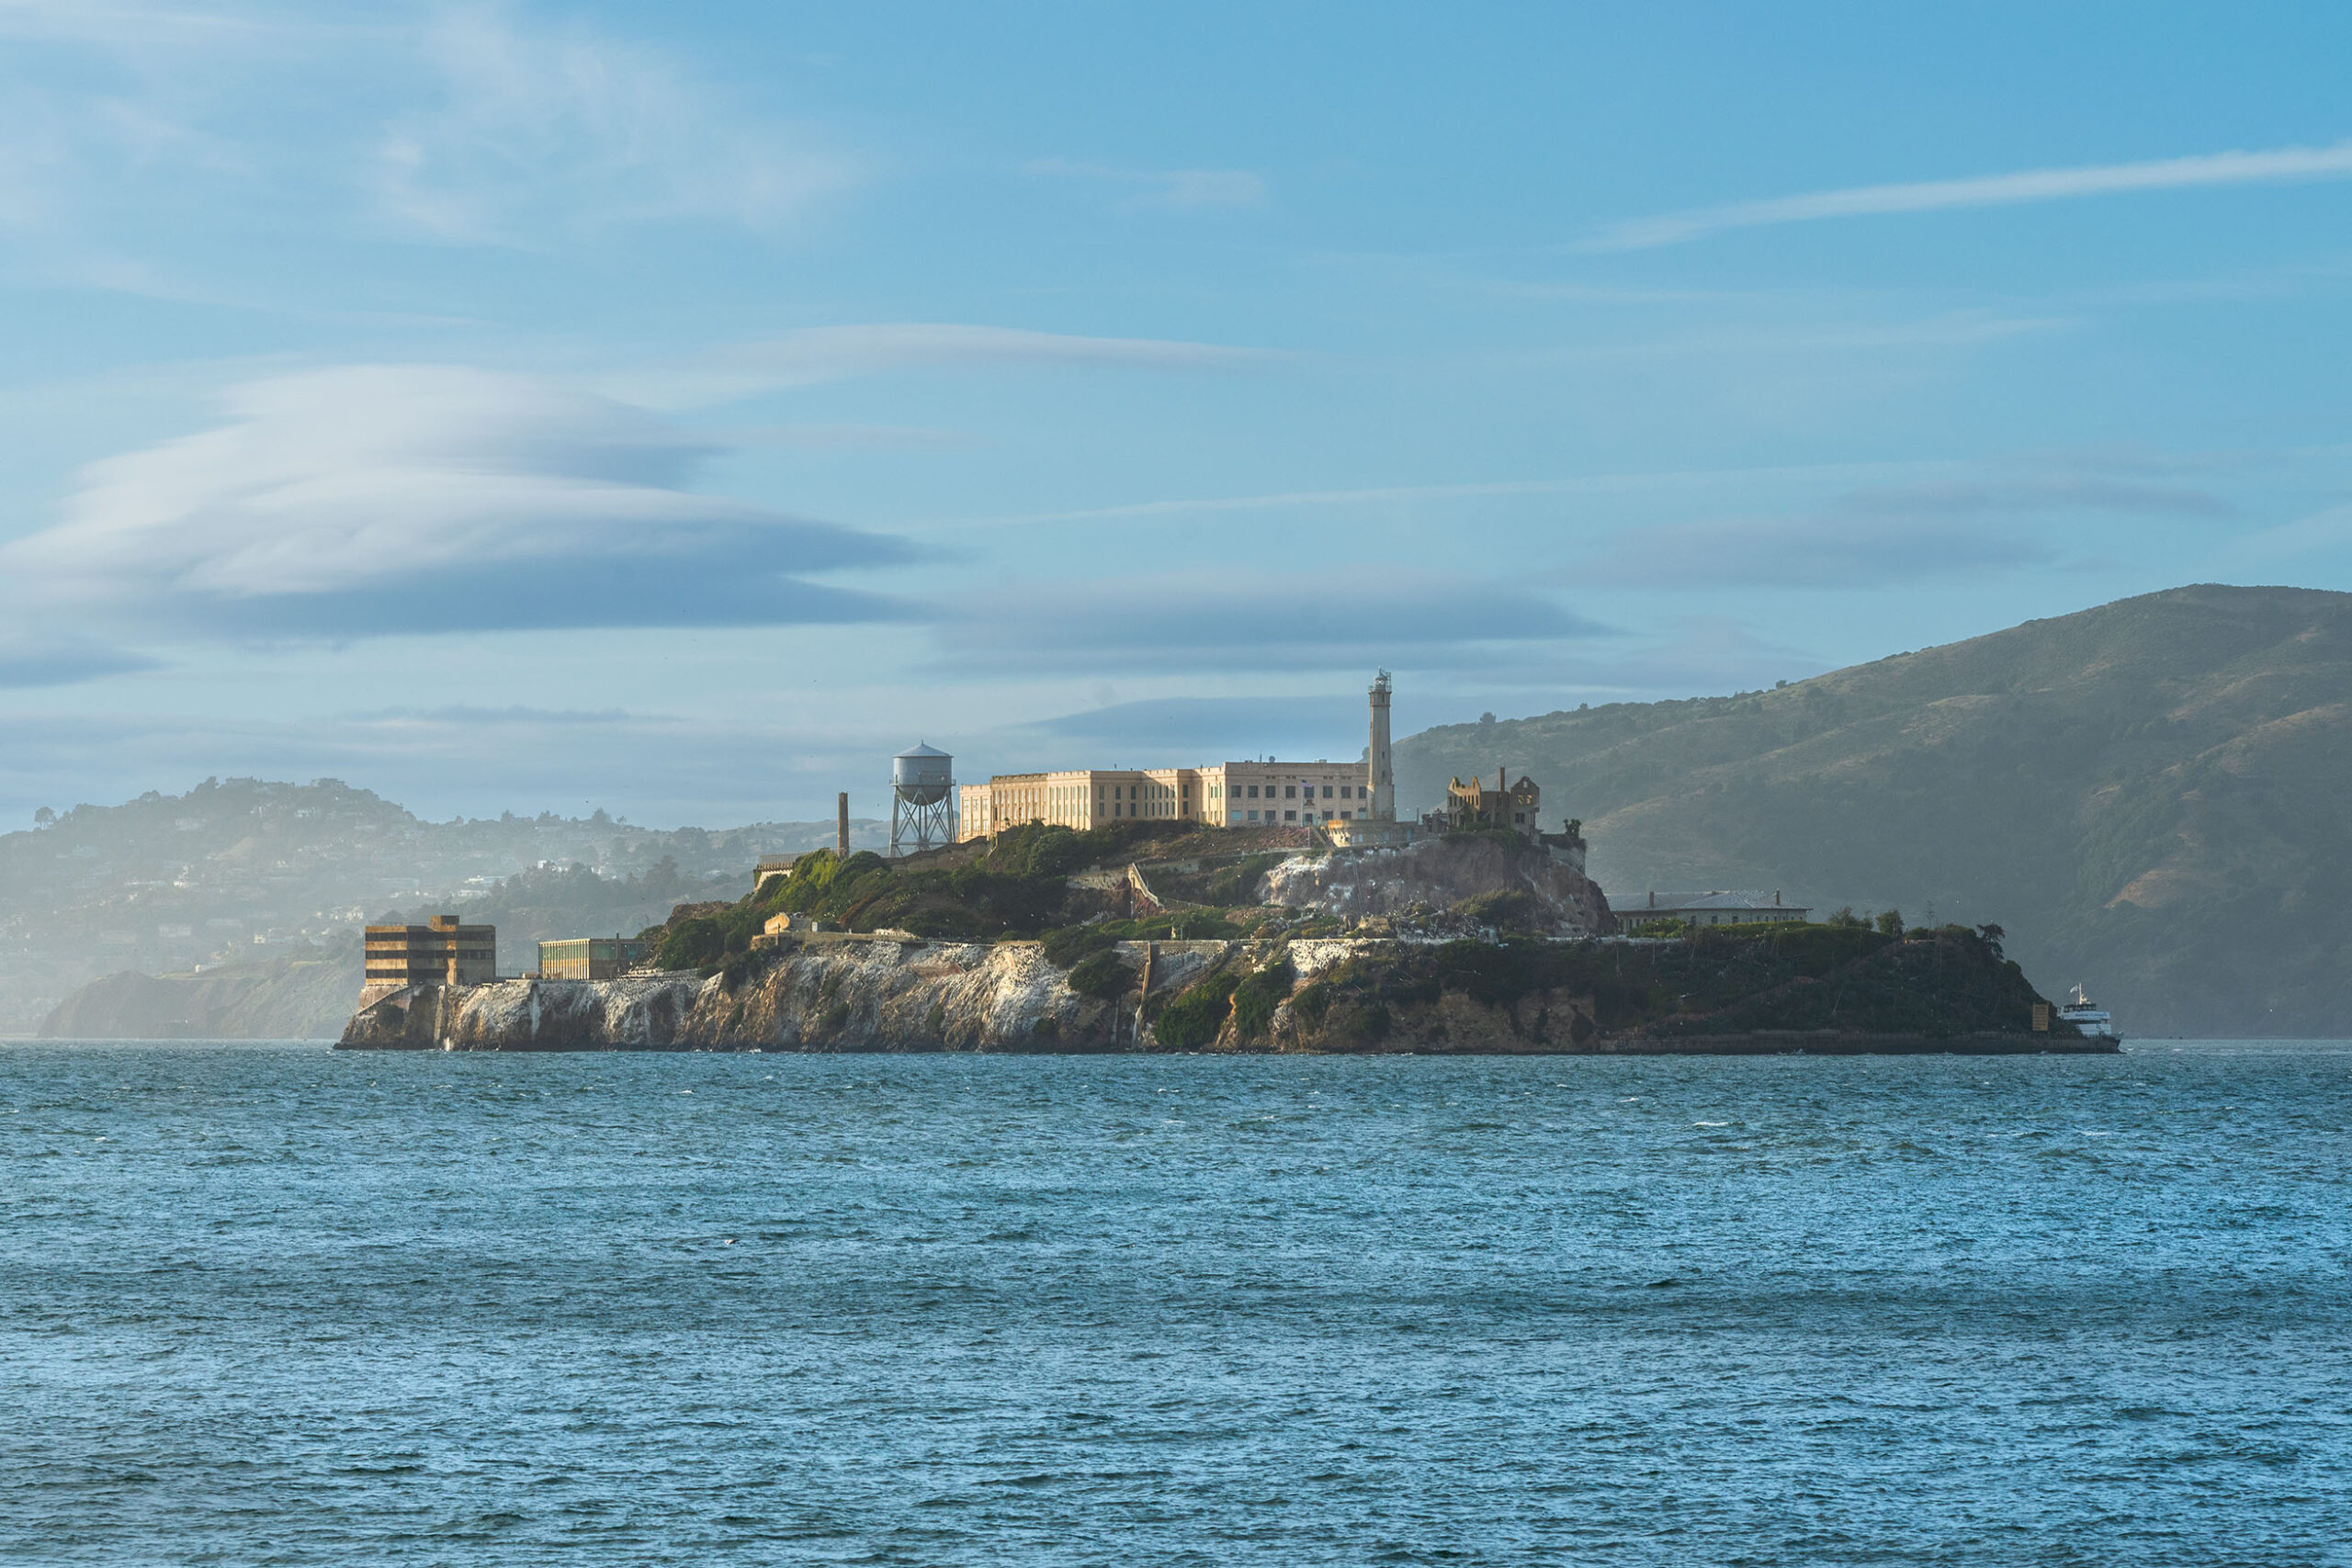
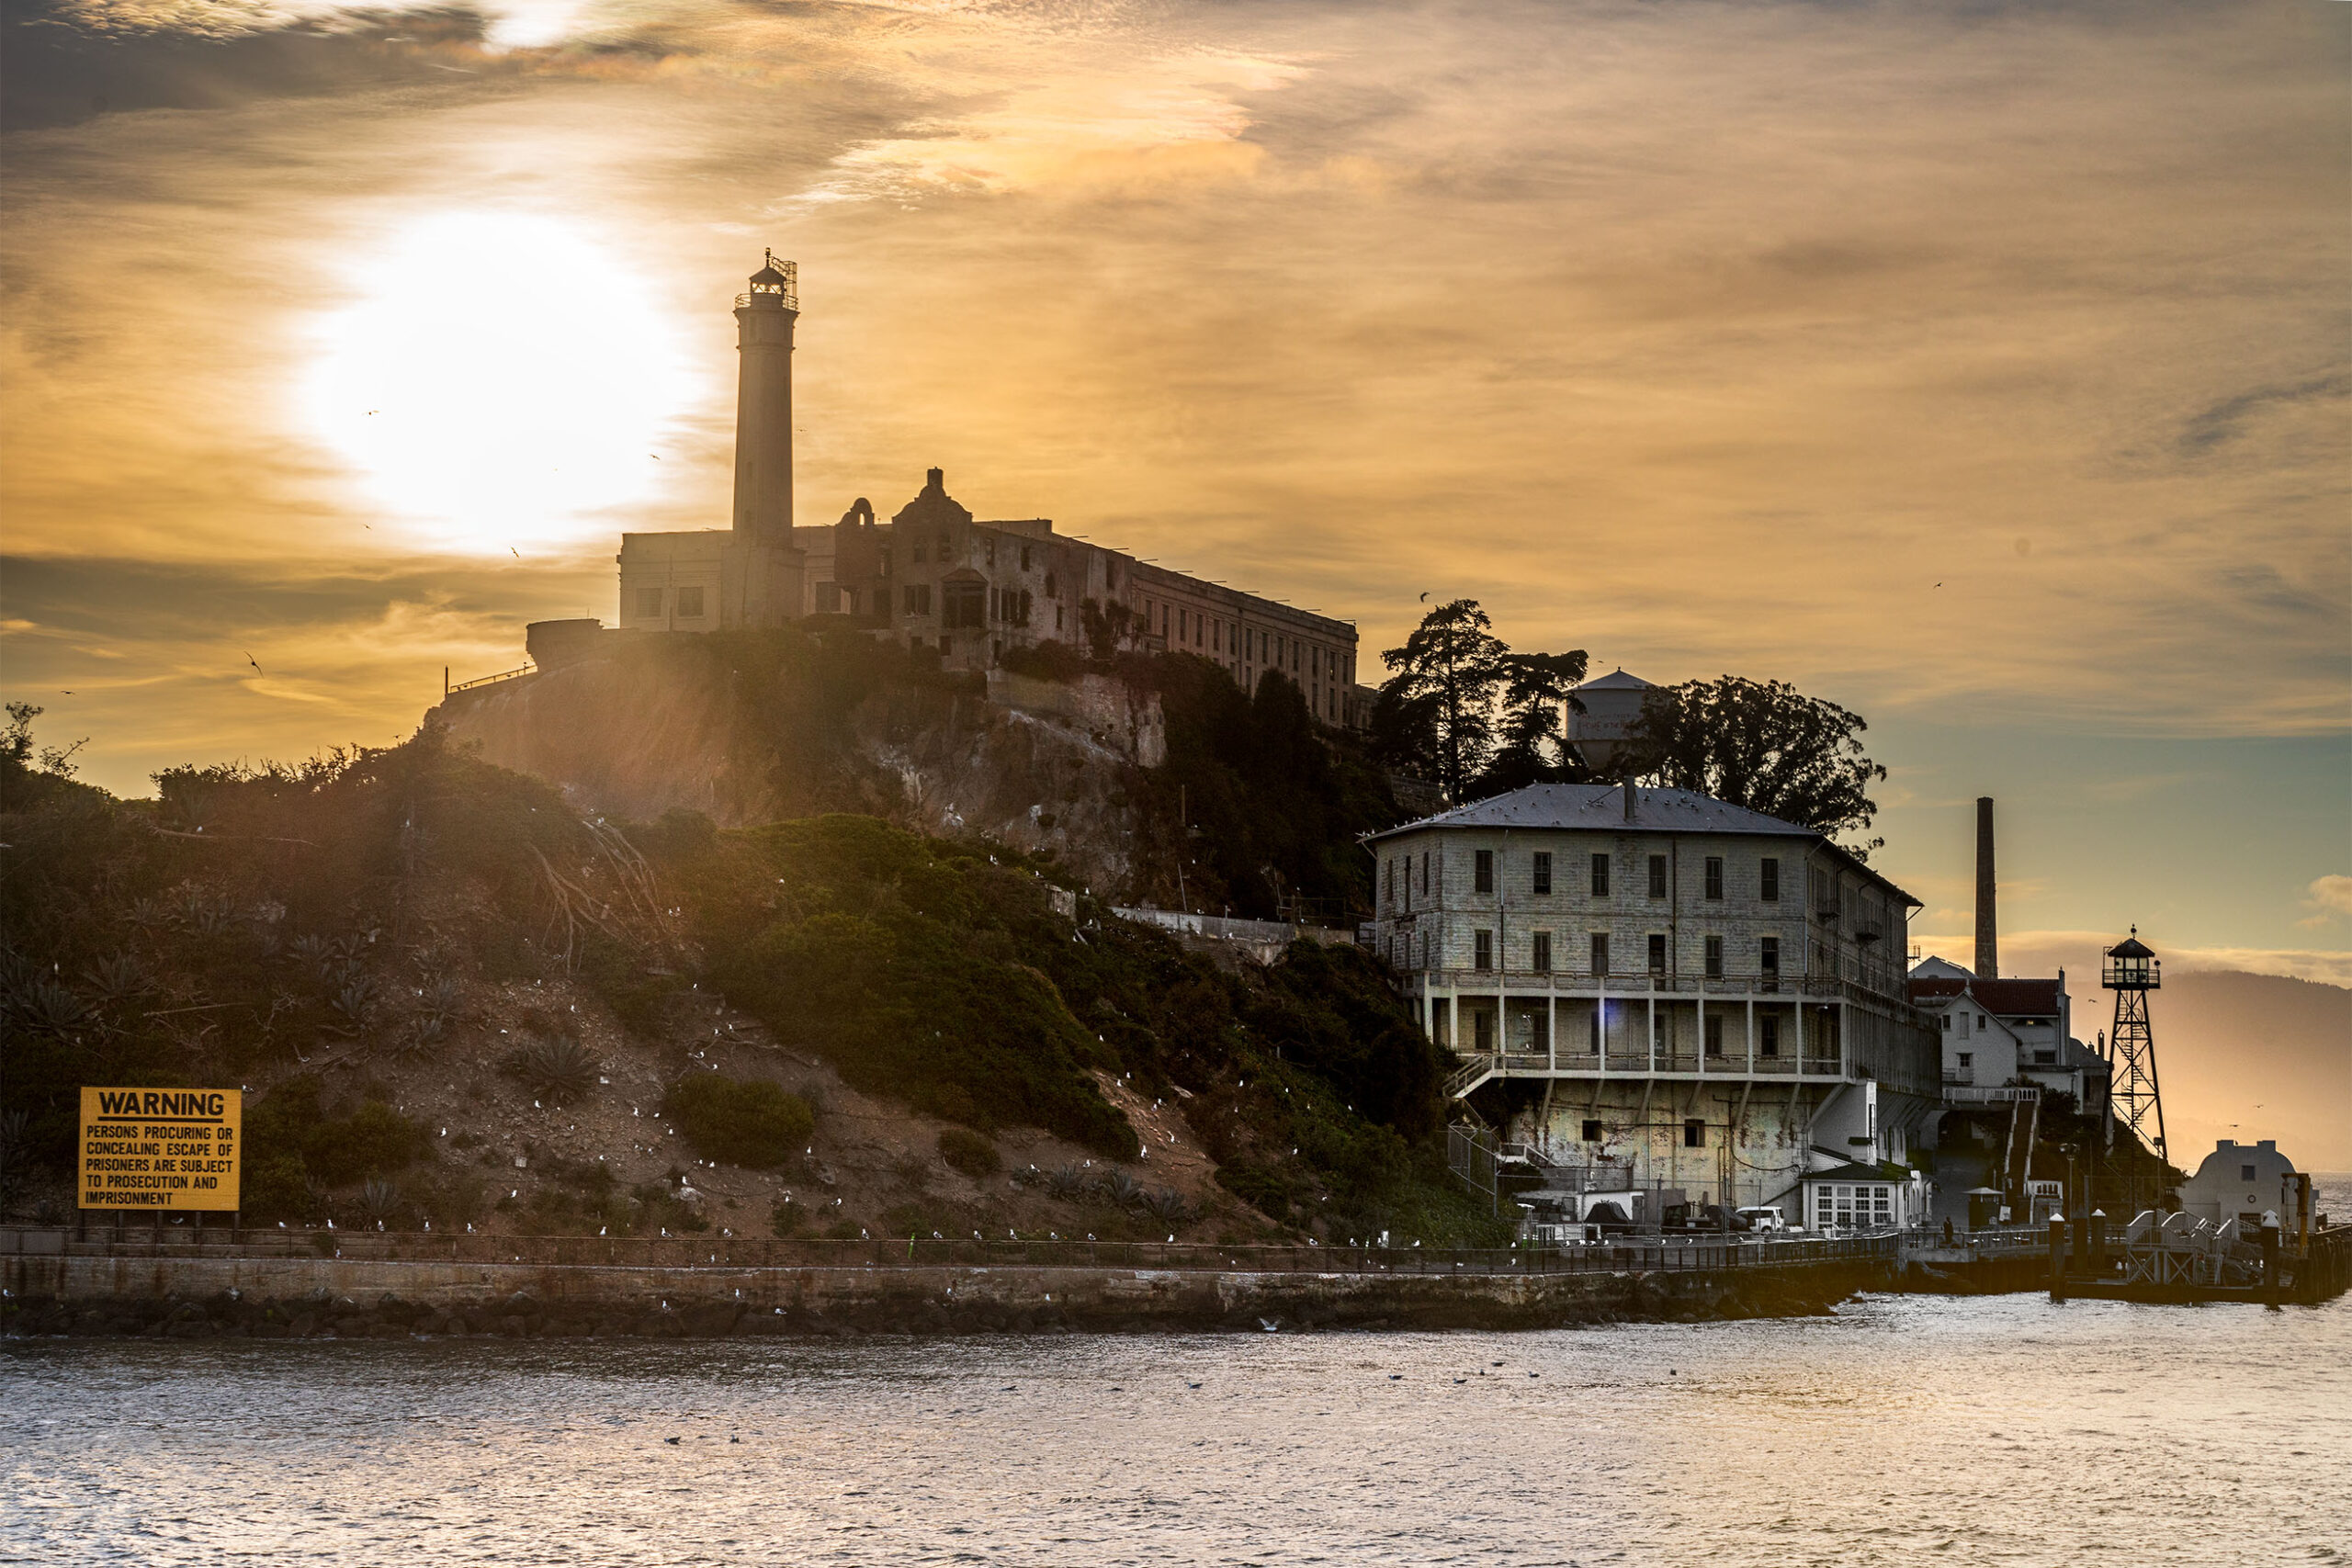
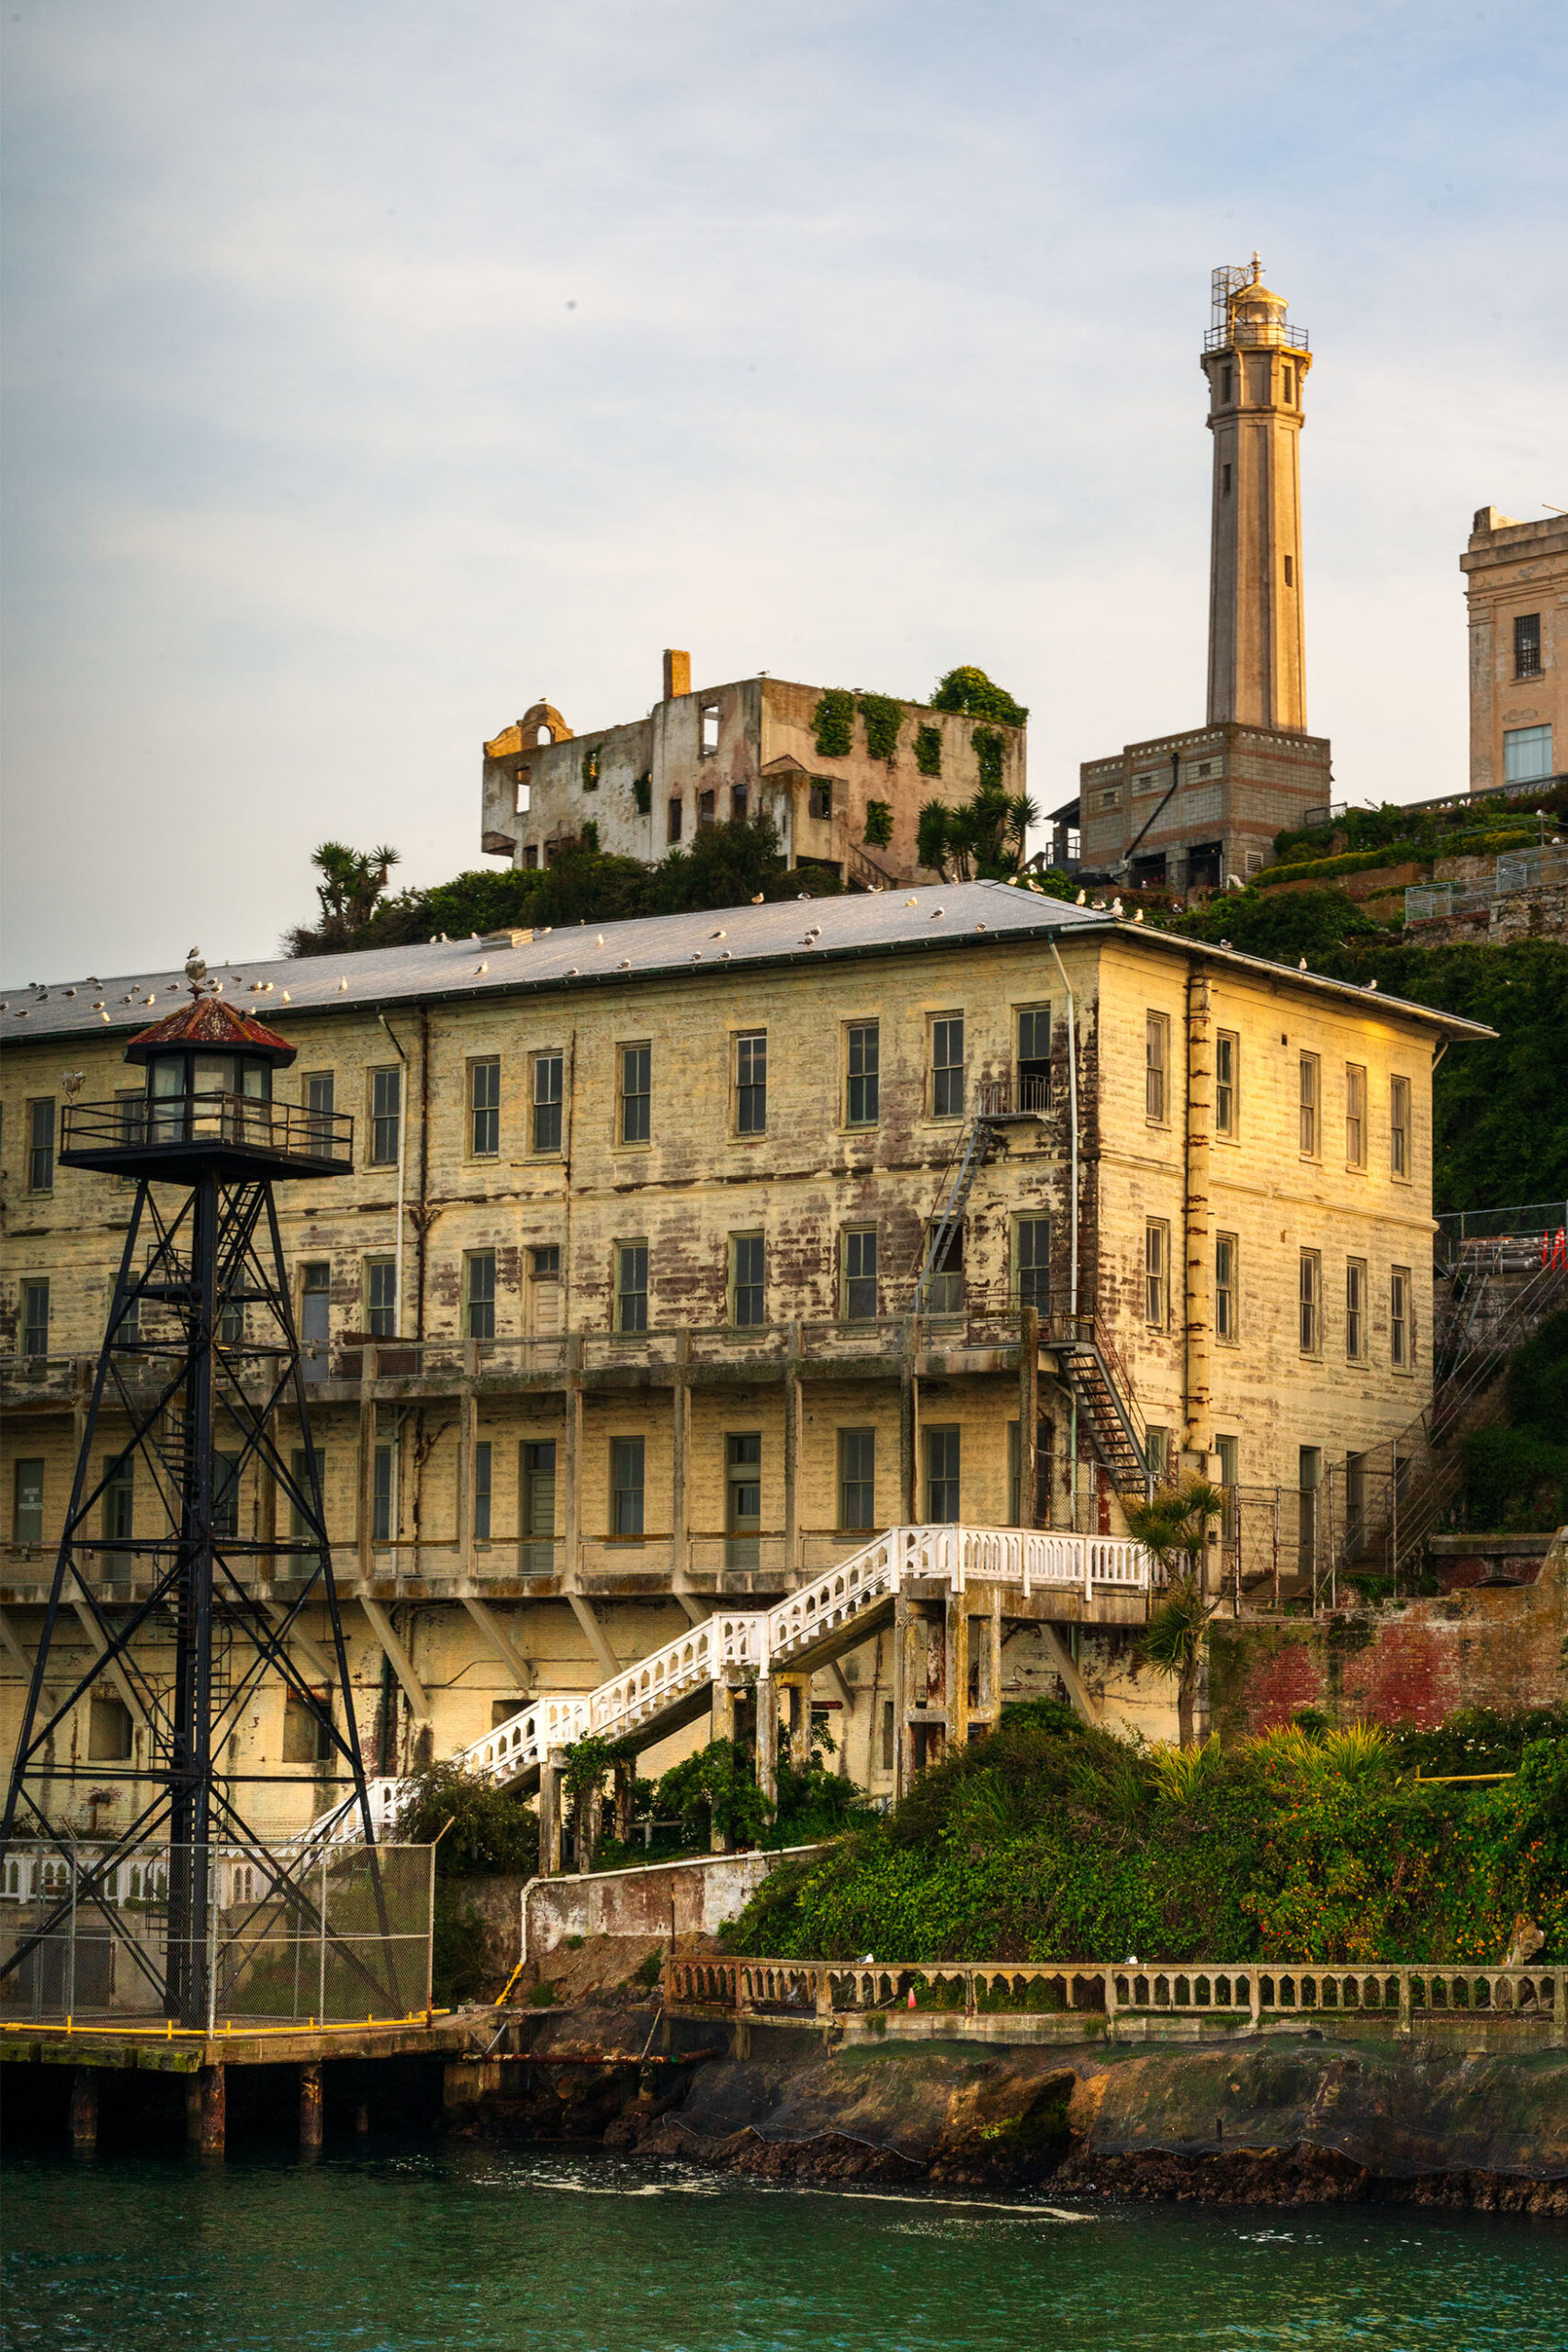
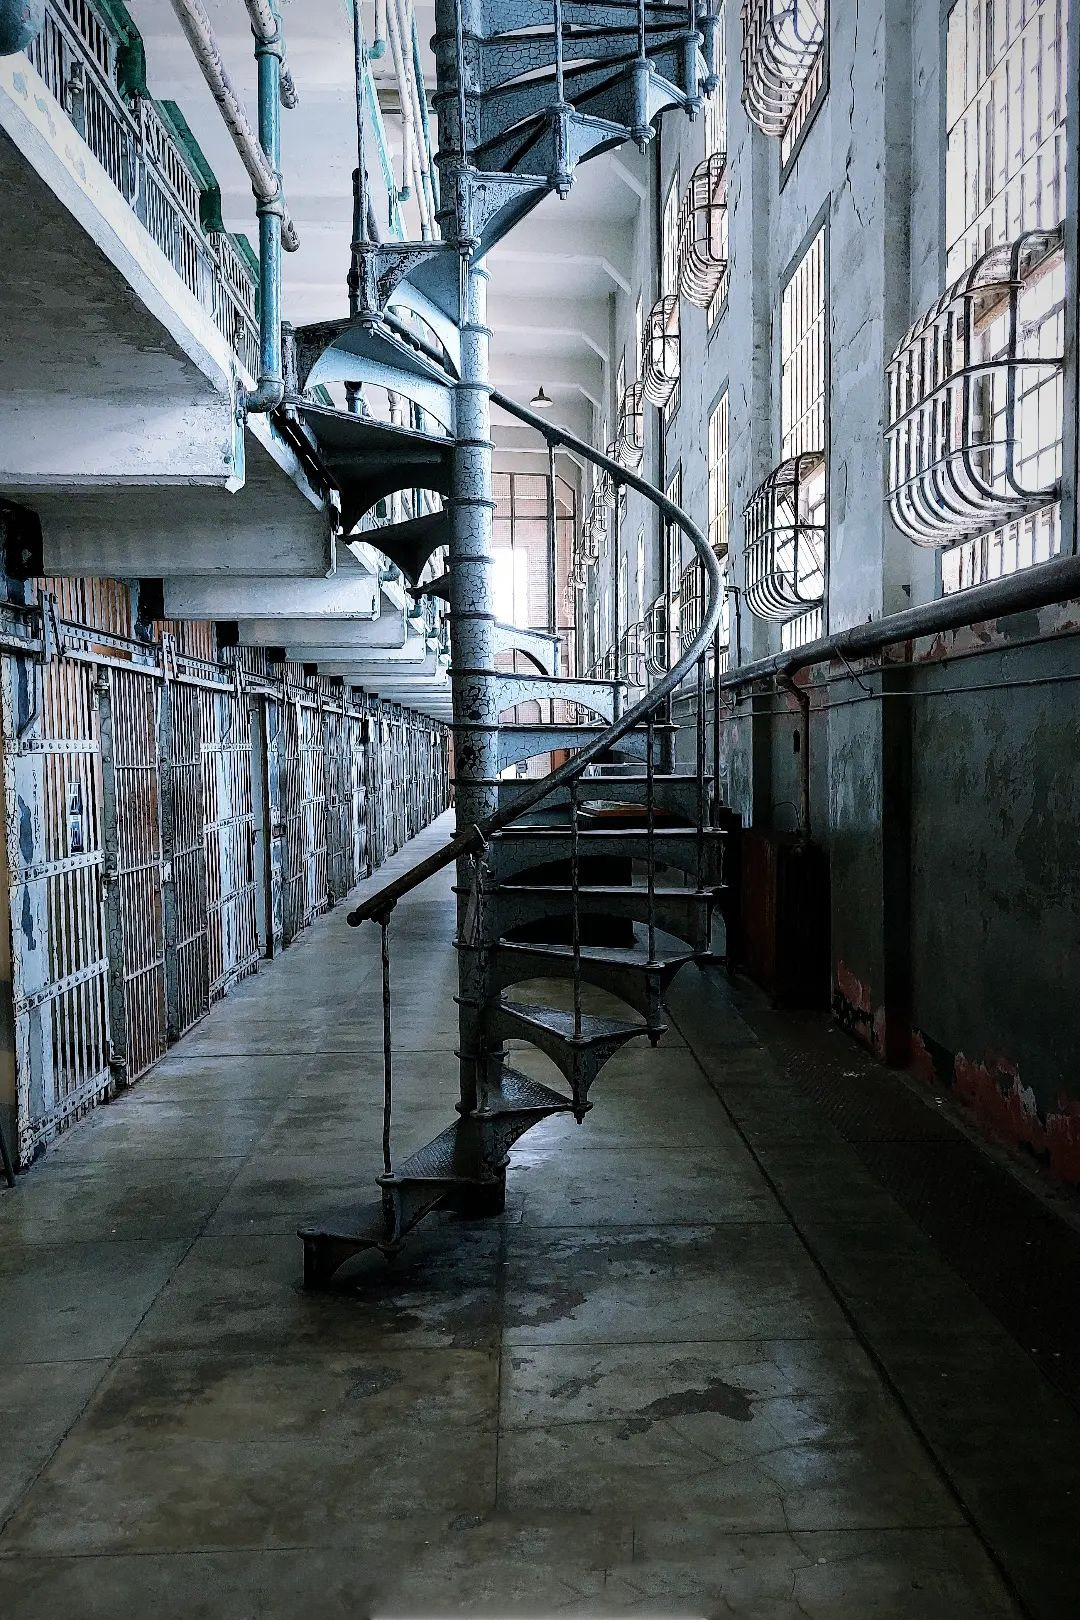
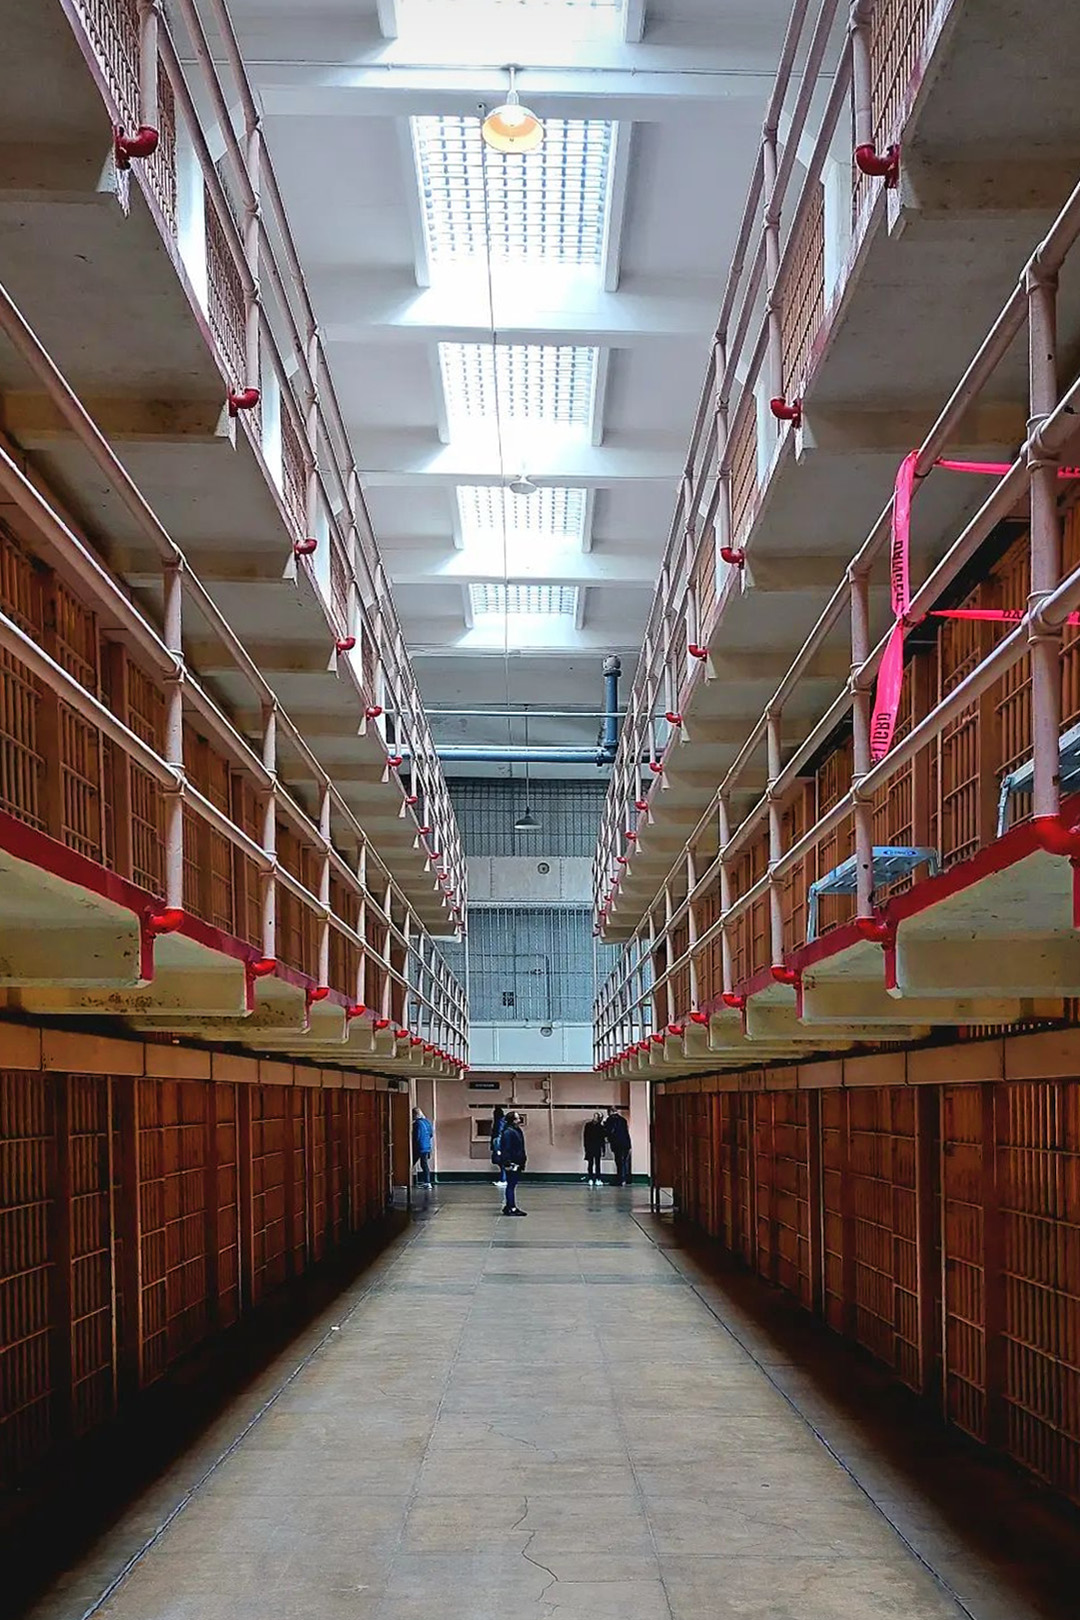
9. Alcatraz
In addition to the city, in a visit to San Francisco you can’t miss the tour of Alcatraz, the famous maximum security prison, built on the island of the same name. The tour includes the crossing and the guide on the spot. The visit is very impressive and deserves a few hours. The boat ride will allow you to see up close and pass under the Golden Gate Bridge. If you book the visit in the afternoon and the weather is good, on your return you will be able to enjoy beautiful sunsets over the bay.
Photo tips: take a few photos as you approach with the boat. It will be the only moment in which to grasp the whole island and the structure of the prison in its entirety. Also turn your attention to the breathtaking skyline of San Francisco. Once on the island, concentrate on the most emblematic details, or take symmetrical photos inside the prison rooms with the wide angle, to render the seriality of the small cells that follow one after the other.
@giadaantonini_photography
@giadaantonini_photography
@giadaantonini_photography
@giadaantonini_photography
@giadaantonini_photography
@giadaantonini_photography
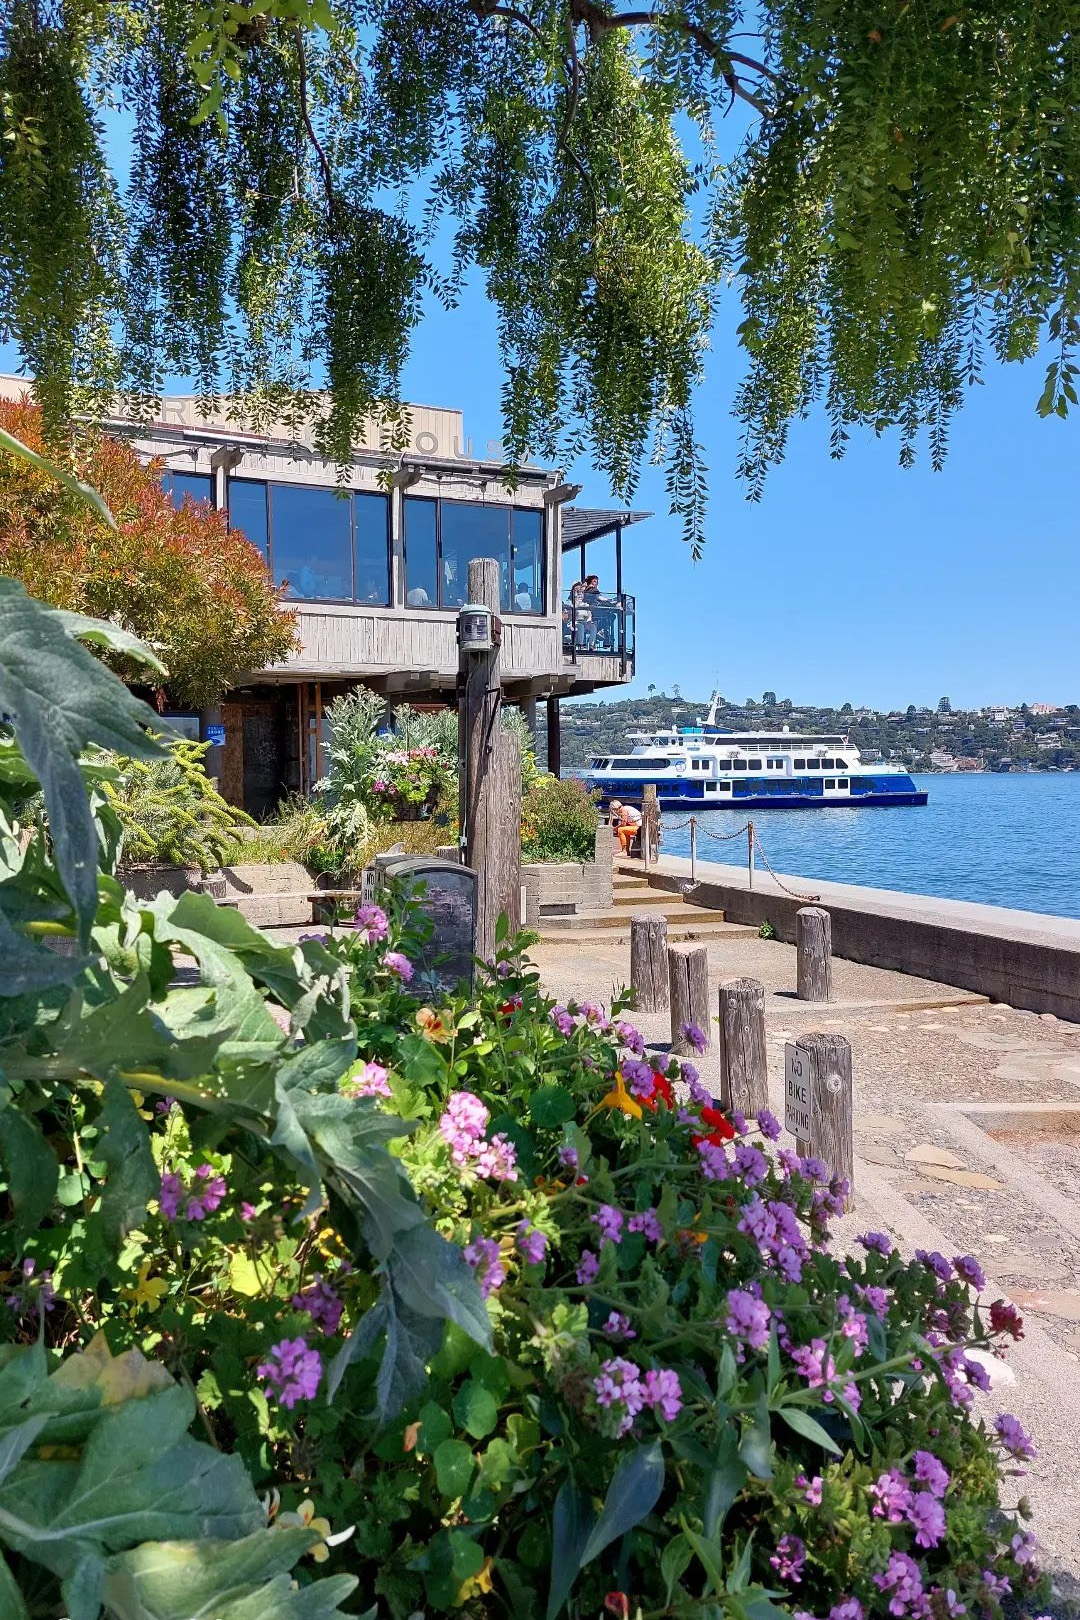
10. Sausalito and the Muir Woods National Monument
In Marin county, on the other side of San Francisco bay, crossing the Golden Gate, you quickly arrive at a small and elegant town, Sausalito, from which you can admire the San Francisco skyline.
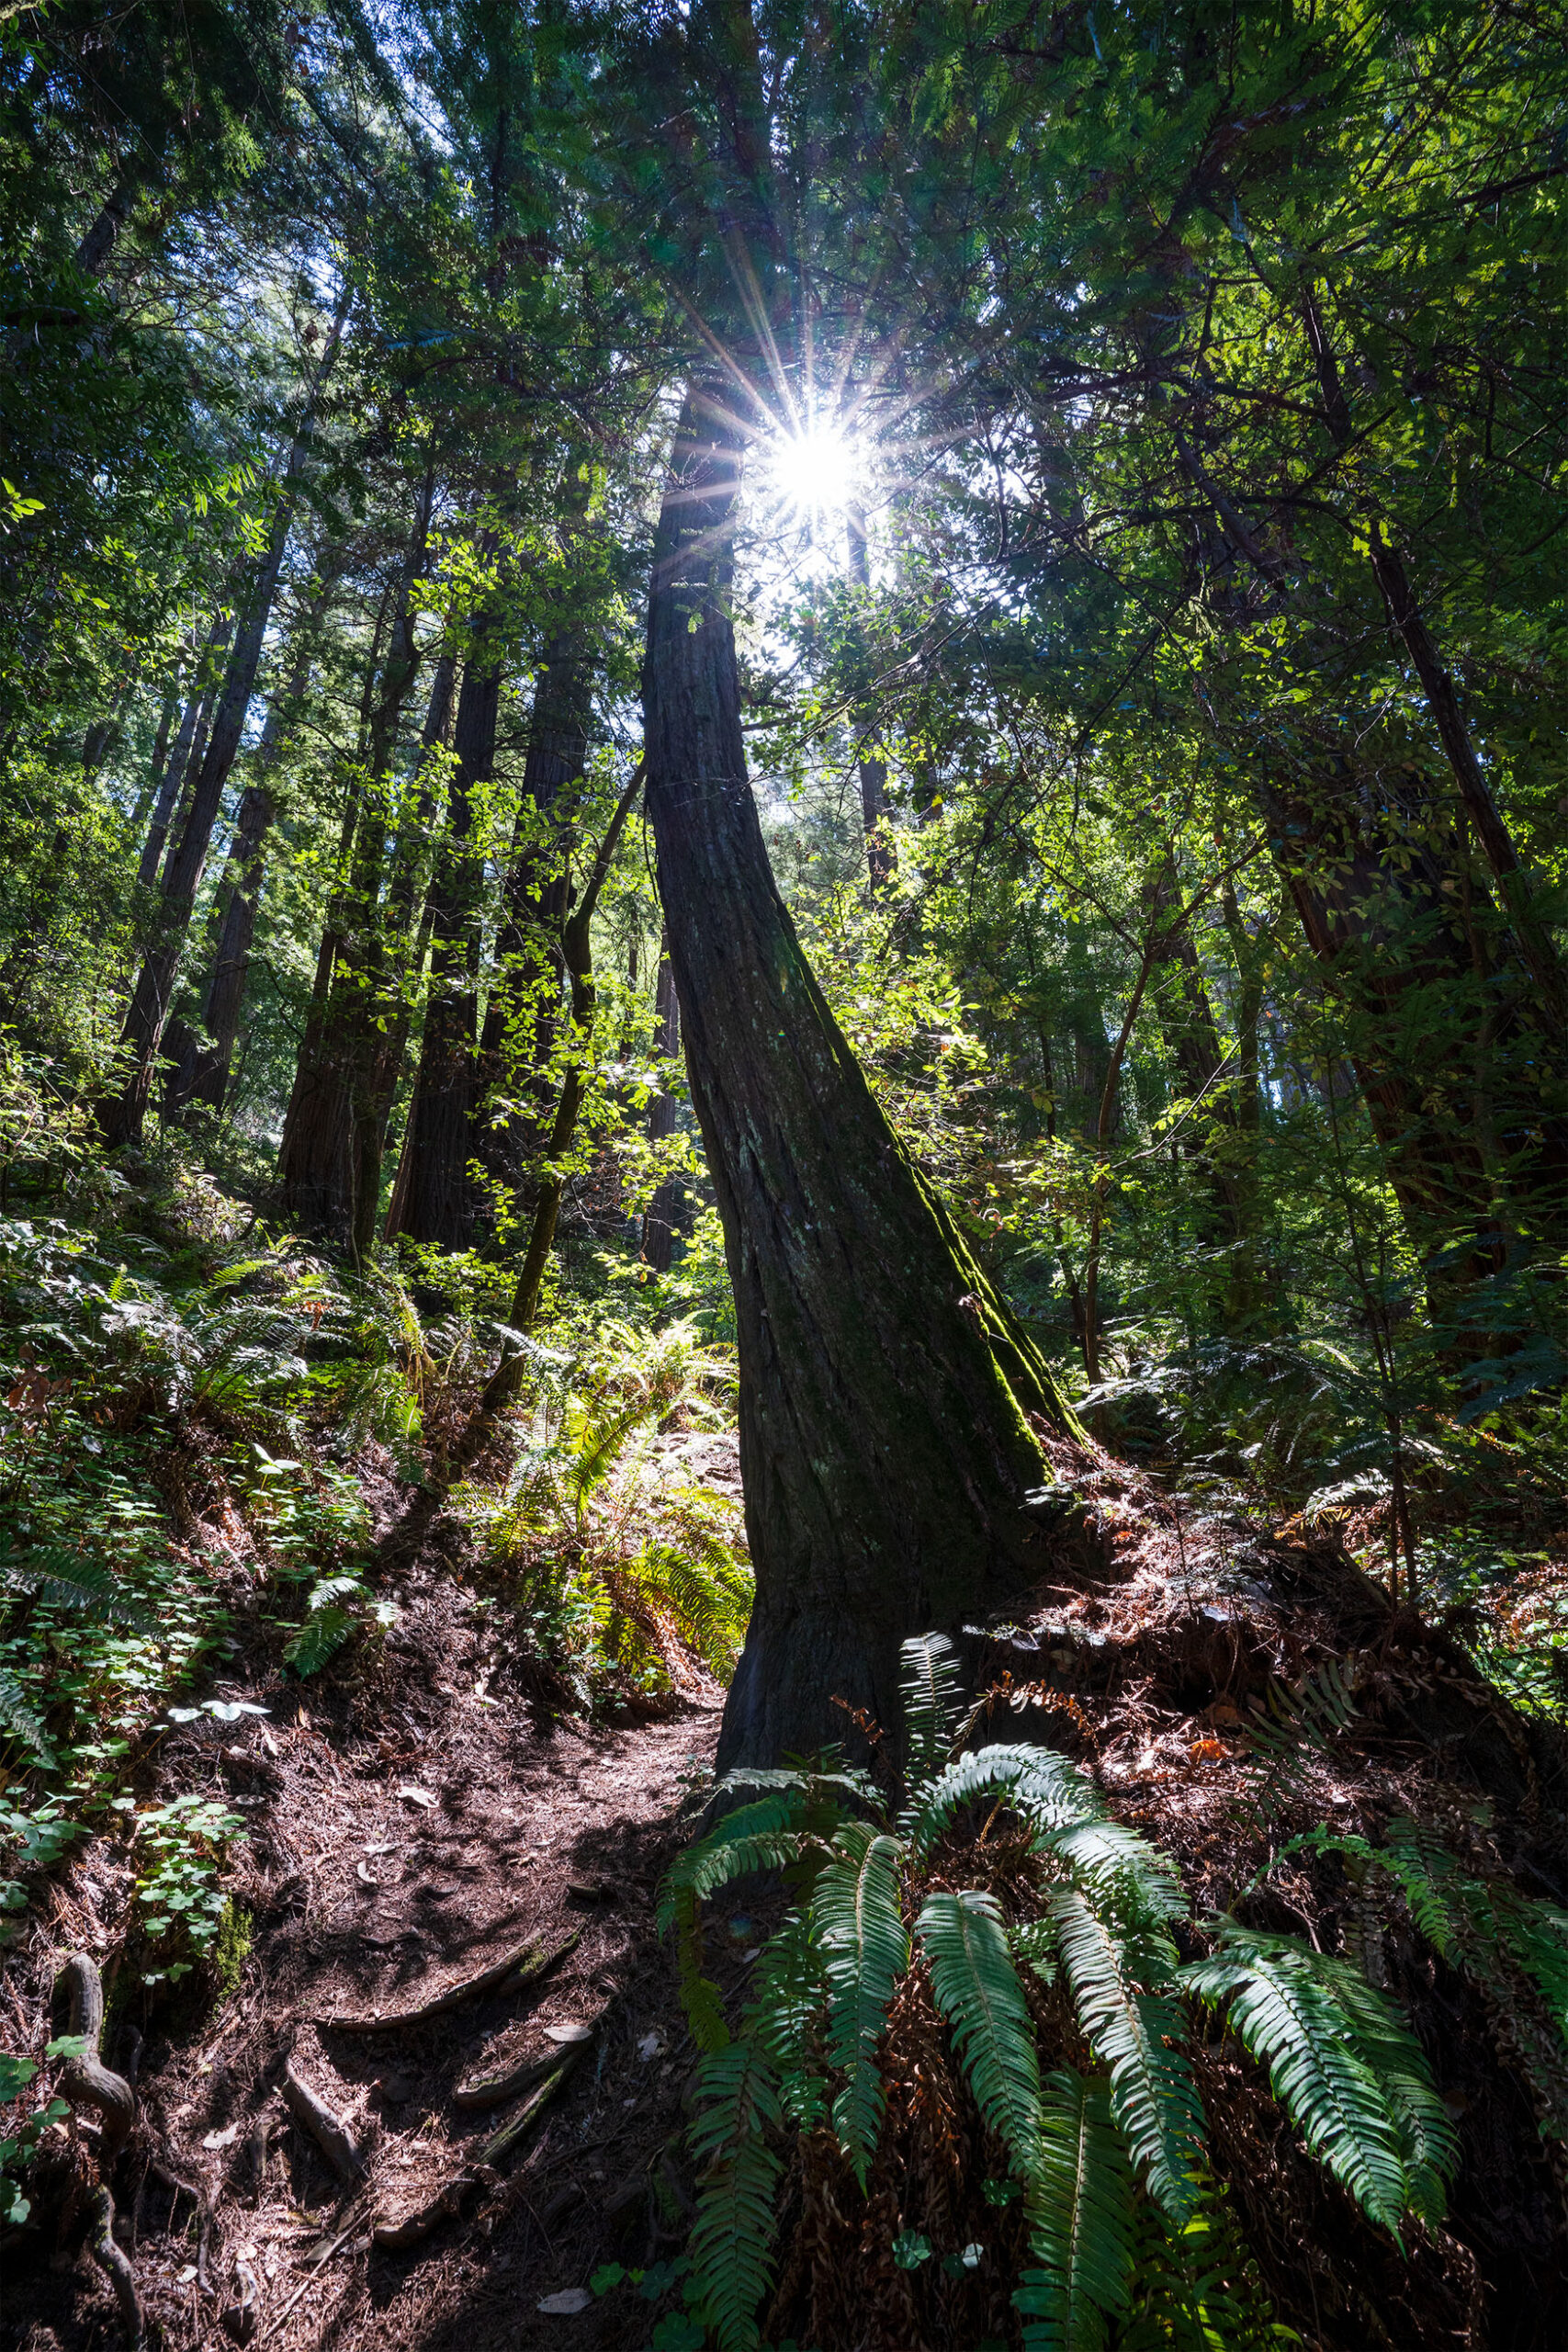
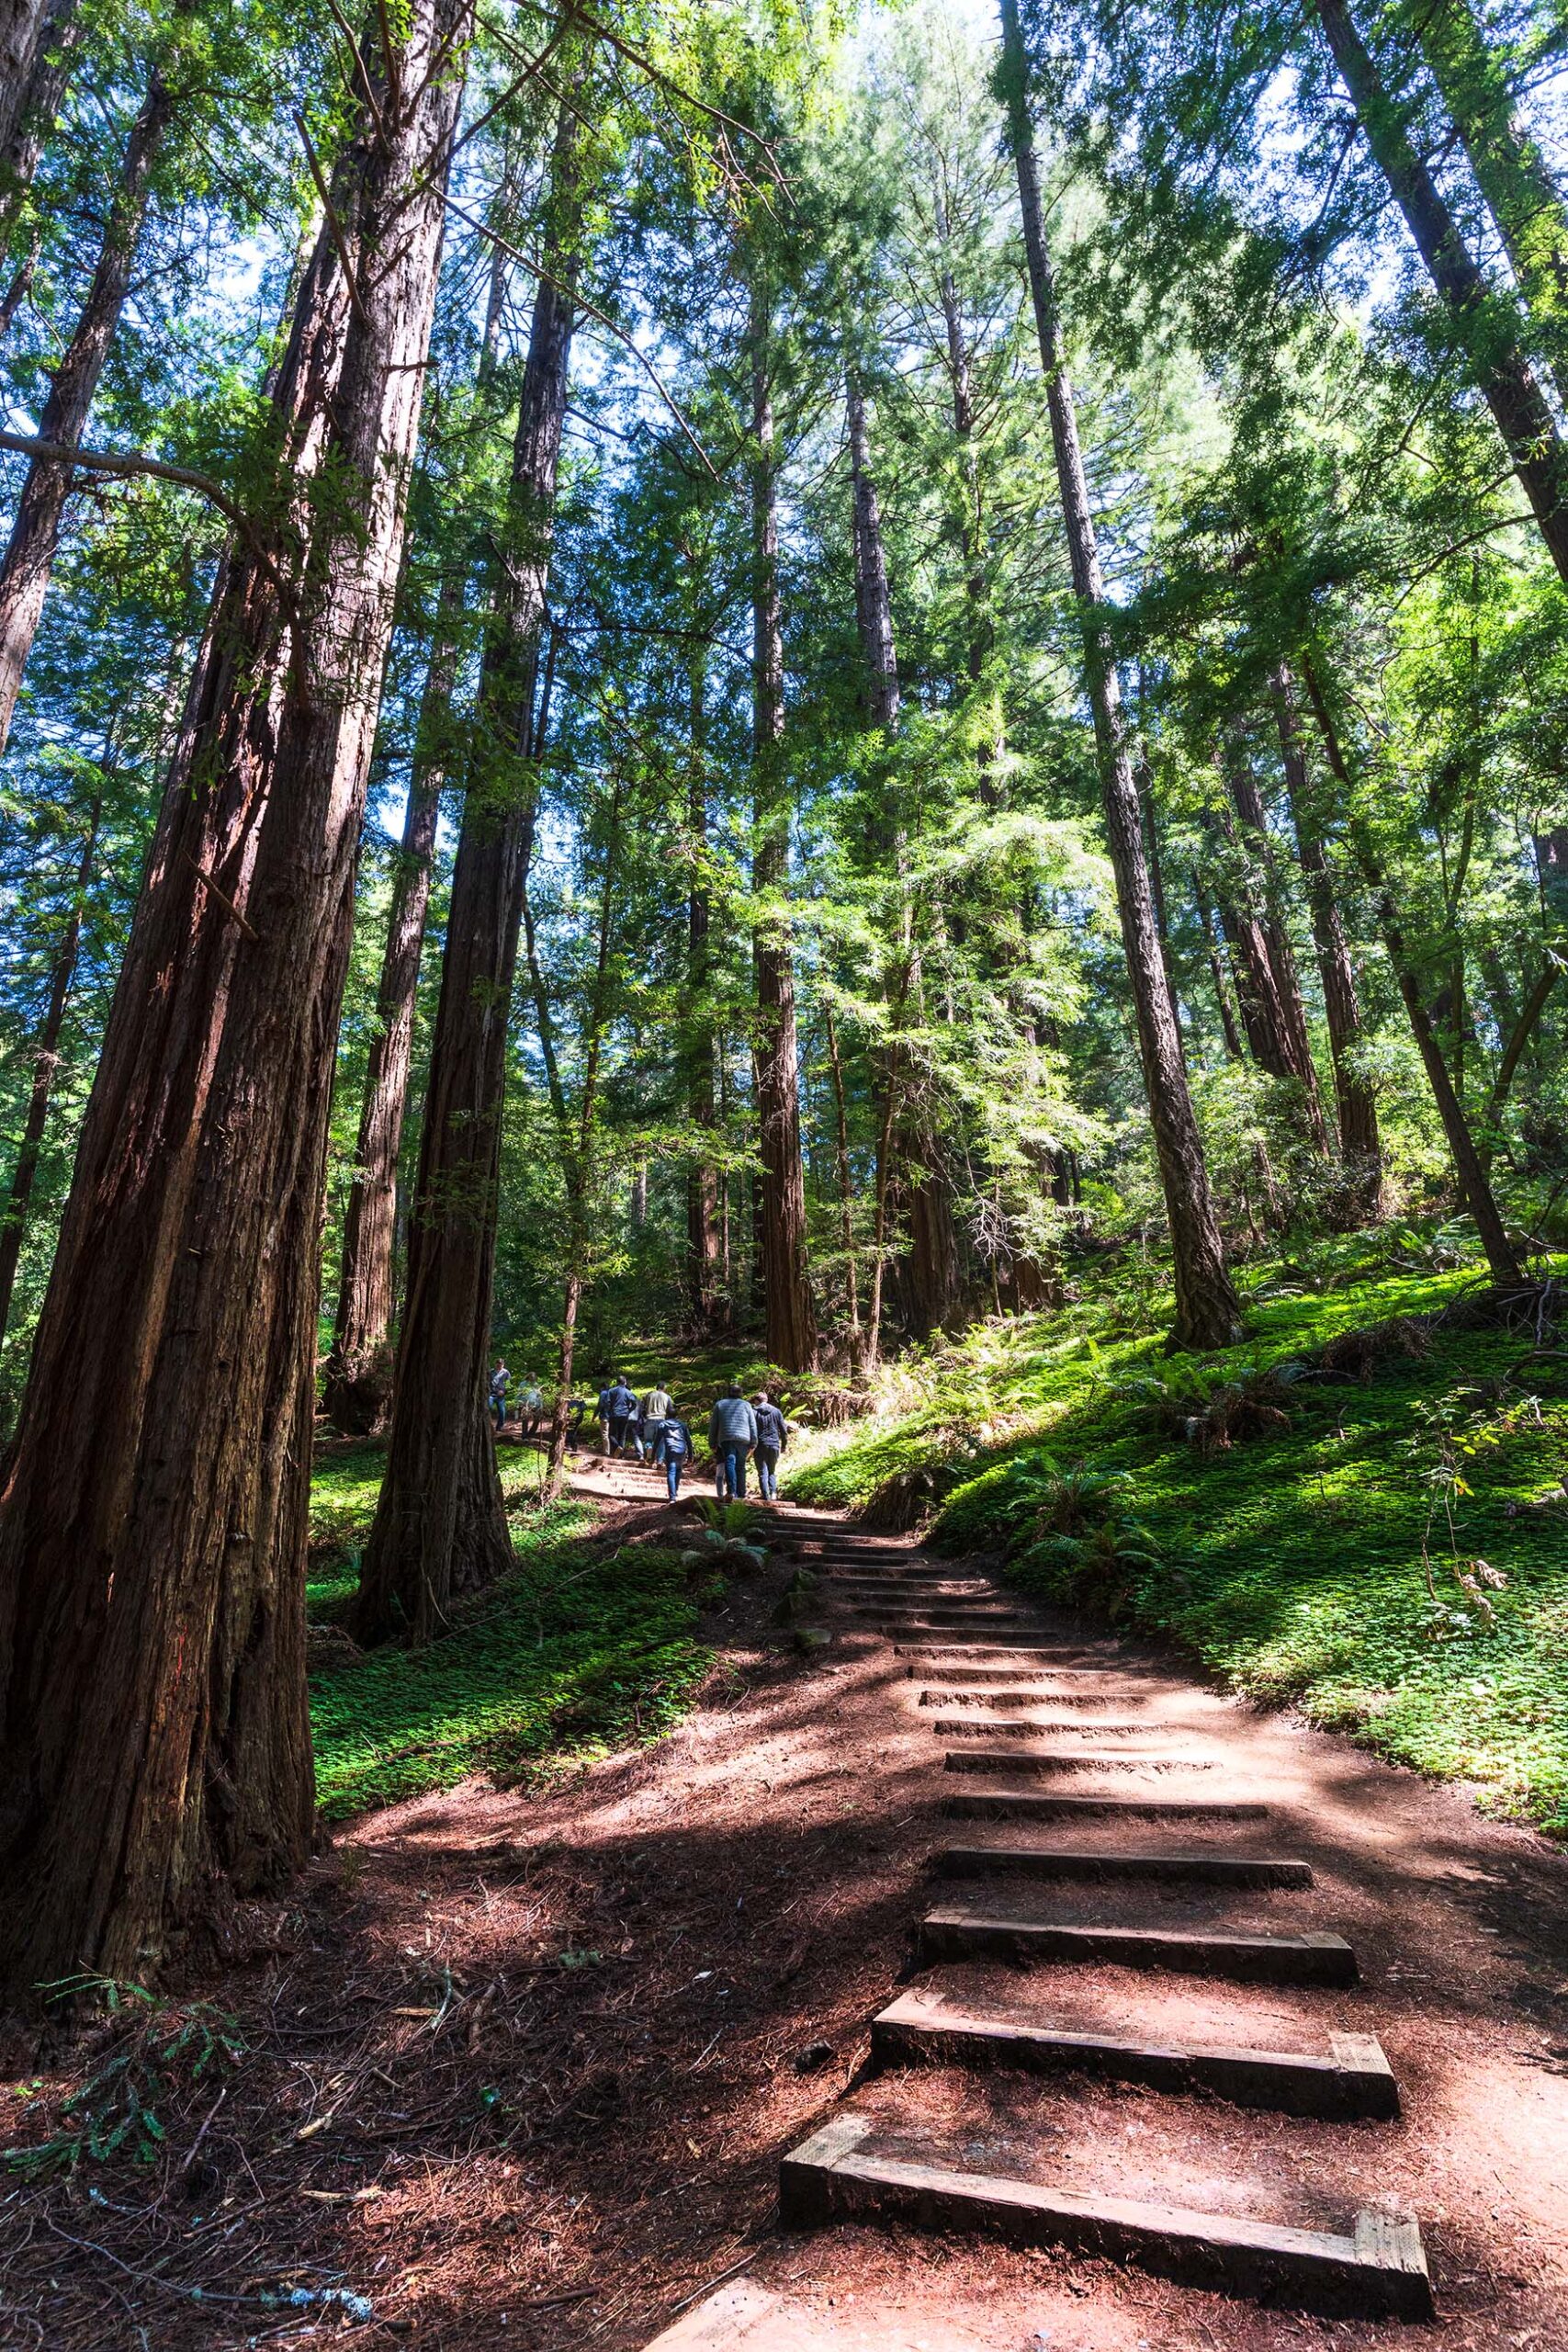
Many choose to get there by bike, crossing the bridge, and then returning by boat, but there are also many half-day guided tours which, in addition to Sausalito, allow you to visit the Muir Woods National Monument, with its wonderful giant sequoias.
Photo tips: in Sausalito, take some photos of the immense marina, where you will find hundreds of boats docked, of the main street, with its shops and characteristic buildings, and of the San Francisco skyline in the distance. At Muir Woods National Monument, catch the light that penetrates the redwoods, the succession of majestic trunks, or turn the camera upwards, using the wide angle, to highlight the immense height of the trees. Include some human subjects in your photos, to give an idea of the proportions between people and nature.
@giadaantonini_photography
@giadaantonini_photography
@giadaantonini_photography
@giadaantonini_photography
@giadaantonini_photography
What are you waiting for?
Follow our tips and get ready for your next rip to San Francisco!
If you like our article, write it in the comments and share it!
To not miss the next article and all the other travel and photography tips, subscribe to our newsletter!
Follow us on Instagram and Facebook and share your pics with the tag @imagomap or the hashtag #imagomap!
Discover our sunrise and sunset photography tips and practical examples to realize beautiful shots and capture unforgettable atmospheres!
But managing those light conditions, in which there is a lot of contrast between the brightness of the sky and the dark earth, is not easy at all.
So, let’s see how to best manage our camera to get incredible photos, which will not betray the beauty of what our eyes observe.
Often, in fact, looking at our photos, they do not seem to represent what we have seen in person at their best. This happens mainly because our eye, unlike the camera, has an extraordinary ability to adapt to almost any existing light condition, even when observing environments with different exposures at the same time. For the camera however, when the dynamic range of the image is greater than the capabilities of the sensor, some very bright or very dark parts will not be able to be captured correctly, resulting black or white respectively.
So how can we compensate for this problem in our cameras?
Follow our advice!
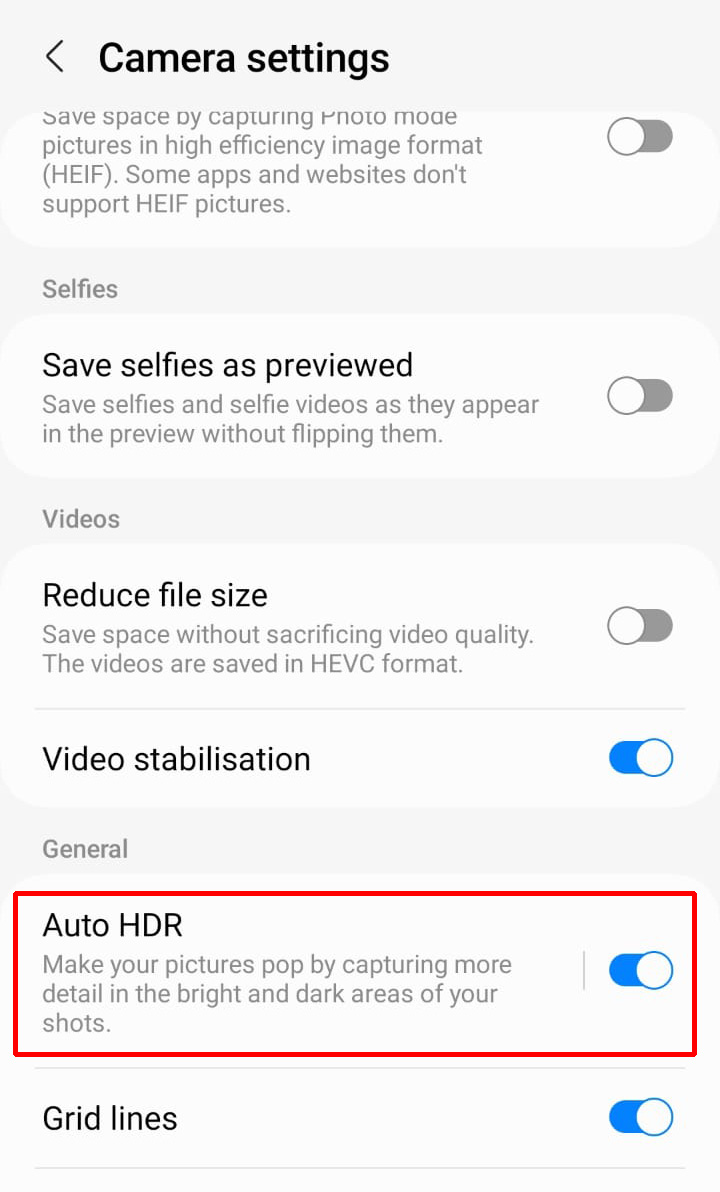
1. With your smartphone
If you use a smartphone, automatic HDR is usually present, just activate it and focus by touching the screen in a dark part of the frame, to calibrate the brightness. In this way the lightest part, that of the sky, will become almost white.
But after taking the shot, looking back at the photo, you will see that the phone will have automatically recorded several exposures and the result will be perfect, with no areas that are too dark or too light, and with bright colors.
Automatic HDR is usually already active, otherwise look for it in the settings. If you shoot against the light and insert a human subject, but the color of the sky is too light and the face remains dark, click right above the face before shooting, to increase the brightness.
After shooting, thanks to the HDR mode, you will also have recovered the background colors and at the same time you will have your subject bright and recognizable!
In the image below you can
Ph:@giadaantonini_photography
Ph:@giadaantonini_photography
2. The filters with the reflex
If, on the other hand, you use a reflex, you can use two methods: the first is to use a degrading filter, that is a glass plate that goes from completely transparent to black, to be mounted in front of the lens thanks to a holder, in order to recalibrate the exposure of the darker areas.
The filters are of different materials and intensities, more nuanced or with a sharper edge, depending on your needs, but you won’t need to spend too much money to start with.
You will also need the holder to screw onto the lens (check that your lens has the thread) and where to insert the filter.
By positioning the dark area in correspondence of the brightest part of the photo, you will be able to compensate for the difference in exposure and obtain ready-to-use photos, without the need for post-production.
Furthermore, using this method you will not need a tripod to take multiple overlapping photos, as we will see with the next method, but you will only need it if the light conditions will force you to use long exposure.
In this case, pay attention to where the darkest part of the filter ends and the transparent part begins, especially if this division is clear. By placing the filter on the lens, make sure that this line of demarcation happens right on the point where the exposure of the landscape you are shooting changes.
Ph: @giadaantonini_photography
Ph: @giadaantonini_photography
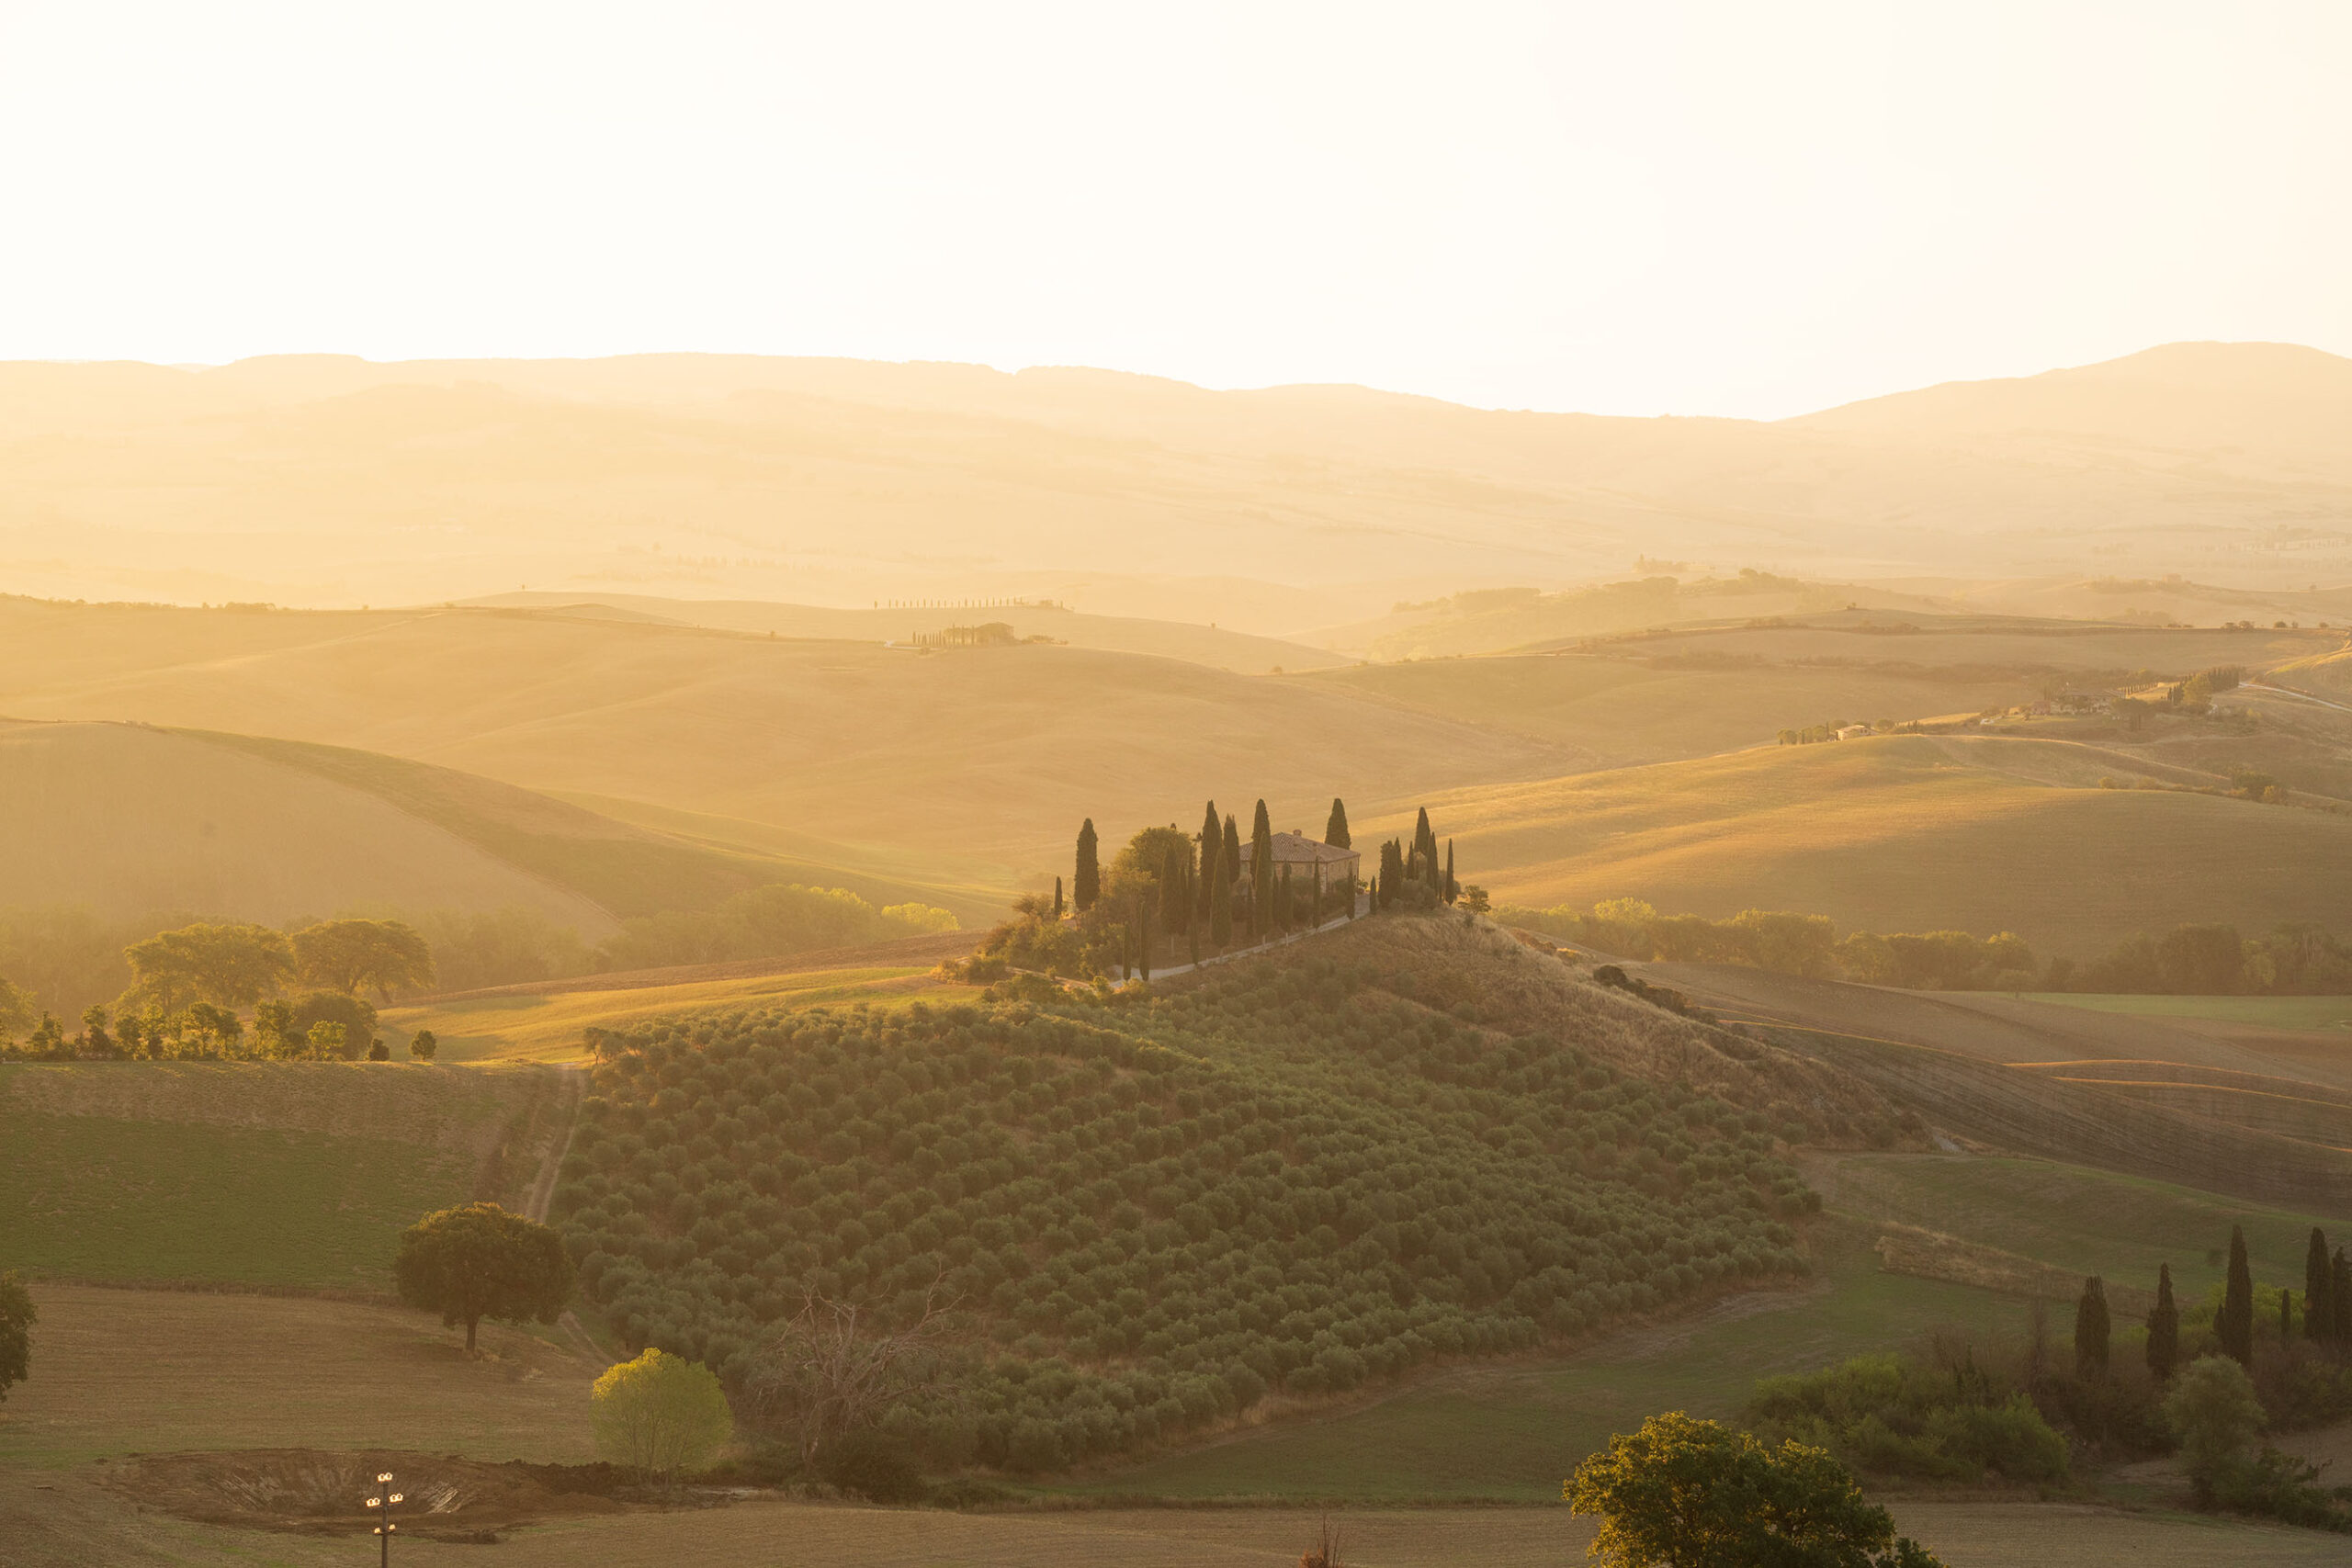
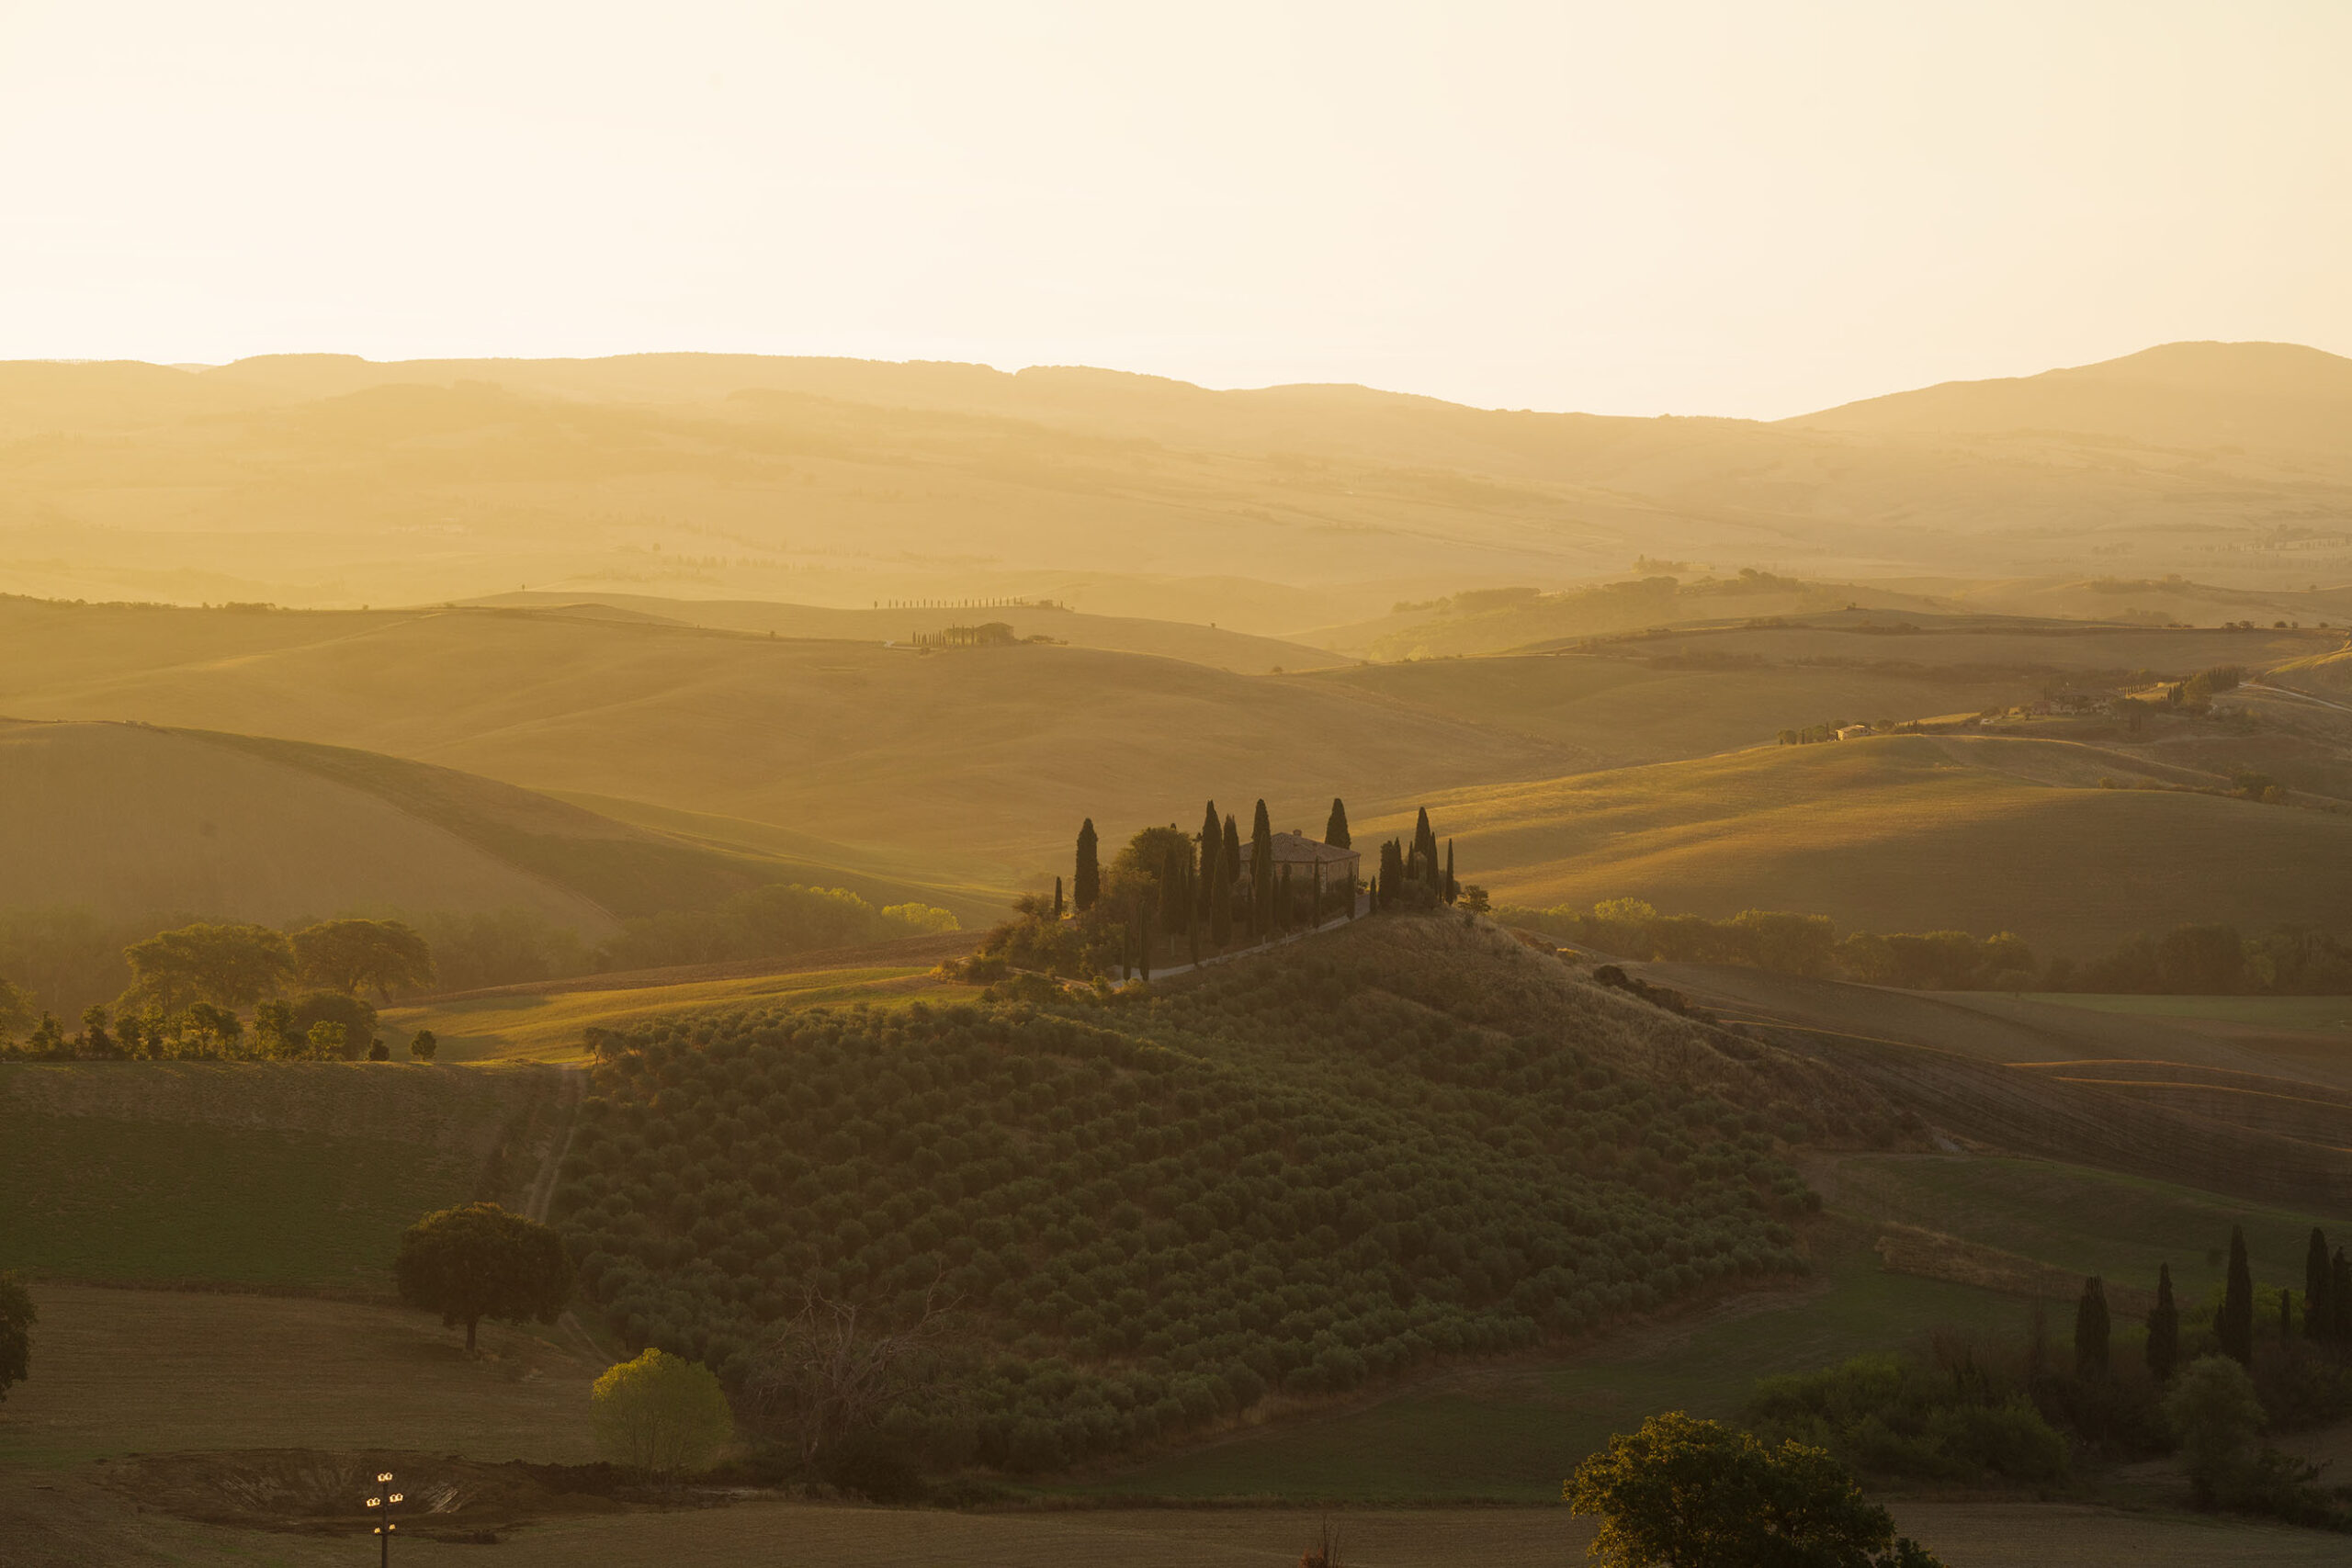
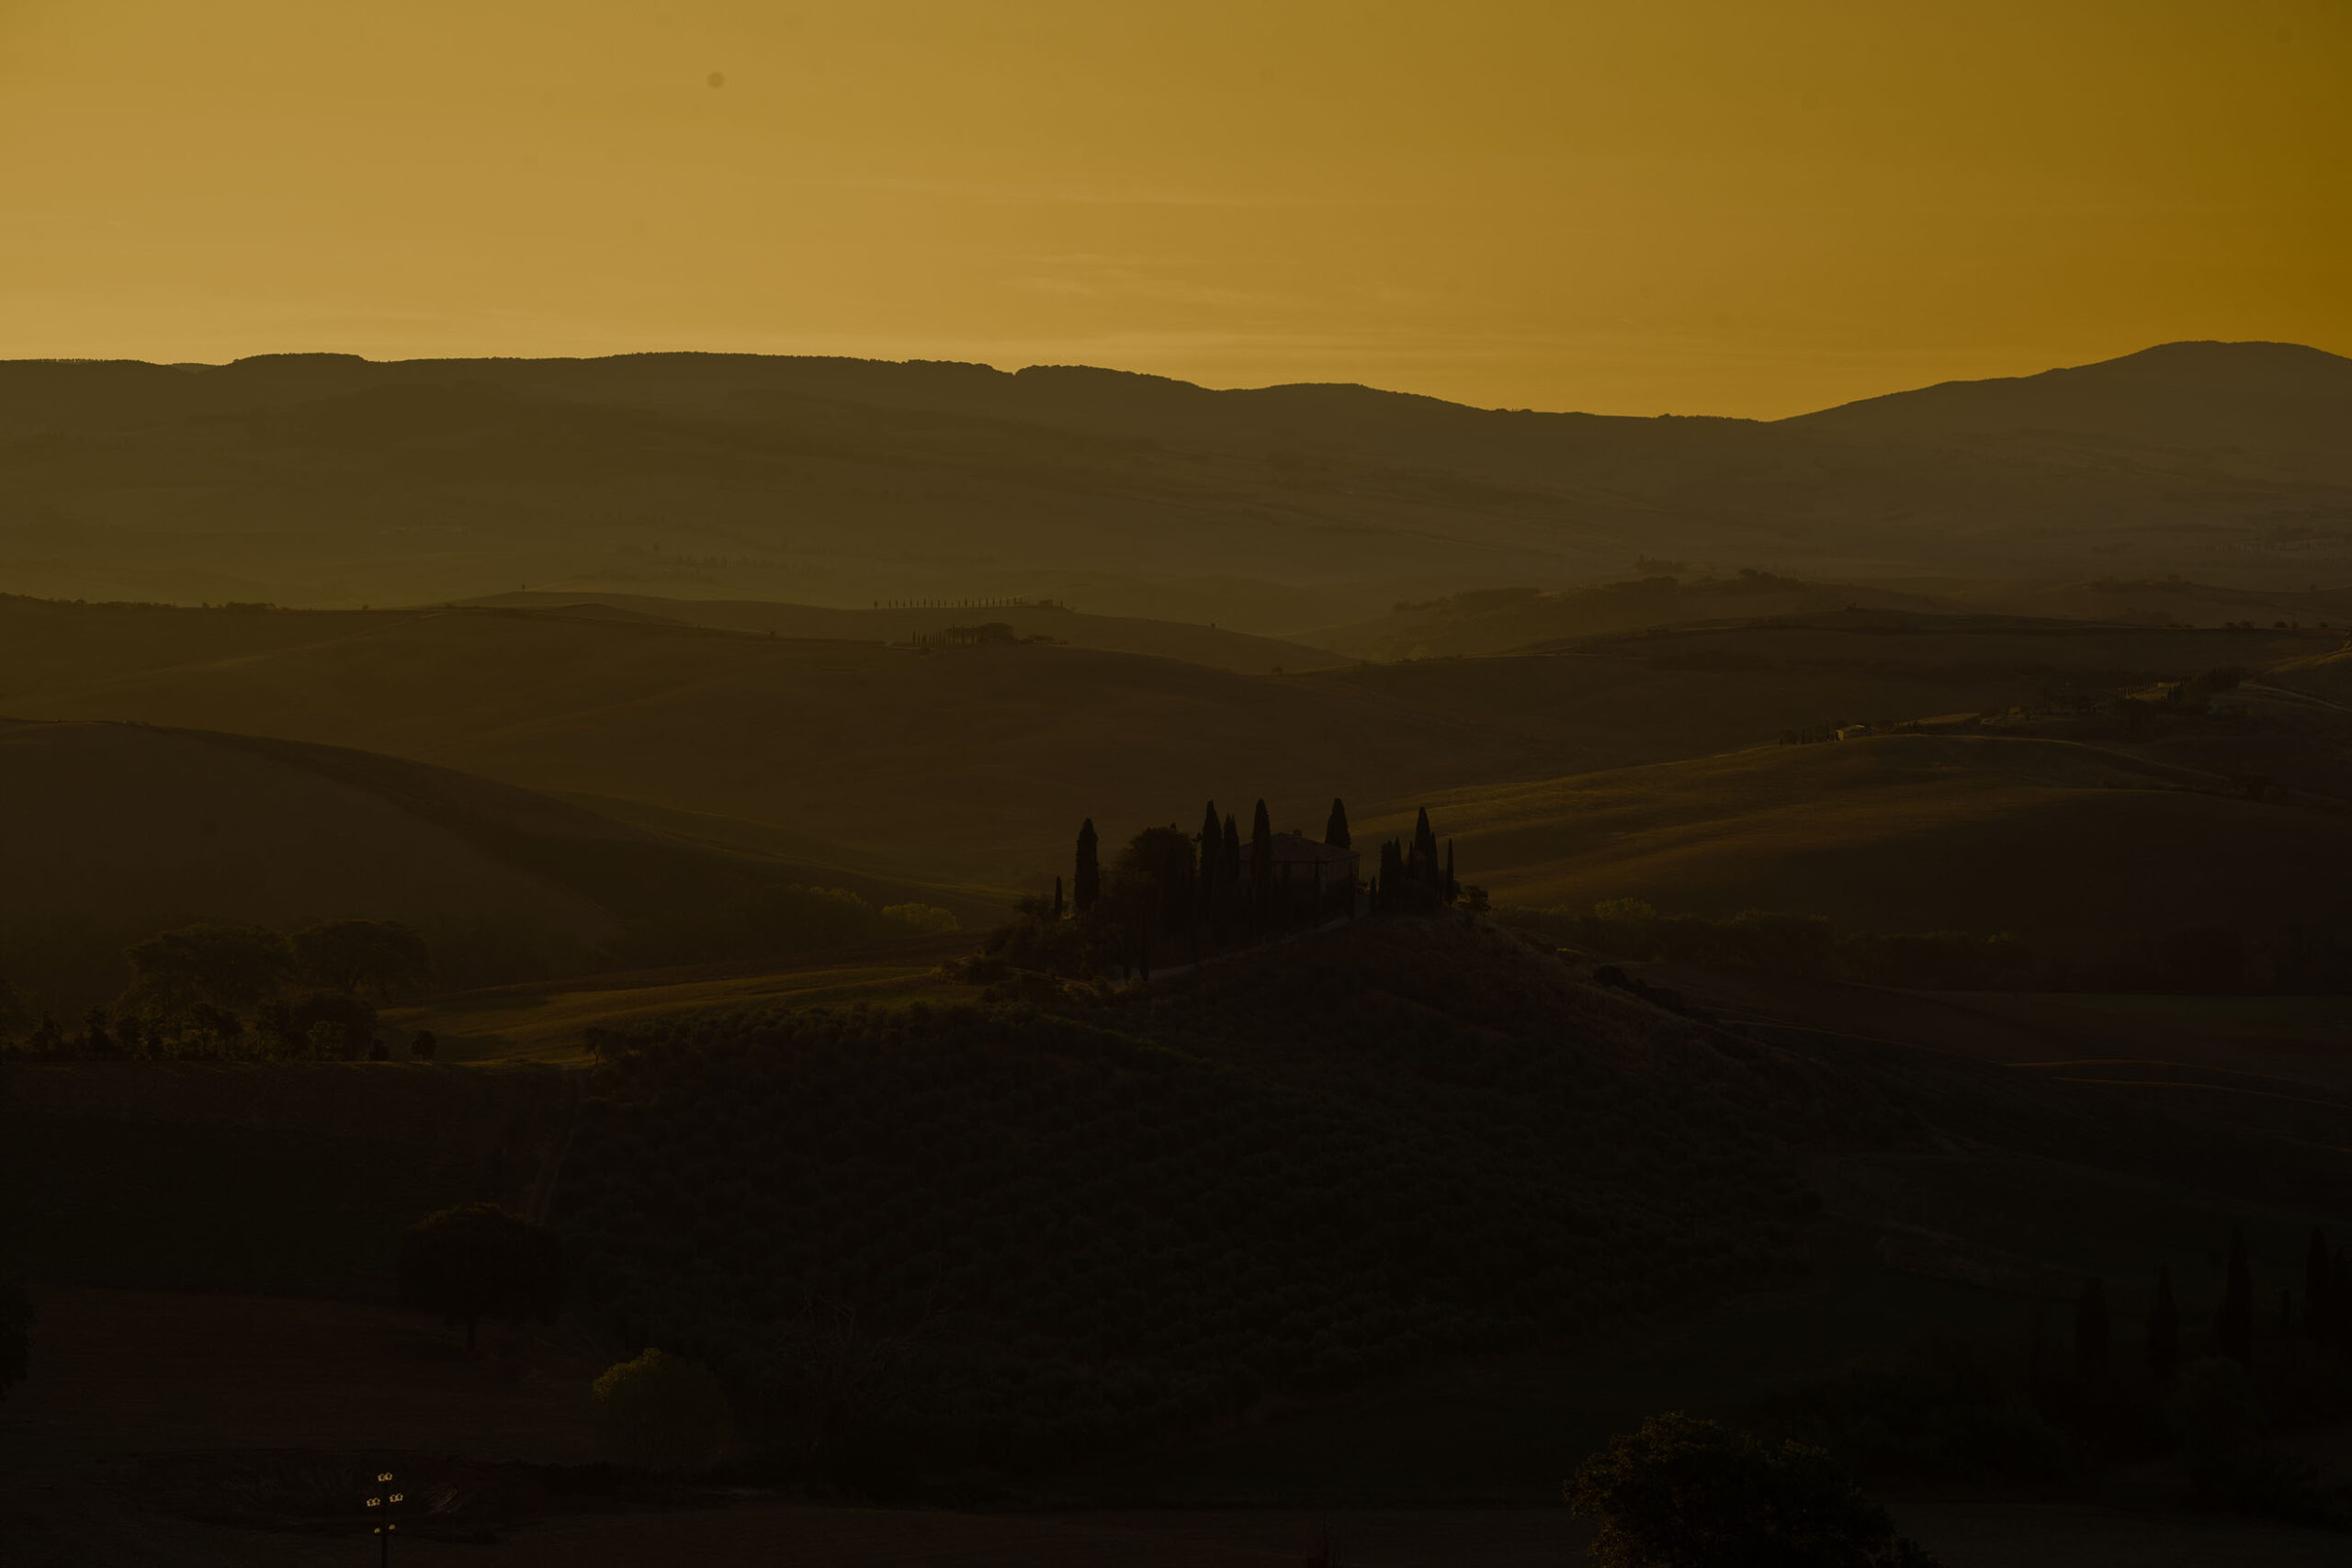
3. Bracketing with the reflex
The second method, without filters, is to take multiple photos with different exposures and then combine the shots in post-production, with a special automatic command. This technique is called bracketing.
Usually, you take at least three shots or five shots, from one very light to one very dark, one normally exposed, one slightly underexposed, and one slightly overexposed. In this way, each shot will have a perfectly exposed area, and only by putting them all together we will obtain the correct exposure throughout the image.
You can apply this method changing the settings about auto exposure bracketing in your camera, turning the dial to set the different exposures, before taking the three photos.
Most cameras have also a special setting to take these shots, just choose the number of total shots you want and the number of exposure compensation stops between shots.
In each of the shots, the aperture will be left constant, so as not to change the depth of field and therefore the focus of the subject between one shot and another, but the shutter speeds will change.
The first shot will be taken with the setting you chose, the second will capture the brightest areas, while the other shot will capture the darkest ones.
You can then do some simple shooting tests to understand how to improve the settings.
Naturally, for this technique, it would be better to use a tripod or to find a support to keep the camera stable, not only because some shots could take a long time and therefore the single photo could be blurry, but also because the photos should be perfectly the same to simplify post-production work.
It is also better to shoot in .RAW mode (just choose this format from the various available in the camera settings). This way your photos won’t lose quality when editing in post-production.
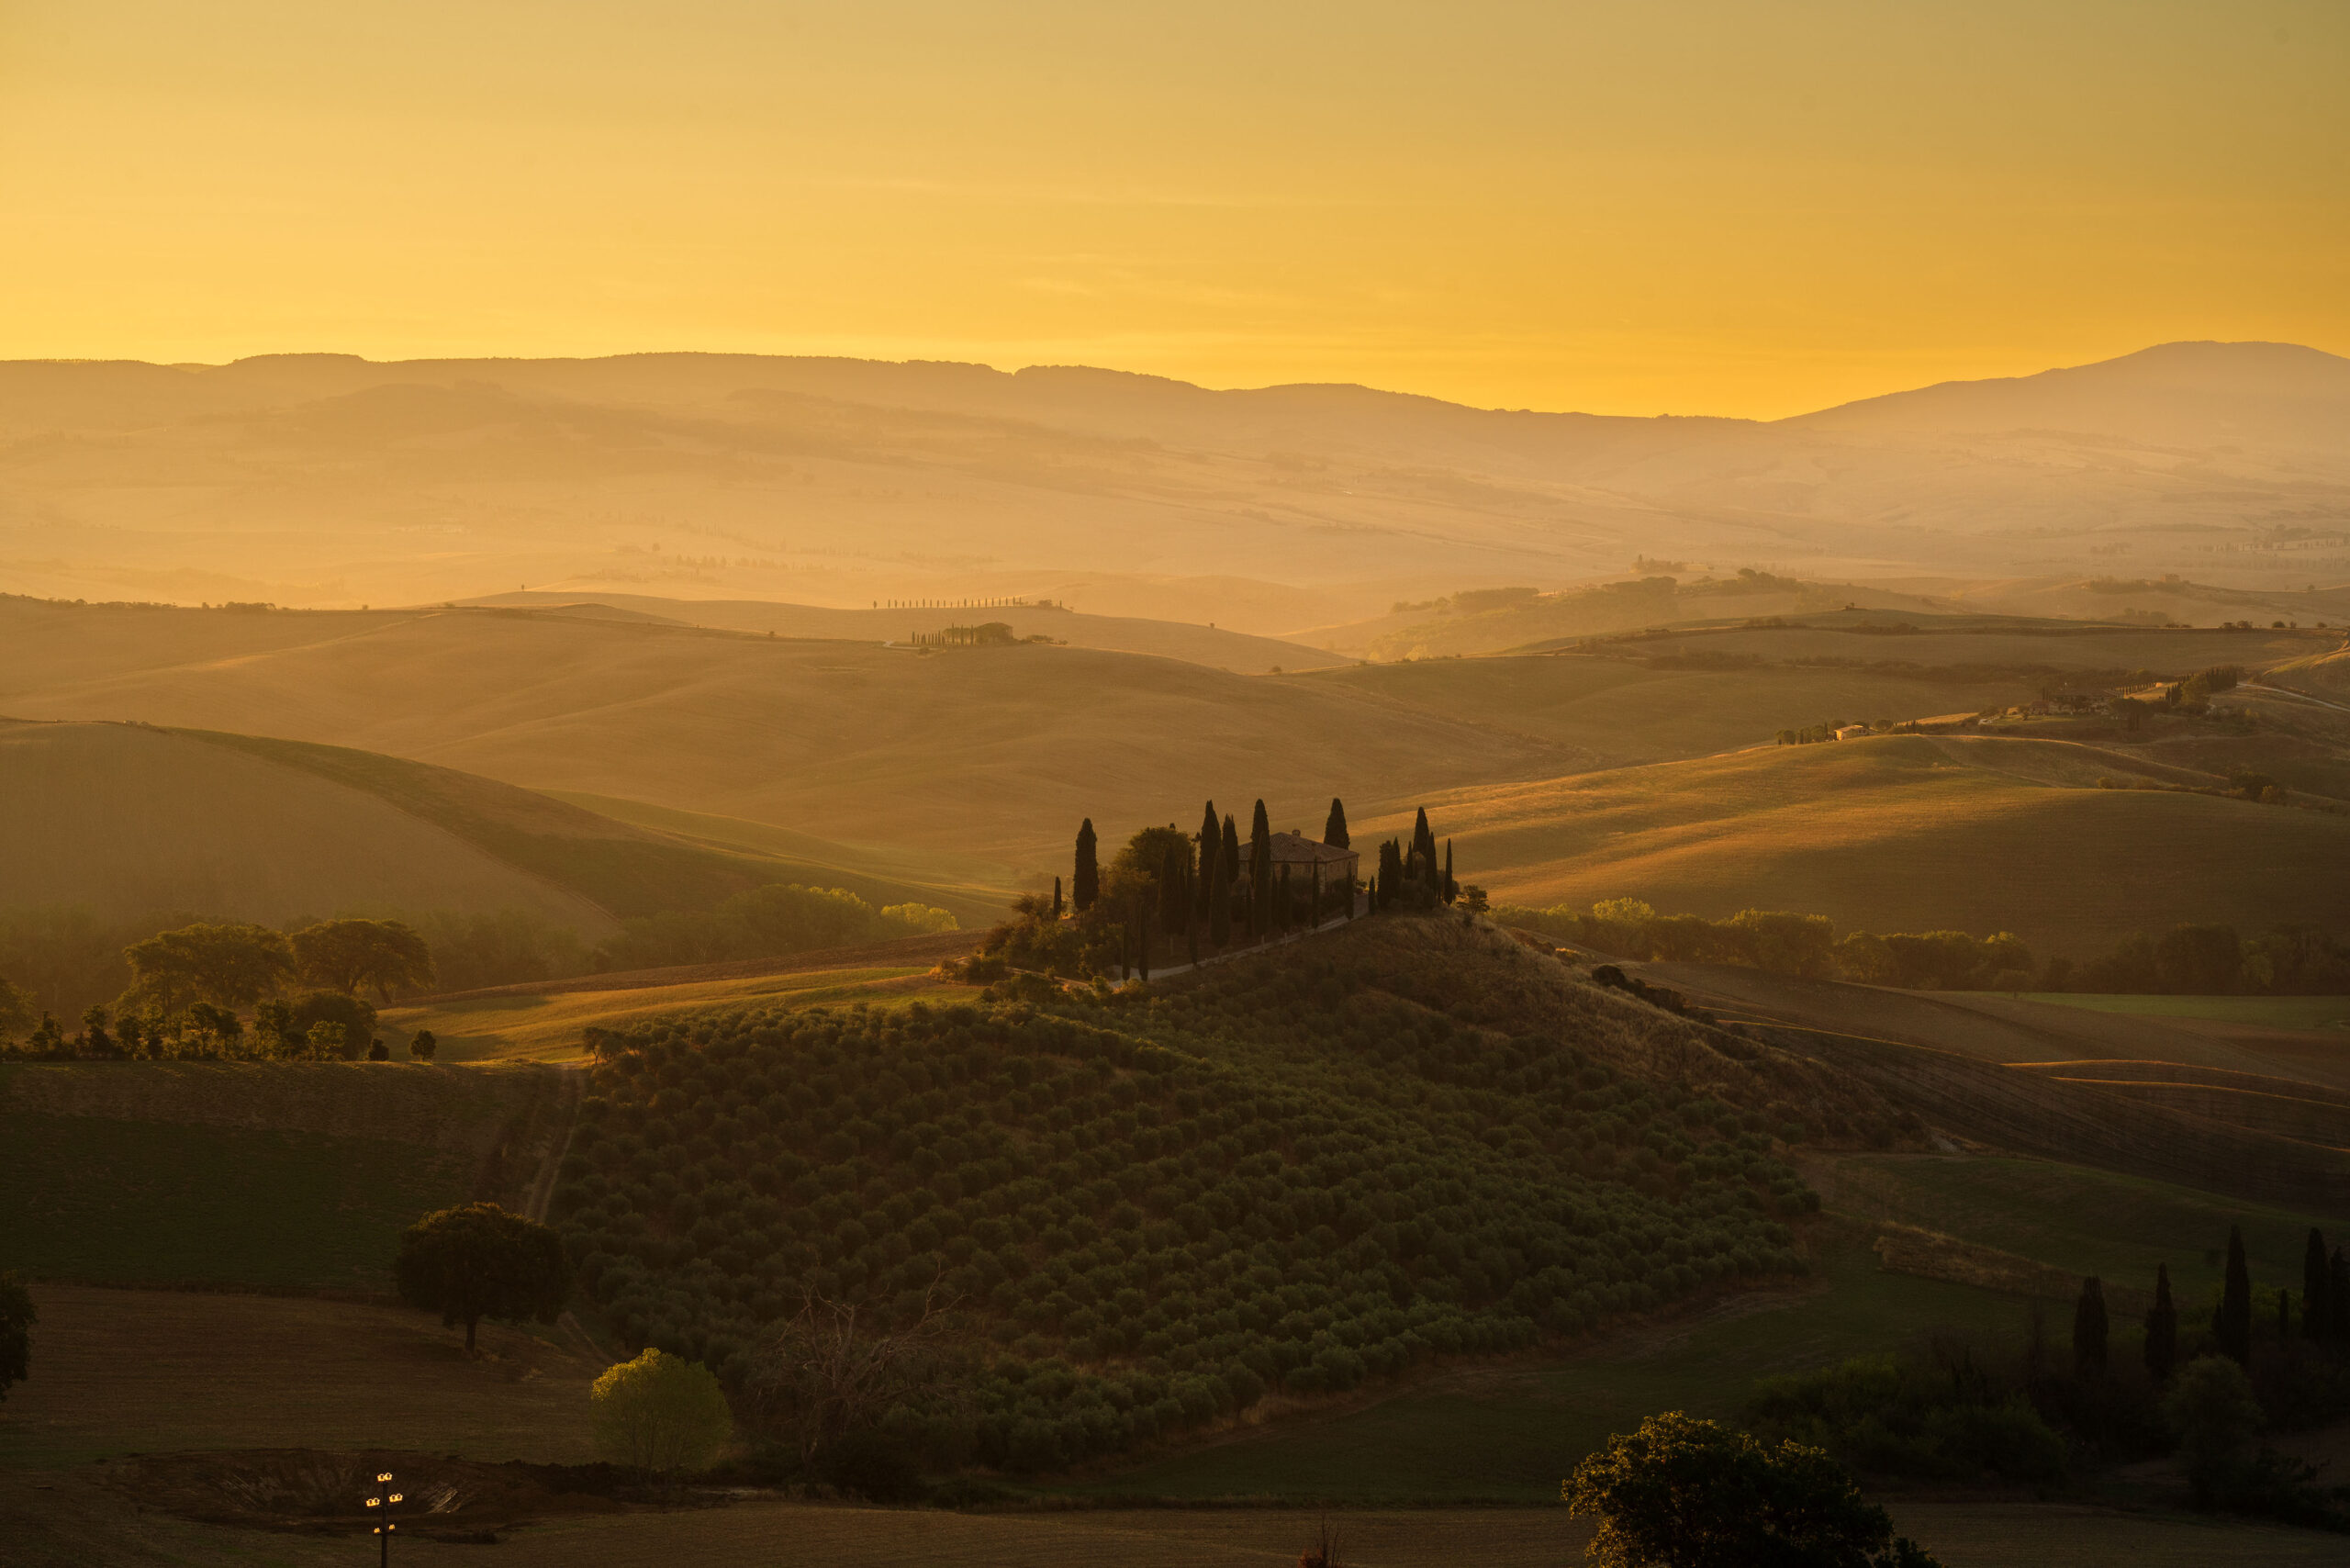
In the following images you can see the tree shots taken with the bracketing method. The last photo is the final one, after post-production.
1st photo
2nd photo
3dr photo
Ph: @giadaantonini_photography
4. Don’t just focus on the sun!
If the sun is full and too bright, before sunset or just after sunrise, try not to include it in the scene because the photo would be overexposed or you will have annoying glares or reflections (the fleur is not always appreciable).
Concentrate rather on the colors of the sky or of the subjects in the photo, which take on amazing shades because they are lightened by the warm light of dawn or dusk.
In this way you will be able to take much more interesting photos than framing the sun!
The best moment to frame the sun is certainly sunset, when it is about to disappear behind the horizon, because its brightness will not compromise the scene and your camera sensor.
At dawn it is much more difficult for the amount of light to be sustainable, unless there are clouds covering the sun.
Ph: @giadaantonini_photography
Ph: @giadaantonini_photography
Ph: @giadaantonini_photography
Ph: @giadaantonini_photography
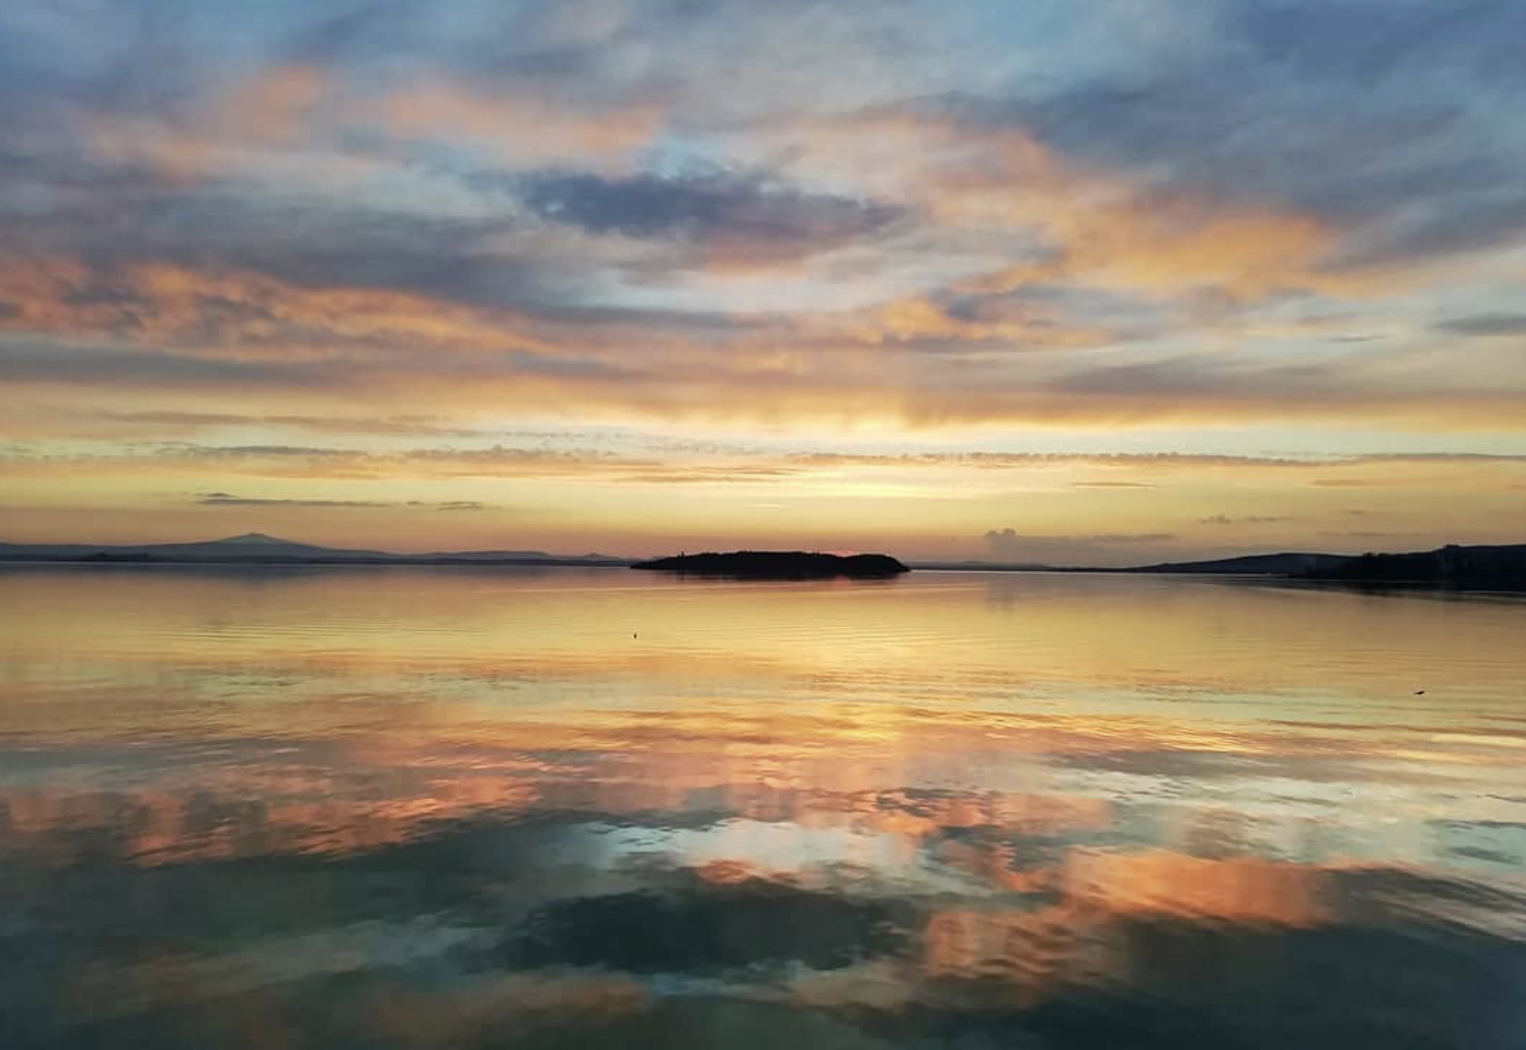
5. Sunrise and sunset photography: how to frame the scene
At sunrise and sunset you can mainly make three choices.
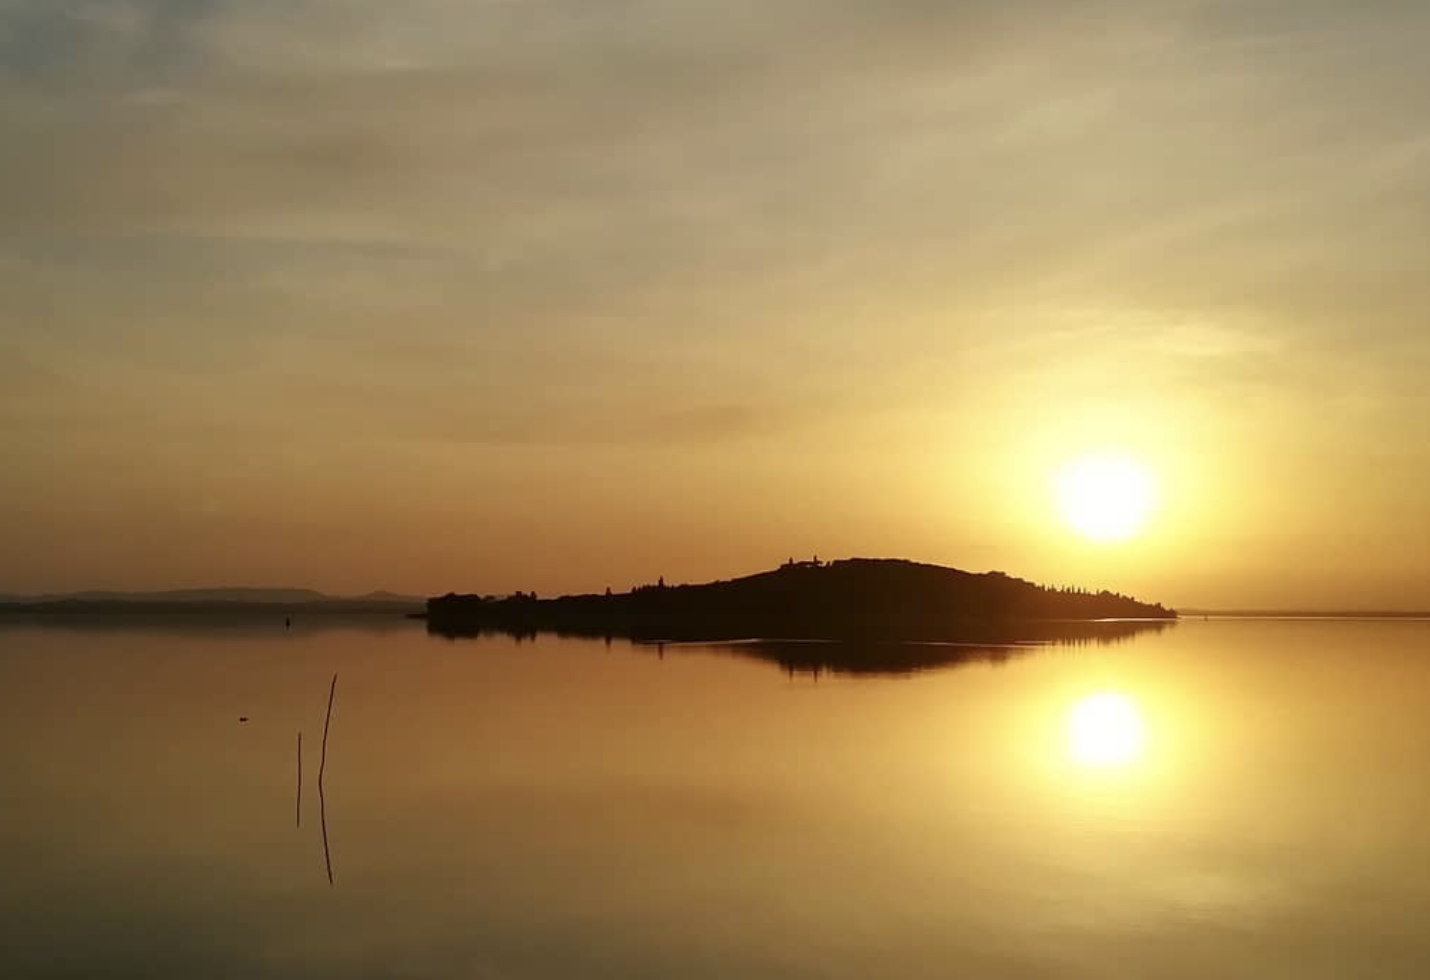
The first is to not include the sun but focus on the overall light, capturing other details of the landscape characterized by it.
This choice also includes all the photos taken before dawn and after sunset, when the nuances of the landscape and the sky change to shades of pink, red and yellow and you can see incredible panoramas with a thousand shades.
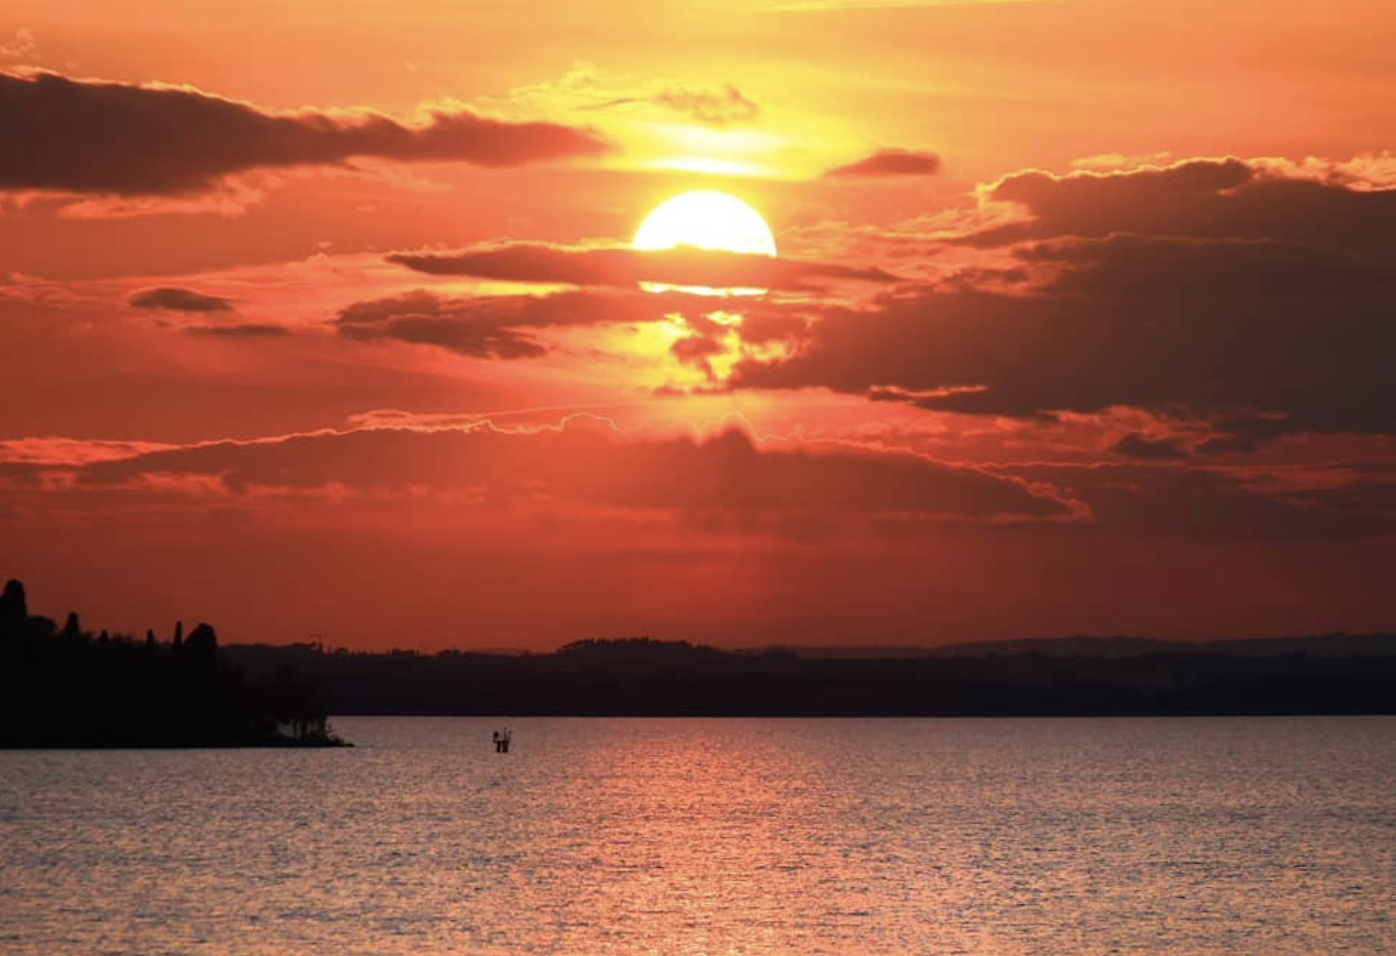
The second is, as we mentioned before, to make the sun your subject, especially at sunset, focusing on its colors and those of the surrounding context. In this case the sun will assume a central position and you will probably choose to use a zoom.
The third is to include the moment of sunset or sunrise in a larger frame, including both the sun and the entire landscape. In terms of composition, you will probably choose a wide angle shot, placing the sun in one third and another important subject, in the other third (read this article to learn more about the rule of thirds and other simple rules of composition).
Ph: @giadaantonini_photography
Ph: @giadaantonini_photography
Ph: @giadaantonini_photography
Ph: @giadaantonini_photography
Do you want to know more about how to frame your shoots? Find out out tips in this article!
What are you waiting for?
Try to put our tips into practice and tag us in your photos, we will publish them on our Instagram andFacebook pages.
Curious about more tips to shoot with different lights? Find them out in this article!
If you liked the article, let us know in the comments and share it.
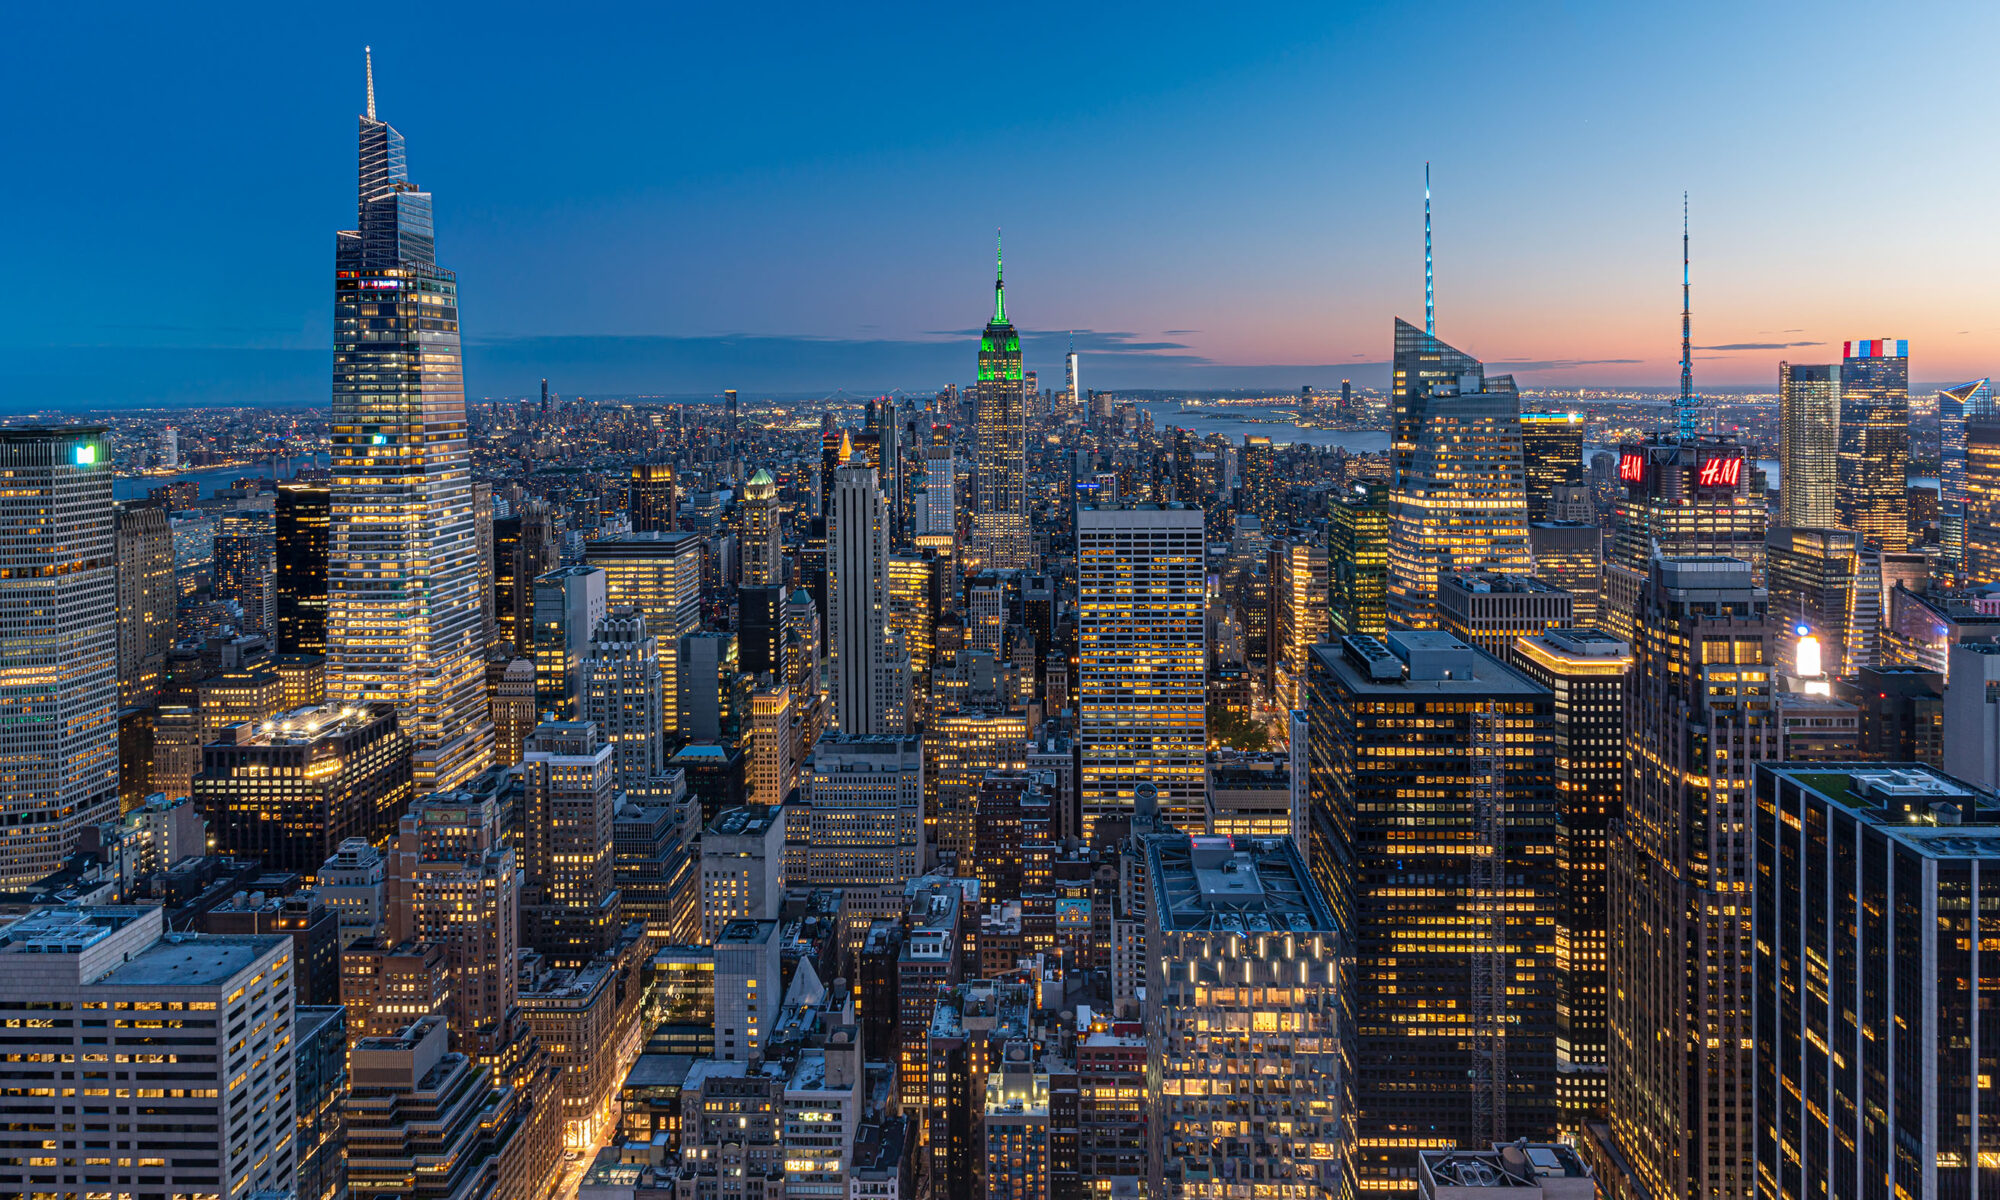
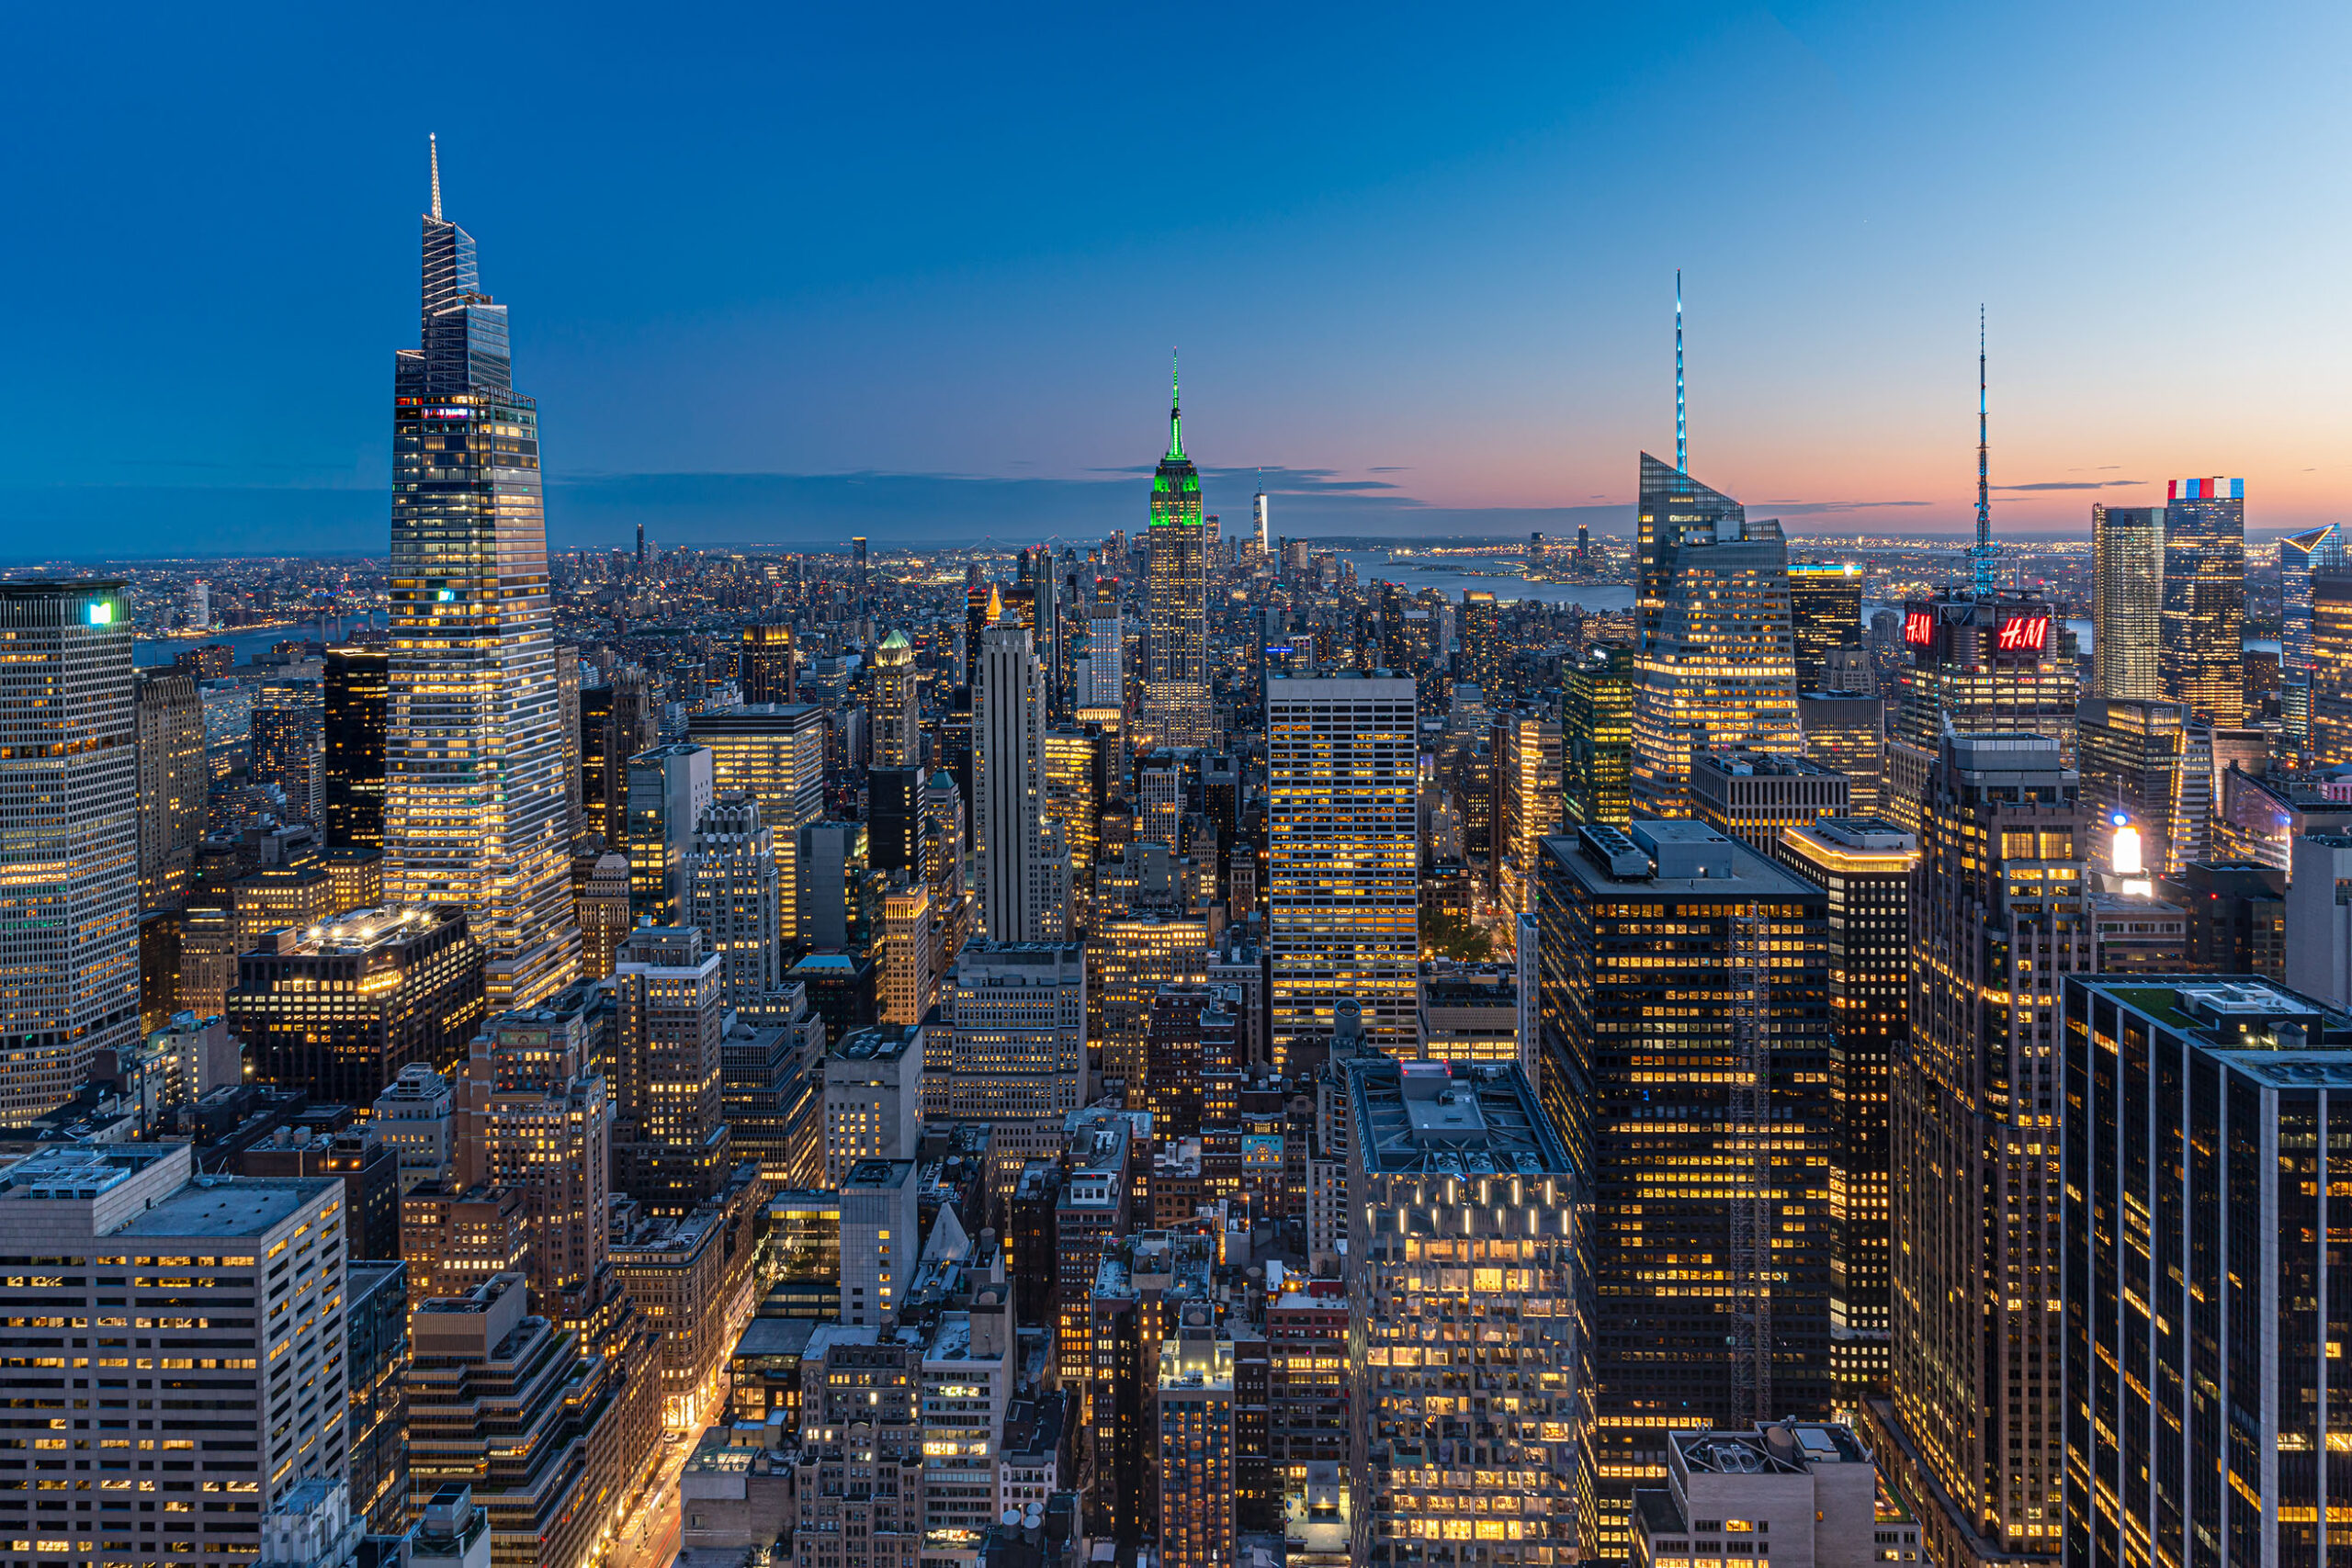
Want to discover the best photo spots in NYC? Follow our tips and discover beautiful spots you can’t miss in NYC to take amazing photos.
New York is one of the most fascinating city in the world and it can be the perfect set for your photos. You could stay there for life and never stop to find new perspectives to capture with you camera.
But now let’s see together the spots you can’t miss if you are there for the first time!
1. New York from above
First of all, you have to admire the skyline from an high point of view. The skylines of NY are very famous, and you can choose from many skyscrapers to climb to see them.
We advise you to not miss two of them. The first is the Top of the Rock Observation Deck, where you can appreciate a 360° incredible view of the city from three different levels.
The Top of the Rock is at the highest floors of the famous Rockefeller Center, the complex of buildings on the Fifth Avenue, built in the thirties from one of the most rich families of the city. You can also visit the complex, learning about its art and history. If you go there at sunset and wait for the city lights to come on, you will get excited at the sight of its unbelievable beauty.
Photo tips: From one of the decks you could see in front of you the Empire State Building, one of the most famous landmarks of the city. Try to include it in your photos, in the center or in one of the thirds (read more here). Keep your camera straight, don’t tilt it up. If you have a camera, use a tripod or search for a support (there are some small walls that are perfect to set it). Use long exposure to capture light in the blue hour, when the sun has gone and the city lights begins to shine.
Ph: @giadaantonini_photography
The second place you can’t miss is the SUMMIT One Vanderbilt, with its incredible views and glazed windows and floors, that will you fill like suspended in the void with the city at your feet. The mirror games will create special effects that alter the space. A unique experience, perfect to spend some hours of your day.
Photo tips: try to include in your photos not only the city views, but also the amazing rooms you will go through, to emphasize reflections and the futuristic space created by the mirrors.
There are also a lot of rooftop bars from where you can enjoy astonishing views. We recommend the 230 Fifth Rooftop Bar, not so expensive and absolutely beautiful.
Ph: @giadaantonini_photography
Ph: @giadaantonini_photography
2. Squares
Times Square is the most famous spot in NY. Both during the day and in the evening, it perfectly embodies the frenetic life of the city. There are many points of view in the square to admire, so take your time and stroll around.
Photo tips: try to focus on the lights, the billboards and the digital screens, the people crossing the streets and the car traffic.
Ground Zero is the second place you can’t miss. This place is surrounded by an atmosphere of silence, respect and pain. It’s a sacred place, where the project realised after the tragedy of the Twin towers is focused on the memory.
Photo tips: the area is really big, and it’s so difficult to find a way to capture the entire scene, so focus on details that are important to understand the aim of this plac, the role of the water to fill the void left by the buildings and to reflect the surrounding space. For example, on the birthday of each of the people killed in the attack, a rose is left on the name written on the monument surrounding the perimeter of each tower.
Other famous squares you can’t miss are Rockfeller Plaza, Union square, Madison square Park and the MOMA sculpture garden.
Ph: @giadaantonini_photography
Ph: @giadaantonini_photography
Ph: @giadaantonini_photography
Ph: @giadaantonini_photography
Ph: @giadaantonini_photography
Ph: @giadaantonini_photography
3. Parks
Central Park covers 843 acres (341 ha). Stroll around to find your favourite spots. We suggest you to go the Belvedere Castle, the Great Lawn, where you can rest admiring the skyscrapers over the trees, the beautiful Bethesda Terrace, and to stroll around the lakes to discover beautiful views and bridges like the Bow bridge.
A beautiful innovative park you can’t miss is the High Line, an amazing elevated linear park built on an old railway. Here, enjoy also the characteristic Chelsea market.
Don’t miss Little Island, a new park literally built on the river like a stilt house. With its huge dimensions, innovative design and beautiful gardens, it will leave you speechless. You can admire this incredible space also from Pier 57 Rooftop Park, which is also worth a visit.
In the city center there are other lovely parks between the skyscrapers, like Bryant Park and Madison Square Park, with their elegant gardens.
Photo tips: the parks are the perfect place to use the wide angle, to capture the whole scene, with the gardens, the bridges and the skyscrapers. Remember to not tilt up you camera, or the buildings will seem to fall down.
Ph: @giadaantonini_photography
Ph: @giadaantonini_photography
Ph: @giadaantonini_photography
Ph: @giadaantonini_photography
Ph: @giadaantonini_photography
4. Small secret gardens
The Valley park and the Greenacre park are two fascinating secret small gardens that you absolutely have to visit. Entering these spaces you will find a beautiful surprise: an incredible waterfall that, with the sound of the water, make you fill far from the busy streets of the frenetic city. A corner of peace where you can relax and take original photos, because these gardens are not so famous.
Photo tips: the narrow spaces and the presence of the water are the most important topic of the gardens. So try to focus on it and also on some details that capture your attention. Taking photos here is a good exercise to explore your creativity and test different techniques, because these place are small and there are few subjects to focus on. Check out this article to test your skills and improve!
Ph: @giadaantonini_photography
Ph: @giadaantonini_photography
5. The bridges and the ferry cruise to the Statue of Liberty
You can enjoy a beautiful view of the city from the riverside parks, like Battery Park on Hudson River and Brooklyn Bridge Park on East River. Explore the Piers and their attractions. Go also to Pier 35, that offers a wonderful experience of the waterfront, with plenty of seating opportunities, especially the amazing swings with views that face the Manhattan Bridge and the Brooklyn Bridge. These are the perfect places to relax and take photos of the city skyline, also at sunset and at night.
You can also have a beautiful walk on the Brooklyn bridge. Starting from Dumbo neighborhood, and in particular from the corner between Washington Street and Water Street, you can admire a view of the Manhattan bridge between the buildings. From there, continue on Water Street till Brooklyn Bridge pedestrian access. On the bridge, it will be exciting to see the two neo-Gothic stone towers and the vertical and diagonal suspender cables up close.
Then, take a ferry cruise to the Statue of Liberty. This is the best way to admire an original panoramic view of the Statue of Liberty and the NYC skyline. So, during the boat trip to visit Liberty Island and Ellis Island, look around and take photos!
Photo tips: on the bridge, focus on its structure in contrast with the cityscape in the background. Use also the zoom to focus on the bridge details. In the riverside parks, use wide angle to capture all the scene with the long bridges and the city view. Use long exposure if you shoot at night with the city lights (prefer the blue hour, after sunset but when the sky isn’t black yet). If you are close enough to the river, with long exposure you can also obtain a good silk effect of the water. During the cruise, zoom on the Liberty Statue when you are close enough to capture some details. You won’t be able to do it again when you will be back in the city, because you will be too far, nor when you”re’ll arrive on the island, because you will be too close under the statue. Use also the wide angle to include in the frame the statue and the cityscape on the river.
Ph: @giadaantonini_photography
Ph: @giadaantonini_photography
Ph: @giadaantonini_photography
Ph: @giadaantonini_photography
Ph: @giadaantonini_photography
6. City streets
Strolling around in the city streets will be a great experience. Some of these, like the Fifth Avenue, Broadway street, Guernsey street, the streets in Turtle Bay, Soho, Little Italy and China Town are really enchanting. Every place has different vibes and atmospheres and you will be amazed by how many different souls are in there same city.
Photo tips: be careful, but take pictures from the center of the street, to obtain symmetrical photos and not have people in front of you. Try to change the point of view, bringing the camera closer to the floor or searching for a raised point. For example, from a rooftop terrace, with the zoom, try to capture a portion of a single street from above. Play with the sunlight filtering between the buildings or frame the sky above you between the skyscrapers.
Ph: @giadaantonini_photography
Ph: @giadaantonini_photography
Ph: @giadaantonini_photography
Ph: @giadaantonini_photography
Ph: @giadaantonini_photography
Ph: @giadaantonini_photography
What are you waiting for?
Follow our tips and get ready for your next rip to NYC!!
If you like our article, write it in the comments!
To not miss the next article and all the other travel and photography tips, subscribe to our newsletter !
Follow us on Instagram and Facebook and share your pics with the tag @imagomap or the hashtag #imagomap!
Light in photography is the essential element to express our creativity, to give strength to the image and to give meaning to our story.
The different light conditions will completely change the meaning of our photo and express different feelings.
So let’s see how to use different light conditions to realize amazing shots!
1. Backlight shooting
Backlight shooting is very interesting when creating the silhouette effect. The strong brightness captured by the camera makes the shadow elements appear completely black and creates exciting contrasts, as in the photos below.
When shooting backlighting photos, try not to frame the sun if it is still too bright, because otherwise that area of the photo will be overexposed (white), or you could create flares or unpleasant reflections. In fact, these defects are very difficult to fix even in post production.
If you still want to include the sun, try to partially cover it with another subject. In this way, you will get the sun star effect and you will see the rays spread across the photo. To achieve this, you’ll need to use aperture values like f/18 or f/20, to decrease the amount of light hitting the sensor. Also try with your smartphone in pro mode.
Instead, you can use the sun as your subject at sunset, when it is already low on the horizon and its brightness has decreased.
Ph: @giadaantonini_photography
Ph: @giadaantonini_photography
Ph: @giadaantonini_photography
Ph: @giadaantonini_photography
Ph: @giadaantonini_photography
Ph: @giadaantonini_photography
2. Human subjects in sunlight
When photographing a human subject in sunlight, try to avoid ugly shadows on the face caused by shadows. To do this, shoot when the sun is not too high in the sky or have the person’s face rotated or tilted until it is fully illuminated.
If you are shooting backlighting portraits and you don’t want the silhouette effect, overexpose the photo, decreasing the shutter speed or opening the aperture, until the person is correctly illuminated, while the rest of the scene will tend to white.
Ph: Daniel Pascoa on Unsplash
Ph: Ben White on Unsplash
3. Light as the main subject
Often the light is the main subject of photography, because it creates really interesting contrasts.
If you’re looking for contrasts, then this has to be strong, with areas well lit (but never overexposed) and others very dark. To do this, you’ll need to be mainly indoors, with a direct light source, positioned to illuminate only part of the subject.
Sometimes a dark room illuminated only by the light from a window is enough to create really interesting images.
For indoor shots, you can also use artificial lights and, if necessary, opaque panels, called diffusers, to soften the light and make it diffuse.
If you are outdoors, to get strong contrasts, there must be a beautiful sunny day and an element, such as a building or a forest, which creates strong shadows.
Ph: Nora Hutton on Unsplash
Ph: @pictureknak
Ph: @sineoh_foto
Ph: @knederskovpetersen
Ph: @photobyfrederik
Ph: @knederskovpetersen
Or, in the evening, you can obtain soft and interesting atmospheres by capturing a light source, such as a street lamp, which lights up a streets. This way only part of the scene will be illuminated, in contrast to the dark walls of the buildings. The choice of having the light come from an internal environment, such as the window of a house or the shop window of a club, is also very interesting.
Ph: @giadaantonini_photography
Ph: @lastanzadelvinc
Ph: @lastanzadelvinc
Ph: @pictureknak
4. Blue hour
Unless you want to photograph the starry sky, prefer the moment after sunset when the sky is still blue and not black (blue hour).
Often, you’ll need slower shutter speeds to capture as much light as possible. But beware of low light: when shooting in these conditions it is easy to have low quality photos as a result, because they are blurry or too dark.
For cameras, use a tripod or look for a low wall or something to support the camera on to make it stable.
With your smartphone, if you don’t use a tripod or support, try to keep as still as possible and try to select the night mode from the settings.
We advise against using the zoom of your smartphone for shots in poor light conditions, because you would lose the quality of the photo.
Always take more than one shot to be able to select the best one later and avoid surprises.
Ph: @wedelheinenjan
Ph: @micnie02
Ph: @redo_el_khomsi
5. Moving light
Playing with light you can create extraordinary effects that will make your photos simply amazing.
You can capture, for example, the moving car headlights in the night.
You will need a tripod and long exposure, your shoot would last for some seconds. This way, when the cars will pass, you will capture the moving lights that will create sparkling lights, following the road shapes.
Increasing the exposure, pay attention to ISO, that have to be set in low values (for example, 100), to avoid noise and detail loss.
With light painting you can add extremely creative effects on your shots.
To make them, you can use moving artificial lights, such as colored LED lights, or a simple smartphone flashlight.
Again, the long exposure is necessary to capture the entire movement of the lights, which you can also manage yourself, setting the shutter to automatic and fixing the camera on a tripod.
To use these techniques also with the smartphone, it is necessary to have a stable support, to keep the camera still. Try setting the shot to night mode, or use the PRO settings to decrease the shutter speed.
Ph: @krisphotopot
Ph: @micnie02
Ph: mono-log on Unsplash
Ph: siddhant-rane on Unsplash
What are you waiting for?
Try to put our tips into practice and tag us in your photos, we will publish them on our Instagram andFacebook pages.
Sunrise and Sunset? Surely they are optimal light conditions to obtain wonderful photos. Our tips? Don’t miss our next article.
If you liked the article, let us know in the comments and share it.
Before starting: how to get the aim of Copenhagen in your shots
Copenhagen is one of the most liveable city in the world. It has the European oldest amusement park and astronomical observatory and the largest aquarium. It is the oldest monarchy, but it is also one of the most advanced and sustainable city in the world.
It is an amazing place that exceeds expectations, as small city, as well equipped and smart as a big metropolis.
But the most amazing thing is the atmosphere of the city, that makes you feel at home with its strong but unobtrusive character. Copenhagen does not impose itself, but welcomes, fascinates, involves, and offers the scenography to express yourself.
And in every photo it stimulates you to show as much character, to arouse as much surprise.
When you walk taking photos to represent the aim of the city, you should think that Copenhagen is the city of well-matched contrasts, where every aspect represents the perfect union between present and past, in which each part increases the value of the whole and the subjects in the background enhance those in the foreground.
A composition of many different slides: the canals with coloured houses, the paved streets of the city center, the royal castles, the shacks decorated with murals, the sea, which also seems only a canal, the white fumes of the new sustainable industries and the red bricks of the old requalified factories.
But above all, what is exciting is the change between the narrow and thick spaces of traditional buildings and the vastness of the squares reflected in the glass facades of the new architectures.
Walking or cycling in the city, among crowds of cyclists, you will be amazed by the continuous but balanced changes of the urban scenarios, by intimate views and wide perspectives, and by the lights reflected in the canals.
Consider all this characteristics in taking your photos, play with the water, the reflections, the dimensions of the public spaces and the lines and materials of the new architectures, the contrasts of colours and shapes.
Discover our four photographic daily itineraries !
Nyhavn is the most famous attraction. A beautiful canal with amazing coloured houses facing the water and full of shops, restaurants and cafes. The little boats tied up in the canal complete the fascinating scene. It will be maybe your favourite place in the city, to have a walk or eat or relax with friends, but also to take beautiful pictures!
Photo tips! Go there at sunrise, when you can admire this place not crowded people and watch the sun that enlighten the coloured buildings. Take symmetrical pictures with the water reflections in the canal or creates series based on the building’s facades (read more about these photography techniques here). With the camera, tripod could be useful when the light is not too much. A good polarizing filter and a neutral density filter can help you to work with water and reflections.
Ph: @giadaantonini_photography
Then, dedicate a day to the very heart of Copenhagen: Strøget, the characteristic pedestrian shopping street in the centre of the old city. It’s restaurants, shops and cafes make it one of the liveliest spots in Copenhagen. Admire the old and elegant buildings on the way, and the beautiful pavement of Amagertorv square, then proceed through Gammeltorv square and Radhuspladsen, the City Hall Square.
Other streets you can’t miss are Frederiksborggade, through Nørreport square and Kultorvet square, and Købmagergade.
Photo tips! In the city center, pay attention to the vertical lines, try to don’t tilt up your camera or phone, or the buildings will seem to fall. Use the grid to help you or look for more about it in this article. If you are searching for a raised point, enjoy the view from Illum Rooftop in Amagertorv.
Ph: @dreamreflectionz
Ph: @cliqeye
Ph: @mydearcopenhagen
Ph: @the_eysturlands
Ph: @britharas
Ph: @kentkillebjer
Ph: @loudreisig
Ph: @britharas
Another unique spot that can’t be missed is Christianshavn canal and the Freetown Christiania. There you can find the typical poor houses and barracks and colourful murals, the famous Pusher Street and overall a unique atmosphere. The visit to Christiania can last 1 or 2 hours. Photos are not very appreciated the inhabitants, but but some murals are worth capturing, and they will express the very aim of this district!
Ph: @wedelheinenjan
Ph: @simona_manzella_photo
2. Castles and churches
The Rosenborg Castle, the renaissance Royal Castle is open to the public to visit the royal rooms and houses the Royal Danish Collections, so we suggest you to dedicate 1.30 hours to visit it inside.
Then, continue till Amalienborg Palace, home to the Danish Royal family and the heart of Frederiksstaden. Here you can visit the Amalienborg Museum.
In Christiansborg Palace, home to the Danish Parliament, the Danish Prime Minister’s Office and the Supreme Court of Denmark, you can visit the royal rooms.
Ph: @copenhague_que_ver
Ph: @giadaantonini_photography
Ph: @kamrajshahapure
Ph: @pieceoftripgr
Photo tips! Inside the Castle, focus on decoration details with zoom or try some symmetric shots placing yourself in the exact center of the room. Try also to use frames (like doors or windows) to emphasize the subject. Read more about these tips here.
About the churches, you can’t miss the Frederiks Kirke, also called Marmorkirken, thanks to its beautiful marbles. It is the most imposing church of the city, with it’s massive dome.
Another beautiful church is Saint Alban, in Langelinie park. The beautiful atmosphere surrounding the church and the water that reflects the high bell tower makes it simply magical.
The last church you can’t miss is the Church of Our Saviours, in Christianshavn, famous for it helix spire that you can climb!
Ph: @dreamreflectionz
Ph: @dreamreflectionz
Ph: @jonas.eichen
Ph: @madseoland
Photo tips! Try to capture some details of the dome or the tower bells. If you want to capture all the building, try to go far and keep the camera straight vertical, or go exactly in front of the facade and tilt up your camera, to make stand out the high. For more details read the article about framing with lines.
3. New architectures and water reflections
Along the inner Harbour you can admire some of the new contemporary beautiful buildings of the city.
The Skuespilhuset, that is the Royal Playhouse, the Opera House, that is the national opera house and the Black Diamond, the waterfront extension to the Royal Danish Library, are some of the most famous city landmarks. With their glazed facades and clear geometric design and shapes, they represent the symbols of geometric design and new architecture solutions.
Don’t miss the surroundings of the Opera House: there are beautiful old architectures restored that creates a beautiful atmosphere.
Ph: @photo_by_vesti
Ph: @redo_el_khomsi
Ph: @heidinielsen9
Ph: @wedelheinenjan
Photo tips!We are facing one of the main theme of the city: new contemporary geometrical architectures with glass facades facing the water and reflecting lights. This could be the main subject of your photos here! You could arrive at the blue hour in Amaliehaven Garden, a little elegant waterfront park where you can take beautiful photos to the Opera House enlightened and reflected in the water. Here enjoy the bridges on the harbour, that offer beautiful panoramas: Inderhavnsbroen, Knippelsbro and Lille Langebro are the best ones. With your photos, use the grid to stress lines and geometrical shapes! With the camera, use a tripod and long exposures to create silk effect on the water and emphasize reflections!
Reach also the Cirkelbroen, a beautiful bridge made by many circles, facing wonderful restored industrial buildings.
Ph: @knederskovpetersen
Ph: @erniedenoob
Ph: @dreamreflectionz
In the Harbour enjoy Krøyers Plads, a perfect example of danish contemporary redesign of ancient architectural shapes and solutions. This beautiful square can’t be missed in your visit!
Also the Tycho Brahe Planetarium is a beautiful place to shoot, because its geometrical and particular shapes face the water and you can get amazing pics.
Ph: @matildebevilacqua
Ph: @giadaantonini_photography
4. Monuments and royal changing of the Guard
The most famous monument in Copenhagen is the Mermaid statue, the bronze statue on the water representing the protagonist of the famous fairy tale by Hans Christian Andersen.
Then, enter Kastellet, a pentagonal fortress surrounded by a moat at the end of Langeline promenade. You will enjoy beautiful views over the park and the surrounding canals. In one of the pentagons you will find the iconic windmill, built in 1847, that is the only one left out of approximately 16 windmills built on the bastions.
Ph: @wedelheinenjan
Ph: @george.charmpis
In Amagertorv square, focus on the beautiful Stork fountain, while in Amalienborg square enjoy the Rytterstatuen, the equestrian statue of Frederik V. In Langelinie park, focus on Gefion Fountain and the Ivar Huitfeldt Column.
Ph: @dandounavuelta
Ph: @shelleypandey
Photo tips! Focus on the subject you want to capture and try to isolate it from the other elements: the Mermaid statue, the fountains, the Windmill or one of the buildings of Kastellet. Use the green grass or the blue water to create contrasts between colours and to frame the main subject. Try to go near the subject to avoid too much people in your scene, as these could be very busy places. If you want to include people in your shots, try to focus only on one or a small group and use the rule of thirds. The grid will help you.
Every day at 12 am, in Amalienborg square you can attend the Changing of theRoyal Guard. At 11.30 am, the guard marches from Rosenborg Castle to Amalienborg, with its traditional uniform and typical cap.
Ph: @simona_manzella_photo
Ph: @dreamreflectionz
Photo tips! Try to use small depth of field with you camera or portrait mode on your phone to make the subjects stand outs, like the royal guards.
5. Parks
There are a lot of parks in Copenhagen which are worth a visit.
The gardens of Rosenborg Castle are a beautiful place to spend some moments. Near, the Botanisk Have holds the largest collections of living plants in Denmark. Ørsted park will offer you wonderful spots and a romantic atmosphere. Walking in Langelinie park, that leads to the Mermaid statue and the Kastellet, is an amazing experience. There are a lot of different views and sceneries to admire. Vestre cemetery, with its 54 hectares, offers beautiful tree-line avenues and landscapes.
Ph: @mariano_domino
Ph: @lydiak.jpeg
Ph: @giadaantonini_photography
Ph: @lisbeth_dk_
Ph: @giadaantonini_photography
Then, you can’t miss Tivoli Gardens, that is one of the oldest operating amusement parks in the world and one of the main attractions in Copenhagen. It includes a great variety of attractions, it is famous for its gardens and blinding lights, that offer a magic and amazing atmosphere. If you go in the afternoon and stay there in the evening, you will be enchanted by the beautiful lights and decorations of the park!
Ph: @myspacecopenhagen
Ph: @britharas
Photo tips! Tivoli is beautiful in every season and moment of the day. Use zoom to catch details and wide angle to frame the whole scene, search for raised points to avoid the crowd in your photos.
6. Panoramas
The Rundetaarn is a 17th-century tower, built as an astronomical observatory, famous for its helical corridor leading to the top, where you can admire a beautiful view of the city center.
The most high view of the city is offered from the Christiansborg Palace‘s tower, 106 meters high.
But we recommend you to reach the top of the Church of Our Saviour in Christianshavn. The characteristic helix spire, with his winding staircase, offers one of the best panoramic views of the town. The lantern of the spire, from 1933, holds the biggest carillon in Europe.
Photo tips! The panoramic view of the city are a beautiful way to enjoy a different perspective. The best moment to go is at sunset, when you can capture the beautiful colours of the sky and the warm light of the sun on the roofs. If not not possible, go in the middle of the day, when the sun is high, so you can see a clear 360° panorama avoiding the blacklight.
Ph: @lapitona
Ph: @camillepapote
7. New or renovated urban districts
Copenhagen offers beautiful examples of sustainable, fascinating urban districts, new or renovated, extremely amazing with their futuristic design. They are perfect to take incredible photos!
Superkilen is an urban regeneration and landscape project by Topotek 1 Architects. The aim of the project was to revitalize a degraded area of the Nørrebro neighbourhood. The coloured paved grounds are one of the main features of the park.
Photo tips!This is the perfect place to play with colors, shapes and lines, also searching for abstract pics or funny one.
Some other beautiful examples of contemporary danish architecture are the Søndre Campus at Ørestad North, or the complex 8 Tallet, in Ørestad South, Havneholmen or Kaktus tower in Versterbro and Nordhavnen district.
Impressive architectures, mixed-use, ecological solutions, urban and landscape experimentations are the basis of these astonishing projects.
Ph: @sineoh_foto
Ph: @giadaantonini_photography
Ph: @wedelheinenjan
Ph: @sim_sve
Ph: @micnie02
Ph: @juliekaasgaardlindschouw
Ph: @wedelheinenjan
What are you waiting for?
Explore or photo map and all the itineraries and discover Copenhagen through a photographic eye!
If you like our article, write it in the comments!
To not miss the next article and all the other travel and photography tips, subscribe to our newsletter !
Follow us on Instagram e Facebook and share your pics with the tag @imagomap or the hashtag #imagomap!
Thanks to all our followers who allowed us to use their photos for the article! Tag us for this opportunity!
We use cookies on our website to give you the most relevant experience by remembering your preferences and repeat visits. By clicking “Accept”, you consent to the use of ALL the cookies.
This website uses cookies to improve your experience while you navigate through the website. Out of these, the cookies that are categorized as necessary are stored on your browser as they are essential for the working of basic functionalities of the website. We also use third-party cookies that help us analyze and understand how you use this website. These cookies will be stored in your browser only with your consent. You also have the option to opt-out of these cookies. But opting out of some of these cookies may affect your browsing experience.
Necessary cookies are absolutely essential for the website to function properly. These cookies ensure basic functionalities and security features of the website, anonymously.
Cookie
Duration
Description
cookielawinfo-checbox-analytics
11 months
This cookie is set by GDPR Cookie Consent plugin. The cookie is used to store the user consent for the cookies in the category "Analytics".
cookielawinfo-checbox-functional
11 months
The cookie is set by GDPR cookie consent to record the user consent for the cookies in the category "Functional".
cookielawinfo-checbox-others
11 months
This cookie is set by GDPR Cookie Consent plugin. The cookie is used to store the user consent for the cookies in the category "Other.
cookielawinfo-checkbox-necessary
11 months
This cookie is set by GDPR Cookie Consent plugin. The cookies is used to store the user consent for the cookies in the category "Necessary".
cookielawinfo-checkbox-performance
11 months
This cookie is set by GDPR Cookie Consent plugin. The cookie is used to store the user consent for the cookies in the category "Performance".
viewed_cookie_policy
11 months
The cookie is set by the GDPR Cookie Consent plugin and is used to store whether or not user has consented to the use of cookies. It does not store any personal data.
Functional cookies help to perform certain functionalities like sharing the content of the website on social media platforms, collect feedbacks, and other third-party features.
Performance cookies are used to understand and analyze the key performance indexes of the website which helps in delivering a better user experience for the visitors.
Analytical cookies are used to understand how visitors interact with the website. These cookies help provide information on metrics the number of visitors, bounce rate, traffic source, etc.
Advertisement cookies are used to provide visitors with relevant ads and marketing campaigns. These cookies track visitors across websites and collect information to provide customized ads.