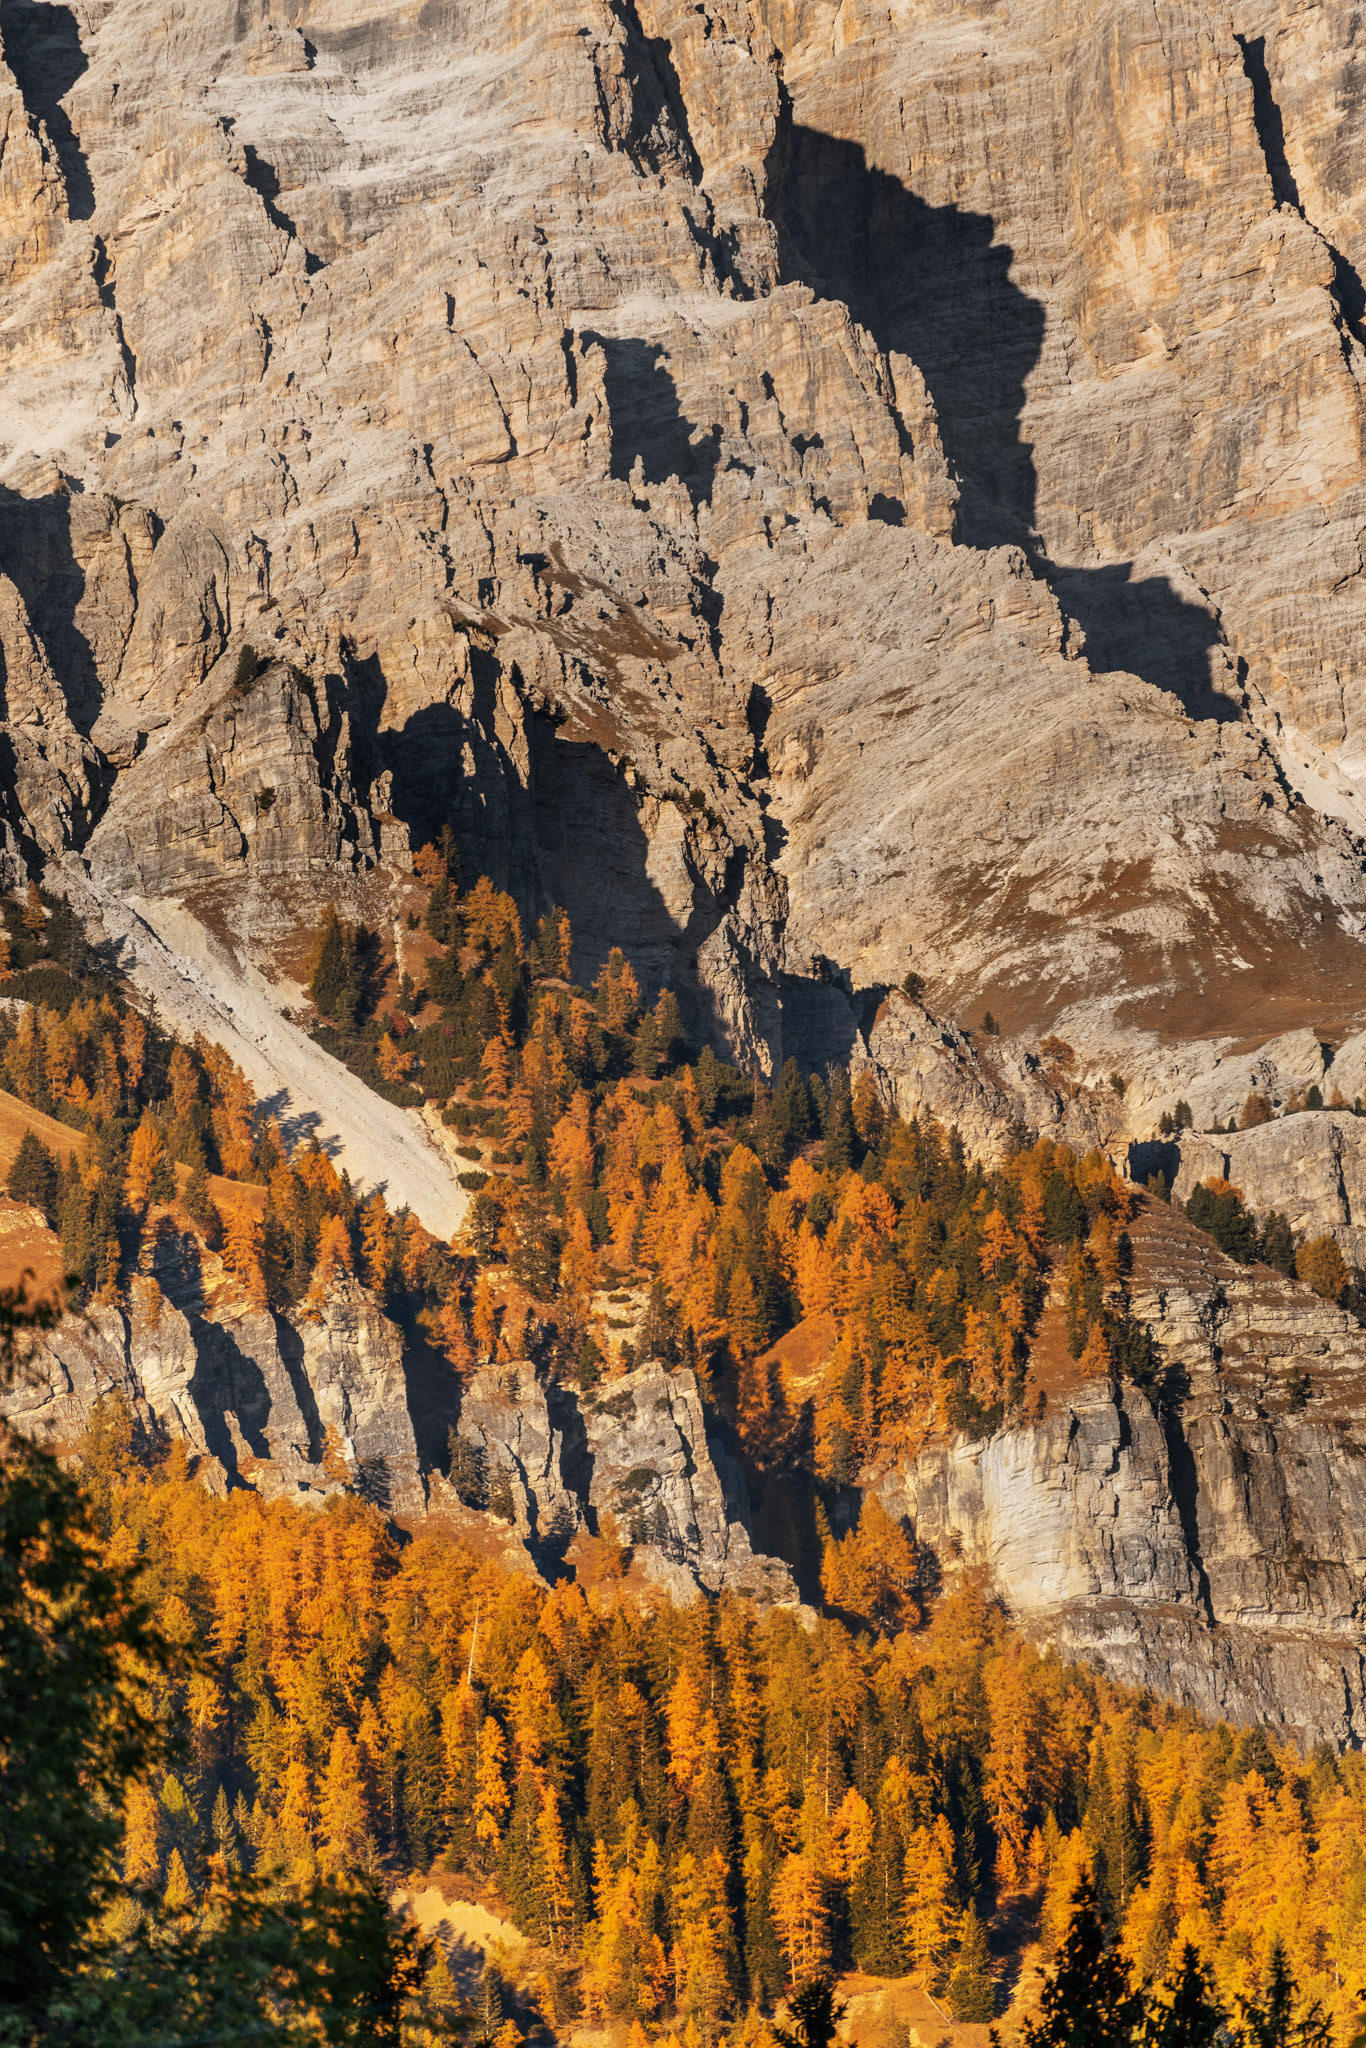
Who hasn’t stopped to take fall foliage photos at least once? Fall is perhaps the most evocative season of the year, with its amazing landscapes. In fact, the color shades of the leaves give our photos a unique atmosphere of fairytale worlds. So, what are the best photo tips for fall foliage pics?
A single tree, an entire avenue, a chestnut or beech forest, some leaves scattered along the sidewalk, offer perfect ideas for composing outstanding images.
In the next posts about fall we will see together, every week, some practical tips that professional photographers follow to get the best pics!
Let’s start from composition!
Photo tips for fall foliage pics: the composition of the shot
As in every shot, the composition is the most important aspect!
Especially during the fall season, where often the scene has too many details, with leaves, branches, trees and others elements. For this reason, it’s important to stop a bit and observe before shooting.
What do you need to ask yourself before shooting?
When you find yourself in front a scene or landscape that you love, stop for 10 seconds to analyse the scene, before hiding behind the lens of your camera. The risk of falling into banal photos is just around the corner.
These four simple questions can give you the inspiration for the perfect photo in just a few seconds:
What are you really interested in?
What is the subject of your photo?
What elements do you want to include or delete from the frame?
How can you make your pic original?
Photo tips for fall foliage pics: 7 easy photo tips
To find the answers to these questions there are some simple practical photo tips for fall foliage pics, to follow before shooting.
1.Isolate with your eyes some details of the scene
Focus on them to identify the subject or subjects of your photographic story. Whether they are a single leaf or a small group, a branch, a tree or a little mushroom that grows out of the ground, select them.
2. Photo tips for fall foliage pics: place the subject inside the composition
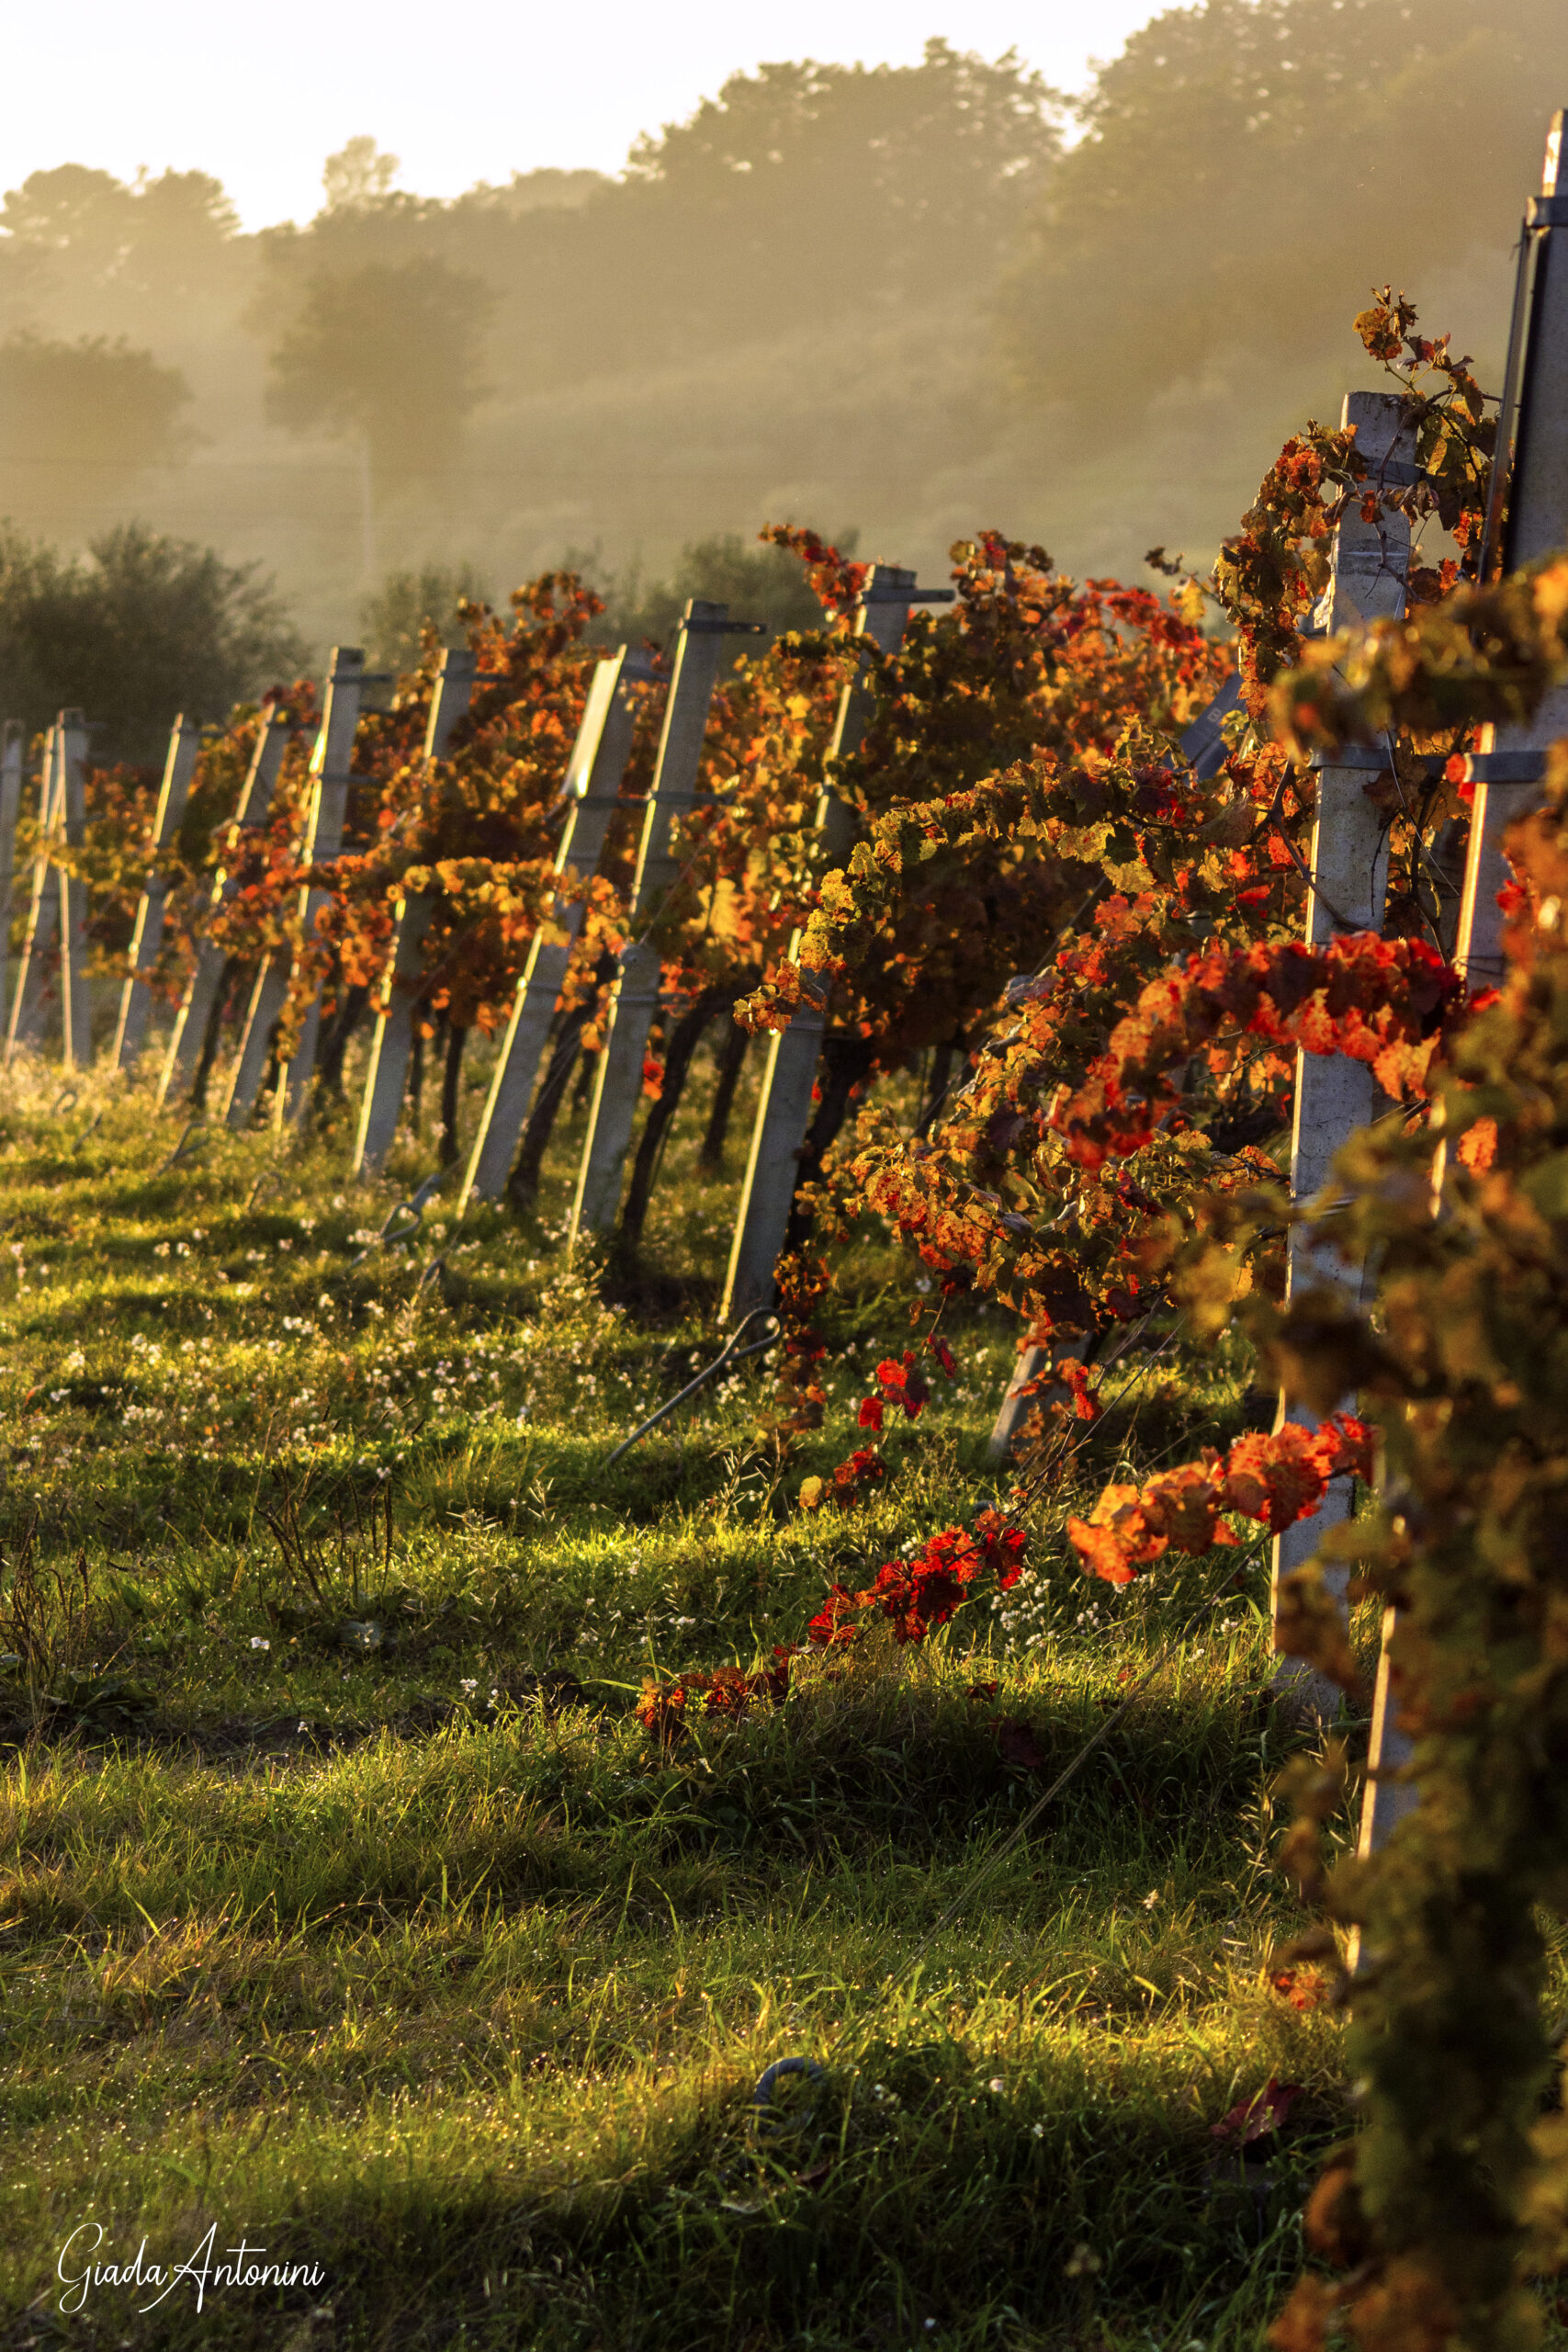
Give the subject the maximum strength, placing it in the center of the composition, or on one of the thirds (remember to activate the grid, both from smartphone or camera). If your subjects are more than one, placing them one on every third will give you an excellent result. For example, a tree on the right and a human subject on the left, or a branch full of colored leaves in the foreground on one side and a tree on the background, on the other side.
@giadaantonini_photography
@giadaantonini_photography
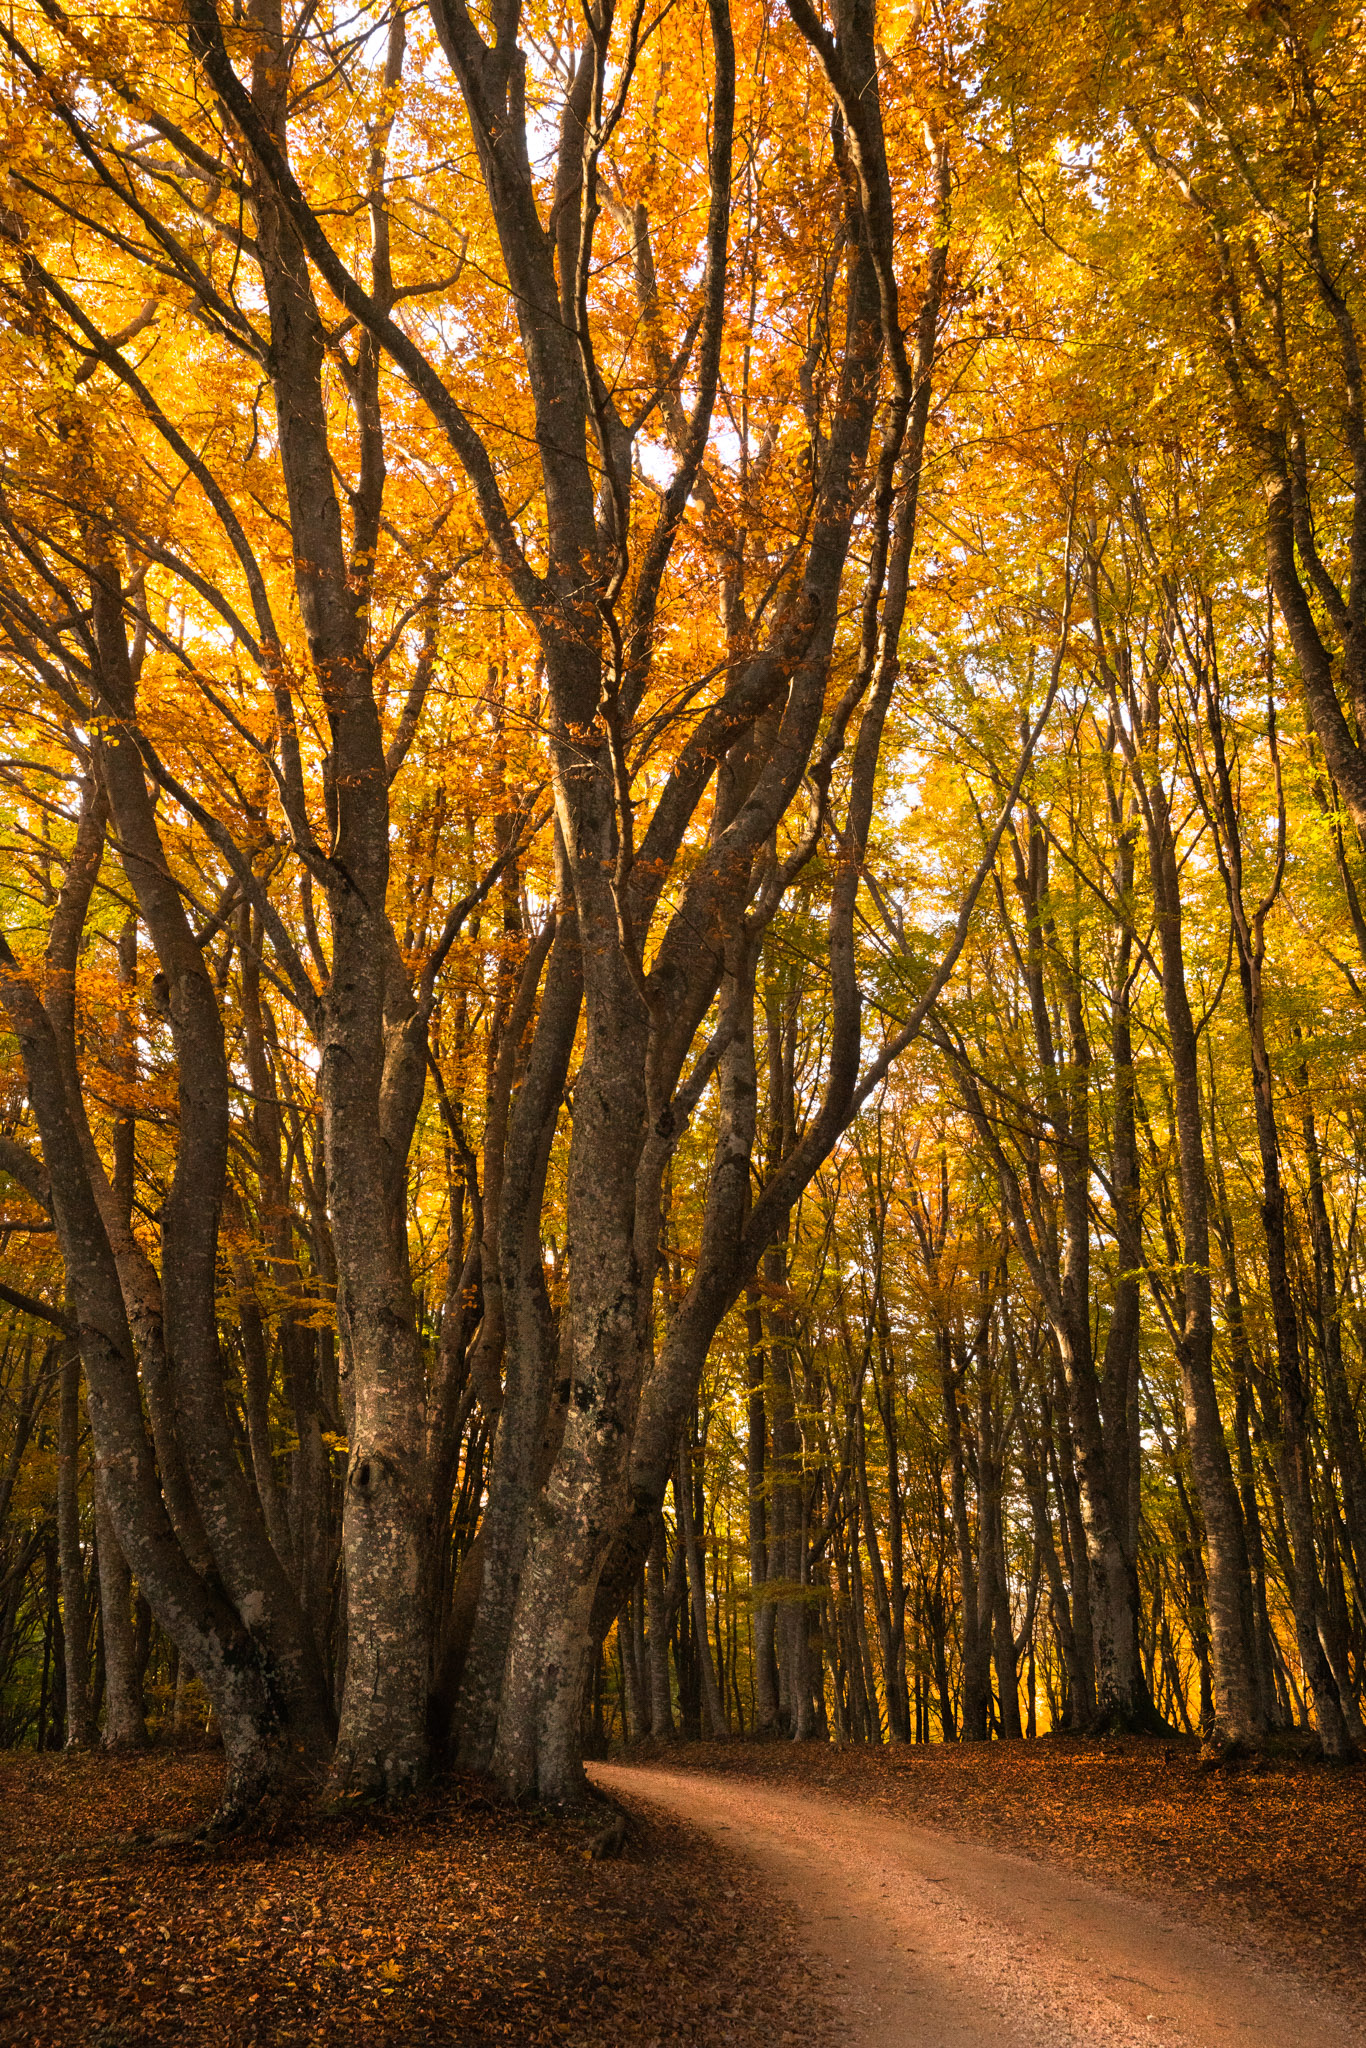
3. Choose the best distance from the subject to raise its significance in the context
Try to move closer or further away physically before shooting. You may find that you need a zoom or macro lens to better isolate the protagonist of your photo.
IMPROVE YOUR PHOTO WITH FRAMING
Learn in five minutes simple tips to improve your shots!
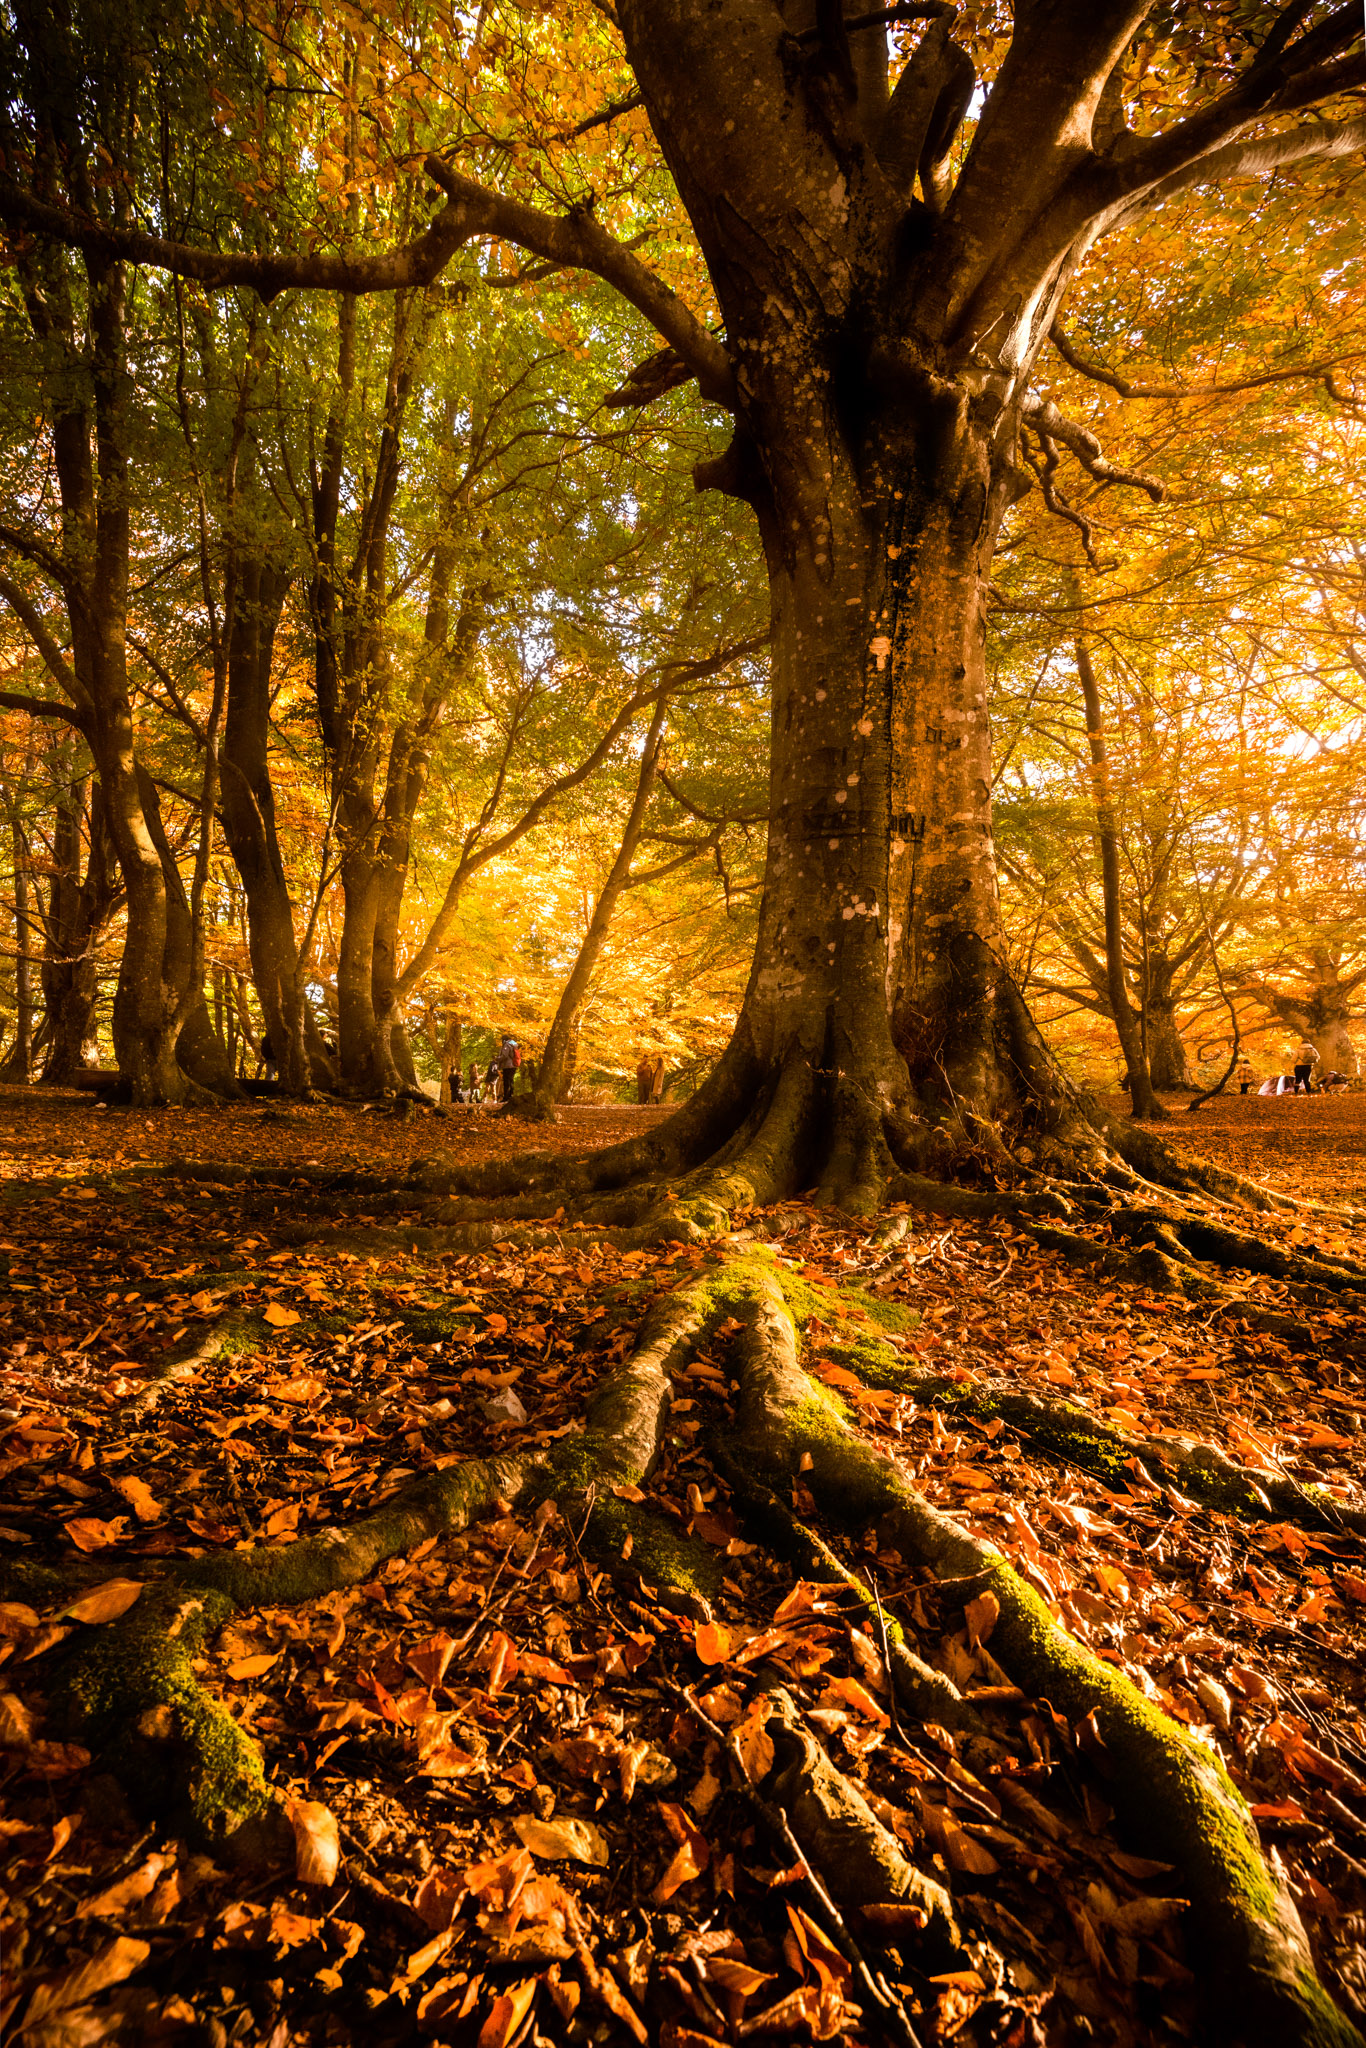
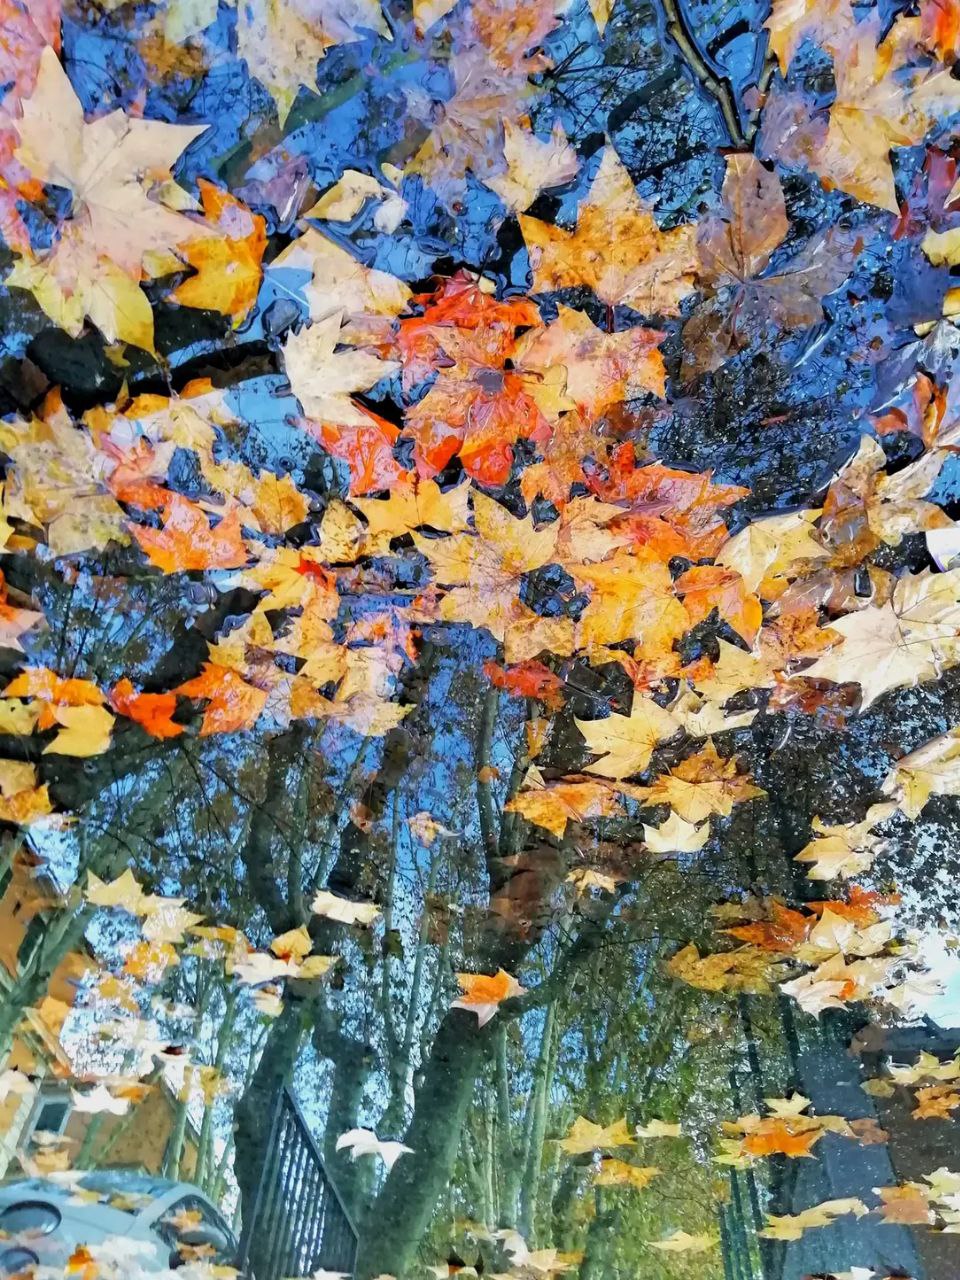
It can be from above if the main subject is on the ground, as often happens with fallen leaves. Or it can be from below close to the ground, for example to enhance a carpet of leaves and perhaps an imposing tree in the background. Don’t forget the possibility to choose a point that partially covers the scene, like a tree trunk, that can frame the subject.
@giadaantonini_photography
@giadaantonini_photography
@giadaantonini_photography
5.Photo tips for fall foliage pics: create a subject
If there is no prominent objects in the scene you are observing and you cannot find an original point of view, then create it! Just move a stone, or a small group of leaves, or put a human subject in the frame to have a protagonist who makes your composition original.
6. Observe the edges of the frame to cut out disturbing elements
They cool be stones, trees, bushes, walls, parked cars and anything else that is not useful for telling what you want to express: “less is more”. This way, whoever looks at your photo will remain focused on the subject.
@giadaantonini_photography
@giadaantonini_photography
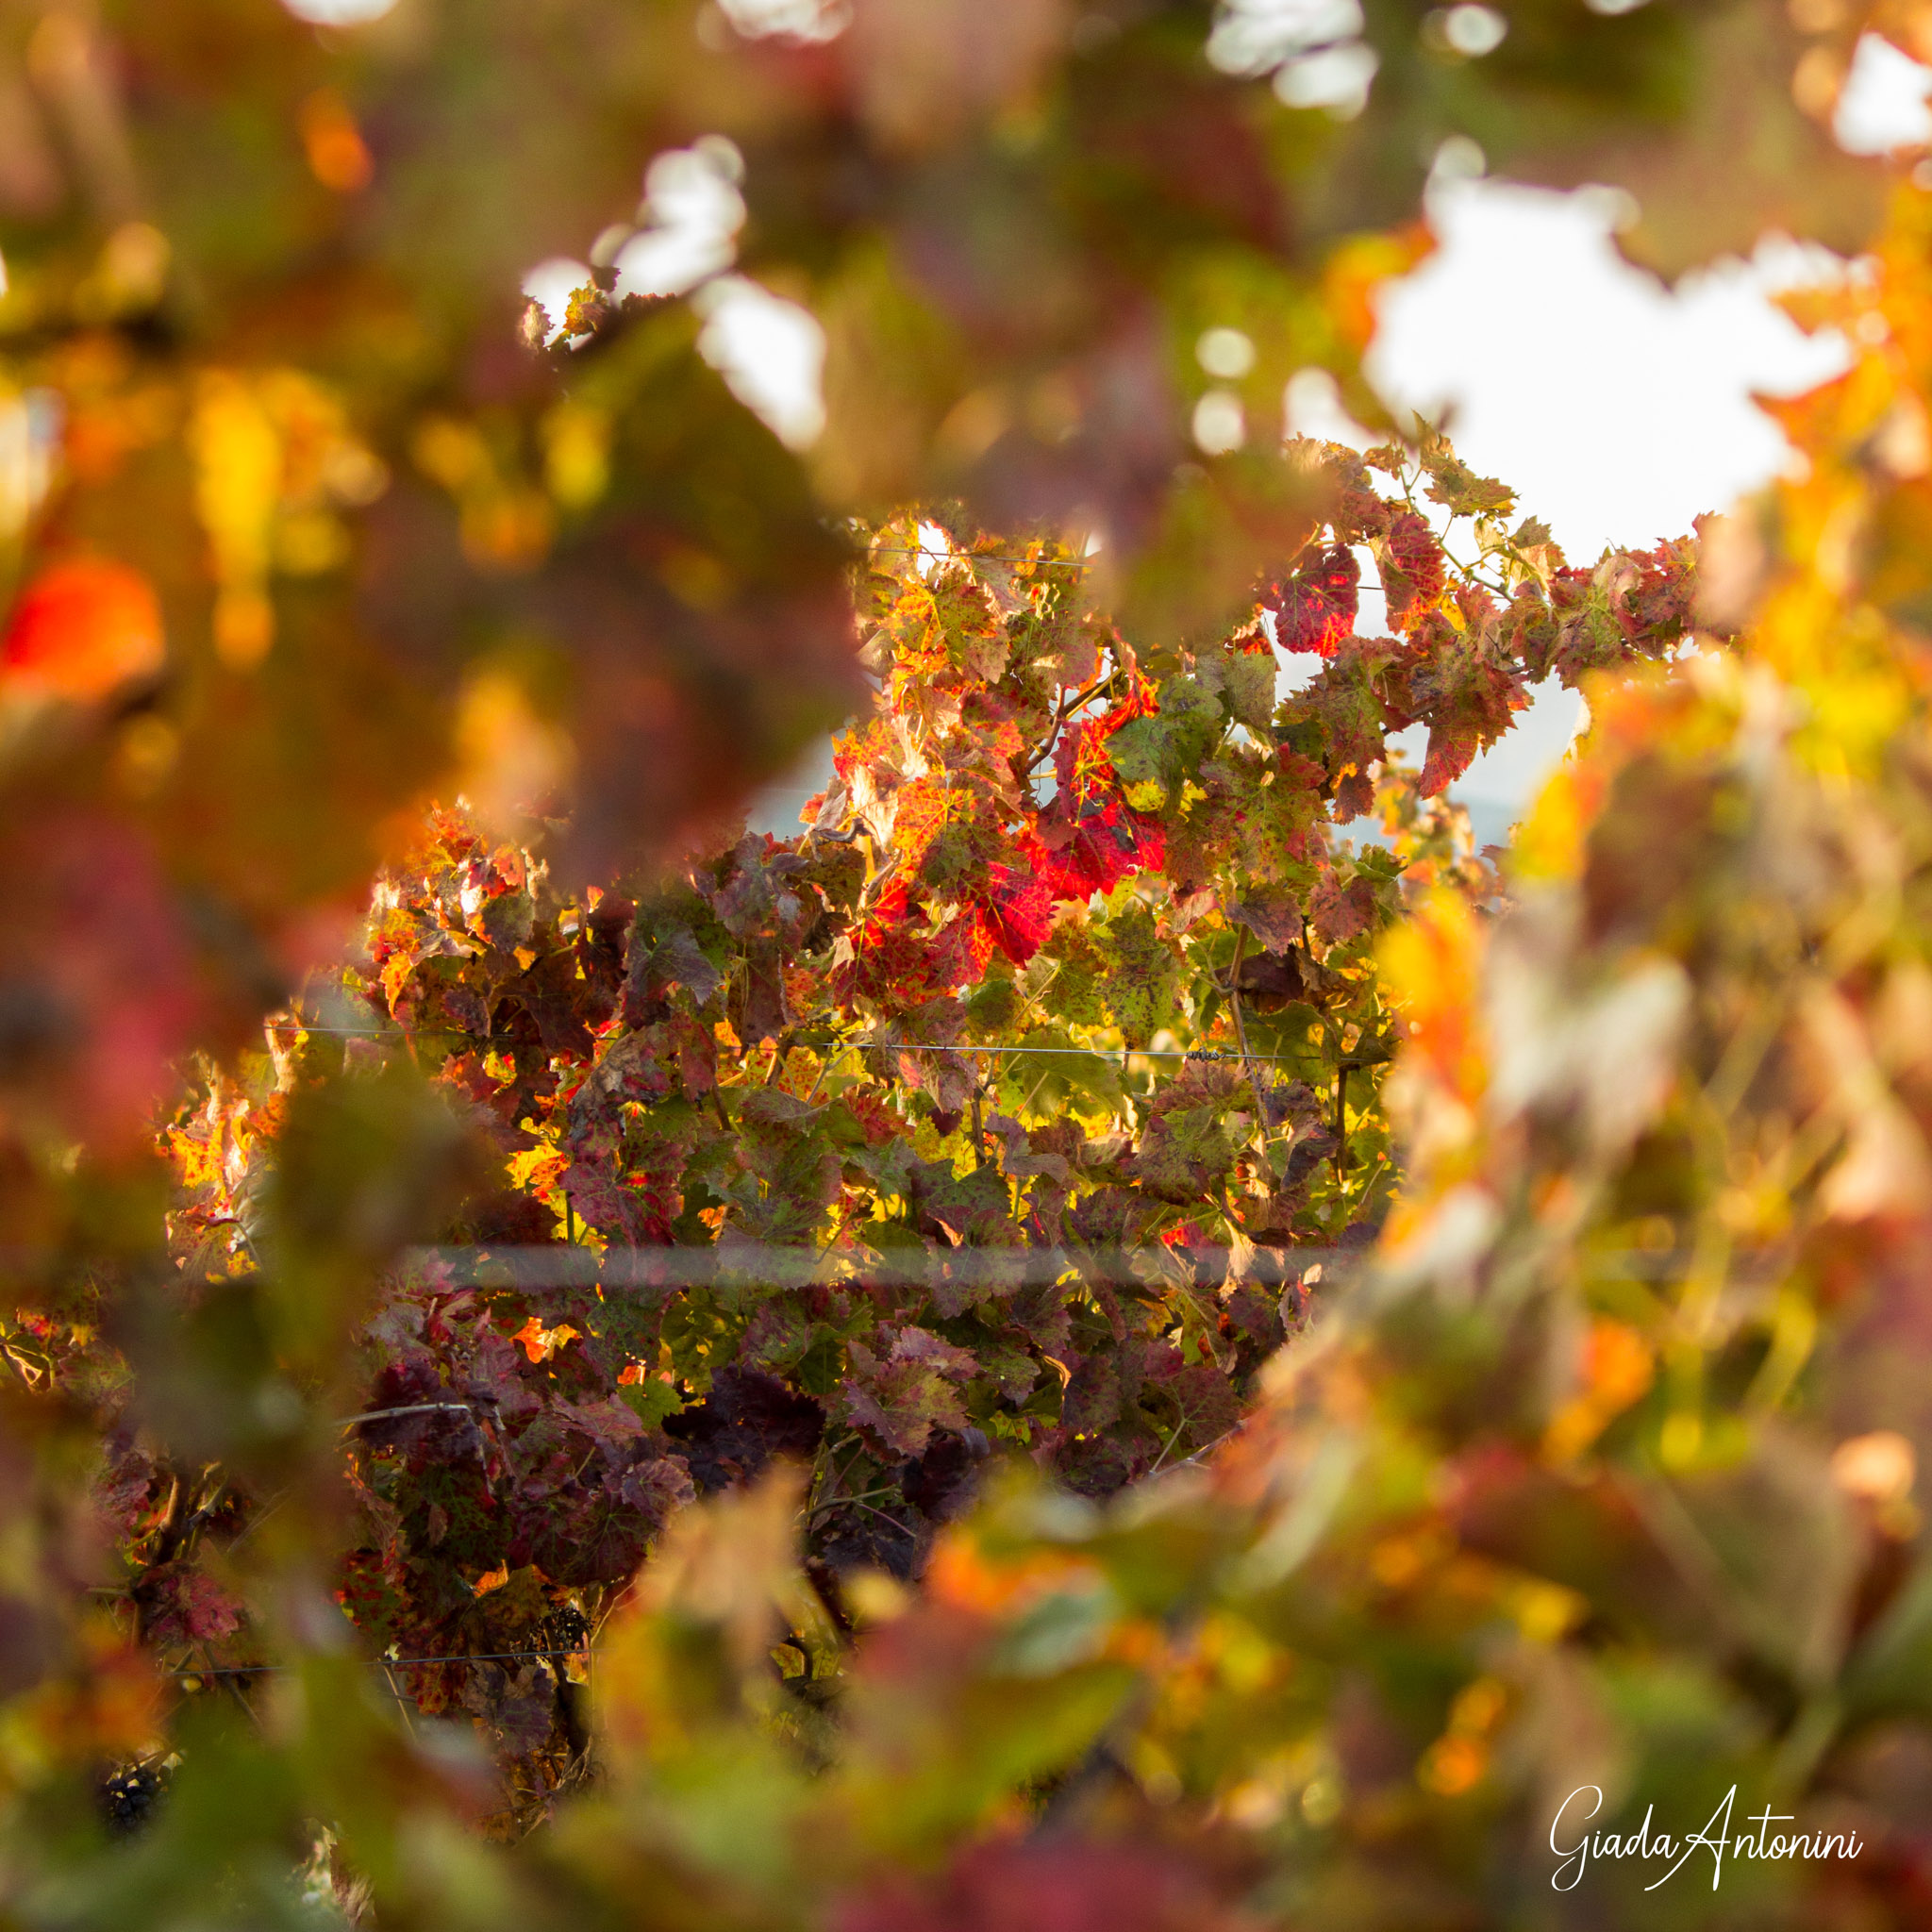
7. Photo tips for fall foliage pics: help yourself with the focal aperture
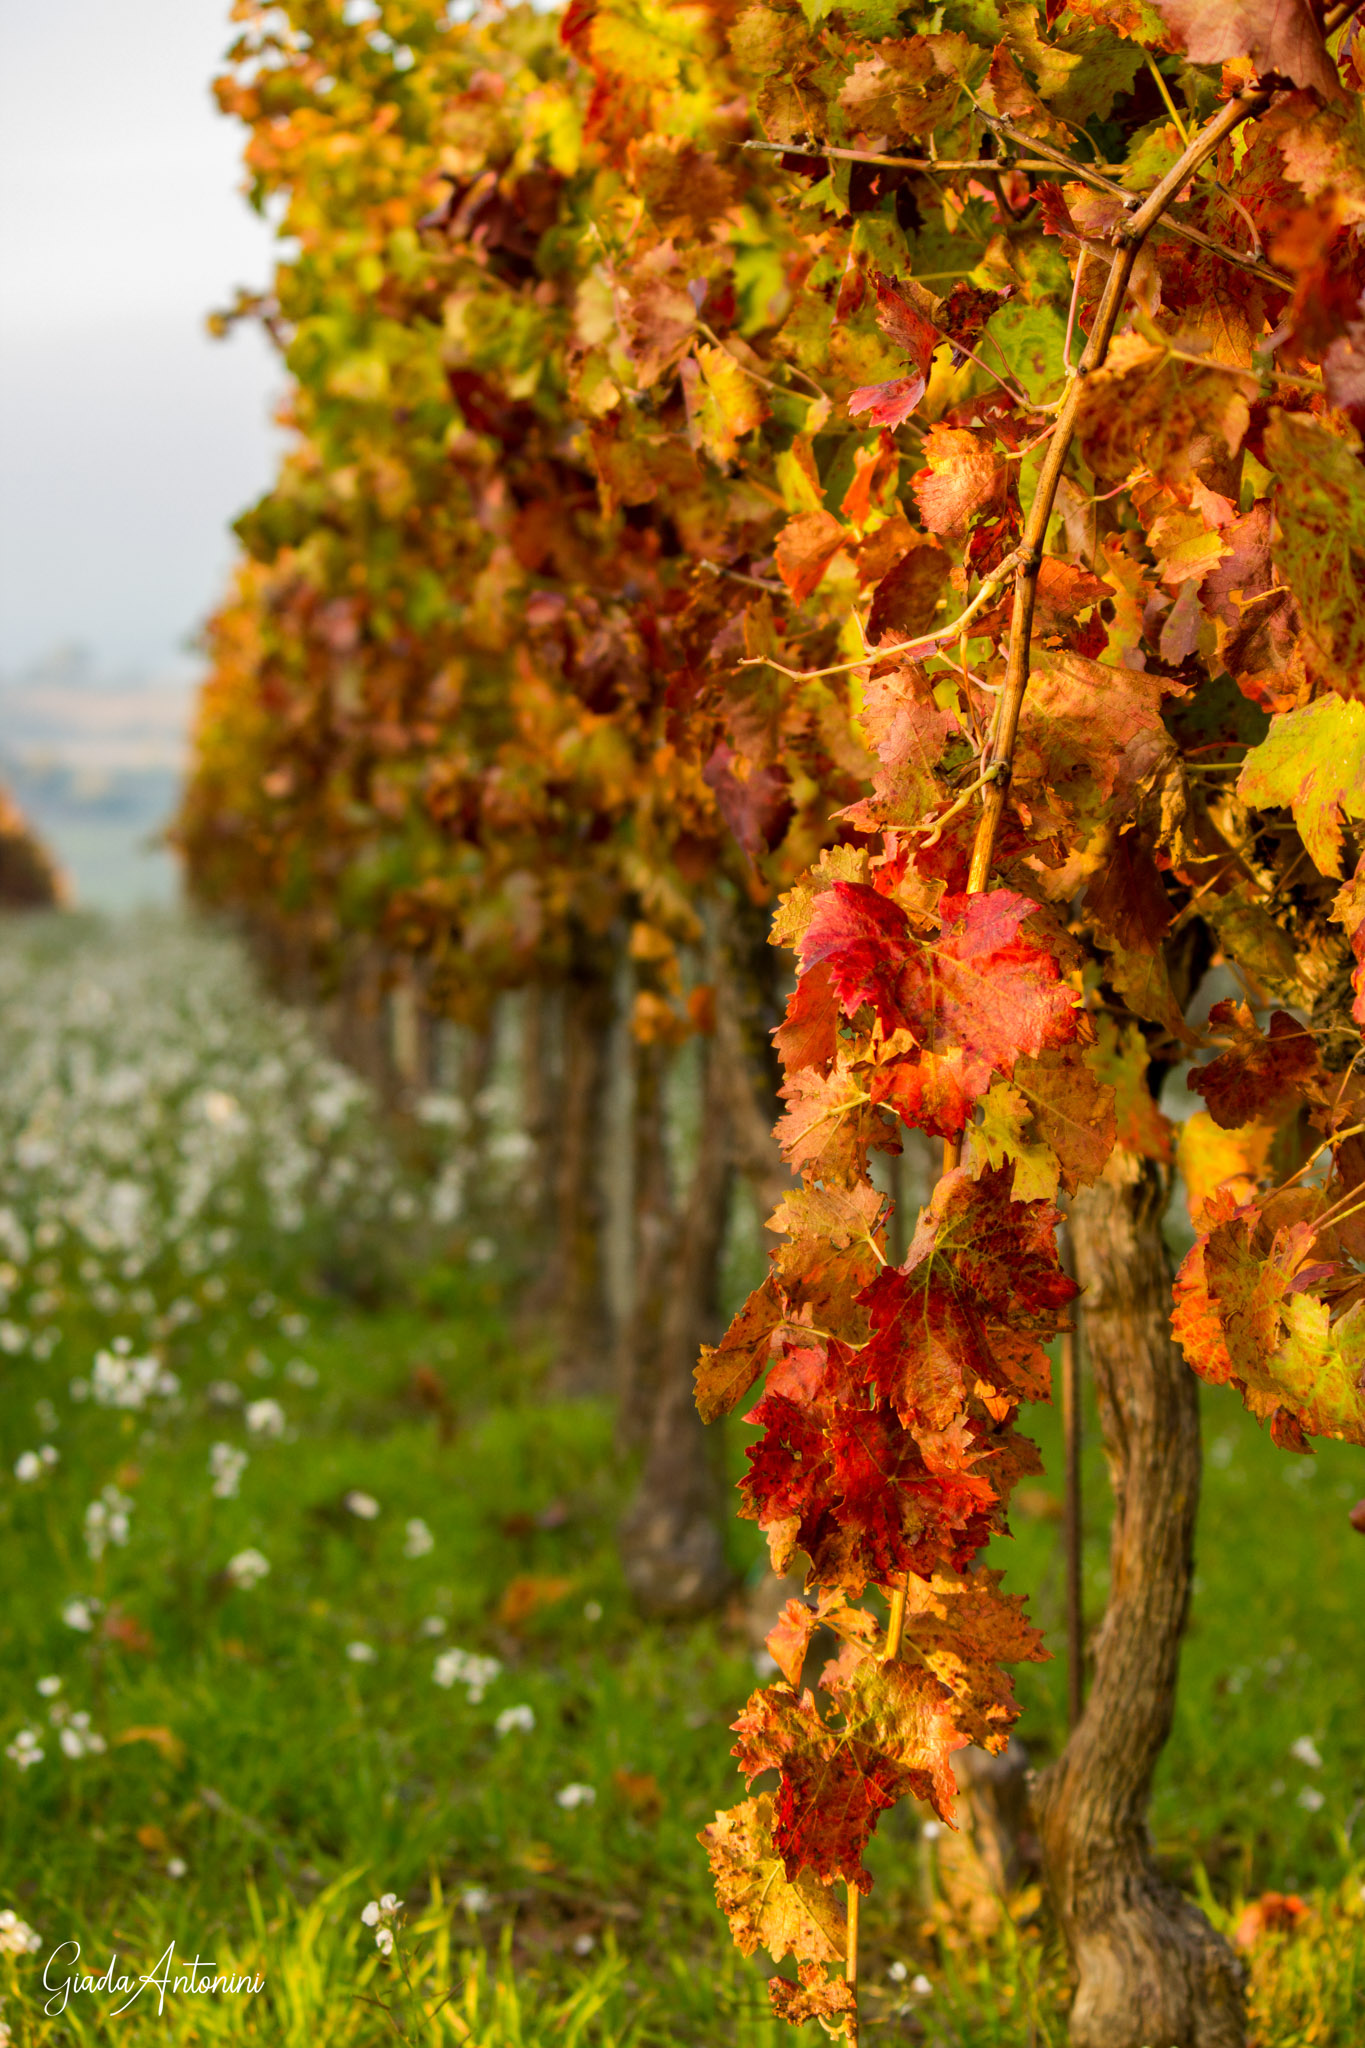
Play with the aperture in order to keep the subject in focus and blur the background or foreground (with your smartphone just focus on the subject from a fairly close point or use the portrait option). This method helps especially if the scene is very confusing and full, as often happens in autumn landscapes.
Ph: @giadaantonini_photography
Ph: @giadaantonini_photography
In short, to realise stunning fall foliage pics, move around the scene like a director before shooting!
IMPROVE YOUR PHOTO WITH FRAMING PT.2
Do you want to know more to find the best composition in your pics?
Looking at the settings of your camera or listening to photographers, you will have known that, in addition to JPEG, a very common format for saving photo files is RAW, now also in the most recent smartphone models!
But what are the differences between the two formats? And how to choose the best one for our photos?
Let’s compare them and try to understand together!
JPEG and RAW: what are them?
JPEG are raster files, meaning images made up of pixels, and are popular for sharing, creating, and viewing photos.
When a JPEG file is generated, it is subject to lossy compression, which means that all the nuances of color, and therefore the details, that the human eye can hardly see are eliminated, creating groups of pixels with homogeneous color.
When you take a JPEG image, you will have an 8 bit file. The number of bits represents the color depth of the image. Each pixel of an 8-bit image consists of a numerical string of 8 digits 0 or 1, which combined together determine a colour. In this way it is possible to have 256 (28) different combinations and therefore 256 shades of color for each of the three primary colours.
RAW files are still raster files, even if they are represented by code and require software processing to be converted into images.
When a RAW file is generated, it does not undergo any type of compression or data loss during recording. This means that it contains a large amount of data within it. All digital cameras can take photos in RAW format and now some of the latest smartphone models can do it too, making them ideal for amateur or professional photographers.
Digital cameras can shoot at 12 or 14 bit, depending on the type of camera, and this means that if we save the file in RAW, the color gradients will reach 4096 or 16384 for each primary color.
But let’s see the main differences, the advantages or disadvantages of the two formats and learn which one to choose in each situation.
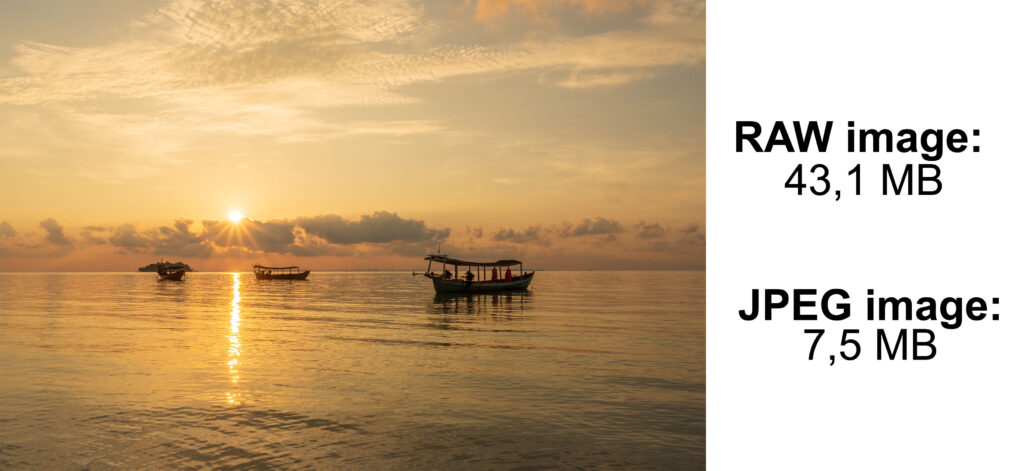
1. The weight
JPEG files are about 5-10 times smaller than RAW.
JPEG files are the most used for saving and sharing images online, they are light in terms of MB, which allows them to be opened, sent and shared quickly, while still maintaining good quality online.
RAW files, on the other hand, containing a greater amount of information, are much heavier. This means that uploading, sending and sharing take much longer. Furthermore, specific programs and software are needed to open these files, while JPEGs are universally recognized.
RAW files, for example, cannot be sent as simple email attachments, as they exceed the maximum capacity allowed and to manage them easily, the computer on which they are processed must offer high performance.
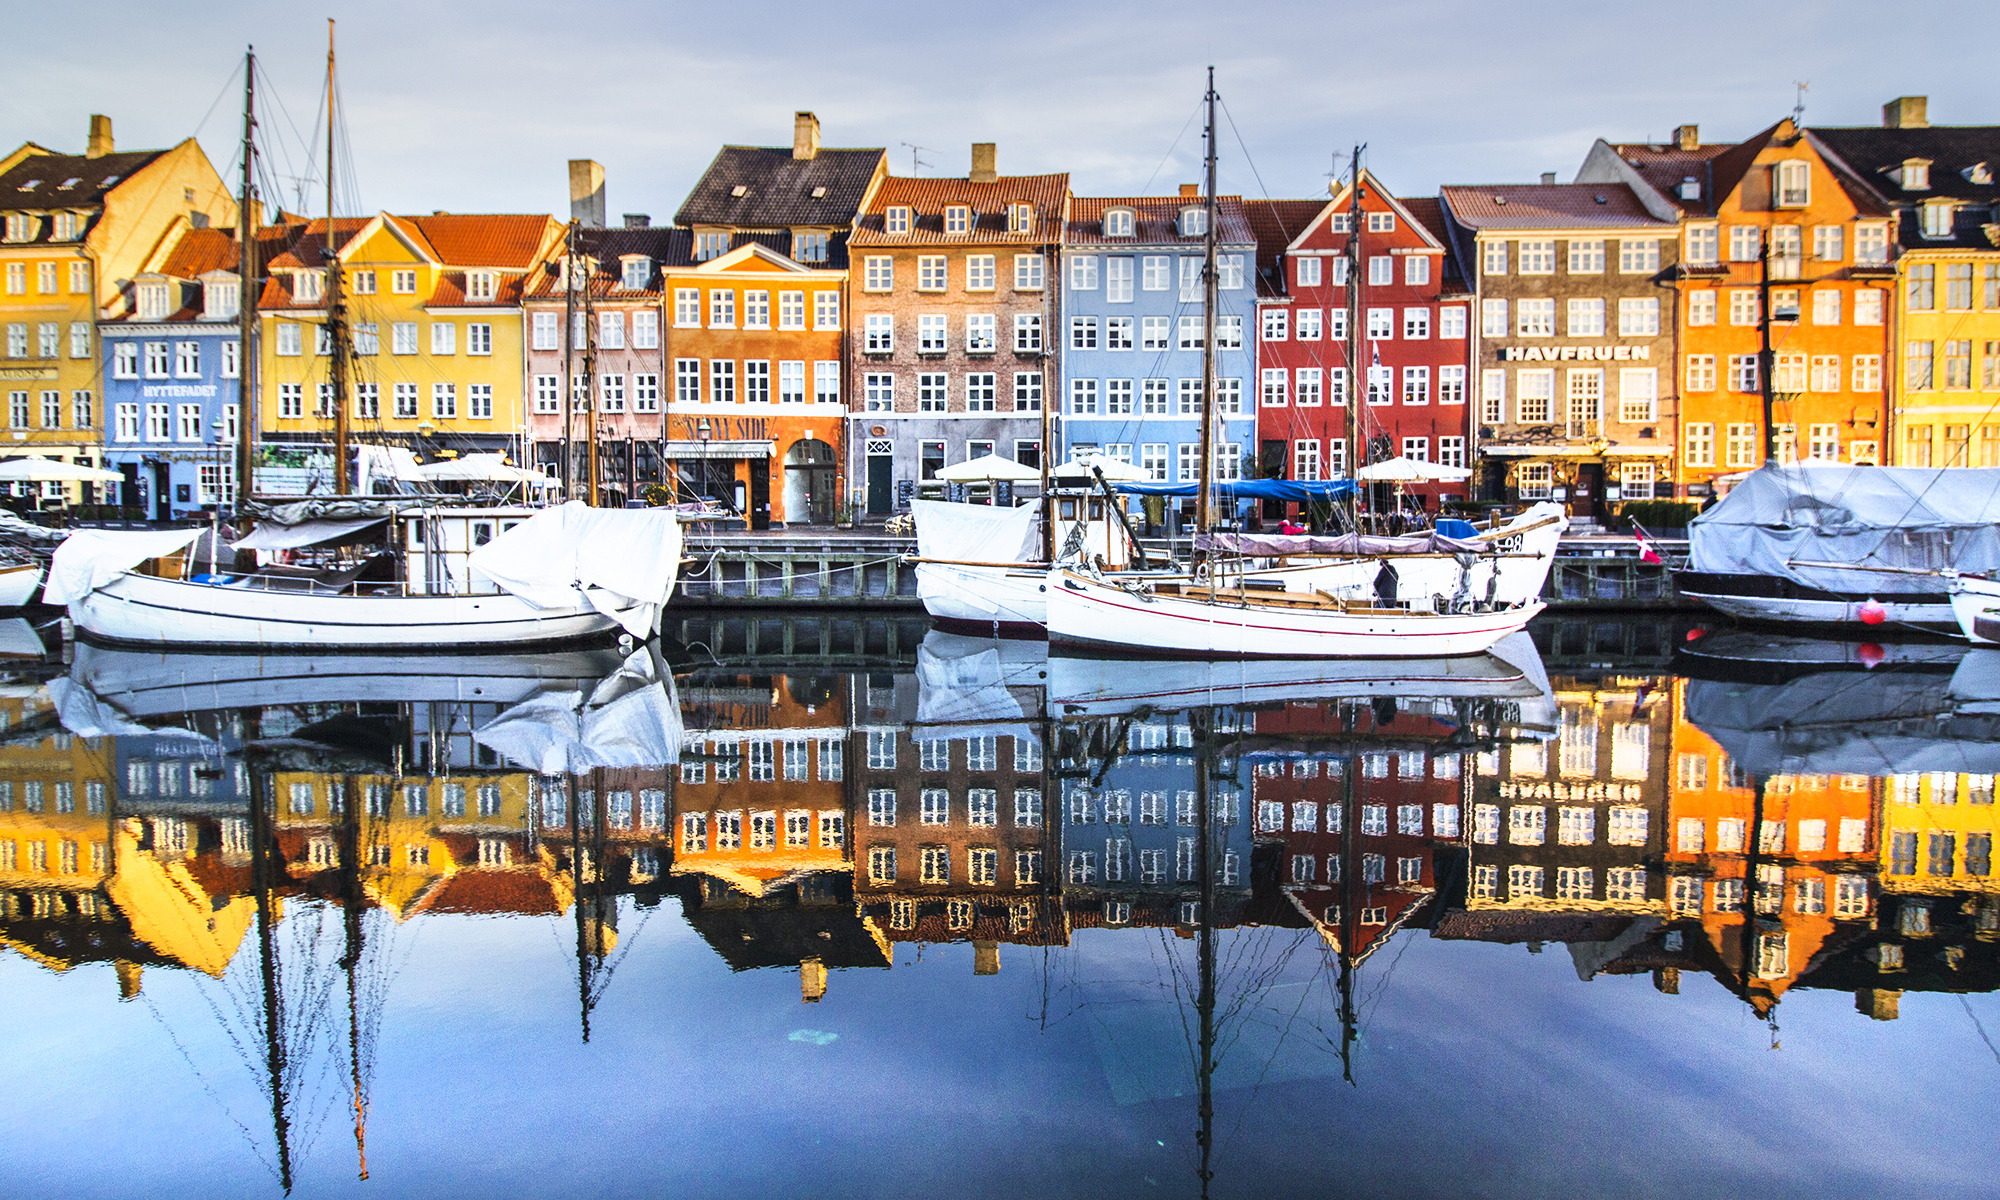
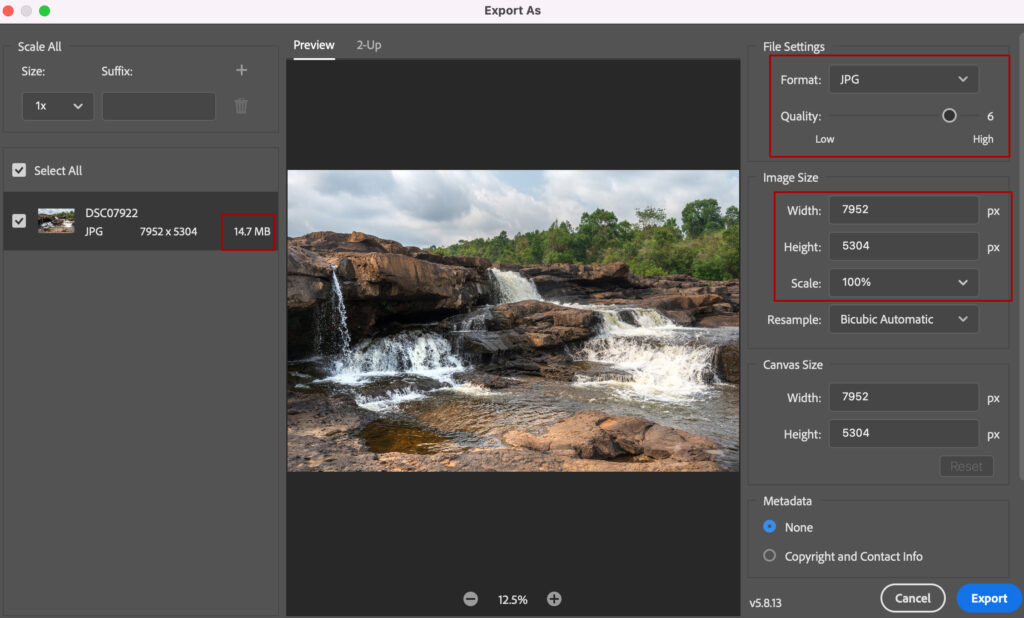
In the image below we report the weight in MB of the original RAW image taken with a Sony digital camera and the weight of the same file exported from Photoshop in JPEG. During export, there are various settings that can be modified to further reduce the weight of the JPEG, according to different needs, but we still start from a size 7 times smaller! The same image, used as the cover of this article, has been reduced to 1 MB, in order not to weigh down the page and maintain fast viewing times. Despite this reduction, for a website display, the quality is still enough.
2. The quality
RAW files have higher quality than JPEGs. The choice depends on the use we will make of that photo.
JPEG files are subject to lossy compression, which means that some detail, and therefore image quality, is sacrificed to reduce file size and allow for easier management. However, this also alters the image, slightly modifying the colours. The quality of the JPEG file is still good for viewing from a computer or smartphone, for use on websites, which very often have limits on the weight of the uploaded images, for social networks or for printing in the classic smaller photographic formats.
But if we have to modify that image and process it with post-production software, or enlarge it dramatically, it is precisely the details that the JPEG loses, which do not allow us to continue viewing a quality file and a high definition image. This is where the RAW format comes into play.
In fact, this certainly guarantees a much higher image quality, because it doesn’t compress the data collected by the camera. It therefore has a multitude of more details and records millions more colors than a JPEG image, returning a wider range of colors and tones. This guarantees greater control over the image.
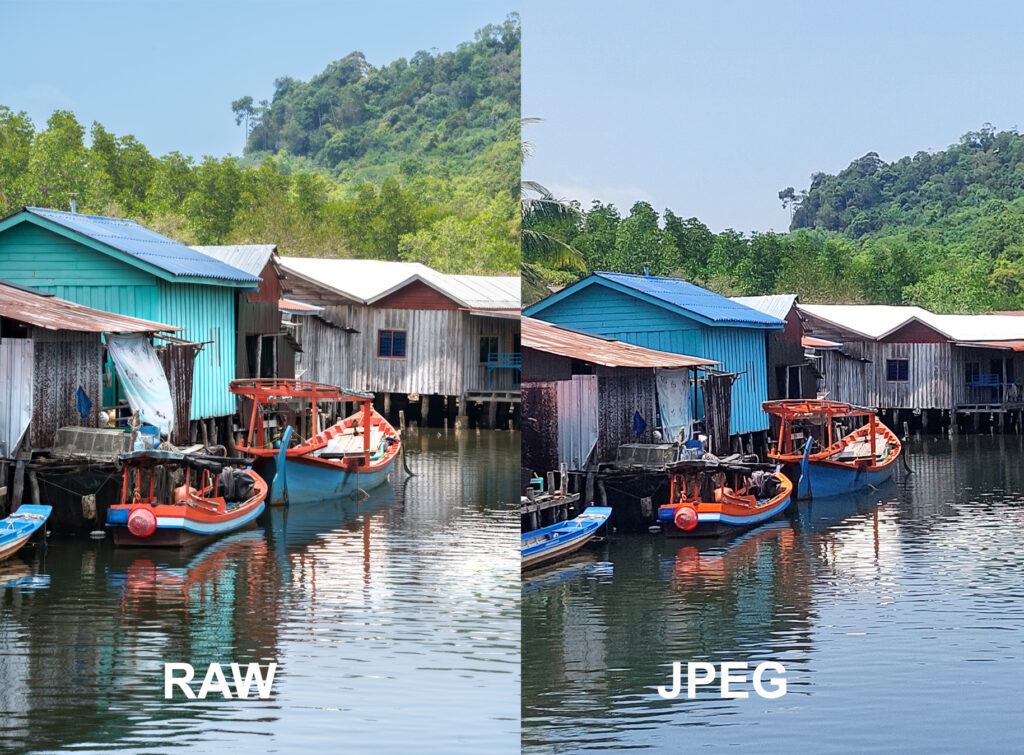
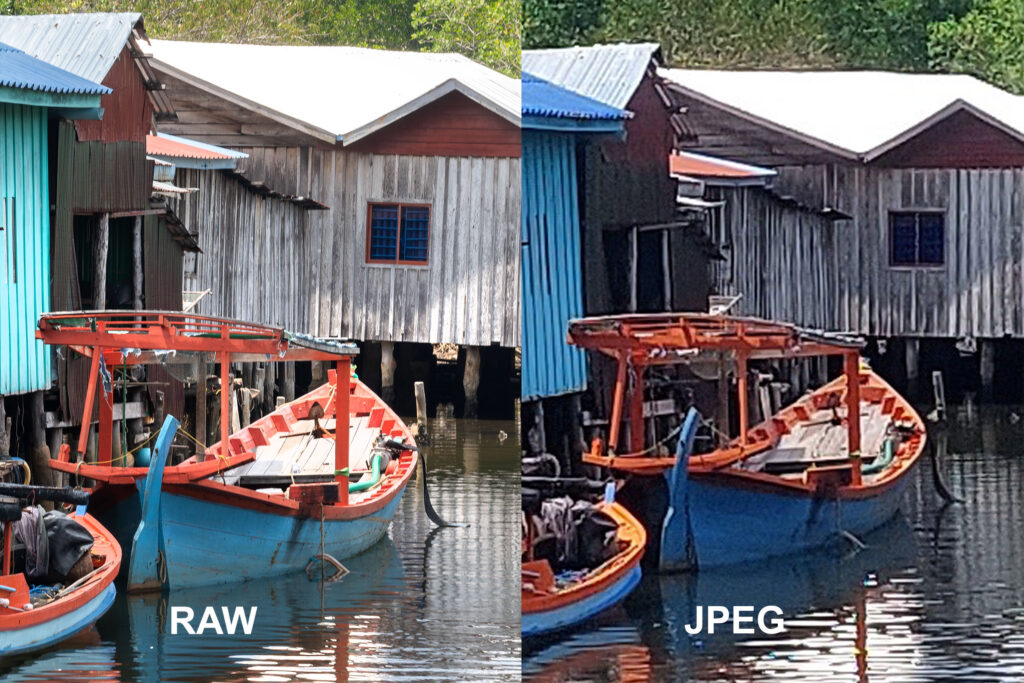
Below we compare two photos, one taken in RAW and one in JPEG, first in the original shot size and then in an enlarged detail. While in the first image it is more difficult to grasp the difference in quality, in the second it is certainly more evident. In this case, the photo taken in RAW format was first edited, enlarged and then exported in JPEG, while on the right the image already taken in JPEG was edited, enlarged and saved in the same format.
3. Photo editing
RAW is the best format for photo editing.
As we said before, if the image needs to be processed, post-produced, modified, altered, or printed in large dimensions (such as for a poster), surely RAW is the right format to choose to maintain the quality of the photo. This is why it is the format most used by professional or amateur photographers.
The high quality of the RAW file allows you to change a wide range of settings after shooting, ensuring maximum flexibility during editing.
Very often RAW images are processed in the main post-production programs, such as Photoshop and Lightroom and then saved in JPEG or other lossless formats, such as PNG or TIFF, based on the use that will be made of them.
Of course, to view and edit RAW files through a computer, it must have good performance, in terms of graphic memory and storage space.
Photoshop and Lightroom, as well as other editing programs, are also available in smartphone app format, in free and paid solutions. If our smartphone allows shooting in RAW, we will therefore be able to obtain excellent results after editing our photos, even without going through the computer.
Can you edit a JPEG with a photo editing program? Yes, it is possible, but in addition to having fewer editing options, the quality of the photo, if you make substantial changes, is compromised even more and you risk damaging the file, rather than improving it.
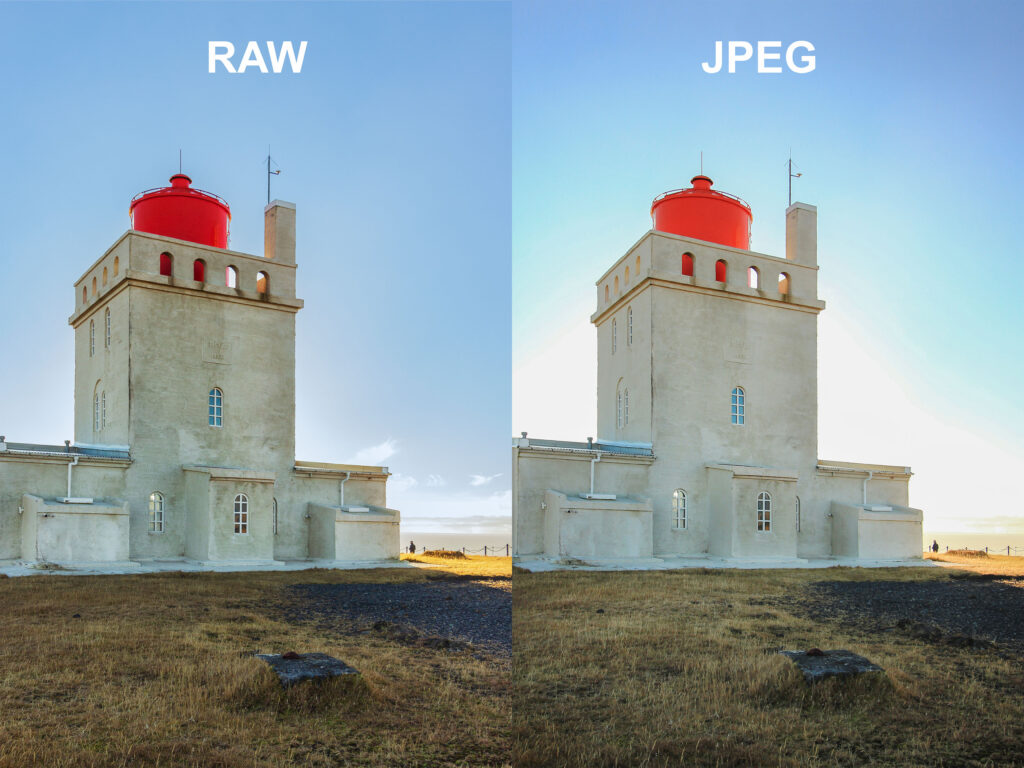
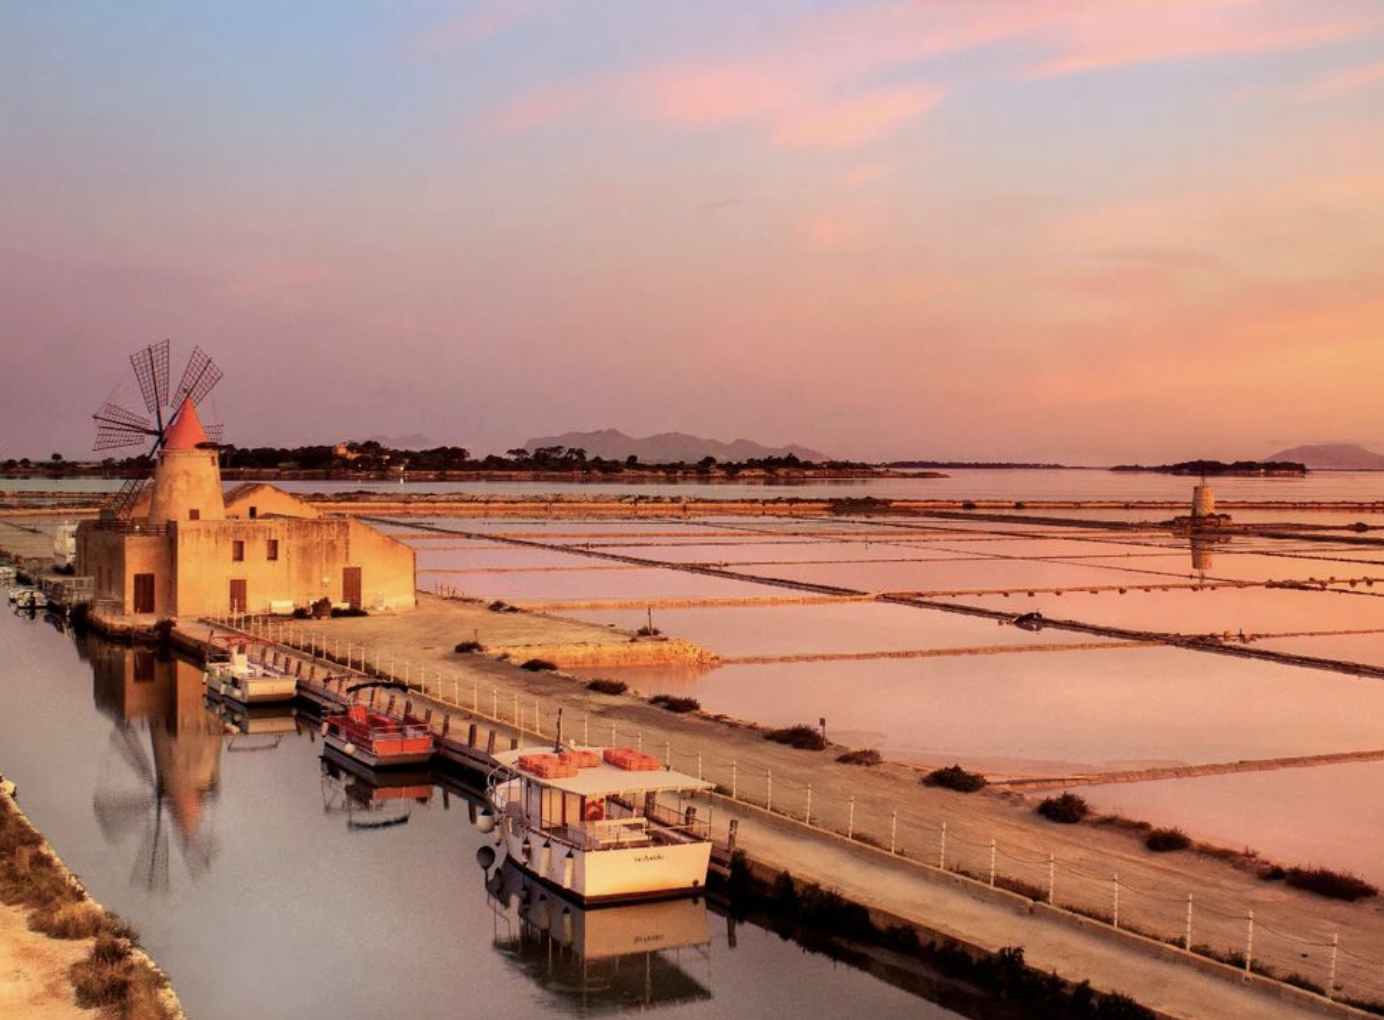
In the example below, the same photo was shot in both RAW and JPEG. After making the same changes while editing, it is clear the immense difference between a RAW file compared to JPEG. The areas of light (overexposed) of the sky on the horizon are not recovered in the JPEG (they remain white), while in the RAW the details of the scene become visible again. The RAW file also has many more details and shades of color. Just look at the main facade of the lighthouse.
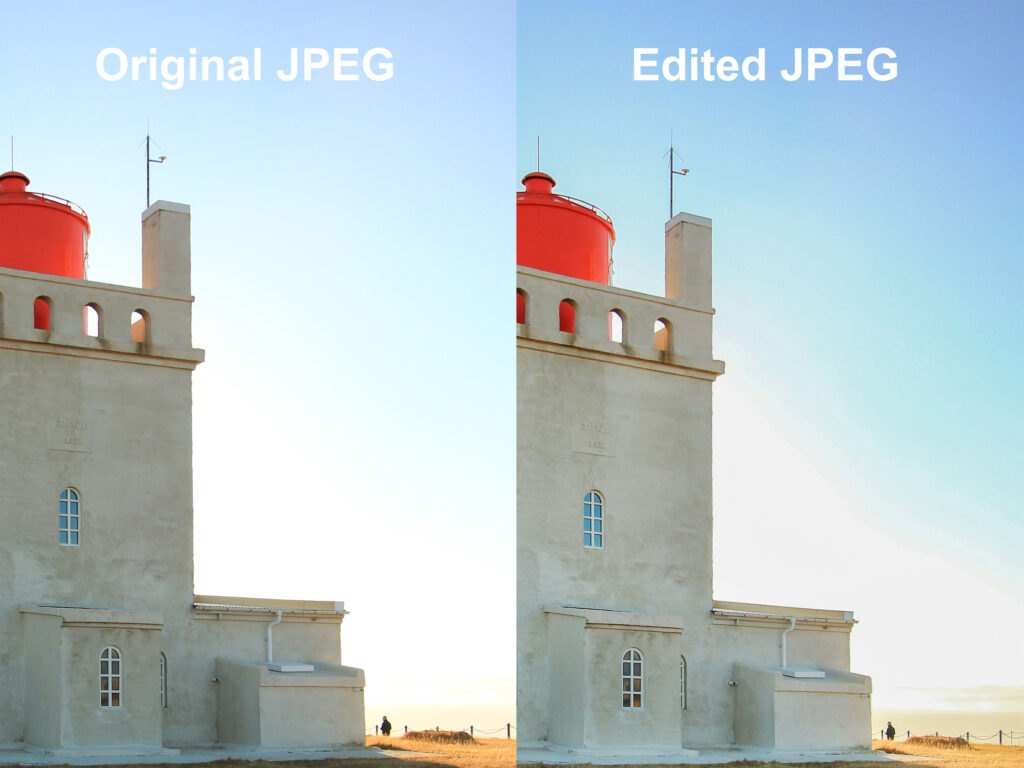
Below, a detail of the area of the sky damaged during the editing of the JPEG photo. Unlike RAW, post-production in JPEG has worsened the quality of the original JPEG file, altering the colors of the sky, which no longer has uniform shades, but bands of different tones with sharp divisions.
4. Usability
JPEG files are more convenient to use.
This is because not all photo viewing programs allow you to open RAW files. To view them, it will therefore be necessary to download specific software or convert them to JPEG. Furthermore, it may happen that we see RAW files in many different extensions, such as .CR2, .RW2, .NEF, .ARW, .SR2, .ORF, .PEF, .RAF, depending on the brand of camera used, which are not universally recognized as JPEG instead.
Furthermore, being much heavier, RAW files can slow down applications, unless the computer has good performances.
Given that usually these files are then sent, shared, uploaded to social networks or websites, most people who work with RAW files, once the editing is finished, save them in more manageable formats, such as the JPEG.
Once these points have been clarified, let’s now see some technical and practical aspects that will help us in passing from one file to another.
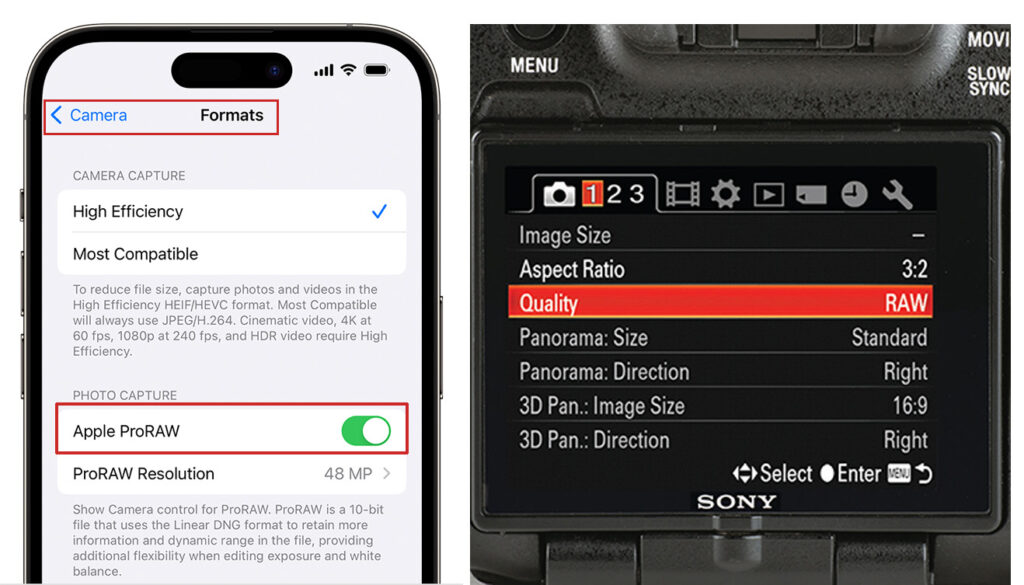
5. RAW or JPEG: how to set our devices
The format in which you want to shoot can be selected in all cameras and in the most recent smartphones, by accessing the settings menu. Naturally, since RAW files are much heavier, the maximum number of photos stored in the phone’s memory or in the camera’s SD card will drastically decrease. The choice will always depend on the use we want to make of them. In cameras, it is also possible to take a photo and save it in RAW+JPEG at the same time: in this way two files will be generated, a JPEG ready to use and a RAW to be worked on. Sometimes this choice can be very useful, but remember that in this way the memory space will run out even faster.
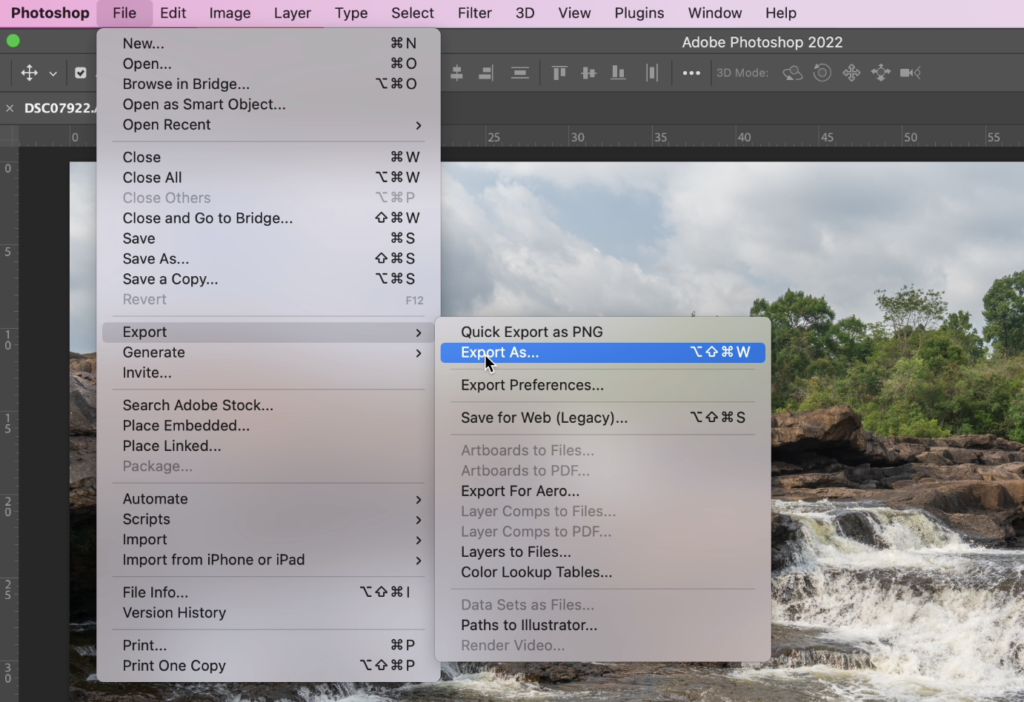
6. Converting a RAW file to JPEG
You can convert a RAW file to JPEG by opening it in an editing program and saving or exporting it in a different format from theFile window. In the images below, we see how to export a RAW file to JPEG with Photoshop. There are also some easy-to-use online apps where you can directly upload a RAW photo, by dragging it to the web screen, to convert it to JPEG or other formats.
If we need a higher quality than JPEG, especially in occasions such as large prints or fine art prints, or if we have to archive many files before editing, but we want to preserve their quality, we can choose to export the file in PNG or TIFF, which are subject to compression but lossless.
So again, the conversion depends on the use of the file.
After clicking Export As…, you’ll find a screen where you can choose whether to export to JPEG or other formats, a preview on the left of the file size, and further settings on the right to change the weight and quality of your file.
7.JPEG or RAW? Some practical examples
Let’s see, therefore, some examples to choose when to shoot in JPEG or RAW.
If we’re taking photos that we’re not going to edit with post-production and we’ll have to use for social pages or online sharing, it’s perfectly fine to shoot in JPEG: so we’ll have files that are light and fast enough to view, share, download, upload online.
If, on the other hand, we intend to modify the file in post-production, also to use it on the web, or we want to print our photos, perhaps in fine art or simply in a format larger than the simple 10×15 or 12×18, such as posters, then we should opt for the RAW format.
Naturally, for all professional work, such as photos taken for events, exhibitions, graphic work or for any client, a minimum of post-production is practically a must, so the RAW format must be chosen.
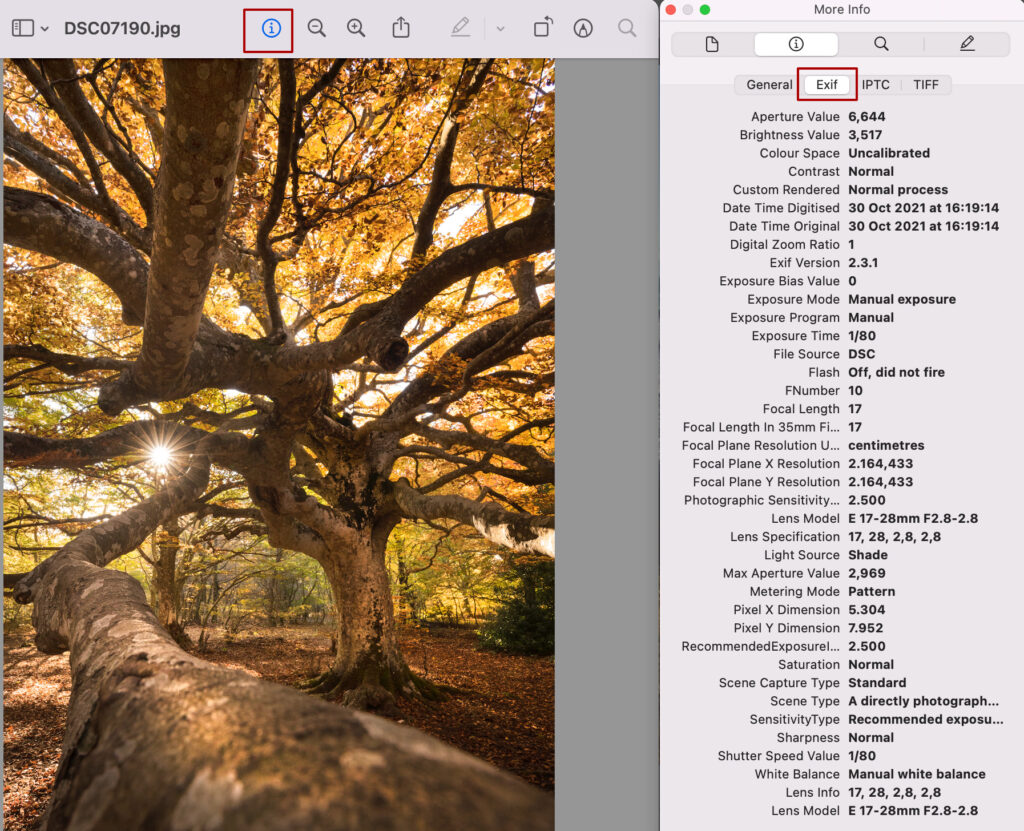
8. One last tip: the EXIF files
Every time we take a photo, the EXIF (Exchangeable Image File Format) data is associated with it, which provides informationconcerning the time and date of shooting, the make and model of the camera, the settings about the aperture, the shutter speed, the ISO, and even the geographic coordinates of the shooting location (where active or if can be activated) and copyright information (where entered).
These data, less detailed than digital cameras, are also present in photos taken with smartphones.
To view them, just access the properties of the photo taken, both from a smartphone and a camera. The EXIF data remains attached to the file even after exporting and editing, compressing and sending the files, unless you want to remove them on purpose with specific software.
These files are very useful for analyzing and verifying the images produced, for understanding the settings used in a photo that we like and for repeating them in similar lighting conditions. From EXIF files you can really learn a lot if you want to improve the technique, both by analyzing and comparing your own photos, taken with different settings, and by taking inspiration from the images of others, especially if you are approaching the manual settings for the first time.
What are you waiting for?
Follow our advice and tag us in your photos, we will publish them on our pages InstagramandFacebook.
If you liked our article, share it and let us know in the comments.
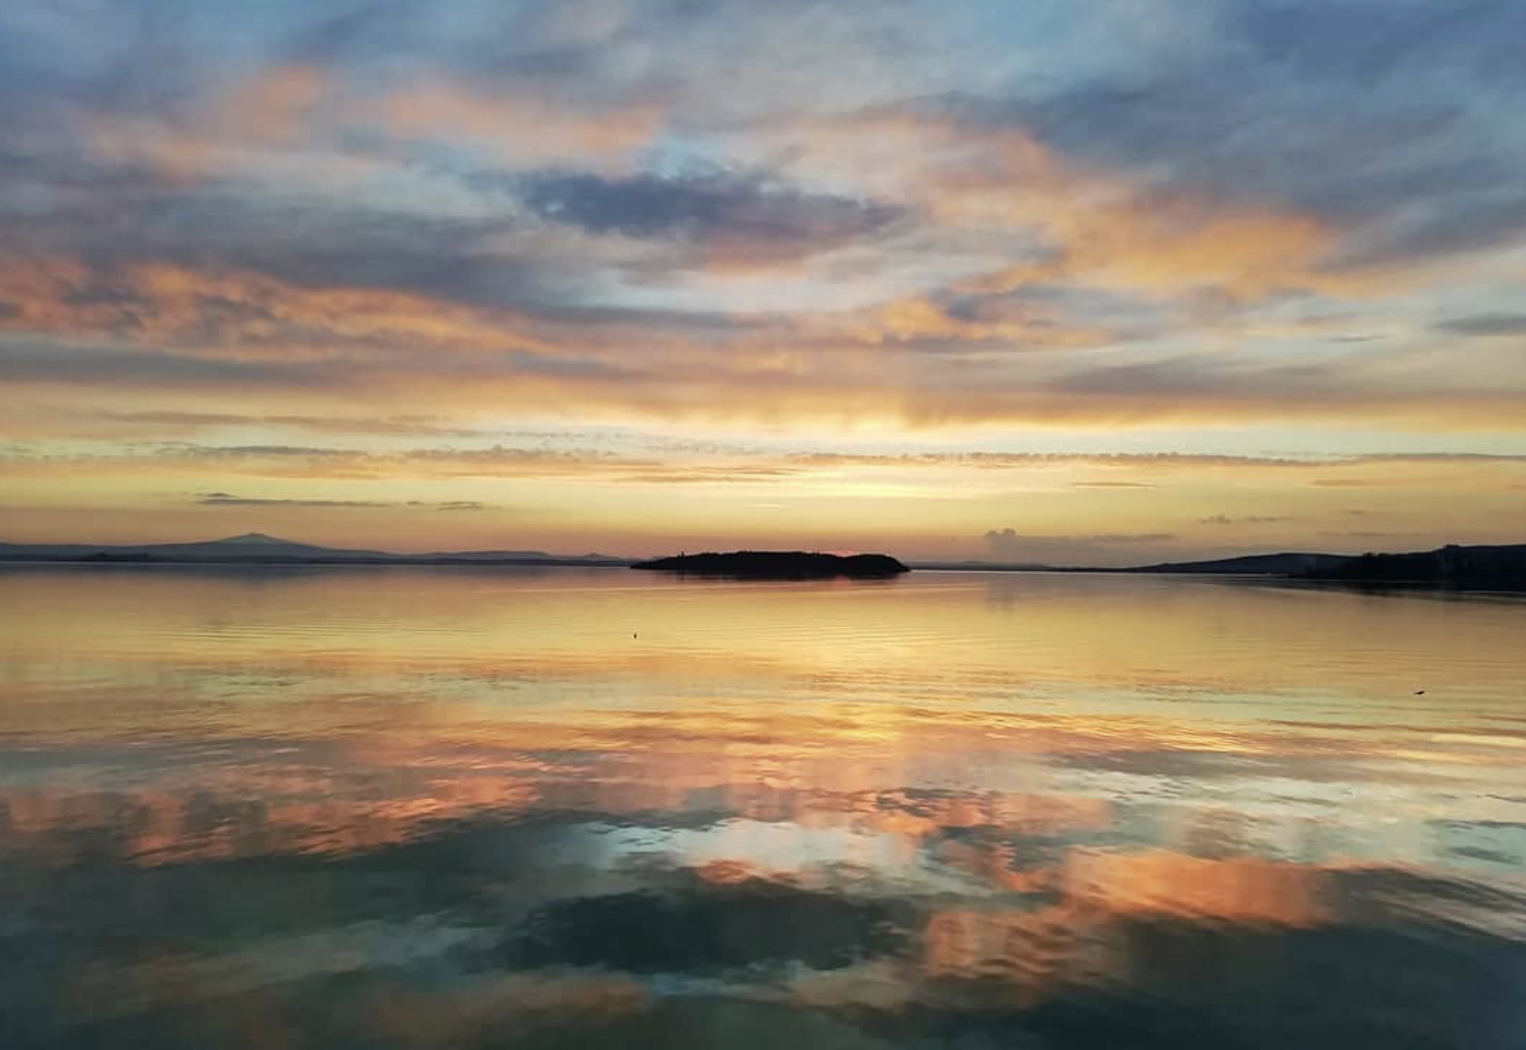
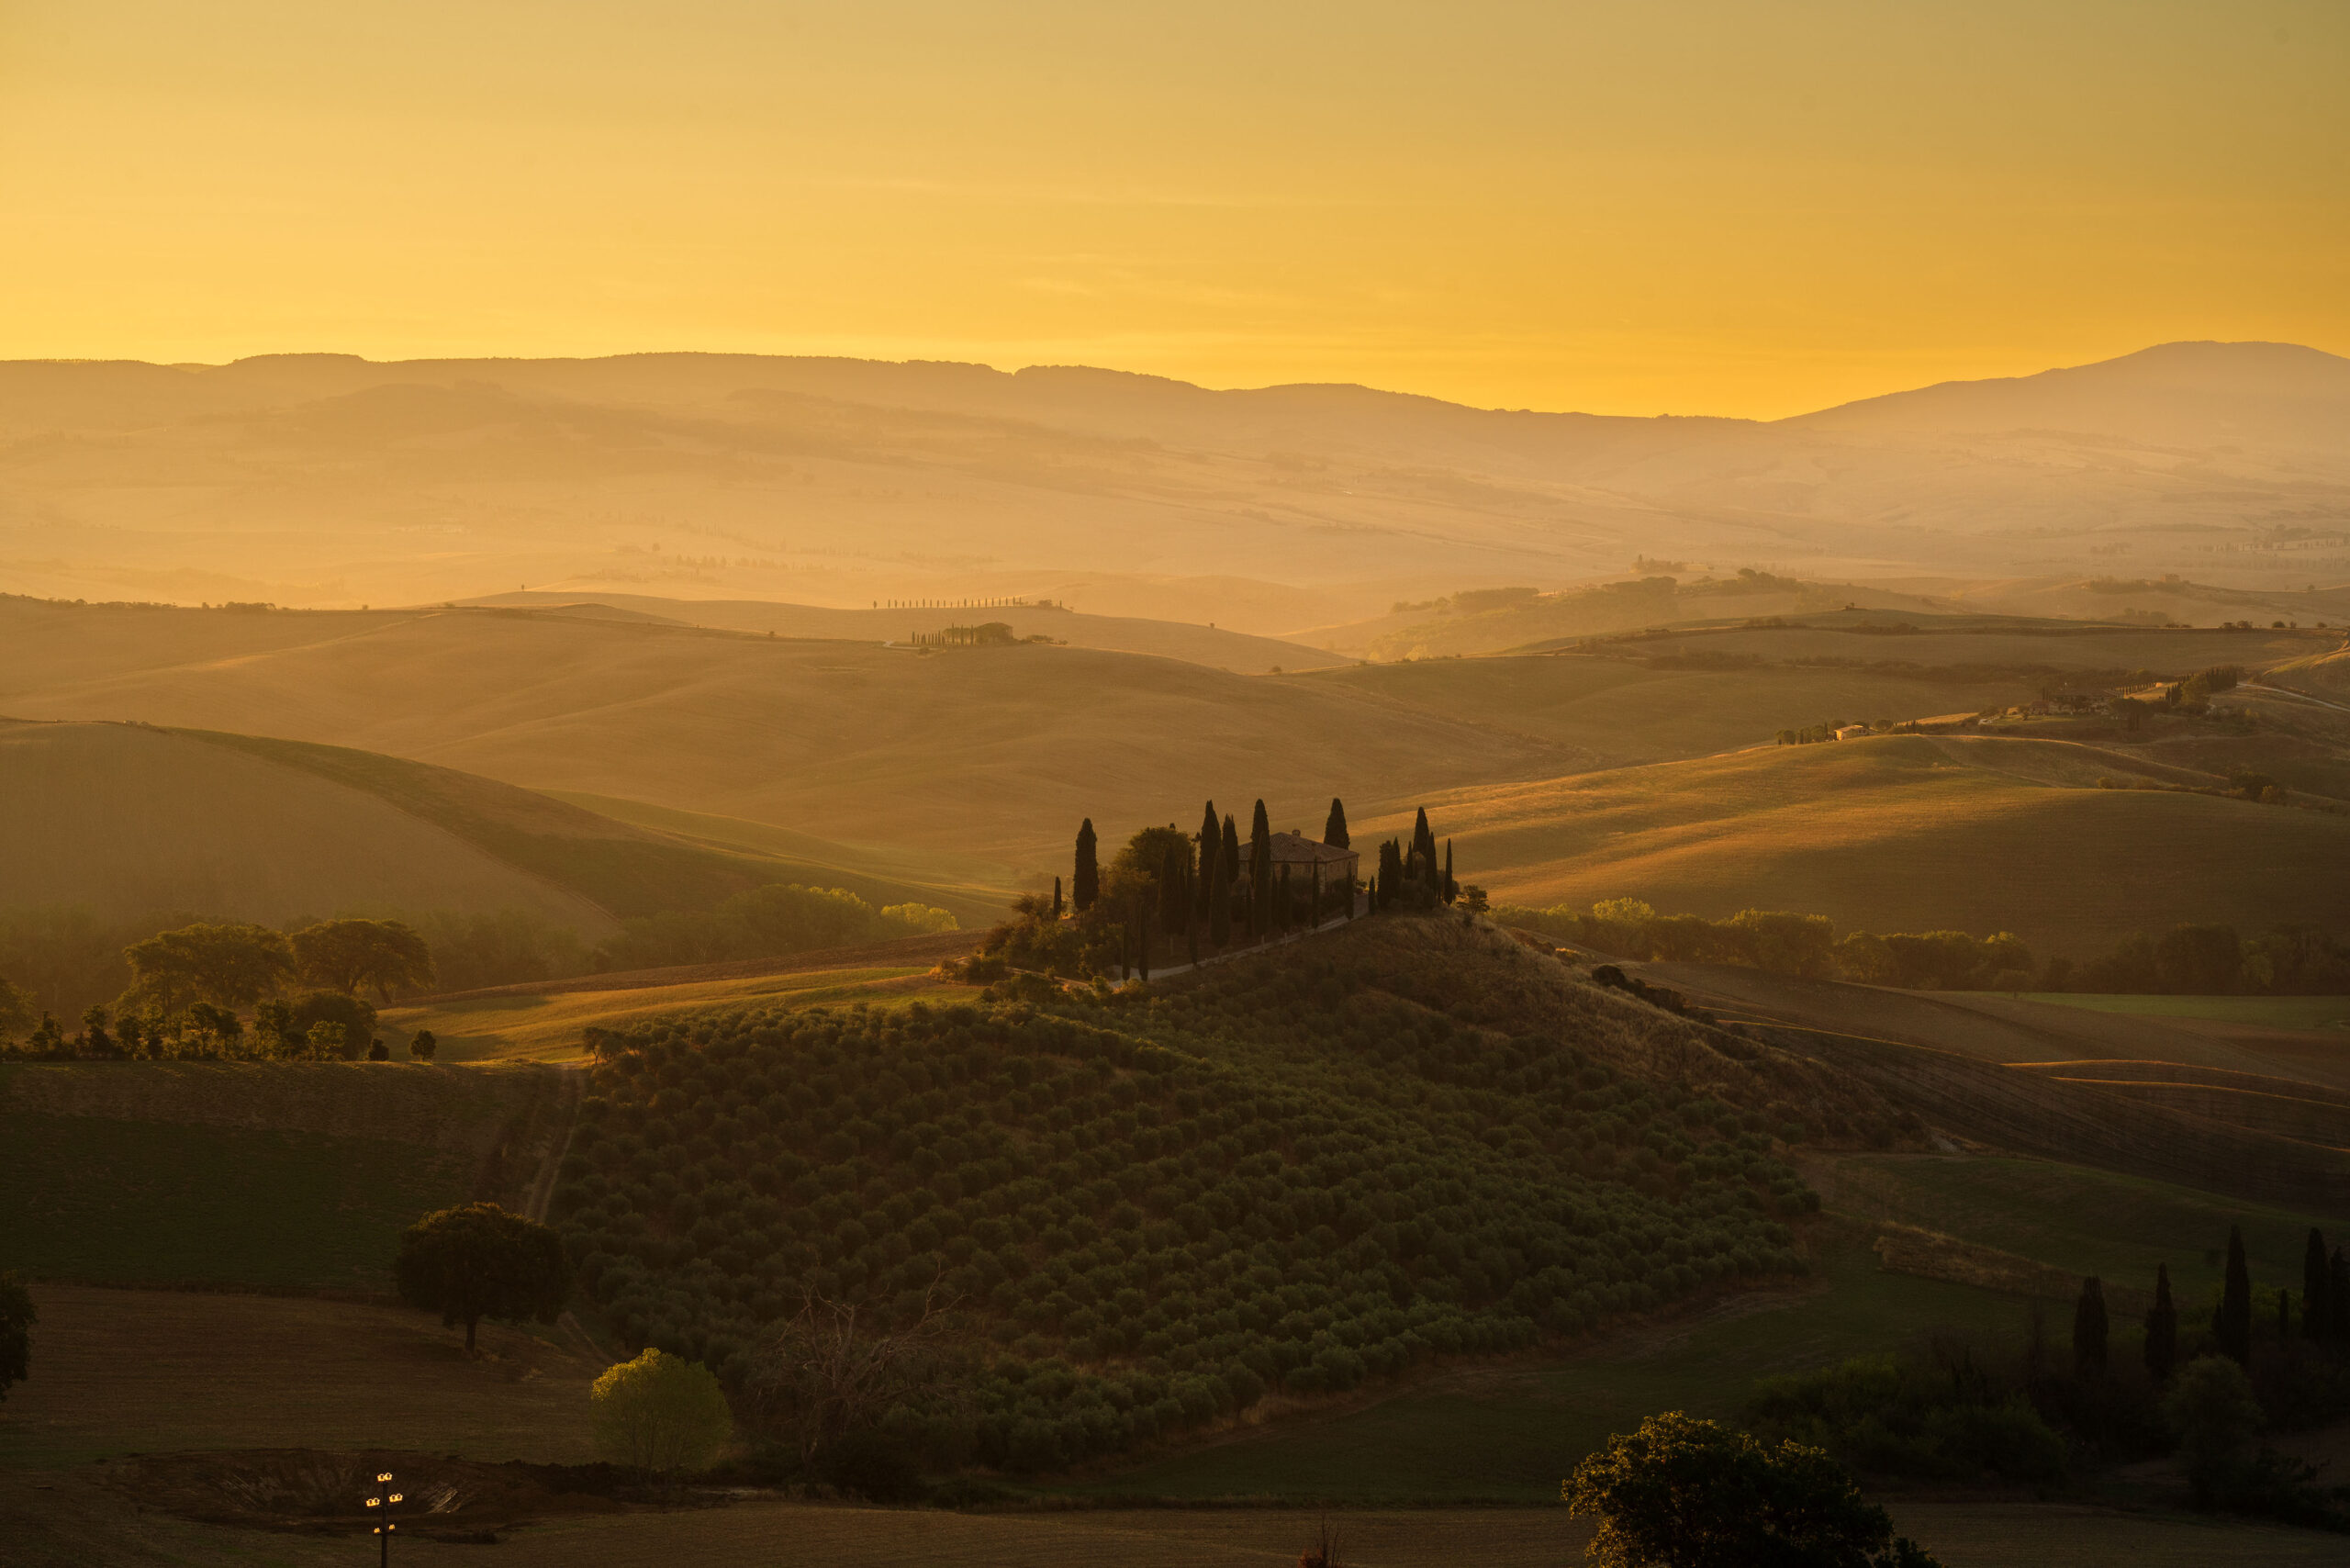
Discover our sunrise and sunset photography tips and practical examples to realize beautiful shots and capture unforgettable atmospheres!
But managing those light conditions, in which there is a lot of contrast between the brightness of the sky and the dark earth, is not easy at all.
So, let’s see how to best manage our camera to get incredible photos, which will not betray the beauty of what our eyes observe.
Often, in fact, looking at our photos, they do not seem to represent what we have seen in person at their best. This happens mainly because our eye, unlike the camera, has an extraordinary ability to adapt to almost any existing light condition, even when observing environments with different exposures at the same time. For the camera however, when the dynamic range of the image is greater than the capabilities of the sensor, some very bright or very dark parts will not be able to be captured correctly, resulting black or white respectively.
So how can we compensate for this problem in our cameras?
Follow our advice!
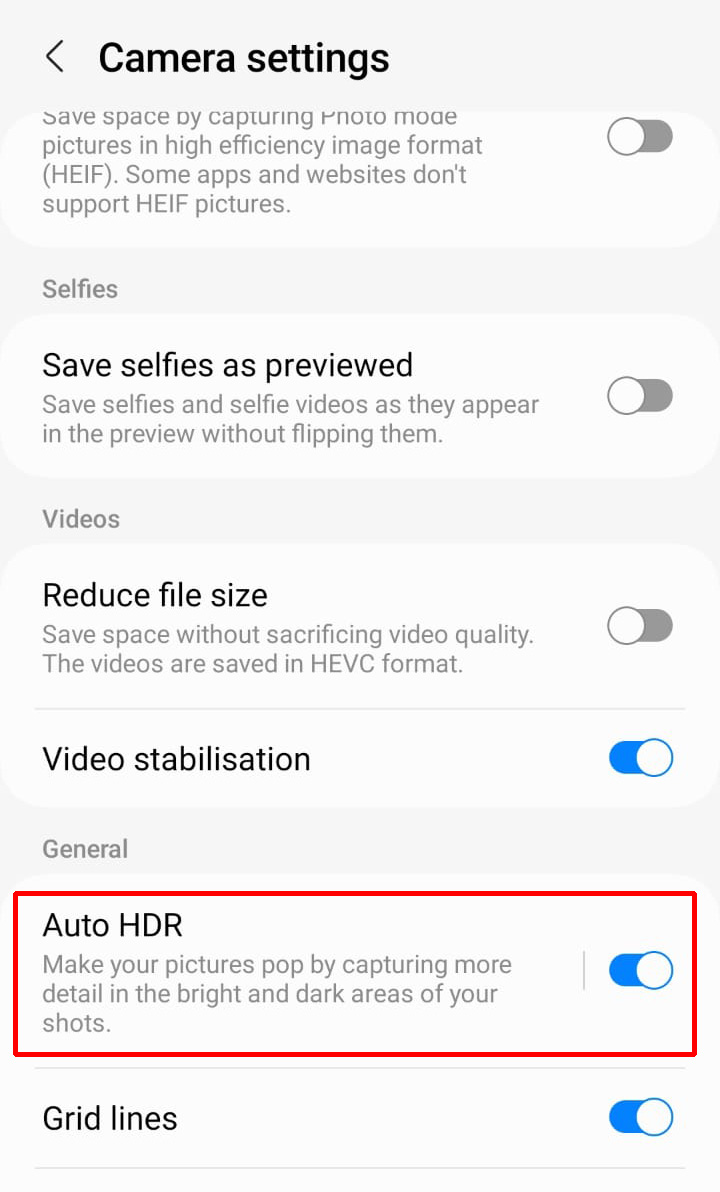
1. With your smartphone
If you use a smartphone, automatic HDR is usually present, just activate it and focus by touching the screen in a dark part of the frame, to calibrate the brightness. In this way the lightest part, that of the sky, will become almost white.
But after taking the shot, looking back at the photo, you will see that the phone will have automatically recorded several exposures and the result will be perfect, with no areas that are too dark or too light, and with bright colors.
Automatic HDR is usually already active, otherwise look for it in the settings. If you shoot against the light and insert a human subject, but the color of the sky is too light and the face remains dark, click right above the face before shooting, to increase the brightness.
After shooting, thanks to the HDR mode, you will also have recovered the background colors and at the same time you will have your subject bright and recognizable!
In the image below you can
Ph:@giadaantonini_photography
Ph:@giadaantonini_photography
2. The filters with the reflex
If, on the other hand, you use a reflex, you can use two methods: the first is to use a degrading filter, that is a glass plate that goes from completely transparent to black, to be mounted in front of the lens thanks to a holder, in order to recalibrate the exposure of the darker areas.
The filters are of different materials and intensities, more nuanced or with a sharper edge, depending on your needs, but you won’t need to spend too much money to start with.
You will also need the holder to screw onto the lens (check that your lens has the thread) and where to insert the filter.
By positioning the dark area in correspondence of the brightest part of the photo, you will be able to compensate for the difference in exposure and obtain ready-to-use photos, without the need for post-production.
Furthermore, using this method you will not need a tripod to take multiple overlapping photos, as we will see with the next method, but you will only need it if the light conditions will force you to use long exposure.
In this case, pay attention to where the darkest part of the filter ends and the transparent part begins, especially if this division is clear. By placing the filter on the lens, make sure that this line of demarcation happens right on the point where the exposure of the landscape you are shooting changes.
Ph: @giadaantonini_photography
Ph: @giadaantonini_photography
3. Bracketing with the reflex
The second method, without filters, is to take multiple photos with different exposures and then combine the shots in post-production, with a special automatic command. This technique is called bracketing.
Usually, you take at least three shots or five shots, from one very light to one very dark, one normally exposed, one slightly underexposed, and one slightly overexposed. In this way, each shot will have a perfectly exposed area, and only by putting them all together we will obtain the correct exposure throughout the image.
You can apply this method changing the settings about auto exposure bracketing in your camera, turning the dial to set the different exposures, before taking the three photos.
Most cameras have also a special setting to take these shots, just choose the number of total shots you want and the number of exposure compensation stops between shots.
In each of the shots, the aperture will be left constant, so as not to change the depth of field and therefore the focus of the subject between one shot and another, but the shutter speeds will change.
The first shot will be taken with the setting you chose, the second will capture the brightest areas, while the other shot will capture the darkest ones.
You can then do some simple shooting tests to understand how to improve the settings.
Naturally, for this technique, it would be better to use a tripod or to find a support to keep the camera stable, not only because some shots could take a long time and therefore the single photo could be blurry, but also because the photos should be perfectly the same to simplify post-production work.
It is also better to shoot in .RAW mode (just choose this format from the various available in the camera settings). This way your photos won’t lose quality when editing in post-production.
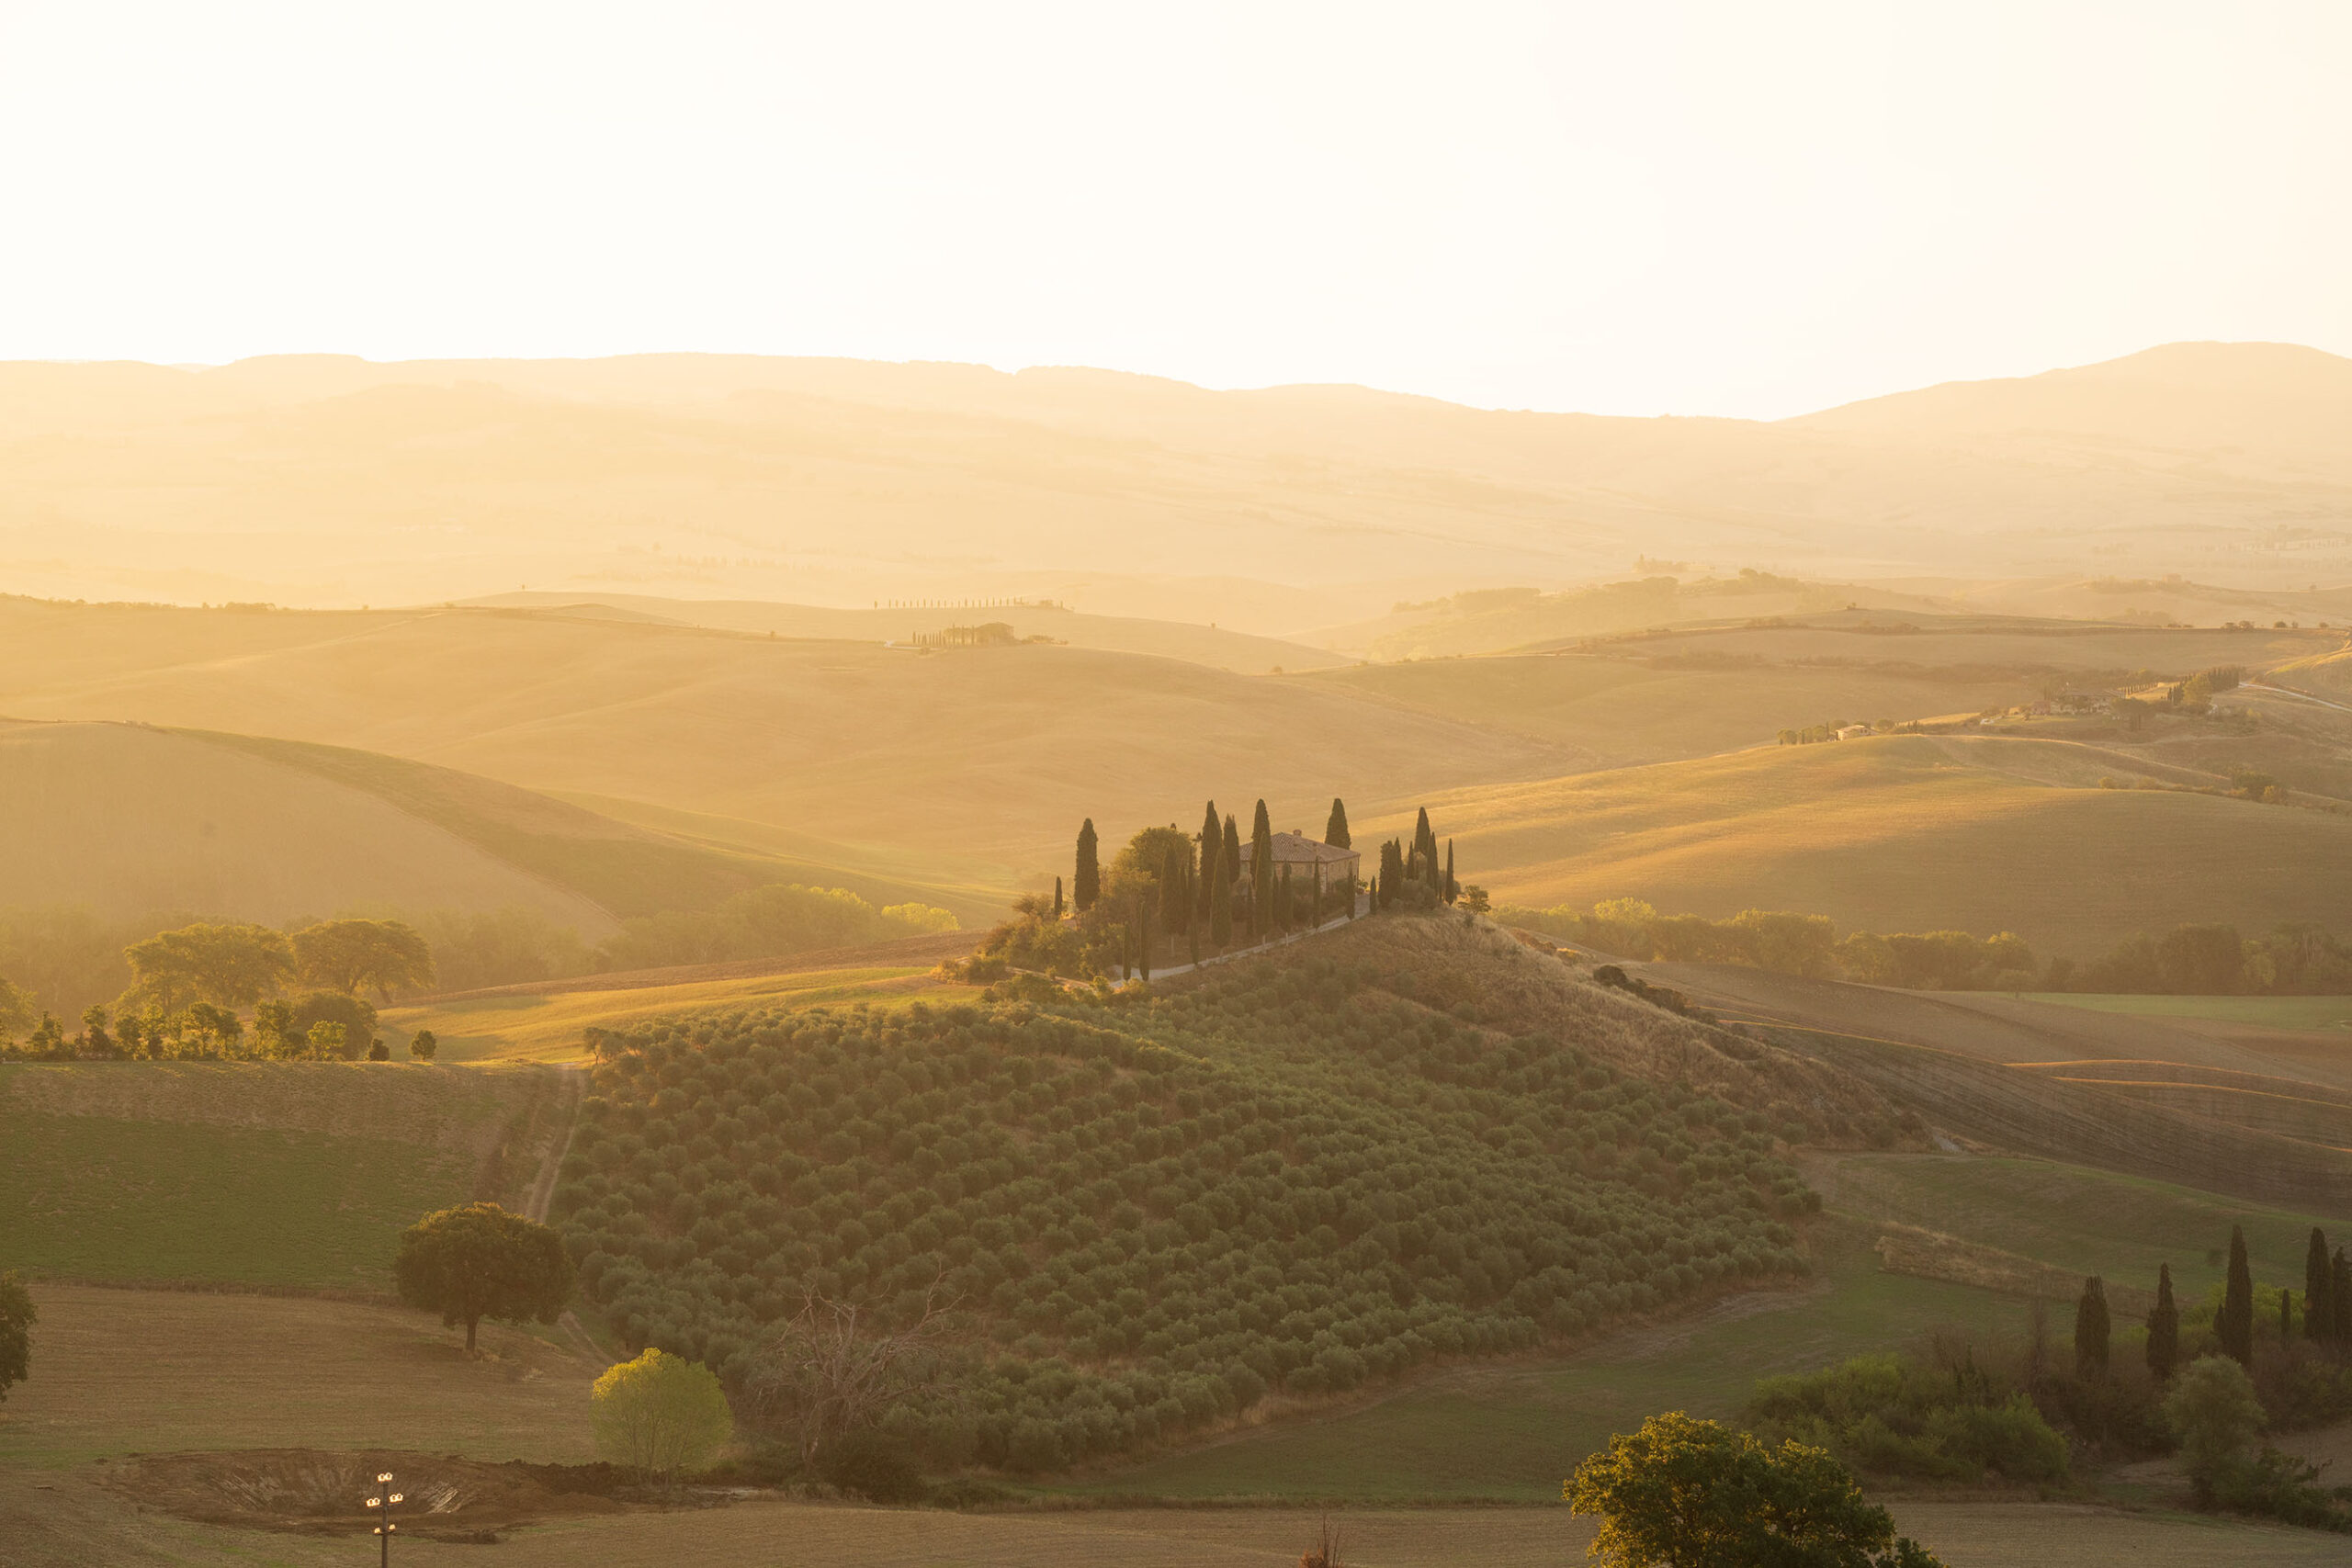
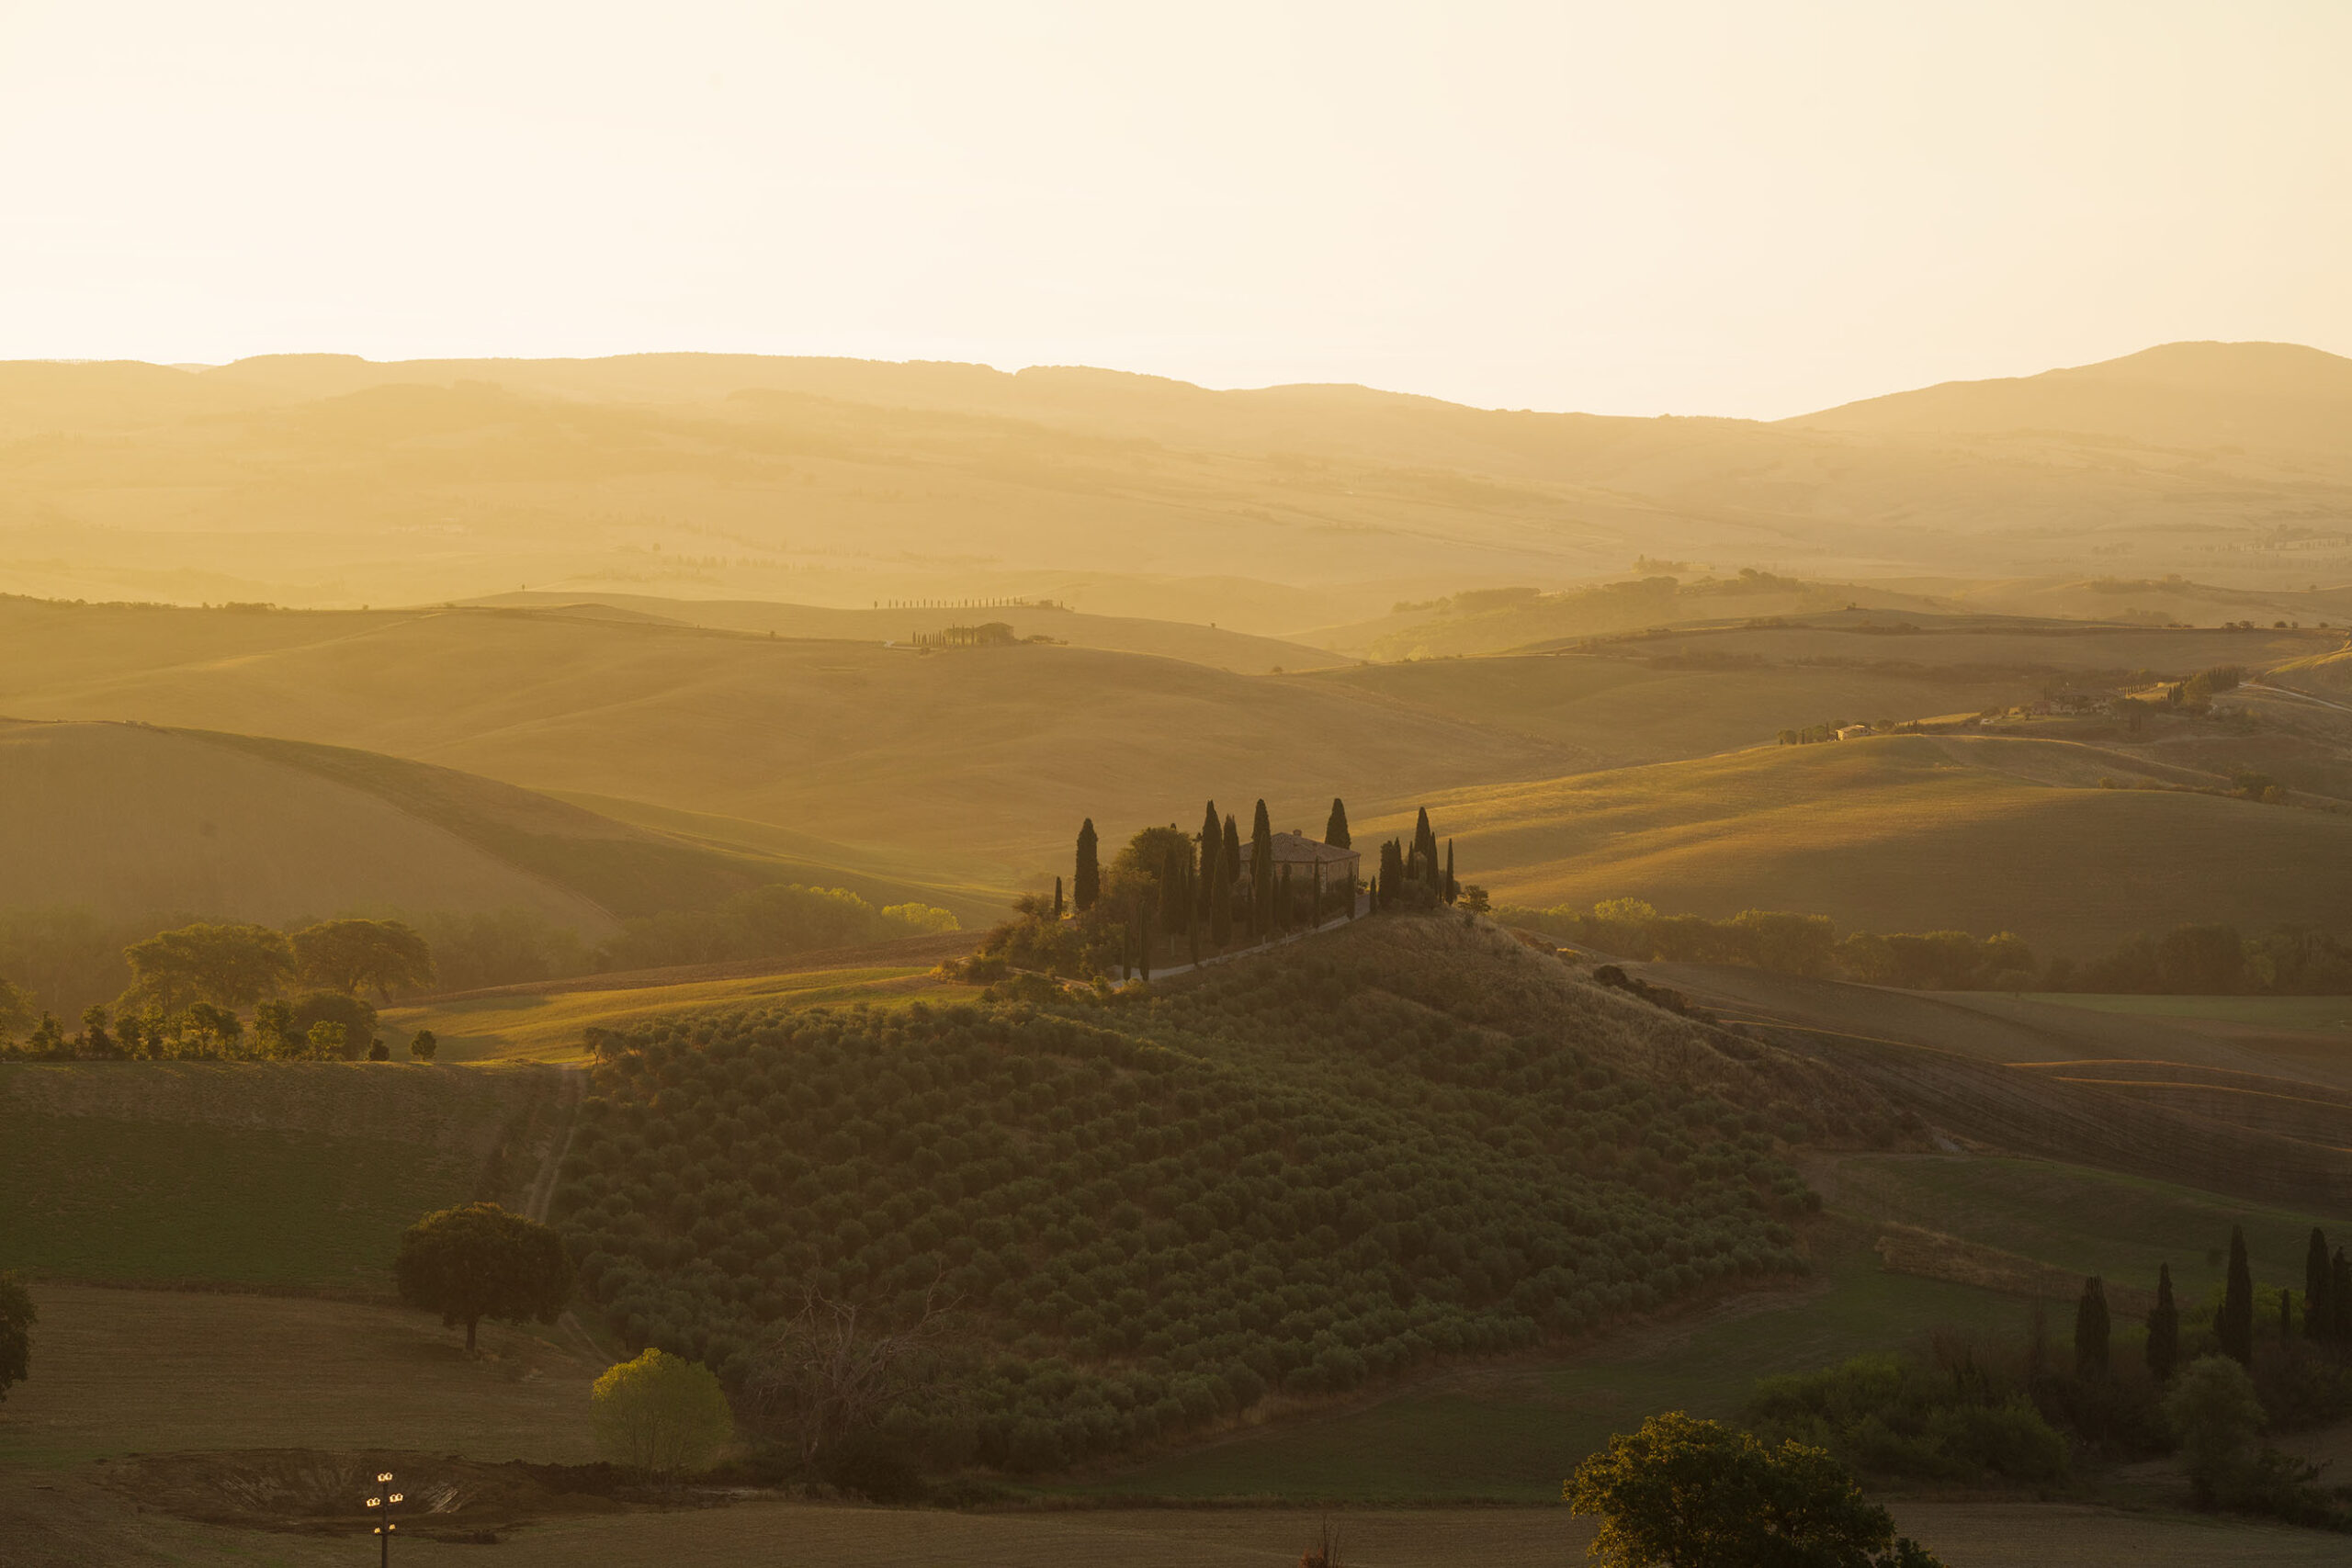
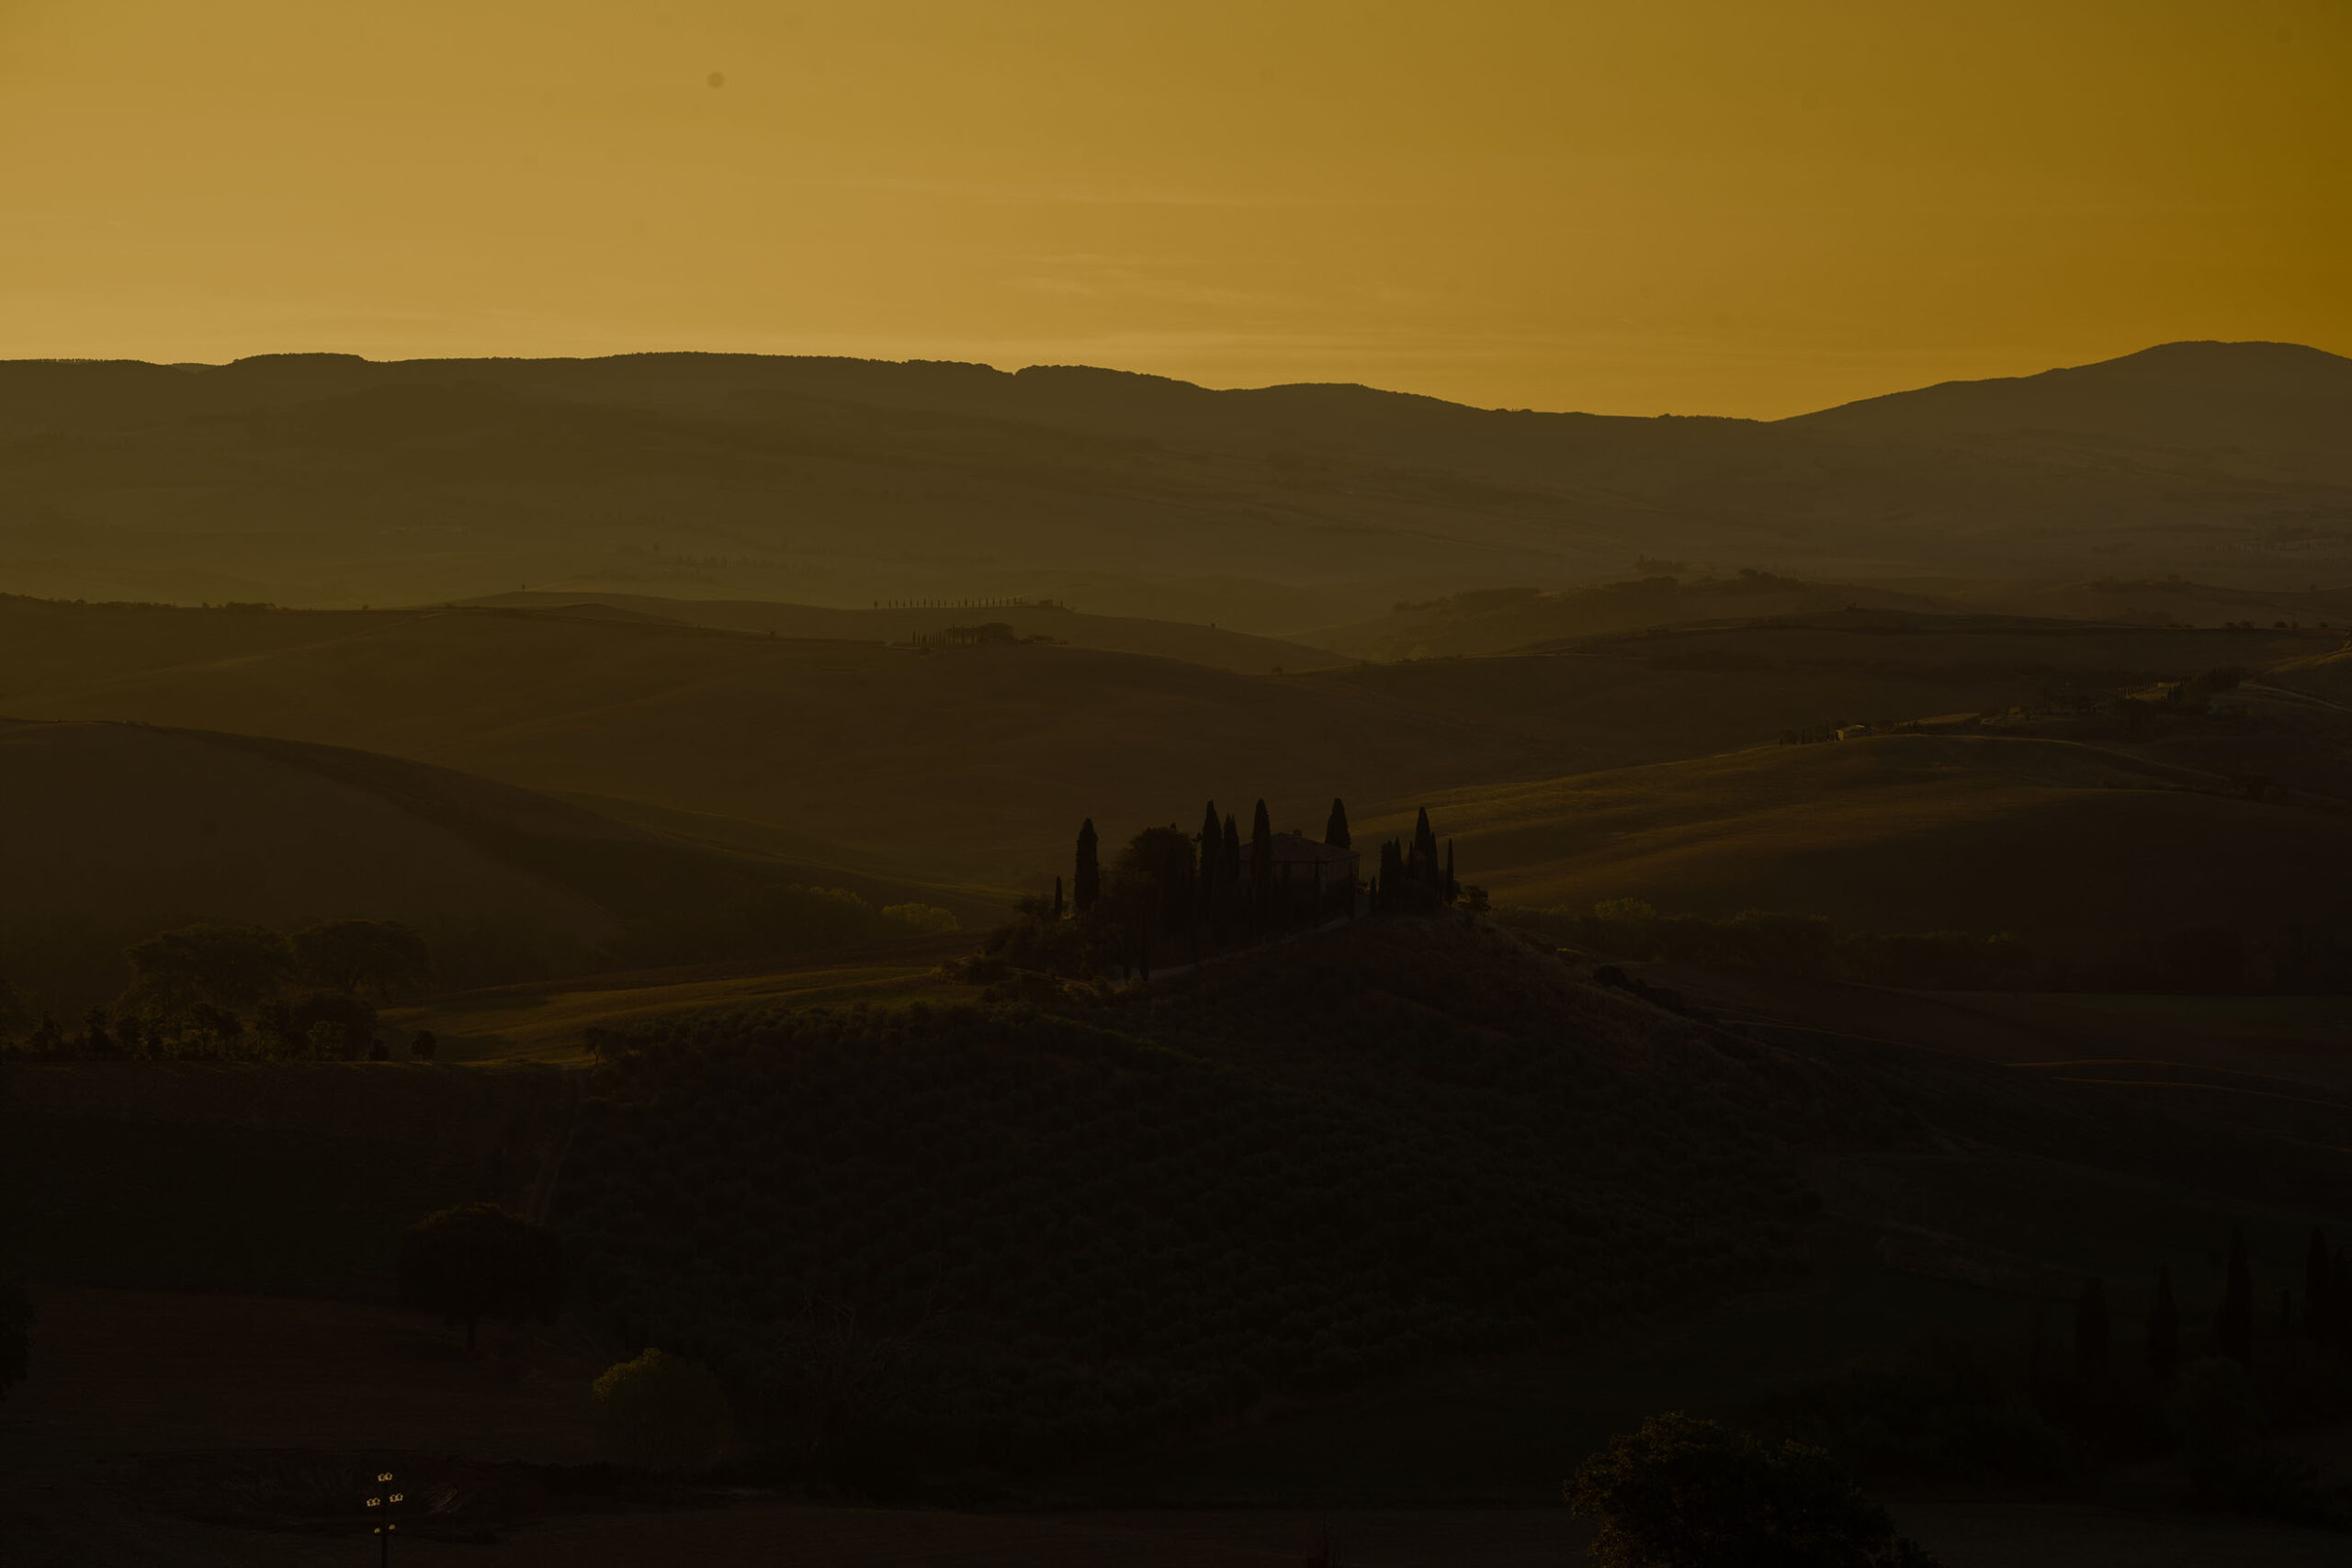
In the following images you can see the tree shots taken with the bracketing method. The last photo is the final one, after post-production.
1st photo
2nd photo
3dr photo
Ph: @giadaantonini_photography
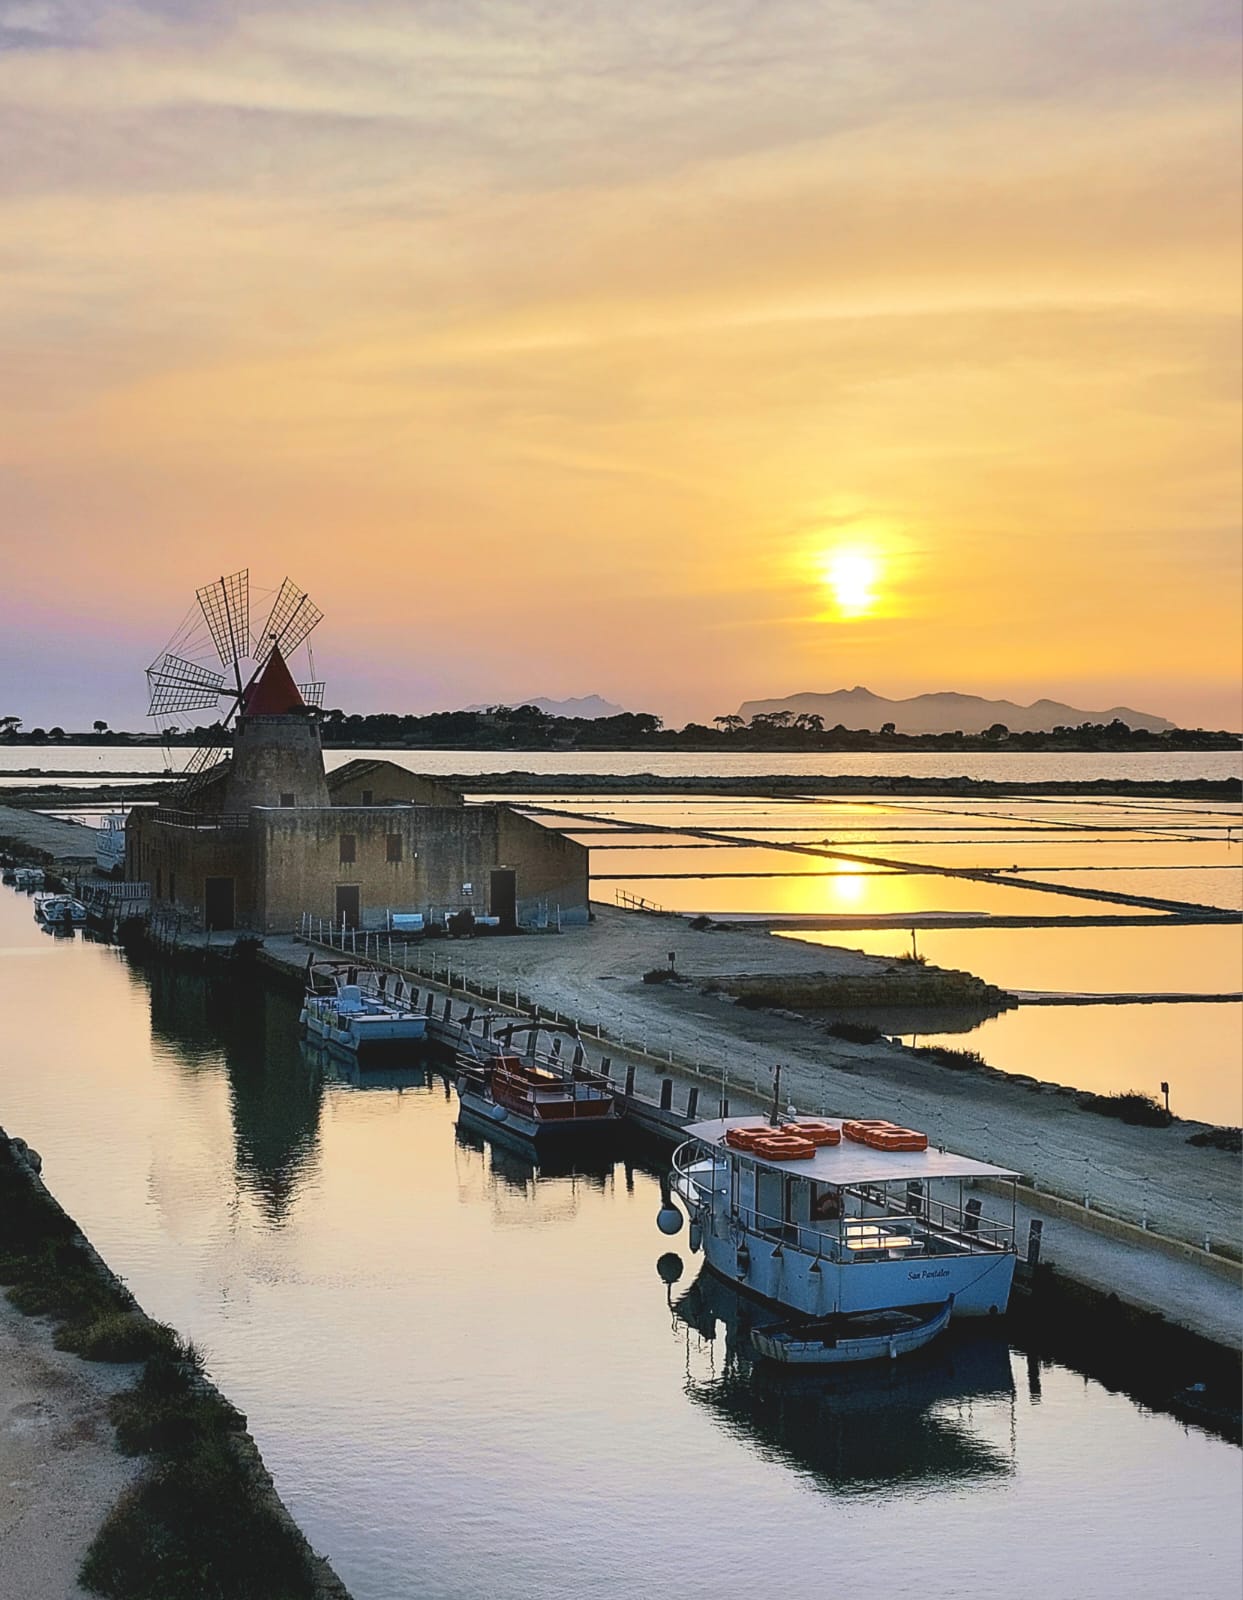
4. Don’t just focus on the sun!
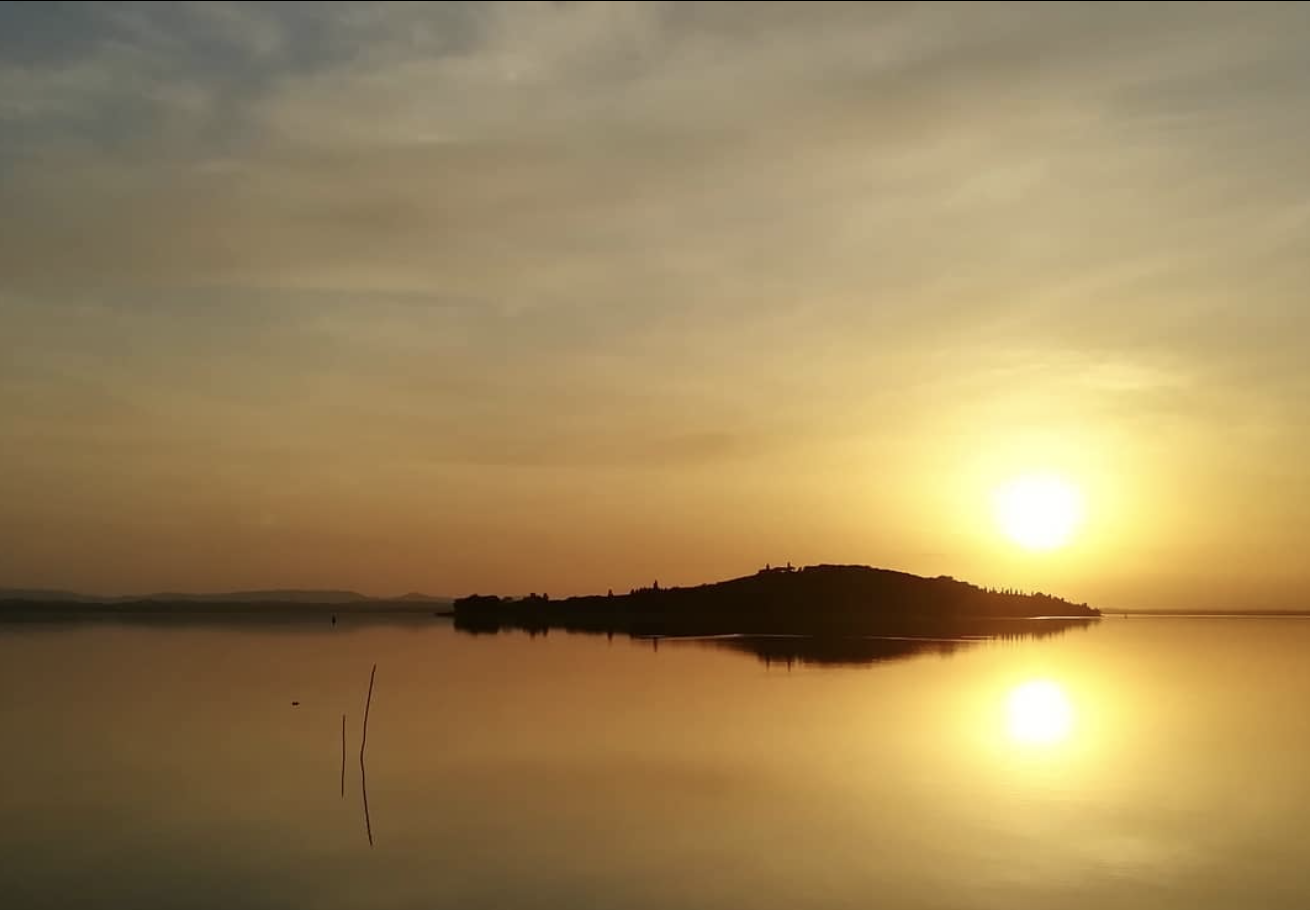
If the sun is full and too bright, before sunset or just after sunrise, try not to include it in the scene because the photo would be overexposed or you will have annoying glares or reflections (the fleur is not always appreciable).
Concentrate rather on the colors of the sky or of the subjects in the photo, which take on amazing shades because they are lightened by the warm light of dawn or dusk.
In this way you will be able to take much more interesting photos than framing the sun!
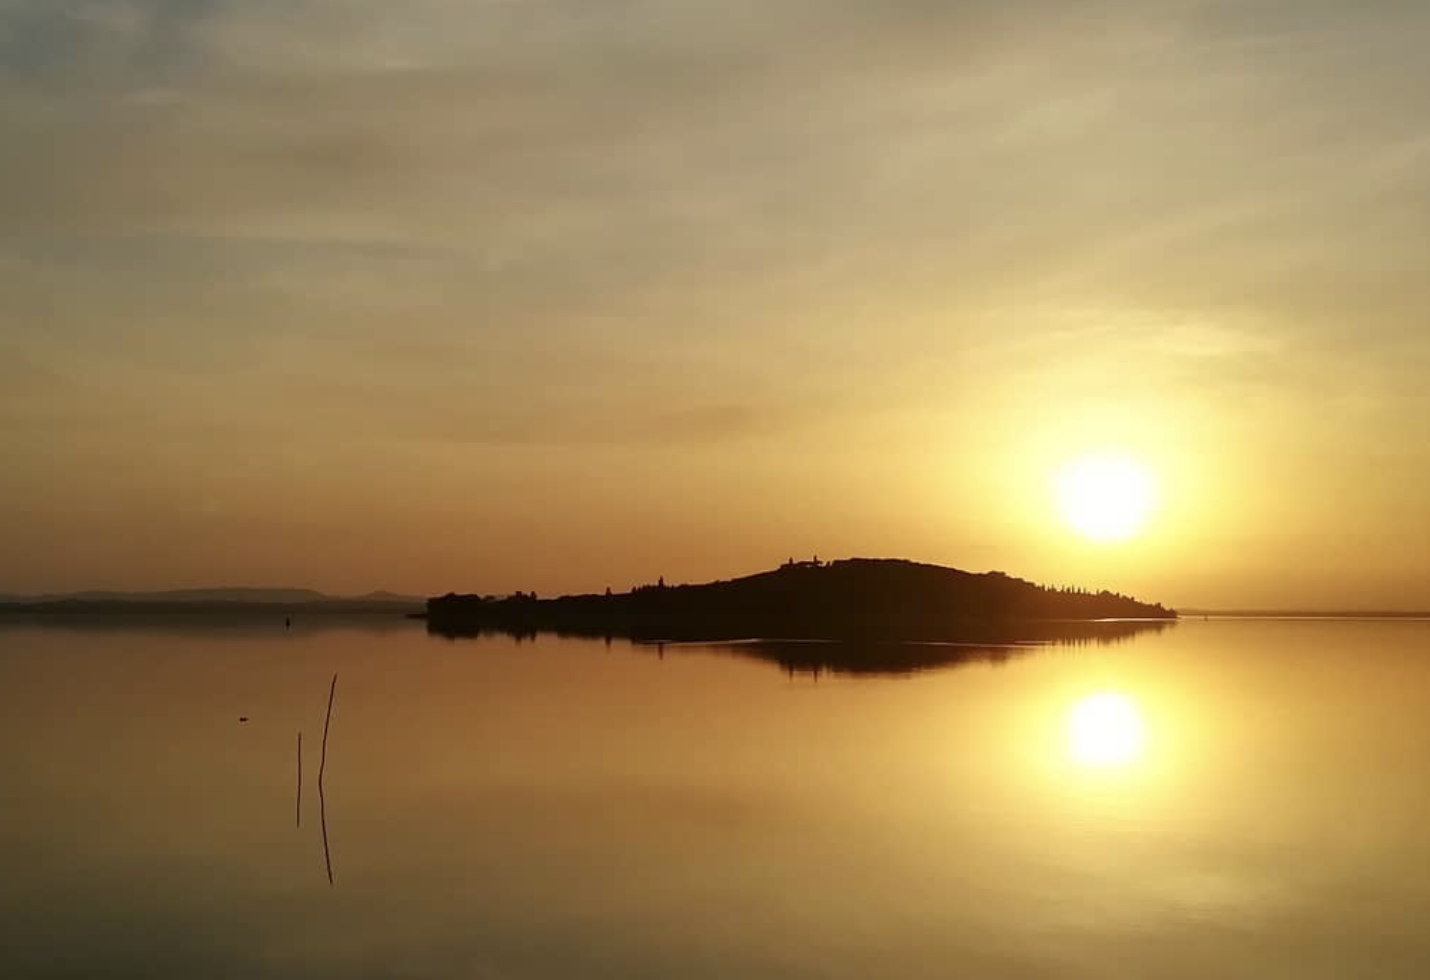
The best moment to frame the sun is certainly sunset, when it is about to disappear behind the horizon, because its brightness will not compromise the scene and your camera sensor.
At dawn it is much more difficult for the amount of light to be sustainable, unless there are clouds covering the sun.
Ph: @giadaantonini_photography
Ph: @giadaantonini_photography
Ph: @giadaantonini_photography
Ph: @giadaantonini_photography
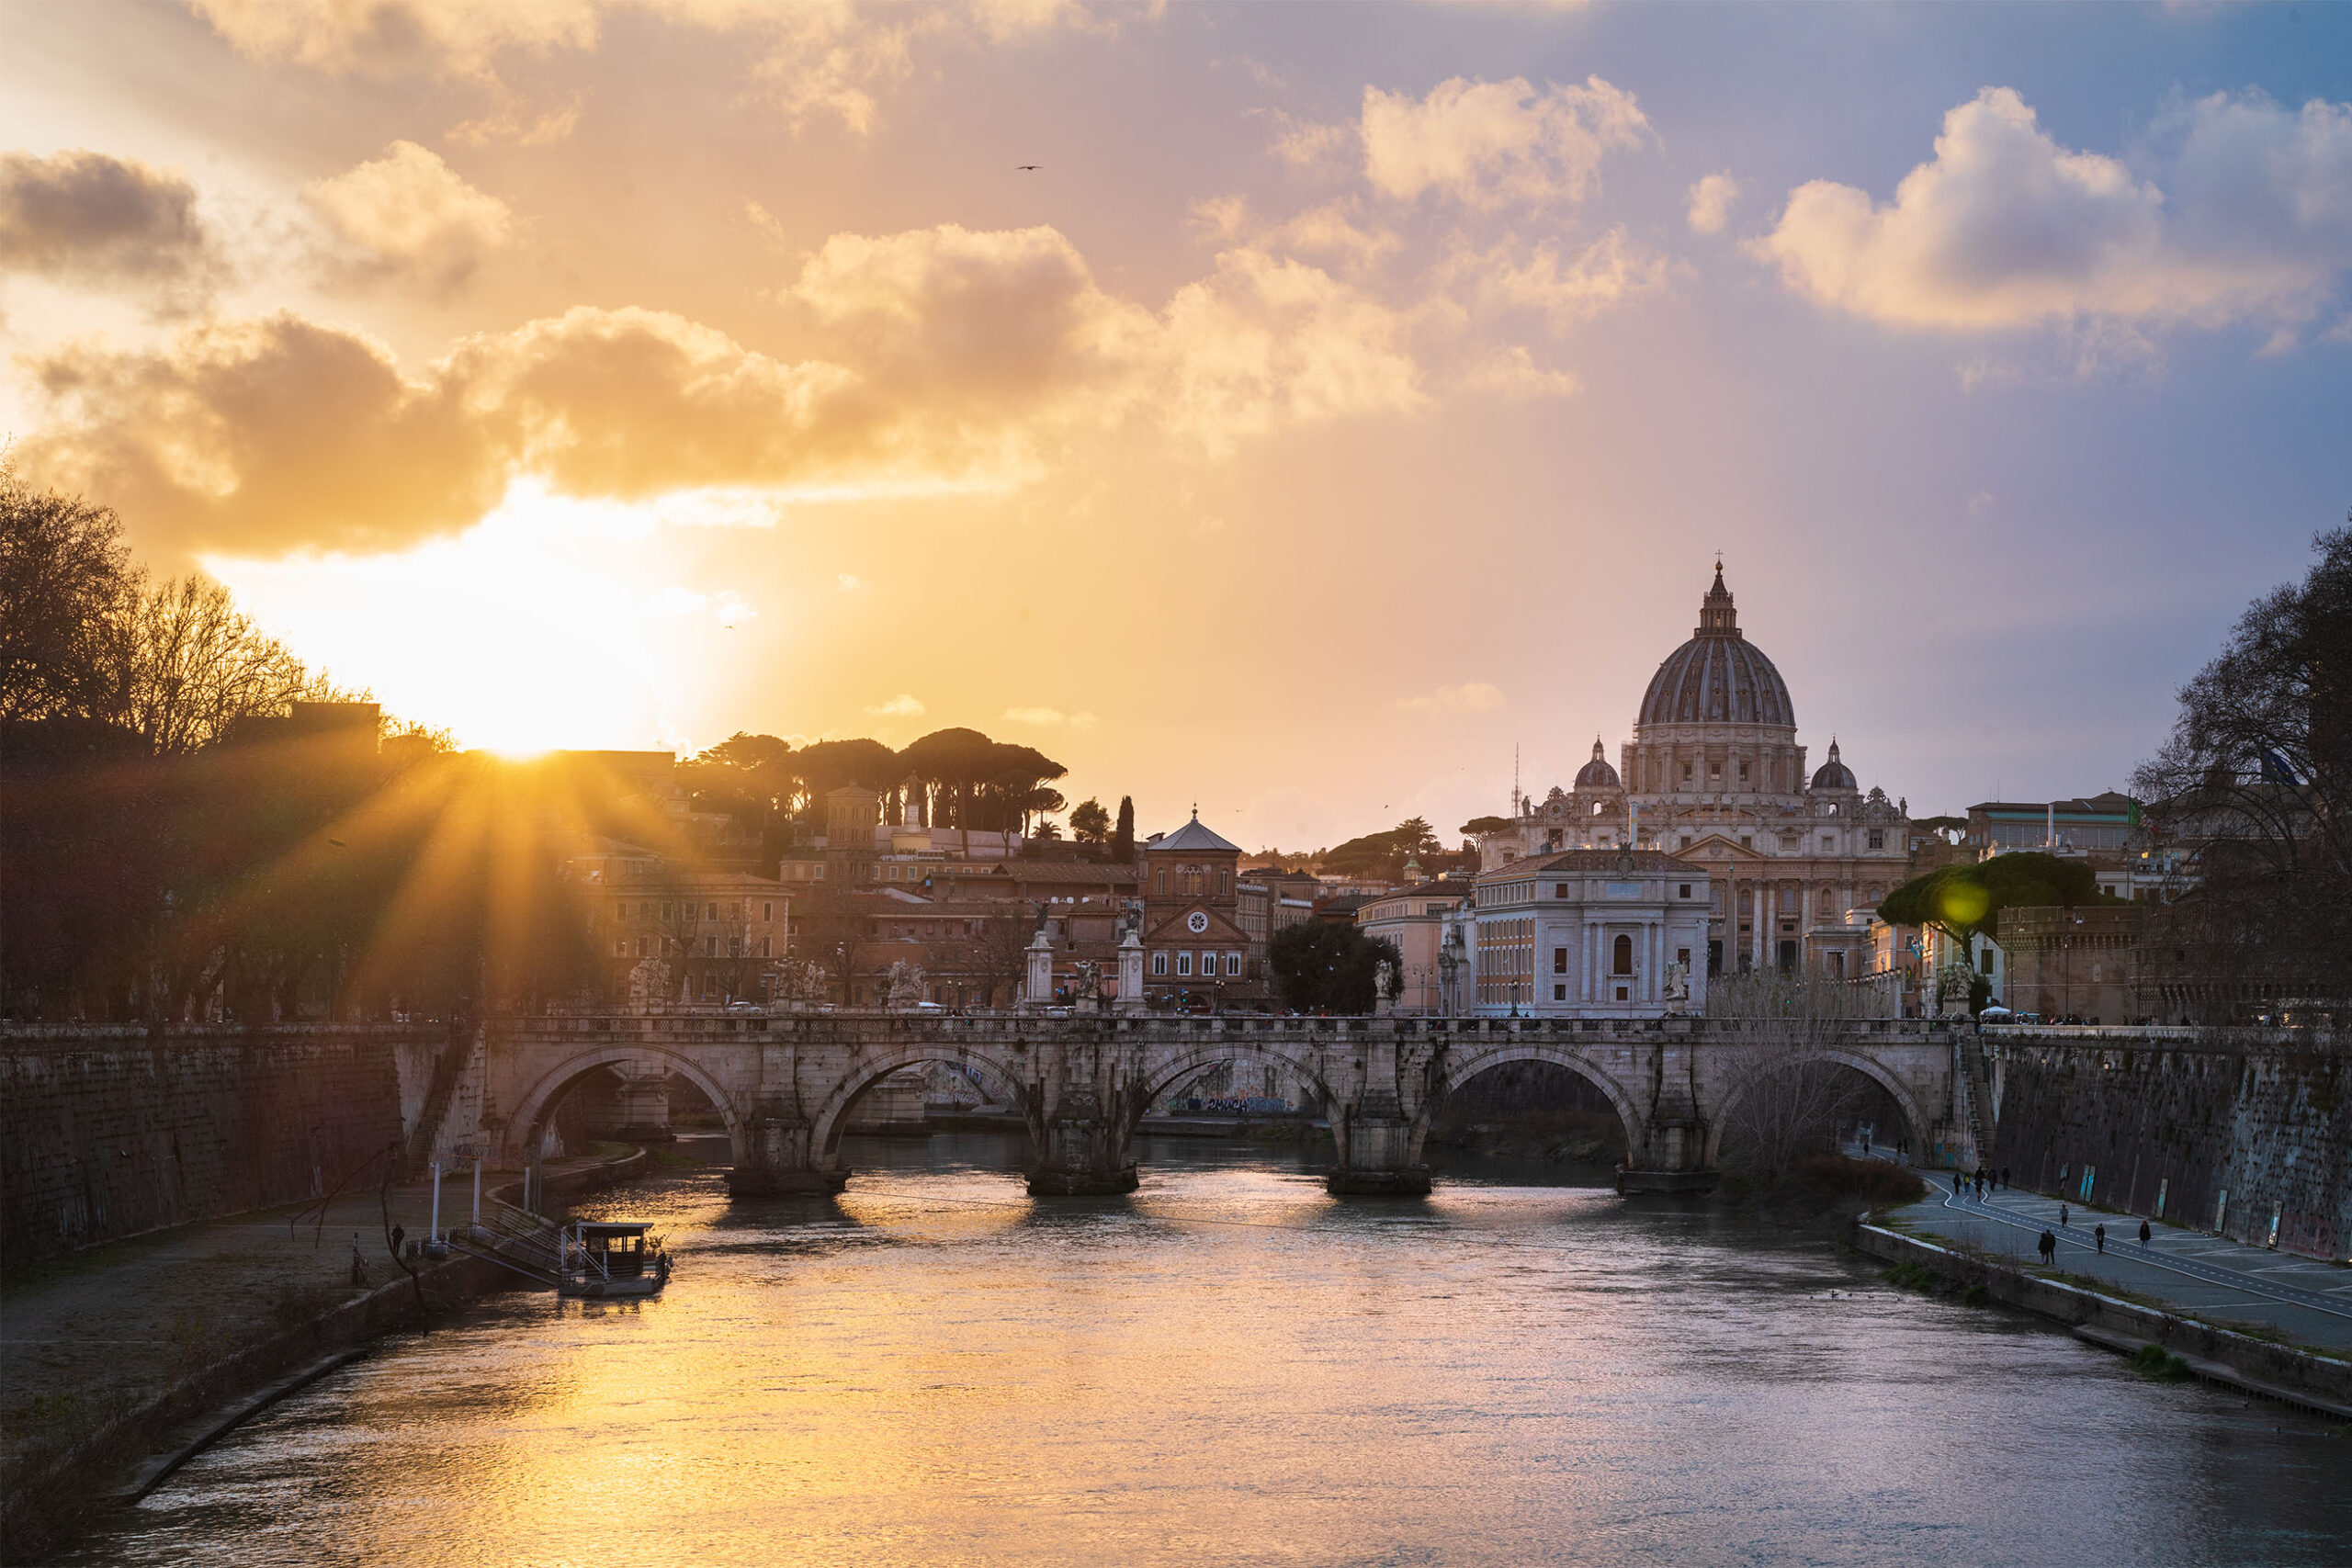
5. Sunrise and sunset photography: how to frame the scene
At sunrise and sunset you can mainly make three choices.
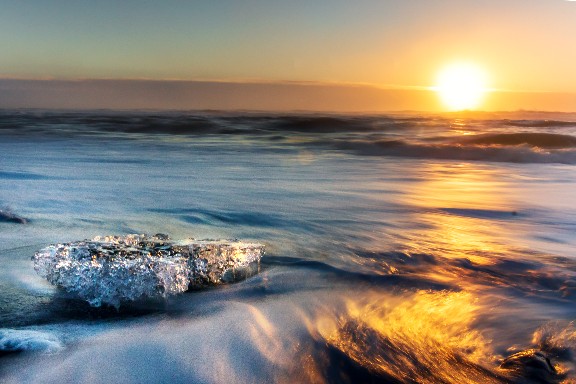
The first is to not include the sun but focus on the overall light, capturing other details of the landscape characterized by it.
This choice also includes all the photos taken before dawn and after sunset, when the nuances of the landscape and the sky change to shades of pink, red and yellow and you can see incredible panoramas with a thousand shades.
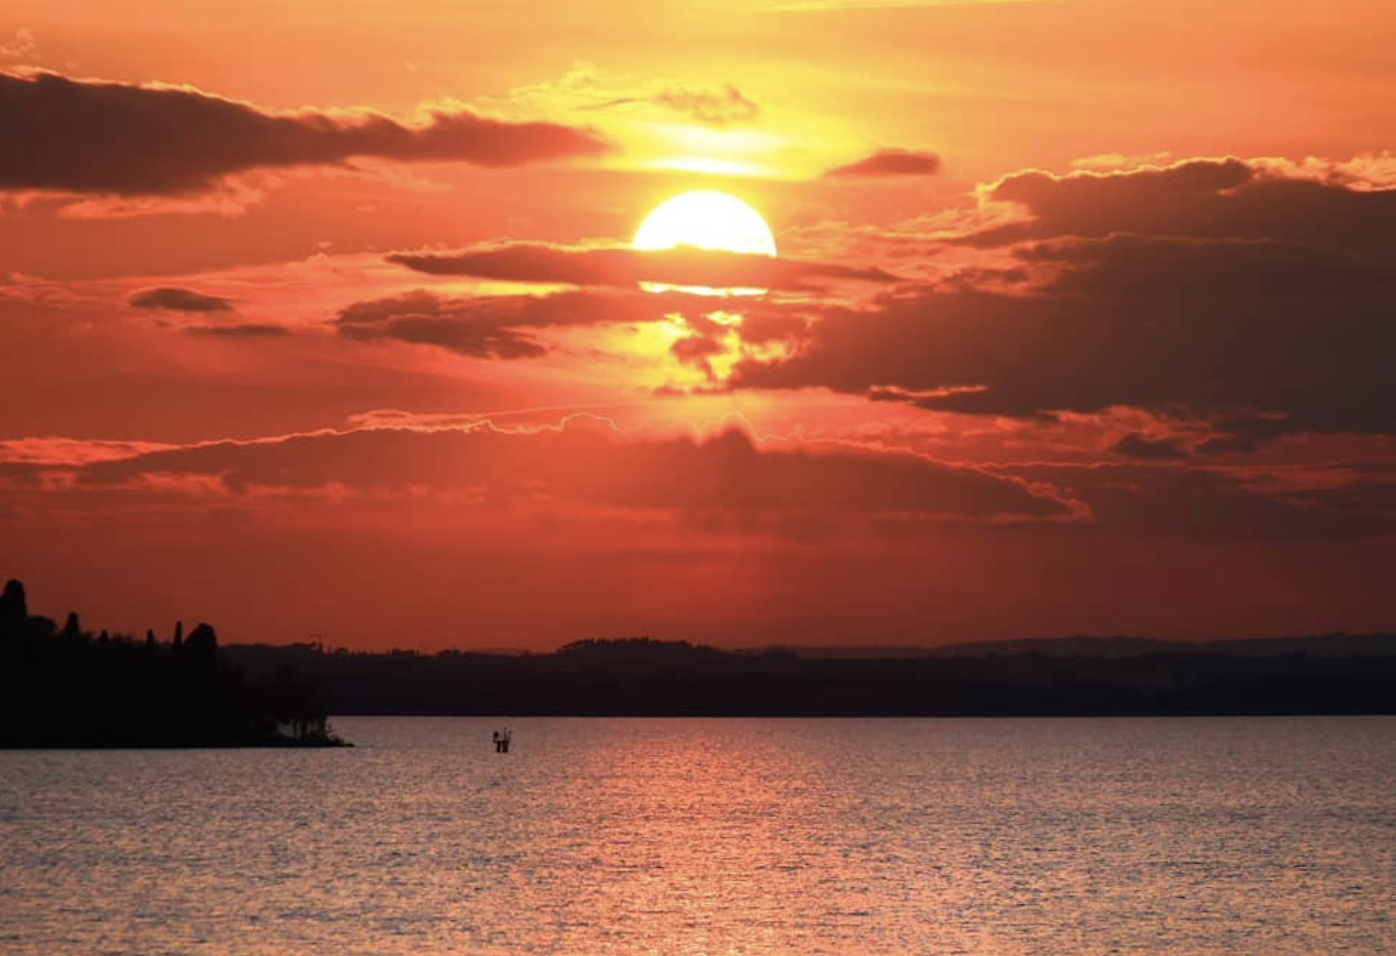
The second is, as we mentioned before, to make the sun your subject, especially at sunset, focusing on its colors and those of the surrounding context. In this case the sun will assume a central position and you will probably choose to use a zoom.
The third is to include the moment of sunset or sunrise in a larger frame, including both the sun and the entire landscape. In terms of composition, you will probably choose a wide angle shot, placing the sun in one third and another important subject, in the other third (read this article to learn more about the rule of thirds and other simple rules of composition).
Ph: @giadaantonini_photography
Ph: @giadaantonini_photography
Ph: @giadaantonini_photography
Ph: @giadaantonini_photography
Do you want to know more about how to frame your shoots? Find out out tips in this article!
What are you waiting for?
Try to put our tips into practice and tag us in your photos, we will publish them on our Instagram andFacebook pages.
Curious about more tips to shoot with different lights? Find them out in this article!
If you liked the article, let us know in the comments and share it.
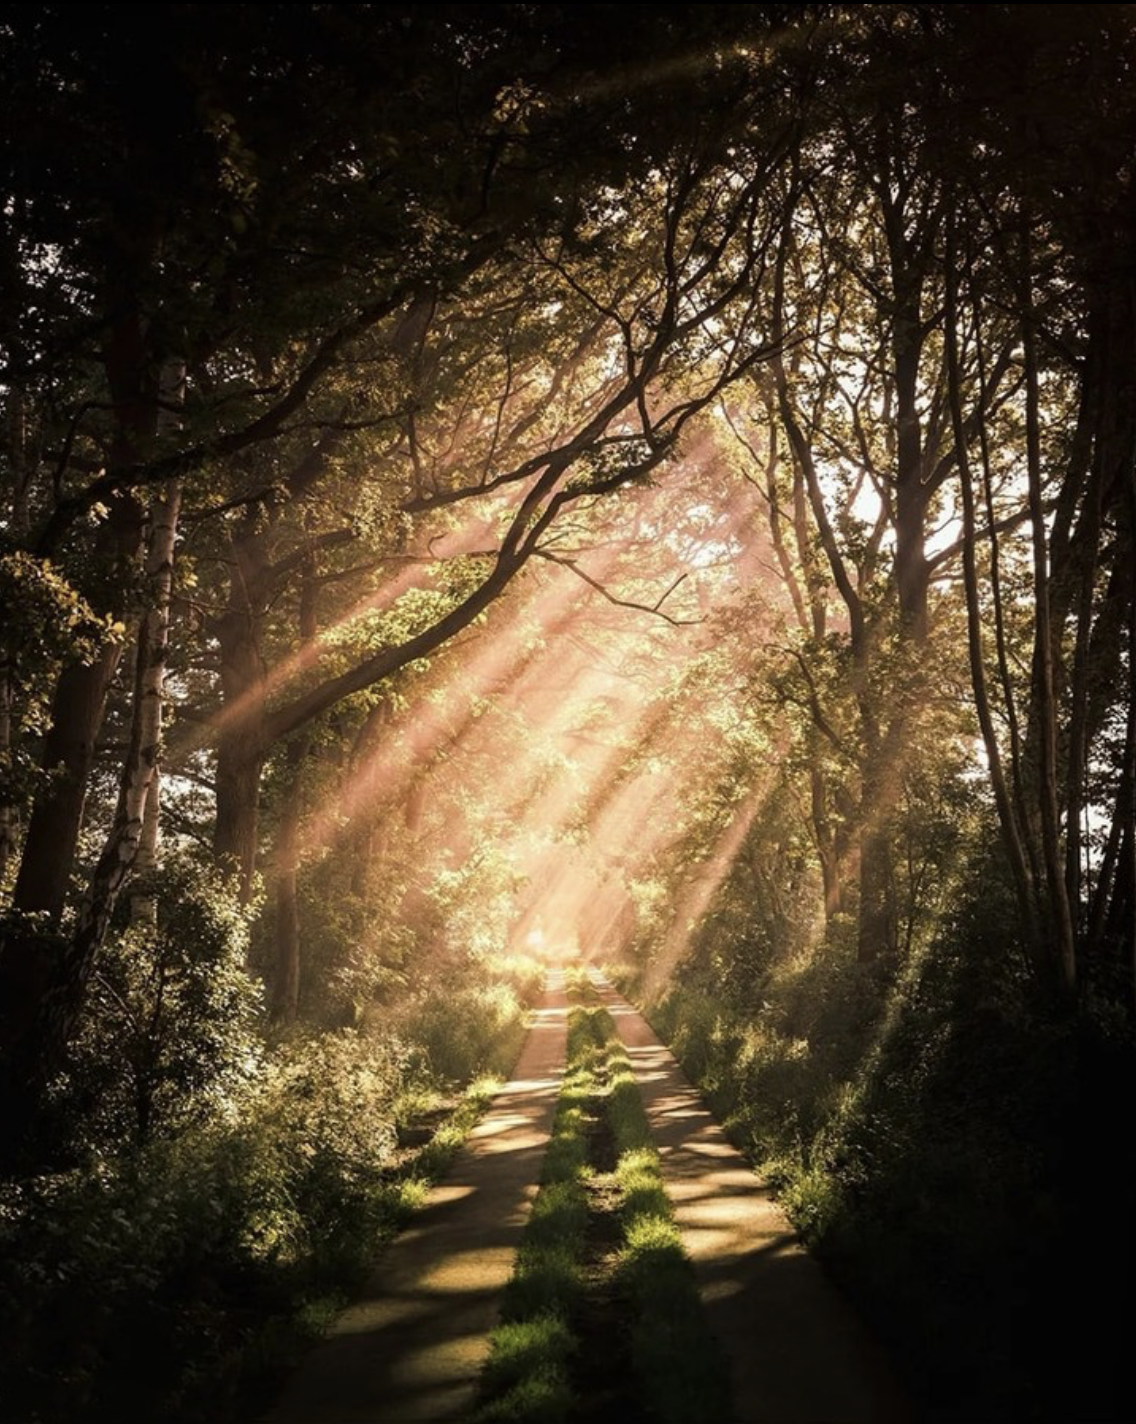
Light in photography is the essential element to express our creativity, to give strength to the image and to give meaning to our story.
The different light conditions will completely change the meaning of our photo and express different feelings.
So let’s see how to use different light conditions to realize amazing shots!
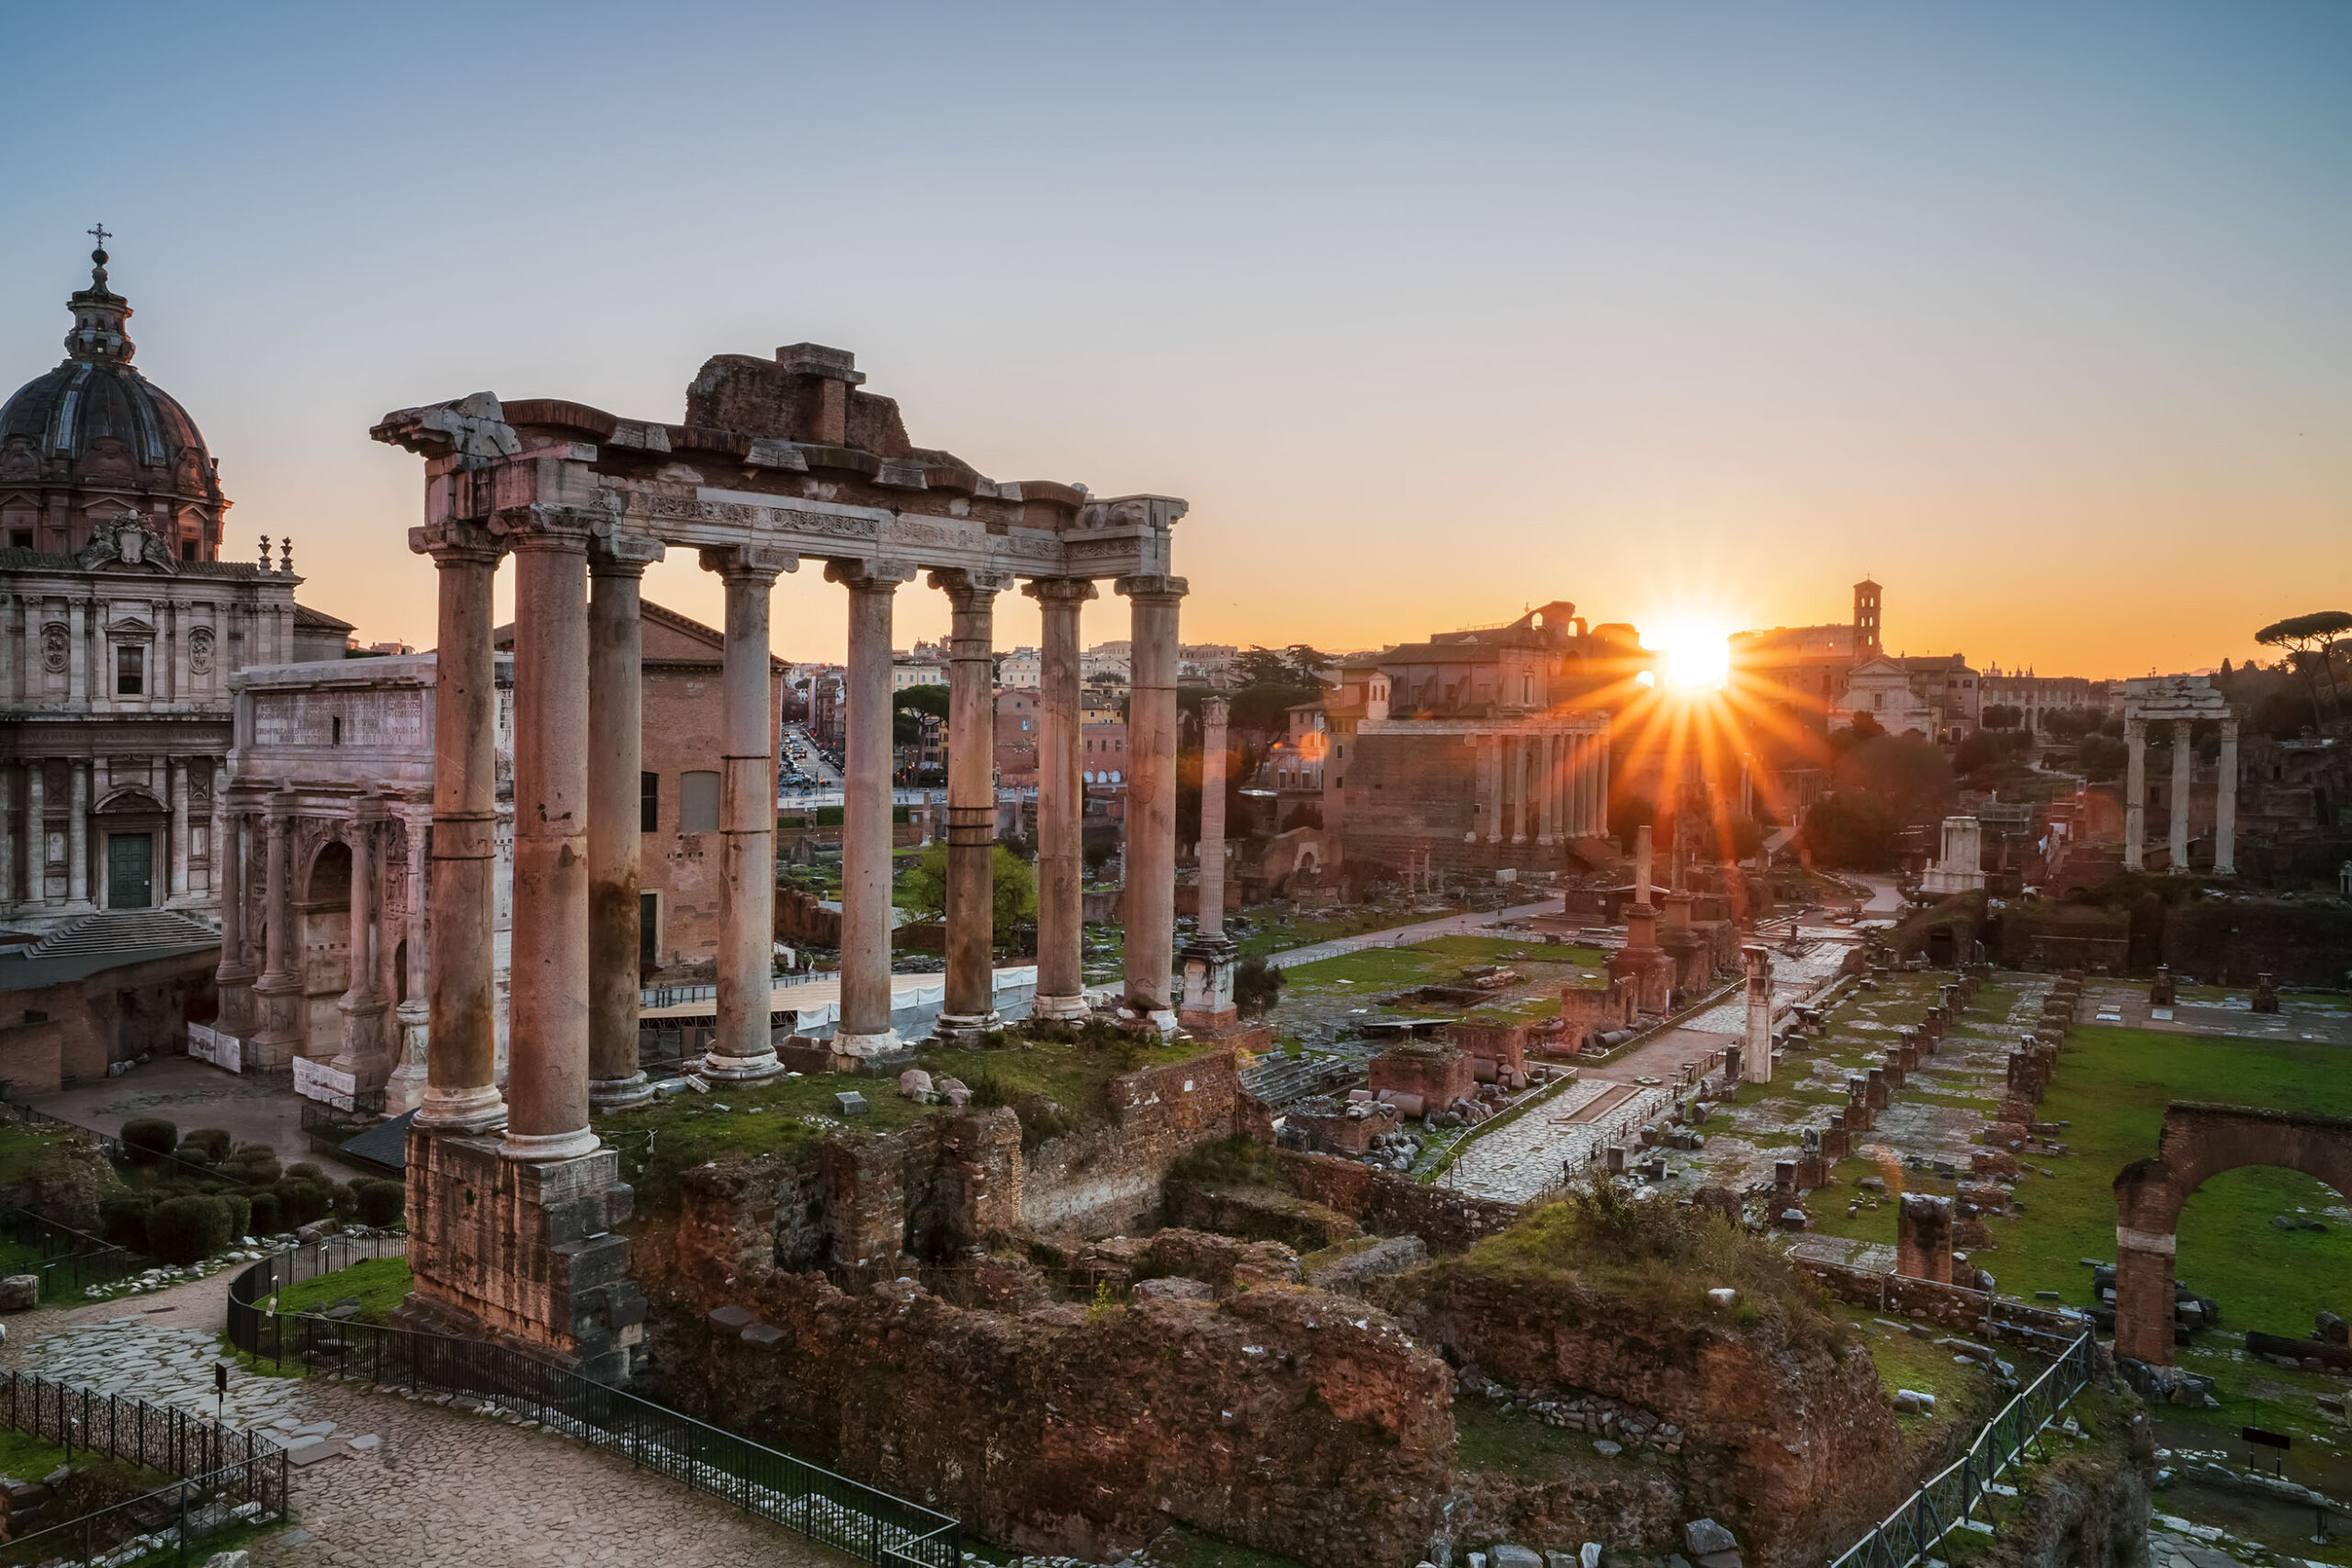
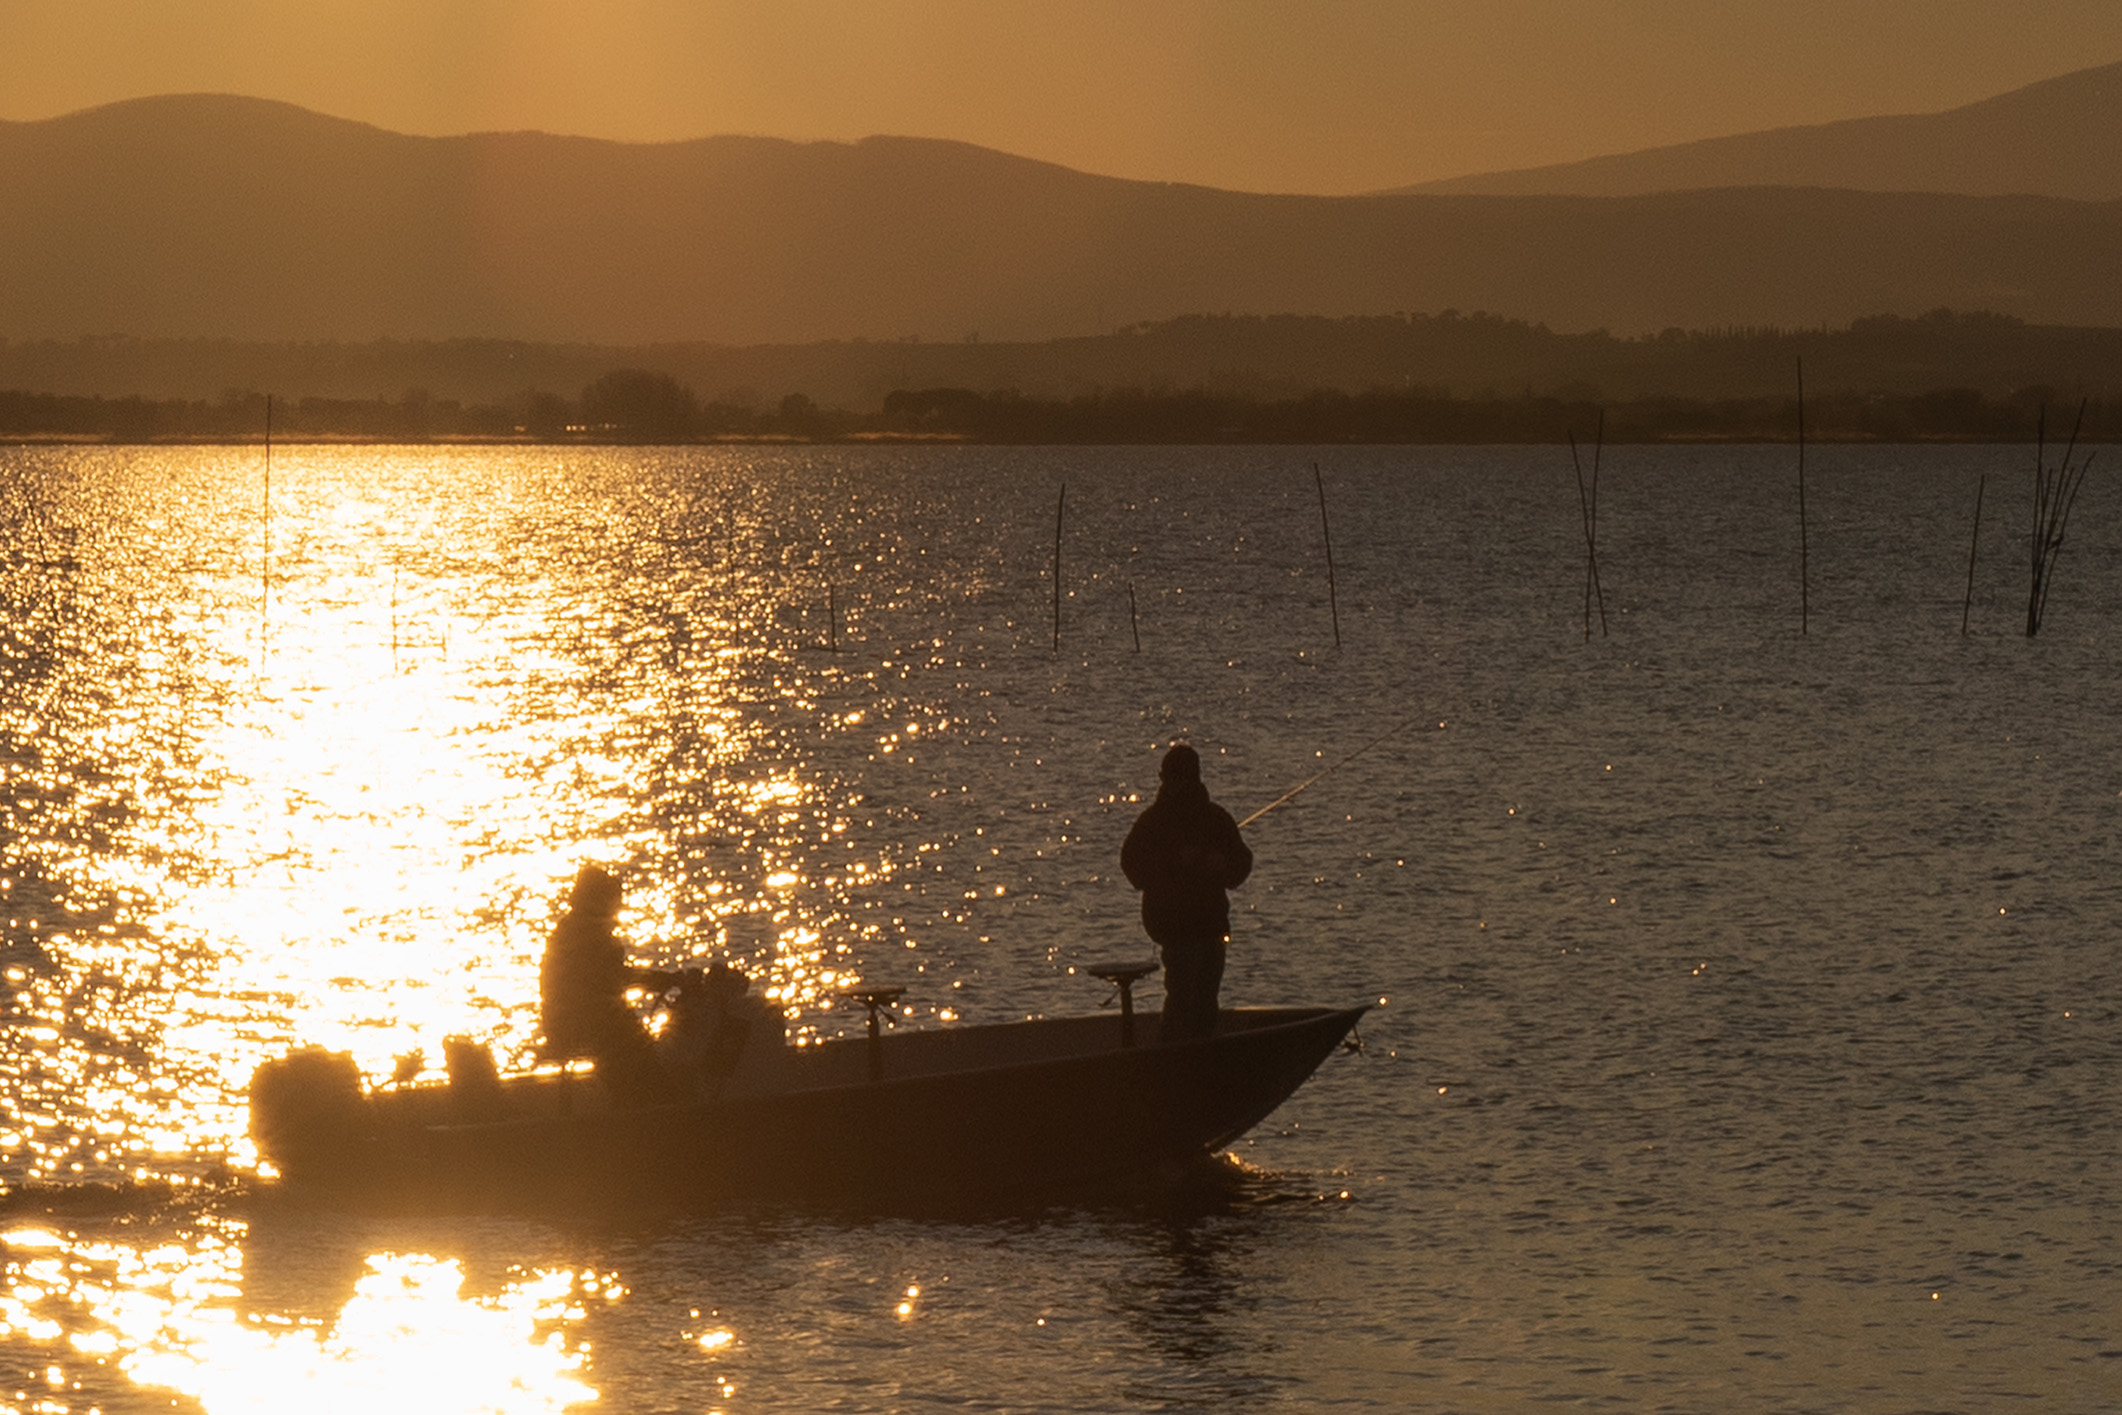
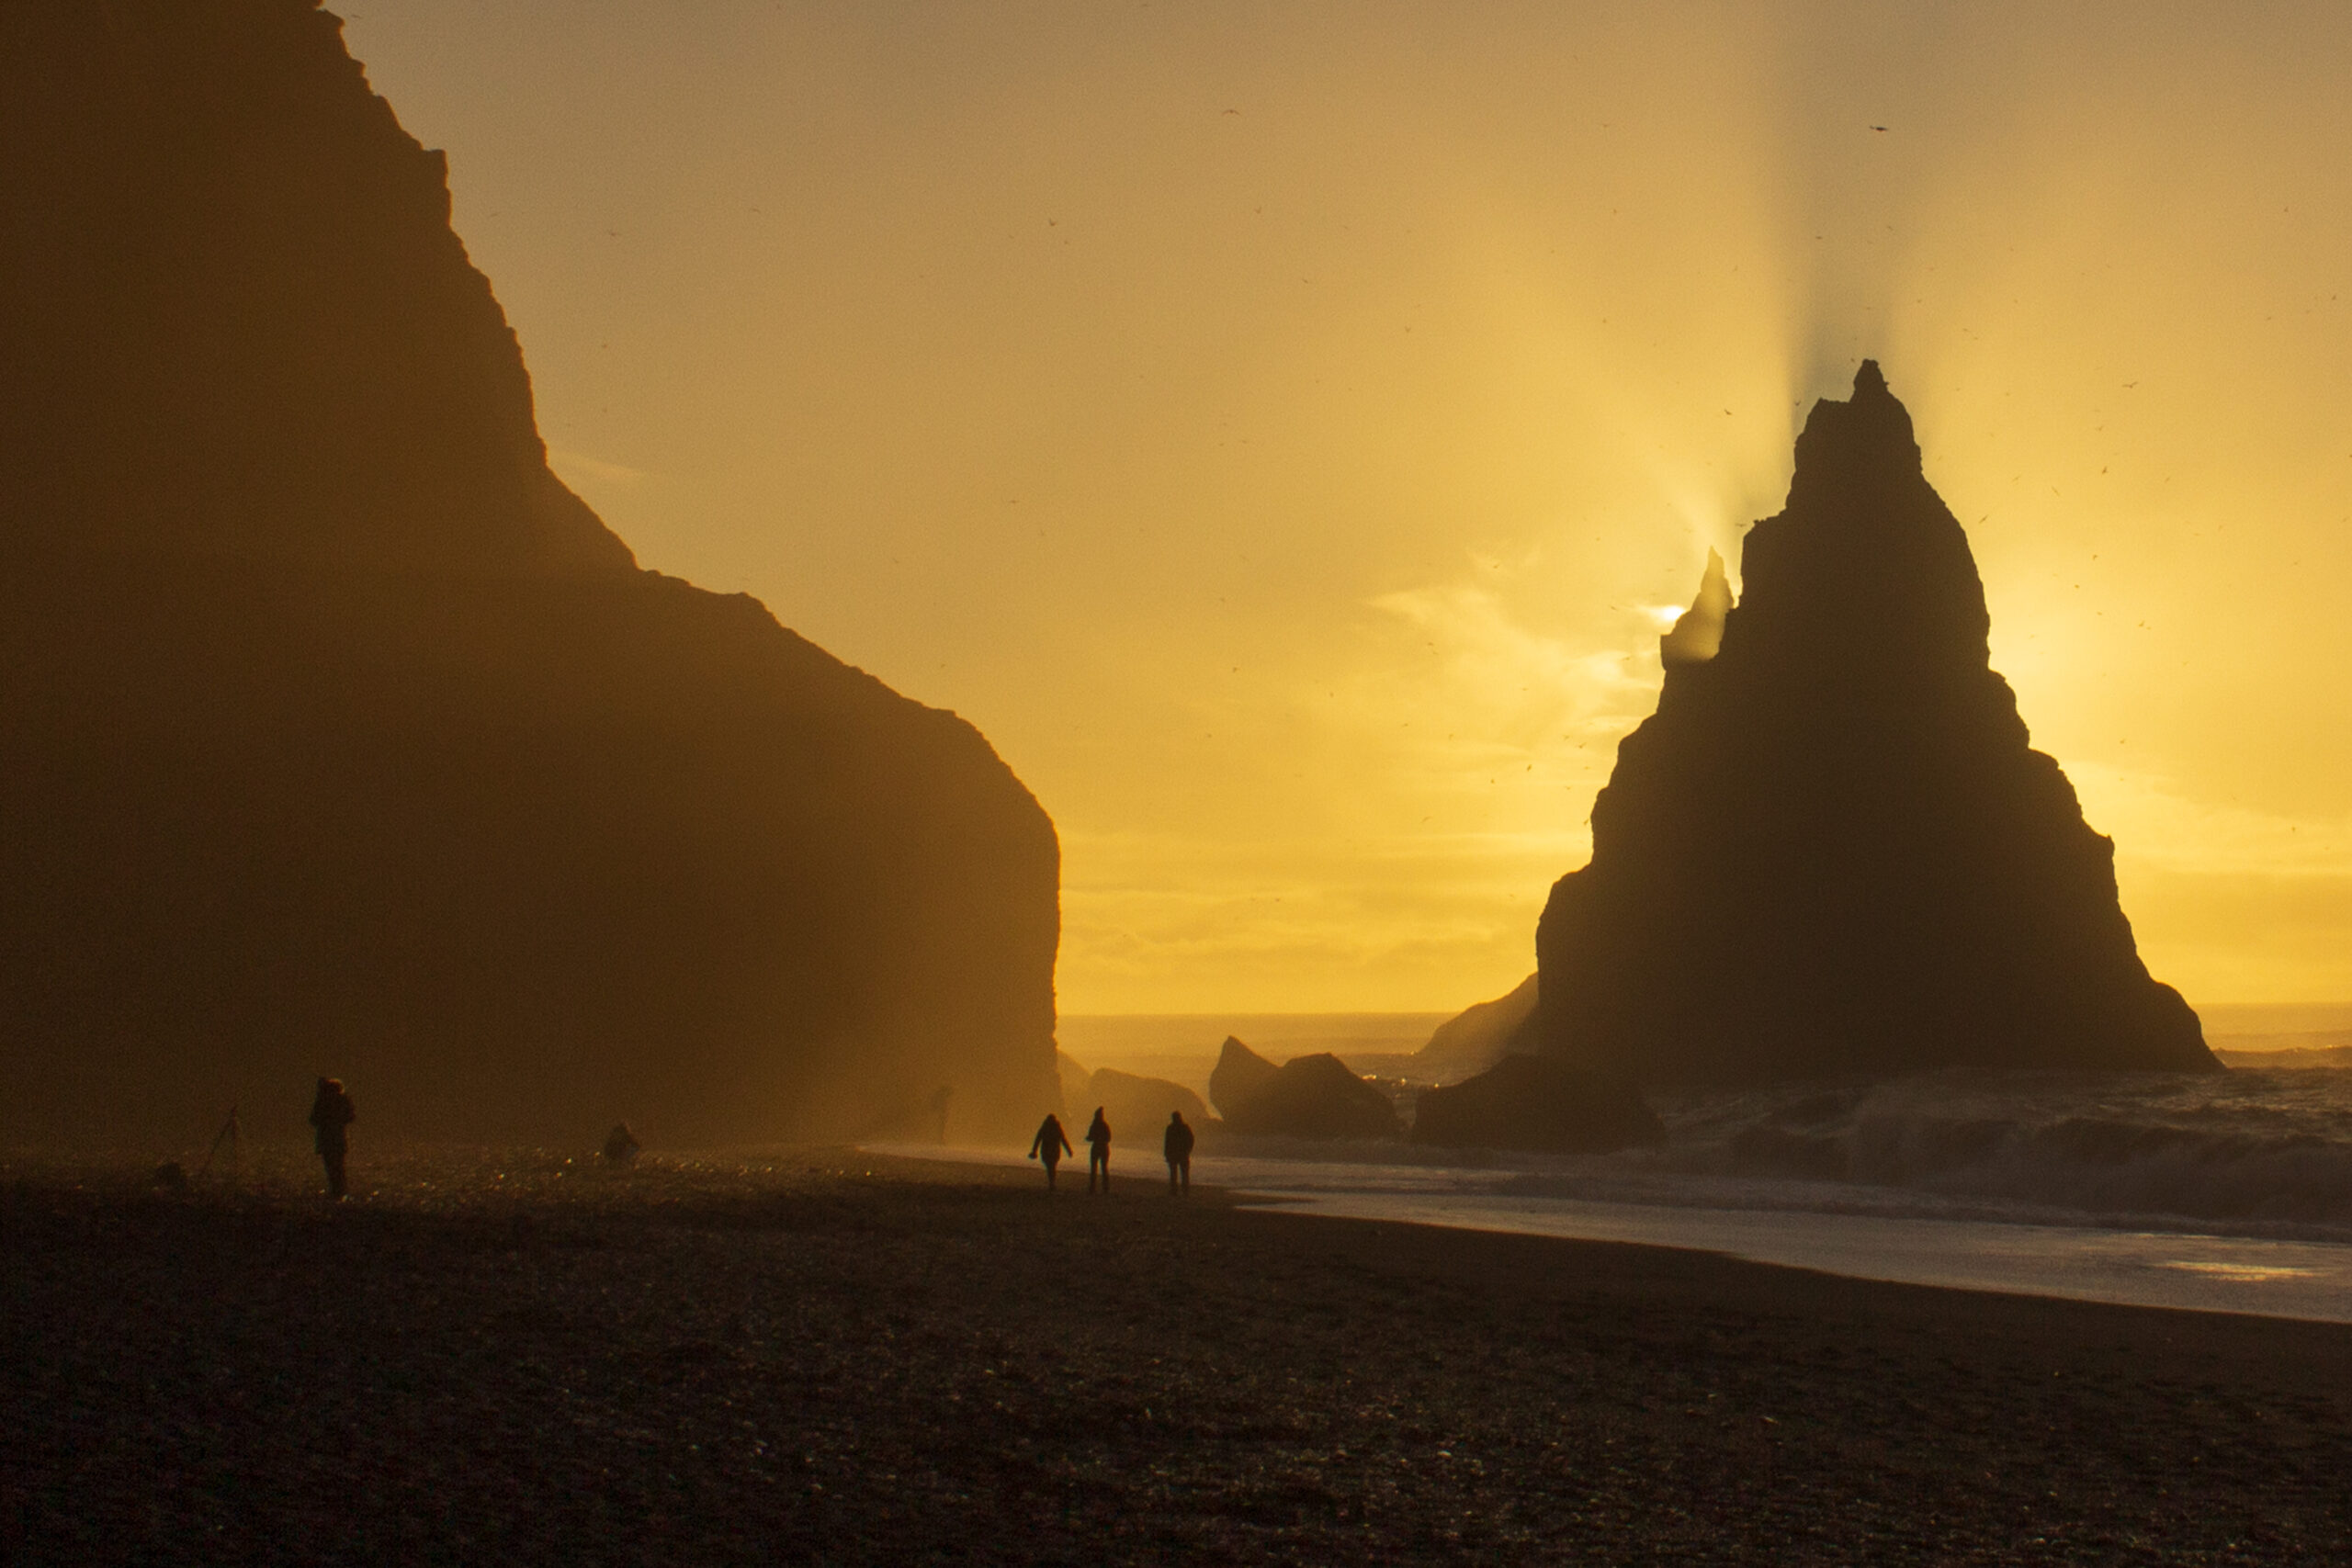
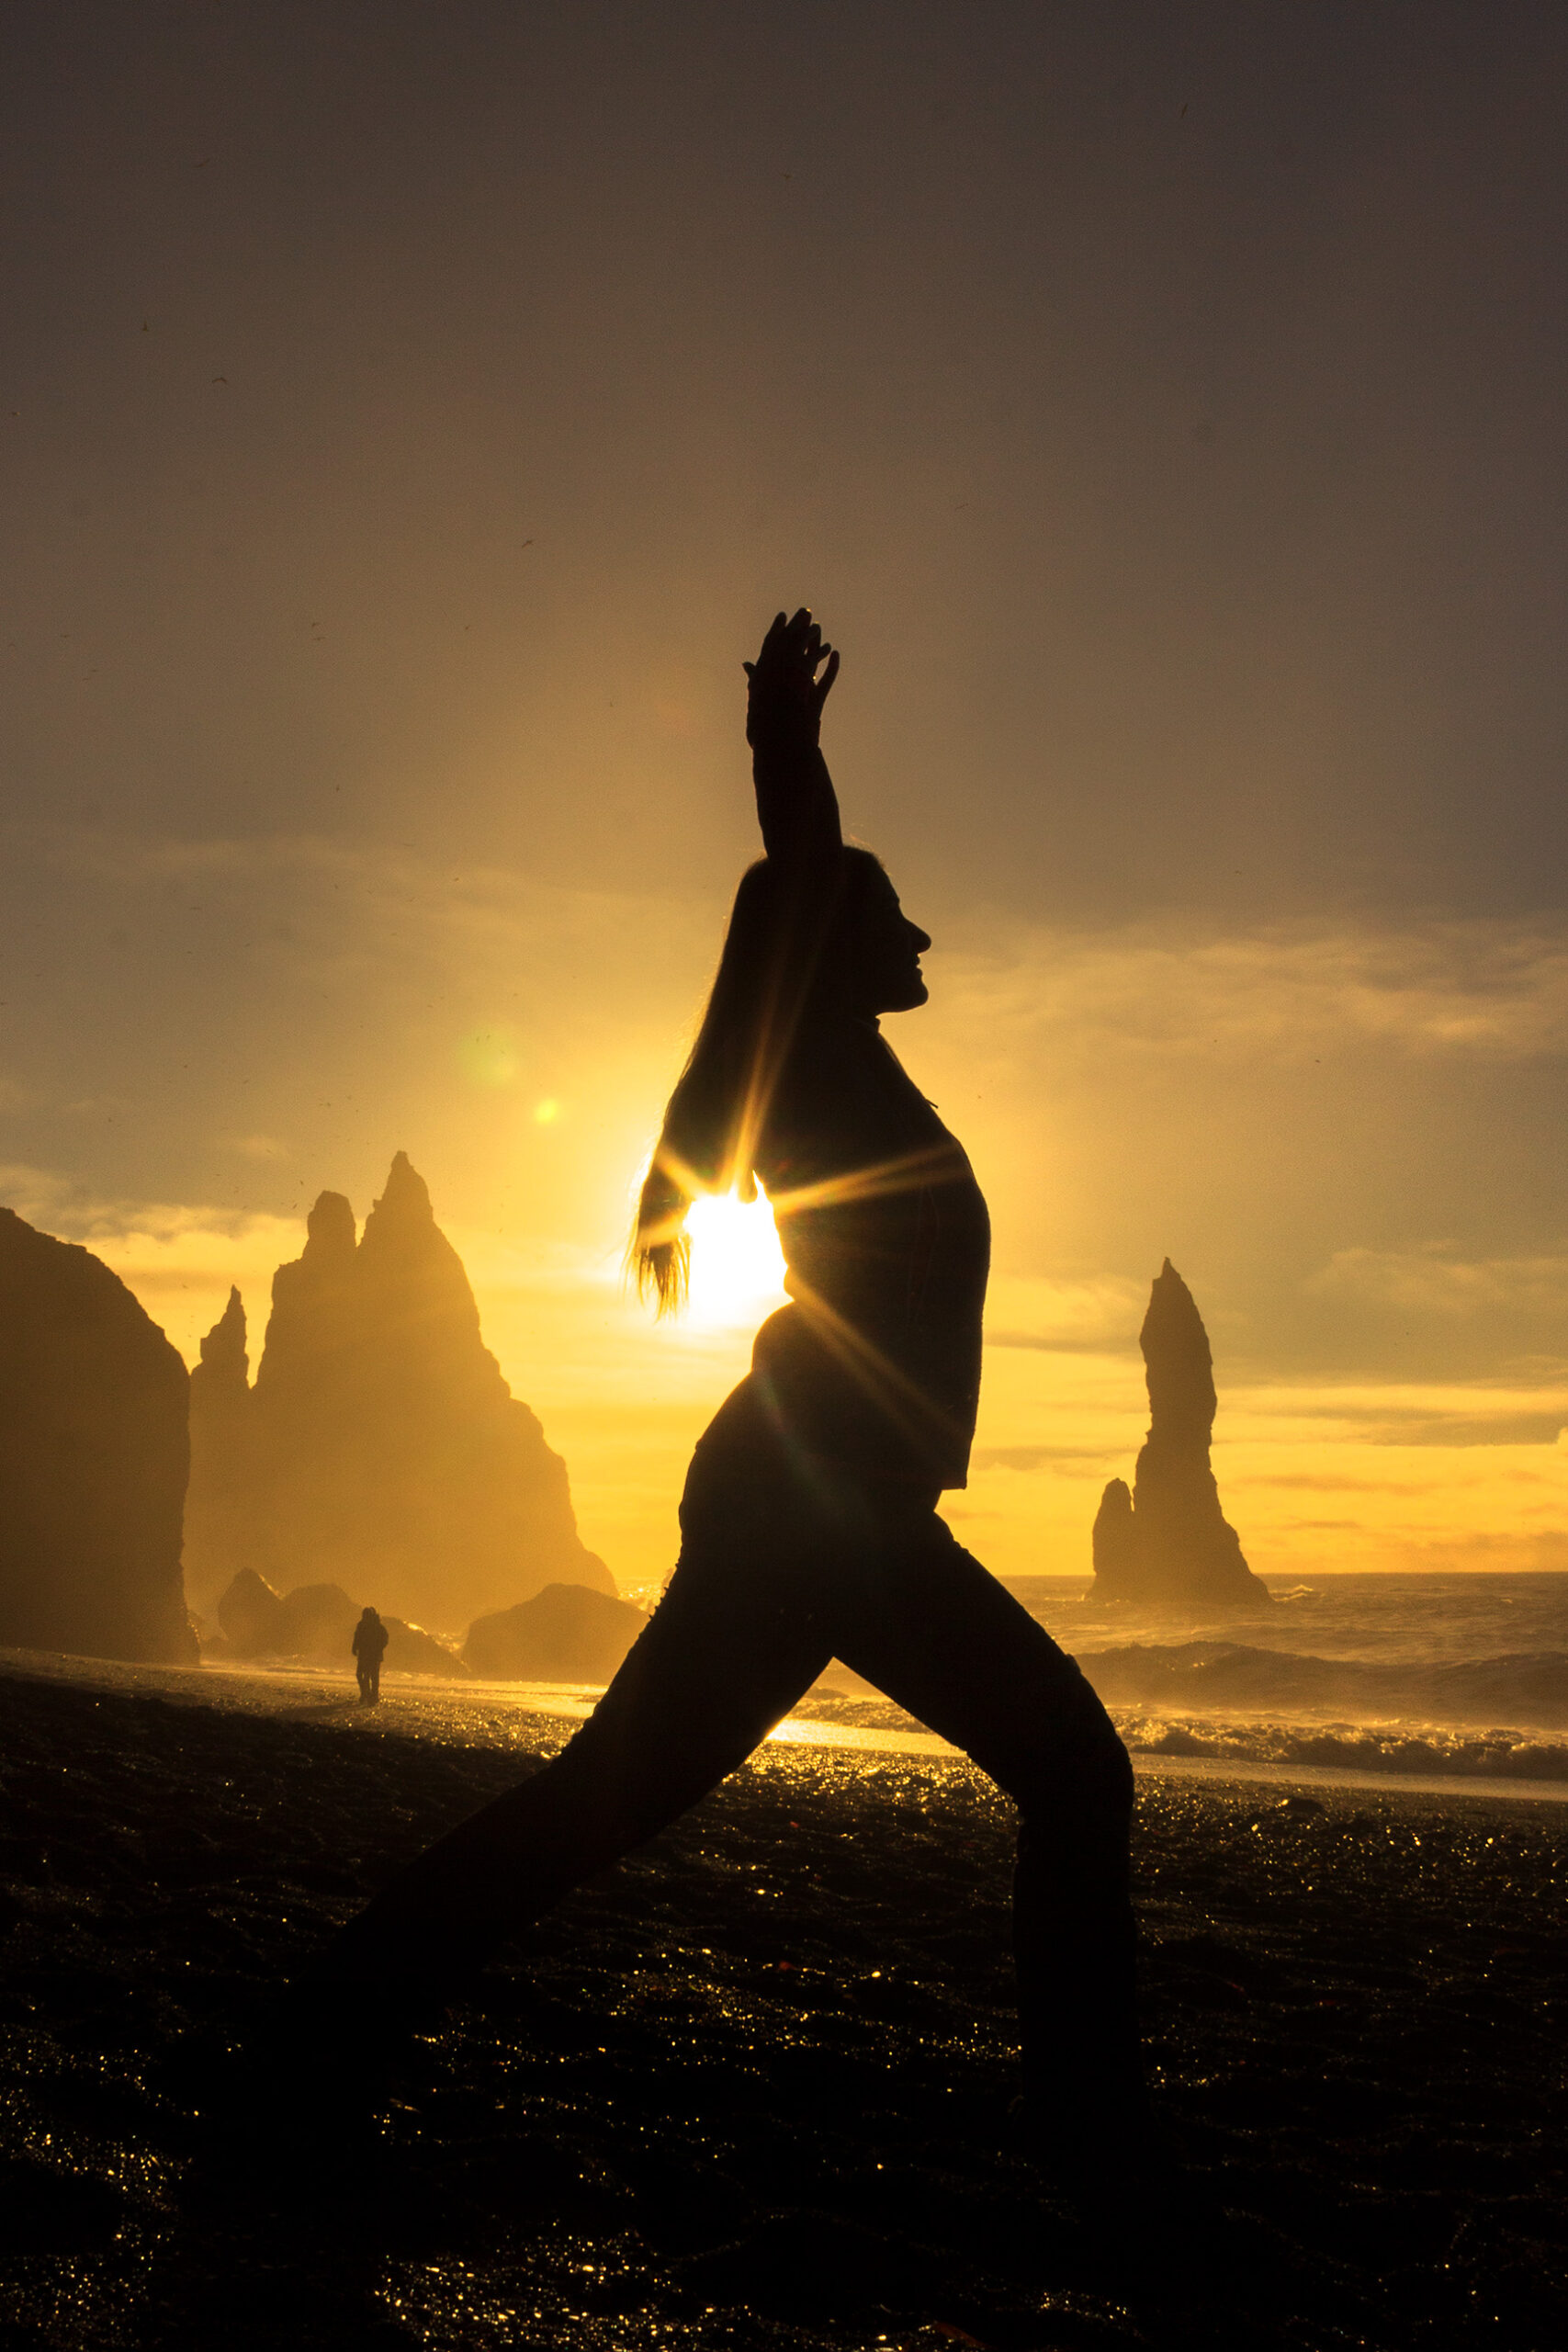
1. Backlight shooting
Backlight shooting is very interesting when creating the silhouette effect. The strong brightness captured by the camera makes the shadow elements appear completely black and creates exciting contrasts, as in the photos below.
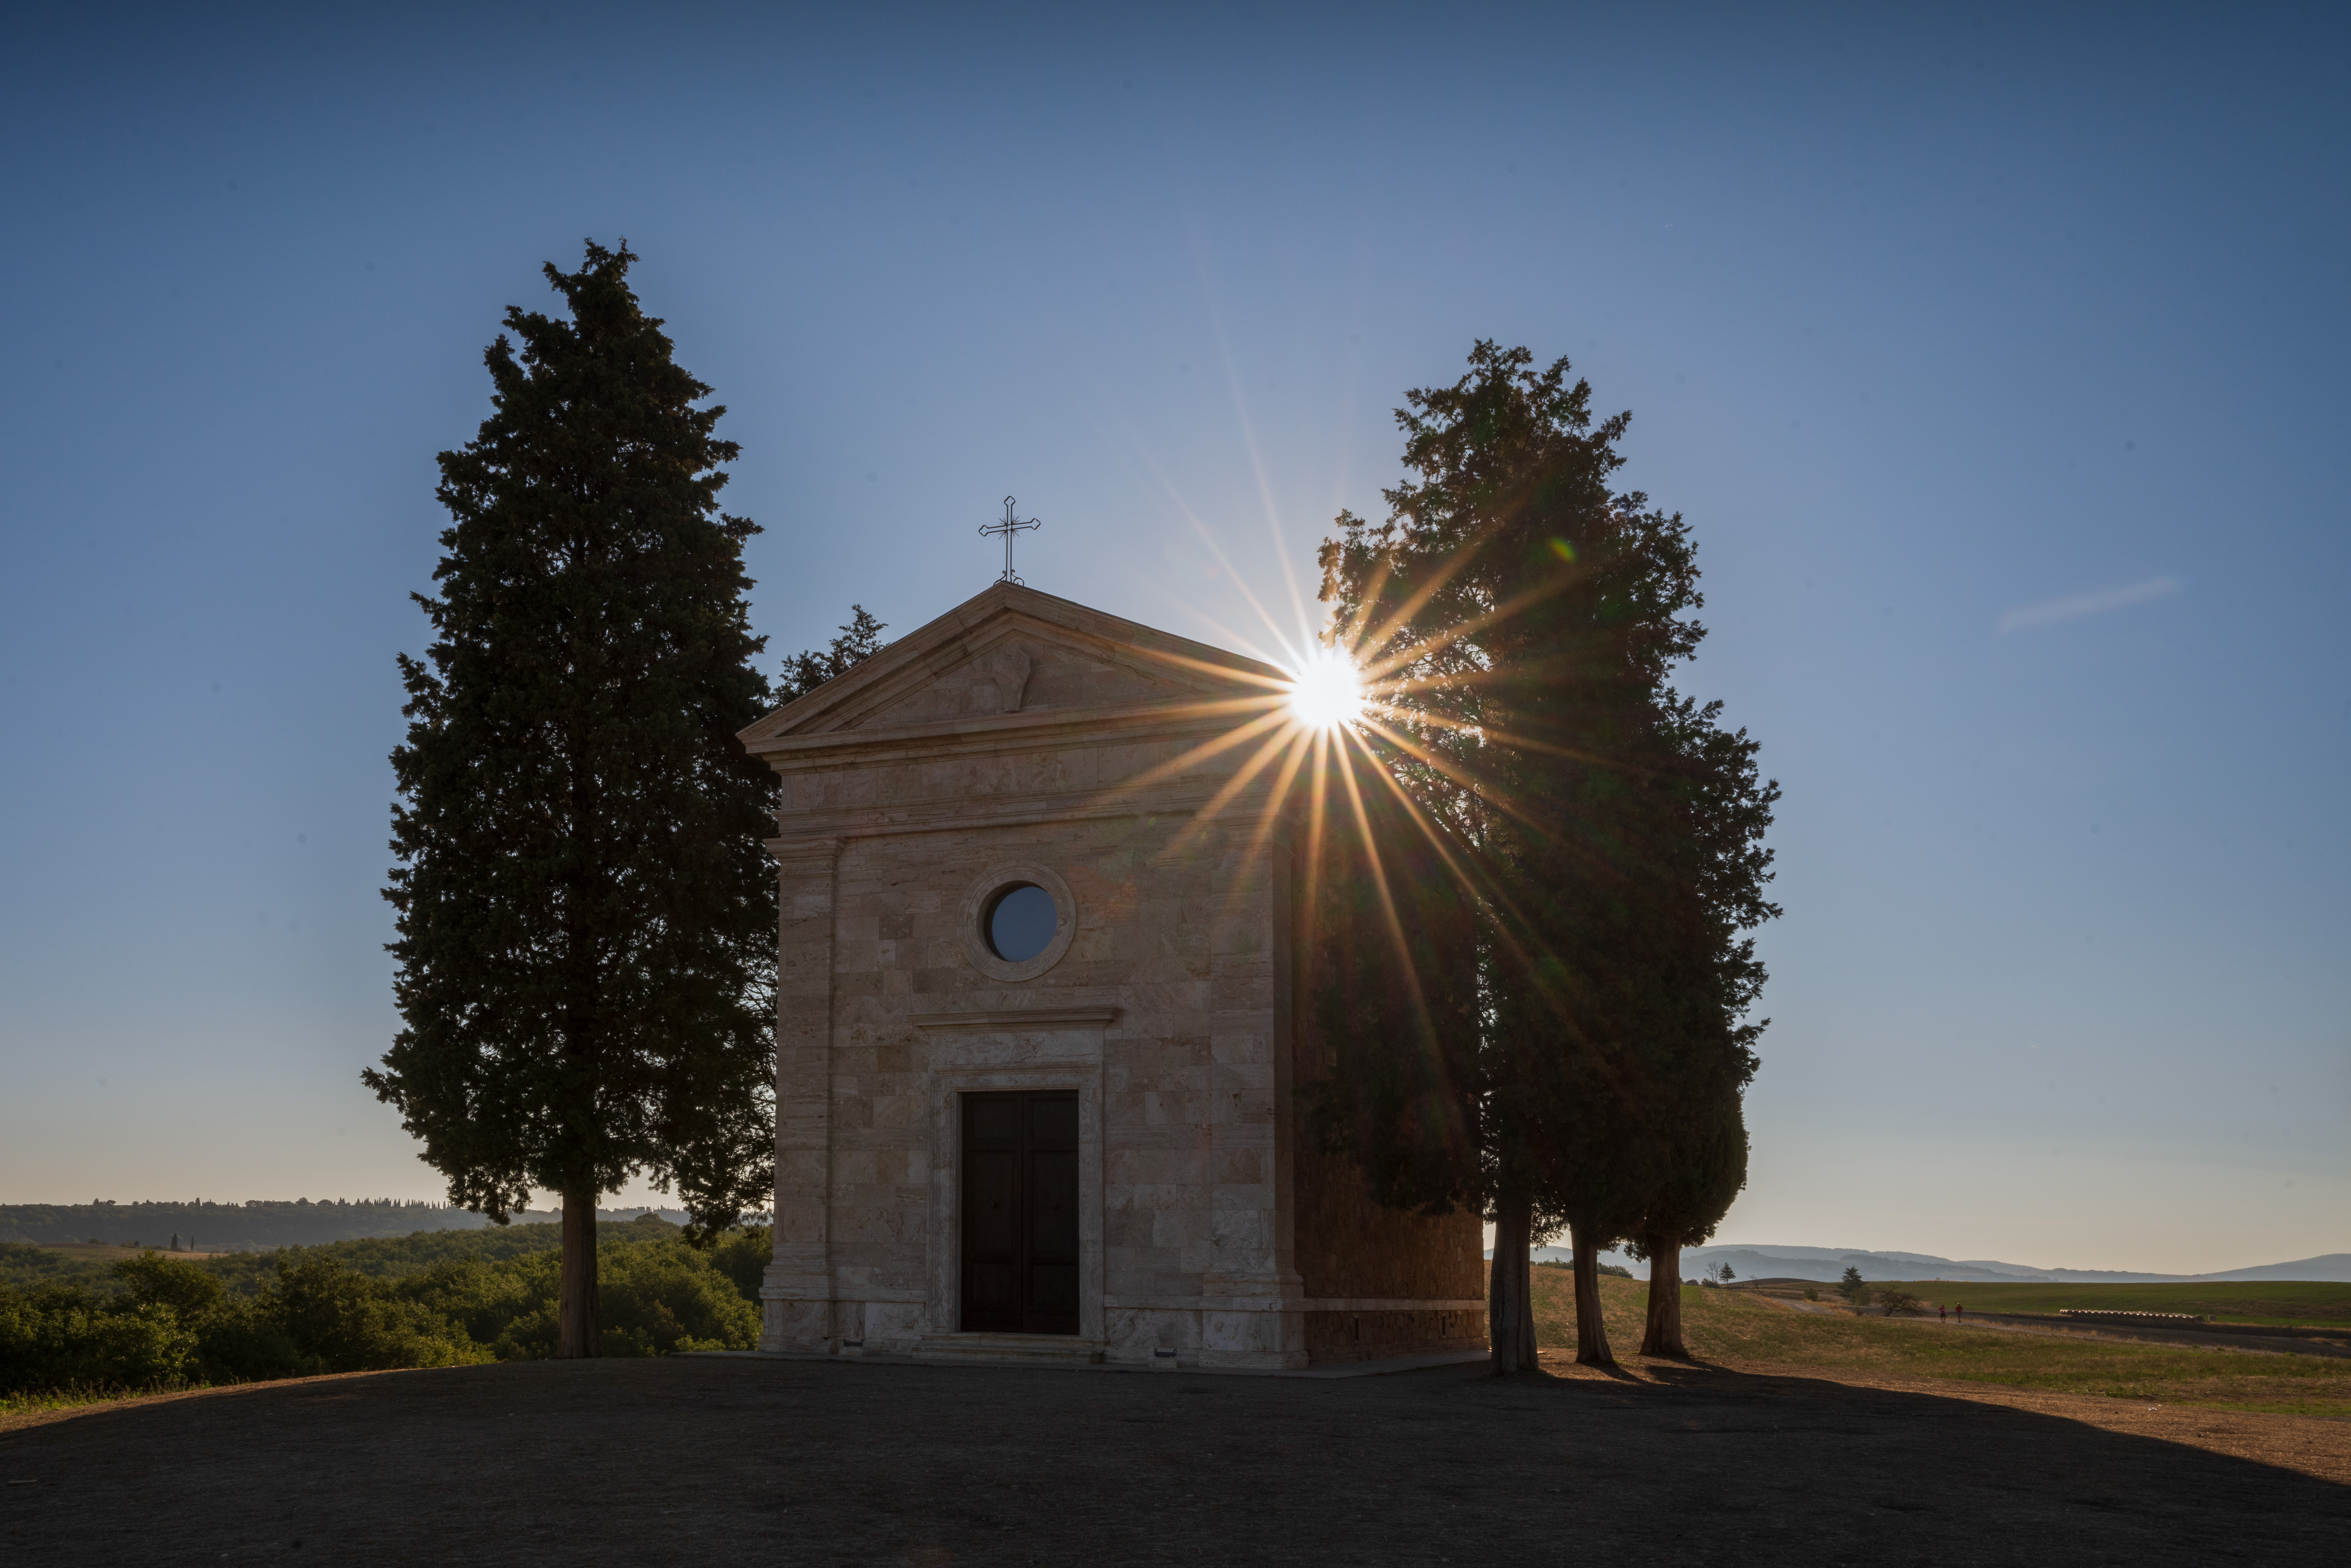
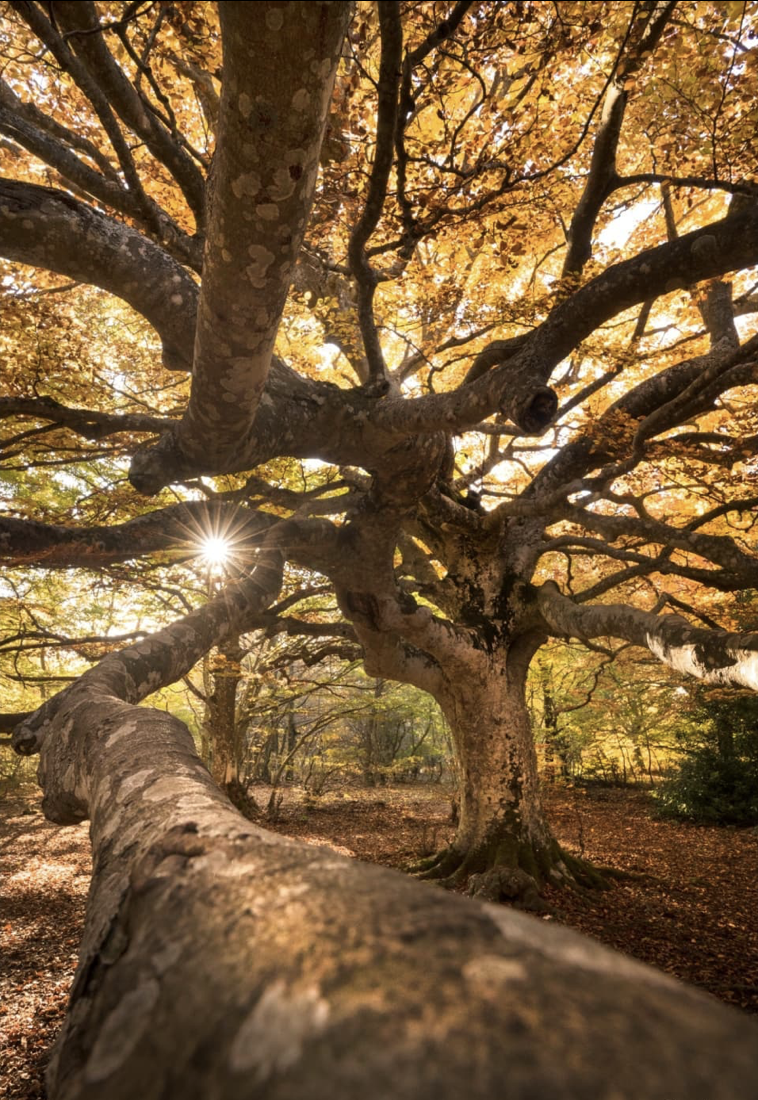
When shooting backlighting photos, try not to frame the sun if it is still too bright, because otherwise that area of the photo will be overexposed (white), or you could create flares or unpleasant reflections. In fact, these defects are very difficult to fix even in post production.
If you still want to include the sun, try to partially cover it with another subject. In this way, you will get the sun star effect and you will see the rays spread across the photo. To achieve this, you’ll need to use aperture values like f/18 or f/20, to decrease the amount of light hitting the sensor. Also try with your smartphone in pro mode.
Instead, you can use the sun as your subject at sunset, when it is already low on the horizon and its brightness has decreased.
Ph: @giadaantonini_photography
Ph: @giadaantonini_photography
Ph: @giadaantonini_photography
Ph: @giadaantonini_photography
Ph: @giadaantonini_photography
Ph: @giadaantonini_photography
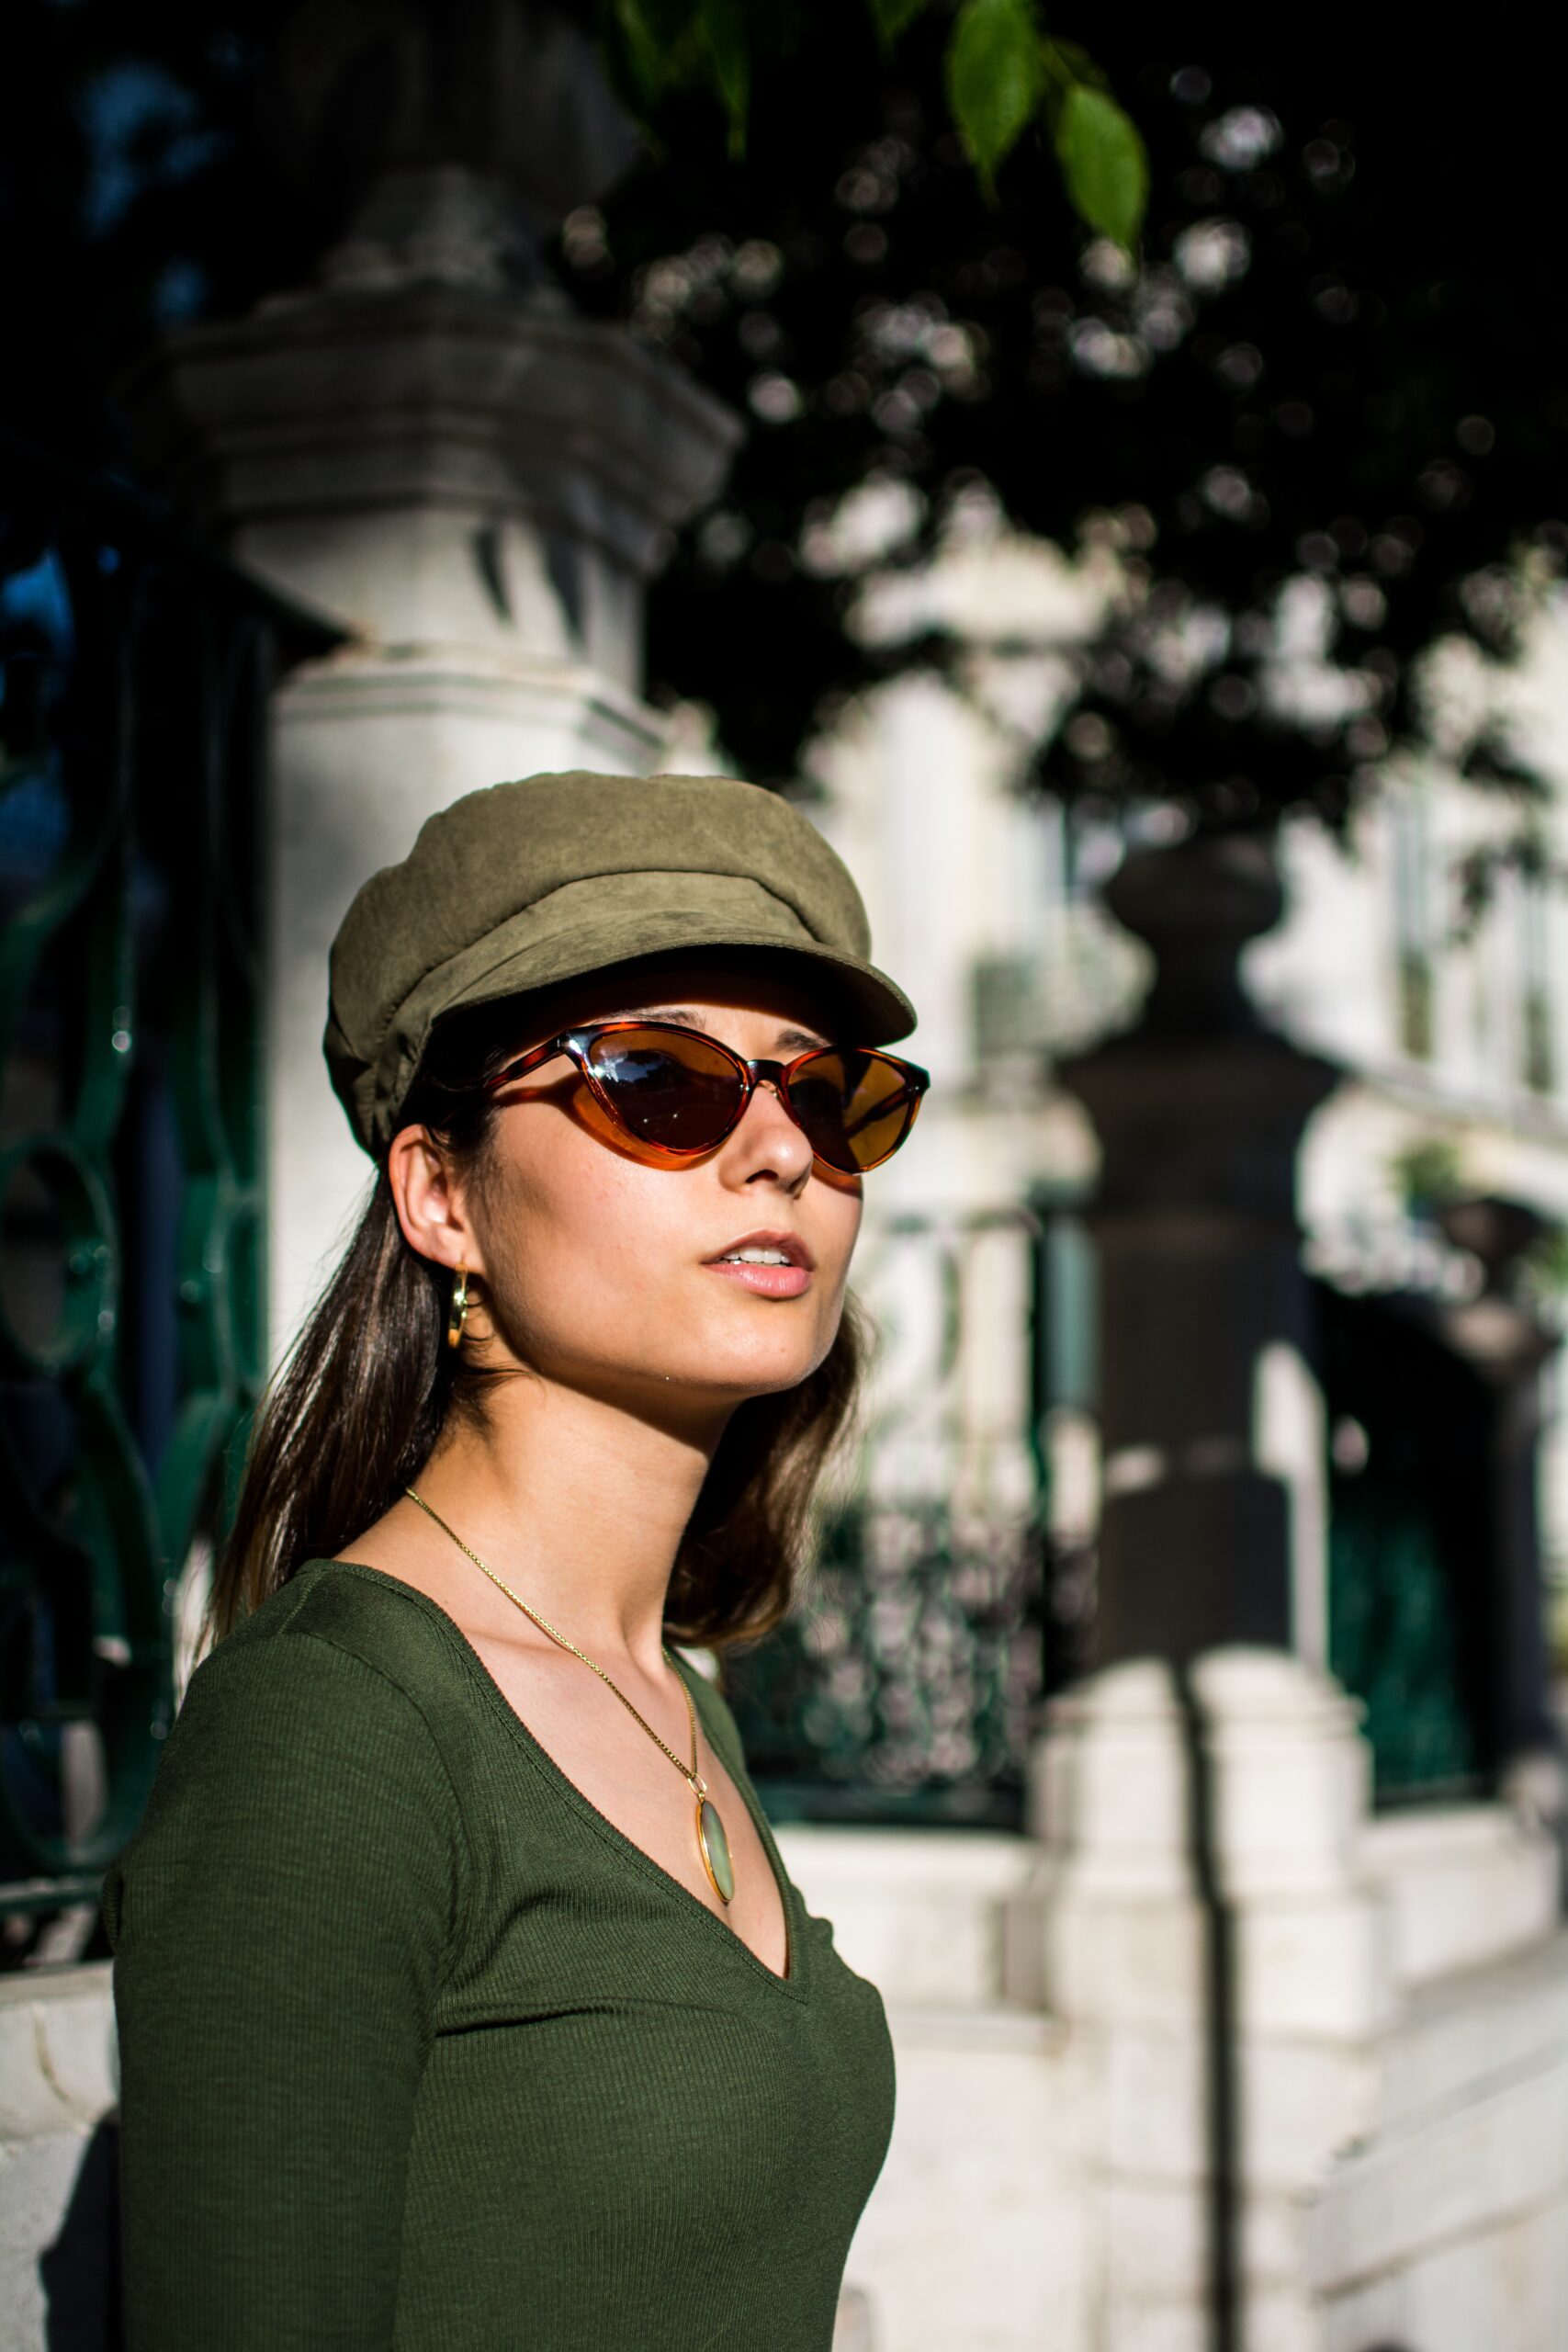
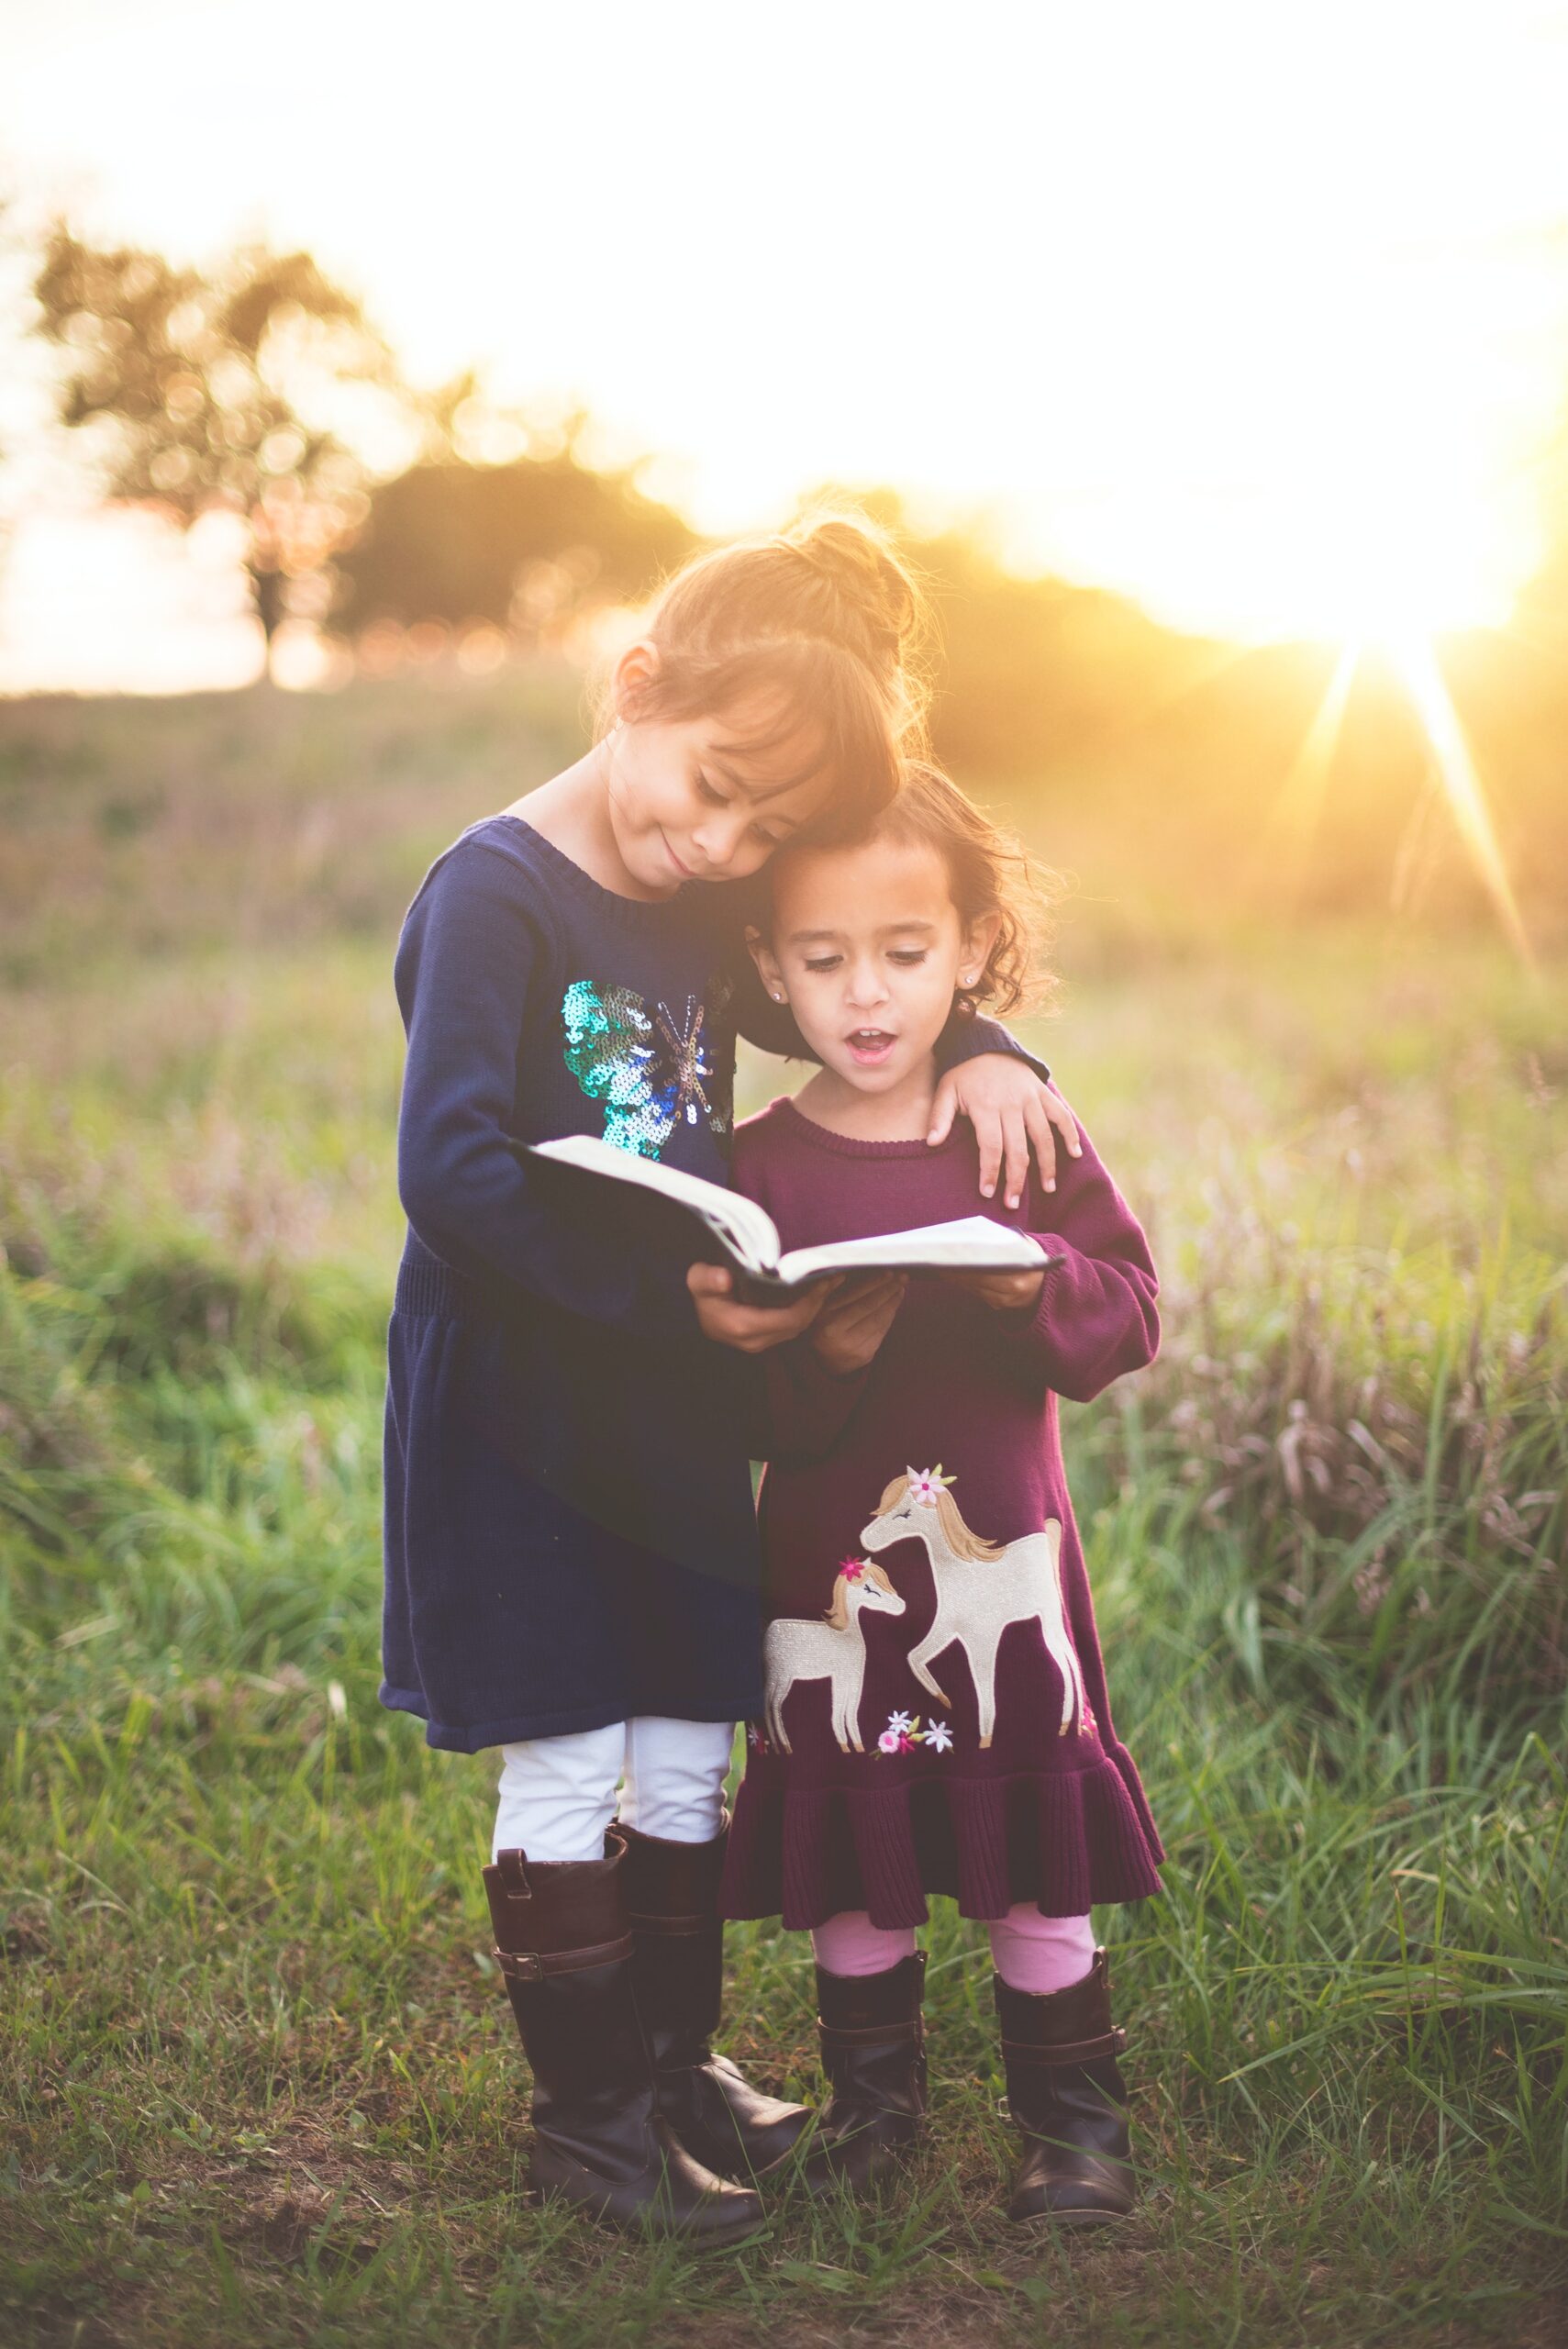
2. Human subjects in sunlight
When photographing a human subject in sunlight, try to avoid ugly shadows on the face caused by shadows. To do this, shoot when the sun is not too high in the sky or have the person’s face rotated or tilted until it is fully illuminated.
If you are shooting backlighting portraits and you don’t want the silhouette effect, overexpose the photo, decreasing the shutter speed or opening the aperture, until the person is correctly illuminated, while the rest of the scene will tend to white.
Ph: Daniel Pascoa on Unsplash
Ph: Ben White on Unsplash
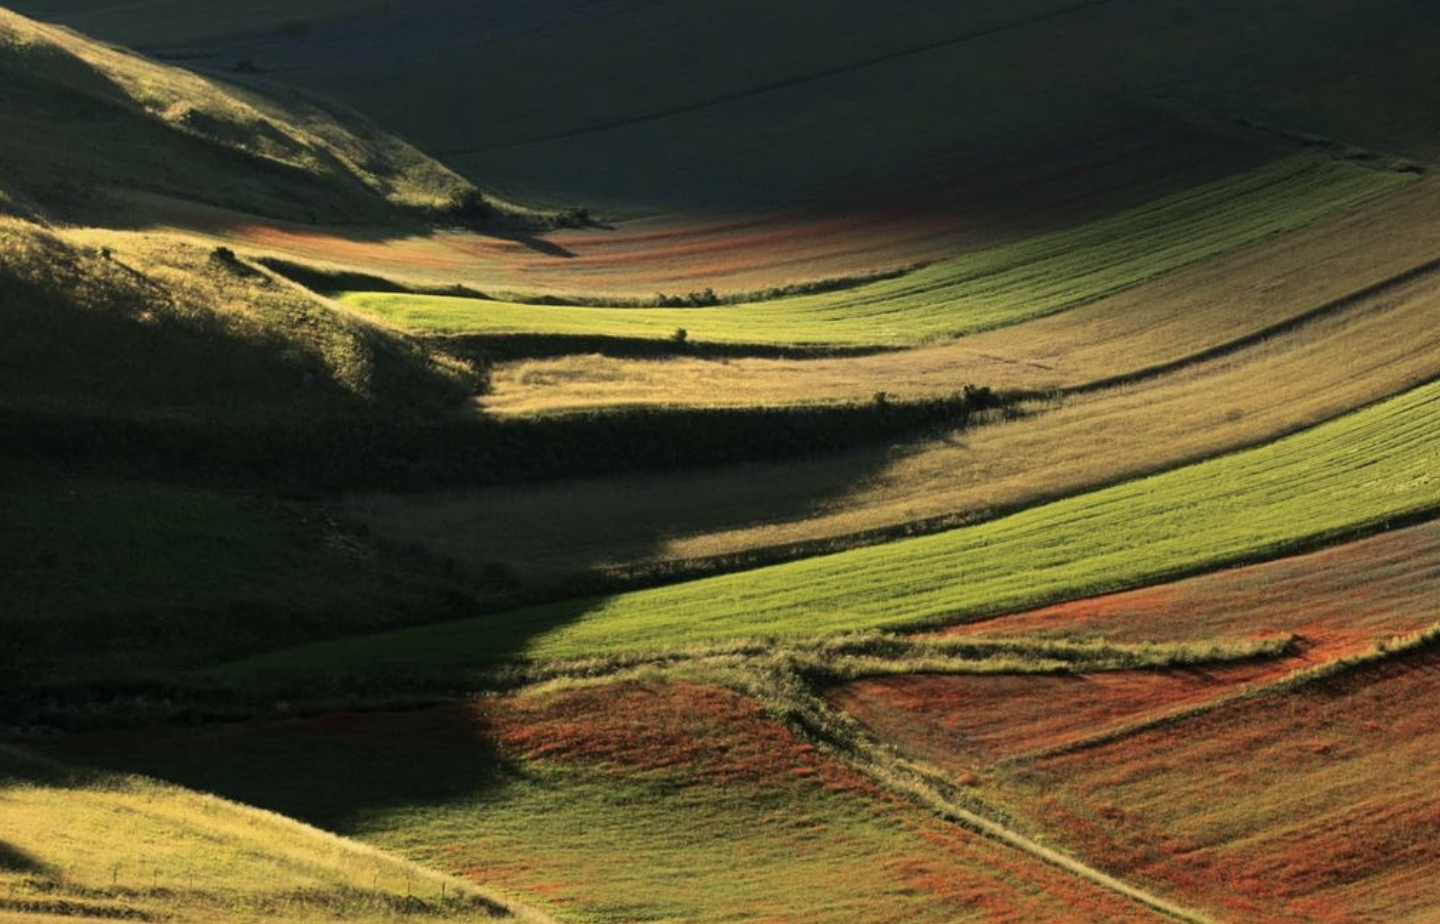
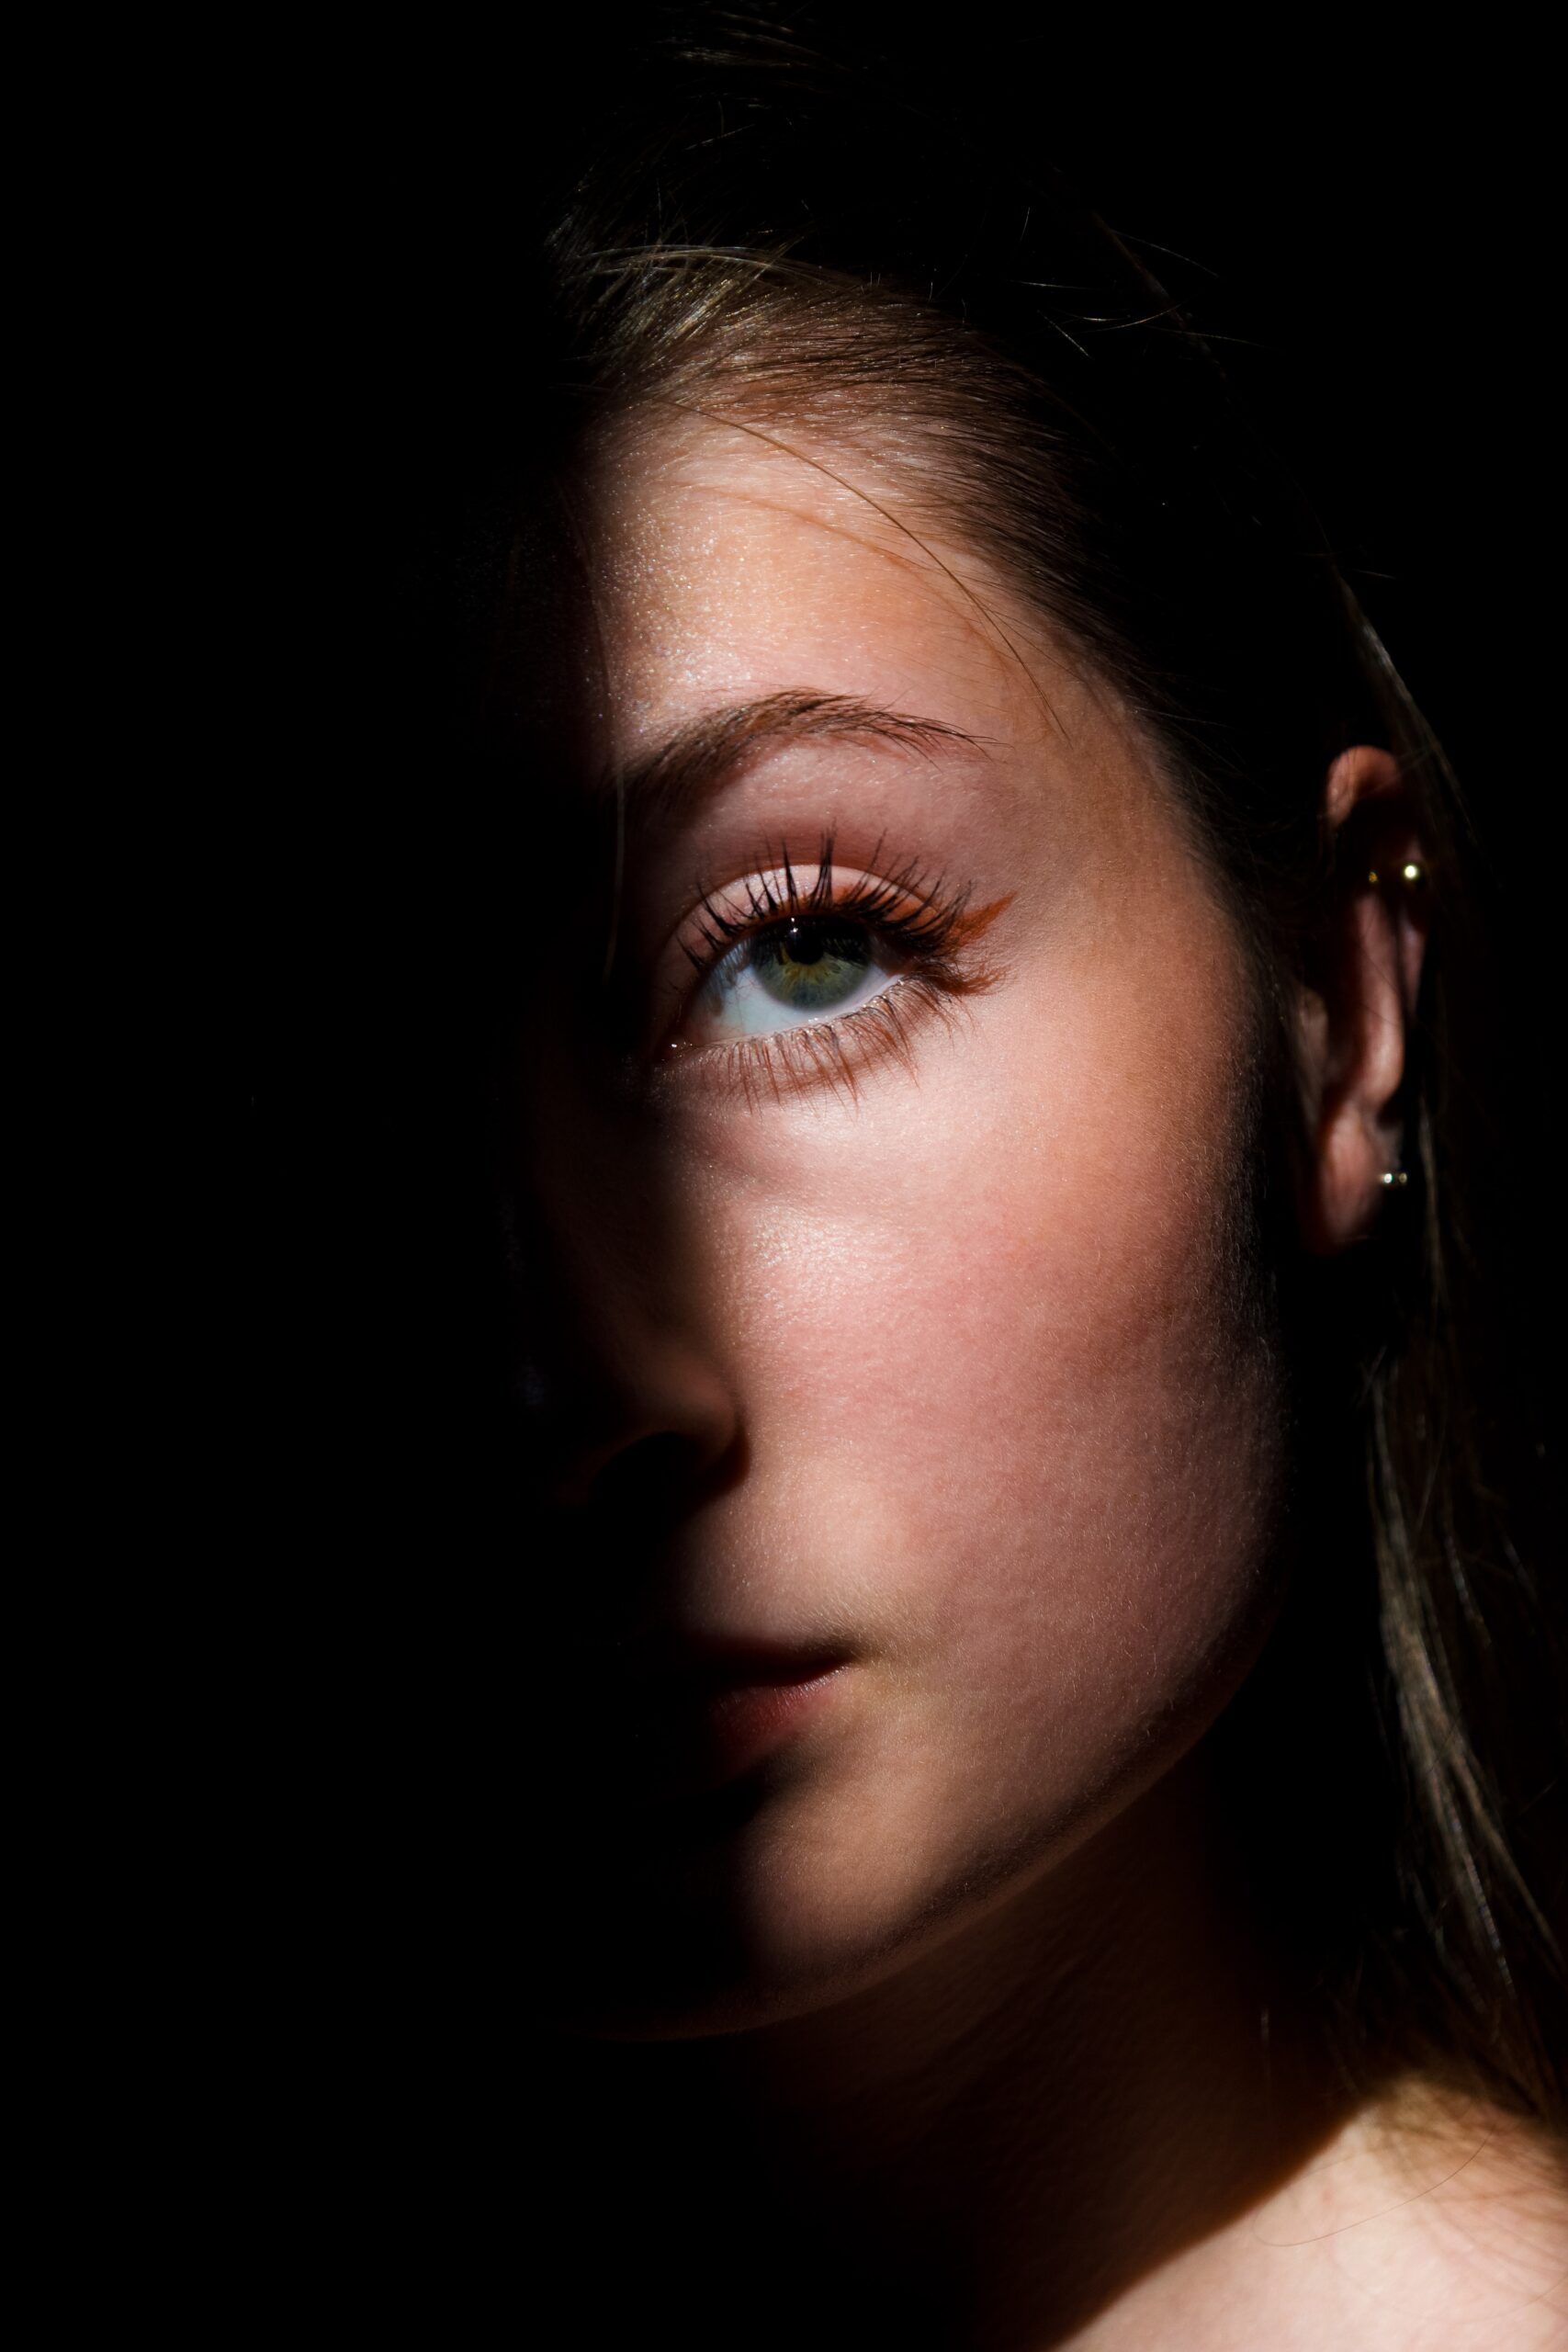
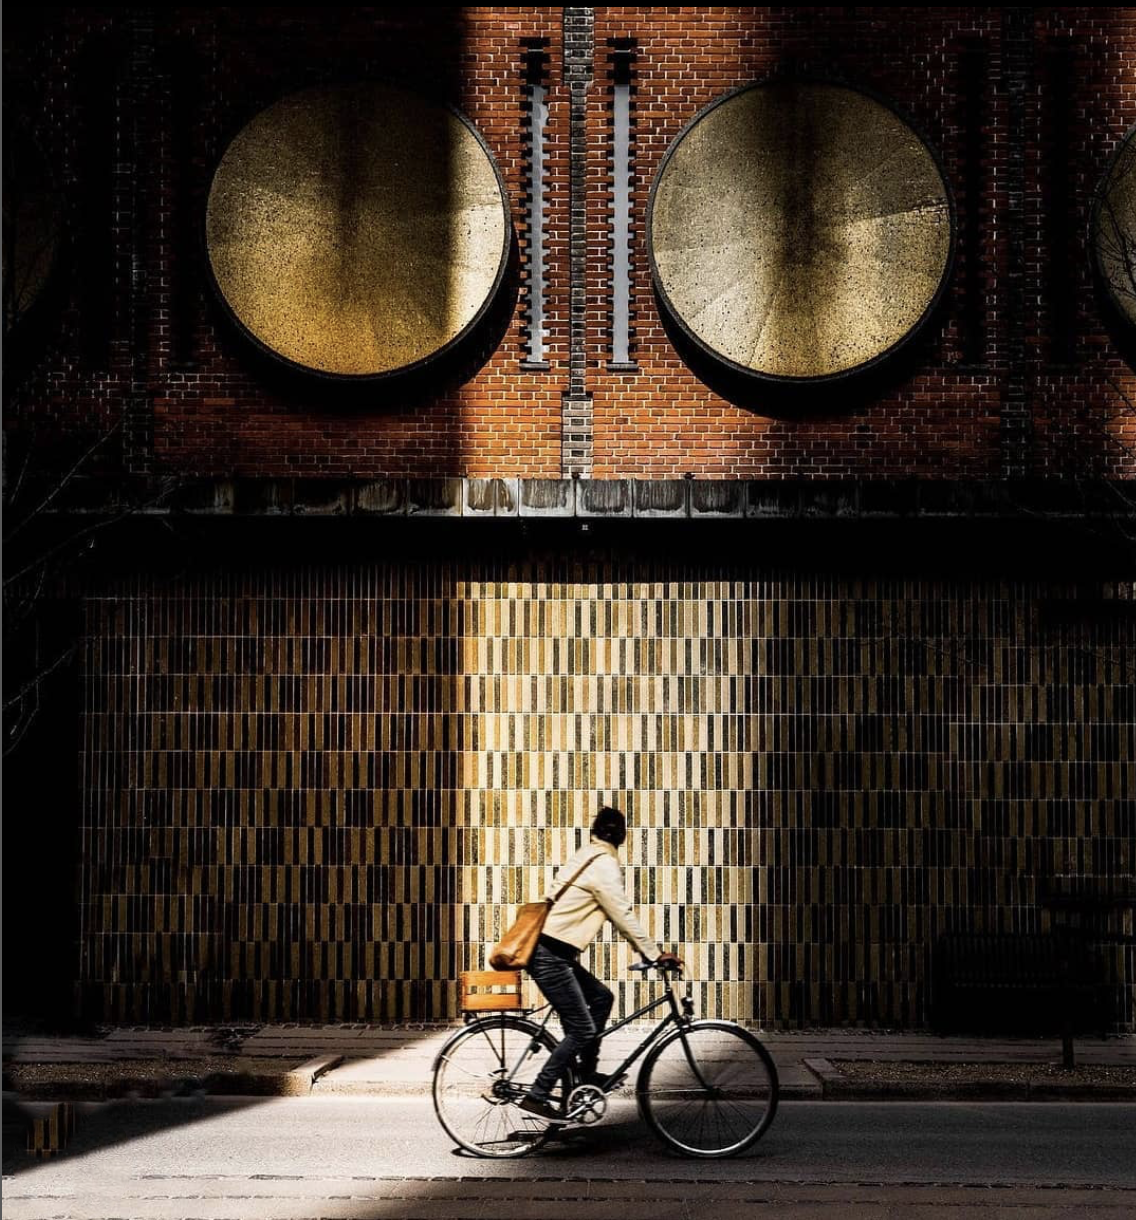
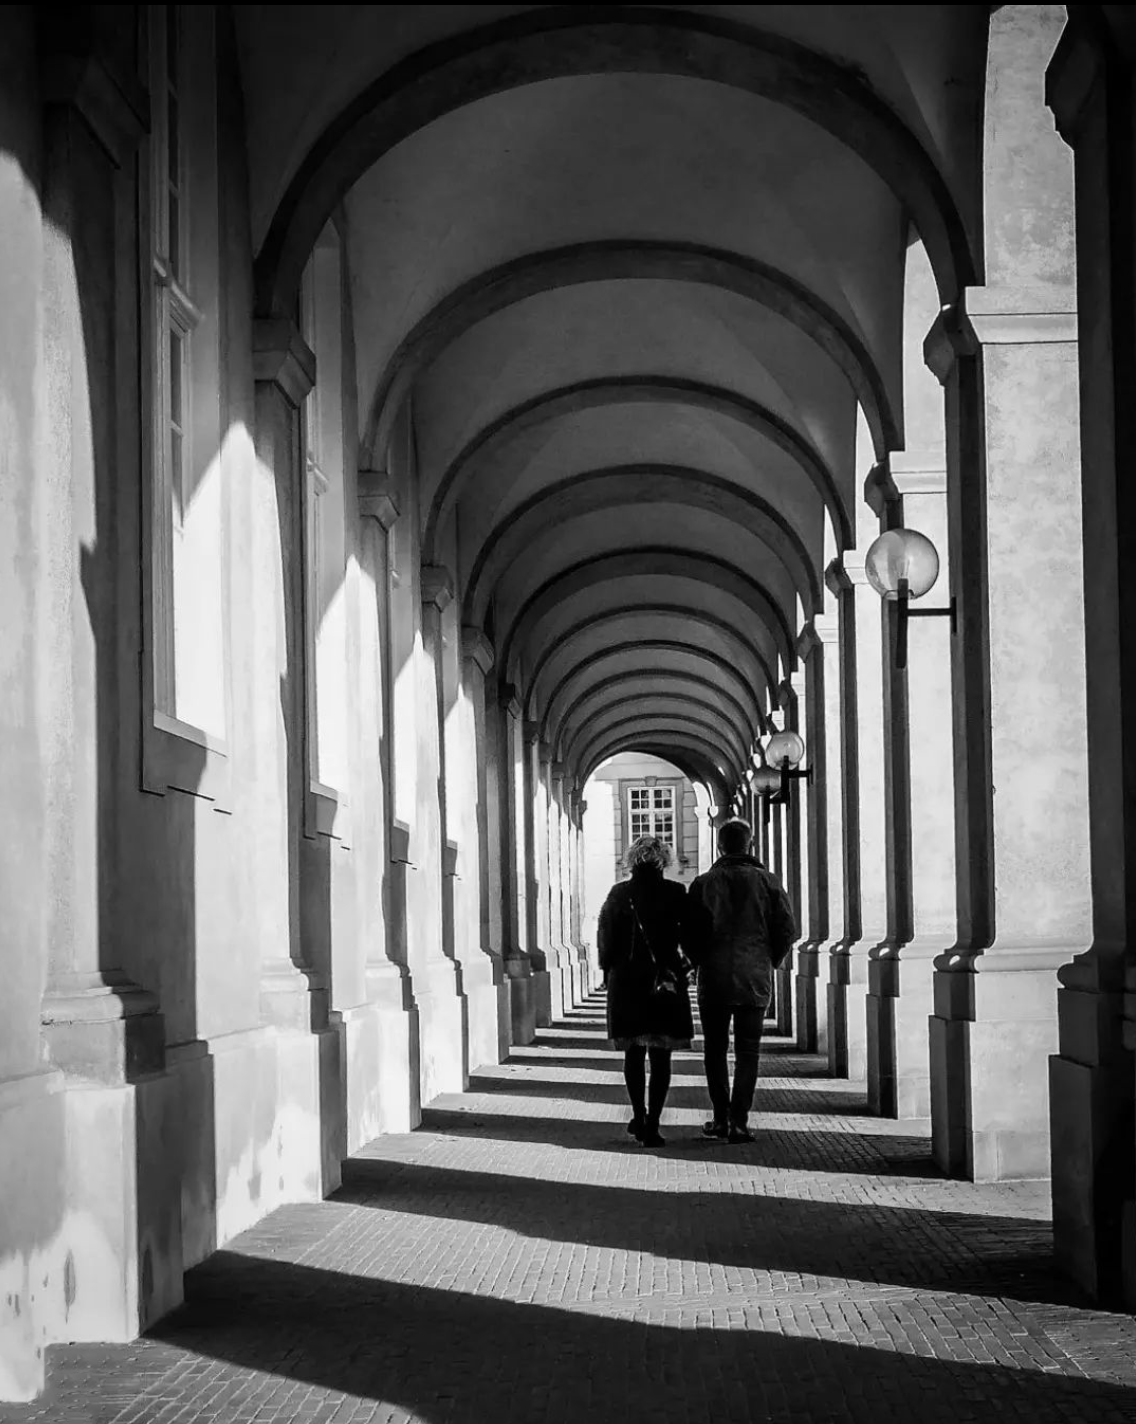
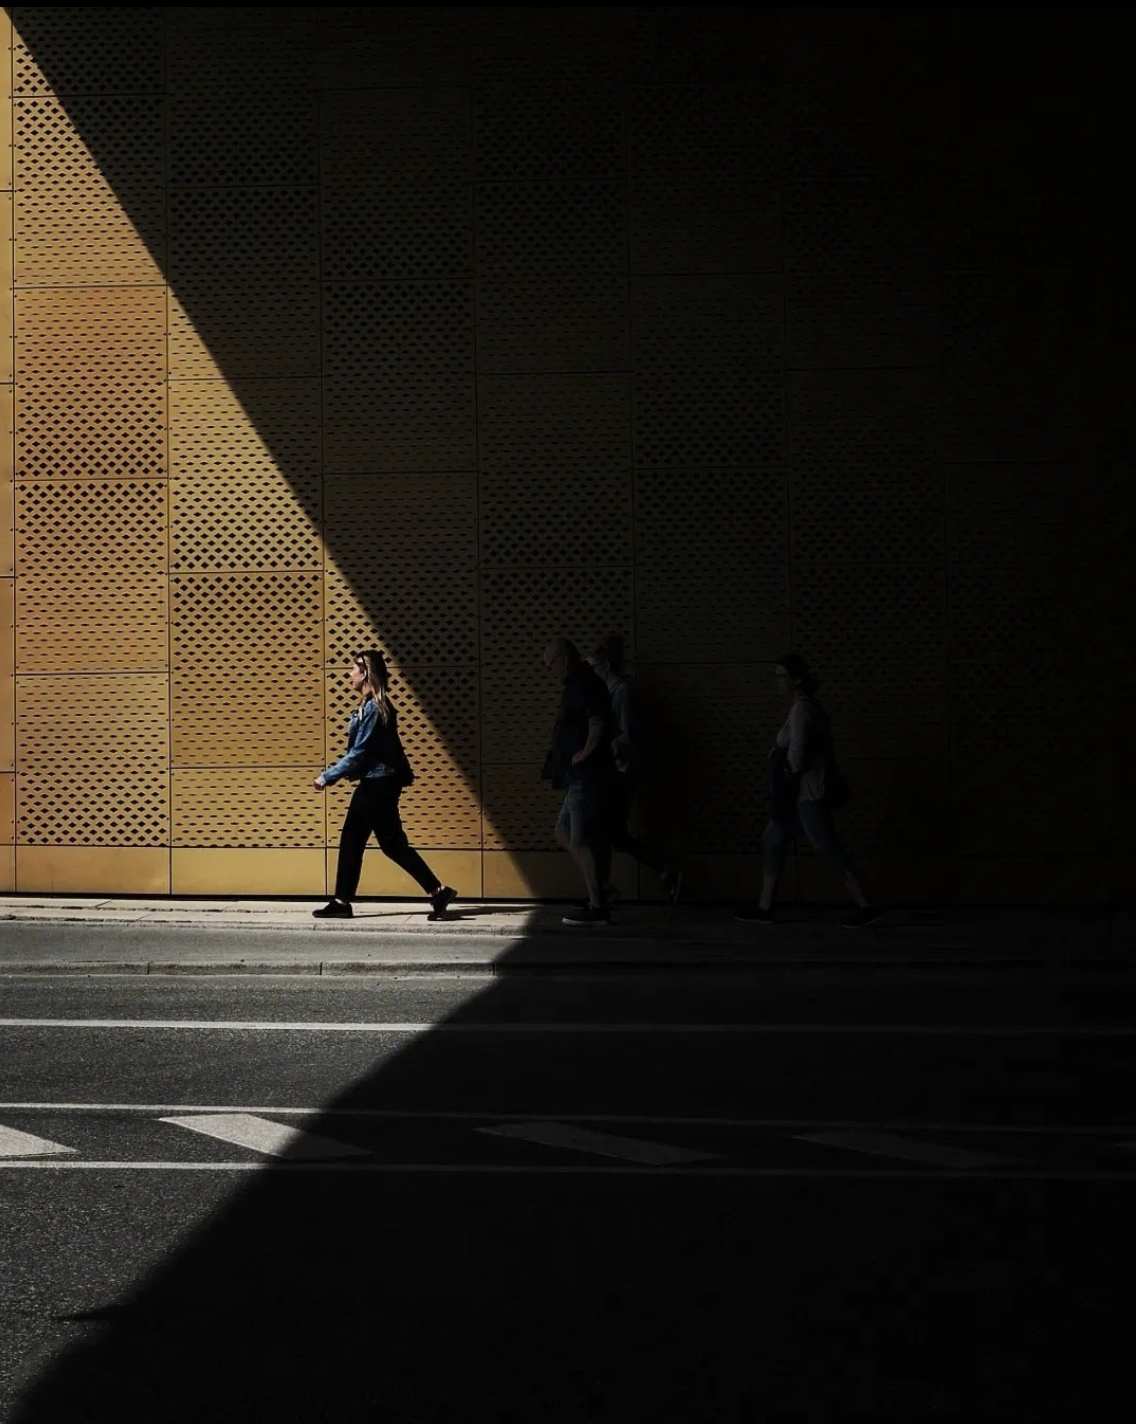
3. Light as the main subject
Often the light is the main subject of photography, because it creates really interesting contrasts.
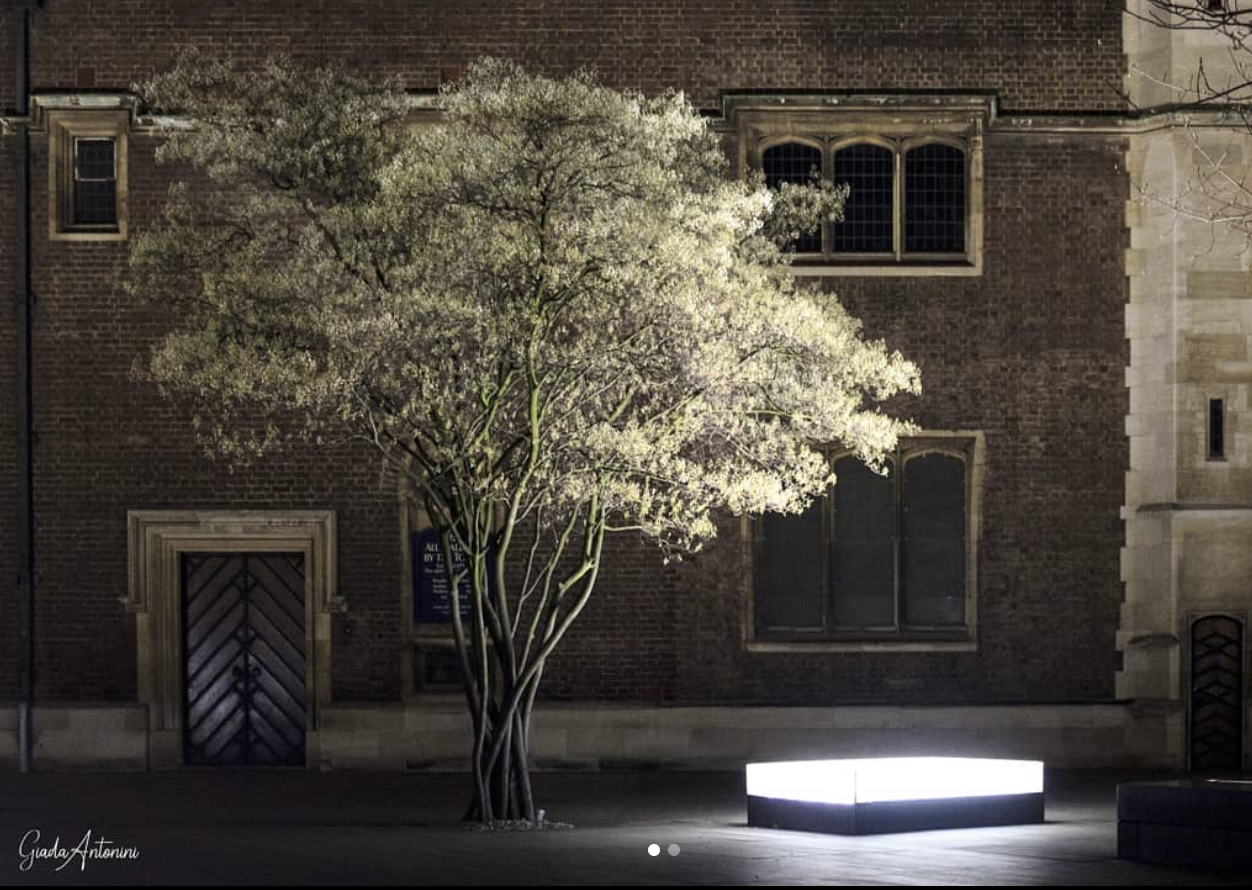
If you’re looking for contrasts, then this has to be strong, with areas well lit (but never overexposed) and others very dark. To do this, you’ll need to be mainly indoors, with a direct light source, positioned to illuminate only part of the subject.
Sometimes a dark room illuminated only by the light from a window is enough to create really interesting images.
For indoor shots, you can also use artificial lights and, if necessary, opaque panels, called diffusers, to soften the light and make it diffuse.
If you are outdoors, to get strong contrasts, there must be a beautiful sunny day and an element, such as a building or a forest, which creates strong shadows.
Ph: Nora Hutton on Unsplash
Ph: @pictureknak
Ph: @sineoh_foto
Ph: @knederskovpetersen
Ph: @photobyfrederik
Ph: @knederskovpetersen
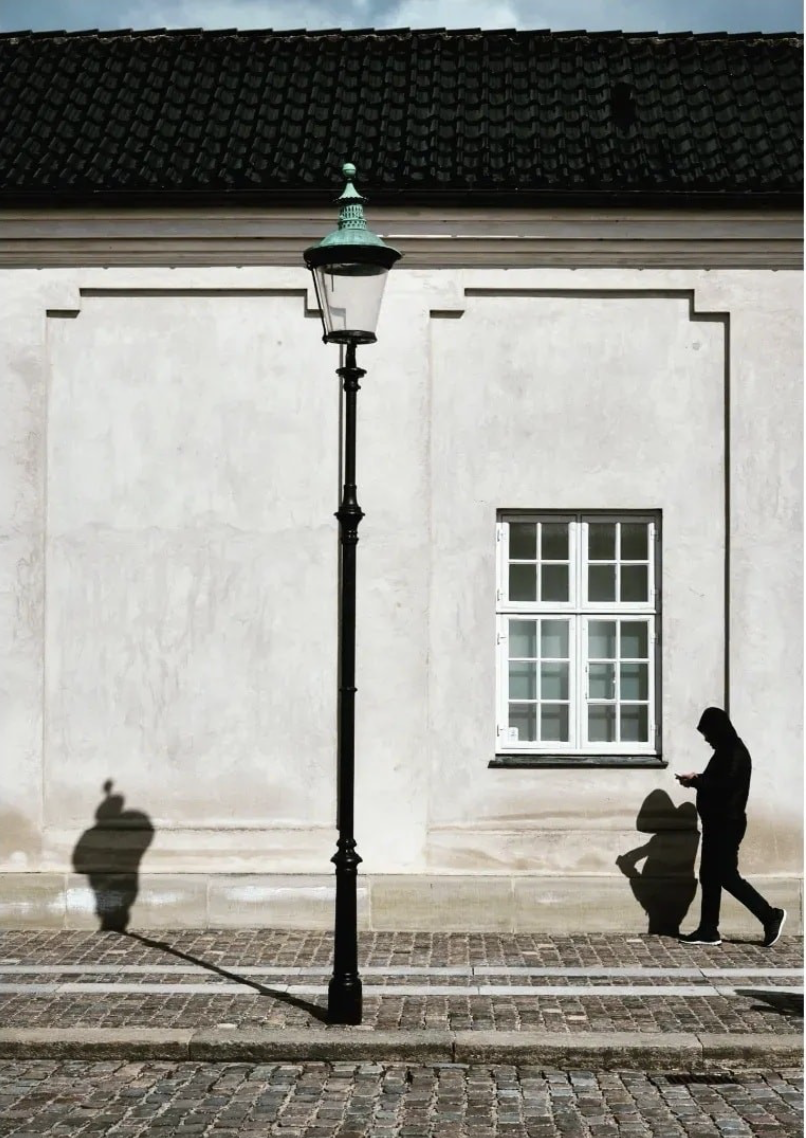
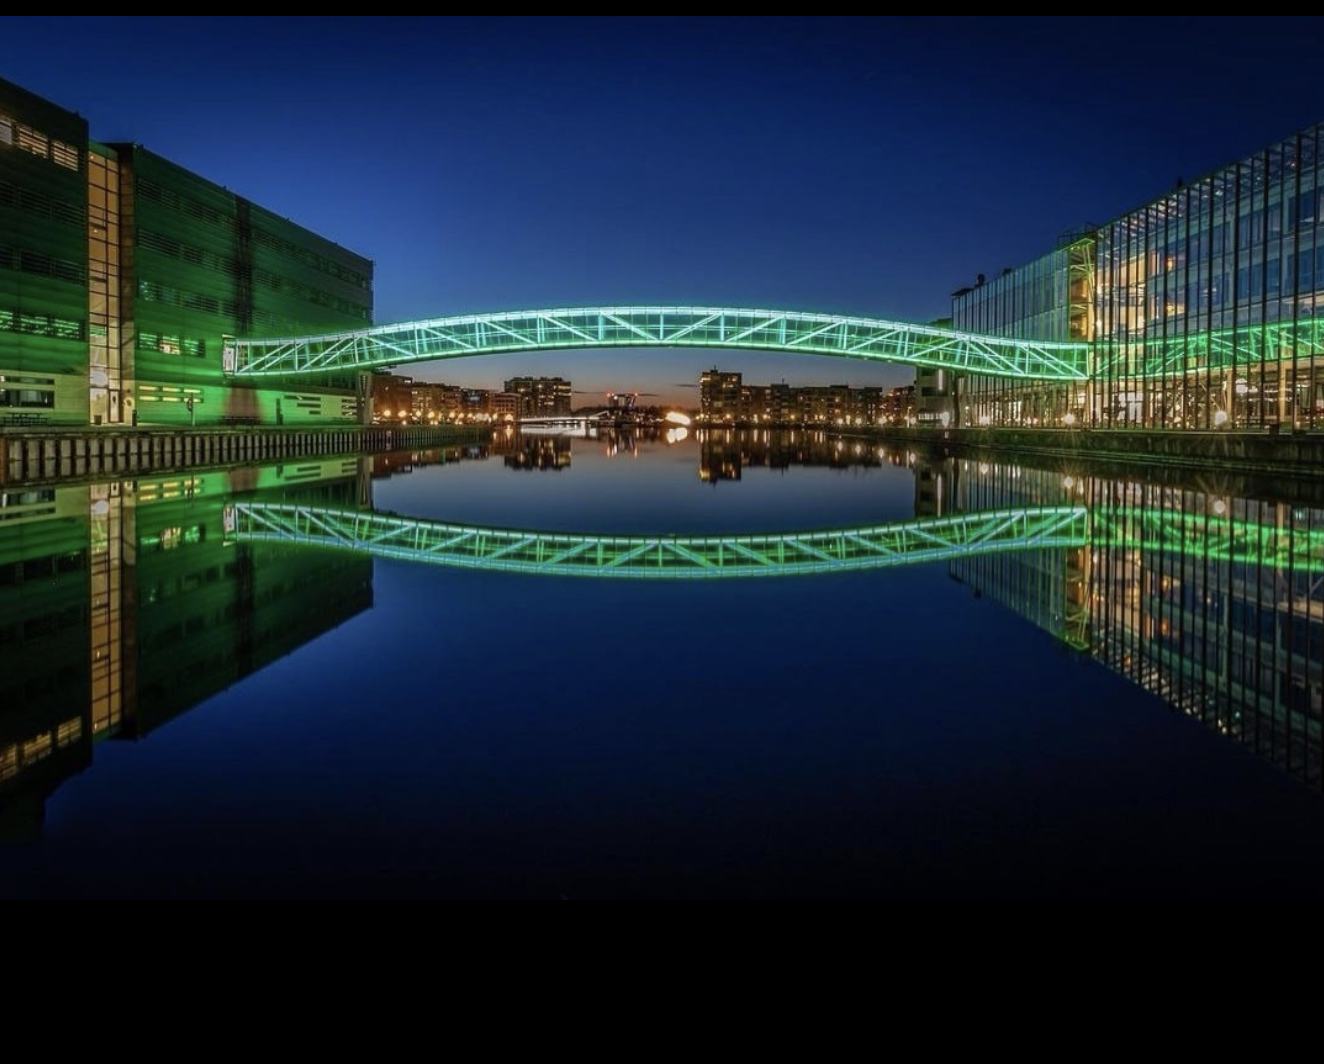
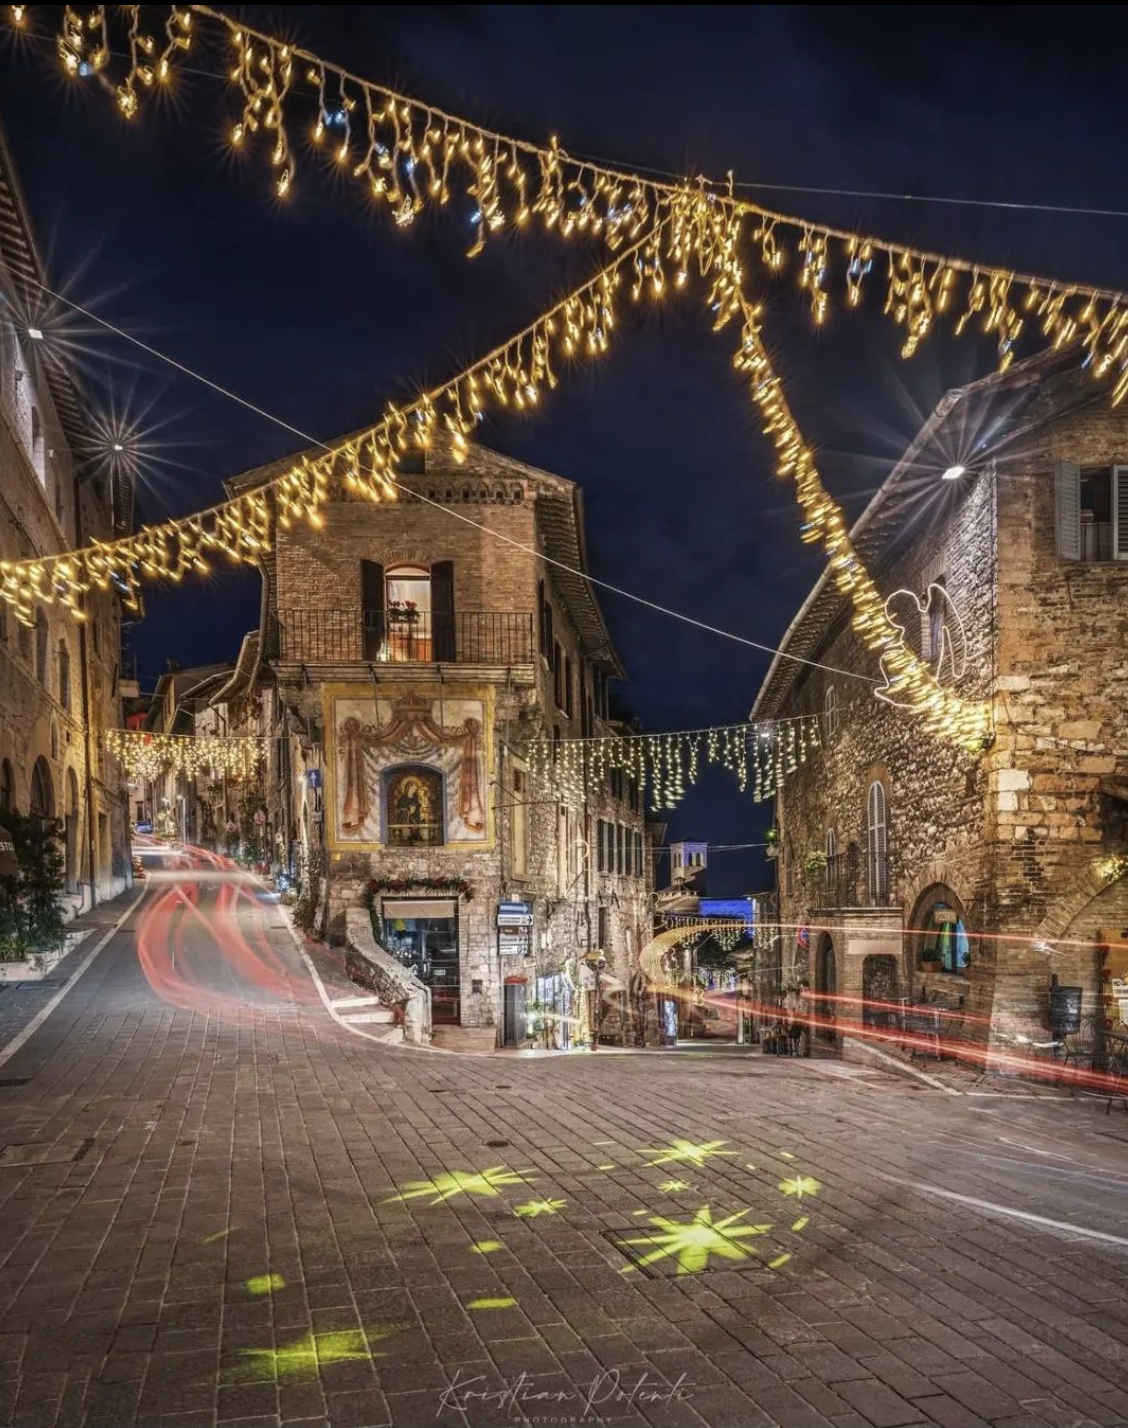
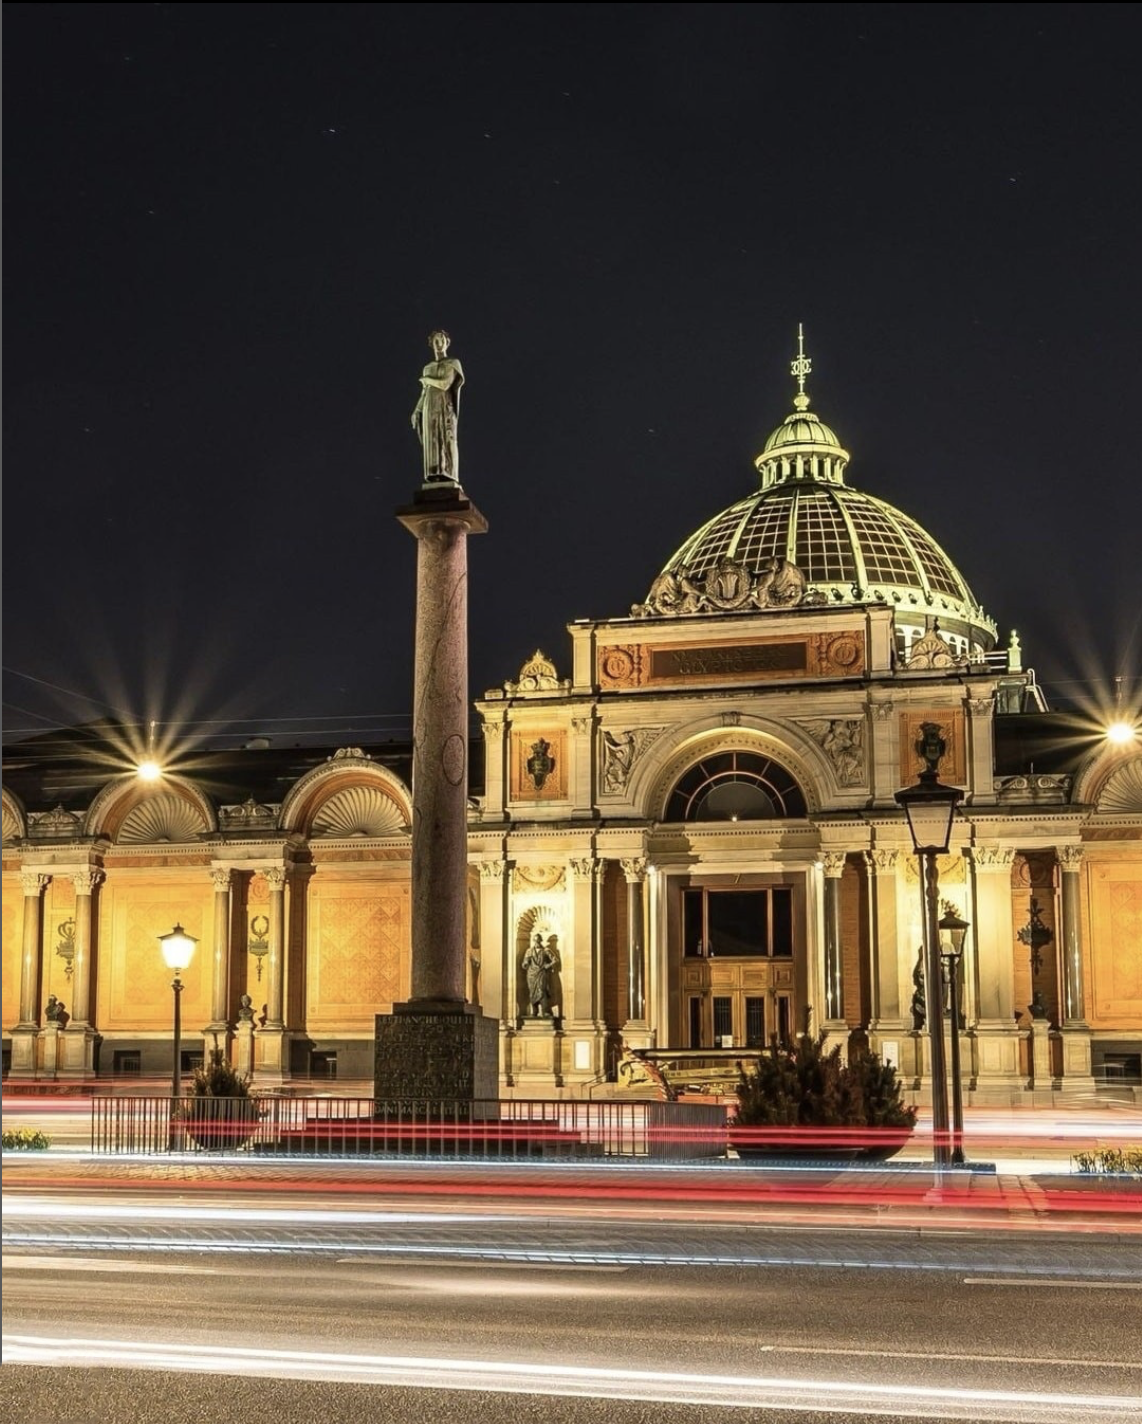
Or, in the evening, you can obtain soft and interesting atmospheres by capturing a light source, such as a street lamp, which lights up a streets. This way only part of the scene will be illuminated, in contrast to the dark walls of the buildings. The choice of having the light come from an internal environment, such as the window of a house or the shop window of a club, is also very interesting.
Ph: @giadaantonini_photography
Ph: @lastanzadelvinc
Ph: @lastanzadelvinc
Ph: @pictureknak
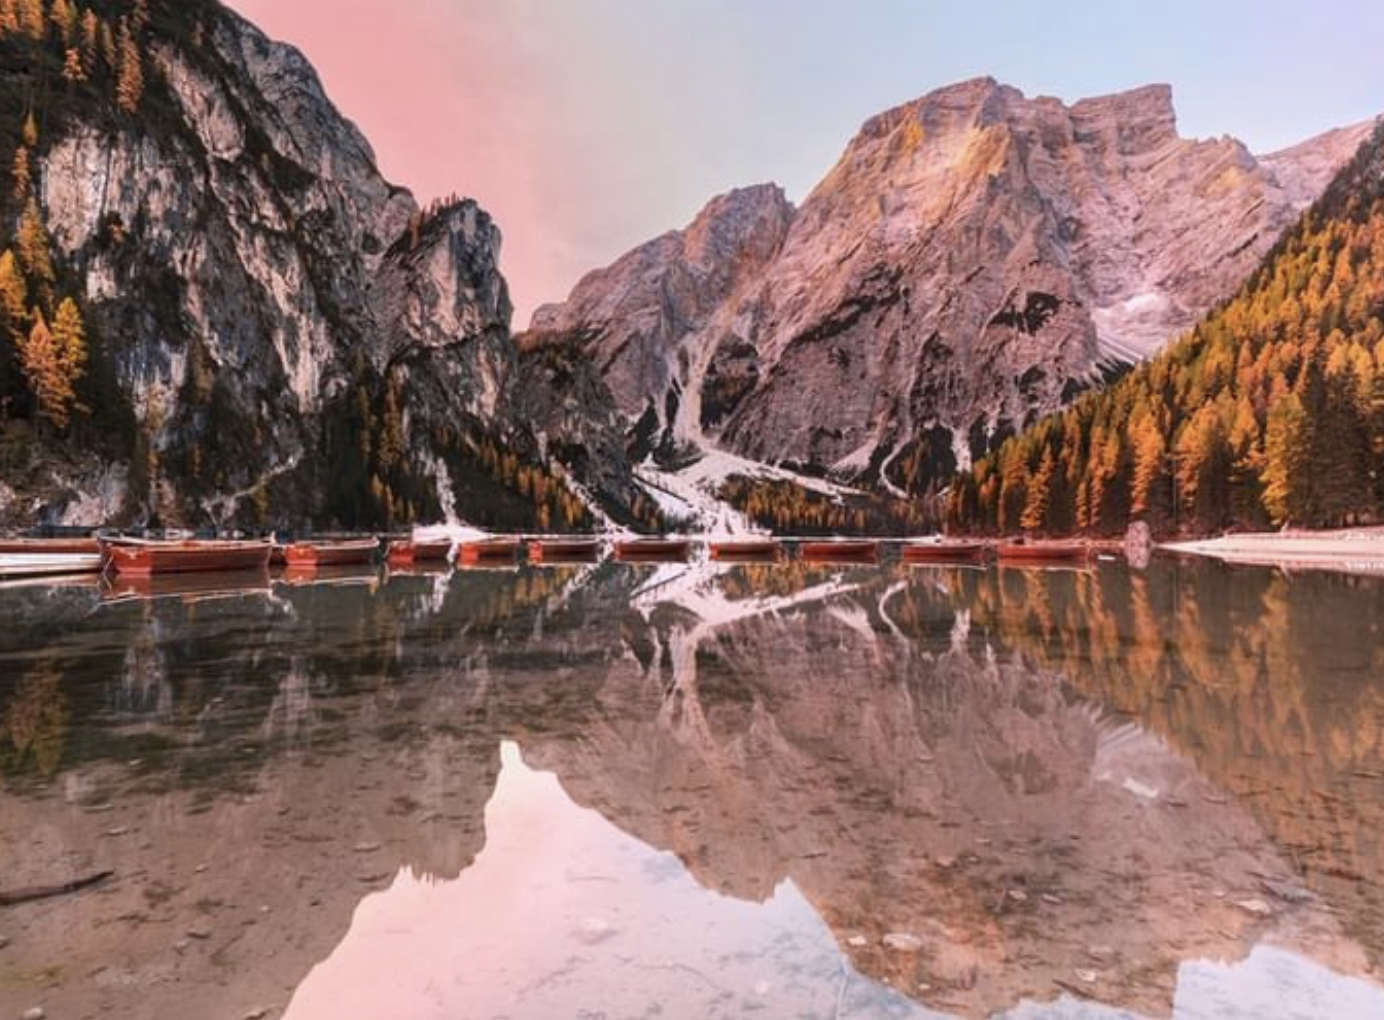
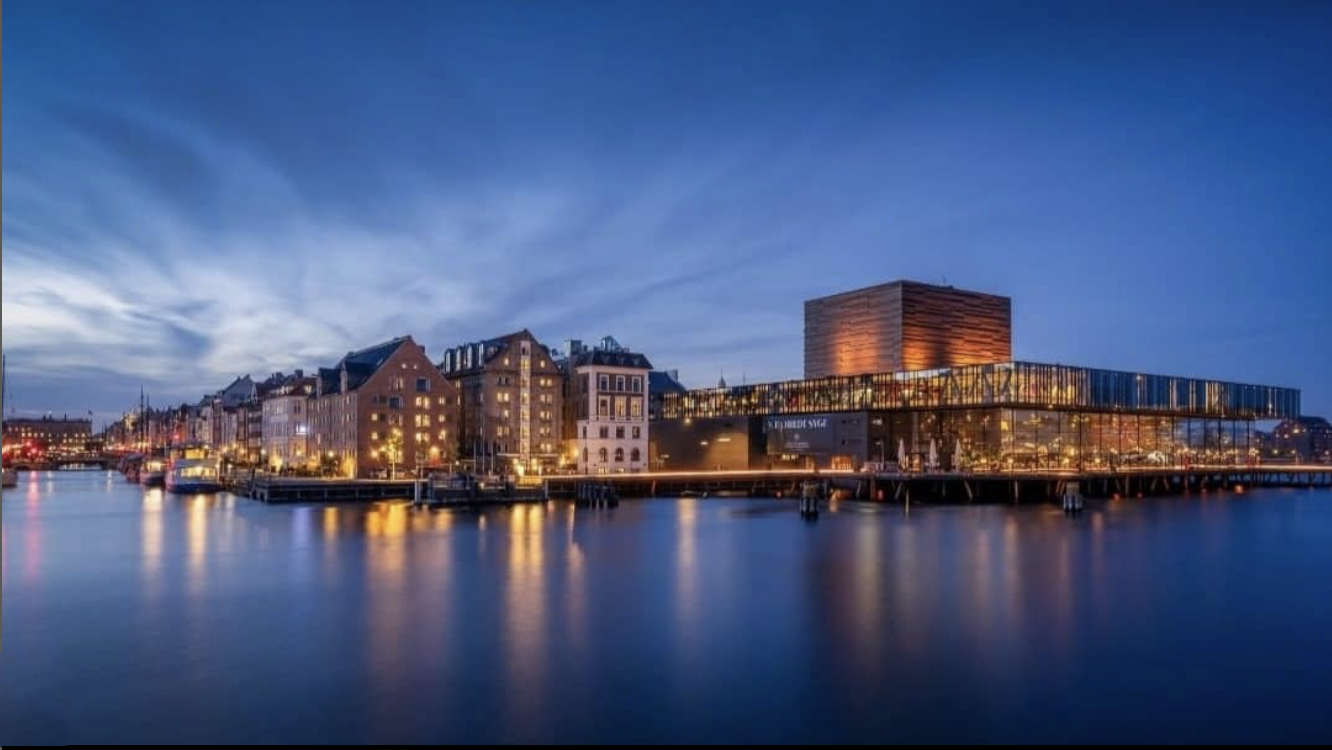
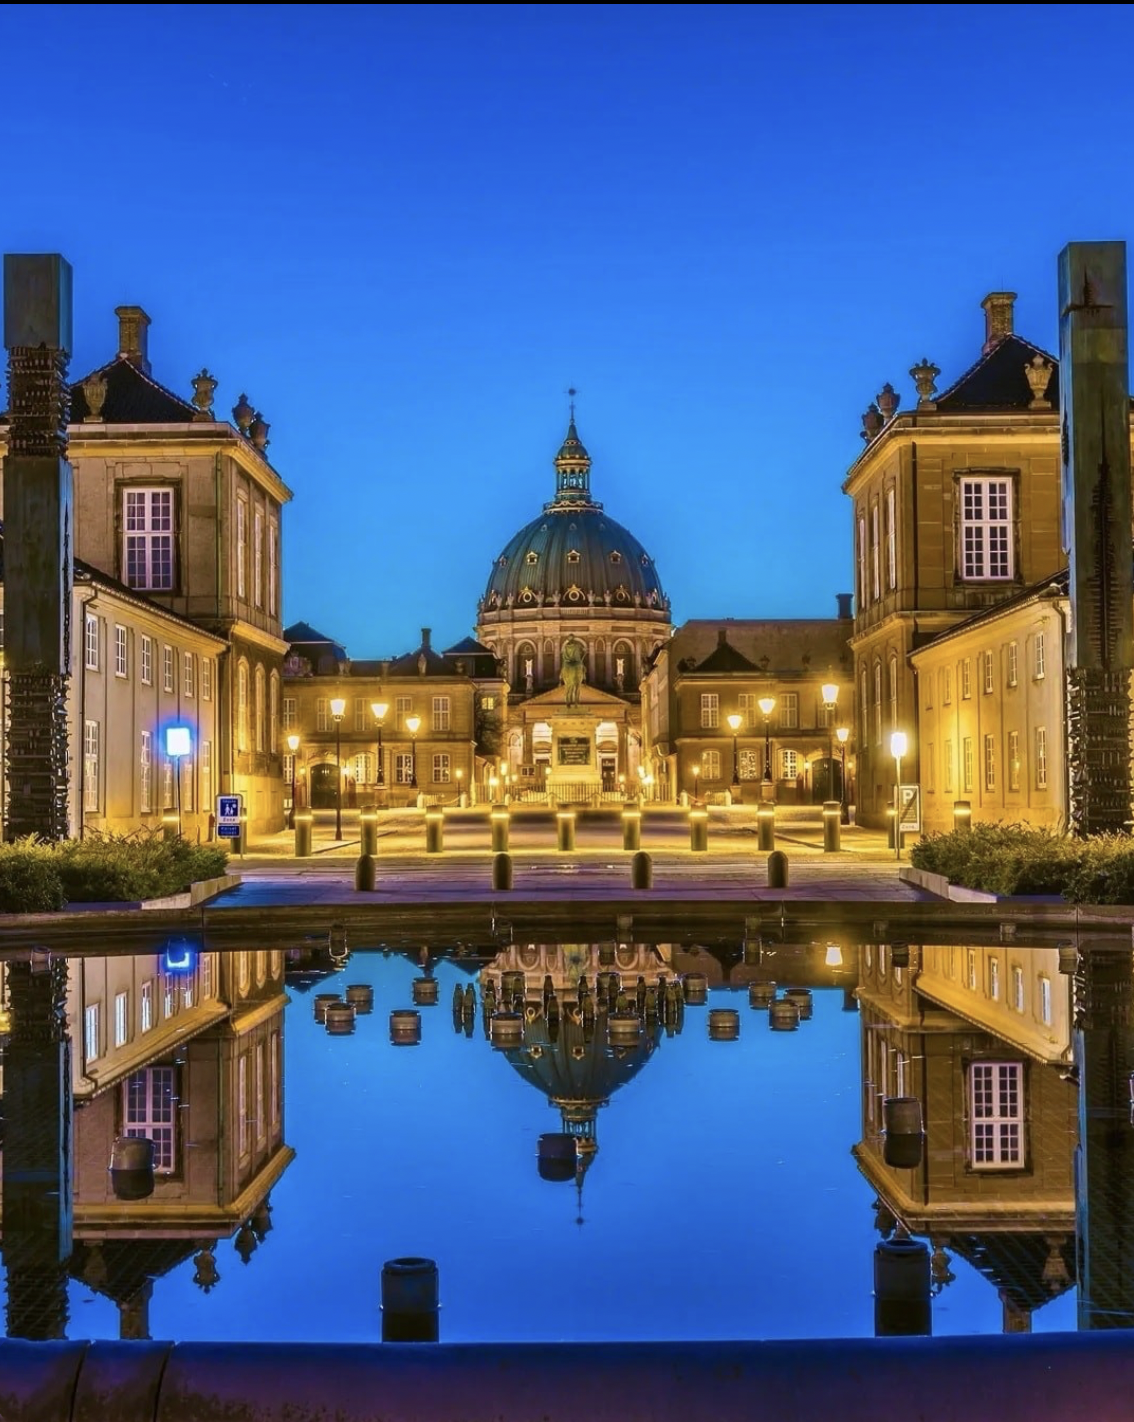
4. Blue hour
Unless you want to photograph the starry sky, prefer the moment after sunset when the sky is still blue and not black (blue hour).
Often, you’ll need slower shutter speeds to capture as much light as possible. But beware of low light: when shooting in these conditions it is easy to have low quality photos as a result, because they are blurry or too dark.
For cameras, use a tripod or look for a low wall or something to support the camera on to make it stable.
With your smartphone, if you don’t use a tripod or support, try to keep as still as possible and try to select the night mode from the settings.
We advise against using the zoom of your smartphone for shots in poor light conditions, because you would lose the quality of the photo.
Always take more than one shot to be able to select the best one later and avoid surprises.
Ph: @wedelheinenjan
Ph: @micnie02
Ph: @redo_el_khomsi
5. Moving light
Playing with light you can create extraordinary effects that will make your photos simply amazing.
You can capture, for example, the moving car headlights in the night.
You will need a tripod and long exposure, your shoot would last for some seconds. This way, when the cars will pass, you will capture the moving lights that will create sparkling lights, following the road shapes.
Increasing the exposure, pay attention to ISO, that have to be set in low values (for example, 100), to avoid noise and detail loss.
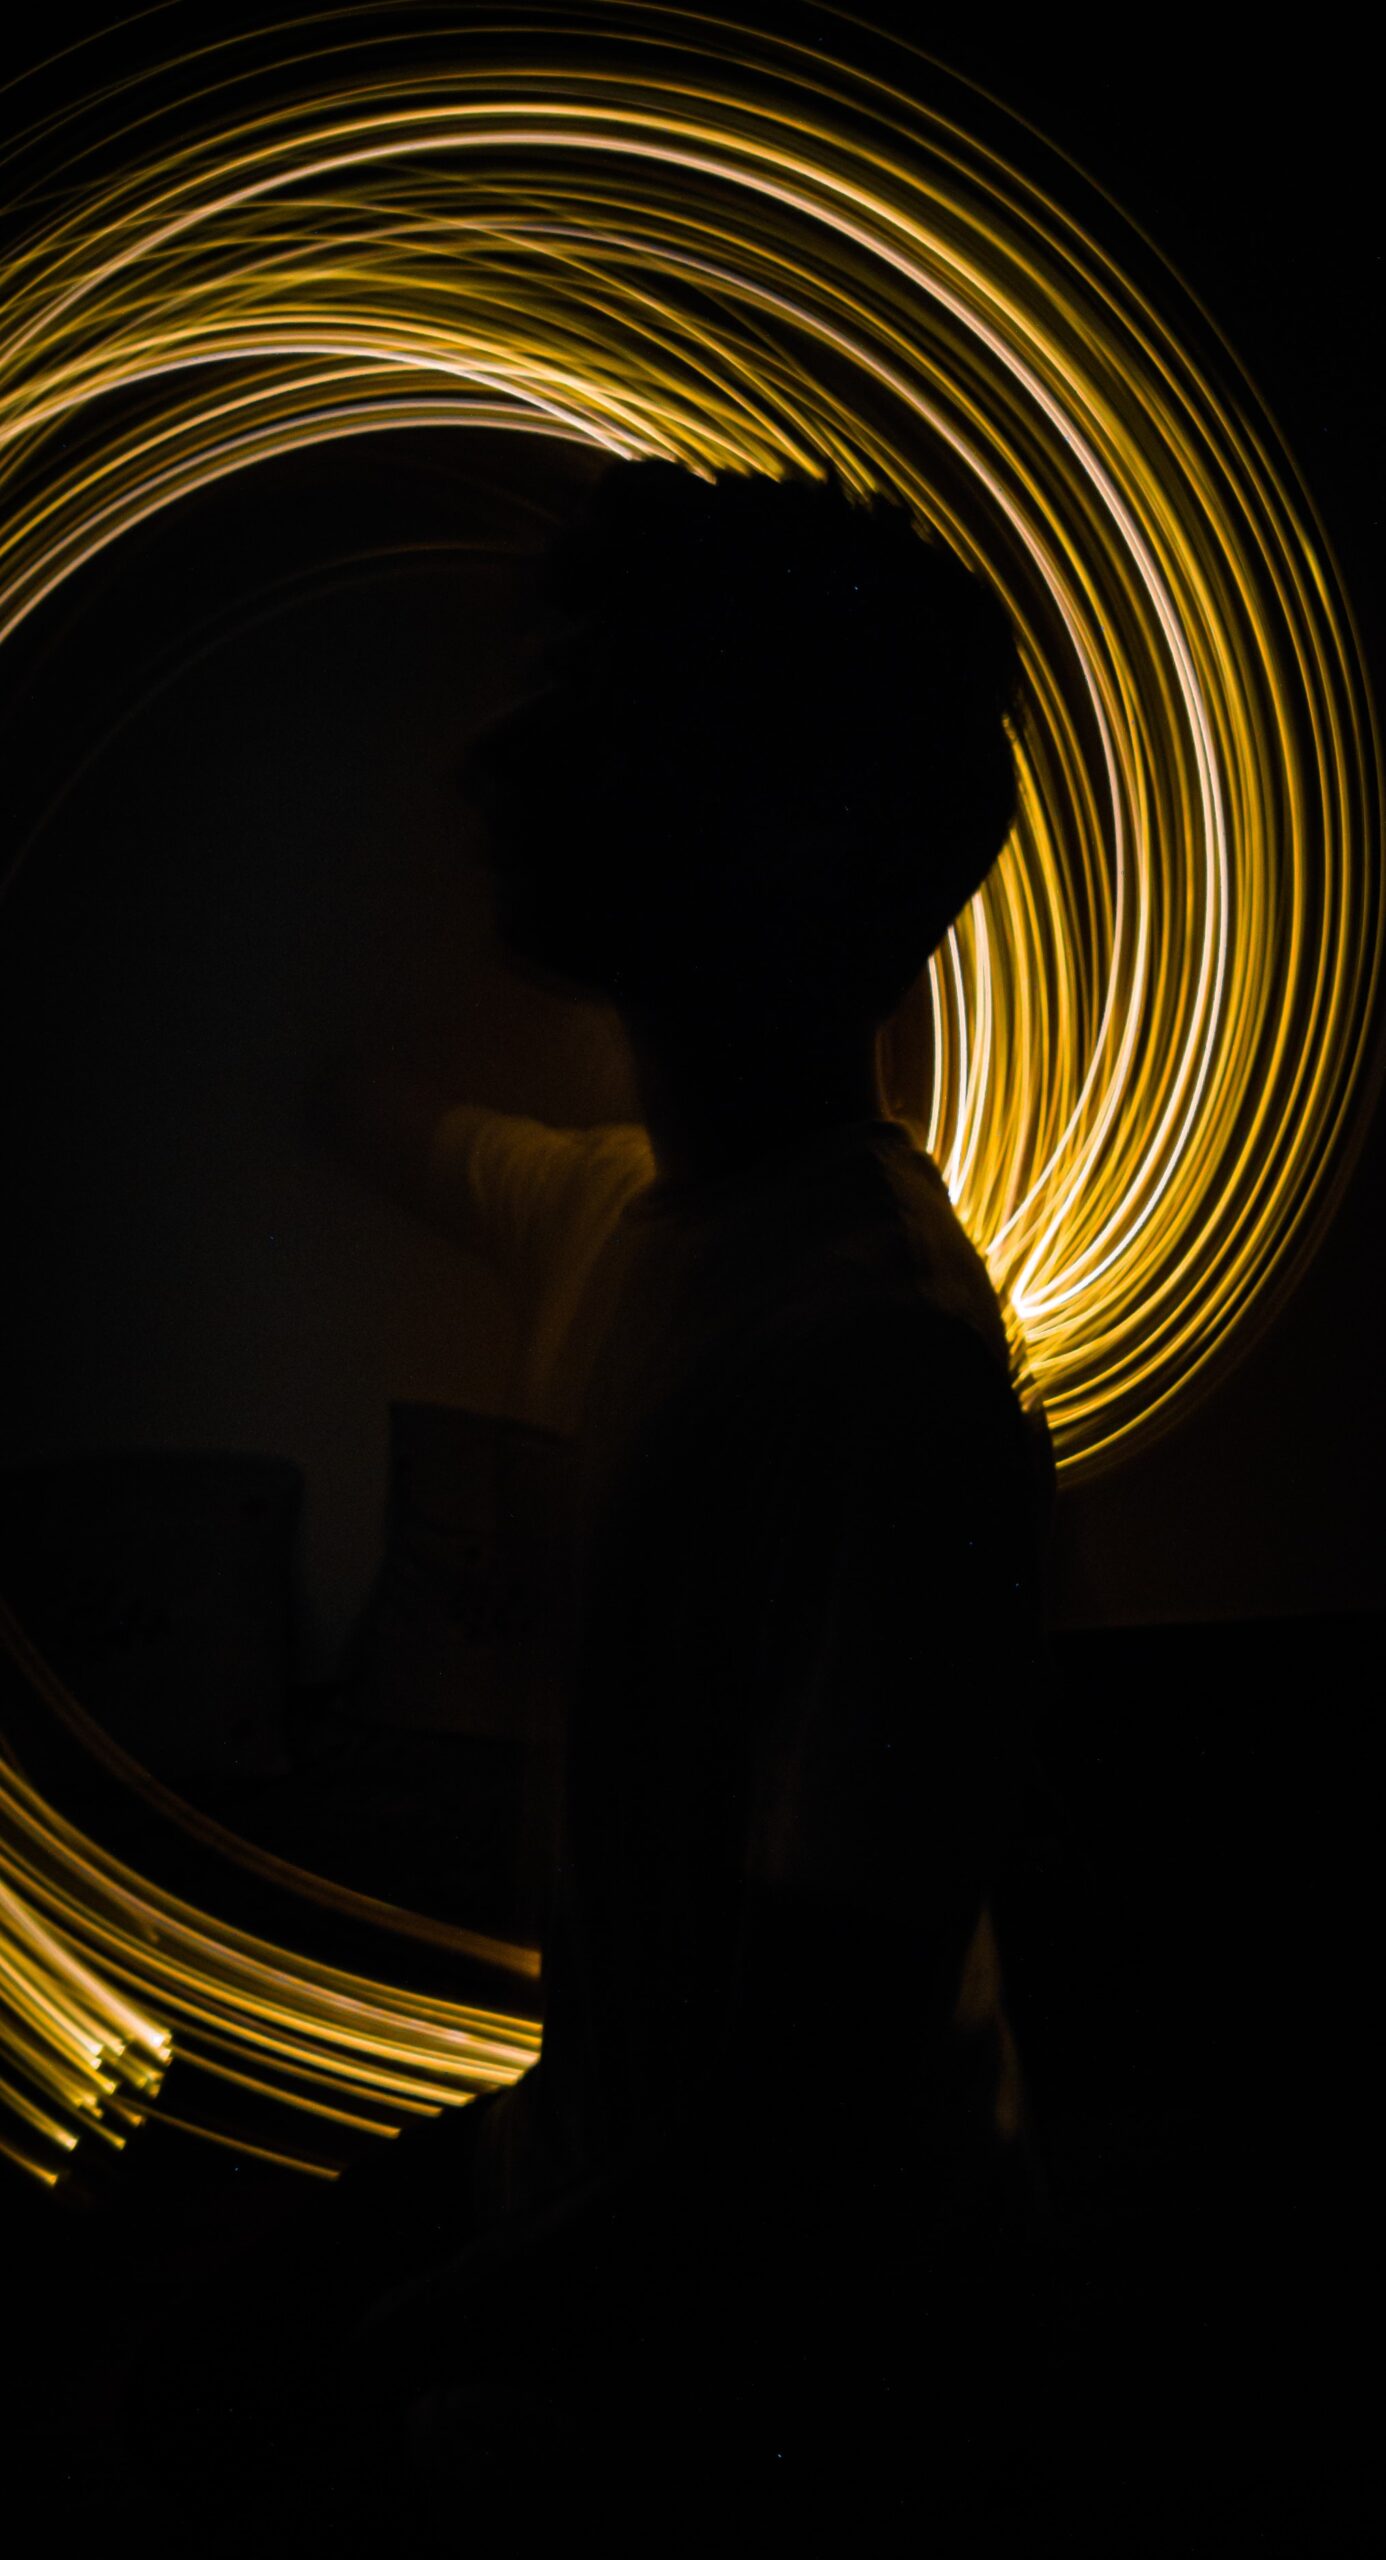
With light painting you can add extremely creative effects on your shots.
To make them, you can use moving artificial lights, such as colored LED lights, or a simple smartphone flashlight.
Again, the long exposure is necessary to capture the entire movement of the lights, which you can also manage yourself, setting the shutter to automatic and fixing the camera on a tripod.
To use these techniques also with the smartphone, it is necessary to have a stable support, to keep the camera still. Try setting the shot to night mode, or use the PRO settings to decrease the shutter speed.
Ph: @krisphotopot
Ph: @micnie02
Ph: mono-log on Unsplash
Ph: siddhant-rane on Unsplash
What are you waiting for?
Try to put our tips into practice and tag us in your photos, we will publish them on our Instagram andFacebook pages.
Sunrise and Sunset? Surely they are optimal light conditions to obtain wonderful photos. Our tips? Don’t miss our next article.
If you liked the article, let us know in the comments and share it.
Thanks to our followers for their photos in the article!
We use cookies on our website to give you the most relevant experience by remembering your preferences and repeat visits. By clicking “Accept”, you consent to the use of ALL the cookies.
This website uses cookies to improve your experience while you navigate through the website. Out of these, the cookies that are categorized as necessary are stored on your browser as they are essential for the working of basic functionalities of the website. We also use third-party cookies that help us analyze and understand how you use this website. These cookies will be stored in your browser only with your consent. You also have the option to opt-out of these cookies. But opting out of some of these cookies may affect your browsing experience.
Necessary cookies are absolutely essential for the website to function properly. These cookies ensure basic functionalities and security features of the website, anonymously.
Cookie
Duration
Description
cookielawinfo-checbox-analytics
11 months
This cookie is set by GDPR Cookie Consent plugin. The cookie is used to store the user consent for the cookies in the category "Analytics".
cookielawinfo-checbox-functional
11 months
The cookie is set by GDPR cookie consent to record the user consent for the cookies in the category "Functional".
cookielawinfo-checbox-others
11 months
This cookie is set by GDPR Cookie Consent plugin. The cookie is used to store the user consent for the cookies in the category "Other.
cookielawinfo-checkbox-necessary
11 months
This cookie is set by GDPR Cookie Consent plugin. The cookies is used to store the user consent for the cookies in the category "Necessary".
cookielawinfo-checkbox-performance
11 months
This cookie is set by GDPR Cookie Consent plugin. The cookie is used to store the user consent for the cookies in the category "Performance".
viewed_cookie_policy
11 months
The cookie is set by the GDPR Cookie Consent plugin and is used to store whether or not user has consented to the use of cookies. It does not store any personal data.
Functional cookies help to perform certain functionalities like sharing the content of the website on social media platforms, collect feedbacks, and other third-party features.
Performance cookies are used to understand and analyze the key performance indexes of the website which helps in delivering a better user experience for the visitors.
Analytical cookies are used to understand how visitors interact with the website. These cookies help provide information on metrics the number of visitors, bounce rate, traffic source, etc.
Advertisement cookies are used to provide visitors with relevant ads and marketing campaigns. These cookies track visitors across websites and collect information to provide customized ads.